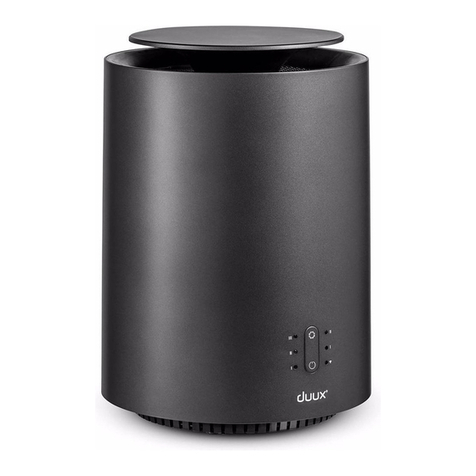
Duux Threesixty DXFH07 User manual

PROLINE
REFRIGERATEUR
BRF40
DUUX
CHAUFFAGE
DXFH07
MANUEL D'UTILISATION
Besoin d'aide ? Rendez-vous sur https://sav.darty.com

1
Threesixty
smart ceramic heater
user manual | gebruikershandleiding | manuel d’utilisation
manual de usuario | Bedienungsanleitung
WATCH THE
INSTRUCTION
MOVIES

32
Thank you for
choosing Duux.
We’re so glad you decided to read the instructions to your new Duux ceramic heater! Many users casually
dismiss instructions and seek to gure it out on their own. But studies show that people who read
instructions will get up to speed more quickly and eciently than those who poke around with trial and
error.
At Duux we believe in the importance of a comfortable and healthy living environment. Enhancing your
wellbeing by designing appealing, functional and eective products is the passion that drives us every day.
With our range of innovative air treatment products we aim to provide you the best possible indoor air
quality.
Cozy up with the Duux Threesixty Ceramic Smart Heater – the perfect companion for cold winter days.
This compact heater has a unique organic design and a capacity of 1.800 watt, making it much more
powerful than you’d expect. Thanks to the built-in fan, Threesixty accelerates the heating process in any
room up to 30m², warming it up in no time! And with the free Duux app, operating this handy heater is a
piece of cake.
1. Important safety instructions 4
2. Product overview 5
3. Installation 7
4. Maintenance and storage 9
5. Functions 15
6. Technical specications 16
7. Frequently asked questions 15
8. Disposal instructions 16
Table of
contents
EN

54
• If the power cable gets damaged, it must be
replaced by certied personnel.
• Do not use the heater in places that are not used
or visited for long periods of time.
• Do not use accessories on the heater that have
not been recommended by DUUX.
• Loose connections between the heater plug
and the electrical outlet can cause the plug to
overheat.
• To avoid overload and burnt-out fuses, do not
connect other appliances to the same wall socket.
• The heater is only intended for indoor use. Only
use the heater for supplementary heating.
• Do not position the heater in a place where
objects may fall on it from above. This can cause
the heater to break down or malfunction.
• Do not place the heater near other appliances
that are not suitable for exposure to hot air,
such as PCs or smartphones. This can cause the
appliance to break down or malfunction.
• Only connect the heater to a single-phase socket
with a main voltage as specied on the rating
plate.
• Do not leave your home while the heater is
in function: ensure that the heater is OFF
completely.
• This heater is not equipped with a device to
control the room temperature. Do not use this
heater in small rooms when they are occupied by
1. Important safety instructions
in such a way that it does not constitute a trip
hazard. Ensure the cable cannot be stepped on
and that no furniture is put on it. Do not route
the cable around sharp corners, and do not wind
it up too tightly after use.
• To prevent overheating, the heater must never be
covered.
• Do not use the heater outdoors.
• Please do not extend the power cable
yourself. The use of an extension cable is not
recommended; this may cause overheating
and/or re. If the use of an extension cable is
unavoidable, ensure it is an undamaged and
approved extension cable with a minimum
diameter of 3 x 2.5 mm² and an authorized
power rating of at least 2,000 Watt/10 Amp.
Always unwind the cable completely to prevent
overheating.
• Remove the plug from the wall socket by pulling
it by the plug. Never pull on the cable to remove
the plug from the wall socket.
• Please remove the plug from the wall socket
when the product is left unsupervised for longer
periods of time.
• Keep combustible material such as furniture,
cushions, bedding, paper, clothes, curtains, etc. at
least 100cm away from the heater.
• Keep the air inlet and outlet free from objects: at
least 50cm around the heater.
EN
hazards involved.
• Children between the ages of 3 and 8 shall not
plug in, regulate and clean the appliance or
perform user maintenance.
• Cleaning and user maintenance shall not be
made by children without supervision. Children
under the age of 3 should be kept away from the
product unless continuously supervised.
• This appliance can be used by children aged from
8 years and above and persons with reduced
physical, sensory or mental capabilities or lack
of experience and knowledge if they have been
given supervision or instruction concerning use of
the appliance in a safe way and understand the
hazards involved.
• Switch o the heater via the control panel, then
wait for the heater to cool down; switch o the
appliance using the on/o button on the bottom
and then remove the plug from the wall socket
before carrying out the following operations:
Clean the heater.
Carry out maintenance on the heater.
Move the heater.
• Unwind the power cable completely before
plugging the power cable into the wall socket, and
make sure the cable does not come into contact
with the heater or become exposed to heat. Do
not route the cable under carpet, do not cover it
with mats, runners or suchlike, and lay the cable
Note: Some parts of this product can become
very hot and cause burns. Particular attention has
to be given where children and vulnerable people
are present.
Note: The stickered icon indicates the
product should never be covered.
When using electronic equipment, the standard
safety warnings must be taken into consideration
at all times, including the following safety
instructions:
• To become familiar with the controls, safety
features and use of the heater, we recommend
you carefully read all the instructions before
using it.
• Do not insert any objects into the air inlet or air
outlet.
• This product is not a toy. Do not allow children to
play with the product, regardless if the product is
plugged into a wall socket or not.
• Children between the ages of 3 and 8 shall only
switch on/o the appliance provided that it has
been placed or installed in its intended normal
operating position and they have been given
supervision or instruction concerning use of
the appliance in a safe way and understand the
1
2
3

76
EN
persons not capable of leaving the room on their
own, unless constant supervision is provided.
• The heater should not be placed directly under,
near, or directed towards, a wall socket.
• The heater must be placed on a stable surface
where it cannot be easily toppled or shocked.
• This heater is not suitable for use in wet or
damp areas such as bathrooms, washrooms,
etc. Do not place it near a tap, bath, shower,
swimming pool, fountain or suchlike. Make
sure the appliance can never fall into water and
prevent water from entering the heater. Should
the heater come into contact with water, take
the plug out of the wall socket rst. A heater with
wet internal parts can no longer be used; the
appliance must be sent for repair rst. Never
immerse the heater, cable or plug in water or
other liquids, and never touch the heater with
wet hands.
• In case the heater is malfunctioning in any way,
shape or form it must turned o and unplugged
following the correct procedure immediately and
returned to the point-of-sale.
2. Product overview
I
II
III
I
II
Air outlet
1
Air inlet
2
Control panel
3
Fan Speed/WiFi pairing button
Indicator power level III (1800W)
4
Indicator Boost (Speed II)
8
Indicator power level II (1200W)
5
Indicator power level I (600W)
6
Indicator Eco (Speed I)
9
Indicator WiFi status
10
Fan Speed/WiFi pairing button
7
Power level / On/O button
11
I
II
III
I
II
Control panel

98
4. Maintenance and storage
Note: Carefully read the safety instructions
(Chapter 1) and the installation and operation
instructions below before using the product
Installation
Note: See Chapter 2 for the product overview
and references
Insert the plug into the wall socket.
Position the heater on a hard at surface
at least 50cm away from the wall or any other
objects.
EN
Power button
12
Air inlet
13
3. Installation
Turn the on/o switch on the bottom of the
appliance to the “on position”, the fan heater is
now in stand-by mode.
1
2
3
Note: Carefully read the safety instructions
(Chapter 1) and the installation and operation
instructions below before using the product
Caution: Allow the heater to cool down for a
minimum of 30 minutes before moving the
product. The top surface of the product can be
very hot. Do NOT touch before the product is
cooled down.”
• To avoid the risk of electric shock, do not clean
the heater with water and do not immerse it.
Clean the housing with a dry or slightly damp
cloth. Do not use aggressive soaps, sprays,
cleaners or abrasives, waxes, polishes or chemical
agents. Make sure the device is completely dry
before switching it on again.
• If necessary, dust particles accumulated in the air
inlet and outlet openings may be removed with
a vacuum cleaner. This maintenance should be
done regularly to assure the good operation of
the appliance. Dust particles in the appliance may
cause overheating.
• Be careful not to touch or damage any internal
parts during cleaning. The heater contains no
other parts which require further maintenance.
When the heater will not be used for a prolonged
period, please store the cleaned heater safely,
optionally in the original packaging. Store the
product in the upright position in a cool, dry and
dust-free location.
Bottom of the product

1110
EN
Power
• Press the to turn on the appliance. The heater
will turn on and the indicator at Power position I
and Fan speed position I will illuminate.
• Pressing the again will set the heater to power
setting II and speed II. The corresponding LEDs
will illuminate. When increasing the power output,
the fan speed automatically increases as well to
prevent overheating of the product.
• Pressing the again activates the highest heat
setting, and the light at power position III will
illuminate.
Note: power level II & III can only be used in
combination with speed II (boost)
• Pressing the once more will reset the heat
and fan speed setting
to I.
• To switch o the appliance, the must be
pressed for ±2 secs.
• After switching o the heater, the fan will remain
on for ± 30 seconds to cool the heating element
down. After this, the appliance automatically
returns to the stand-by mode.
5. Functions Fan speed
• Pressing the when the product is in stand-by
mode increases the fan speed and the Power
output. This is indicated by the LED from
Indicator Fan speed II and Indicator Power level II.
• Pressing the again will reset the fan speed
and power level to I.
• Pressing the for ± 5 secs. activates the WiFi
pairing mode.
Wi
• When turning on the heater using the main
power switch (item 12 in chapter 2), the WiFi
will automatically be activated and start pairing
mode. The WiFi indicator (item 10 in chapter 2)
will blink red for 3 minutes or until pairing has
been successful.
• Pairing mode can be re-activated pressing the
for +/- 5 seconds.
• The pairing mode will automatically be
deactivated when the product is unable to
connect to a device within 3 minutes.
• When pairing is successful, the WiFi indicator will
turn blue.
• For further instructions on how to pair your
product to WiFi, please refer to the Duux App.
APP STORE PLAY STORE
WIFI and APP operation
Scan below QR code to download the Duux APP
or search DUUX APP in the App Store or Google
Play Store to start the procedure to download the
APP. Once installed, enter your e-mail address and
complete the registration.
Connect to WIFI
Once registered, click “add duux device” on the
main screen or use the “+” button in the top
right corner to add a new device.
Search for “Threesixty” and press to continue
Connect to your preferred WiFi network and
enter the corresponding password
Follow the instructions in the app to complete
the pairing process.
1
2
3
4

1312
6. Technical specications
The appearance
and specication of
the device may be
changed without
notice.
EN
Model no.:
DXCH07
Power consumption:
600 – 1800W
Weight:
2.4 kg
Main materials:
ABS, PA & GF
Output settings:
2
22 cm
30 cm
The 360º heater
that lets you cozy
up anywhere
I
II
III
I
II
Noise level:
56dB
Heating element:
PTC Ceramic
Heating settings:
3
WiFi:
2.4Ghz
22 cm
30 cm
Heating settings Heating element

1514
Disposal
EN
7. FAQ
The appliance does not switch on.
Make sure the on/o switch on the bottom of
the product is “on”.
Can the appliance be used in the
bathroom?
The appliance is not suitable for wet rooms and
cannot be used in a bathroom.
What happens when the appliance is
knocked over?
Should the appliance be knocked while in use,
a safety mechanism will be operated, and the
appliance will switch itself o automatically.
If the appliance is put back on its feet, it will
indicate so and illuminate all LEDs. The product
can be switched on using the again.
Can I connect multiple appliances to the
same wall socket?
Due to the power required being in excess
of 1.800 watts, it is not advisable to connect
several appliances to the same wall socket.
Q.
Q.
Q.
A.
A.
When the appliance is switched o, the
fan continues to run for a while. Is this
correct?
This is correct. In order to cool the ceramic
heating element, the fan remains on for
approximately 30 seconds before the
appliance goes into stand-by mode.
Can I use an extension cable?
Use of an extension cable is not
recommended. If necessary, only make use of
an approved extension cable with a minimum
cross-section of 3 x 2.5 mm² and an authorized
power rating of at least 2.000 Watt/10Amp.
The appliance is emitting a strong odor.
A strong odor may be released when the
appliance is used for the rst time. This will
disappear after a while.
I’m having trouble connecting my device
to the Duux Smart App
Please refer to the FAQ in the Duux App for
further pairing instructions.
A.
A.
Q.
A.
Q.
Q.
A.
The European Directive 2012/19/EC on Waste
Electrical and Electronic Equipment (WEEE), states
that old electrical household appliances must not
be disposed of in the normal municipal, unsorted
waste stream. Old appliances must be collected
separately in order to optimise recycling and reuse
of the materials they contain and to mitigate any
consequences to the environment and public health.
The symbol with the crossed-out wheelie bin on the
product reminds you of your obligation to ensure
the appliance is collected separately for disposal.
Consumers must contact their local authority or
vendor for information regarding proper disposal of
their old appliance.
Q.
A.
Q.
A.

1716
Bedankt dat je
voor Duux hebt
gekozen.
We zijn blij dat je hebt besloten de handleiding bij je nieuwe keramische kachel van Duux door te lezen!
Veel gebruikers laten de handleiding links liggen en proberen er zelf achter te komen. Uit onderzoek
blijkt echter dat mensen die de handleiding lezen sneller en beter snappen hoe een apparaat werkt dan
mensen die er met vallen en opstaan achterkomen.
Bij Duux geloven we in het belang van een comfortabele, gezonde leefomgeving. Jouw welzijn verhogen
door aantrekkelijke, functionele en eectieve producten te ontwikkelen: dat is de passie die ons iedere
dag opnieuw drijft. Met ons aanbod aan innovatieve luchtbehandelingsproducten willen we je de best
denkbare luchtkwaliteit binnenshuis bieden.
Maak het behaaglijk met de slimme keramische kachel Threesixty van Duux - de ideale metgezel voor
koude winterdagen. De Threesixty heeft een uniek organisch ontwerp en een vermogen van 1800 watt,
wat deze compacte kachel krachtiger maakt dan je zou verwachten. Dankzij de ingebouwde ventilator,
zorgt de Threesixty voor een sneller verwarmingsproces in kamers tot 30m², in een mum van tijd is de
kamer warm! En dankzij de nieuwe Duux-app is de bediening van deze handige kachel heel eenvoudig.
NL
1. Belangrijke veiligheidsinstructies 4
2. Productoverzicht 5
3. Installatie 7
4. Onderhoud en opbergen 9
5. Functies 15
6. Technische specicaties 16
7. Veelgestelde vragen 15
8. Instructies voor afvoer 16
Inhouds-
opgave

1918
1. Belangrijke veiligheidsinstructies
• Kinderen tussen drie en acht jaar mogen
het apparaat niet aansluiten, instellen of er
onderhoud aan uitvoeren.
• Laat de reiniging en het gebruikersonderhoud
niet door kinderen uitvoeren zonder toezicht.
Houd kinderen jonger dan drie jaar uit de buurt
van de kachel tenzij er voortdurend toezicht is.
• Dit apparaat kan door kinderen vanaf acht jaar
en door mensen met verminderde fysieke,
sensorische of mentale vermogens of met een
gebrek aan ervaring en kennis worden gebruikt
onder toezicht of na uitleg over het veilige
gebruik van het apparaat en de risico’s.
• Zet de kachel uit via het bedieningspaneel en
wacht tot de kachel is afgekoeld; zet het apparaat
uit met de aan/uit-knop aan de onderkant
en verwijder vervolgens de stekker uit het
stopcontact vóór het uitvoeren van de volgende
handelingen:
Reinigen van de kachel.
Onderhoud aan de kachel uitvoeren.
Verplaatsen van de kachel.
• Rol de stroomkabel volledig uit voordat je deze
in het stopcontact steekt. Zorg ervoor dat de
kabel niet in contact komt met de kachel of
wordt blootgesteld aan hitte. Leid de kabel niet
onder een vloerkleed door, dek de kabel niet
af met matten, vloerlopers en dergelijke, en leg
de kabel zodanig neer dat er geen sprake is van
Let op: sommige onderdelen van dit apparaat
kunnen zeer heet worden en brandwonden
veroorzaken. Let vooral goed op wanneer er
kinderen en kwetsbare personen aanwezig zijn.
Opmerking: de pictogramsticker geeft aan
dat het product nooit mag worden afgedekt.
Bij het gebruik van elektronische apparatuur, moet
te allen tijde rekening worden gehouden met de
standaard veiligheidswaarschuwingen, waaronder
de volgende veiligheidsinstructies:
• Om vertrouwd te raken met de bediening,
veiligheidsfuncties en het gebruik van de kachel,
raden we je aan alle instructies zorgvuldig door te
lezen vóór gebruik.
• Steek geen voorwerpen in de luchtinlaat of
luchtuitlaat.
• Dit product is geen speelgoed. Laat kinderen niet
met het product spelen, ongeacht of de stekker
van het product in het stopcontact zit of niet.
• Kinderen tussen drie en acht jaar mogen het
apparaat alleen aan- en uitzetten indien het op
de gebruikelijke positie staat, er toezicht is op
de kinderen en de kinderen zijn geïnstrueerd
over het veilige gebruik van het apparaat en de
bijbehorende risico’s.
1
2
3
voorwerpen: minimaal 50 cm rondom de kachel.
• Als de stroomkabel beschadigd is, dient deze
door gecerticeerd personeel te worden
vervangen.
• Gebruik de kachel niet in ruimtes die gedurende
een lange periode niet worden gebruikt of
bezocht.
• Plaats geen accessoires op de kachel die niet zijn
aanbevolen door DUUX.
• Losse verbindingen tussen de stekker van
de kachel en het elektrisch stopcontact kan
oververhitting van de stekker veroorzaken.
• Om overbelasting en doorgebrande zekeringen
te voorkomen, mogen er geen andere apparaten
op hetzelfde stopcontact worden aangesloten.
• De kachel is uitsluitend bedoeld voor gebruik
binnenshuis. Gebruik de kachel uitsluitend als
extra verwarmingstoestel.
• Plaats de kachel niet op een plek waar
voorwerpen er bovenop kunnen vallen. Dit kan
ertoe leiden dat de kachel defect raakt of slecht
gaat werken.
• Plaats de kachel niet in de buurt van andere
apparaten die niet geschikt zijn voor blootstelling
aan hete lucht, zoals computers of smartphones.
Dit kan ertoe leiden dat het apparaat defect
raakt personen die niet in staat zijn de kamer
zelfstandig te verlaten, tenzij er sprake is van
voortdurend toezicht.
struikelgevaar. Zorg dat niemand op de kabel kan
gaan staan en dat er geen meubilair op geplaatst
is. Leid de kabel niet om scherpe hoeken heen,
en rol de kabel na gebruik niet te strak op.
• Om oververhitting te voorkomen mag de kachel
nooit worden afgedekt.
• Gebruik de kachel niet buitenshuis.
• Verleng de stroomkabel nooit zelf. Het gebruik
van verlengsnoeren wordt afgeraden. Dit kan
oververhitting en/of brand veroorzaken. Als het
gebruik van een verlengsnoer onvermijdelijk
is, zorg dan dat het een onbeschadigd en
goedgekeurd verlengsnoer is met een minimale
diameter van 3 x 2,5 mm² en een goedgekeurd
nominaal vermogen van minstens 2000 Watt/10
Ampère. Rol de stroomkabel altijd volledig uit om
oververhitting te voorkomen.
• Houd de kabel bij de stekker vast wanneer u
deze uit het stopcontact trekt. Trek nooit aan de
kabel zelf om de stekker uit het stopcontact te
verwijderen.
• Verwijder de stekker uit het stopcontact wanneer
het product voor langere tijd zonder toezicht
worden achtergelaten.
• Houd brandbare materialen zoals meubels,
kussen, beddengoed, papier, kleding, gordijnen
enz. op een afstand van minimaal 100 cm van de
kachel.
• Houd de luchtinlaat en luchtuitlaat vrij van
NL

2120
• De kachel mag niet direct onder, dichtbij of
gericht naar een stopcontact worden geplaatst.
• De kachel dient te worden geplaatst op een
stabiel oppervlak waar het apparaat niet
gemakkelijk kan omvallen of kan worden
omgestoten.
• Deze kachel is niet geschikt voor gebruik in
natte of vochtige ruimten zoals badkamers,
toiletten, enz. Plaats de kachel niet in de buurt
van een kraan, bad, douche, zwembad, fontein
en dergelijke. Zorg dat het apparaat nooit in
het water kan vallen en voorkom dat er water
in de kachel binnendringt. Mocht de kachel in
contact komen met water, trek dan allereerst de
stekker uit het stopcontact. Een kachel waarvan
de inwendige onderdelen vochtig zijn, mag niet
langer worden gebruikt. U dient het apparaat
eerst te laten repareren. Dompel de kachel,
kabel of stekker nooit onder in water of andere
vloeistoen, en raak de kachel nooit aan met
vochtige handen.
• Indien de kachel op welke manier dan ook niet
goed werkt, dient het apparaat onmiddellijk
uitgezet te worden en de stekker uit het
stopcontact te worden verwijderd volgens de
juiste procedure. In dat geval dient de kachel
teruggebracht te worden naar het verkooppunt.
2. Productoverzicht
I
II
III
I
II
Luchtuitlaat
1
Luchtinlaat
2
Bedieningspaneel
3
Ventilatorsnelheid Verbindingstoets
voor Wi Stroomindicator
niveau III (1800W)
4
Indicator Boost (Snelheid II)
8
Stroomindicator niveau II (1200W)
5
Stroomindicator niveau I (600W)
6
Indicator Eco (Snelheid I)
9
Indicator Wi-status
10
Ventilatorsnelheid/
Verbindingstoets voor Wi
7
Stroomniveau / Aan/uit-knop
11
I
II
III
I
II
Bedieningspaneel
NL

2322
let op: lees de veiligheidsinstructies (Hoofdstuk 1)
en de installatie- en bedieningsinstructies hieronder
goed door voordat je dit product gebruikt
Installatie
Opmerking: Zie Hoofdstuk 2 voor het
productoverzicht en de referenties
Steek de stekker in het stopcontact.
Plaats de kachel op een hard, vlak oppervlak
op een afstand van minimaal 50 cm van de
muur of andere voorwerpen.
Aan/uit-knop
12
Luchtinlaat
13
3. Installatie
Zet de aan/uit-knop aan de onderkant van het
apparaat op de stand ‘Aan’, de
verwarmingsventilator staat nu in stand-
bymodus.
1
2
3
Onderkant van het product 4. Maintenance and storage
Let op: lees de veiligheidsinstructies
(Hoofdstuk 1) en de installatie- en
bedieningsinstructies hieronder goed door
voordat je dit product gebruikt
Waarschuwing: laat de kachel minimaal
30 minuten afkoelen alvorens het product te
verplaatsen. De bovenkant van het product kan
zeer heet zijn. Raak het product NIET aan voordat
het is afgekoeld.”
• Reinig de kachel niet met water en dompel
het apparaat niet onder om het risico op
een elektrische schok te vermijden. Reinig
de behuizing met een droge of licht vochtige
doek. Gebruik geen agressieve zeepproducten,
sprays, reinigings- of schuurmiddelen, was,
glansmiddelen of chemische stoen. Zorg dat het
apparaat volledig droog is alvorens het weer aan
te zetten.
• Stofdeeltjes die zich hebben opgehoopt in de
openingen van de luchtinlaat en luchtuitlaat
kunnen indien nodig worden verwijderd met
een stofzuiger. Dit onderhoud moet regelmatig
worden uitgevoerd om de goede werking van
het apparaat te garanderen. Stofdeeltjes in het
apparaat kunnen oververhitting veroorzaken.
• Pas op dat u geen inwendige onderdelen
aanraakt of beschadigt tijdens het reinigen. De
kachel bevat geen andere onderdelen die verder
onderhoud vereisen.
Wanneer de kachel gedurende langere perioden
niet wordt gebruikt, berg dan de kachel na reiniging
veilig op, eventueel in de originele verpakking. Berg
het product rechtop op, in een koele, droge en
stofvrije omgeving.
NL

2524
Aanzetten
• Druk op om het apparaat aan te zetten. De
kachel wordt ingeschakeld en de indicator op
Stroomstand I en Ventilatorsnelheid I and Fan
speed position I gaat branden.
• Door opnieuw op te drukken, gaat de kachel
naar Stroomstand II en Ventilatorsnelheid II.
De bijbehorende LED-lampjes gaan branden.
Wanneer het stroomniveau wordt verhoogd, gaat
ook de ventilatorsnelheid automatisch omhoog
om oververhitting van het product te voorkomen.
• Door opnieuw op te drukken, wordt de
hoogste verwarmingsstand geactiveerd, en het
lampje op stroomstand III gaat branden.
Opmerking: stroomniveau II en III kunnen
uitsluitend worden gebruikt in combinatie met
ventilatorsnelheid II (boost)
• Door nogmaals op te drukken, wordt de
instelling van de warmte en de ventilatorsnelheid
teruggezet naar I.
• Om het apparaat uit te zetten moet
gedurende ±2 seconden worden ingedrukt.
• Nadat de kachel is uitgezet, blijft deventilator
nog ± 30 seconden werken om het
verwarmingselement af te koelen. Hierna schakelt
het apparaat automatisch terug naar de stand-
bymodus.
5. Functies Ventilatorsnelheid
• Door op te drukken wanneer het product in de
stand-bymodus staat, wordt de ventilatorsnelheid
en het stroomniveau verhoogd. Dit wordt
aangegeven door het LED-lampje van de indicator
Ventilatorsnelheid II en Indicator stroomniveau II.
• Door opnieuw op te drukken worden de
Ventilatorsnelheid en het Stroomniveau teruggezet
naar I.
• Door ± 5 seconden op te drukken, wordt de
modus voor de Wi-verbinding geactiveerd.
Wi
• Wanneer de kachel wordt aangezet met de
hoofdschakelaar (onderdeel 12 in hoofdstuk 2),
wordt Wi automatisch geactiveerd en wordt de
verbindingsmodus geactiveerd. De WiFi-indicator
(onderdeel 10 in hoofdstuk 2) knippert rood
gedurende 3 minutes of totdat de verbinding tot
stand is gebracht.
• De verbindingsmodus kan opnieuw worden
geactiveerd door +/- 5 seconden op te drukken.
• De verbindingsmodus wordt automatisch
gedeactiveerd als het product niet in staat is om
binnen 3 minuten verbinding te maken met een
apparaat.
• Als de verbinding tot stand is gebracht, gaat de Wi-
indicator blauw branden.
• Raadpleeg de Duux-app voor verdere instructies
over de Wi-verbinding van uw product.
APP STORE PLAY STORE
Bediening van wi en app
Scan de onderstaande QR-code om de Duux-
app te downloaden of zoek de Duux-app in de
App Store of Google Play Store om de app te
downloaden. Voer na de installatie je e-mailadres
in en rond de registratie af.
Verbinden met wi
Klik na de registratie op ‘add duux device’
op het hoofdscherm of gebruik de knop ‘+’
rechtsboven om een nieuw apparaat toe te
voegen.
Zoek naar ‘Threesixty’ en klik hierop om door te
gaan.
Maak verbinding met het gewenste wi-netwerk
en voer het bijbehorende wachtwoord in.
Volg de instructies in de app om de
verbindingsprocedure te voltooien.
1
2
3
4
NL

2726
De 360º kachel
die het overal
behaaglijk maakt
6. Technische specicaties
22 cm
30 cm
I
II
III
I
II
22 cm
30 cm
NL
Het uiterlijk en
de specicaties
van het apparaat
kunnen zonder
voorafgaande
kennisgeving
worden gewijzigd.
Modelnr.:
DXCH07
Stroomverbruik:
600 – 1800W
Gewicht:
2,4 kg
Hoofdmaterialen:
ABS, PA en GF
Uitgangsinstellingen:
2
Geluidsniveau:
56dB
Verwarmingselement:
PTC Keramiek
Warmte-instellingen:
3
Wi:
2.4Ghz
Heating settings Heating element

2928
7. Veelgestelde vragen Afvoer
De Europese richtlijn 2012/19/EU betreende
afgedankte elektrische en elektronische apparatuur
(AEEA) schrijft voor dat oude elektrische
huishoudelijke apparaten niet via de gemeentelijke
diensten als normaal ongesorteerd huishoudelijk
afval mogen worden afgevoerd. Oude apparaten
moeten gescheiden worden ingezameld om recycling
en hergebruik van de materialen in de apparaten
te optimaliseren en de eecten op het milieu en
de gezondheid van mensen te beperken. Het
symbool van een container met een kruis erdoor
herinnert je aan je verplichting om het apparaat
aan te bieden voor gescheiden afvalinzameling.
Consumenten dienen contact op te nemen met de
plaatselijke overheid of hun detailhandelaar voor
meer informatie over de correcte afvoer van oude
apparaten.
NL
Het apparaat wordt niet ingeschakeld.
Zorg dat de aan/uit-knop aan de onderkant van
het product op 'Aan' staat.
Kan het apparaat worden gebruikt in de
badkamer?
Het apparaat is niet geschikt voor vochtige
ruimten en kan niet in een badkamer worden
gebruikt.
Wat gebeurt er als het apparaat wordt
omgestoten?
Als het apparaat wordt omgestoten
terwijl het in gebruik is, wordt er een
veiligheidsmechanisme in werking gezet en
schakelt het apparaat zichzelf automatisch
uit. Als het apparaat weer rechtop wordt
gezet, wordt dat aangegeven doordat alle
LED-lampjes gaan branden. Het product kan
worden aangezet door opnieuw de te
gebruiken.
Kan ik meerdere apparaten op hetzelfde
stopcontact aansluiten?
Het wordt afgeraden om meerdere apparaten
op hetzelfde stopcontact aan te sluiten, omdat
de vereiste stroomtoevoer dan hoger ligt dan
1800 watt.
V.
V.
V.
A.
A.
Wanneer het apparaat uitgezet is,
blijft de ventilator nog enige tijd werken.
Is dit juist?
Dit is juist. Om het keramische
verwarmingselement af te koelen, blijft de
ventilator nog ± 30 seconden werken voordat
het apparaat overschakelt naar de stand-
bymodus.
Kan ik een verlengsnoer gebruiken?
Gebruik van een verlengsnoer wordt
afgeraden. Indien noodzakelijk, maak dan
uitsluitend gebruik van een goedgekeurd
verlengsnoer met een minimale diameter van
3 x 2,5 mm² en een goedgekeurd nominaal
vermogen van minstens 2000 Watt/10 Ampère.
Het apparaat geeft een sterke geur af.
Een sterke geur kan worden afgegeven
wanneer het apparaat voor het eerst wordt
gebruikt. Dit verdwijnt na enige tijd.
Het lukt mij niet mijn apparaat te
verbinden met de slimme Duux-app
Raadpleeg de Veelgestelde vragen in de
Duux-app voor verdere instructies over het
verbinden.
A.
A.
V.
A.
V.
V.
A.
V.
A.
V.
A.

3130
Nous vous
remercions d’avoir
choisi Duux.
Nous sommes ravis que vous ayez décidé de lire les instructions relatives à votre nouveau chauage
céramique Duux! De nombreux utilisateurs ne prêtent pas attention aux instructions et veulent trouver
eux-mêmes comment fonctionne l’appareil. Cependant, des études démontrent que les personnes qui
lisent les instructions pourront se familiariser avec l’appareil plus rapidement et plus ecacement que
celles qui procèdent par tâtonnements.
Chez Duux, nous sommes convaincus de l’importance d’un environnement de vie confortable et sain.
La passion qui nous anime jour après jour est d’améliorer votre bien-être en concevant des produits
attrayants, fonctionnels et ecaces. Grâce à notre gamme d’appareils de traitement de l’air innovants,
nous visons à vous fournir la meilleure qualité d’air intérieur possible.
Cocoonez avec le chauage céramique intelligent Duux Threesixty Ceramic Smart Heater – votre
compagnon parfait pour les journées hivernales. Ce chauage compact a un design organique unique et
une puissance de 1800 watts, dépassant de loin de vos attentes. Grâce au ventilateur intégré, Threesicty
accélère le processus de chauage dans une pièce jusqu’à 30m² et la chaue en un clin d’oeil! Et avec
l’application Duux gratuite, vous commandez ce chauage pratique en toute simplicité.
FR
1. Instructions de sécurité
importantes 4
2. Aperçu du produit 5
3. Installation 7
4. Maintenance et stockage 9
5. Fonctions 15
6. Spécications techniques 16
7. Foire aux questions 15
Table des
matières

3332
1. Instructions de sécurité importantes
• Les enfants âgés de 3 à 8ans ne doivent
pas brancher, régler et nettoyer l’appareil ou
eectuer la maintenance utilisateur.
• Le nettoyage et la maintenance utilisateur ne
doivent pas être eectués par des enfants sans
surveillance. Les enfants de moins de 3ans
doivent être tenus à l’écart de l’appareil, sauf s’ils
sont sous constante surveillance.
• Cet appareil peut être utilisé par des enfants
âgés de plus de 8ans ainsi que des personnes
à mobilité réduite ou à décience sensorielle ou
mentale dans le cas où ils ont été placés sous
la surveillance d’une personne responsable, ont
été informés de la manière d’utiliser l’appareil en
toute sécurité et comprennent les risques.
• Éteignez le chauage à l’aide du panneau de
commande, et attendes son refroidissement;
éteignez l’appareil à l’aide du bouton marche/
arrêt sur le fond et retirez la che de la prise
murale avant d’eectuer les opérations
suivantes:
Nettoyer le chauage.
Eectuer la maintenant sur l’appareil.
Déplacer le chauage.
• Déroulez entièrement le câble d’alimentation
avant de brancher l’appareil sur le prise. Veillez
à ce que le câble ne soit pas en contact avec le
chauage ou la chaleur. Ne faites pas passer le
Remarque: certaines pièces de ce produit
peuvent devenir très chaudes et causer des brûlures.
Une attention particulière doit être portée aux
enfants et aux personnes vulnérables présents.
Remarque: l’étiquette avec le pictogramme
indique que le produit ne doit jamais être recouvert.
Pendant l’utilisation de produits électroniques,
les avertissements de sécurité doivent à tout
moment être pris en compte, tout comme les
instructions de sécurité suivantes:
• Nous vous recommandons de lire attentivement
toutes les instructions avant l’utilisation, pour
vous familiariser avec les commandes, les
dispositifs de sécurité et l’utilisation du chauage.
• N’insérez pas d’objets dans l’entrée ou la sortie
d’air.
• Ce produit n’est pas un jouet. Ne laissez pas les
enfants jouer avec l’appareil, qu’il soit branché sur
une prise ou non.
• Les enfants âgés de 3 à 8ans peuvent être
autorisés à mettre l’appareil sous ou hors
tension si celui-ci a été placé dans sa position de
fonctionnement normale et s’ils ont reçu toutes
les instructions relatives à l’utilisation en toute
sécurité de l’appareil et comprennent les risques.
1
2
3
• L’entrée et la sortie d’air doivent rester libres; au
moins 50cm autour du chauage.
• Si le câble d’alimentation est endommagé, celui-ci
doit être remplacé par du personnel qualié.
• N’utilisez pas le chauage dans des endroits qui
ne sont pas utilisés pendant de longues périodes.
• N’utilisez pas d’accessoires sur le chauage qui
n’ont pas été recommandés par DUUX.
• Une mauvaise connexion entre la che et la prise
murale peut causer une surchaue dans la che.
• Ne connectez pas d’autres appareils sur la même
prise murale, pour éviter la surcharge et les
fusibles sautés.
• • Le chauage est uniquement destiné
à un usage intérieur. Utilisez le chauage
uniquement comme chauage d’appoint.
• N’utilisez pas le chauage dans des endroits où
des objets peuvent tomber dessus. Le chauage
pourraient être endommagé ou dysfonctionner.
• Ne placez pas le chauage près d’autres
appareils ne supportant pas une exposition à l’air
chaud, tels que les ordinateurs ou smartphones.
L’appareil pourrait être endommagé ou mal
fonctionner. personnes qui ne peuvent pas
quitter la pièce de leurs propres moyens, sauf
sous supervision continue.
câble sous une moquette, ne le couvrez pas avec
des tapis ou des produits comparables et posez-
le de manière à ce qu’il n’y ait pas de risque de
trébuchement. Veillez à ce que le câble ne puisse
être piétiné et qu’aucun meuble ne soit posé
dessus. Ne faites pas passer le câble sur un angle
vif et ne l’enroulez pas trop serré après utilisation.
• Le chauage ne doit jamais être couvert pour
éviter la surchaue.
• N’utilisez pas le chauage à l’extérieur.
• Ne réalisez pas vous-même une rallonge pour le
câble d’alimentation. L’utilisation d’une rallonge
est déconseillée, elle peut causer une surchaue
ou un incendie. Si l’utilisation d’une rallonge
est inévitable, vériez que la rallonge n’est
pas endommagée et qu’il s’agit d’une rallongé
approuvée avec un diamètre minimum de 3 x
2,5mm² et une classe de puissance d’au moins
2000 watts/10ampère. Déroulez toujours
entièrement le câble pour éviter la surchaue.
• Tirez toujours sur la che pour retirer la che.
Ne tirez jamais sur le cordon d’alimentation pour
retirer la che.
• Retirez la che de la prise murale si le produit
n’est pas surveillé pendant de longues périodes.
• Tenez les matières inammables tels que les
meubles, les coussins, le linge de lit, le papier,
les vêtements, les rideaux à au moins 100cm du
chauage.
FR

3534
• Le chauage ne doit pas être placé directement
sous, près de ou orienté vers une prise murale.
• Le chauage doit être posé sur une surface
stable où il ne peut pas être renversé ou percuté.
• Ce chauage ne convient pas pour une utilisation
dans des zones mouillées ou humides, tels que
les salles de bains, salles d’eau, etc. Ne le posez
pas près d’un robinet, une baignoire, une douche,
une piscine, une fontaine etc. Assurez-vous que
le chauage ne peut pas tomber dans l’eau et
que l’eau ne peut pas pénétrer dans le chauage.
Si le chauage entre en contact avec de l’eau,
retirez d’abord la che de la prise. Un chauage
dont les éléments internes sont mouillés, ne peut
plus être utilisé et doit d’abord être envoyé dans
un centre de réparation. N’immergez jamais le
chauage, le câble ou la che dans de l’eau ou
d’autre liquides, et ne touchez jamais le chauage
avec des mains mouillés.
• Au cas où le chauage dysfonctionne de quelque
façon que ce soit, il doit immédiatement être
éteint et la che doit être retirée de la prise
suivant la procédure correcte, après quoi il doit
être retourné au point de vente.
2. Aperçu du produit
I
II
III
I
II
Sortie d’air
1
Entrée d’air
2
Panneau de
commande
3
Vitesse du ventilateur/Bouton d’appairage
wi- Indicateur niveau de puissance
III (1800W)
4
Indicateur Boost (vitesse II)
8
Indicateur niveau de puissance II
5
Indicateur niveau de puissance I
6
Indicateur Eco (vitesse I)
9
Indicateur d’état wi-
10
Vitesse du ventilateur/Bouton
d’appairage wi-
7
Niveau de puissance/Bouton
Marche/Arrêt
11
I
II
III
I
II
Panneau de commande
FR

3736
lRemarque: lisez attentivement les instructions
de sécurité (chapitre 1), d’installation et de
fonctionnement ci-dessous avant d’utiliser le produit.
Installation
Remarque: voir le chapitre 2 pour l’aperçu du
produit et les références
Insérez la che dans la prise murale.
Placez le chauage sur une surface solide,
plane, à au moins 50cm d’un mur ou d’autres
objets.
Bouton d’alimentation
12
Entrée d’air
13
3. Installation
Positionnez le bouton marche/arrêt sur le fond
de l’appareil sur «marche», maintenant le
ventilateur chauant est en veille.
1
2
3
Fond du produit 4. Maintenance et stockage
Remarque: lisez attentivement les instructions
de sécurité (chapitre 1), d’installation et de
fonctionnement ci-dessous avant d’utiliser le produit.
Avertissement: le chauage doit refroidir au
moins 30minutes avant de déplacer
le produit. La surface supérieure du produit peut
être très chaud. Ne touchez PAS le produit avant
qu’il soit entièrement refroidi.
• Pour éviter le risque d’électrocution, ne nettoyez
pas le chauage avec de l’eau et ne l’immergez
pas. Nettoyez le boîtier avec un chion sec ou
légèrement humide. N’utilisez pas de savon,
vaporisateur, nettoyant ou produit abrasif, cire,
lustrant ou substances chimiques agressifs.
Assurez-vous que l’appareil est parfaitement sec
avec de le réutiliser.
• Si nécessaire, vous pouvez éliminer la poussière
accumulée dans l’entrée et la sortie d’air
avec un aspirateur. Cet entretien doit être
eectué régulièrement pour assurer le bon
fonctionnement du chauage. Les particules de
poussière dans l’appareil peuvent générer une
surchaue.
• Ne touchez pas de pièces internes pendant le
nettoyage pour ne pas les endommager.
Le chauage ne contient pas de pièces demandant
de l’entretien.
Si le chauage n’est pas utilisé pendant une
période prolongée, stockez le chauage nettoyé en
sécurité, de préférence dans son emballage
d’origine. Stockez le produit en position verticale
dans un lieu frais, sec et à l’abri de la poussière.
FR
Table of contents
Languages:
Other Duux Heater manuals
Popular Heater manuals by other brands

Daikin
Daikin REYQ8-48PY1B Service manual

THERMOCOAX
THERMOCOAX isopad IGB-G Series operating instructions

EAS Electric
EAS Electric EHC2200 instruction manual

COZY
COZY VC201A and Installation and operating instructions

Kermi
Kermi Credo-Duo II Assembly and operating instructions

Malmbergs
Malmbergs BDO-20 instruction manual