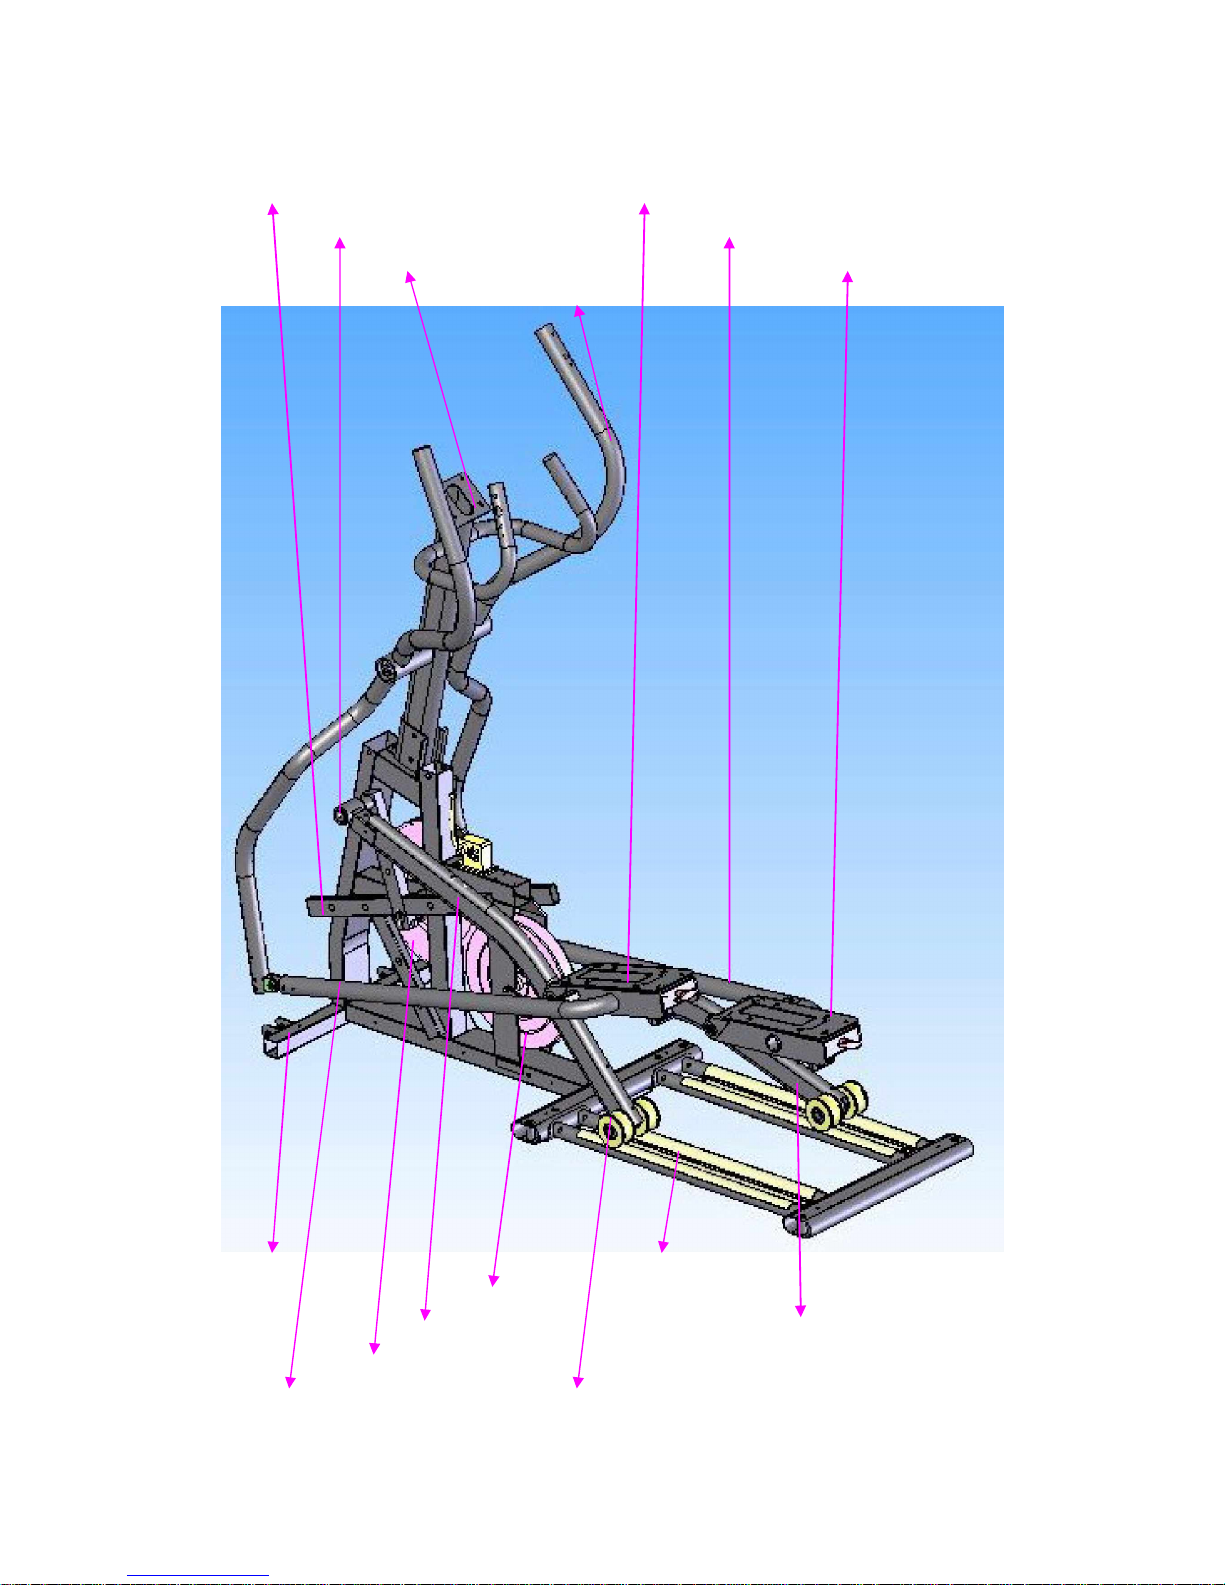
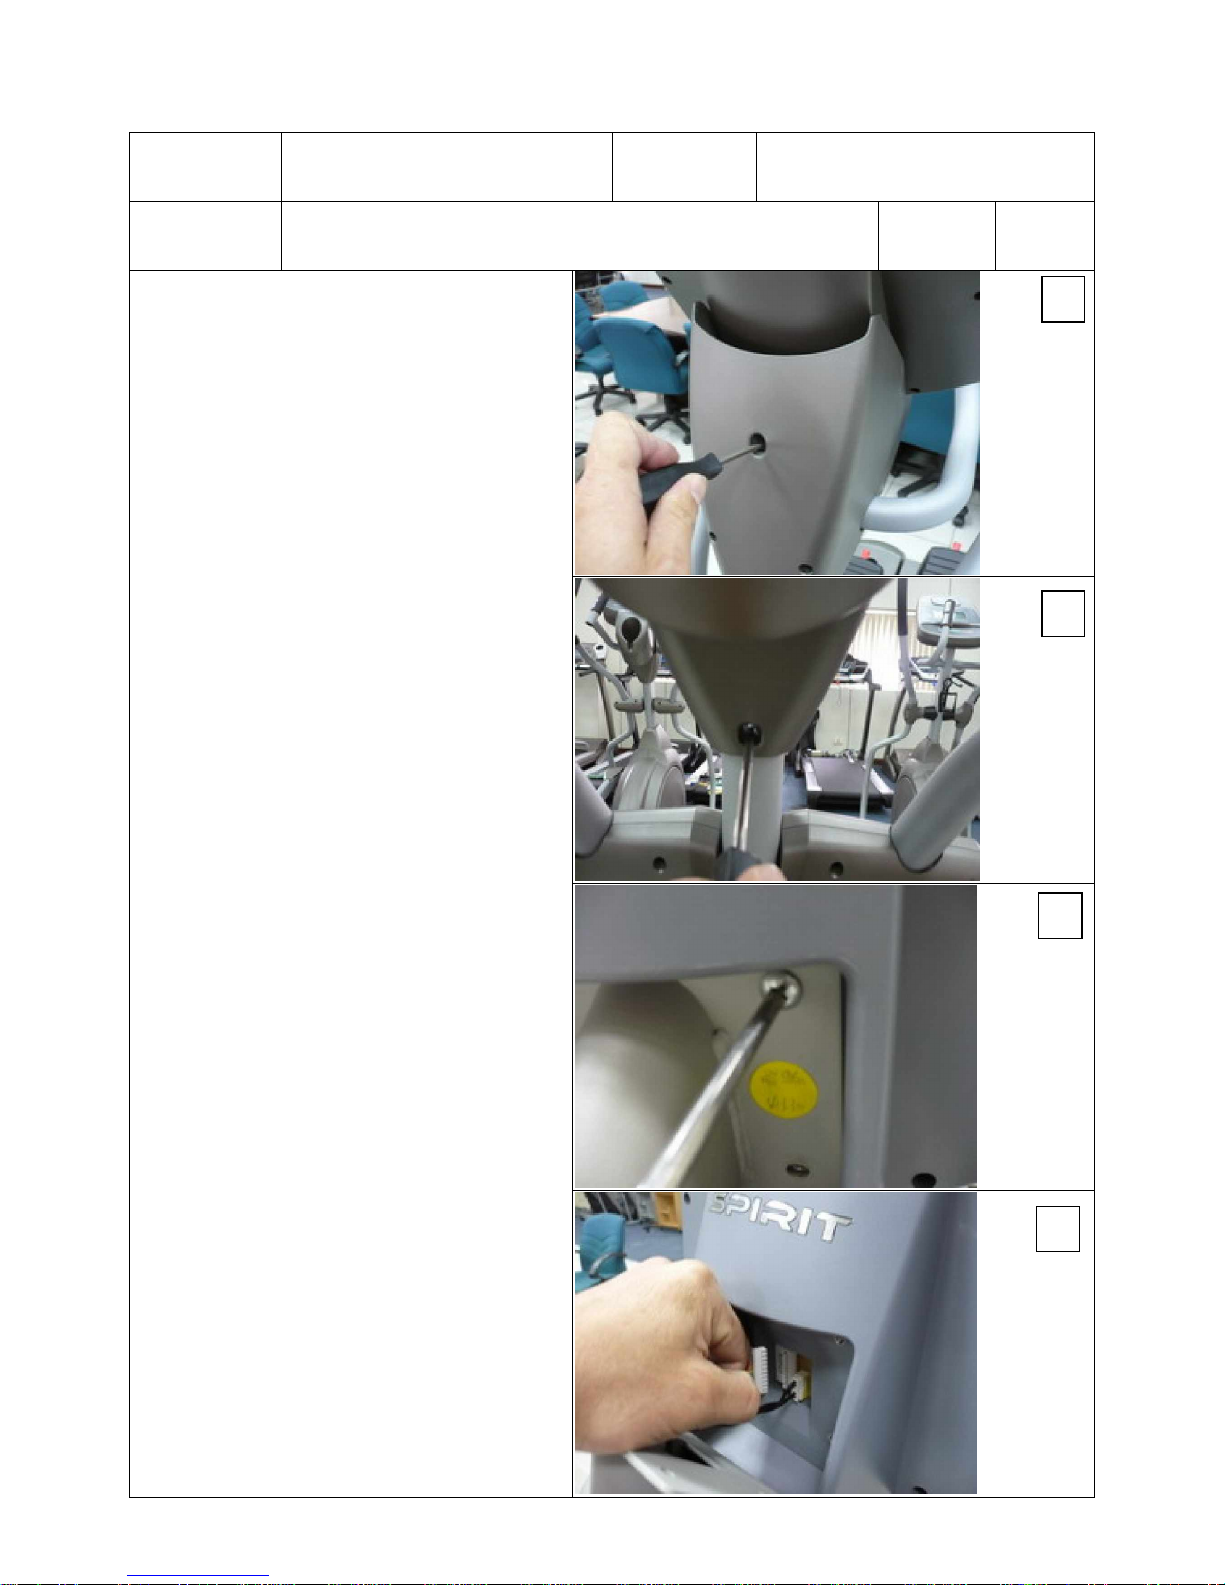
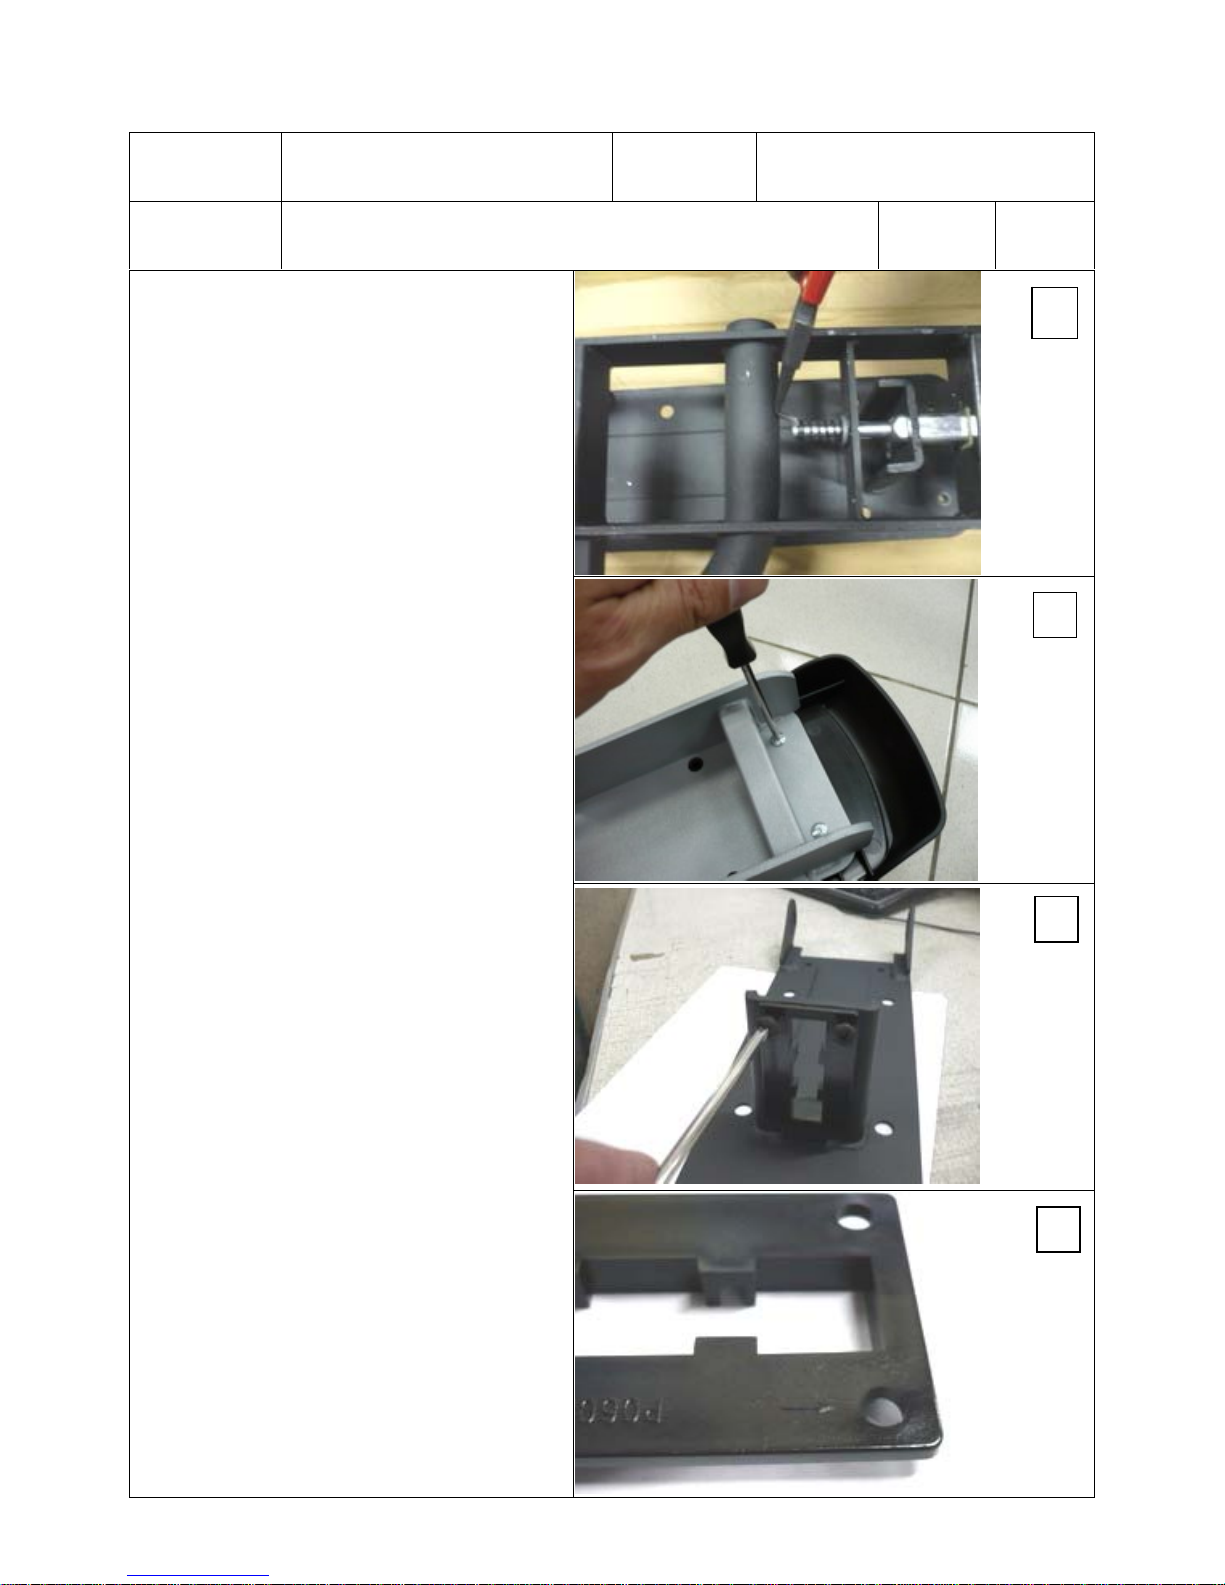
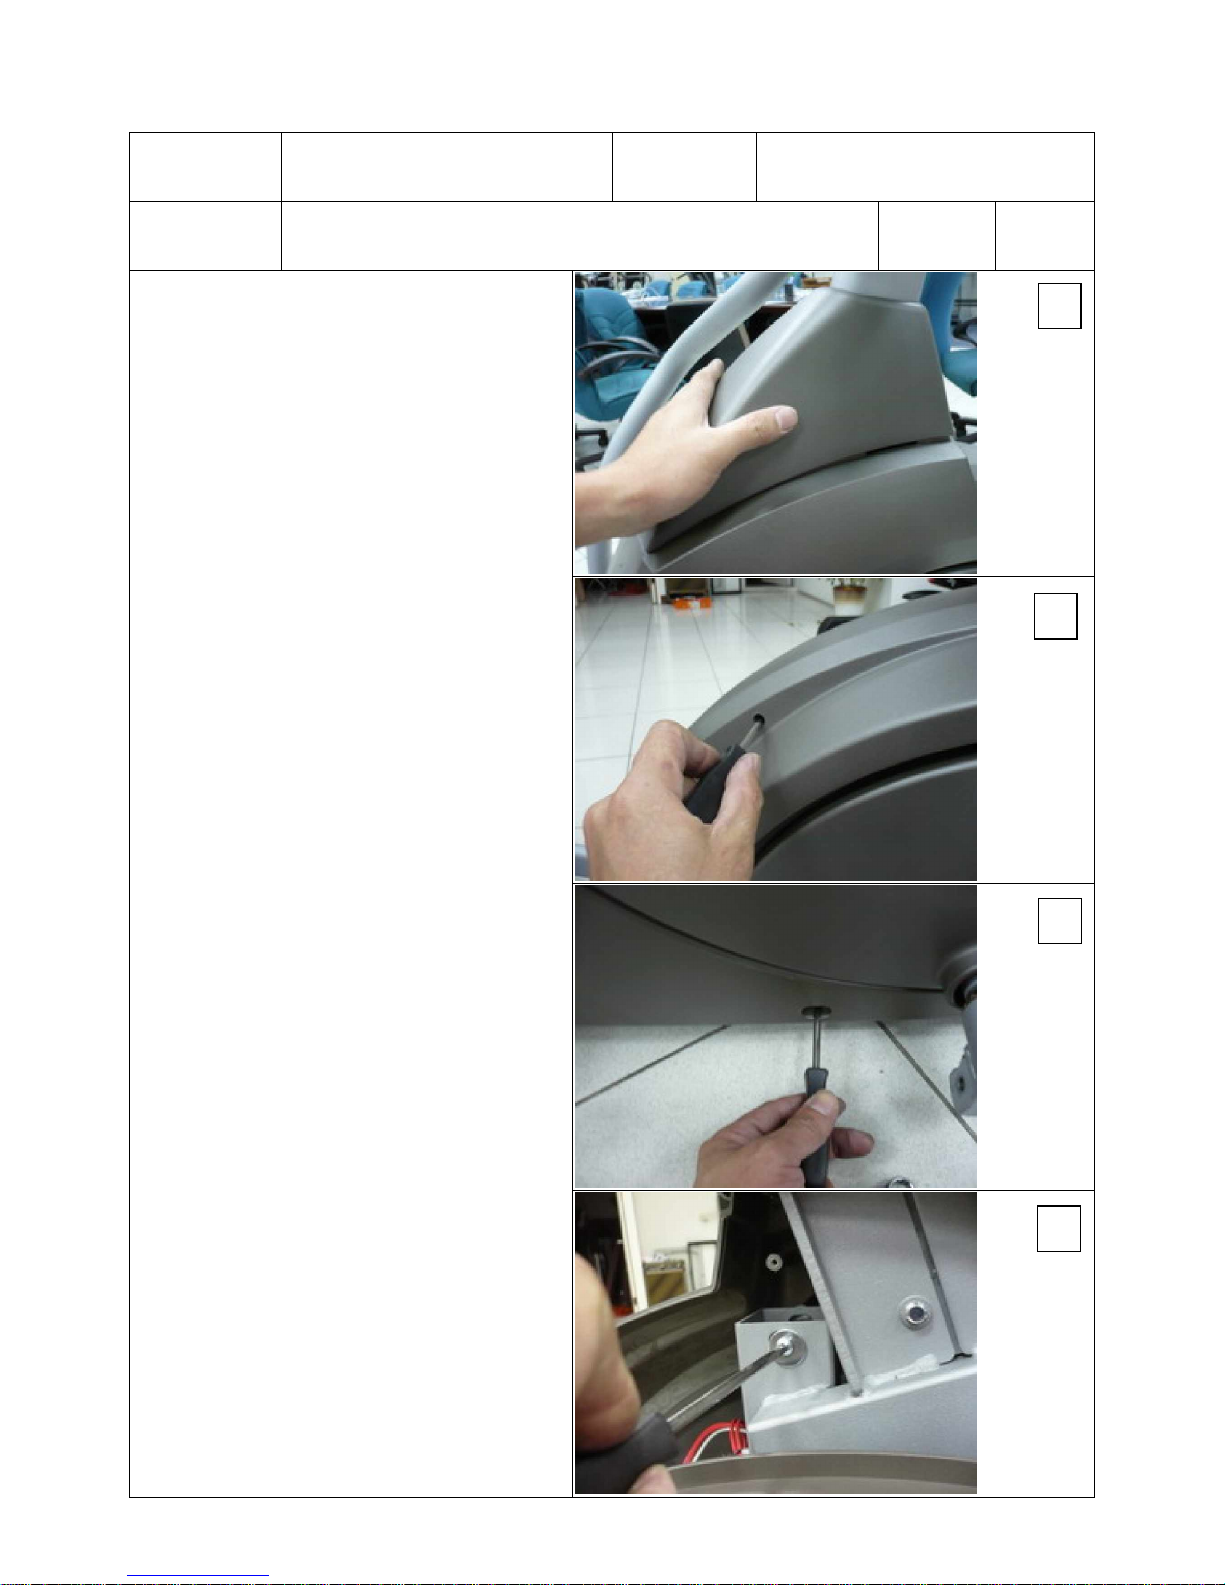
Dyaco Canada XE528s User manual

XE528s Service Manual
Plastic Parts
Round Disk Cover, Crank Front Console Cover Front Handlebar Cover (R)
RoundDiskCover Console RightPedal
RearConsoleCover ChainCover(R)
Front Handlebar Cover (L) Console Mast Cover
PedalArmCover(L) RearstabilizerCoverA
Connecting Arm Cover B (L) Slide Wheel Cover Rear Stabilizer Cover B
Connecting Arm Cover A(L) Left Pedal
Front Stabilizer Cover Chain Cover (L)

II. Skeleton
Cross Bar Adjustable Pedal (L)
BushingHousing ConnectingArm(R)
ConsoleMast AdjustablePedal(R)
Handlebar(R)
MainFrame RailAssembly
FlyWheel
PedalArm(L) PedalArm(R)
DrivePulley
Connecting Arm (L) Slide Wheel

CONTENTS
I. Disassembling and replacing of parts
1. Console
2. Connecting Arms
3. Pedal Arms
4. Left and right Chain Covers
5. Cross Bar
6. The Belt
7. Idler wheel Assembly
8. Fly Wheel
9. Drive Pulley
10. Bushing Housing
11. Slide Wheels
II. Troubleshooting
1. Console
2. Chain Covers and Round Disk Covers
3. Fly Wheel
4. The Belt
5. Handlebars
6. Bushing Housing
7. Pedal Arm, Connecting arm and Slide Wheels
III. Q&A
1. Noises
2. Slippage
3. Wobble
4. Smoothness
5. Others

Model XE528s Work Disassembling and Replacing
Parts 1 Console Rev
Procedures
1. Use Phillips head screw driver to
release 3pcs of M5x12mm screws
and 2pcs of 3.5x12 self tapping
screws to take apart both Front and
Rear Console Covers. Then release
4pcs of M5 x 10 mm screws which
secure the Console. Disconnect
computer cables and handpulse
cables to take apart the Console, as
shown in figures 1, 2, 3 and 4.
2. To resume, connect the computer
cables and handpulse cables and
secure the Console with 4pcs of M5
x 10 mm screws. Return both Cron
and Rear Console Covers.
1
2
3
4

Model XE528s Work Disassembling and Replacing
Parts 2 Connecting Arms Rev
Procedures:
1. Unscrew Connecting Arm Covers A
and B with Phillips head
screwdriver, as shown in figures 1
and 2.
2. Use 12 mm and 13 mm wrenches to
release 5/16" x1-1/4" hex head bolt
together with 5/16" x 20 x 1.5T flat
washer and 5/16" x 7T nut, as shown
in figure 3.
3. Use 12 mm wrench to release 5/16"
x 15m/m hex head bolt with 5/16" x
20 x1.5T flat washer which secure
the Connecting Arm then take off
carriage bolt to release the
Connecting Arm, as shown in figure
4.
4. Use C-ring pliers to release ψ10
C-ring in order to take offAdjustable
Pedal, as shown in figure 5.
1
2
3
4

Model XE528s Work Disassembling and Replacing
Parts 2 Connecting Arms Rev
Procedures:
1. Use Phillips head screwdriver to
release 4pcs of M5x10mm screws
and take off the Pedal, as shown in
figure 6.
2. Use Phillips head screwdriver to
release 4pcs of M5x10mm screws to
take off the Locking Pin Holder, as
shown in figure 7.
3. To resume, install the Locking Pin
Holder (with arrowhead pointing the
Pedal) on the Adjustable Pedal and
secure with 4pcs of M5 x10m/m
screws, as shown in figure 8.
4. Secure the Pedal on the Adjustable
Pedal with 4pcs of M5 x 10m/m
screws together with the spring, as
shown in figure 9.
5
6
7
8

Model XE528s Work Disassembling and Replacing
Parts 2 Connecting Arms Rev
Procedures:
5. Put Adjustable Pedal and Connecting
Arm together and return the Locking
Pin with ψ13.5x 38.5L spring, pull
it backward and return the C-ring by
using C-ring pliers, as shown in
figure 10.
6. Return the Connecting Arm with
Adjustable Pedal back to Pedal Arm
and insert the carriage bolt and
secure with 5/16" x 15m/m hex head
bolt and 5/16" x 23 x 1.5T flat
washer and fasten the other end of
the spring on the Locking Pin
Holder, as shown in figures 11 and
12.
7. Return Connecting Arm Covers A
and B with Phillips head
screwdriver.
9
10
11
12

Model XE528s Work Disassembling and Replacing
Parts 3 Pedal Arms Rev
Procedures
1. Follow procedures 2 to take
Connecting Arm apart.
2. Use Phillips head screwdriver to
unscrew Pedal Arm Cover, as shown
in figure 1.
3. Use M6 and 13 mm wrenches to
release M8 x 50 socket head cap
screw, 2pcs of 5/16"×20×1.5T flat
washer and M8 x 7T nut and pull
Pedal Arm backward to take it off, as
shown in figures 2 and 3.
4. To resume, join the Pedal Arm with
Bushing Housing and secure with
socket head cap screw, 2pcs of
5/16"×20×1.5T flat washer and M8
x7T nut. Return Pedal Arm Cover.
5. Follow procedure 2~5 to return
Connecting Arm.
1
2
3

Model XE528s Work Disassembling and Replacing
Parts 4 Chain Covers Rev
Procedures
1. Follow procedures 2 and 3 to take
apart Connecting Arm and Pedal
Arm.
2. Slightly press Console Mast Cover
to separate from Chain Covers, as
shown in figure 1.
3. Use Phillips head screwdriver to
release 7pcs of 4x19 self tapping
screws and 3pcs of 5x16 tapping
screws which secure Right Chain
Cover, as shown in figure 2 and 3.
4. To take apart left Chain Cover,
release 4x15 self tapping screw, on
the main frame, and 1/4"x19 flat
washer together with 3pcs of 5x16
tapping screws, and disconnect DC
cables, as shown in figures 4, 5 and
6.
1
2
3
4

Model XE528s Work Disassembling and Replacing
Parts 4 Chain Covers Rev
Procedures
5. To resume, connect DC cable back
on first.
6.
Return Left Chain Cover back on the
Main frame (be sure to put a 5/16" x
23 x 1.5T flat washer between the
Main Frame and the Chain Cover)
and use a 4x15 self tapping screw
together with a 1/4"x19 flat washer
to hold (not too tight temporarily)
Left Chain Cover on the Main Frame
then tighten with 3pcs of 5x16
tapping screws (be sure the Chain
Cover matches with Round Dick
Cover, Crank). Now tighten 4x15
self tapping screw, as shown in
figures 7 and 8.
7. Match Right and Left Chain Covers
and use 7pcs of 4x19 self tapping
screws and 3pcs of 5x16 tapping
screws to secure them.
8. Follow procedures 3~4 and 2~5 to
return Pedal Arm and Connecting
Arm.
5
6
7
8

Model XE528s Work Disassembling and Replacing
Parts 5 Cross Bar Rev
Procedure
1. Follow procedures 2, 3 and 4 to take
apart Connecting Arm, Pedal Arm
and both Chain Covers.
2. Use a sharp stick to take off Round
Disk Cover, as shown in figure 1.
3. Use 12 mm wrench to release 5/16"
x 15m/m hex head bolt with 5/16" x
35 x 1.5T flat washer then use M6
wrench to release M8x30 socket
head cap screw and take off Cross
Bar with Round Disk Cover, Crank,
as shown in figures 2 and 3.
4. Separate the Cross Bar apart from
Round Disk Cover, Crank by using
Phillips head screwdriver to release
8pcs of 5x16 tapping screws and
1/4"x19 flat washers, as shown in
figure 4.
1
2
3
4

Model XE528s Work Disassembling and Replacing
Parts 5 Cross Bar Rev
Procedures
4. To resume, secure Round Disk
Cover, Crank onto the Cross Bar and
return and align it on the Crank
Axle. Return 7x7x25L Woodruff
Key in the hole. Tighten M8x30
socket head cap screw until it reads
600 Kg-cm. Return 5/16" x 15m/m
hex head bolt and 5/16" x 35 x 1.5T
flat washer, as shown in figures 5
and 6.
5. Follow procedures 4, 3 and 2 to
resume Connecting Arm, Pedal Arm
and Round Disk Cover.
5
6

Model XE528s Work Disassembling and Replacing
Parts 6 The Belt Rev
Procedures
1. Follow procedures 2, 3, 4 and 5 to
take apart Connecting Arm, Pedal
Arm, both Chain covers and Cross
Bar Assembly.
2. Use 13 mm wrench to loosen M8 x
7T nuts on M8x170mm J-
bolt and on
Idler wheel Assembly. The Belt can
thus be released, as shown in figures
1, 2 and 3.
3. To resume, return the Belt onto the
Drive Pulley and Fly wheel and
tighten M8 x 7T nuts until the belt
tension reads 170 Hz +/- 10 Hz, as
shown in figure 4.
4. Follow Procedures 5, 4, 3 and 2 to
return other parts.
1
2
3
4

Model XE528s Work Disassembling and Replacing
Parts 7 Idler Wheel Assembly Rev
Procedures
1. Follow procedures 2, 3, 4, 5 and 6 to
take Connecting arm, Pedal Arm,
both Chain Covers, Cross Bar
Assembly and the Belt.
2. Use 13 mm wrench to loosen M8 x
7T nut on M8x170mm J-bolt until
J-bolt is off. Use the same wrench to
release M8 x 20 carriage bolt, 5/16"
x 20 x 1.5T flat washer and M8 x 7T
nut and take off Idler Wheel
Assembly, as shown in figures 1 and
2.
3. To resume, return Idler wheel
Assembly and hold with M8x20
carriage bolt, 5/16" x 20 x 1.5T flat
washer and M8 x7T nut (to be
tighten after the belt tension being
adjusted) and return and tighten the
J-bolt. Follow 6, 5, 4, 3 and 2 to
return other parts.
1
2

Model XE528s Work Disassembling and Replacing
Parts 8 Fly Wheel Rev
Procedures
1. Follow procedures 2, 3, 4, 5, 6 and 7
to take apart Connecting Arm, Pedal
Arm, Both Chain Covers, Cross Bar
Assembly, the Belt and Idler Wheel
Assembly.
2. Turn on the power and set the
resistance at level 20. Release the
cable as shown in figure 1.
3. Use 15 mm wrench to loosen 3/8"
-UNF26 x 9T nuts which secure the
Fly Wheel at each side and pull out
the Fly Wheel from the Main Frame.
Take off the Belt, as shown in
figures 2, 3 and 4.
1
2
3
4

Model XE528s Work Disassembling and Replacing
Parts 8 Fly Wheel Rev
Procedures
3. To resume the Fly Wheel, return the
Belt onto the notches on the Fly
Wheel pulley and return the
Flywheel on the Main Frame.
4. Return and tighten 3/8" -UNF26 x
9T nuts at each side.
5. Return the Cable (45 degree) onto
the Fly Wheel and resume the Idler
Wheel Assembly, as shown in figure
5.
6. Turn the Drive Pulley and make sure
the Belt stays on the Pulley by
adjusting 3/8"-UNF26 x 4T nuts.
Tighten all screws when the Belt
stays in the middle on the Drive
Pulley. Adjust the Belt for proper
tension, as shown in figure 6.
7. Follow procedures 7, 6, 5, 4, 3 and 2
to resume other parts.
5
6

Model XE528s Work Disassembling and Replacing
Parts 9 Drive Pulley Rev
Procedures:
1. Follow procedures 2, 3, 4, 5 and 6 to
take apart Connecting Arm, Pedal
Arm both Chain Covers Cross Bar
Assembly and the Belt.
2. Use C-ring Pliers to release both ψ
25 C-rings on Crank Axle to take
apart the Crank Axle and Drive
Pulley. Use rubber hammer if
necessary, as shown in figures 1 and
2.
3. To separate Drive Pulley from Crank
Axle, Use C-ring pliers to release ψ
25 C-ring on the Crank Axle and use
11 mm wrench to release 4pcs of
1/4" x 3/4" hex head bolts and 1/4"
nuts, as shown in figure 3.
4. To resume, return Drive Pulley and
one C-ring onto the Crank Axle.
Return both C-rings after the
returning the Crank Axle back to the
Main Frame.
5. Follow procedures 6, 5, 4, 3 and 2 to
resume other parts.
1
2
3

Model XE528s Work Disassembling and Replacing
Parts 10 Bushing Housing Rev
Procedures:
1. Follow procedures 2 and 3 to take
apart Connecting Arm and Pedal
Arm.
2. Use 12 mm wrench to release 5/16"
x 15m/m hex head bolt and 5/16" x
35 x 1.5T flat washer and take off
Bushing Housing, as shown in figure
1.
3. To resume, be sure to put ψ25
wave washer on the shaft and apply
some lubricant prior to returning
Bushing Housing onto the shaft.
Return and tighten 5/16" x15m/m
hex head bolt and 5/16" x 35 x 1.5T
flat washer, as shown in figures 2
and 3.
4. Follow procedures 3~4 and 2~5 to
resume Pedal Arm and Connecting
Arm.
1
2
3

Model XE528s Work Disassembling and Replacing
Parts 11 Slide Wheels Rev
Procedures:
1. Follow procedures 2 and 3 to take
Connecting Arm and Pedal Arm
apart.
2. Use Phillips head screwdriver to take
off Slide Wheel Cover, as shown in
figure 1.
3. Use C-ring pliers to take off ψ17
C-ring and release Slide Wheel, as
shown in figure 2.
4. To resume, return ψ17 wave
washer, Slide Wheel and ψ17 wave
washer in sequence onto the shaft
and use C-ring to secure the Slide
Wheel. Finally, return the Slide
Wheel Cover, as shown in figure 3.
5. Follow procedures 3~4 and 2~5 to
resume Pedal Arm and Connecting
Arm.
1
2
3

Model XE528s Work Troubleshooting
Parts 1 Console Rev
Procedures
1. Follow the procedure below to
diagnosis when the display is blank.
2. Make sure that power is plugged in
properly and check the continuity of
the cables. Make sure there is no
damages with cables., as shown in
figure 1.
3. Make sure all wires, including
computer cables and which are in the
Console, are connected properly.
Disassembling the Console and
check cables inside if necessary.
4. If cables are all connected properly,
check for any damages for cables or
malfunction of the Console or the
Gear Motor, as shown in figure 2.
1
2
Table of contents
Popular Elliptical Trainer manuals by other brands

HEALTH RIDER
HEALTH RIDER HRCCEL49011 user manual

Flow Fitness
Flow Fitness Driver DMR800 manual

Life Fitness
Life Fitness FS6 Operation manual

FREE MOTION
FREE MOTION e5.5 SFEL51412.0 user manual

HEALTH RIDER
HEALTH RIDER E330 Elliptical Manuel de l'utilisateur

Pro-Form
Pro-Form 505 Zle Elliptical Gebruiksaanwijzing

Pro-Form
Pro-Form REBEL user manual

Pro-Form
Pro-Form 650 Cardio Cross Trainer Elliptical manual

Life Fitness
Life Fitness 95Xi Total Body Trainer Operation manual

ICON
ICON NordicTrack FREESTRIDE TRAINER FS9i user manual

HEALTH RIDER
HEALTH RIDER E660 Elliptical manual

V-fit
V-fit MCCT1 Assembly & user manual