manuals.online logo
Brands
  1. Home
  2. •
  3. Brands
  4. •
  5. Dynamix
  6. •
  7. Media Converter
  8. •
  9. Dynamix HP-51/M User manual

Dynamix HP-51/M User manual

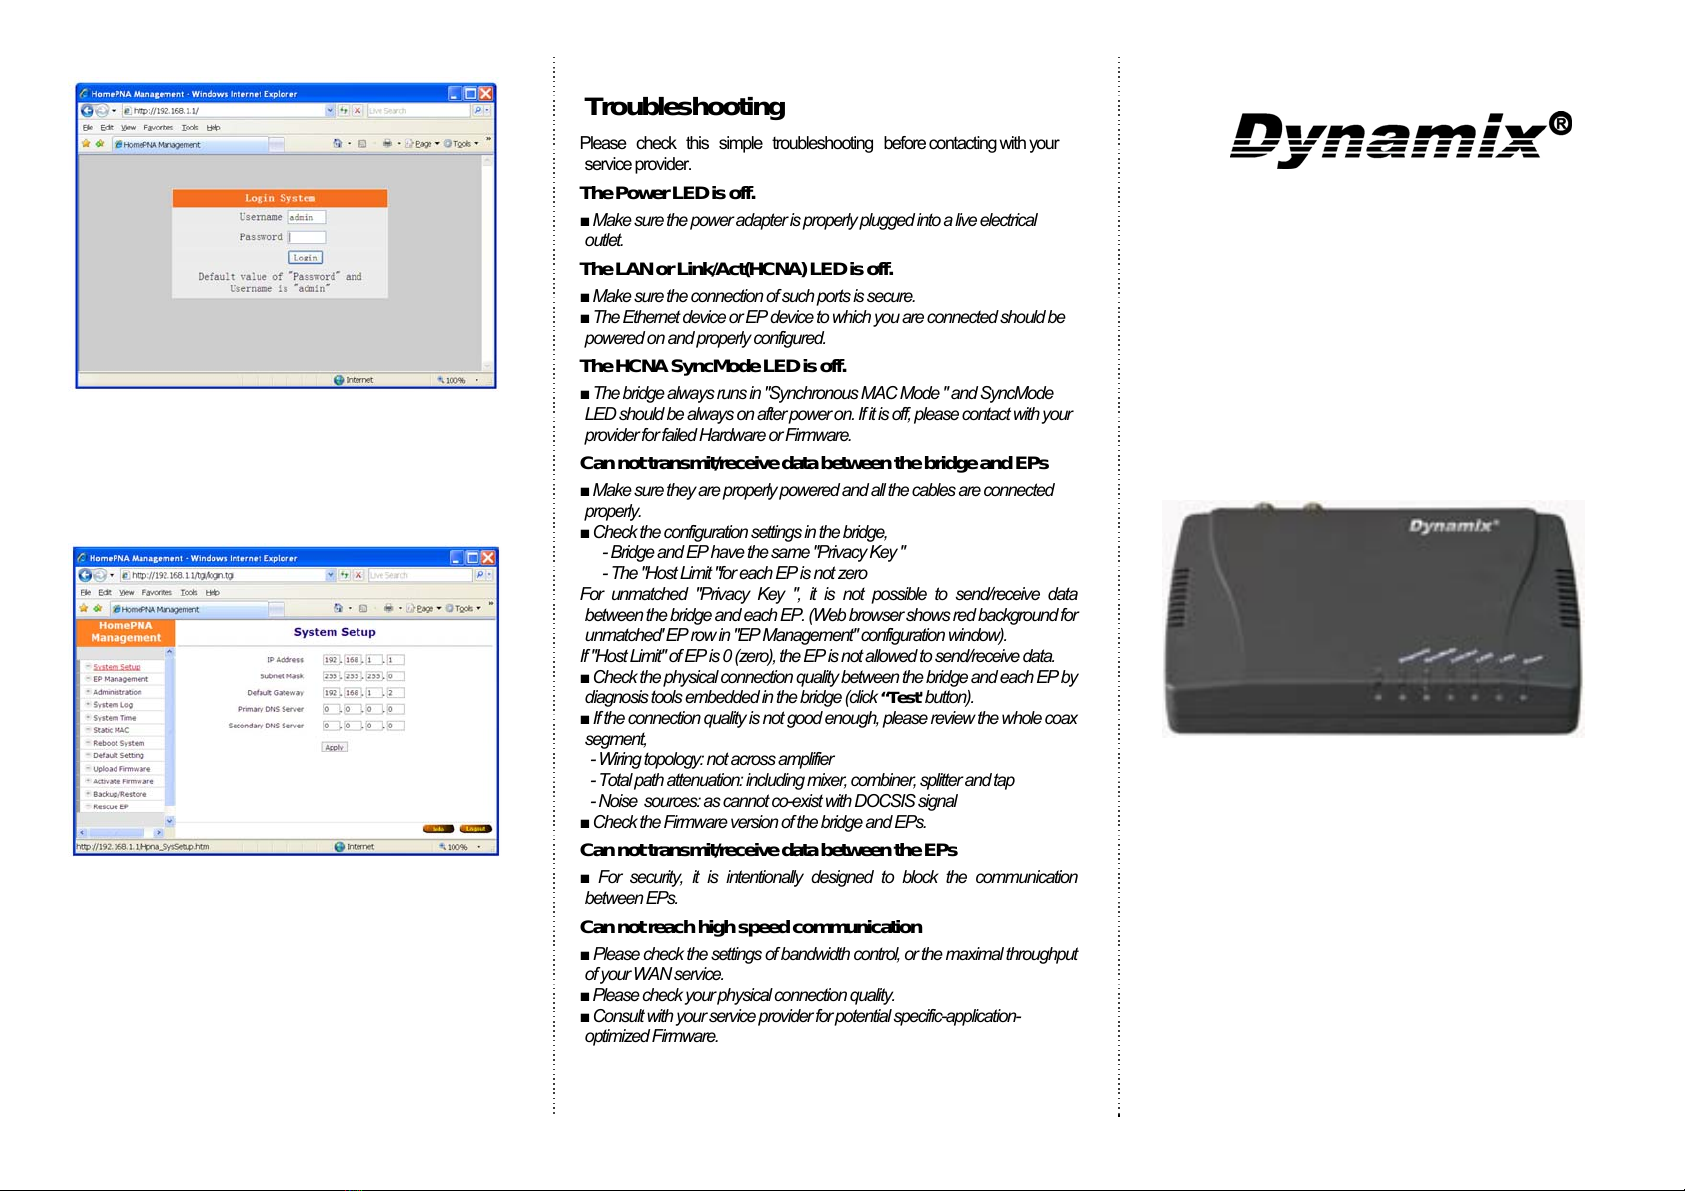
The bridge will prompt you a window for
authorization. The factory default Username
is “admin”, also Password is “admin”.
Please change it to a more secured
password after you login successfully. Here
shows the main menus after logon:
The main window contains the left sub-
window for the items to be configured, and
the right sub-window displays the contents for
the selected item. Click your mouse on the
item in the left window will pop out the
corresponding item-window in the right side.
Click on the “Apply” button (or “OK” button)
will submit your new settings into the
DYNAMIX HP-51/M bridge and will take effect
immediately.
Troubleshooting
Please check this simple troubleshooting before contacting with your
service provider.
The Power LED is off.
■Make sure the power adapter is properly plugged into a live electrical
outlet.
The LAN or Link/Act(HCNA) LED is off.
■Make sure the connection of such ports is secure.
■The Ethernet device or EP device to which you are connected should be
powered on and properly configured.
The HCNA SyncMode LED is off.
■The bridge always runs in "Synchronous MAC Mode " and SyncMode
LED should be always on after power on. If it is off, please contact with your
provider for failed Hardware or Firmware.
Can not transmit/receive data between the bridge and EPs
■Make sure they are properly powered and all the cables are connected
properly.
■Check the configuration settings in the bridge,
- Bridge and EP have the same "Privacy Key "
- The "Host Limit "for each EP is not zero
For unmatched "Privacy Key ", it is not possible to send/receive data
between the bridge and each EP. (Web browser shows red background for
unmatched' EP row in "ЕР Management" configuration window).
If "Host Limit" of EP is 0 (zero), the EP is not allowed to send/receive data.
■Check the physical connection quality between the bridge and each EP by
diagnosis tools embedded in the bridge (click “Test' button).
■If the connection quality is not good enough, please review the whole coax
segment,
- Wiring topology: not across amplifier
- Total path attenuation: including mixer, combiner, splitter and tap
- Noise sources: as cannot co-exist with DOCSIS signal
■Check the Firmware version of the bridge and EPs.
Can not transmit/receive data between the EPs
■For security, it is intentionally designed to block the communication
between EPs.
Can not reach high speed communication
■Please check the settings of bandwidth control, or the maximal throughput
of your WAN service.
■Please check your physical connection quality.
■Consult with your service provider for potential specific-application-
optimized Firmware.
www.godynamix.com
Coax MDU
Master Bridge
DYNAMIX HP-51/M
Quick Start Guide
Version 1.0
Packing List
The contents:
♦One Main Unit (DYNAMIX HP-51/M)
♦One DC 5 V Power Adapter
♦One F-Type Male-to-Male Coaxial Cable
♦One RJ-45 Ethernet Cable.
Rear Panel
Figure 1: Rear Panel DYNAMIX HP-51/M
Connectors
1. DC5V: Connect to the power adapter plug.
2. LAN1/LAN2: Two fast Ethernet ports to
connect Switch / FTTx / xDSL Modem for
Internet access.
3. Reset: While the bridge is turned on, press
and release this button will reboot the bridge.
Press it for lasting 5 seconds will restore all
settings to factory default. For example, the IP
address will restore to default “192.168.1.1”.
4. HCNA: Attach to existing coaxial cable and
use the cable as networking backbone in one
or more MDUs DYNAMIX HP-51/M. The
DYNAMIX HP-51/M is the HCNA master
device and controls the other HCNA endpoint
devices (refer to EP, as DYNAMIX HP-51/S)
on the same coax network.
5. TV/Antenna: Connect to TV set. Or
connect to VHF/UHF antenna or CATV to
bypass TV signal to HCNA port.
LED Indicators
Status
LED Glowing Dimming Flashing
Power Powered by
DC5V Not powered N/A
LAN1 LAN1
Link up
Disconnect or
Link fail
Receive or
Transmit
LAN2 LAN 2
Link up
Disconnect or
Link fail
Receive or
Transmit
Link/A
ct
HCNA
Link up
Disconnect or
Link fail
Receive or
Transmit
SyncM
ode
Synchronous
Mode Bridge failed N/A
Diagno
sis
Diagnosing
EPs
Not running
Diagnosis N/A
NOTE: HCNA always adopt the Synchronous
MAC protocol layer in coax network in order to
coordinate all the transmissions and eliminate any
collisions. It works as head-end device in one coax
MDU network.
Connecting the Cables
Figure 2: Cabling example 1 of the Bridge
Figure 3 shows the connection by other
Combiner or Mixer-Splitter with the bridge.
Figure 3: Cabling example 2 of the Bridge
Configure by Web Browser
The factory default IP address of the
DYNAMIX HP-51/M bridge is “192.168.1.1”
and the default subnet mask is
“255.255.255.0”. To access the bridge with
default IP, your PCs IP address should be as
“192.168.1.xxx”. For instance, you may
connect one PC with the bridge directly by one
Ethernet cable between your PC's Ethernet
adapter and the bridge's port LAN1. Also
configures your PC's TCP/IP setting to fixed IP
as “192.168.1.xxx”, subnet mask as
“255.255.255.0”, disable DHCP option. Make
your PC and the bridge within the same
“192.168.1.xxx” network. Type in 192.168.1.1
in your browser's website navigating field, as
the following:

Other Dynamix Media Converter manuals

Dynamix RC 903-V35FE1 User manual

Dynamix

Dynamix RC 903-V35FE1 User manual

Dynamix 10/100/1000 (SFP) User manual

Dynamix

Dynamix 10/100/1000 (SFP) User manual

Dynamix 20km 10/100/1000WDM User manual

Dynamix

Dynamix 20km 10/100/1000WDM User manual

Dynamix VC-M User manual

Dynamix

Dynamix VC-M User manual

Dynamix RC 907 EV 35 User manual

Dynamix

Dynamix RC 907 EV 35 User manual

Popular Media Converter manuals by other brands

Comtech EF Data LBC-4000 Installation and operation manual

Comtech EF Data

Comtech EF Data LBC-4000 Installation and operation manual

Apogee Mini-Me owner's manual

Apogee

Apogee Mini-Me owner's manual

Magewell Pro Convert AES67 user manual

Magewell

Magewell Pro Convert AES67 user manual

LEVTECH LSP-IVC Series user manual

LEVTECH

LEVTECH LSP-IVC Series user manual

T+A MP 1250 R user manual

T+A

T+A MP 1250 R user manual

VigilLink VLSP-18CTH14 user manual

VigilLink

VigilLink VLSP-18CTH14 user manual

GE D485 instruction manual

GE

GE D485 instruction manual

Maverick Audio TubeMagic D1 quick start guide

Maverick Audio

Maverick Audio TubeMagic D1 quick start guide

Peak P701 L Installation and operating

Peak

Peak P701 L Installation and operating

SeeEyes SC-MAC02 user manual

SeeEyes

SeeEyes SC-MAC02 user manual

Castell Salvo user guide

Castell

Castell Salvo user guide

MACH SYSTEMS 100BASE-T1 user manual

MACH SYSTEMS

MACH SYSTEMS 100BASE-T1 user manual

Newall SHG-A Series installation manual

Newall

Newall SHG-A Series installation manual

Transition Networks E-R-TX-FX-01(SC) user guide

Transition Networks

Transition Networks E-R-TX-FX-01(SC) user guide

Benchmark DAC3 HGC Firmware Upgrade Instruction

Benchmark

Benchmark DAC3 HGC Firmware Upgrade Instruction

Datalogic AMT58 Series manual

Datalogic

Datalogic AMT58 Series manual

PowerBox Systems Teleconverter instruction manual

PowerBox Systems

PowerBox Systems Teleconverter instruction manual

Renishaw QUANTiC RKLC40-S installation guide

Renishaw

Renishaw QUANTiC RKLC40-S installation guide

manuals.online logo
manuals.online logoBrands
  • About & Mission
  • Contact us
  • Privacy Policy
  • Terms and Conditions

Copyright 2025 Manuals.Online. All Rights Reserved.