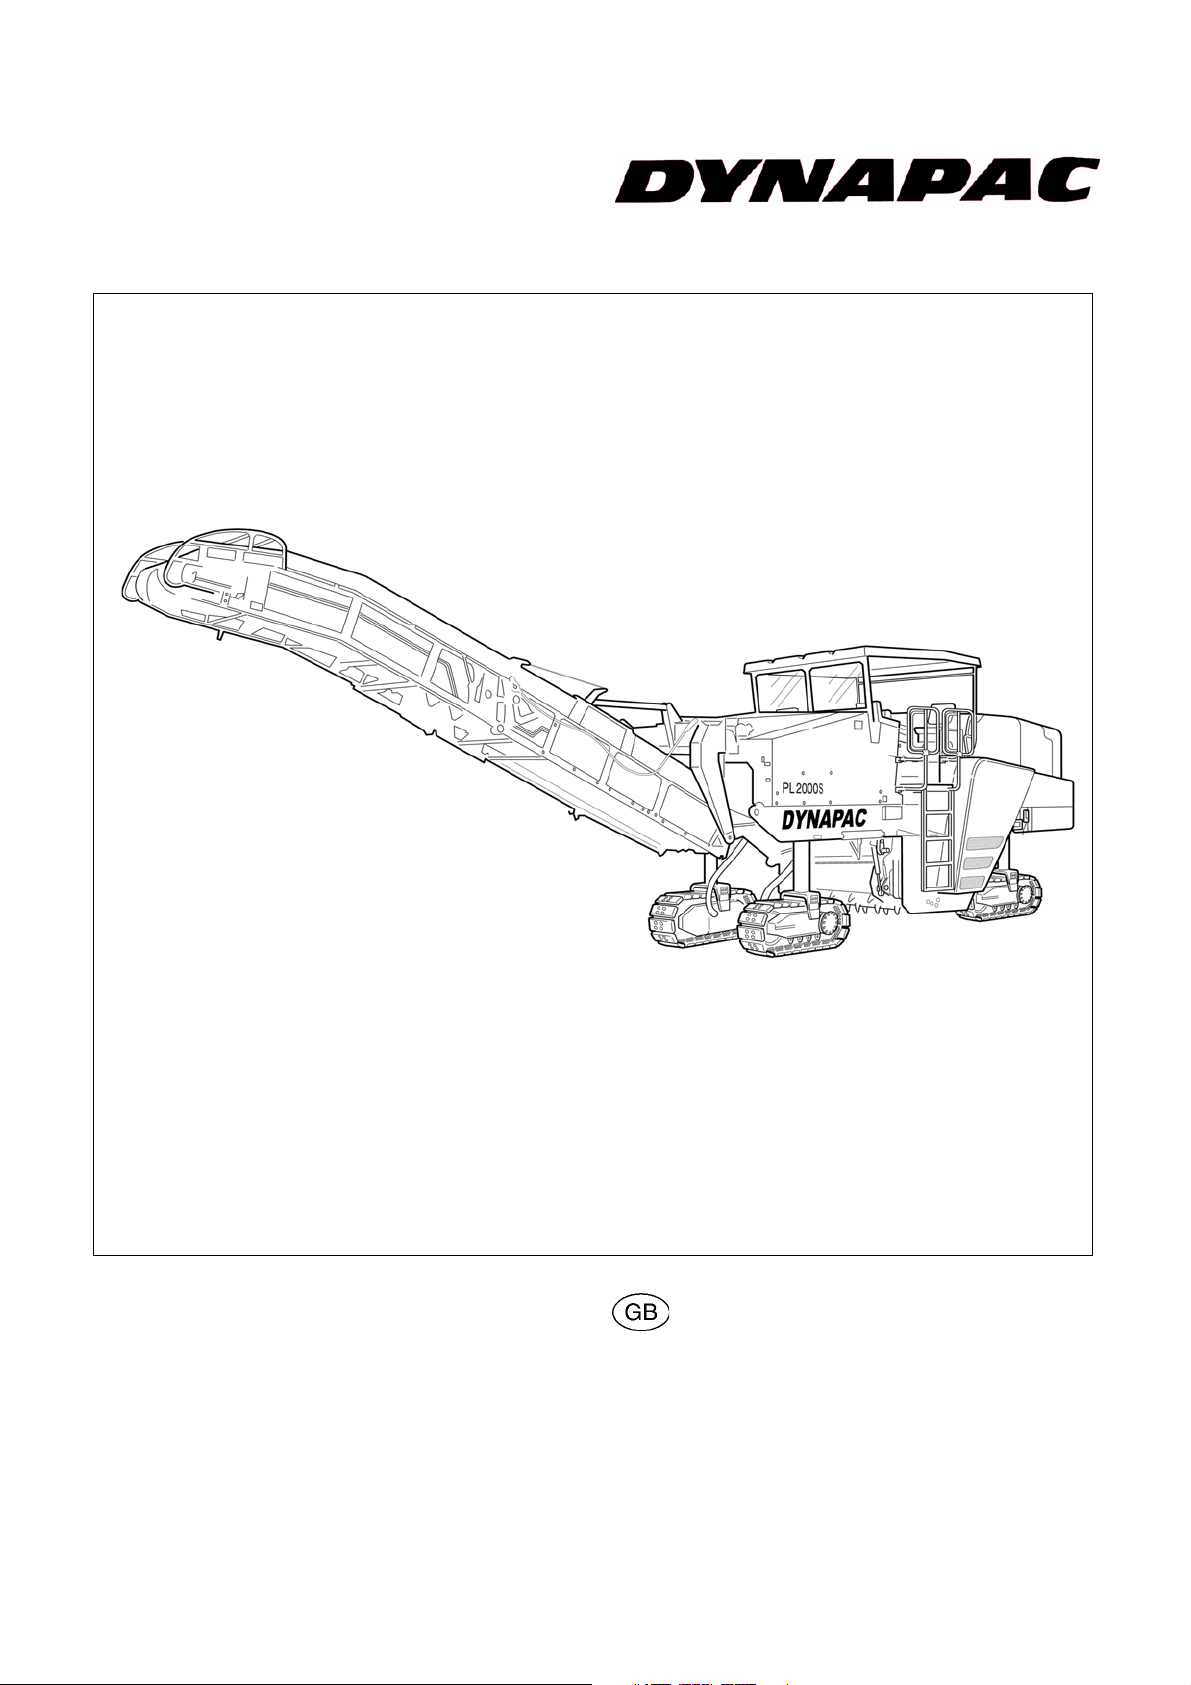
Dynapac PL2000S User manual

900 98 04 83
Cold planer
PL2000S
PL2100S
Operating instructions Valid for:
02-10.01


V00.001.GB 1-2 10.01
Foreword
If the machines are to be operated safely, the information provided in these Operating
Instructions will be required. The information is shown in a brief and clear form. The
Chapters are ordered by letter. Each Chapter starts with Page 1. The pages are iden-
tified using a Chapter letter and Page number.
Example: Page B 2 is the second page of Chapter B.
In order to prevent misunderstanding when making inquiries, during consultations,
when placing orders etc. , please always use the terms specified in the Operating In-
structions.
These Operating Instructions document various options. During operation and when
undertaking maintenance work, ensure that the description appropriate for the option
in question is used.
The machine may only be operated by trained staff.
These Operating Instructions should be read and applied by everyone who has been
assigned tasks involving the operation, recondition (maintenance, repairs, inspec-
tion) or transport of the machine.
These Operating Instructions contain important specifications and information on
how to safely, economically, professionally and correctly use the machine. Compli-
ance with these instructions will help to prevent dangerous situations, reduce down-
times and repair costs, to increase reliability during usage and the service life and to
ensure compliance with the warranty terms.
Safety information and important explanations are identified by the following picto-
grams:
Stands for safety information which must be observed in order to prevent dangers af-
fecting operators.
$Stands for information which must be observed in order to prevent material damage.
Stands for information and explanations.
+
Identifies standard equipment.
&
Identifies optional equipment.

V00.001.GB 2-2 10.01
The Operating Instructions must always be available at the machine’s operating site.
They are valid in conjunction with the Dynapac safety manual, the information on in-
tended usage and the supplementary operator’s instructions required on the basis of
existing national or regional specifications regarding technical regulations, accident
prevention and environmental protection.
In the interest of further technical development, the manufacturer reserves the right
to undertake modifications while retaining the key features of the machine type de-
scribed and to do so without correcting these Operating Instructions.
Dynapac GmbH
Wardenburg
Ammerländer Strasse 93
D-26203 Wardenburg / Germany
Tel.: +49 / (0)4407 / 972-0
Fax: +49 / (0)4407 / 972-228
www.dynapac.com

I 1
PL2000_GBIVZ.fmI 1-4 - 10.01
Table of contents
A Intended usage ........................................................................ 1
B Vehicle description ................................................................. 1
1 Description of usage ..................................................................................1
2 Descriptions of assemblies and functions ..................................................2
2.1 Vehicle .......................................................................................................4
Assembly ...............................................................................................4
3 Safety devices ..........................................................................................12
Emergency-stop button ........................................................................12
Horn ..................................................................................................... 13
Headlights, indicators rotary beacons ..................................................14
Hazard warning lights on side panels (O) ............................................15
Reverse lights and folding warning signs, reverse warning device, ....15
Traction unit supports ..........................................................................16
Steel retaining cables ..........................................................................17
Retaining hook of scraper flap .............................................................17
Limit switch of scraper flap ..................................................................17
Scraper flap safeguard .......................................................................18
Exit ladders, grab bars and guardrails .................................................18
Side shield ...........................................................................................18
4 Technical data, standard version .............................................................19
4.1 Dimensions .............................................................................................. 19
4.2 Weights ....................................................................................................21
4.3 Performance data ....................................................................................21
4.4 Loading system ......................................................................................21
4.5 Engine ......................................................................................................22
4.6 Travel drive .............................................................................................. 22
4.7 Hydraulic system ......................................................................................22
4.8 Water system ............................................................................................ 23
4.9 Compressed air system ............................................................................24
4.10 Electrical system ......................................................................................24
5 Identification points and type plates ......................................................... 25
5.1 Type plate and vehicle identification number ...........................................25
Type plate, machine ..........................................................................26
Serial number of discharge conveyor ................................................26
5.2 Identification points .................................................................................. 27
6 European standards .................................................................................33
6.1 Permanent noise level .............................................................................33
6.2 Operating conditions during the measurements ...................................... 33
6.3 Arrangement of measuring points ............................................................33
6.4 Vibration acting on the entire body .......................................................... 34
6.5 Vibration acting on the hand-arm .............................................................34
6.6 Electromagnetic compatibility (EMC) .......................................................34

I 2
PL2000_GBIVZ.fm 2-4 - 10.01
C Transport ................................................................................. 1
1 Safety regulations for transport ..................................................................1
2 Fix points .................................................................................................... 2
3 Transport on trailers ................................................................................... 3
4 Normal on-road travel ................................................................................6
5 Articulation procedure of foldable upper conveyor (O) .............................7
5.1 Folding in the upper conveyor ....................................................................7
5.2 Unfolding the upper conveyor ....................................................................9
6 Hydraulically foldable upper conveyor (O) ...............................................11
6.1 Folding out upper conveyor .....................................................................13
7 Loading by crane .....................................................................................14
8 Towing procedure ....................................................................................15
9 Secure before parking up .........................................................................16
D Operation ................................................................................. 1
1 Safety regulations ......................................................................................1
2 Controls ......................................................................................................2
3 Controls ......................................................................................................4
3.1 Control panel ..............................................................................................4
3.2 Switch panel ...............................................................................................8
Display indicator and menu operation .................................................34
Basic settings on the display ............................................................... 36
Operation, displays and setting options in the menu ...........................38
The basics of terminal operation ..........................................................39
Information and warning messages .....................................................41
Setting options ..................................................................................... 50
Other displays ......................................................................................55
Screen structure for setting and display options ..................................57
3.3 Error messages and warnings .................................................................58
Engine warnings (I) ..............................................................................58
Engine fault codes ...............................................................................59
Engine warnings (II) .............................................................................66
Warnings for hydraulic and water circuits ............................................69
Error messages, electrical system .......................................................70
Other possible error messages and warnings .....................................76
3.4 Lower rear control panel ..........................................................................79
3.5 Front lower control panel .........................................................................85

I 3
PL2000_GBIVZ.fmI 3-4 - 10.01
4 Controls ....................................................................................................91
4.1 Controls at operator’s control station .......................................................91
Driver’s seat on left / right ....................................................................91
Battery’s main switch ........................................................................... 92
Batteries ............................................................................................... 92
Windscreen wipers ..............................................................................93
Tilt display ............................................................................................ 93
Folding ladder ......................................................................................94
Guardrail ..............................................................................................95
Hydraulic folding roof operations ......................................................... 96
Hydraulic hood operations ...................................................................97
Throttle valves for deployment speed of hood and roof .......................98
Throttle valve for lowering speed of discharge conveyor .....................98
High pressure cleaner ..........................................................................99
4.2 Controls, vehicle frame .......................................................................... 100
Filling pump for water tank ................................................................ 100
Water filling (pressure fill) connection for water tank ......................... 101
Changeover for separate circuits of rear strut towers ........................ 102
Grading depth display ........................................................................ 103
Milling drum operational check .......................................................... 103
Ultrasonic sensor on side shield (optional) ........................................ 104
Reflector on ultrasonic sensor (optional) .......................................... 104
Interlock on scraper flap .................................................................... 105
Retaining hook of scraper flap ...........................................................105
Limit switch of scraper flap ................................................................106
Traction unit supports ........................................................................ 107
Support brackets ................................................................................ 107
"Scraper flap function changeover" valve .......................................... 108
Scraper flap throttle valves ................................................................ 109
"Upper conveyor function changeover" valve .................................... 109
Monitoring camera (o) ........................................................................ 110
Compressed air system ..................................................................... 111
Storage area and protective flaps ...................................................... 112
Plumbline fixture ................................................................................ 113
Swivel-mounted warning sign ............................................................114
Tool holder ......................................................................................... 114

I 4
PL2000_GBIVZ.fm 4-4 - 10.01
5 Levelling unit .......................................................................................... 115
5.1 MOBA-matic type ................................................................................... 115
6 Operating the MOBA-matic .................................................................... 116
6.1 Liquid crystal display (1) ........................................................................ 120
Activation message ............................................................................ 120
Sensor message ................................................................................ 121
LED display ........................................................................................ 122
Connection: ........................................................................................ 123
Equipping with other sensors / conversion ........................................ 125
Button usage and possible button combinations
on the digital controller during milling ................................................ 127
6.2 Basic settings ......................................................................................... 129
6.3 Calibration to zero .................................................................................. 130
Initial situation for calibration to zero .................................................130
Other tasks ........................................................................................ 130
Calibration to zero for cable tension and Digi-Sonic sensors
when sensing the ground via the side boards. .................................. 131
Calibration to zero for the Sonic-Ski during ground sensing .............. 132
Calibration to zero for the Sonic-Ski during cable sensing ................ 133
Calibration to zero of the Digi-Rotary sensor (rotary arm sensor)
during cable sensing .......................................................................... 134
Calibration to zero for the laser receiver LS 250 ...............................135
6.4 Actual value calibration .......................................................................... 136
Digi-Slope sensor (transverse slope sensor) ..................................... 136
Initial situation for actual value calibration ......................................... 136
Other tasks ........................................................................................ 136
Height sensors ................................................................................... 139
6.5 Other settings ......................................................................................... 140
6.6 Operating the Moba-matik during milling ...............................................142
Initial situation for operation ............................................................... 142
6.7 Other tasks for adopting the initial position for milling: ........................... 143
Milling with height sensors ................................................................. 143
Milling with height sensors together with the transverse slope sensor145
6.8 MOBA-Matic error messages ................................................................. 146
7 Operation ............................................................................................... 147
7.1 Preparing for operation .......................................................................... 147
Devices and aids ............................................................................... 147
Before starting work ........................................................................... 147
Checklist for machine operator .......................................................... 148
7.2 Starting the machine .............................................................................. 151
External starting (starting aid) ............................................................ 153
Allowing engine to "warm up" ............................................................ 154
Driving the machine ........................................................................... 155
Milling (preparation) ........................................................................... 157
Milling ................................................................................................. 159
Milling operations using set-up button ...............................................160
Ending the milling procedure ............................................................. 161
Parking the machine .......................................................................... 163
Parking the machine for long periods of time .................................... 164
8 Emergency steering unit ........................................................................ 165

A 1
A PL2000.GB 1-2 - 10.01
A Intended usage
The Dynapac "Guideline for the intended and correct usage of cold planers" falls with-
in the scope of supply of this machine. It forms part of these Operating Instructions
and must be observed. National regulations apply without restriction.
The machine described in these Operating Instructions is a cold planer which can be
used as follows in enclosed building sites on roads:
- to partially or completely remove asphalt, asphalt based and cement layers
- to remove distortions in the form of track grooves, lateral bulges, lateral warps,
- to recreate a proper surface,
- to implement roughing up and stripping work.
For this, the underlying base layer must be robust enough to withstand movement of
the cold planer.
The transportation of outsiders is expressly forbidden, as is using the cold planer as
a traction mechanism, winch or lifting device.
The intended usage also includes compliance with the operating, transport, mainte-
nance and repair conditions specified in the Operating Instructions.
The machine is not designed for any type of usage not described in the intended us-
age section. The manufacturer is not liable for such instances of use. The operator
alone bears all risks for such usage. When in doubt, contact the manufacturer.
Obligations of the operator: An operator, as defined in these Operating Instruc-
tions, is any natural or judicial person who uses the cold planer himself or on whose
behalf it is used. In special circumstances (e.g. leasing, rental), the operator is that
person who is to observe the specified operating obligations in accordance with the
contractual agreements made between the owner and user of the cold planer.
The operator must ensure that the cold planer is only used for its intended purpose
and that all kinds of risk to the life, limb and health of users or third parties are pre-
vented. Compliance must also be maintained with the accident prevention regula-
tions, all technical safety rules as well as the operating, maintenance and repair
guidelines. The operator must ensure that all users have read and understood these
Operating Instructions.

A 2
A PL2000.GB 2-2 - 10.01
Technical modifications, attachments and conversions: The cold planer may
only be operated with the extension parts, optional equipment and accessories, pro-
tection and safety devices authorised by the manufacturer as well as the setting va-
lues specified by the manufacturer. The manufacturer is not liable for damage
resulting from unauthorised changes to the assemblies, their removal or their repla-
cement with other, non-intended components or taking them completely or partially
out of operation.
The attachment or installation of additional devices, which are used to intervene in
the function of the cold planer or with which its functions are supplemented, is only
permitted with the written approval of the manufacturer. If necessary, approval should
be sought from the local authorities.
Consent from the authorities is however no substitute for approval from the manufac-
turer.

B 1
B PL2000.GB 1-34 - 10.01
B Vehicle description
1 Description of usage
The DYNAPAC cold planercold planer PL 2000 S / PL 2100 S is a compact, efficient
large planer detachment, hydraulically driven by four steerable crawler units. It has a
front loading system which is used to remove asphalt and cement layers. The milling
drums are driven mechanically by power-transmission belts.
As a result of its high planing performance, we would recommend that this cold planer
is used in particular when carrying out extensive redevelopment work on large and
spacious roads, such as motorways, urban and country roads, car parks, airports etc.
The PL 2000 S / PL2100 S corresponds to the European safety standard and satisfies
very stringent requirements in terms of its reliability, economic viability and environ-
mental responsibility.
P5030058new.tif

B 2
B PL2000.GB 2-34 - 10.01
2 Descriptions of assemblies and functions
P5030058.eps, P5030061.eps
1 2 4 5
9
10
11
151413
12
8
7
36
18
19
16
17
20
2423
22
21
20
20
25

B 3
B PL2000.GB 3-34 - 10.01
Item Designation
1Frame
2 Operator’s control station
3 Weather protecting sun roof
4 Control panel
5 Lower control panels
6 Engine
7 Air pressure system
8 Belt drive (milling drum drive)
9 Cutting section
10 Traction systems
11 Strut towers
12 Lower conveyor
13 Upper conveyor
14 Water refilling system
15 Water tank
16 Video monitoring system
17 Water spraying system
18 Folding ladder
19 Guardrails (on both sides)
20 Plug-in contacts for additional headlight (on both sides)
21 Storage area
22 Swivel-mounted radiator grille
23 Connection for external water filling (filling under pressure)
24 Swivel-mounted warning sign
25 Plumbline fixture

B 4
B PL2000.GB 4-34 - 10.01
2.1 Vehicle
Assembly
Frame and assembly: Robust, distortion-resistant steel welded design with useful
brackets for supporting the assemblies, units, attachments and tanks. All parts can
be easily accessed for maintenance and repair work.
Operator’s control station: The continuous length of accessible operator’s control
station is located in the central part of the machine and can be reached via two lad-
ders. Two ergonomic seats ensure that the planer can be conveniently operated from
both sides and that the operator has a good overview of and can monitor the milling
process.
The cold planer can be fitted with a weather protecting sun roof (can be folded in) and
all-round panels as an option. During transportation, the roof can be mechanically or
hydraulically folded forwards and fixed on the water tank.
Controls at operator’s control station: An operating panel, the position and height
of which can be easily adjusted, can be locked on the right and left and contains all
operating and control elements required. If necessary, the machine operator can
move this into any other position required, even beyond the edge of the machine. The
securely arranged controls are obviously marked for all applications.
Steering and feed are simultaneously controlled using a drive lever, designed as a
joystick. A second joystick controls the position of the upper conveyor and its speed
(controlled in a gradual manner).
A LC display integrated in the operating panel rapidly and comprehensively informs
the machinist of the present operating modes as well as any setting and
maintenance work required on the machine. All machine settings, including the grad-
ing depth and slope control, can be simply programmed and modified by means of a
perforated keypad with internationally comprehensible symbols.
Space has been left for the installation of a monitor for observing the planer track and
the dead space. This equipment is optionally available and can be installed with four
video cameras.
The main control panel, the lower control panels and access to all important switching
and connection points can be sealed off.

B 5
B PL2000.GB 5-34 - 10.01
Lower control panels: The operating panels housed here are located on neither
side of the planer, in front of and behind the milling roller box. They contain duplicates
of the main controls of the operator’s control station with override functions so that the
milling process can be monitored, corrected and interrupted from this point.
One digital controller for the grading depth and one for the slope position are attached
next to the rear operating panels on the left and right sides.
Dynapac CAN-BUS data communication system: The tried and tested state-of-
the-art electronic PLC (Programmable Logic Control) monitors all control functions of
the cold planer. Signals processed by microprocessors are safely transferred by an
efficient CAN-BUS system (Data Information System) and displayed as information
on the LC display. Possible function deviations and errors are noted and can be cor-
rected immediately.
Engine: The machine is fitted with an efficient 6-cylinder Cummins turbodiesel en-
gine which with its 600 bhp easily covers the rating of the large planer. This engine
has electronic engine management which also automatically adapts it to the extreme
operating and environmental conditions and therefore keeps its torque stable. Com-
pliance is maintained with emission values as defined in the U.S. EPA exhaust stan-
dard and the European COM2 exhaust standard. The engine cover is noise-insulated
as standard so that operating staff and the surrounding area are subjected to mini-
mum levels of noise.

B 6
B PL2000.GB 6-34 - 10.01
Cutting section: The cutting section consists of the mechanical milling drum drive,
the milling drum housing, the milling drum, the moldboard, the sliding shoe and the
side boards.
All these elements are precisely tuned to one another and their designs adapted so
that high performance milling is assured with low levels of cutting tool wear, as is very
good retrieval, granulation and transport of the milled product, an exact milling pattern
with cleaner milling edges is produced and the processed area is kept clean and free
of milling product which has not been retrieved.
- The mechanical milling drum
is driven by the diesel engine via a hydraulic separating clutch, belt pulleys and a 14-
belt powered-belt pack on a planetary gear directly connected with the drum body.
This guarantees a low-loss transfer of power, intercepts load impact and has a long
service life. The drive is fitted with an automatic belt tensioning fixture. The hydrauli-
cally selectable 3-pulley dry-plate clutch and the two-stage planetary gear are config-
ured specially for the milling drum drives and finely tuned to the engine rating of the
machine.
- The milling drum
rotates in the opposite direction to the machine forward drive. The professional cut-
ting tool arrangement and equipping with the best cutting tools ensures rapid and
clean cutting as well as high cutting tool downtimes.
A good, tried and tested, new type of changeable fixing system is used on the stan-
dard drum (line spacing 15 mm, milling width 2010 mm (PL 2000 S) / 2100 mm (PL
2100 S)). Thanks to the manner in which it is able to rapidly and simply replace upper
fixing parts, it makes minimum change times possible and does not therefore cause
long downtimes during replacement.
The milling drum housing
seals off the milling drums to the left and right through the side boards, the sliding
shoe to the front, the moldboard to the rear, in all grading depths and therefore en-
sures optimum material pickup and a clean cutting surface.
The side plates are fitted with replaceable, zero-wear hard metal plates to increase
their service life.

B 7
B PL2000.GB 7-34 - 10.01
Traction system, steering system, brakes
- Traction system
Four large crawler units, suspended in floating manner on the strut towers, hydrostat-
ically driven and fitted with sensor-monitored anti-slip control are equipped with slip-
free plastic pads. They provide excellent traction when cornering and in all usage po-
sitions.
Driving and working gear can be selected. The speed limits required can be set be-
forehand using the button provided or can be changed during operations. The control
lever of the travel drive then allows the speed to be gradually adjusted in this driving
range from zero to the maximum for both forwards and reverse travel.
When overloaded, the machine feed is automatically reduced using limit load control.
- Steering system
The machine has fully-tracked steering and therefore has high manoeuvrability.
When used in conjunction with a pre-selection button, the control lever allows the ma-
chine to be driven in four different steering variations and the speed to be changed at
the same time:
- "only front-steered",
- "only rear-steered",
- "co-ordinated front and rear-steered"
- "driving in crab steering"
If necessary, both axes are brought into the straight ahead position at the touch of a
button.
-Brakes: The machine is braked by the auto-inhibit of the hydrostatic drive and by
the hydraulic spring accumulator brakes integrated in the gears of all four drive
units. The machine is braked when the control lever is swivelled back from the max-
imum position to neutral. The accumulator spring brakes are activated both in the
neutral position (during machine "Stop") and when the engine is shut down and
they act as parking brakes.
During a towing procedure, the spring accumulator brakes can be hydraulically dis-
engaged by a manual pump.
-Strut towers: The strut towers are secured to the vehicle frame. The cold planer is
lowered and raised in a controlled manner into the position required via these tow-
ers. The milling drum is therefore moved into the correct cutting position and com-
pliance can be maintained with the grading depth and slope required during milling.
The height of the strut towers is adjusted using an integrated hydraulic cylinder
which is activated by proportional valves.
The grading depth and slope are set by means of the two front columns. The height
of each of the front strut towers can be adjusted individually. The two rear columns
operate in tandem and therefore adapt themselves to the appropriate machine po-
sition. For service purposes, the rear strut towers can also be changed over to in-
dividual adjustment mode.
The strut towers make a large lifting height possible so that the space required be-
tween the machine and ground is always provided during difficult manoeuvres such
as loading.

B 8
B PL2000.GB 8-34 - 10.01
Levelling equipment: The cold planer is fitted with electronic levelling equipment as
standard. The levelling equipment consists of two digital controllers and LC display
which can be connected with combination of a tilt sensor and various height or dis-
tance sensors.
The levelling equipment controls the cylinders of the front drive unit legs.
The grading depth and lateral slope required are pre-selected and compliance is au-
tomatically maintained with them during milling as the distance defined to a reference
surface is continually compared and corrected.
The automatic operation can be briefly bridged and replaced by manual control.
The levelling equipment cannot respond when not intended during a period of down-
time because a safety cutout is engaged when the machine is stopped.
In its standard version, the cold planer is fitted with two digital controllers and option-
ally either with two cable tension sensors acting on the side boards or two ultrasonic
sensors for zero-contact sensing of the surface.
As an option, the machine can be fitted with an additional tilt sensor, either with
ultrasonic sensors or laser receivers for zero-contact sensing or also with rotary sen-
sors for contact sensing of tensioning cables and side panels.
Water system: The water system consists of the water spraying and cooling system
and the water high pressure cleaner. It is operated by a hydraulically driven water
pump which can be switched from medium to high pressure displacement.
- Water spraying and cooling system:
The water spraying and cooling system operates in a medium pressure range of ap-
prox. 20 - 25 bar. The system is used to cool and rinse-clean the milling cutting tool,
milling drum, lower and upper conveyors.
The spray nozzles can be easily replaced.
- Water high pressure cleaner (optional):
For cleaning work, the system can be switched over to high-pressure operations, ap-
prox. 130 bar. The cold planer can optionally be fitted with a water lance and a tube
reeling device for such purposes. An appropriate high-pressure connection is provid-
ed for these.
Water refilling system: The cold planer is fitted with two front and rear C-shaped
pipe connections and a large filling aperture as standard for rapid water filling.
As an option, a hydraulically driven recirculating pump which significantly reduces the
filling time can also be used.
The water tank is large and resistant to corrosion.

B 9
B PL2000.GB 9-34 - 10.01
Loading unit: The cold planer is designed as a front loader and has a dual-section,
wide-belt loading system. The lower conveyor located under the machine receives
the material released and ejected by the milling drum and conveys it to the front upper
conveyor.
Wide gravel funnels ensure a clean transfer. Via the upper conveyor, the milled pro-
duct is finally loaded onto a means of transport or its support outside the cutting track.
Both conveyors are wide and have conveyance speeds which can be set in both for-
ward and reversing mode. Their maximum values can be pre-selected depending on
the material in question. Here, the speed of the upper conveyor can be gradually ad-
justed from zero to maximum when in operation. The speed of the lower conveyor au-
tomatically changes in proportion to the speed adjustment of the upper conveyor.
All belt changes can be simply and rapidly performed.
The lower conveyor is positioned on a sliding shoe to protect it from wear. This shoe
also serves as a compression device and prevents lumps from breaking up on the
cutting surface. Spraying the inside of the belt with water prevents it from sticking to
the asphalt granulate
The upper conveyor with hydraulic height adjustment has a large loading height and
can be swivelled by 45° on both sides. The level of dust contamination is noticeably
reduced through the use of the complete cover available.
As an option, the upper conveyor can be folded in for simpler transport.
Hydraulic system: The various operating functions of the cold planer are conducted
using several, independent hydraulic circuits with a clear pipework system, predomi-
nantly permanently installed piping and short sections of hose connection.
All hydraulic pumps are driven centrally by a pump drive in turn driven by the diesel
engine.
The following ensure that the entire hydraulic system is kept perfectly clean:
- a large return suction filter, fitted in the hydraulic oil tank, for the drive circuits of the
traction unit, loading belt, fan and water system as well as for the drives of the cyl-
inder adjustment functions;
- two pressure filters, fitted in front of the milling drum housing, on the right under the
machine and easily accessible from the outside. In the drive circuit for height ad-
justment and steering, these are switched between the load-sensing adjustment
pump and the hydraulic control blocks.

B 10
B PL2000.GB 10-34 - 10.01
Electrical system: 24 volt system, with two in-line cold start high-performance bat-
teries 2V/170 Ah/600A, 3-phase alternator 24V/100A.
The power supply can be interrupted to ground/earth by the battery’s main switch.
Air pressure system:Compressor driven directly by the engine with compressed air
reservoir of 20l/6.3 bar. There is a commissioning point with a rapid release clutch for
external consumers (e.g. pneumatic cutting tool driver or rotary screwdriver) in the
rear section under the machine.
This manual suits for next models
1
Table of contents
Other Dynapac Planer manuals