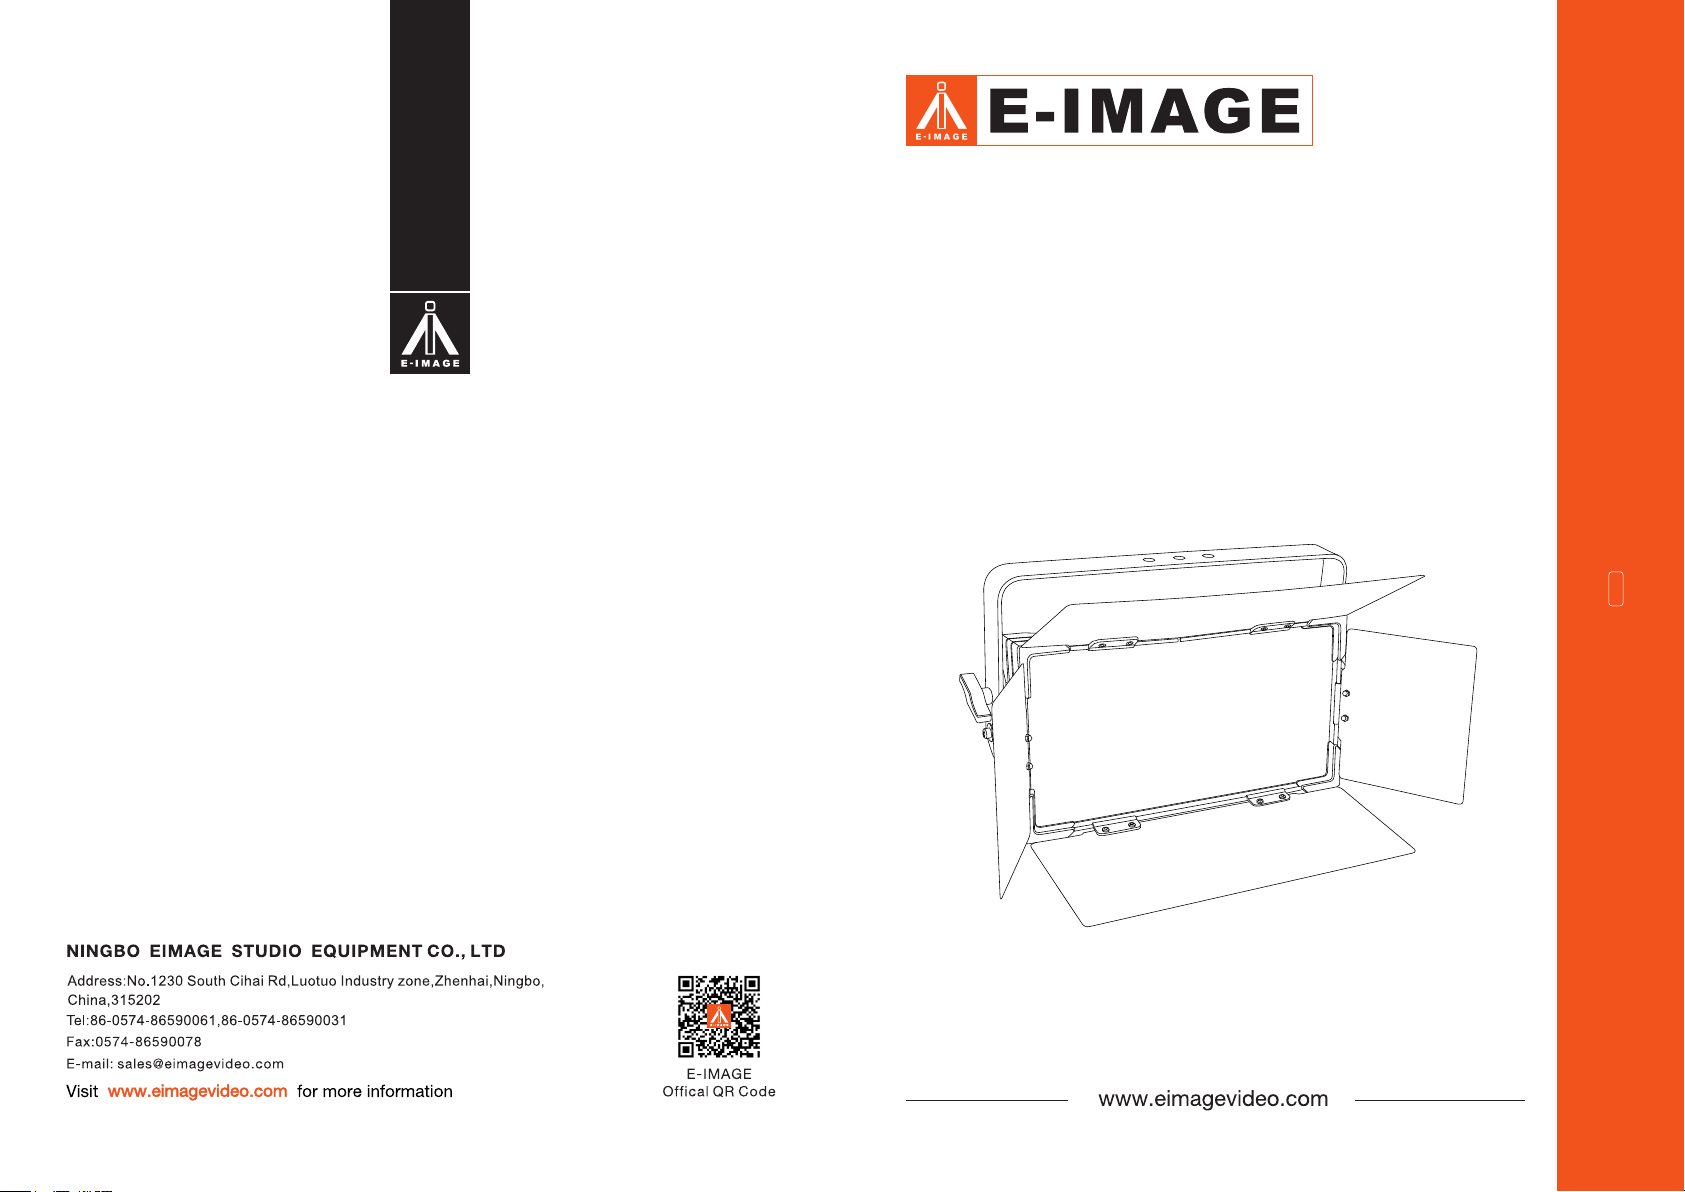
E-Image EL-1250S User manual
SUPPORT YOUR IMAGE
UserManual V1.0
2022.04
Studio LED PanelLight
EL-1250S
Contents
Cautions:
Thanks for purchasing E-IMAGE products.
We encourage you to read this manual carefully to familiarize all the details features
before operation, some of which maybe new to you. The manual including all safety
instructions, operation, maintance. Please make sure that all equipments is operated
correctly to avoid any defects or damage.
1.
2.
3.
4.
5.
6.
7.
8.
9.
10.
Always keep this product dry. Do not use in rain or in damp conditions.
Do not disassemble. Should repairs become necessary, this product must be sent to
an authorized maintenance center.
Keep out of reach of children.
As this product do not have waterproof function, please take measures of waterproof in
rainy or damp environment.
Do not use or store the product if the ambient temperature reads over 50 °C.
Do not use the flash unit in the presence of flammable gases, chemicals and other similar
materials. In certain circumstance, these materials may be sensitive to the strong light
emitting from this flash unit and fire or electromagnetic interference may result.
This LED light is designed for professional studio , TV station and filming using.
Please make sure the lights is under waterproof protection in raining day.
Please keep this light far from any combustible.
If the connection cables is damaged, please ask professional person to change it.
For up-to-date product information, please visit www.eimagevideo.com and click on
the product page.
1 2
2
3
4
7
13
Cautions
3
5
Introduction
In The Box:
6
EL-1250S Size:
EL-1250S:
Technical Data:
Installation :
Customer Information:
3 43 4
With the idea of enegy saving and enviroment protection, the device use lower power
loss and extremely high efficiency led. The device housing cover is made of used the new
high strength heat resistance engineering plastics, with beautiful shape and smooth lines.
The designing and manufacturing is in compliance with the IEC standard. The device is
suitable in the large-scale theatrical performance, the theater, the performance hall, the
bar, night club and so on.
The product conforms to the international standard DMXS12 agreement completely, the
device can be controlled In single, and also be controlled in many units.
Introduction:
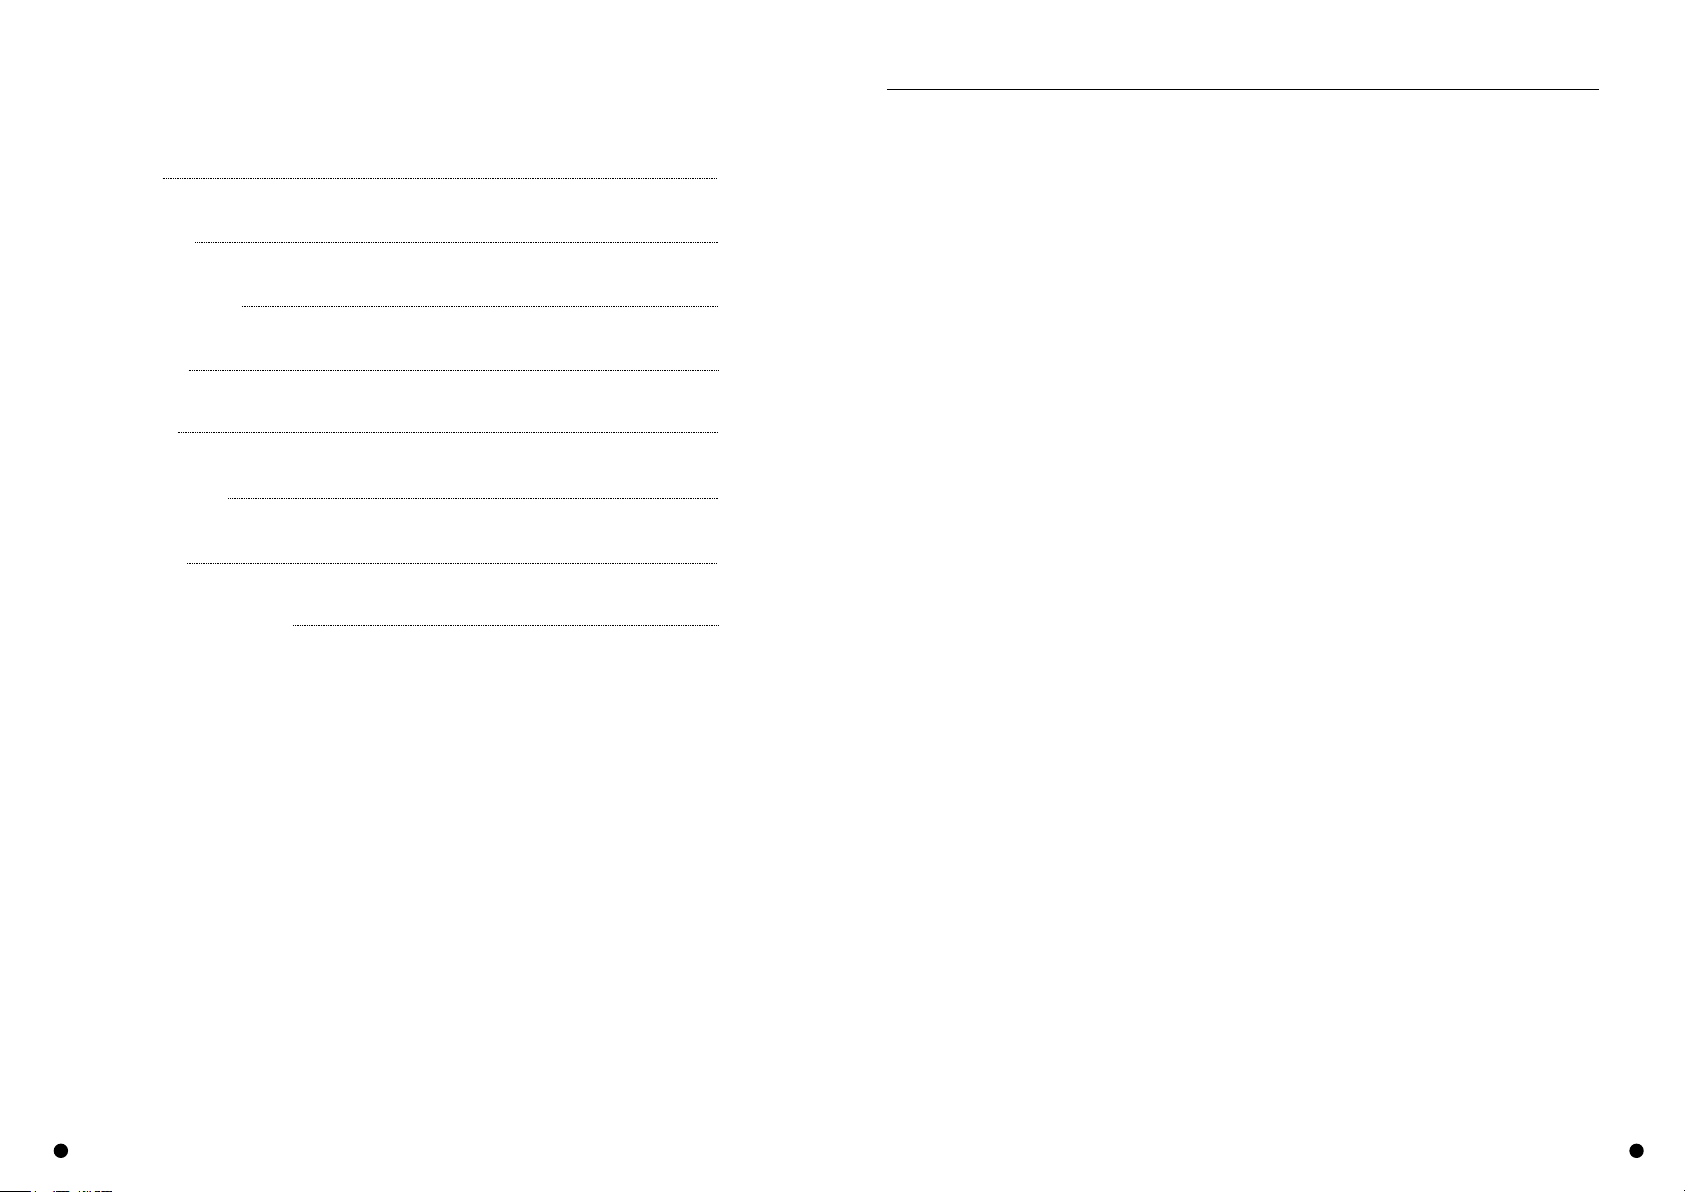
EL-1250S Size:
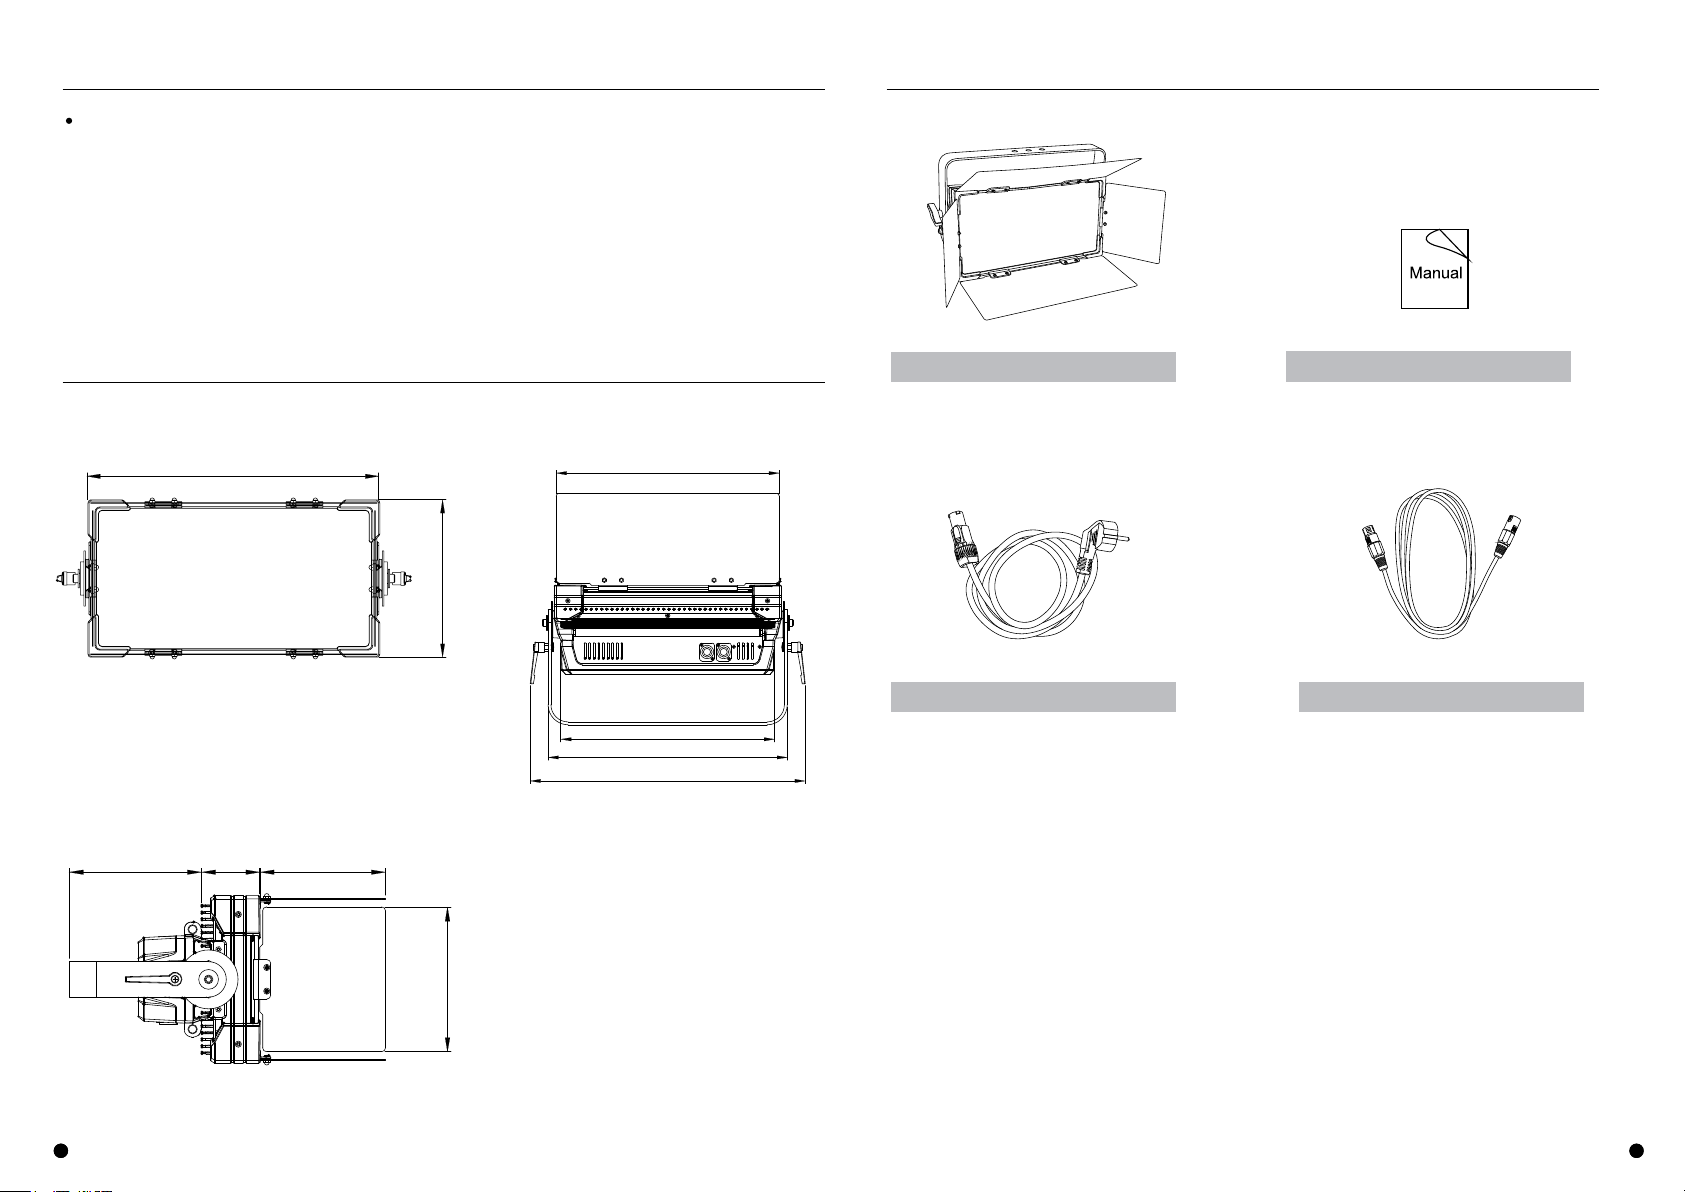
In The Box:
x 1 PC
Fresnel LED Light x 1 PC
AC Power Cable
x 1 PC
AC Power Cable
x 1 PCUser Guide
213mm
395mm 388mm
371mm
416mm
478mm
169mm 74mm 160mm
148mm
5 6
EL-1250S: Technical Data:
Model EL-1250S
Power supply AC100V-240V,5OHz/60Hz
Power consumption 250W
Lamp Led 200W, white
more than 50000hours
Color temperature 3200k and 5600k are available
CRI ≥95Ra
Dimmer 0-100% linear dimmer
Strobe 1-20 flash per second
Heat High quality radiator
Display OLed display
Control mode international standard dmx512 signal, with XLR 3PIN or
XLR 5PIN connectors
Channel mode 1 channel mode and 2channels mode
Protection grade lP20
Use environment
temperature -20℃-45℃
Net weight 8.4kg
Gross weight 10.8kg
Dimensions (LxWxH) 540×365×215mm
1
2
3
4
POWER
INPUT
POWER
OUTPUT
DMX IN DMX OUT
POWER
INPUT
POWER
OUTPUT
DMX IN DMX OUT
5 6 7 8
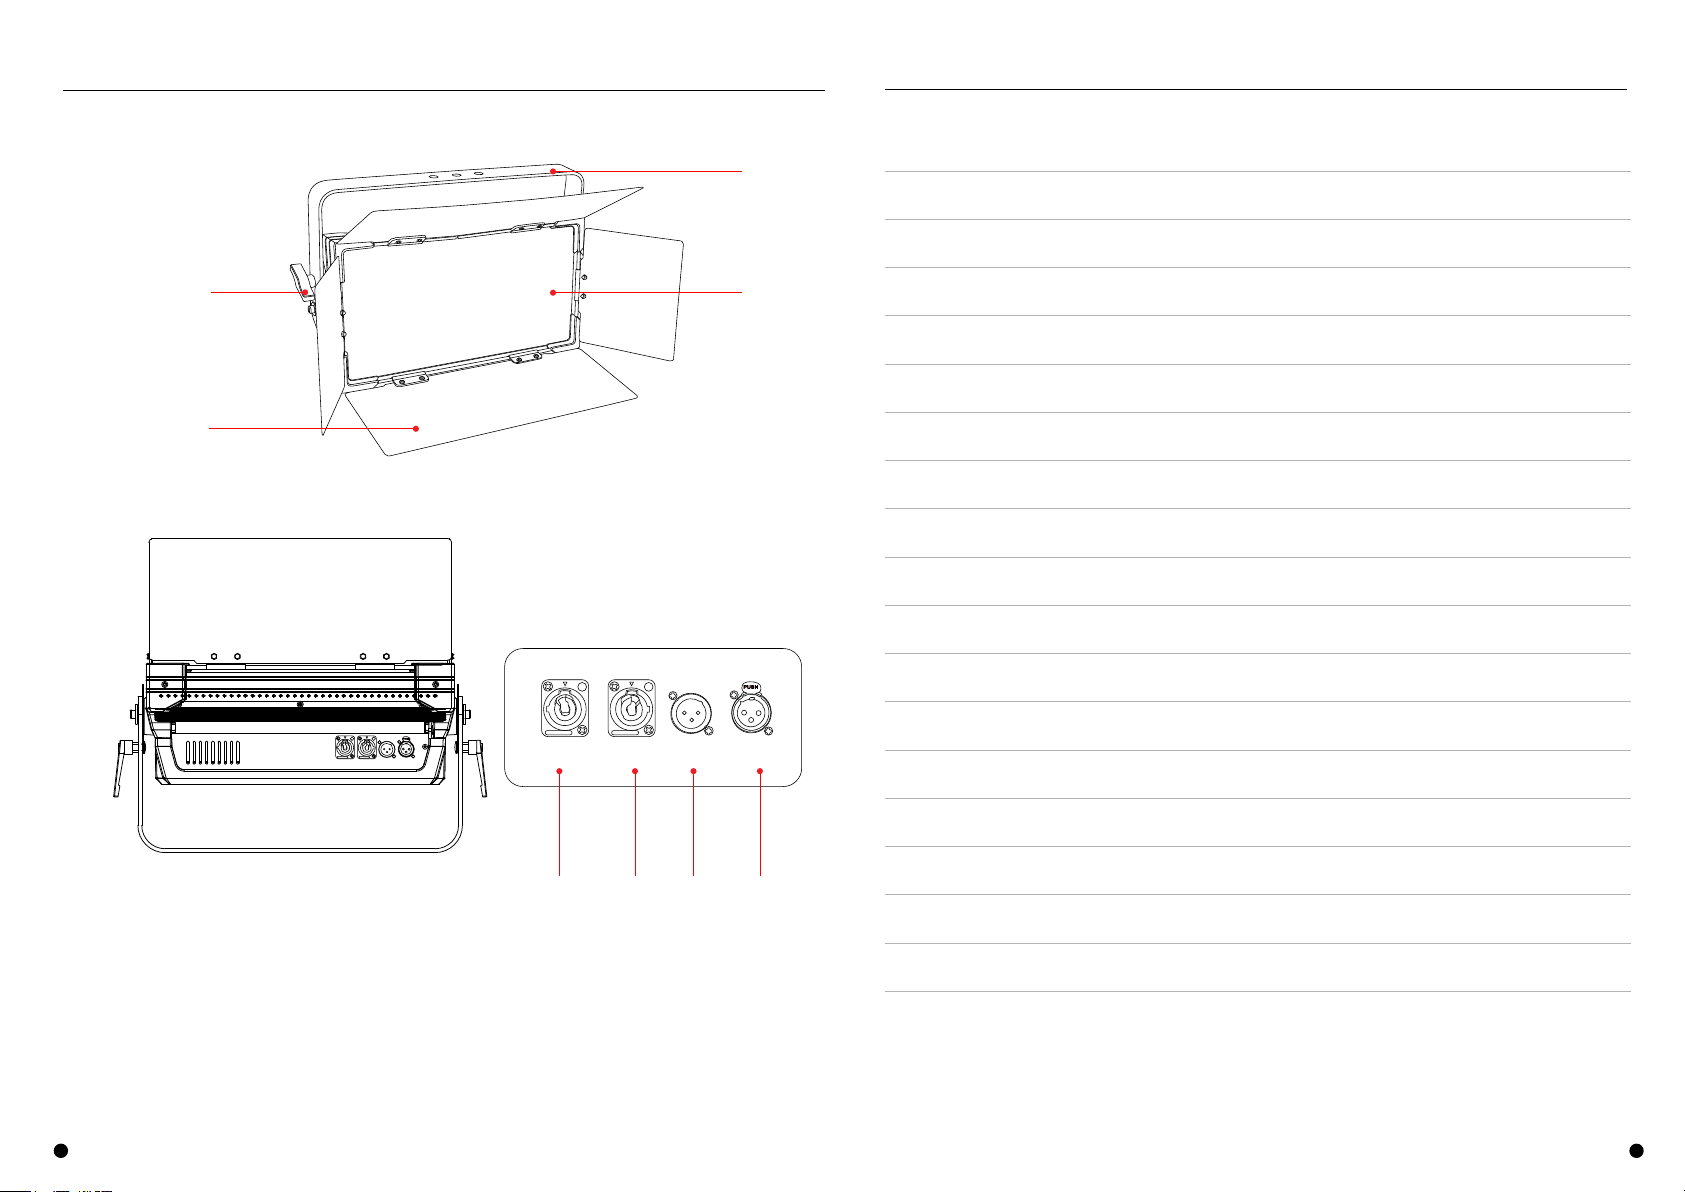
1. Disk Brake Handle
2. Barndoor
3. Yoke
4.LED Beads
5. Power Input
6. Power Output
7. DMX In
8.DMX Out
Lifetime of led
7
Installation : Installation :
8
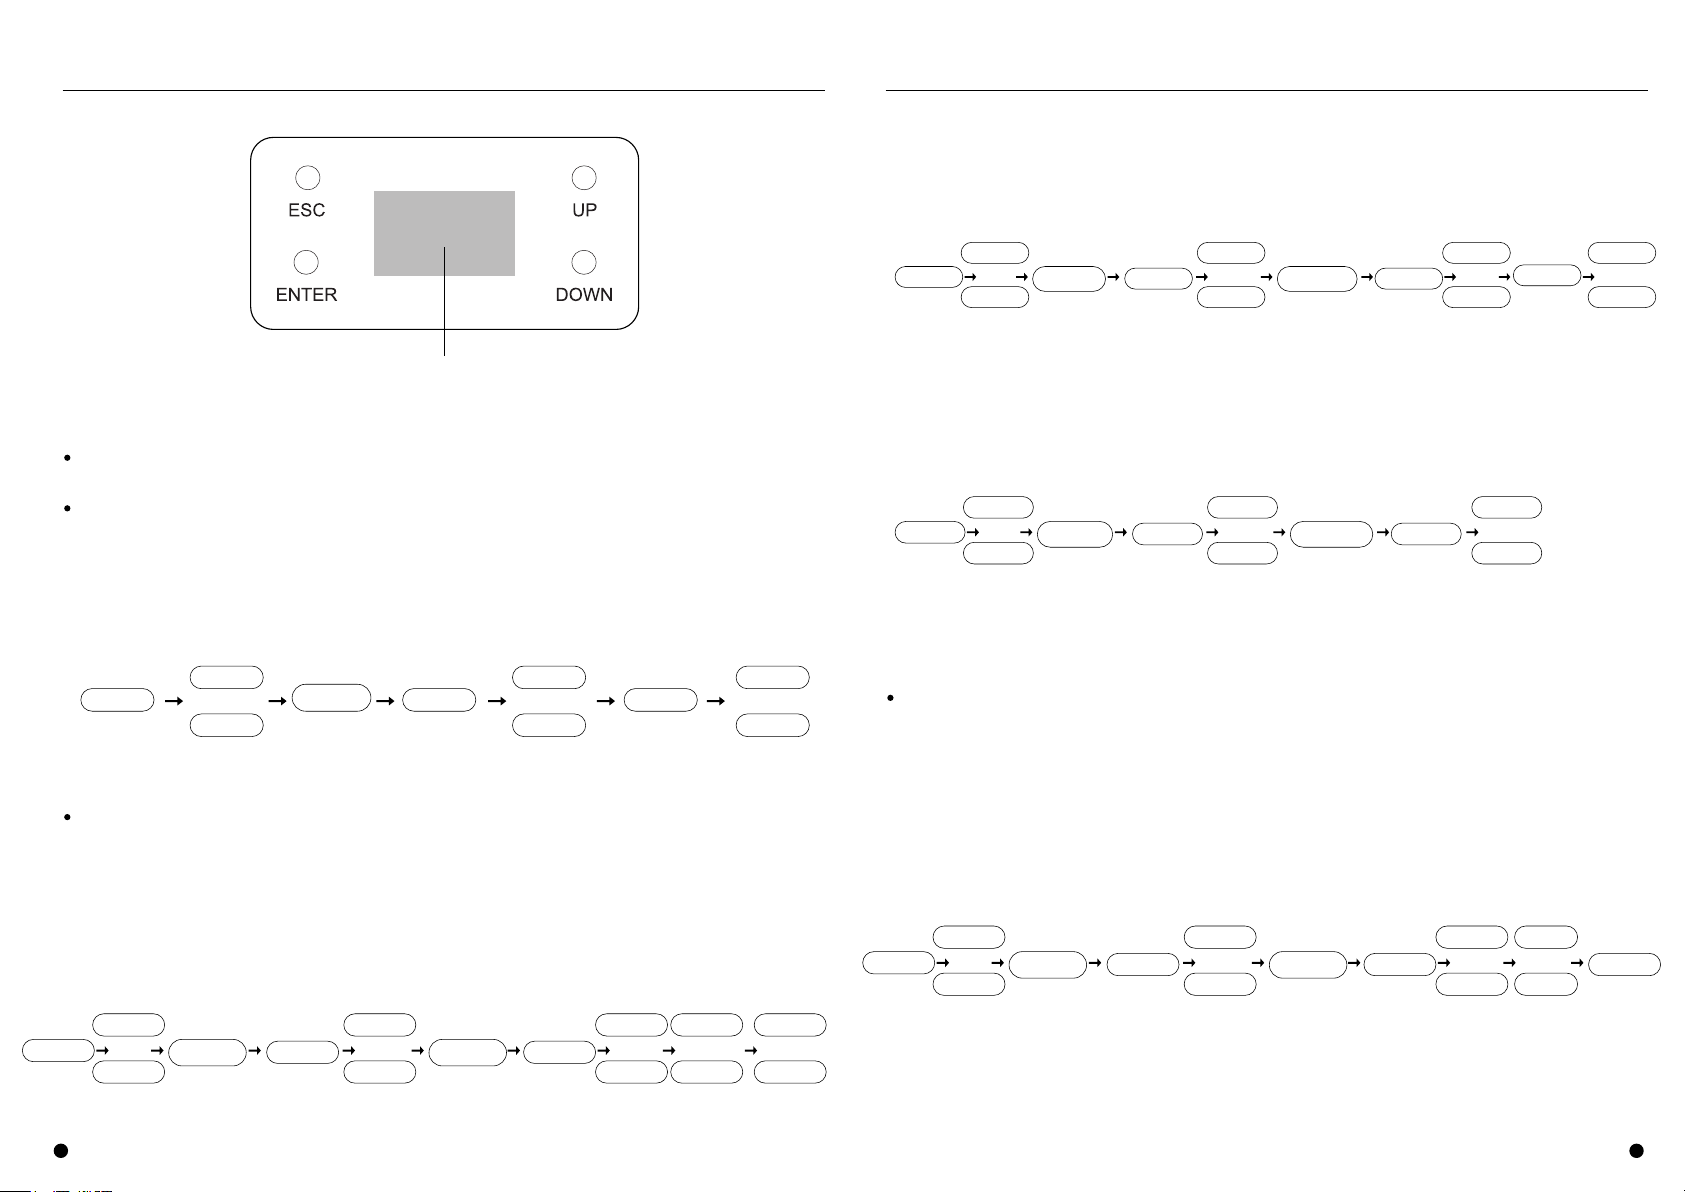
1.Description of the keys:
Digital Display
2.Basic setting:
Connect the power source,press”ESC”and the display will show DMC512 address
and color temperature information.
DMX address setting: DMX address is a DMX channel where your light starts
synchronizing in the 512 channels available. By setting it up, the light will respond to any
signal sent to this address.
Press ENTER into the main menu. " "
Press UP or DOWN to select[ Fixture Address]and then press “ENTER” to confirm. " " " "
Press UP or DOWN to Set Address (001-511). " " " "
Press ESC or ENTER to confirm and return to previousmenu. " " " "
ENTER
Fixture
Address
ENTER
DOWN
UP
ENTER
or
DOWN
UP
or
Dmx Adr
001-511
ESC
Check equipment data:
Press ENTER into the main menu. " "
Press UP or DOWN to select[ Information] and then press ENTER to confirm." " " " " "
Press UP or DOWN to select[ Power On Time] and then press ENTER to confirm." " " " " "
Press UP or DOWN to select[ Hours:xxxxxh] show the total working times of the light, " " " "
to select[ Resetable Hours] can reset the working times of the light.
Press ESC or ENTER to confirm and return to previousmenu " " " "
ENTER
Information
ENTER
DOWN
UP
or
DOWN
UP
or
Power On
Time
ENTER
DOWN
UP
or
Hours:
xxxxxh
Resetable
Hours
or
ENTER
ESC
Press ENTER into the main menu. " "
Press UP or DOWN to select[ Information] and then press ENTER to confirm." " " " " "
Press UP or DOWN to select[ Lamp Temperature] and then press ENTER to confirm." " " " " "
Press UP or DOWN to select[ Hours:xxxxxh] show the total working times of the light. " " " "
Press ESC or ENTER to confirm and return to previousmenu. " " " "
ENTER
Information
ENTER
DOWN
UP
or
DOWN
UP
or
Lamp
Temperature
ENTER
DOWN
UP
or
Hours:
xxxxxh
ENTER
ESC
Press ENTER into the main menu. " "
Press UP or DOWN to select[ Information] and then press ENTER to confirm." " " " " "
Press UP or DOWN to select[ Version] and then press ENTER to confirm,[Version:x.x]show " " " " " "
the version number of the light.
Press ESC or ENTER to confirm and return to previousmenu. " " " "
ENTER
Information
ENTER
DOWN
UP
or
DOWN
UP
or
Version
ENTER
ENTER
ESC
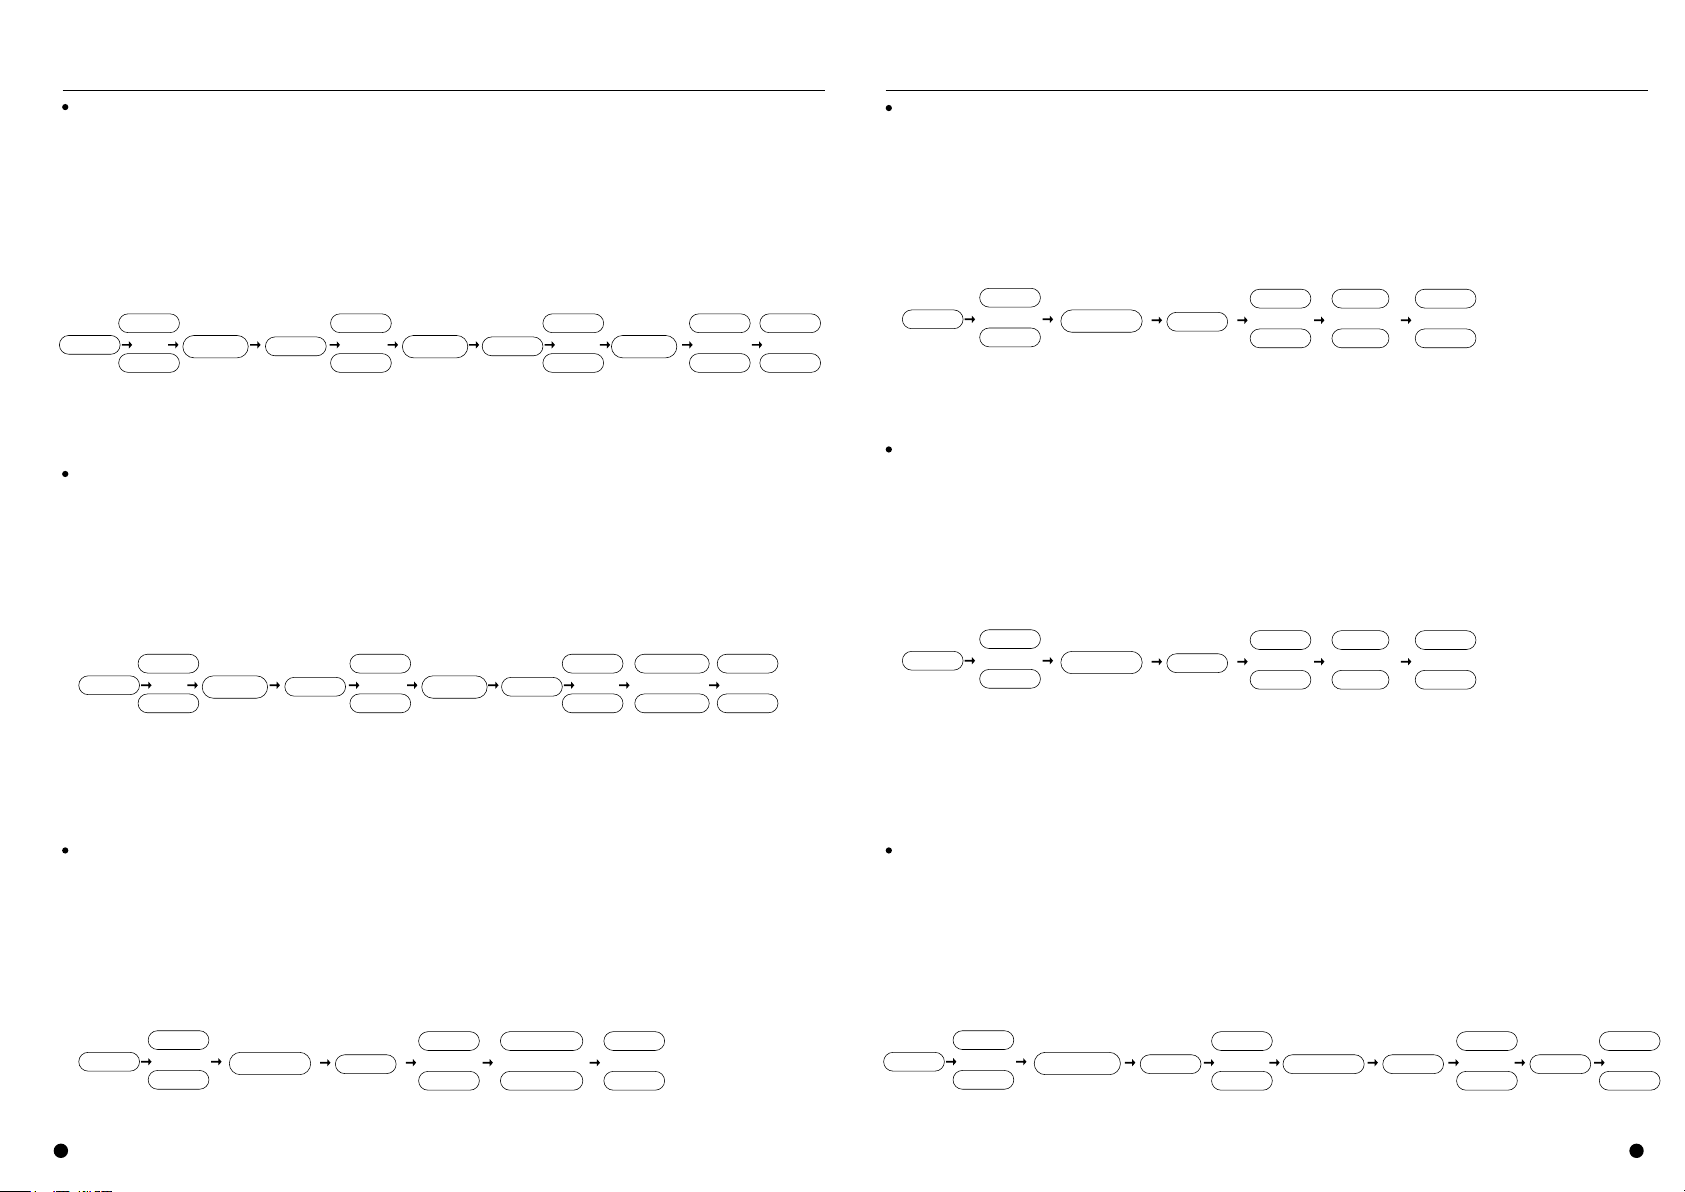
Display adjusting:
Press ENTER into the main menu. " "
Press UP or DOWN to select[ Personality] and then press ENTER to confirm." " " " " "
Press UP or DOWN to select[ Display Adjust] and then press ENTER to confirm." " " " " "
Press UP or DOWN to select[ Display Turned] and then press“ENTER”to confirm. " " " "
Press UP or DOWN to selec[t OFF] the displayinformation show in normal direction,to " " " "
selec[t ON]the displayinformation turn to the opposite direction.
Press ENTER to confirm and return to previousmenu. " "
ENTER
Personality
ENTER
DOWN
UP
or
DOWN
UP
or
Display
Adjust
ENTER
DOWN
UP
or
OFF
ON
ENTER
9
Installation : Installation :
10
DMX channel setting:
Press ENTER into the main menu. " "
Press UP or DOWN to select[ Personality] and then press ENTER to confirm." " " " " "
Press UP or DOWN to select[ Display Adjust] and then press ENTER to confirm." " " " " "
Press UP or DOWN to select[ Select Language] and then press ENTER to confirm. " " " " " "
Press UP or DOWN to select[ English] the menu shows in English;to select[ Chinese] the menu " " " "
shows in Chinese.
Press ESC or ENTER to confirm and return to previousmenu. " " " "
ENTER
Personality
ENTER
DOWN
UP
or
DOWN
UP
or
Display
Adjust
ENTER
DOWN
UP
or
Chinese
English
or
ENTER
ESC
Select
Language
Press ENTER into the main menu. " "
Press UP or DOWN to select[ Personality] and then press ENTER to confirm." " " " " "
Press UP or DOWN to select[ DMX Channel] and then press ENTER to confirm." " " " " "
Press UP or DOWN to selec[t Mode1:5ch]strobe mode; to selec[t Model2:4ch]color " " " "
temperature mode.
Press ESC or ENTER to confirm and return to previousmenu. " " " "
ENTER
Personality
ENTER
DOWN
UP
or
DOWN
UP
or
DMX
Channel
ENTER
DOWN
UP
or
Mode1:5ch
ENTER
ESC
Mode2:4ch
Run the test program:
Press ENTER into the main menu. " "
Press UP or DOWN to select[ Test Program] and then press ENTER to confirm." " " " " "
Press UP or DOWN to select[ Program Off] off the test program to select[ Program On]run the " " " "
test Program.
Press ESC or ENTER to confirm and return to previousmenu. " " " "
ENTER
Test Program
ENTER
DOWN
UP
or
DOWN
UP
or
Program Off
ENTER
ESC
Language setting:
Program On
Master and slave setting:
Press ENTER into the main menu. " "
Press UP or DOWN to select[ Master/Slave] and then press ENTER to confirm." " " " " "
Press UP or DOWN to select[ Slave] set the light as the slave equipmentto select[ Master]set " " " "
the light as the master equipment.
Press ESC or ENTER to confirm and return to previousmenu. " " " "
ENTER
Master/Slave
ENTER
DOWN
UP
or
DOWN
UP
or
Master
ENTER
ESC
Slave
Manual mode setting:
Press ENTER into the main menu. " "
Press UP or DOWN to select[ Manual Mode] and then press ENTER to confirm." " " " " "
Press UP or DOWN to select[ Off] off the manual mode select[ On]start the manual mode." " " "
Press ESC or ENTER to confirm and return to previousmenu. " " " "
ENTER
Manual Mode
ENTER
DOWN
UP
or
DOWN
UP
or
On
ENTER
ESC
Off
Notice: This menu is factory default set to Off , that is, the default is DMX512 signal control;[ ]
When the device is controlled in manual mode, the menu here should be set to On .[ ]
*
Warm white adjusting:
Press ENTER into the main menu. " "
Press UP or DOWN to select[ Manual Control] and then press ENTER to confirm." " " " " "
Press UP or DOWN to select[ Warm White] and then press ENTER to confirm." " " " " "
Press UP or DOWN to set Warm White Color(000-255)." " " "
Press ESC or ENTER to confirm and return to previousmenu. " " " "
ENTER
Manual Control
ENTER
DOWN
UP
or
DOWN
UP
or
ENTER
ESC
Warm White
ENTER
DOWN
UP
or
000-255
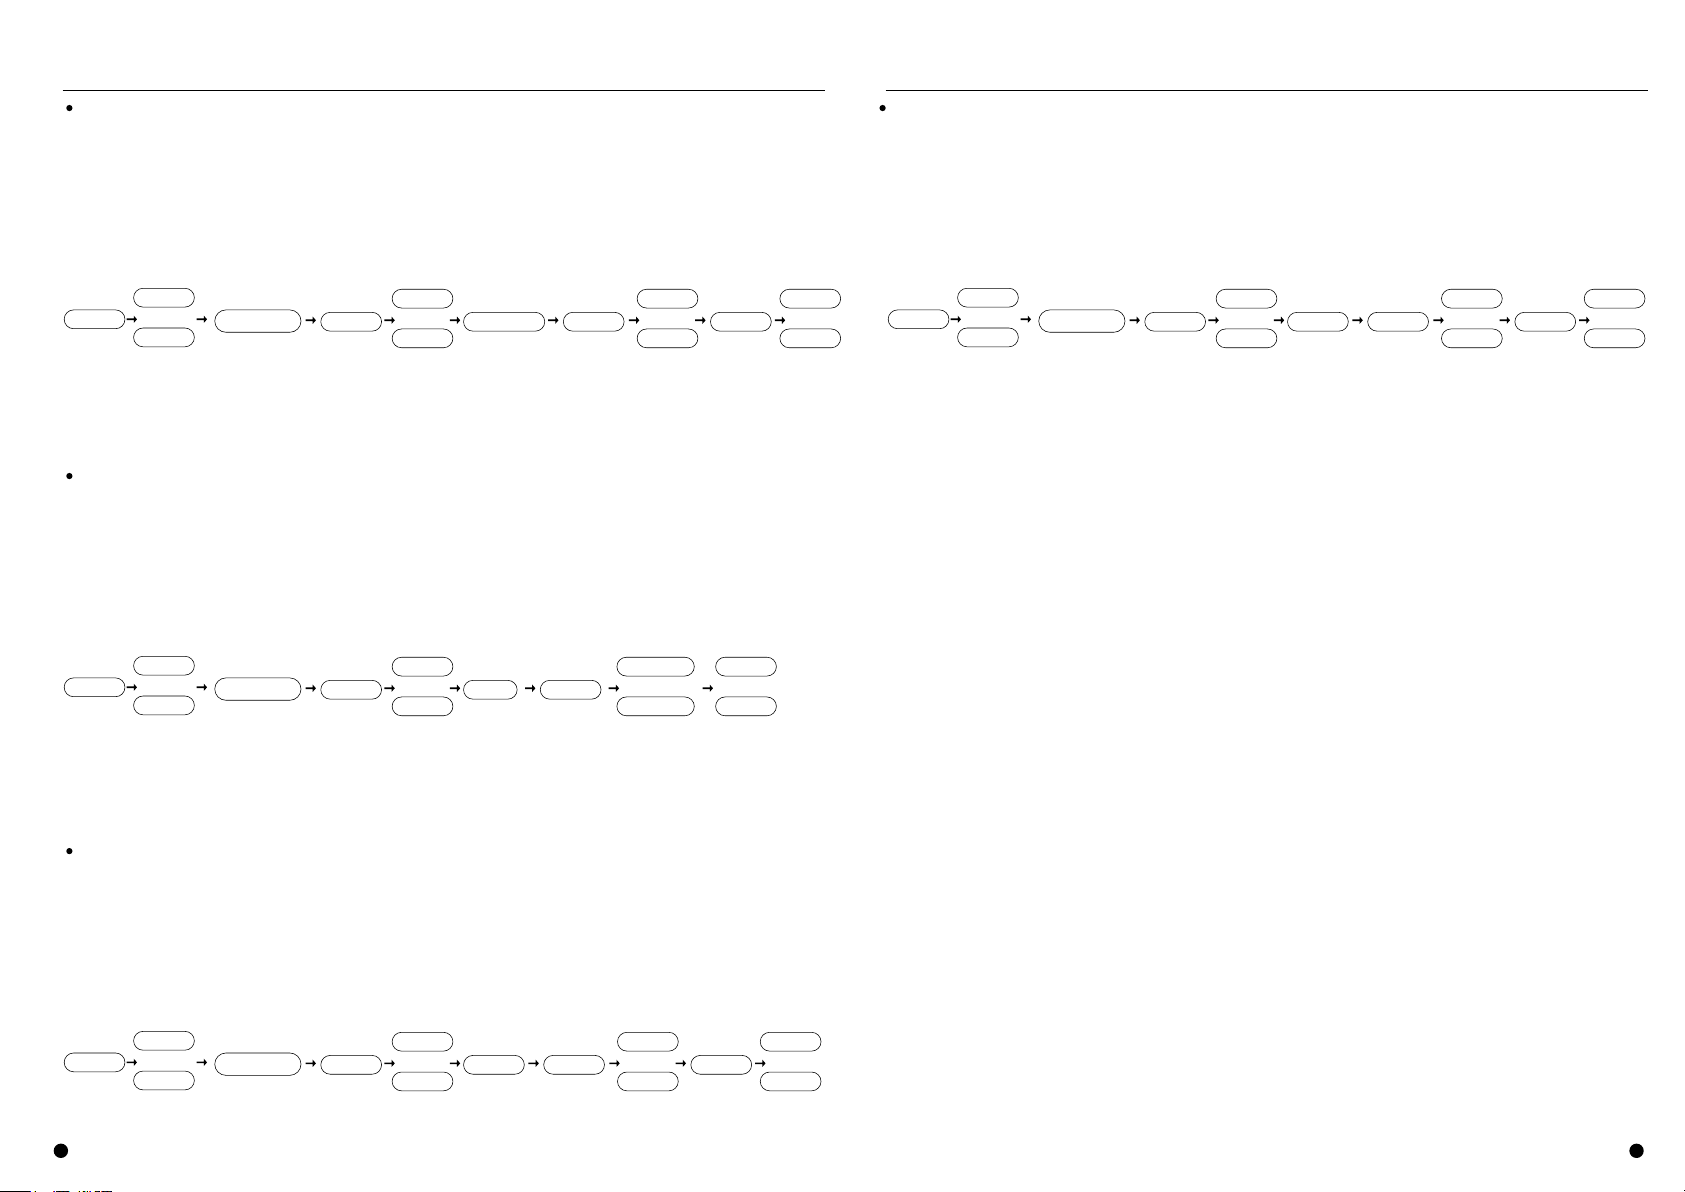
Cold white adjusting:
Press ENTER into the main menu. " "
Press UP or DOWN to select[ Manual Control] and then press ENTER to confirm." " " " " "
Press UP or DOWN to select[ Cold White] and then press ENTER to confirm." " " " " "
Press UP or DOWN to set Warm White Color(000-255)." " " "
Press ESC or ENTER to confirm and return to previousmenu. " " " "
ENTER
Manual Control
ENTER
DOWN
UP
or
DOWN
UP
or
ENTER
ESC
Cold White
ENTER
DOWN
UP
or
000-255
11
Installation : Installation :
12
Color temperature adjusting:
Press ENTER into the main menu. " "
Press UP or DOWN to select[ Manual Control] and then press ENTER to confirm." " " " " "
Press UP or DOWN to select[ CTO] and then press ENTER to confirm." " " " " "
Press UP or DOWN to select run the unfixed color temperatur toselect" " " " [OFF]
[2700K......6500K]choose the fixed color temperature.
Press ESC or ENTER to confirm and return to previousmenu. " " " "
ENTER
Manual Control
ENTER
DOWN
UP
or
DOWN
UP
or
ENTER
ESC
CTO
ENTER
OFF
2700k...6500k
Strobe adjusting:
Press ENTER into the main menu. " "
Press UP or DOWN to select[ Manual Control] and then press ENTER to confirm." " " " " "
Press UP or DOWN to select[ Strobe] and then press ENTER to confirm." " " " " "
Press UP or DOWN to set strobe level(000-255)." " " "
Press ESC or ENTER to confirm and return to previousmenu. " " " "
ENTER
Manual Control
ENTER
DOWN
UP
or
DOWN
UP
or
ENTER
ESC
Strobe
ENTER
DOWN
UP
or
000-255
Manual dimmer
Press ENTER into the main menu. " "
Press UP or DOWN to select[ Manual Control] and then press ENTER to confirm." " " " " "
Press UP or DOWN to select[ Dimmer] and then press ENTER to confirm." " " " " "
Press UP or DOWN to set strobe level(000-255)." " " "
Press ESC or ENTER to confirm and return to previousmenu. " " " "
ENTER
Manual Control
ENTER
DOWN
UP
or
DOWN
UP
or
ENTER
ESC
Dimmer
ENTER
DOWN
UP
or
000-255
Notice: When manually controlling the device, the "DIMMER' value of the menu should be set to "255".
*
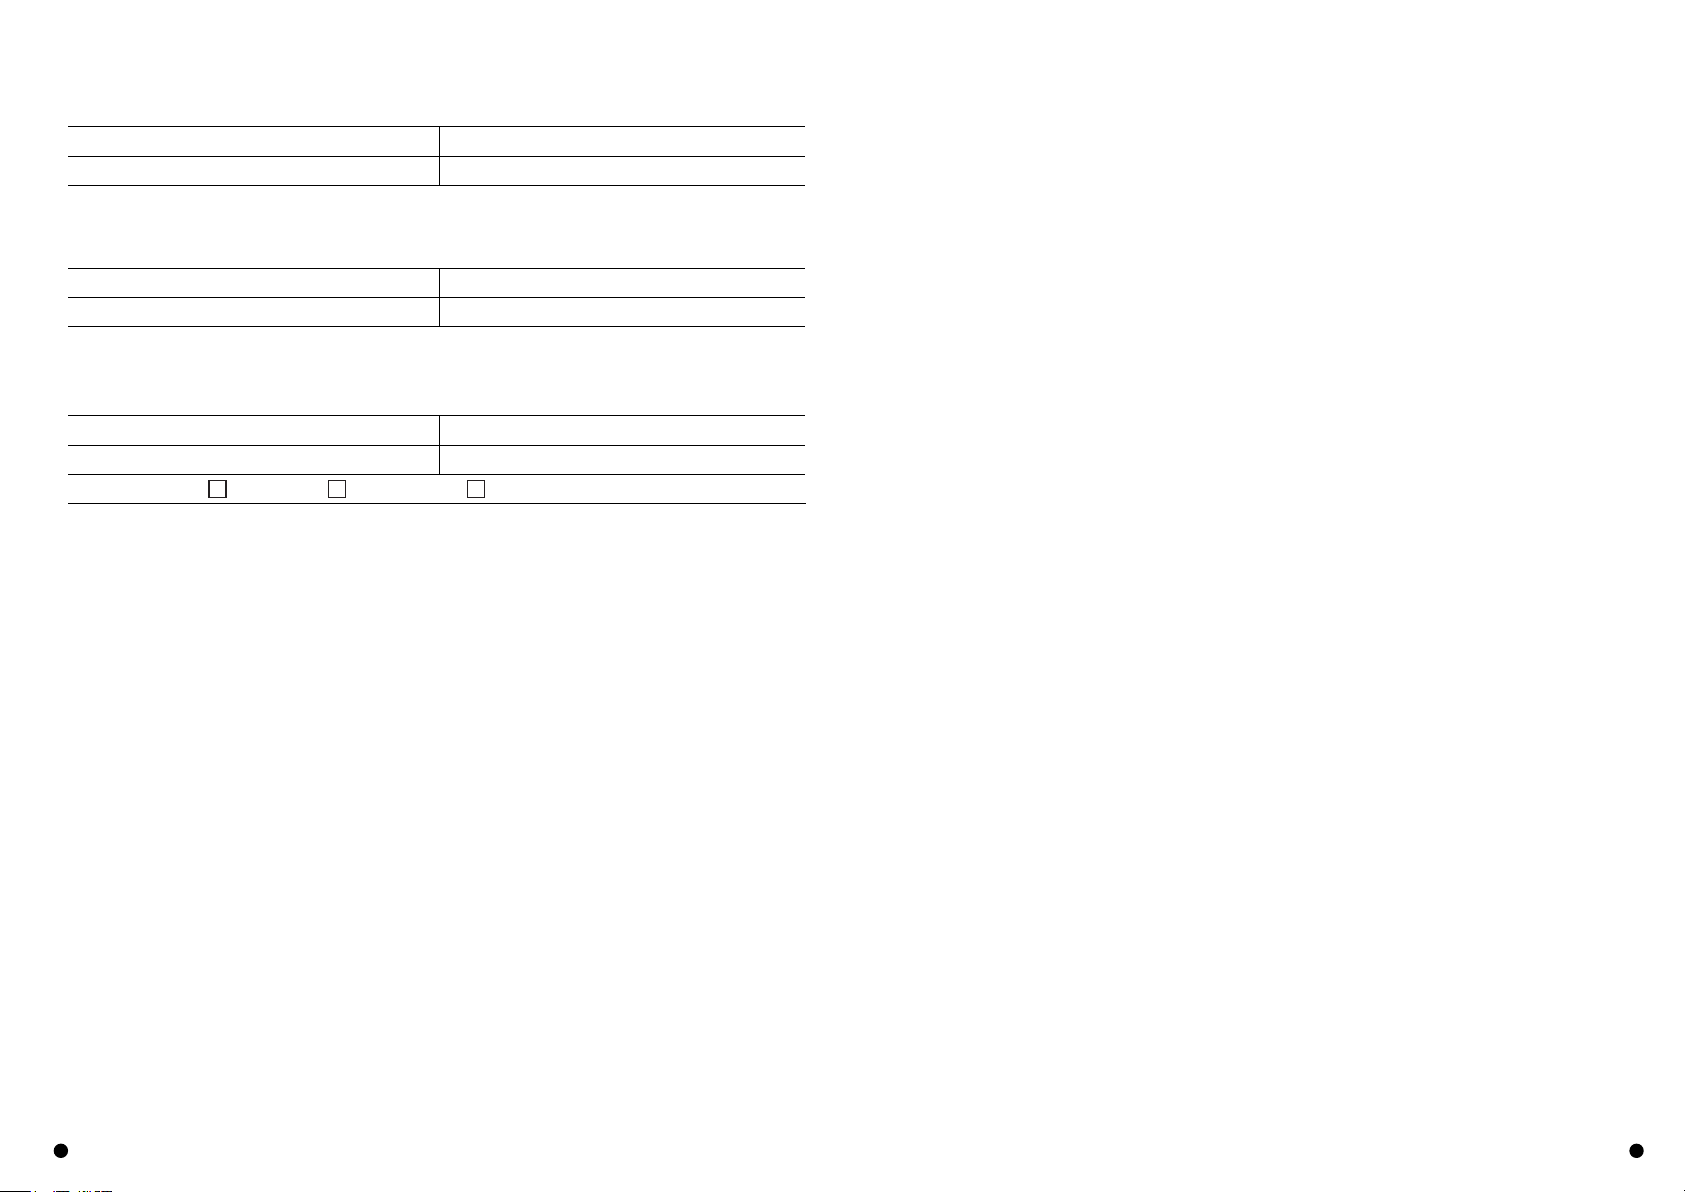
Customer Name
Address
Sales Manager
Sales Date
Dealer Contact No.
#1 Maintenance Record
Service Date
Contact No.
Dealer
Signature of Repairman
Cause of Problem
Solved Unsolved Refunded/ Replaced
Customer Information
Service Result:
13 14
Table of contents
Other E-Image Camera Accessories manuals


