E-Mode SensiRoom h User manual

1 из 6
USER MANUAL
Complete Set
Unit including socket, cable, plug - 1 pcs.
Humidity sensor - 1 pcs.
Suspended fixture - 1 pcs.
Technical feature:
Humidity range: 0 - 100%
Watering time: 1 sec - 10 min
Watering interval: 1 min - 10 h
Voltage: 220 - 240 V
Power output: 1500W
SensiRoom h
Watering control device
Microprocessor control
Auto-watering
Humidity sensor
Service life : 10 years
Made in Russia
Serial number: 0102120
Made in a lab E-Mode.pro
www.E-Mode.proMade in a lab E-Mode.pro
www.E-Mode.pro

2 из 6
USER MANUAL
Content:
Buttons and parts ....................................................................................................................................................................................... 2
Device connection ...................................................................................................................................................................................... 3
Humidity sensor installation ................................................................................................................................................................... 3
Setting humidity level............................................................................................................................................................................... 5
Setting watering intervals ...................................................................................................................................................................... 5
Setting watering intervals ....................................................................................................................................................................... 5
Settings by default ..................................................................................................................................................................................... 5
Warranty........................................................................................................................................................................................................ 6
Operation conditions................................................................................................................................................................................. 6
Buttons and parts
1 - Digital display
2 - Arrows «Left» и «Right»
3 - LED indicator
4 - Ⓜbutton to enter Setting mode and to
save.
5 - Diode color in humidity setting mode,
dosing time mode, and pause mode.
6 - Socket with protective cap
7 - Slot for humidity level
Made in a lab E-Mode.pro
www.E-Mode.proMade in a lab E-Mode.pro
www.E-Mode.pro

3 из 6
USER MANUAL
Made in a lab E-Mode.pro
www.E-Mode.proMade in a lab E-Mode.pro
www.E-Mode.pro
Humidity sensor installation
Place the humidity sensor plug into the slot. Then place the sensor into the
substrate and setup an optimal humidity level.
Read before use
Soil or substrate in a grow bag/pot can be relatively divided into three
layers.
1 st – surface layer (it loses moisture very quickly, part of water/solution
naturally goes lower to the 2 nd and 3 rd layers).
2 nd – interlayer (it is located between the dries and the moistest layers),
as a rule root system starts developing right here , and only later in the 1st
and 3rd layers.
3 rd – moistest layer, about 30% of water gets there 15 minutes after
watering.
1. Operating mode is on when the device is plugged in (220V).
2. Connect the humidity sensor to the device.
3. Place the humidity sensor into soil (substrate) to see the current humidity level (%) on the display.
4. Plug the pump or electromagnetic valve into SensiRoom h. socket.
5. Setup necessary humidity level, watering time, and watering intervals.
Device connection
GROWBAG
WATER
GROWBAG GROWBAG
GROWBAG GROWBAG GROWBAG
HUMIDITY SENSOR
220 V

4 из 6
USER MANUAL
Please mind, that the device will show maximum humidity level of the
layer available for the sensor. The objectivity depends on the depth the
sensor is placed at. In this case the device displays the humidify level
where middle and lower layers border.
The lower layer is the moistest. At the beginning, when the root system is
not developed, it is recommended to water plants in grow bags more often,
but doses should be less.
This position of the sensor will display the humidity level of the 3rd layer.
Mind it when setting the parameters. Do not set minimal humidity level
when watering mode operates if the sensor is in the lower (moistest) layer.
It will lead to over-drying.
And vice a versa, do not set maximum humidity level when watering mode
operates if the sensor is in the surface (driest) layer. It will lead to
overwatering.
Optimal way: sensor is placed into the 2nd layer, humidity level is about
60-70%, when watering mode starts operating.
Made in a lab E-Mode.pro
www.E-Mode.proMade in a lab E-Mode.pro
www.E-Mode.pro

5 из 6
USER MANUAL
Made in a lab E-Mode.pro
www.E-Mode.proMade in a lab E-Mode.pro
www.E-Mode.pro
Setting humidity level
Humidity level of a substrate is its moistening degree.
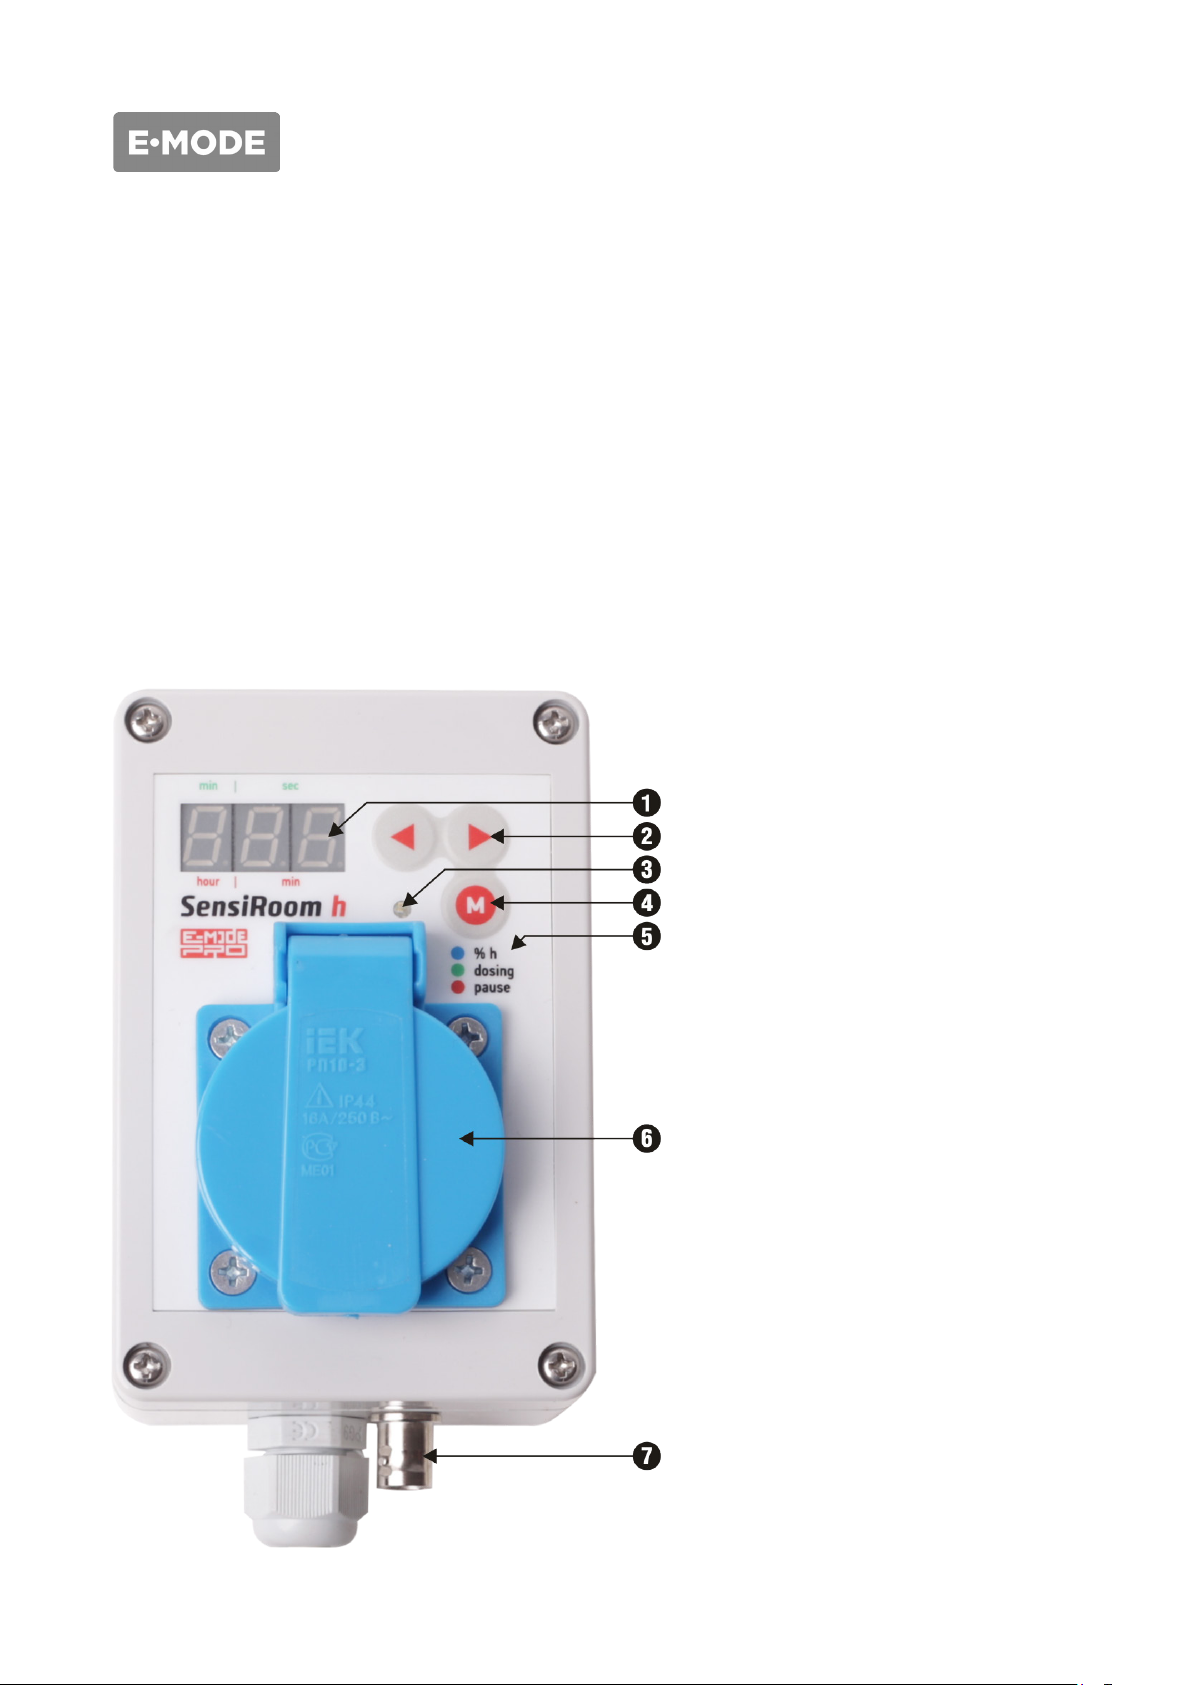
Press Ⓜbutton once to enter humidity setting mode. The led indicator
turns on blue.
With ←and →buttons setup humidity level: 0 - 100%, when watering
mode should start operating.
Press Ⓜbutton again to save the setting and turn to watering time setting.
Setting watering time
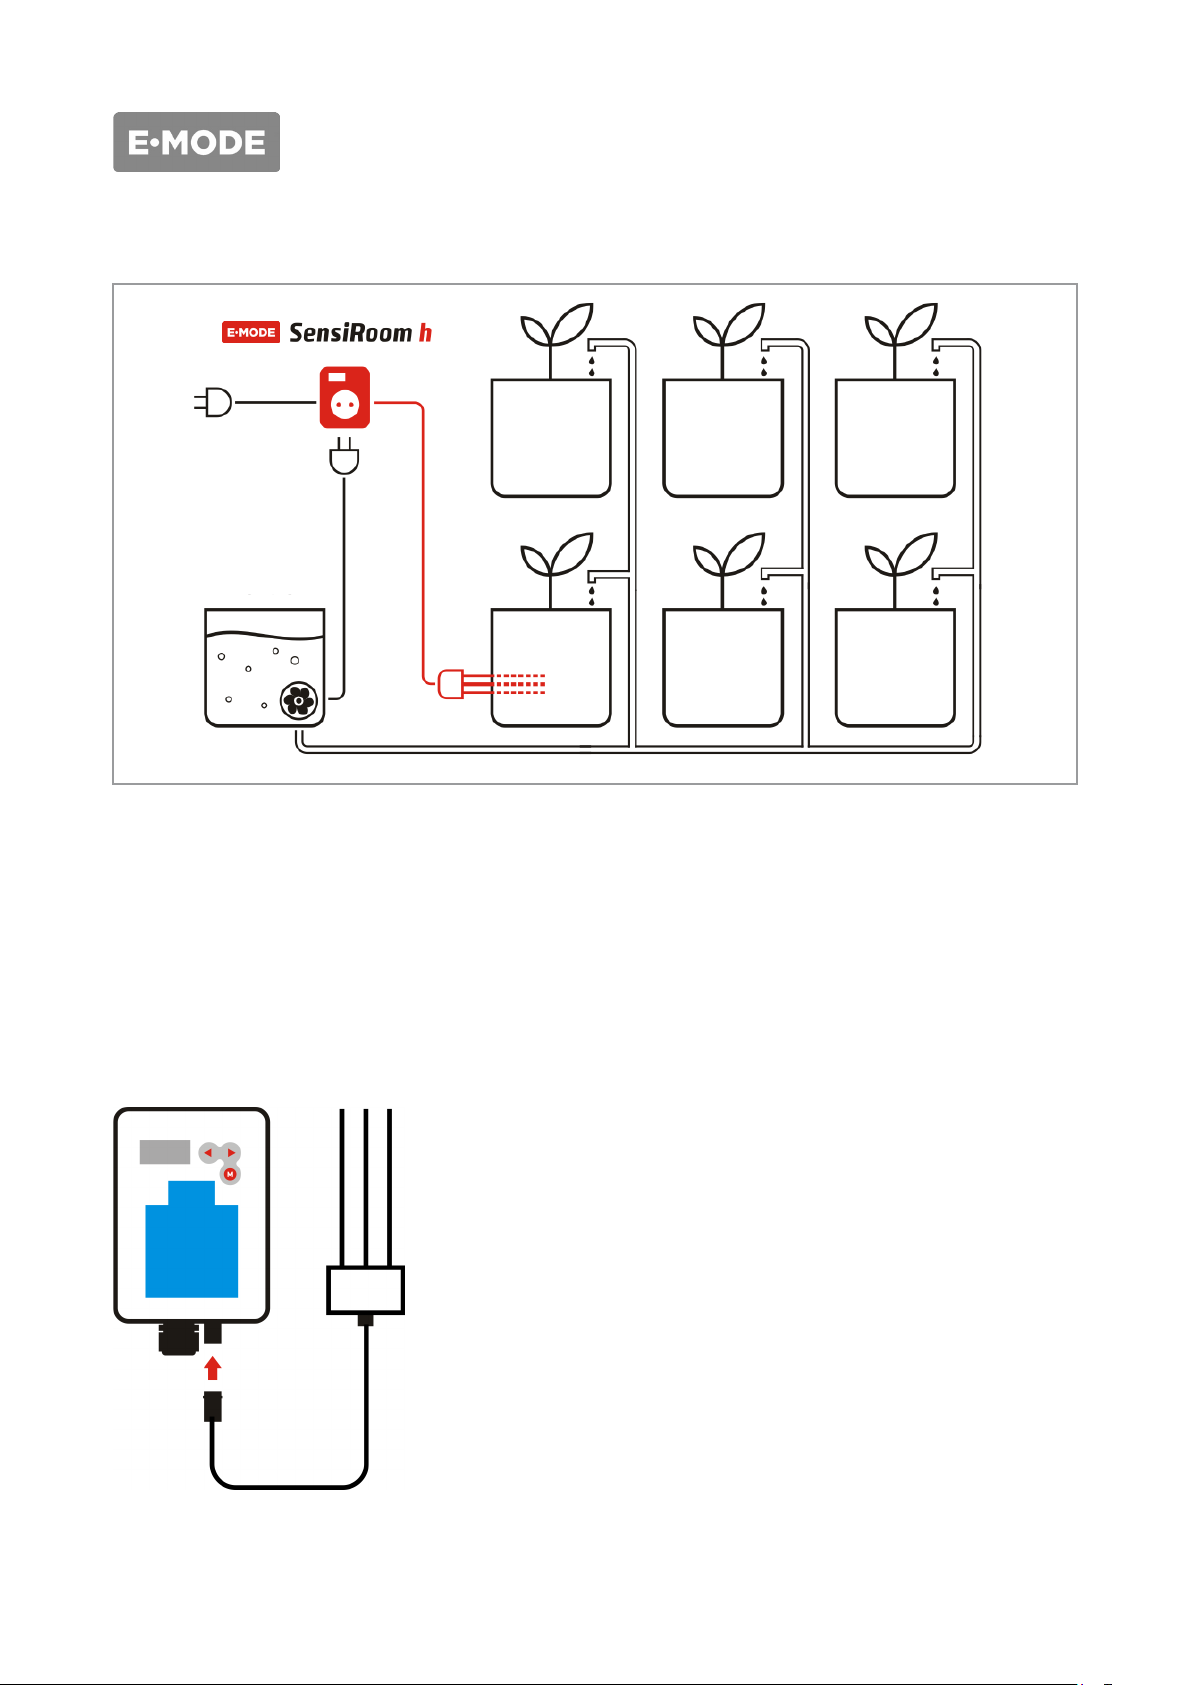
Watering time is a time period when the device supplies the
pump/electromagnetic valve with power.
Press Ⓜbutton twice to enter watering time setting mode.The led
indicator turns on green.
Watering time is setup in seconds and minutes: 1 sec – 10 minutes.
With ←and →buttons setup minutes and seconds of watering period.
Press Ⓜbutton to save the setting and turn to watering intervals setting.
Setting watering intervals
Watering interval is a time period for the substrate to soak up nutrient
solution.
When this period is over the device take measurement of a current
humidity level to compare it with a setup data and if necessary starts
watering again.
Press Ⓜbutton three times to enter watering interval setting mode.The
led indicator turns on red.
Watering interval is setup in minutes and hours: 1 minute – 10 hours.
With ←and →buttons setup minutes and hours of watering intervals.
Settings by default
• Humidity level - 70%.
• Watering time - 30 sec.
• Watering interval - 1 hour.
The device waters during 30 seconds, if the humidity level is below 70%.
Watering is repeated in an hour, if the humidity level is below 70%.

6 из 6
Made in a lab E-Mode.pro
www.E-Mode.proMade in a lab E-Mode.pro
www.E-Mode.pro
USER MANUAL
Warranty
Warranty period: 1 year since the day of purchasing.
Free service and warranty repair is carried out by the specialists of E-mode
laboratory.
The address of the authorized service center: Russia, 614099 Perm,
Dzerzhinskii Str. 59, office 405.
The warranty is valid in case the operation conditions are complied with
and there is a seller’s stamp with the date of purchasing.
Operation conditions
Operation temperature (of the environment): 0°С - 45°С .
Operation humidity level: 0% - 90%.
The device is not waterproof, protect it from moisture.
Use voltage regulator to avoid power surges in the mains.
Keep the device and its spare parts out of reach of children.
Sale date/stamp
Serial number
This manual suits for next models
1
Table of contents
Popular Household Appliance manuals by other brands

Coopers of Stortford
Coopers of Stortford F996 Instructions for use

SERVETTO
SERVETTO i3 Assembly

AUSTRAL CLOTHES HOISTS
AUSTRAL CLOTHES HOISTS RetractAway 40 manual

Ronson
Ronson MDX Torch instruction manual

HSPT Golden Rainbow
HSPT Golden Rainbow AUTOMATIC GOLDEN RAINBOW 10 PLUS instruction manual

OYPLA Home
OYPLA Home 3925 user manual