JML DriBUDDI User manual


22
Do not use DriBuddi for any purpose other than those described in this
manual.
For indoor household use only.
This appliance is not intended for use by anyone with reduced physical,
sensory or mental capabilities or a lack of experience and knowledge
unless they have been given supervision or instruction concerning the
use of this appliance by a person responsible for their safety.
Do not overload your DriBuddi. Its maximum capacity is 10kg of damp
clothing.
Keep your DriBuddi at least 1.5 metres away from any water or fire source.
This appliance is only intended for drying fabrics washed in water.
Keep children away from DriBuddi whilst in use. Do not allow them to
play with DriBuddi or near it when it is in use.
Unplug the cord after use, before assembly or disassembly, and before
cleaning.
Thank you for purchasing DriBuddi from JML. To get
the best performance from this warm air clothes dryer,
please read these instructions in full and retain for
future reference.
Safety Warnings & Advice
Contents
Safety Warnings & Advice 2
Your DriBuddi 4
Assembling DriBuddi 5
Using your DriBuddi 6
Recommendations 7
Cleaning & Care 7
Guarantee 7
Technical information 7
Technical specifications 7
Fuse & mains plug replacement 8
Disposal and the environment 8

3
Safety Warnings & Advice continued
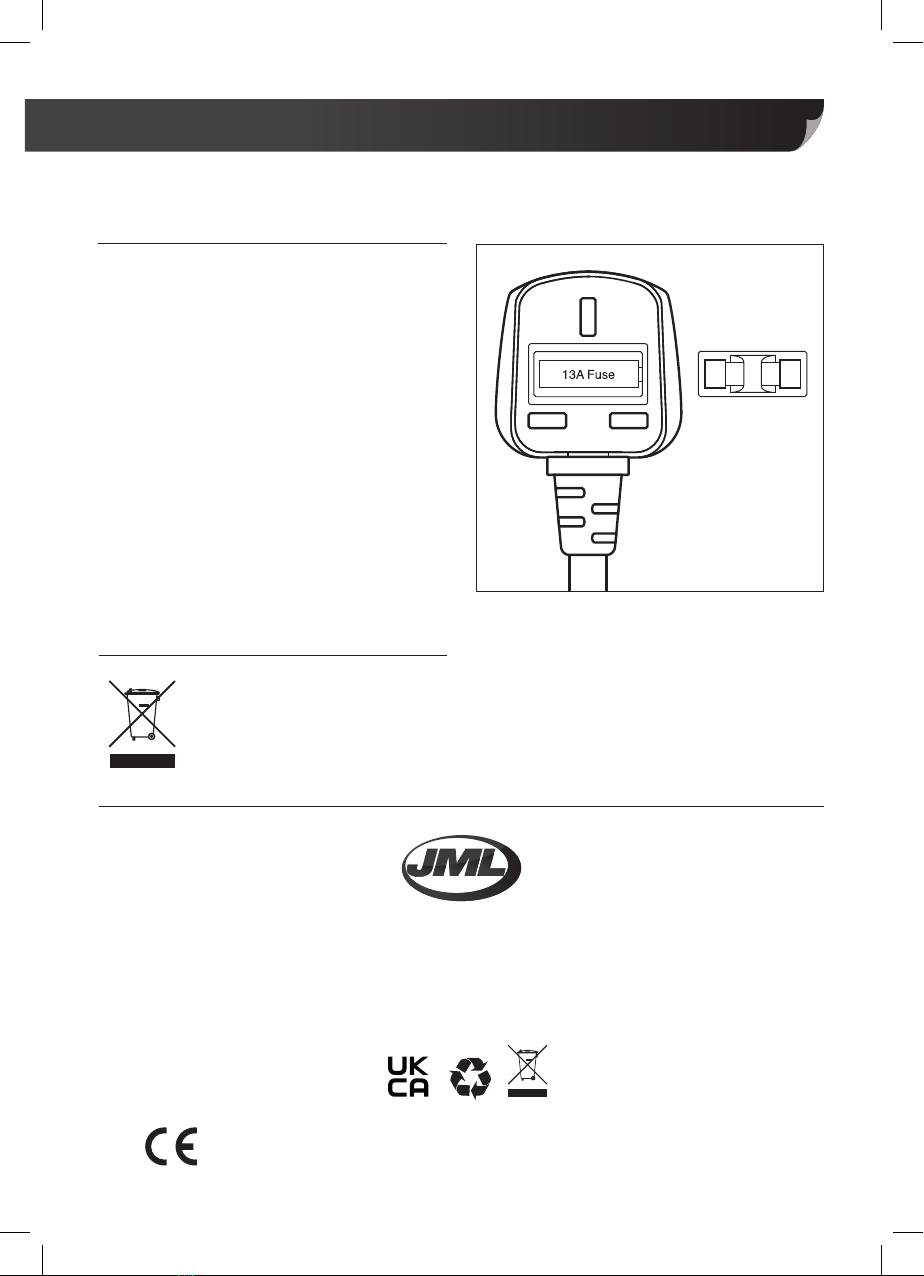
Periodically check the power cord and plug for any damage. If it is
damaged, do not use.
If the power cord and plug is damaged, it must be exclusively replaced by
the manufacturer or a similarly qualified electrician in order to avoid a hazard.
Keep the power cord away from hot surfaces and sharp edges.
Do not open the Motor Unit or attempt to change or repair it.
Unauthorised repairs will invalidate the warranty and could result in injury.
The Motor Unit may become hot during use. NEVER touch any metal
parts as they may cause burns to the skin.
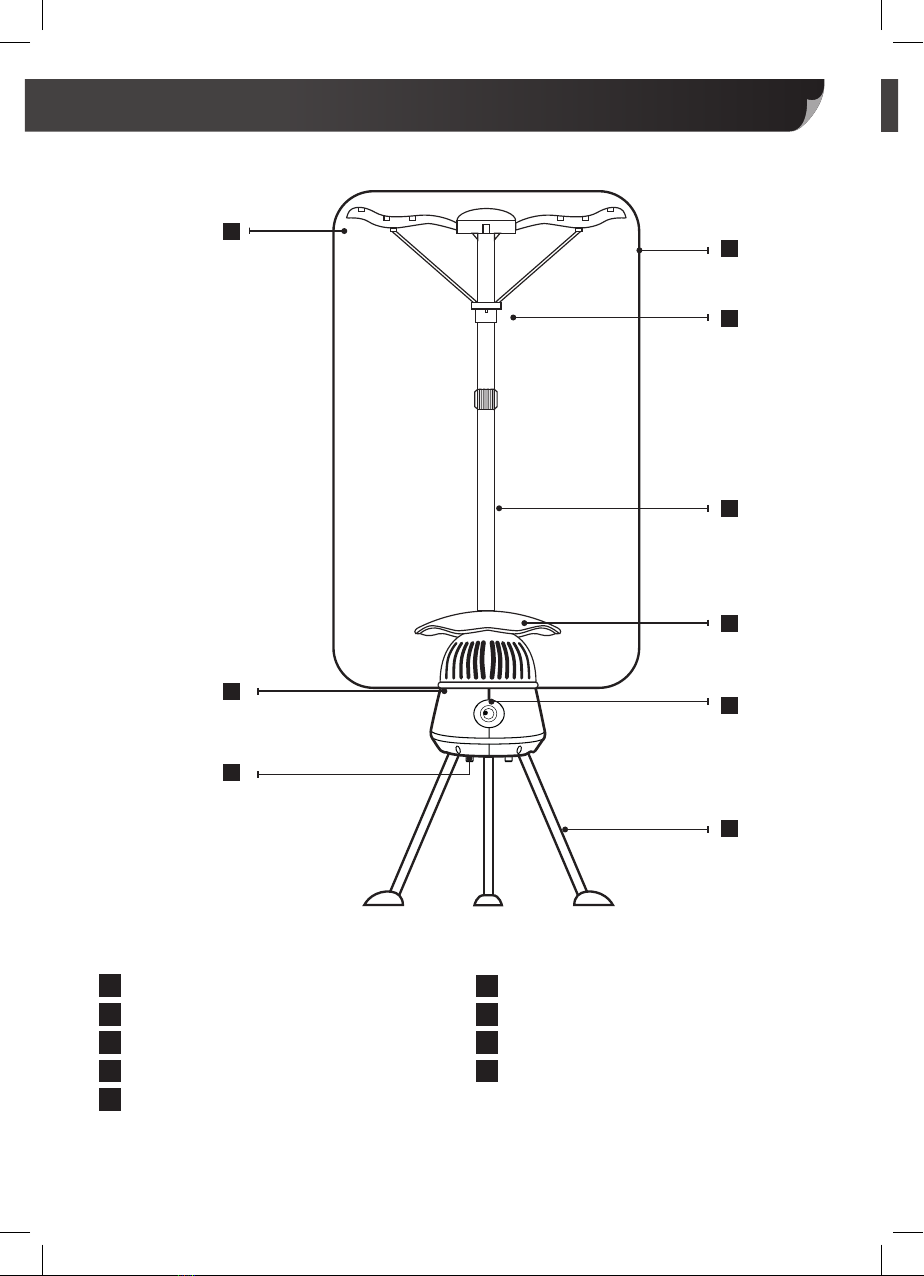
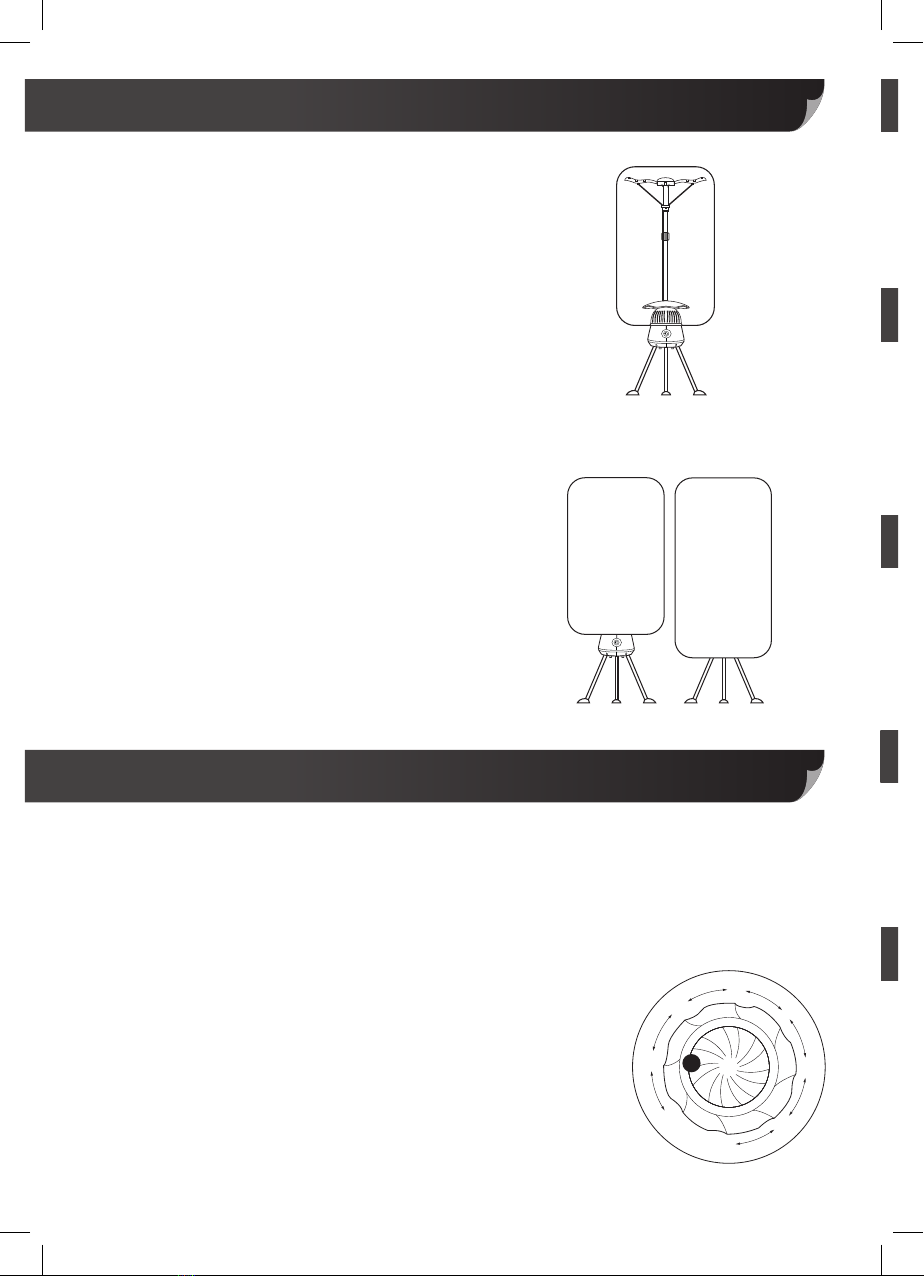
Ensure that the area around the DriBuddi is kept clear.
Ensure that the holes on top of the Cover are not covered during operation.
Keep DriBuddi away from water or other liquids. Do not plug in if it is
resting on a wet surface.
DriBuddi should only be used in a well-ventilated area. If ventilation is
lacking, it can also be used near an open window. Do not push directly
up against a wall; leave at least a gap of an inch so air can circulate
around it.
Please regularly inspect your DriBuddi to make sure clothes have not
fallen off their hangers.
Always use the DriBuddi in a clean environment to avoid any ingress of
dust or debris into the DriBuddi unit.
Customers should always attach the plastic grey cover over the motor.
Clothes should never be dripping when placed inside the unit.
Long clothes that may obstruct the warm air vent need to be placed
correctly so there is no obstruction that may cause overheating of the motor.
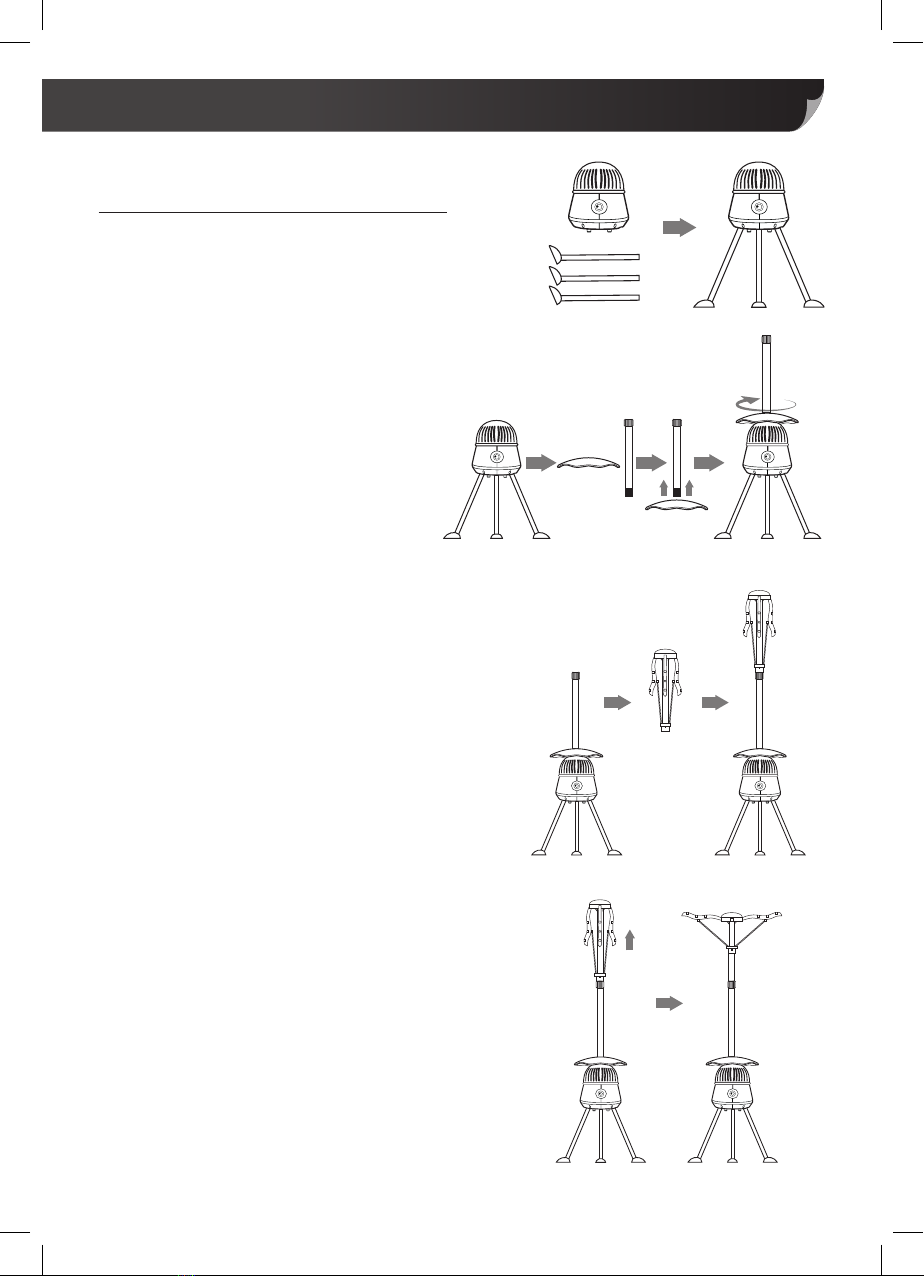
The feet should always be attached.
The vent on the underside should be checked for any sign of dust/fluff
and this should be removed where possible.
The unit should not be used for any other means – i.e. as a warm
heater (without the canvas bag).

4
A
B
C
D
F
E
G
H
I
Clothing Rack
Motor Unit
Vent
Cover
Clothes Hanger
Lower Tube
Waterproof Plate
Timer Dial
Dryer Legs x 3
A
B
C
D
G
F
I
E
H
Your DriBuddi

5
Assembling DriBuddi
1. Insert the 3 (I) Dryer Legs into the
holes on the base of the (B) Motor Unit
(see Fig.1). Ensure they are all fitted
tightly and equally so there is stability.
For ease of installation and to prevent
damage to the motor unit, hold the
(B) Motor Unit upside-down on a soft
surface.
2. Place the (F) Lower Tube through the
(G) Waterproof Plate before screwing
onto the (B) Motor Unit until tight
(see Fig. 2).
3. Screw the (E) Clothes Hanger onto the
(F) Lower Tube until tight (see Fig. 3).
4. In a similar way to opening an
umbrella, push the top of the (E)
Clothes Hanger upwards until the
arms are fully horizontal and have
clicked into place (see Fig. 4).
Fig. 1
Fig. 2
Fig. 3
Fig. 4
Your DriBuddi continued

6
✓✗
5. Open all the zips on the (D) Cover – the
top of the (D) Cover is above where the
three zips meet; the black ring is at the
bottom.
6. Place the Cover around DriBuddi,
ensuring that it surrounds all your clothes
and that the black ring sits around the
metal grill on the (B) Motor Unit (Fig. 6).
Ensure the Cover is correctly positioned on,
not over, the Motor Unit.
DO NOT PLACE THE (D) COVER ON THE
DRI BUDDI WHILE TURNED ON AND/OR
HOT. THIS MAY RESULT IN BURNING OR
THE (D) COVER MAY NOT BE PLACED ON
CORRECTLY. (FIG. 7).
Use caution when removing the (D) Cover
after use. The (B) Motor Unit may still be hot.
7. Zip up all the zips and fold down the zip
cover at the top. DriBuddi is now ready
for use.
1. Plug DriBuddi into a mains socket and switch on. A light should appear on the Timer Dial;
this indicates that DriBuddi is on.
2. Undo all three zips. Pull down the Cover, but leave the black ring still resting above the
Motor Unit. Allow the rest of the Cover to fall to the floor.
3. Place your wet clothes on coat hangers (plastic hangers are recommended) and hang on
DriBuddi. DriBuddi can fit up to 18 garments.
4. Pull the Cover back over DriBuddi and fasten all the zips.
5. You can use DriBuddi in two different ways:
•Set the timer: Turn the Dial clockwise to set the timer.
DriBuddi will automatically turn off when the timer reaches zero.
•Set to Long On: Turn the Dial anti-clockwise to turn DriBuddi
on. It will remain on until you turn it off.
Fig. 6
Fig. 7
Your DriBuddi continued
Using your DriBuddi
60
30
OFF
ON
90
120
180min
150

7
Please Note: DriBuddi should only be used in a well-ventilated area. If ventilation is lacking,
it can also be used near an open window. DO NOT push directly up against a wall; leave at
least a gap of an inch so air can circulate.
• DriBuddi is not recommended for clothes that are soaking/dripping wet. Clothes should
be ideally spin-dried by a washing machine or well-wrung if hand washed.
• DO NOT hang clothes too close together. They will dry quicker if air is allowed to circulate
between them.
Using your DriBuddi continued
Recommendations
Cleaning & Care
Clean with a damp cloth. DO NOT rinse with water in any way.
The vent on the underside should be checked for any sign of dust/fluff and this should be
removed where possible. Only use a dry or a lightly moist cloth when cleaning the motor vent.
This product is unconditionally guaranteed for
one year against all defects of workmanship
and materials. This guarantee does not
Guarantee
affect your statutory rights. If you have any
problems or queries about this product
please contact JML customer services.
Technical specifications
Rated voltage Rated frequency Rated power Degree of Protection
220-240V 50Hz 1200W IP21
Technical Information

Distributed by JML
JML, Unit 1 Eastside, Port of Tyne, South Shields, NE33 5SP
Customer Services: UK: 0800 781 7831 (Freephone) • ROI: 041-978 0003 (Local rate)
©JohnMillsLtd/VG/02.20/1384/M
Disposal and the environment
This product is covered by the waste electrical and electronic equipment
(WEEE) regulations. It should not be discarded with normal household waste,
but taken to your local collection centre for recycling. For further information,
please contact your local authority or approved disposal agency.
Technical Information continued
Fuse & mains plug replacement
(UK & Ireland only)
This appliance is fitted with a BS 1363 13-amp
plug. If you have to replace the fuse, only use
those that are ASTA or BSI approved to BS
1362 and have a rated current of 13 amps.
To change the fuse
1. Use a flat-head screwdriver to prise the
cover off the fuse compartment.
2. Carefully remove the existing fuse.
3. Clip the new 13 amp fuse into place.
4. Clip the cover back firmly into place.
If the power cord is damaged in any way
please contact JML Customer Services.
Distributed by JML GmbH Rheinstraße 3, 63225 Langen, Germany
Table of contents
Other JML Household Appliance manuals
Popular Household Appliance manuals by other brands

Florian Schlumpf
Florian Schlumpf Time Machine TM3 Johann instructions for unpacking & installing

OYPLA Home
OYPLA Home 3155 user manual

Oypla
Oypla HOME 3155 user manual

STIEBEL ELTRON
STIEBEL ELTRON LWZ 8 CS Premium Operation manual

Anslut
Anslut 408-066 User instructions

Dometic
Dometic I-Lux Installation and operating manual