manuals.online logo
Brands
  1. Home
  2. •
  3. Brands
  4. •
  5. E-Z DRILL
  6. •
  7. Construction Equipment
  8. •
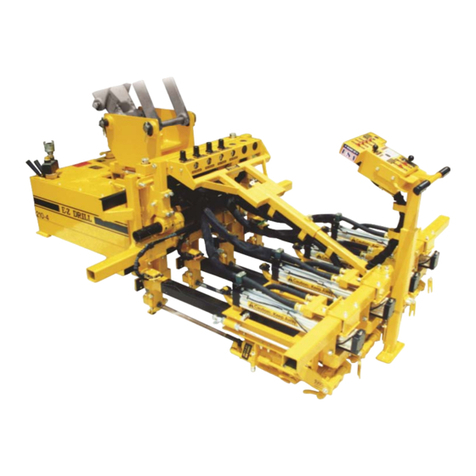
  9. E-Z DRILL 210-3 EQ MT User instructions

E-Z DRILL 210-3 EQ MT User instructions

SETTING UP THE
MODEL 210-3, -4 , and -5 EQ MT
SAFETY PRECAUTIONS FOR THE
MODEL 210-3, -4, -5 EQ MT
System Under Pressure: Shut off air supply and disconnect air
hose before disassembling or disconnecting parts.
Flying Debris: During boring, chips may be ejected. Stay behind
control panel and wear safety glasses to prevent eye injury.
Pinch Points: Keep hand clear of carriage assembly. Hands or
fingers caught between carriage and frame may be seriously injured.
Moving Parts: When moving drill unit, use carriage lock to
prevent assembly from sliding onto hands or fingers.
Transporting: Make sure all carriage locks are in place, and the
swivel brake is engaged.
SAFETY PRECAUTIONS FOR THE
MODEL 210-3, -4, -5 EQ MT (continued)
Loud Noise: Wear ear protection to prevent eardrum damage
from air compressor.
Dust: Wear a dust protection mask to protect from concrete dust.
High Pressure: High pressure from the air compressor can
damage the drill, and can void the warranty.
SET UP FOR THE
MODEL 210-3, -4, -5 EQ MT
•IMPORTANT: If you purchase
this E-Z Drill model and it is
being shipped from the factory,
much of the following set up
steps will be done with the
help of an E-Z Drill
representative. It is provided
the first time set up and
training.
SET UP FOR THE
MODEL 210-3, -4, -5 EQ MT
•Always keep the lever on the drill
motor shown at right in line with
the drill motor.
•If the lever is in the position shown
at right, the air will be shut off from
the drill motor and will not run.
ATTACHING THE DRILL UNIT TO THE
BACKHOE
•Pins must be of the correct size,
as well as the pin bushings, if
needed. These will be provided
by E-Z Drill based on make and
model of the backhoe
•NOTE: If side bushings are
required, the customer must
supply those.
ATTACHING THE DRILL UNIT TO THE
BACKHOE
•Remove bucket from the backhoe
boom. Position the boom over the
drill and line up the holes for the
pins.
•The curl pin goes through the
slotted hole in the mounting
bracket.
ATTACHING THE HOSE TO THE DRILL
UNIT
•Check the specifications to make sure the correct hose
size is being used:
210-3 EQ MT 11/2” –2” ID hose
210-4 EQ MT 2” ID hose
210-5 EQ MT 2” ID hose
•Make sure all safety precautions are followed with the
hose and all hose connections.
•IMPORTANT: AIR COMPRESSOR MUST MAINTAIN
120 PSI WHILE ALL DRILLS ARE DRILLING
ATTACHING THE AIR HOSE TO THE E-Z
DRILL UNIT
•Before attaching the air hose to
the drill, turn the air compressor
on and blow air through the hose
to clean out any debris that may
have accumulated inside the
hose. This prevents contaminates
from entering the drill system.
Secure hose before turning air on
to prevent the hose from whipping.
ATTACHING THE AIR HOSE TO THE E-Z
DRILL UNIT
•The E-Z Drill unit has a 1 ½”
swivel fitting on which to connect
the hose from the air compressor.
The swivel allows the hose to turn
as the drill is turned to position.
•Connect the hose fitting, and
install safety pin.
ATTACHING THE AIR HOSE TO THE
E-Z DRILL UNIT
•It is recommended that a “whip
check” be installed as a safety
measure.
INSTALLING THE DRILL BITS
System Under Pressure: Shut off air
supply and disconnect air hose before
disassembling or disconnecting parts.
(to remove pressure from system, have air
supply disconnected from drill unit, and turn
the power switches to the “On” position)
•IMPORTANT: The chuck size of the
drill bits must match the chuck size of
the drill. Look for the decal on the side
of the drill motor to confirm the chuck
size. Most E-Z Drill models come
standard with 7/8”x 3 ¼” chuck.
However, a 7/8” x 4 ¼” chuck and 1” x
4 ¼” chuck are available on request.
•All 210 series E-Z Drill models use 6”
of the usable length of the bit (i.e. a
24” bit will drill up to 18” deep; an 18”
bits will drill up to 12” deep.
INSTALLING THE DRILL BITS
•IMPORTANT: You must have the
correct bit guide bushing to match
the bit you will be using:
For drilling a:
5/8” diameter hole, use 1108 MCP
3/4” diameter hole, use 1109 MCP
7/8” diameter hole, use 1110 MCP
1” diameter hole, use 1111 MCP
1 1/8” or larger diameter hole, use
1112 MCP
•Part numbers above will fit bits
with either 7/8” x 3 ¼” or 7/8” x 4
¼” chucks. For 1” x 4 ¼” chucks,
see parts book.
INSTALLING THE DRILL BITS
•To install a drill bit, loosen the
swivel bolt until you can swing
it out away from the lower bit
guide.
•NOTE: You can use the
wrenches provided; they are
located next the oil reservoir.
INSTALLING THE DRILL BITS
•Open the retainer latch on the drill
motor.
•Pinch point
INSTALLING THE DRILL BITS
•Place the bit into the chuck and
close the latch.
•Pinch point
INSTALLING THE DRILL BITS
•You may have to adjust the return
stop rod so that the end of the bits
clears the bit guide.
INSTALLING THE DRILL BITS
•To adjust the stop rods, use the
wrenches provided to loosen the
stop rod nuts. Move the stop rod
in the direction needed to the
required location and re-tighten
the nuts.
INSTALLING THE DRILL BITS
•Place the proper bushing into the
bit guide; one half in the upper bit
guide and one half in the lower bit
guide. Close bit guide, swing the
swivel bolt back onto the bit guide,
and tighten.
•Repeat for each drill system.
ADJUSTING THE DRILL SPACING
•IMPORTANT: The following
instructions need to be followed
after the backhoe has placed the
drill on the slab in the drilling
position.
•IMPORTANT: Regardless of the
spacing, always keep the drill
systems centered with the
mainframe so that the entire unit
remains balanced.

Other manuals for 210-3 EQ MT

1

This manual suits for next models

2

Other E-Z DRILL Construction Equipment manuals
E-Z DRILL 210-3 SRA Guide

E-Z DRILL

E-Z DRILL 210-3 SRA Guide

E-Z DRILL 210B SRA User instructions

E-Z DRILL

E-Z DRILL 210B SRA User instructions

E-Z DRILL 20 UTL Guide

E-Z DRILL

E-Z DRILL 20 UTL Guide

E-Z DRILL 210B User instructions

E-Z DRILL

E-Z DRILL 210B User instructions

E-Z DRILL 110B Guide

E-Z DRILL

E-Z DRILL 110B Guide

E-Z DRILL 85B User instructions

E-Z DRILL

E-Z DRILL 85B User instructions

E-Z DRILL 210B-2 SRA User manual

E-Z DRILL

E-Z DRILL 210B-2 SRA User manual

E-Z DRILL 210-3 EQ MT Guide

E-Z DRILL

E-Z DRILL 210-3 EQ MT Guide

E-Z DRILL 110B User instructions

E-Z DRILL

E-Z DRILL 110B User instructions
E-Z DRILL 210B SRA Guide

E-Z DRILL

E-Z DRILL 210B SRA Guide
Popular Construction Equipment manuals by other brands

MQ Multiquip Mikasa MVH508GH manual

MQ Multiquip

MQ Multiquip Mikasa MVH508GH manual

Komatsu GD755-5R Field assembly  instructions

Komatsu

Komatsu GD755-5R Field assembly instructions

Dawson EMV-300 Operator's instructions/Spare parts list

Dawson

Dawson EMV-300 Operator's instructions/Spare parts list

Holzmann UB 70 manual

Holzmann

Holzmann UB 70 manual

MQ Multiquip Mikasa MRH800DS Operation and parts manual

MQ Multiquip

MQ Multiquip Mikasa MRH800DS Operation and parts manual

stellar labs 8621 owner's manual

stellar labs

stellar labs 8621 owner's manual

Husqvarna FS 305 Operator's manual

Husqvarna

Husqvarna FS 305 Operator's manual

Skid Pro QC605-SKD Setup instructions

Skid Pro

Skid Pro QC605-SKD Setup instructions

MULTIQUIP P54K-K2B-K4B Operation manual

MULTIQUIP

MULTIQUIP P54K-K2B-K4B Operation manual

ROTOTILT S30 quick start guide

ROTOTILT

ROTOTILT S30 quick start guide

MULTIQUIP MC94PH8 Operation and parts manual

MULTIQUIP

MULTIQUIP MC94PH8 Operation and parts manual

Wylie i3000 quick reference

Wylie

Wylie i3000 quick reference

Avantco 180 Operator's manual

Avantco

Avantco 180 Operator's manual

Power Fist 8536625 user manual

Power Fist

Power Fist 8536625 user manual

Ditch Witch FM13V Operator's manual

Ditch Witch

Ditch Witch FM13V Operator's manual

Bend-Pak Blue Bullet 1302-BAS Operation and service manual

Bend-Pak

Bend-Pak Blue Bullet 1302-BAS Operation and service manual

Haufftechnik GFH 30 Assembly instruction

Haufftechnik

Haufftechnik GFH 30 Assembly instruction

Contec MODUL 500 instruction manual

Contec

Contec MODUL 500 instruction manual

manuals.online logo
manuals.online logoBrands
  • About & Mission
  • Contact us
  • Privacy Policy
  • Terms and Conditions

Copyright 2025 Manuals.Online. All Rights Reserved.