Loosen set-screw on Calibraon
Bracket
Set adjustment dial to “0” Closed
Acvate switch to extend to the
“STOP”
Slide Calibraon Bracket to
ensure shut-o is closed
Calibraon is now complete
To Calculate RATE SETTINGS:
Determine how much material is to be applied
per 1,000 sq./.
Measure o a distance of 50 feet, preferably on a paved surface such as a parking lot.
Weigh out enough of the material to be applied to ll the hopper at least half full. Record the weight for
future use.
With the unit mounted on the vehicle and the hopper at least half full of the material to be spread, posi-
on the vehicle far enough before the beginning of the 50 foot test area so that the vehicle will achieve the
desired speed before you reach the starng line.
Select the Seng Rate posion that you feel would be an appropriate seng on the ECM Module 1-10.
Start the vehicle in moon and as you cross the starng line (of the
50 feet) move the rate lever to the open posion against the stop.
Take care to be aware of what is going on around you maintaining
control of the vehicle.
Connue from the starng line with the unit spreading the material.
As you cross the nish line move the rate lever to the closed posi-
on.
Stop the vehicle and note the width of the spread path that was just
completed.
Return to the start point and empty the remaining material from
the hopper into your weighing container and re-weigh.
Before lling hopper, become familiar with the operaon of this
spreader.
(Pracce the following steps)
Turn the motor switch to the ON POSITION, so that the impeller is
turning before going on to the next step.
While driving forward turn the ECM Control switch (wide top switch) to the ON POSITION, this opens the
shut o plate on the spreader.
To stop the ow of material, turn the ECM Control switch to the OFF POSITION, then turn the motor o
when nished.
When nished empty any remaining material from hopper.
Thoroughly wash spreader and allow to dry before storing. Lubricate all moving parts with a graphite or
silicon spray.
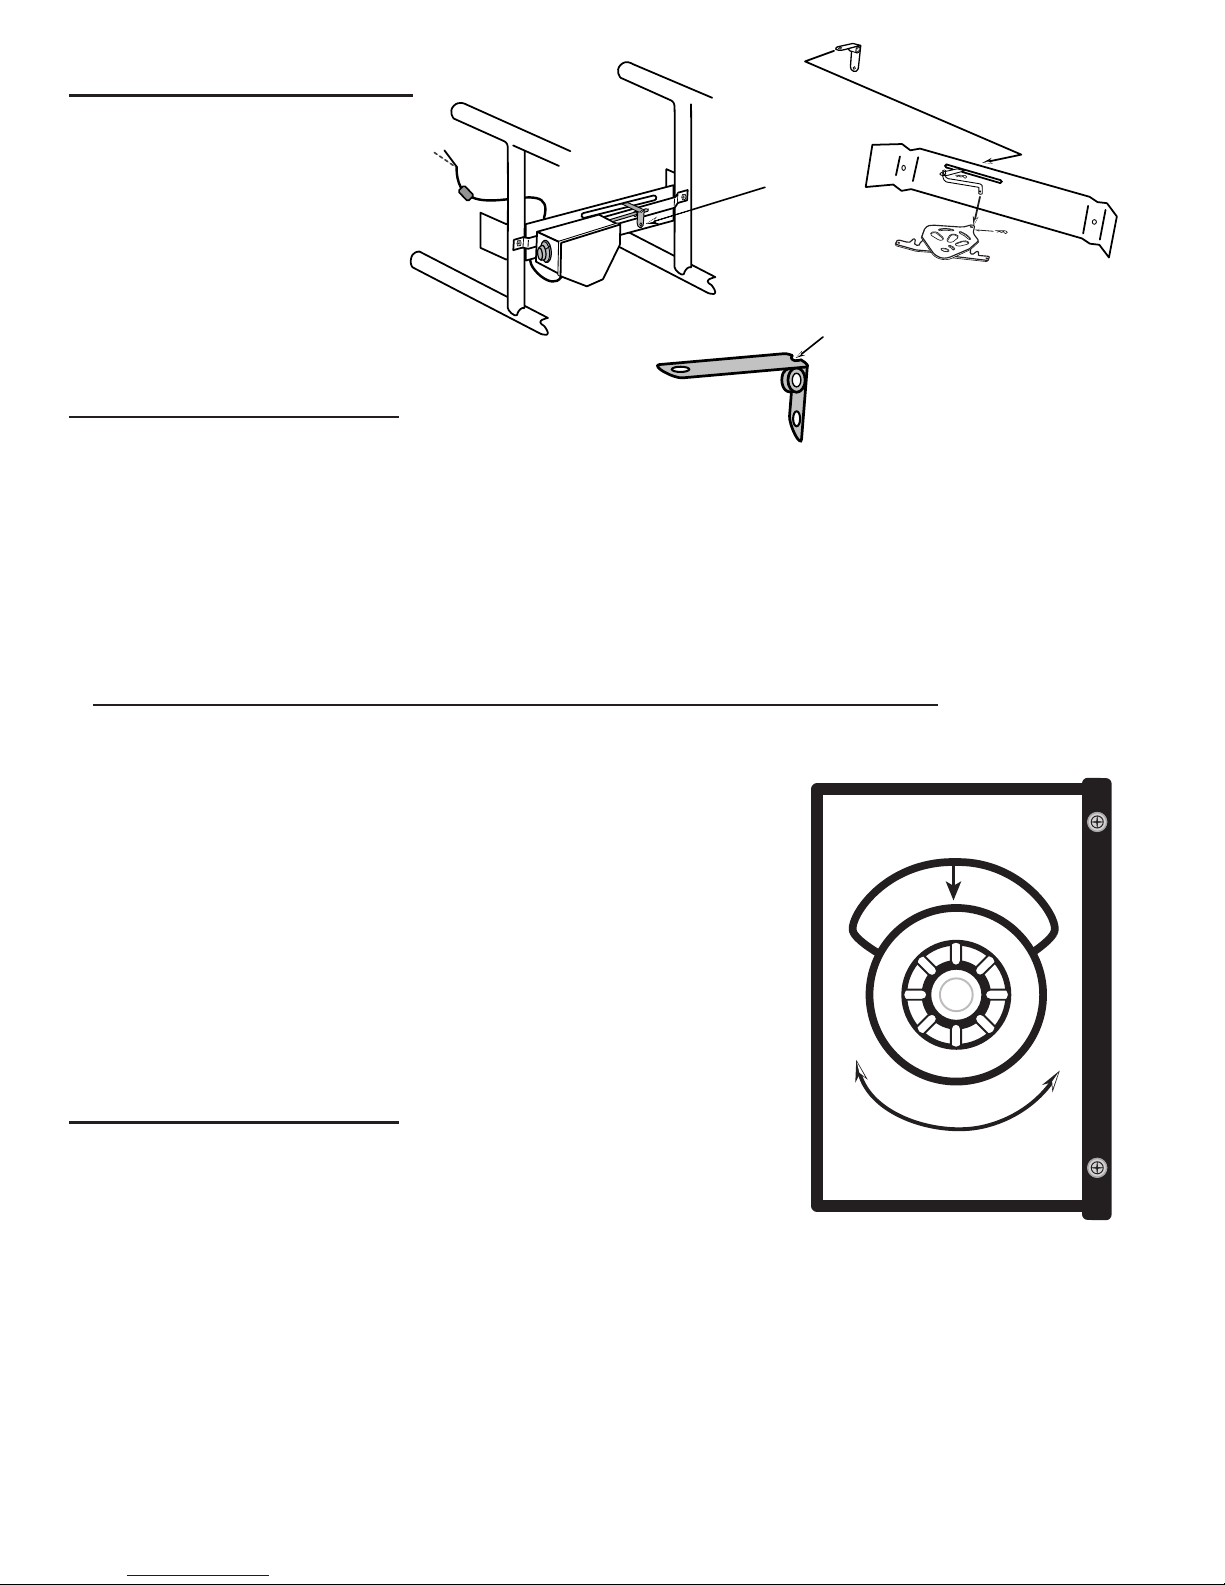
Step 3
Step 4
EarthWay
®
To Calibrate loosen set screw
slide Calibration Bracket
Install Calibration Bracket to ECM
shaft by sliding the Calibration Bracket
on to the ECM shaft.
M80 Side
M40 Side
To install Calibration Bracket you must
determine which leg corresponds to your
spreader. Short for M40, and long
for M80
Install Control Rod on to Shut-Off from
the top down and secure with small Hair Pin Clip.
Then attach the other end of the Control Rod to the
Calibration Bracket from the bottom up.
Tip: You may need to retract ECM to fully
closed “0” to aid in installing the Calibration
Bracket
S
L
IDE
Motor
Connection
C
L
O
S
E
D
O
P
E
N
T
u
r
n
ECM Rate Adjustment
1
1
1
0
9
8
7
6
5
4
3
2
1
0