EastLink Ultra Whole User manual

Ultra Whole Home DVR
User Guide


Contents
Welcome
Horizontal Menu Options������������������� 2
The Main Menu Layout ���������������������� 3
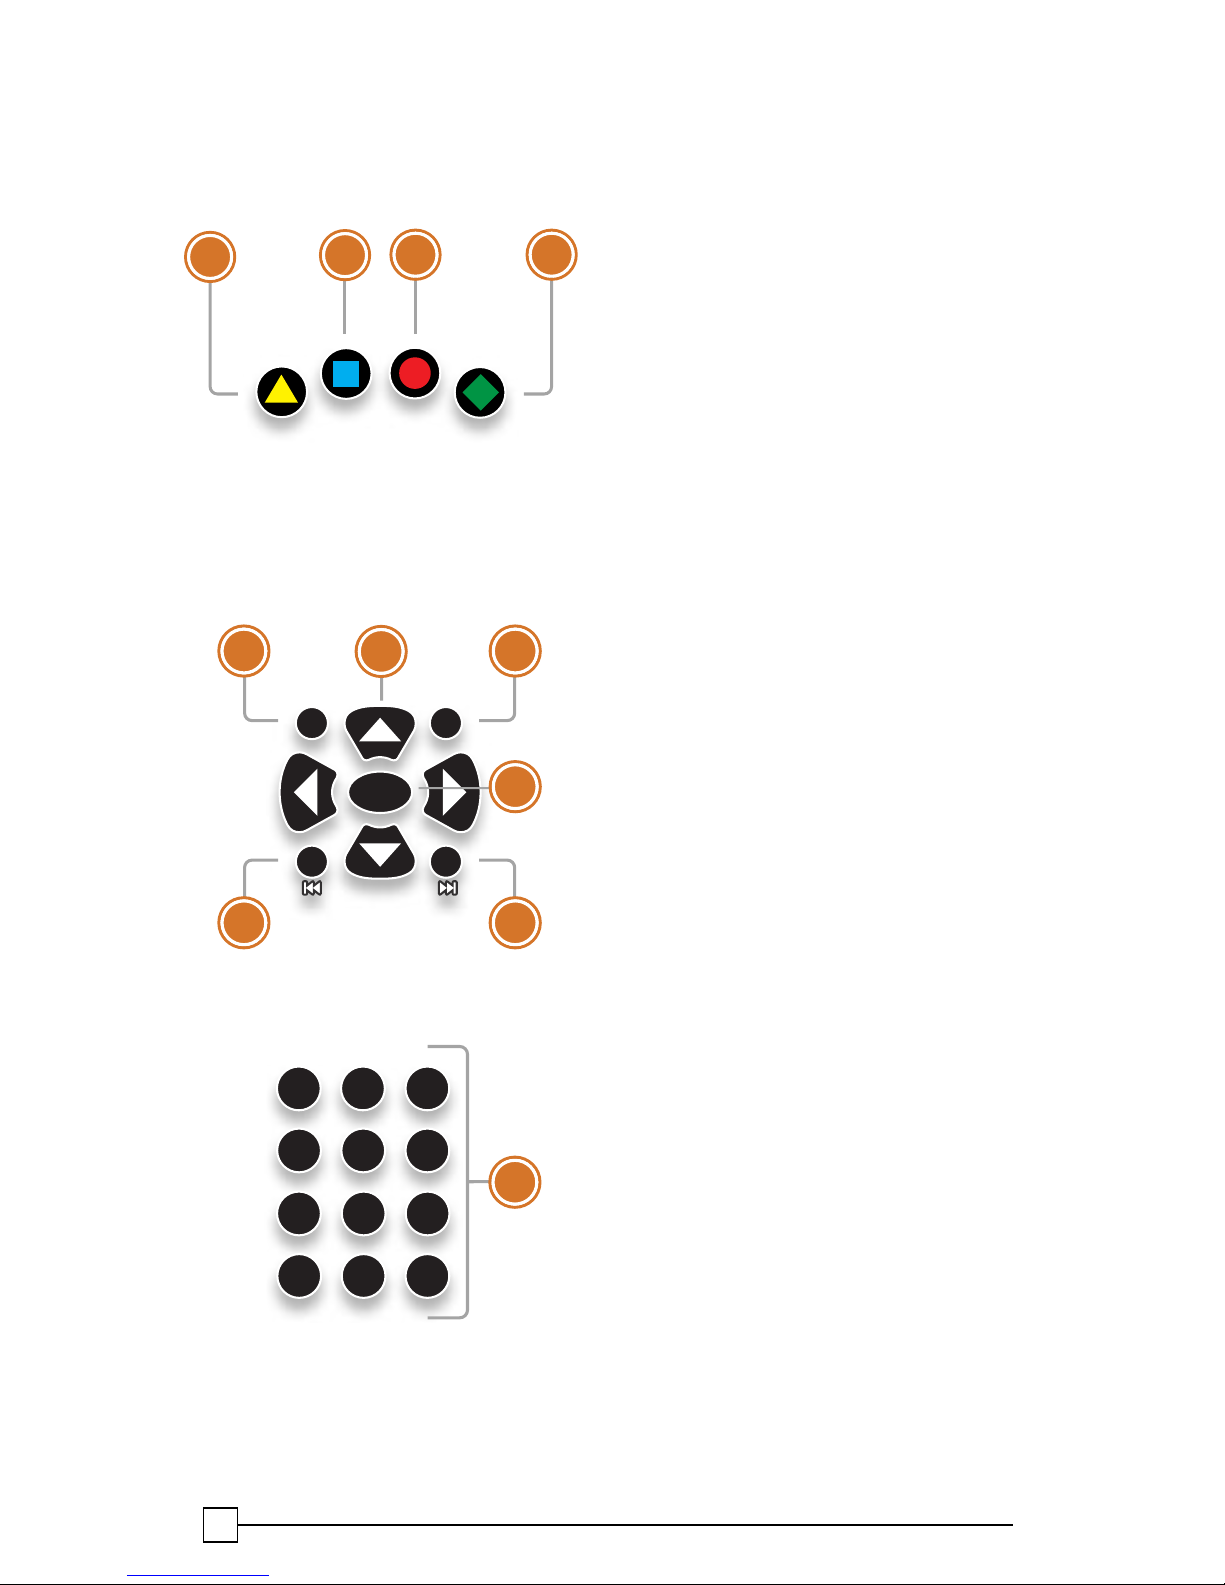
Using Your Remote ����������������������������4
Shortcut Buttons���������������������������4
Menu Navigation���������������������������4
Controlling Live TV ����������������������� 5
TV Channels
TV Channels - Layout ������������������������ 8
Grid Guide����������������������������������������� 9
Preview Panel���������������������������������� 10
Preview Panel - Layout ���������������11
Recording Options��������������������� 12
Recorded TV
Intro to Recorded TV ������������������������14
Recorded TV - Layout ��������������������� 15
Manage Recordings ������������������������ 16
Expand DVR Storage ���������������������� 16
Search
Intro to Search��������������������������������� 18
Find By Title ������������������������������������ 19
Find By Keyword����������������������������� 20
Find By Category������������������������������21
Search Options ������������������������������� 22
On Demand
Intro to Eastlink OnDemand��������������24
OnDemand Library �������������������������� 25
OnDemand Options ������������������������ 25
PIN Entry����������������������������������������� 25
Home Network
Setup ���������������������������������������������� 28
Eastlink Premium Support ��������������� 28
Playing Media���������������������������������� 29
Supported Files ������������������������������� 29
Settings
Parental Controls����������������������������� 32
TV Setup ������������������������������������������34
Sounf Effects �����������������������������������34
Front Panel ��������������������������������������34
Aspect Ration���������������������������������� 35
Recording Default���������������������������� 36
External Hard Drive�������������������������� 36
Audio Output����������������������������������� 36
Working with your PIN����������������������37
Pay Per View PIN �����������������������������37
Messages
Receiving Messages������������������������ 40
New Message ��������������������������������� 40


1
Welcome
Congratulations on choosing Eastlink Ultra Whole Home DVR�
Let’s get started with all your system can do�

2
Messages
A place to receive
messages about
Eastlink services
and updates�
Horizontal Menu Options
The Eastlink Ultra Whole Home DVR experience starts with pressing the MENU button
on the remote� You’ll then see the top level of the main menu, a horizontal band that
runs across the middle of the screen and gives access to all of the main menu options�
Channels
A vertical menu that
lists all available
channels�
Recorded TV
A list of all of the
programs you’ve
recorded�
Search
Options to search
for programs by
title, keyword, or by
category�
Pay-Per-View
Quickly nd PPV
movies and events
�
Home Network
An easy way to enjoy
media stored on your
computer from the
comfort of your TV�
OnDemand
Contains the
OnDemand library
of all available titles�
Games
A variety of classic
games like Blackjack
and Slotmachine�
Settings
A category that allows
you to customize your
Ultra Whole Home DVR
TV Music
A collection of TV
music channels to
match your taste
and mood�
Sports
A lter that displays all
available sports content�
Kids
Access all children’s
programming in one
consolidated list�
News
A lter that displays all
of the 24 hour news
channels and current
news programming�
Movies
A lter that displays
all available movies,
including live and
recorded TV as well as
OnDemand�
HDTV
A lter that displays all
of the high-denition
content�
Favorites
A lter that lets you add
your favorite TV, video,
photo and music content
to one convenient place�

3
The Main Menu Layout
1. VERTICAL GUIDE
Displays programs that are currently
airing� Press for grid guide viewing�
2. TIME
Displays current time�
3. CURRENT CHANNEL
Displays the channel number that is
currently playing in the Mini TV�
4. MINI TV
Lets you keep watching your program
while you browse�
5. FUTURE PROGRAMS
Displays the next three upcoming
programs that will air on the
channel highlighted� Use the right
arrow to scroll through more
upcoming programs�
6. QUICK INFO
Displays information about the high-
lighted program; rating, repeat or new,
short description�
7. HIGHLIGHTED PROGRAM
Displays the network, channel number,
program name and airing time of the
current channel highlighted� Press
OK to view, or info for more program
details and options�
8. RECORDING ICON
Icon will display if the highlighted
program is currently recording or
scheduled to record�
The program is recording
right now�
The program is scheduled to
be recorded�
This recording is kept until
space is needed�
This recording is kept until
manually deleted�

4
Using Your Remote
Menu Navigation
1. ARROWS
Moves backward or foward one
item. Holding down increases your
browsing speed. HINT: Hold the
channel button to browse guide
menu by page.
2. OK
Begins playing a program or
selects an option in a menu.
3. BACK
Jumps back 15 minutes of
recorded programming. Also
shows previous page or jump
back 30 minutes in vertical guide.
4. NEXT
Jumps forward 15 minutes of
recorded programming. Also
shows next page or jump forward
30 minutes in vertical guide.
5. INFO
Brings up a menu of options
or information. Also allows for
individual recording settings.
6. ZOOM
Alternates between full screen
and the Mini TV without losing
menu position.
7. NUMBER KEYS
Entering numbers will take you
directly to the channel entered.
Shortcut Buttons
1. DVR
Goes to a list of recorded TV.
2. VOD
Jumps to Eastlink Video
OnDemand menu.
3. GUIDE
Activates the Channel Guide .
4. LIVE TV
Jumps to full-screen, live TV.
back next
info zoom
OK
0
clear enter
7 8 9
pqrs tuv wxyz
4
ghi
5
jkl
6
mno
12
abc
3
def
43
65
1
27
ABCD
4
3
2
1
back next
info zoom
OK
0
clear enter
7 8 9
pqrs tuv wxyz
4
ghi
5
jkl
6
mno
12
abc
3
def
43
65
1
27

5
Controlling Live TV
rec
pause
play
rew fwd
stop
skipreplay
next
back
• Press PAUSE to alternate between pausing and resuming the program
you’re watching.
• Press REWIND up to three times (for three speeds) to rewind the program.
• Press FORWARD up to three times (for three speeds) to fast-forward
the program up to the point of live broadcast.
• Press PLAY to stop rewinding or resume from pause.
• Press LIVE TV to jump to the point of live broadcast for the last
channel you watched.
• Press REPLAY to view the previous 7 seconds of the program.
• Press SKIP to skip forward 30 seconds in the program. You can change
the number of seconds to skip in the Settings menu.
• Press RECORD to record the entire contents of the program you are
watching or quickly set a recording for a program using your guide.
• Press PAUSE and then SKIP to advance forward one frame.
The Buffer (temporary memory)
Whenever you start watching a
program
, you are storing it in a temporary
memory, called a buffer. The amount stored varies, but it’s never less
than 30 minutes for standard denition or 10 minutes for high denition.
Press record to save the buffer or rewind or replay to go back in the
stored memory.

6

TV Channels
With all of the channels available these days, it’s tough to know
what all of your options are� The TV Channels category makes
it easy to nd what you want to watch.

8
TV Channels - Layout
1. TIME
With the current time, you’ll know
when your program begins.
2. CURRENT CHANNEL
Displays the channel that is play-
ing in Mini TV. If the program is
recorded, an icon will display the
current status - i.e., play or pause.
3. MINI TV
Even when channel surng, Mini
TV always keeps you in the action.
4. FOCUS PROGRAM
Pressing INFO on this item brings
up an action menu.
5. AVAILABLE TV PROGRAMS
Displays all of the programs
that are currently airing.
6. RECORDING ICON
Displays an icon if the
program
is
recording or scheduled to record.
7. INFORMATION PANEL
Displays program information
about the show in focus.
8. PROGRAM INFORMATION
Displays the next three upcoming
programs that will air on the
channel in focus.

9
Grid Guide
The Eastlink Ultra Whole Home DVR offers an optional Grid Guide view for people
who prefer to nd programming in that layout. You can access the Grid Guyide using
the
ABCD
remote short cut key�
The Grid Guide works similarly to the rest of the main menu:
• ARROW buttons navigate the guide
• INFO brings up a list of options
• SKIP will cycle forward 24 hours; REPLAY will cycle back 24 hours
• BACK and NEXT will move through the guide in 30 minute increments
• ZOOM will alternate between the guide and full screen TV
• If you are looking at the present time in the guide, MENU will return you to the
main menu
• Black shows indicate currently-airing programs; gray shows will air in the future
• OK tunes to the program if it’s currently airing, brings up an action menu if it’s on
in the future�

10
Preview Panel
TV Channels, like all horizontal categories that contain TV programming, has
a preview panel that displays upcoming programs for the channel in focus new
program�
Press the RIGHT ARROW button to select the panel, and then use the up and
down arrows to browse through up to two weeks of programming for that channel�
For a shortcut back to the present time, press the MENU button�
If you see a program you would like to record, press the RECORD or the
INFO button�

11
Preview Panel - Layout
1. CHANNEL LOGO
The current channel.
2. PROGRAM LENGTH
The time the program begins
and ends.
3. TIMESLOT
Indicates the day and time that
the preview panel is currently
displaying.
4. PROGRAM INFORMATION
Detailed program information, such
as title, rating, whether it’s a repeat,
cast and crew.
5. TIME
Displays the time corresponding
to each program.
6. SELECTED PROGRAM
The currently-selected show.
Pressing info on the selected
program brings up an action menu
with options.

12
Recording Options
If you have record once or record series selected, you’ll see an arrow to the right
that allows you to access recording options� You can also access recording options
from the action menu of a program that’s currently recording or scheduled to record�
Scheduled to Record
Recording options for a single episode scheduled to record:
• keep - lets you decide when the program will be deleted�
• get series - sets the entire series to record�
• stop - allows you to set the recording to stop early or late�
• start - allows you to set the recording to start early or late�
Recording options for a series scheduled to record:
• keep - lets you decide when the program will be deleted�
• series options - allows you to set recording preferences for the entire series�
• stop - allows you to set the recording to stop early or late�
• start - allows you to set the recording to start early or late�

13
Recorded TV
Your Eastlink Ultra Whole Home DVR makes it easy to watch
and manage your recordings from one place in the main menu:
Recorded TV�

14
Intro to Recorded TV
In the horizontal menu, you’ll nd the Recorded TV category.
• All of the recorded and currently-recording programs are listed
in the vertical band in alphabetical order�
• Episodes of a series are grouped into folders; you’ll see the
individual episodes in the preview panel to the right�
• To watch a program, select it, and press OK� And if you’ve already
watched half of the program, you can choose whether to resume where
you left off or start over from the beginning�

15
7
6
4 5
3
2
1
Recorded TV - Layout
1. CHANNEL LOGO
Displays the channel of the
recorded program.
2. RECORDED PROGRAMS ICONS
Let you know if the show is in
danger of deletion or protected
against deletion.
3. FOCUS
Displays the channel number,
logo and an indication of whether a
program is part of a series. Folders
that contain multiple episodes in
a series also display the number
of episodes.
4. SERIES FOLDER
Episodes of a series are held
within a folder listing the number
of recorded episodes.
5. EPISODES OR DURATION
If the item in focus is a folder
containing episodes in a series,
focus lists the number of episodes.
If it’s an individual program, it lists
the programs’s duration.
6. INFORMATION
With a folder containing episodes
in a series in focus, this area
program the current recording
options for the series. With a single
recorded program in focus, this
area shows a summary of the
program information.
7. SERIES
Individual episodes in a series are
shown in the preview panel. Press
the right arrow button and select
an episode to see that episode’s
action menu.

16
ManageRecordings
When you press INFO with a recorded program in focus, you’ll get the following
list of options in the action menu:
• Play/Start Over - Launches the program full screen from the beginning�
• Resume - This option only appears if you’ve watched a portion of the program�
Launches the program full screen from the point you left off�
• See all times - Displays all of the times that particular program airs�
• Delete - Removes the program from Recorded TV�
• Recording options - Lets you access the recording options menu�
• Keep Until - Your Eastlink Ultra Whole Home will automatically delete the oldest
program in your Recorded TV folder as you need the room for new recordings�
Keep Until lets you set the program to be deleted at the point of your choosing�
• Lock - Prevents someone from watching the recorded program without a PIN�
• Record Series - you’ll get this option if you only have a single episode recorded�
Expand your DVR storage
Deciding which recordings to keep and what to erase is always a difcult decision…
if only you had more space!
Eastlink DVR Expander allows you to install an External Hard Drive to the reverse
side of your DVR – no more managing your content! Best of all, this technology is
available to you at no monthly charge. In order to function properly the External Hard
Drive must have the following specications:
• Must be an “E-sata” Hard Drive – it can not be rewire or USB 2.0
• Minium 16 MB buffer and 7200 RPM
• Includes and “esata” cord, not rewirte or USB 2.0
Table of contents
Other EastLink DVR manuals