manuals.online logo
Brands
  1. Home
  2. •
  3. Brands
  4. •
  5. Eaton
  6. •
  7. Adapter
  8. •
  9. Eaton HALOHOME HWAD1BLE40AWH User manual

Eaton HALOHOME HWAD1BLE40AWH User manual

IB518134ML
Smart Light Adapter Instructions
Instructions pour adaptateur d’éclairage intelligent
Instrucciones del adaptador de luz Smart
• If unsure of any part of these instructions, contact a
licensed electrician before attempting installation.
• Miswiring the adapter can destroy the adapter.
• This product must only be used in conjunction with
LED lighting loads (15 Watts or less).
• To prevent wiring damage or abrasion, do not expose
wiring to edges of sheet metal or other sharp objects
WARNING - Risk of fire or electric shock. Luminaire
wiring and electrical parts may be damaged when drilling
for installation of LED retrofit kit. Check for enclosed
wiring and components.
WARNING - Risk of fire or electric shock. LED Retrofit Kit
installation requires knowledge of luminaires electrical
systems. If not qualified, do not attempt installation.
Contact a qualified electrician.
WARNING - Risk of fire or electric shock. Install this kit
only in luminaires that have the construction features and
dimensions shown in the photographs and/or drawings
and where the input rating of the retrofit kit does not
exceed the input rating of the luminaire.
Only those open holes indicated in the photographs
and/or drawings may be made or altered as a result of
kit installation. Do not leave any other open holes in an
enclosure of wiring or electrical components.
Do not make or alter any open holes in an enclosure of
wiring or electrical components during kit installation.
WARNING - To prevent wiring damage or abrasion, do
not expose wiring to edges of sheet metal or other sharp
objects.
WARNING: To avoid potential fire or shock hazard, do
not use this retrofit kit in luminaires employing shunted
bi-pin lampholders. Note: Shunted lamp holders are
found only in fluorescent luminaires with Instant-Start
ballasts. Instant-start ballasts can be identified by the
words ”Instant Start” or ”I.S.” marked on the ballast. This
designation may be in the form of a statement pertaining
to the ballast itself, or may be combined with the marking
for the lamps with which the ballast is intended to be
used, for example F40T12/IS. For more information,
contact the LED luminaire retrofit kit manufacturer.
Installers should not disconnect existing wires from
lampholder terminals to make new connections at
lampholder terminals. Instead installers should cut
existing lampholder leads away from the lampholder
and make new electrical connections to lampholder lead
wires by employing applicable connectors.
SAVE THESE INSTRUCTIONS AND WARNINGS.
• En cas d’incertitude concernant une partie de ces
instructions, communiquez avec un électricien agréé
avant de procéder à l’installation.
• Un mauvais câblage de l’adaptateur risque de le détruire.
• Ce produit doit être utilisé seulement avec des
charges d’éclairage à DEL (15Watts ou moins).
• Pour éviter les dommages ou l’usure abrasive du câblage,
n’exposez pas le câblage aux arêtes de tôle ou d’autres
objets tranchants.
AVERTISSEMENT - Risque d’incendie ou de décharge
électrique. Les fils du luminaire et les pièces électriques
peuvent être endommagés lorsque vous percez pour
installer la trousse de post-câblage DEL. Vérifiez le
câblage et les composants ci-inclus.
AVERTISSEMENT - Risque d’incendie ou de décharge
électrique.L’installation de la trousse de modernisation
DEL nécessite la connaissance des systèmes électriques
des luminaires. Si vous n’avez pas les compétences
nécessaires, ne tentez pas l’installation. Communiquez
avec un électricien qualifié.
AVERTISSEMENT - Risque d’incendie ou de décharge
électrique. N’installez cette trousse que dans les
luminaires dotés des dimensions et des caractéristiques
présentées sur les photos ou sur les schémas et pour
lesquels la tension d’entrée de la trousse de post-câblage
ne doit pas dépasser celle du dispositif.
Seulement les trous ouverts indiqués dans les images
et (ou) les illustrations peuvent être défoncés ou altérés
lors de l’installation de la trousse. Ne laissez pas
d’autres trous ouverts dans l’enceinte de câblage ou des
composants électriques.
Ne tentez pas de percer ou d’altérer les trous ouverts
dans l’enveloppe du câblage ou des composants
électriques pendant l’installation de la trousse.
AVERTISSEMENT - Pour éviter les dommages ou les
abrasions au câblage, n’exposez pas le câblage aux arêtes
de tôle ou d’autres objets tranchants.
AVERTISSEMENT: N’utilisez pas cette trousse de
rénovation avec des luminaires équipés de douilles à
2broches court-circuitées. Remarque: Les douilles
court-circuitées ne se retrouvent que sur les appareils
d’éclairage fluorescent équipés de ballasts à allumage
instantané. Les ballasts à allumage instantané sont
identifiés par les mots “Instant Start“ ou “I.S.“
marqués sur le ballast. Cette désignation peut prendre
la forme d’une déclaration relative au ballast lui-même
ou peut être combinée avec le marquage des lampes
avec lesquelles le ballast est destiné à être utilisé, par
exempleF40T12/IS. Communiquez avec le fabricant de la
trousse de rénovation de luminaire à DEL pour en savoir
plus.
Les installateurs ne doivent pas débrancher les câbles
existants des bornes de la douille pour effectuer
de nouveaux raccords aux bornes de la douille. Les
installateurs doivent plutôt couper les fils existants de
la douille et les éloigner de la douille et effectuer de
nouveaux raccords électriques aux fils de sortie de la
douille en utilisant un connecteur adéquat.
CONSERVEZ CES INSTRUCTIONS ET CES AVERTISSEMENTS.
• Si tienes alguna pregunta o duda sobre estas
instrucciones, comunícate con un electricista licenciado
antes de intentar la instalación.
• Ejercer el cableado incorrectamente puede destruir el
adaptador.
• Este producto solo se debe utilizar junto con cargas
de iluminación LED (15 vatios o menos).
• Para evitar daños en el cableado o abrasión, no expongas
el cableado a bordes de hojas de metal u otros objetos
filosos.
ADVERTENCIA - Riesgo de incendio o de descarga
eléctrica. El cableado de la luminaria y las piezas
eléctricas pueden dañarse al perforar para la instalación
del kit de retroadaptación de LED. Verifique que los
cables y los componentes se encuentren encerrados.
ADVERTENCIA - Riesgo de incendio o de descarga
eléctrica. La instalación del kit de retroadaptación de
LED requiere conocimiento de los sistemas eléctricos de
las luminarias. Si usted no está calificado para hacerlo, no
intente realizar la instalación. Contacte a un electricista
calificado.
ADVERTENCIA -- Riesgo de incendio o de descarga
eléctrica. Instale este kit solamente en luminarias
que tengan las características de construcción y las
dimensiones que se muestran en las fotografías o
diagramas, y donde la potencia de entrada del kit
retroadaptador no supere la potencia de entrada de la
luminaria.
Por la instalación del kit, solo se podrán hacer o modificar
aquellos orificios abiertos que están indicados en las
fotografías o los diagramas. No deje ningún otro orificio
abierto en un alojamiento de componentes eléctricos o
de cables.
No haga ni altere ningún agujero abierto en un
alojamiento de componentes eléctricos o de cables
durante la instalación del kit.
ADVERTENCIA - Para evitar daños en el cableado o la
abrasión, no exponga el cableado a los bordes de chapa
metálica u otros objetos punzantes.
ADVERTENCIA: Para evitar el riesgo potencial de incendio
o descarga eléctrica, no utilice este kit de retroadaptación
en luminarias que utilicen portalámparas de dos clavijas
derivadas. Nota: Los portalámparas de derivación se
encuentran solo en luminarias fluorescentes con balastos
de arranque instantáneo. Los balastos de arranque
instantáneo pueden identificarse con las palabras
“Arranque instantáneo” o “I.S.” marcados en el balasto.
Esta designación puede tener la forma de una declaración
correspondiente al balasto en sí, o puede combinarse
con el marcado de las lámparas con las que se pretende
utilizar el balasto, por ejemplo, F40T12/IS. Para obtener
más información, póngase en contacto con el fabricante
del kit de retroadaptación de luminarias de LED.
Los instaladores no deben desconectar los cables
existentes de los terminales del portalámparas para hacer
nuevas conexiones en los terminales del portalámparas.
En su lugar, los instaladores deben cortar los cables
existentes del portalámpara lejos del portalámpara
y hacer nuevas conexiones eléctricas a los cables
conductores del portalámpara empleando el conector
correspondiente.
GUARDE ESTAS INSTRUCCIONES Y ADVERTENCIAS.
Risk of Electric Shock -
Turn off circuit breaker or remove fuse(s)
and test that power is off before attempting
installation.
Risque de choc électrique - Déclenchez le
disjoncteur ou retirez les fusibles et assurez-
vous que l’alimentation est hors tension
avant de procéder au câblage.
Riesgo de descarga eléctrica - Apaga el
disyuntor o retira el/los fusible(s) y prueba
que la energía esté apagada antes de iniciar
el cableado.
HWAD1BLE40AWH
WARNING AVERTISSEMENT ADVERTENCIA
FIGURE 2
Male Adapter (included)
Adaptateur mâle (fourni)
Adaptador macho (incluido)
x2
FIGURE 1
Incoming Power Line/Neutral
Fil d’arrivée de courant/neutre
Línea de alimentación entrante/Neutral
Bluetooth Wireless Module
Module sans fil Bluetooth
Módulo inalámbrico Bluetooth
Light Source (supplied by others)
Source d’éclairage (fourni par un tiers)
Fuente de luz (suministrada por otros)
Factory Reset:
Restauration aux paramètres d’usine :
Restablecimiento de fábrica: halohomesupport.eaton.com/adapter
INSTALLATION INSTRUCTIONS
1. Connect the Bluetooth wireless adapter between
the incoming power circuit and the Light source that
you wish to control (Figure 1).
–Jumper assemblies and wire nuts have been
included within your accessory pack which can be
used pending your original wiring setup (Figure 2).
2. Make sure to follow all local codes when deciding
the appropriate way to wire your device.
3. After installing the adapter and light source appropri-
ately, turn breakers back on (or re-install fuses).
4. Turn on the light source switch. This switch must
remain on at all times for the wireless adapter to be
able to receive necessary Bluetooth commands.
5. Download and install the app.
6. Launch the HALO Connected Home App and add
the device after it is discovered. The device will
show up as “Smart Light Adapter” once it is discov-
ered. Follow all instructions within the app to finish
installation.
7. For more help with the HALO Home App, refer to
eaton.com/halohome.
INSTRUCTIONS D’INSTALLATION
1. Raccordez l’adaptateur sans fil Bluetooth entre l’ar-
rivée de courant du circuit et la source d’éclairage
que vous souhaitez contrôler (Figure1).
–Des ensembles de cavaliers et de capuchons de
connexion sont inclus avec votre trousse d’acces-
soire et peuvent être utilisés selon la configuration
de câblage d’origine (Figure2).
2. Assurez-vous de respecter tous les Codes locaux au
moment de décider de la meilleure façon d’effectuer
le câblage de votre dispositif.
3. Réenclenchez le disjoncteur (ou réinstallez les fus-
ibles) après avoir correctement installé l’adaptateur
et la source d’éclairage.
4. Allumez la source d’éclairage avec l’interrupteur.
Cet interrupteur doit rester en position d’allumage
en tout temps afin que l’adaptateur sans fil puisse
recevoir les commandes Bluetooth nécessaires.
5. Téléchargez et installez l’application.
6. Lancez l’application HALO Connected Home et
ajoutez le dispositif après la détection de ce dernier.
Le dispositif sera identifié par «Smart Light Adapter
» (adaptateur d’éclairage intelligent) dès qu’il est
repéré. Suivez les instructions de l’application pour
terminer l’installation.
7. Pour obtenir de l’aide au sujet de l’application HALO
Home, visitez le site eaton.com/halohome.
INSTRUCCIONES DE INSTALACIÓN
1. Conecta el adaptador inalámbrico Bluetooth entre el
circuito de alimentación entrante y la fuente de luz
que deseas controlar (Figura 1).
–Los conjuntos de puente y las tuercas de cable
se han incluido dentro del paquete de accesorios,
que se puede utilizar mientras se configura el
cableado original (Figura 2).
2. Asegúrate de seguir todos los códigos locales
cuando decidas la forma adecuada de conectar tu
dispositivo.
3. Después de instalar apropiadamente el adaptador
y la fuente de luz, vuelve a a encender los interrup-
tores (o vuelve a instalar los fusibles).
4. Enciende el interruptor de fuente de luz. Este inter-
ruptor debe permanecer encendido en todo momen-
to para que el adaptador inalámbrico pueda recibir
los comandos Bluetooth necesarios.
5. Descargue e instale la aplicación.
6. Inicia la aplicación HALO Connected Home y agre-
ga el dispositivo después de que se descubra. El
dispositivo aparecerá como «Smart Light Adapter »
(adaptador de luz Smart) una vez que se descubra.
Sigue todas las instrucciones dentro de la aplicación
para finalizar la instalación.
7. Para obtener más ayuda con la aplicación hogareña
HALO, consulta eaton.com/halohome.
HWAD1BLE40AWH
FCC
This equipment has been tested and found to comply with
the limits for a Class B digital device, pursuant to part 15
of the FCC Rules.These limits are designed to provide
reasonable protection against harmful interference in a
residential installation.This equipment generates uses and
can radiate radio frequency energy and, if not installed and
used in accordance with the instructions, may cause harmful
interference to radio communications. However, there is
no guarantee that interference will not occur in a particular
installation. If this equipment does cause harmful interference
to radio or television reception, which can be determined by
turning the equipment off an on, the user is encouraged to
try to correct the interference by one or more of the following
measures:
• Reorient or relocate the receiving antenna.
• Increase the separation between the equipment and receiver.
• Connect the equipment into an outlet on a circuit different
from that to which the receiver is connected.
• Consult the dealer or an experienced radio/TV technician for
help.
This device complies with FCC radiation exposure limits set
forth for an uncontrolled environment.This equipment must be
installed and operated in accordance with provided instructions
and the antenna(s) used for this transmitter must be installed to
provide a separation distance of at least 20 cm from all persons.
This device complies with Part 15 of the FCC Rules. Operation is
subject to the following two conditions:
(1) this device may not cause harmful interference, and
(2) this device must accept any interference received, including
interference that may cause undesired operation.
CAUTION!
Any changes or modifications not expressly approved by the
party responsible for compliance could void the user’s authority
to operate the equipment.
Bluetooth
The Bluetooth®word mark and logos are registered trademarks
owned by Bluetooth SIG, Inc. and any use of such marks by
Eaton is under license. Other trademarks and trade names are
those of their respective owners.
Industry Canada
This device complies with Industry Canada’s licence-exempt
RSSs. Operation is subject to the following two conditions:
(1)This device may not cause interference; and
(2)This device must accept any interference, including
interference that may cause undesired operation of the device.
Le présent appareil est conforme aux CNR d’Industrie Canada
applicables aux appareils radio exempts de licence. L’exploitation
est autorisée aux deux conditions suivantes :
(1) l’appareil ne doit pas produire de brouillage, et
(2) l’utilisateur de l’appareil doit accepter tout brouillage
radioélectrique subi, même si le brouillage est susceptible d’en
compromettre le fonctionnement.
The device meets the exemption from the routine evaluation
limits in section 2.5 of RSS 102 and compliance with RSS-102
RF exposure, users can obtain Canadian information on RF
exposure and compliance.
Le dispositif rencontre l’exemption des limites courantes
d’évaluation dans la section 2.5 de RSS 102 et la conformité à
l’exposition de RSS-102 rf, utilisateurs peut obtenir l’information
canadienne sur l’exposition et la conformité de rf.
This transmitter must not be co-located or operating in
conjunction with any other antenna or transmitter. This
equipment should be installed and operated with a minimum
distance of 20 centimeters between the radiator and your body.
Cet émetteur ne doit pas être Co-placé ou ne fonctionnant
en même temps qu’aucune autre antenne ou émetteur. Cet
équipement devrait être installé et actionné avec une distance
minimum de 20 centimètres entre le radiateur et votre corps.
5-Year Limited Warranty
THE FOLLOWING WARRANTY IS EXCLUSIVE AND IN LIEU
OF ALL OTHER WARRANTIES, WHETHER EXPRESS, IMPLIED
OR STATUTORY INCLUDING, BUT NOT LIMITED TO, ANY
WARRANTY OF MERCHANTABILITY OR FITNESS FOR ANY
PARTICULAR PURPOSE.
Eaton warrants to customers that, for a period of five years
from the date of purchase, Eaton products will be free from
defects in materials and workmanship.The obligation of Eaton
under this warranty is expressly limited to the provision of
replacement products.This warranty is extended only to the
original purchaser of the product. A purchaser’s receipt or other
proof of date of original purchase acceptable to Eaton. This is
required before warranty performance shall be rendered.This
warranty does not apply to Eaton products that have been
FCC
El equipo ha sido probado y cumple con los límites para un
dispositivo digital de Clase B, de conformidad con la parte 15
de las Normas de la FCC. Estos límites están diseñados para
proporcionar una protección razonable contra las interferencias
dañinas en una instalación residencial. Este equipo genera
usos y puede emitir energía de radiofrecuencia y si no se
instala y utiliza de acuerdo con las instrucciones, puede causar
interferencia dañina en las comunicaciones de radio. Sin
embargo, no se puede garantizar que dicha interferencia no
ocurra en una instalación determinada. Si este equipo causa
interferencia dañina en la recepción de radio o televisión, lo
que puede determinarse apagando y encendiendo el equipo,
se recomienda al usuario que intente corregir la interferencia
mediante una o más de las siguientes medidas:
• Reorientar o reubicar la antena receptora.
• Aumentar la separación entre el equipo y el receptor.
• Conectar el equipo a una toma de corriente en un circuito
diferente al que está conectado el receptor
• Consultar con el distribuidor o con un técnico de radio/TV
experimentado para obtener ayuda.
Este equipo cumple con los límites de exposición a la radiación
de la FCC establecidos para un entorno no controlado.
Este equipo debe instalarse y operarse de acuerdo con las
instrucciones proporcionadas y la(s) antena(s) utilizada(s) para
este transmisor deben instalarse para proporcionar una distancia
de separación de al menos 20 cm de todas las personas.
Este dispositivo cumple con la Sección 15 de las Reglas de la
Comisión Federal de Comunicaciones (FCC). Su funcionamiento
está sujeto a las siguientes dos condiciones:
(1) este dispositivo puede no provocar interferencias
perjudiciales, y
(2) este dispositivo debe aceptar las interferencias recibidas,
incluida la interferencia que puede provocar un funcionamiento
no deseado.
¡PRECAUCIÓN!
Cualquier cambio o modificación no aprobada expresamente por
la parte responsable del cumplimiento puede anular la autoridad
del usuario para operar el equipo.
altered or repaired that have been subjected to neglect, abuse,
misuse or accident (including shipping damages).This warranty
does not apply to products not manufactured by Eaton which
have been supplied, installed, and/or used in conjunction with
Eaton products. Damage to the product caused by replacement
bulbs or corrosion or discoloration of brass components are not
covered by this warranty.
LIMITATION OF LIABILITY:
IN NO EVENT SHALL EATON BE LIABLE FOR SPECIAL, INDIRECT,
INCIDENTAL, OR CONSEQUENTIAL DAMAGES (REGARDLESS
OFTHE FORM OF ACTION, WHETHER IN CONTRACT, STRICT
LIABILITY, OR IN TORT INCLUDING NEGLIGENCE), NOR FOR
LOST PROFITS; NOR SHALL THE LIABILITY OF EATON FOR
ANY CLAIMS OR DAMAGE ARISING OUT OF OR CONNECTED
WITHTHESETERMS ORTHE MANUFACTURE, SALE, DELIVERY,
USE, MAINTENANCE, REPAIR OR MODIFICATION OF EATON
PRODUCTS, OR SUPPLY OF ANY REPLACEMENT PARTS
THEREFORE, EXCEEDTHE PURCHASE PRICE OF EATON
PRODUCTS GIVING RISETO A CLAIM. NO LABOR CHARGES
WILL BE ACCEPTEDTO REMOVE OR INSTALL FIXTURES.
To obtain warranty service, please contact Eaton, at 1-800-
334-6871, press option 2 for Customer Service, or via e-mail
[email protected] and include the following
information:
• Name, address and telephone number
• Date and place of purchase
• Catalog and quantity purchase
• Detailed description of problem
All returned products must be accompanied by a Return Goods
Authorization Number issued by the Company and must be
returned freight prepaid. Any product received without a Return
Goods Authorization Number from the Company will be refused.
Eaton is not responsible for merchandise damaged in transit.
Repaired or replaced products shall be subject to the terms
of this warranty and are inspected when packed. Evident or
concealed damage that is made in transit should be reported
at once to the carrier making the delivery and a claim filed with
them. Reproductions of this document without prior written
approval of Eaton are strictly prohibited.
Changes or modifications not expressly approved by the party
responsible for compliance could void the user’s authority to
operate the equipment.
NOTE: THE MANUFACTURER IS NOT RESPONSIBLE FOR ANY
RADIO ORTV INTERFERENCE CAUSED BY UNAUTHORIZED
MODIFICATIONSTOTHIS EQUIPMENT. SUCH MODIFICATIONS
COULD VOIDTHE USER’S AUTHORITYTO OPERATETHE
EQUIPMENT.
Bluetooth
La palabra y los logotipos de Bluetooth® son marcas registradas
propiedad de Bluetooth SIG, Inc. y cualquier uso de tales
marcas por parte de Eaton se realiza bajo licencia. Otras marcas
comerciales y nombres comerciales son los de sus respectivos
dueños.
Industria Canadá
Este dispositivo cumple con los estándares RSS exentos de
licencia de Industry Canada. Su funcionamiento está sujeto a las
siguientes dos condiciones:
(1) este dispositivo puede no provocar interferencias
perjudiciales; y
(2) este dispositivo debe aceptar las interferencias recibidas,
incluida la interferencia que puede provocar un funcionamiento
no deseado.
El dispositivo cumple con la exención de los límites de
evaluación de rutina en la sección 2.5 de RSS 102 y el
cumplimiento con la exposición a RF RSS-102; los usuarios
pueden obtener información canadiense sobre la exposición y el
cumplimiento de RF.
Este transmisor no debe ubicarse ni funcionar conjuntamente
con ninguna otra antena o transmisor. Este equipo debe
instalarse y operarse con una distancia mínima de 20 cm entre el
radiador y su cuerpo.
Garantía limitada de 5 años
LA SIGUIENTE GARANTÍA ES EXCLUSIVAY REEMPLAZA A
CUALQUIER OTRA GARANTÍA,YA SEA EXPRESA, IMPLÍCITA
O ESTABLECIDA POR LA LEY, INCLUIDA, ENTRE OTRAS,
CUALQUIER GARANTÍA DE COMERCIALIZACIÓN O ADAPTACIÓN
PARA UN OBJETIVO EN PARTICULAR.
Eaton garantiza a los clientes que, durante un período de cinco
años a partir de la fecha de compra, los productos de Eaton
estarán libres de defectos en materiales y mano de obra. La
obligación de Eaton bajo esta garantía queda expresamente
limitada a la provisión de los productos de repuesto. Esta
garantía se extiende solo al comprador original del producto.
Un recibo del comprador u otra prueba de la fecha de la compra
original aceptable para Eaton. Esto es necesario antes de dar
cuenta de un mal rendimiento bajo garantía. Esta garantía no
se aplica a los productos de Eaton que se hayan modificado
o reparado o que se hayan sometido a negligencia, abuso,
mal uso o accidentes (incluidos los daños en el envío). Esta
garantía no se aplica a productos no fabricados por Eaton que
se hayan suministrado, instalado y/o utilizado en conjunto con
los productos de Eaton. Esta garantía no cubre los daños al
producto provocados por el reemplazo de bombillas, corrosión o
decoloración de los componentes de bronce.
LIMITACIÓN DE RESPONSABILIDAD:
BAJO NINGUNA CIRCUNSTANCIA EATON SERÁ RESPONSABLE
POR DAÑOS ESPECIALES, INDIRECTOS, INCIDENTALES O
ACCIDENTALES (INDEPENDIENTEMENTE DE LA FORMA DE
ACCIÓN,YA SEA EN CONTRATO, RESPONSABILIDAD ESTRICTA
O EXTRACONTRACTUAL, INCLUIDA LA NEGLIGENCIA), NI
POR LAS PÉRDIDAS DE GANANCIAS;TAMPOCO EATON
SERÁ RESPONSABLE POR CUALQUIER RECLAMO O DAÑO
QUE SURJA EN RELACIÓN A ESTOS TÉRMINOS O CON LA
FABRICACIÓN, VENTA, ENTREGA, USO, MANTENIMIENTO,
REPARACIÓN O MODIFICACIÓN DE LOS PRODUCTOS, NI CON
EL SUMINISTRO DE CUALQUIER PIEZA DE REPUESTO QUE
EXCEDA EL PRECIO DE COMPRA DEL PRODUCTO. NO SE
ACEPTARÁN CARGOS POR MANO DE OBRA PARA RETIRAR O
INSTALAR LOS ACCESORIOS.
Para obtener servicio de garantía, comuníquese con Eaton, al
1-800-334-6871, presione la opción 2 para Servicio al cliente,
o por correo electrónico a ConsumerP[email protected] e
incluya la siguiente información:
• Nombre, dirección y número de teléfono
• Fecha y lugar de la compra
• Catálogo y cantidad comprada
• Descripción detallada del problema
Todos los productos devueltos deben estar acompañados
por el Número de autorización de bienes devueltos emitido
por la compañía y debe pagarse el transporte por anticipado.
Cualquier producto recibido sin un Número de autorización de
bienes devueltos de la compañía será rechazado. Eaton no es
responsable de los daños en la mercadería durante el transporte.
Los productos reparados o reemplazados quedan sujetos a los
términos de esta garantía y se inspeccionan cuando se embalan.
Los daños evidentes u ocultos ocurridos durante el transporte
deben informarse de inmediato a la empresa transportista
que realiza la entrega, y debe completarse un reclamo. Las
reproducciones de este documento sin previa aprobación por
escrito de Eaton están estrictamente prohibidas.
Cambios o modificaciones no expresamente aprobados por la
parte responsable por conformidad puede invalidar la autoridad
del usuario para operar el equipo.
NOTA: EL FABRICANTE NO ES RESPONSABLE POR
CUALQUIER INTERFERENCIA DE RADIO OTV CAUSADO POR
MODIFICACIONES NO AUTORIZADAS HACIA EL EQUIPO,
DICHAS MODIFICACIONES PUEDE INVALIDAR LA AUTORIDAD
DEL USUARIO PARA OPERAR EL EQUIPO.
Eaton
1121 Highway 74 South
Peachtree City, GA 30269
eaton.com/lighting
© 2019 Eaton
All Rights Reserved
Printed in China
Imprimé aux Chine
Impreso en los China
Publication No. IB518134M
February 21, 2019
Eaton es una marca comercial
registrada.Todas las marcas
comerciales son propiedad de
sus respectivos propietarios.
Eaton est une marque de
commerce déposée.Toutes les
autres marques de commerce
sont la propriété de leur
propriétaire respectif.
Eaton is a registered
trademark. All trademarks are
property of their respective
owners.
HWAD1BLE40AWH

Other Eaton Adapter manuals

Eaton TRIPP LITE U209-005-DB25 User manual

Eaton

Eaton TRIPP LITE U209-005-DB25 User manual

Eaton SKF-HA Manual

Eaton

Eaton SKF-HA Manual

Eaton TRIPP LITE U209-30N-IND User manual

Eaton

Eaton TRIPP LITE U209-30N-IND User manual

Eaton Series NRX User manual

Eaton

Eaton Series NRX User manual

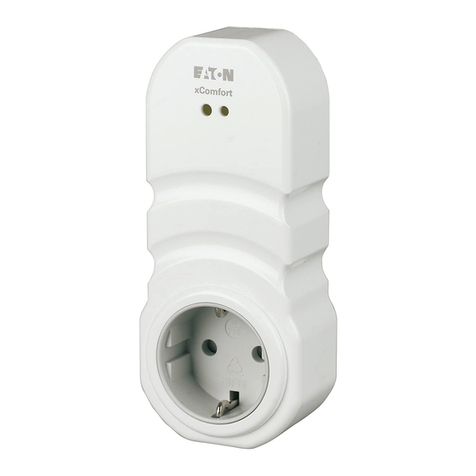
Eaton xComfort CSAP-01 Series Manual

Eaton

Eaton xComfort CSAP-01 Series Manual

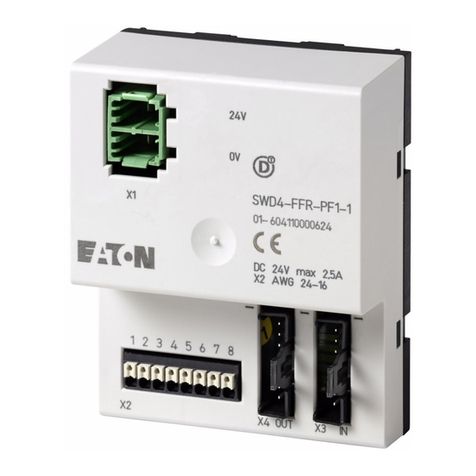
Eaton SWD4-FFR-PF1-1 Manual

Eaton

Eaton SWD4-FFR-PF1-1 Manual

Eaton PowerXL DX-NET-ETHERCAT-2 User manual

Eaton

Eaton PowerXL DX-NET-ETHERCAT-2 User manual

Eaton TRIPP LITE U209-005-DB25 User manual

Eaton

Eaton TRIPP LITE U209-005-DB25 User manual

Eaton Quick Connect User manual

Eaton

Eaton Quick Connect User manual

Eaton Series NRX Manual

Eaton

Eaton Series NRX Manual

Eaton xComfort CEMP Series User manual

Eaton

Eaton xComfort CEMP Series User manual

Eaton Power Defense PDC9-ETU Manual

Eaton

Eaton Power Defense PDC9-ETU Manual

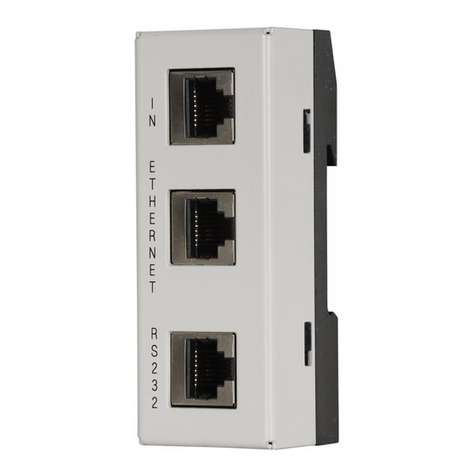
Eaton XT-RJ45-ETH-RS232 Manual

Eaton

Eaton XT-RJ45-ETH-RS232 Manual

Eaton ELC-CAENET User manual

Eaton

Eaton ELC-CAENET User manual

Eaton TRIPP LITE U444-06N-DP4K6B User manual

Eaton

Eaton TRIPP LITE U444-06N-DP4K6B User manual

Eaton TRIPP LITE U209-000-R User manual

Eaton

Eaton TRIPP LITE U209-000-R User manual

Eaton Cutler-Hammer RSS 36-SD-ST User manual

Eaton

Eaton Cutler-Hammer RSS 36-SD-ST User manual

Eaton TRIPP LITE Series User manual

Eaton

Eaton TRIPP LITE Series User manual

Eaton Series NRX User manual

Eaton

Eaton Series NRX User manual

Eaton DX-COM-STICK Manual

Eaton

Eaton DX-COM-STICK Manual

Eaton 800A User manual

Eaton

Eaton 800A User manual

Eaton xComfort CHVZ-01/04 Manual

Eaton

Eaton xComfort CHVZ-01/04 Manual

Eaton Cutler-Hammer APFP15A User manual

Eaton

Eaton Cutler-Hammer APFP15A User manual

Eaton AQB-L400 User manual

Eaton

Eaton AQB-L400 User manual

Popular Adapter manuals by other brands

Celestron 18778 quick start guide

Celestron

Celestron 18778 quick start guide

Socket Cordless Serial Adapter user guide

Socket

Socket Cordless Serial Adapter user guide

CNET CQU-906 Quick installation guide

CNET

CNET CQU-906 Quick installation guide

Benning MA 2-16 instruction manual

Benning

Benning MA 2-16 instruction manual

Proware M-WN910N user guide

Proware

Proware M-WN910N user guide

Brainboxes BL-554 installation guide

Brainboxes

Brainboxes BL-554 installation guide

Getnet GN-621U user manual

Getnet

Getnet GN-621U user manual

Savi APV-60 Getting started

Savi

Savi APV-60 Getting started

Gigabyte GN-WS31N-RH quick start guide
Gigabyte

Gigabyte GN-WS31N-RH quick start guide

THOMSON LDK 5400LDK Operator's manual

THOMSON

THOMSON LDK 5400LDK Operator's manual

SMC Networks 2209USB/ETH Specifications

SMC Networks

SMC Networks 2209USB/ETH Specifications

Airlinkplus ATVUSB01 user manual

Airlinkplus

Airlinkplus ATVUSB01 user manual

Encore ENCA-MDVP datasheet

Encore

Encore ENCA-MDVP datasheet

MSI UB11B MS-6823 user guide

MSI

MSI UB11B MS-6823 user guide

Lindy 42961 user manual

Lindy

Lindy 42961 user manual

Intellinet IPI-15 instructions

Intellinet

Intellinet IPI-15 instructions

Asus WiFi-g user guide

Asus

Asus WiFi-g user guide

NETGEAR XAV1301v1/XAVB1301v1 Podręcznik Instalacji

NETGEAR

NETGEAR XAV1301v1/XAVB1301v1 Podręcznik Instalacji

manuals.online logo
manuals.online logoBrands
  • About & Mission
  • Contact us
  • Privacy Policy
  • Terms and Conditions

Copyright 2025 Manuals.Online. All Rights Reserved.