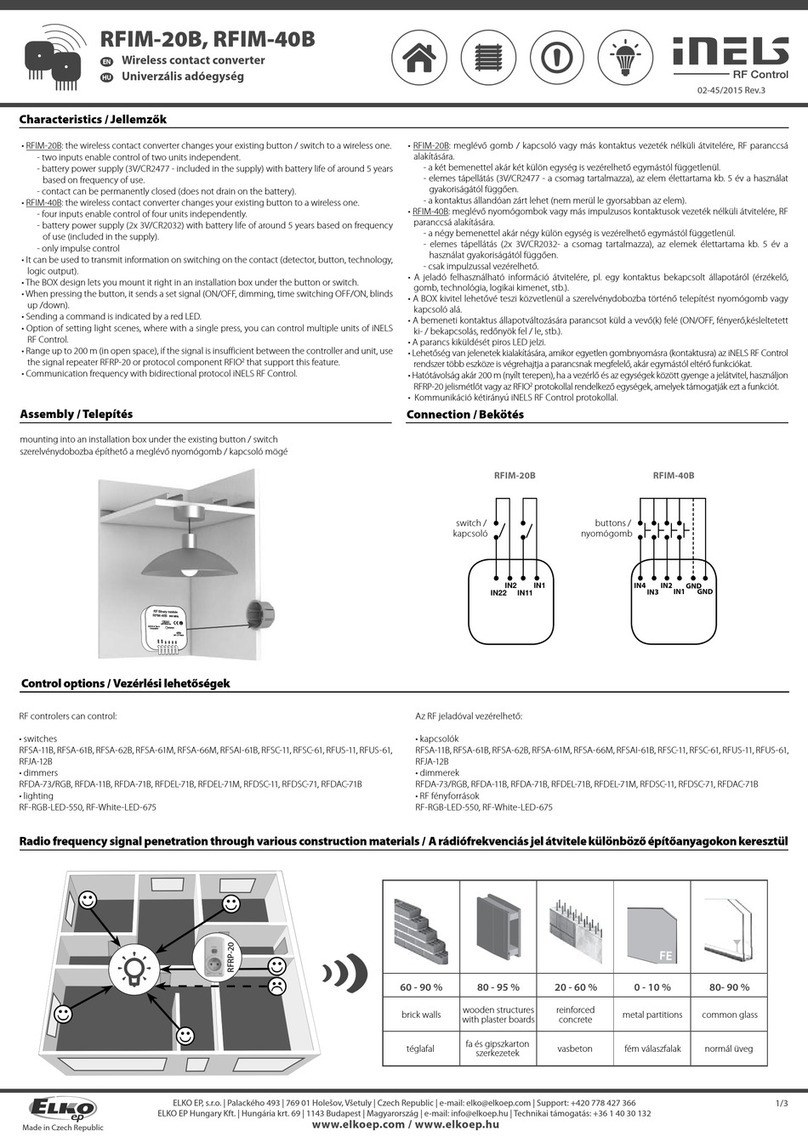
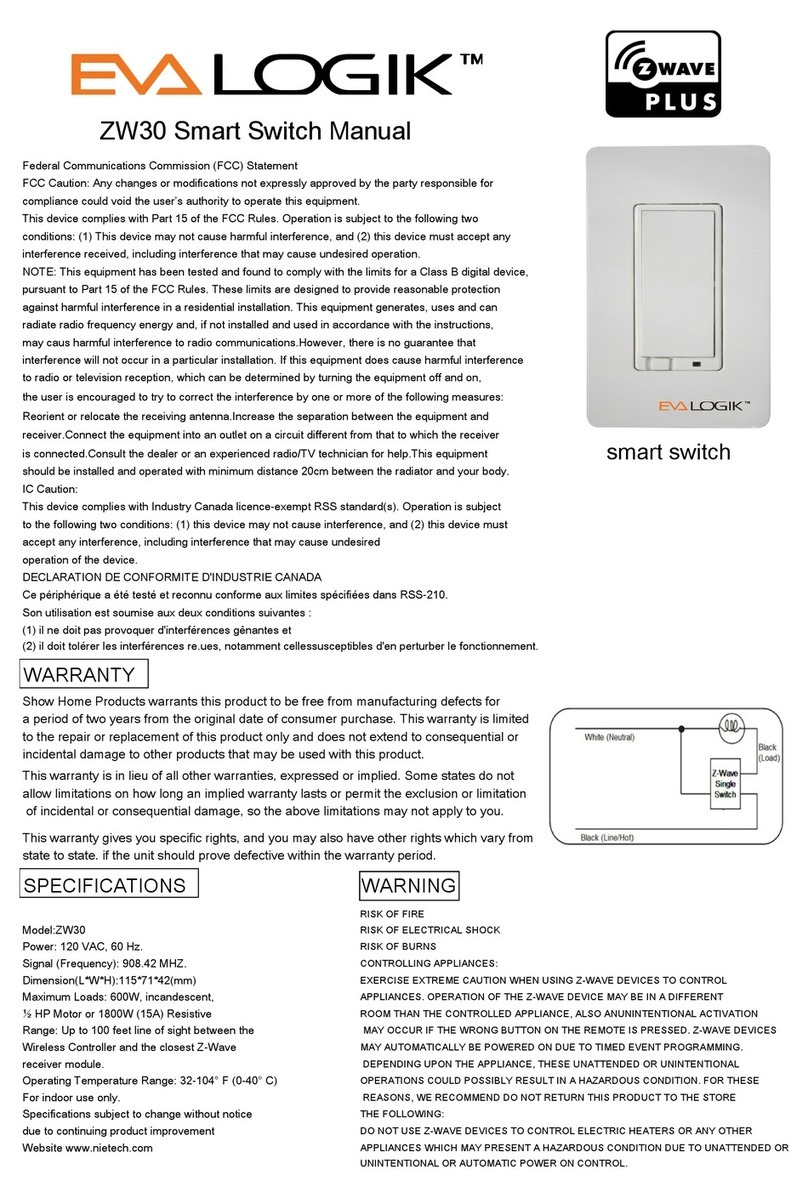
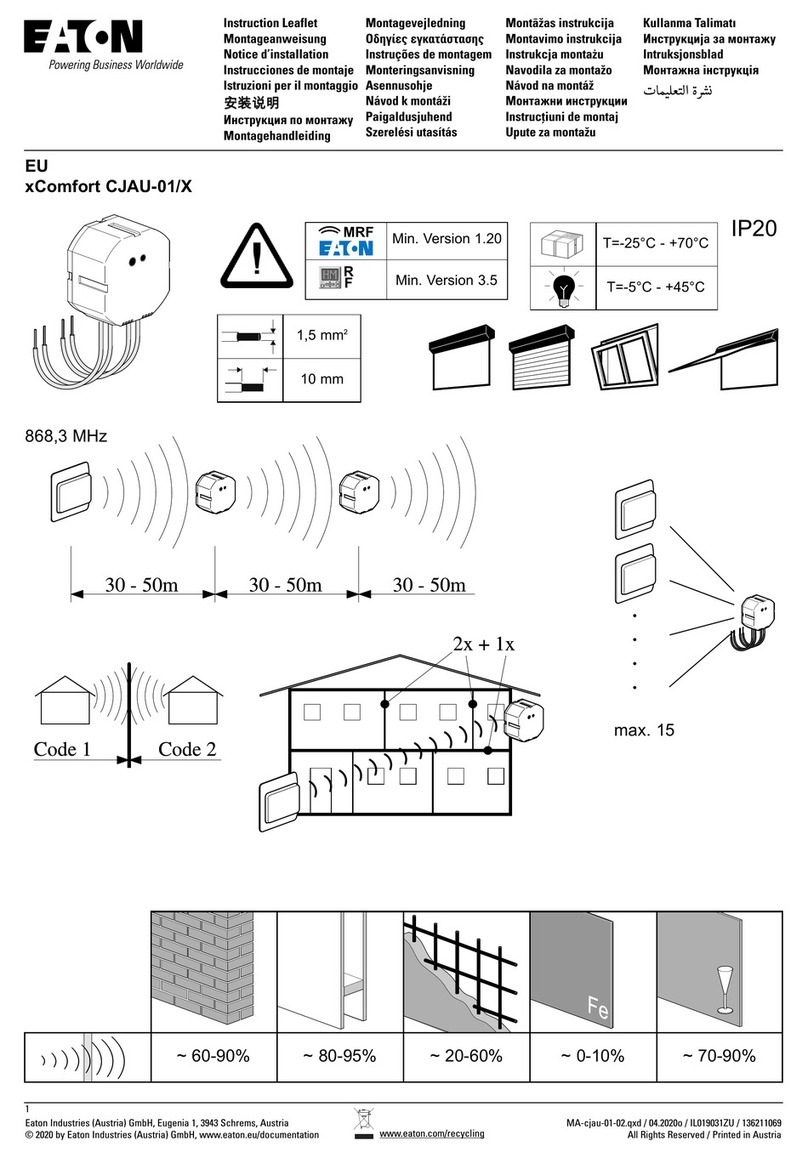
Eaton HDFS3P1 Service manual

ENGLISH
HDFS3P1 - INSTALLATION INFORMATION FOR HUMIDITY SENSOR AND FAN CONTROL
www.eaton.com
www.eaton.com/wiringdevices
EIS-0268-EFS (REV. A)
HDFS3P1
Humidity Sensor and Fan Control
WARNING
SPECIFICATIONS
Power..................................................................................................120VAC, 60Hz
Maximum fan load.......................................................................................3 Amps
Fan Time Delay.............................................................................................20 mins
Humidity range...................................................................................45%-80% RH
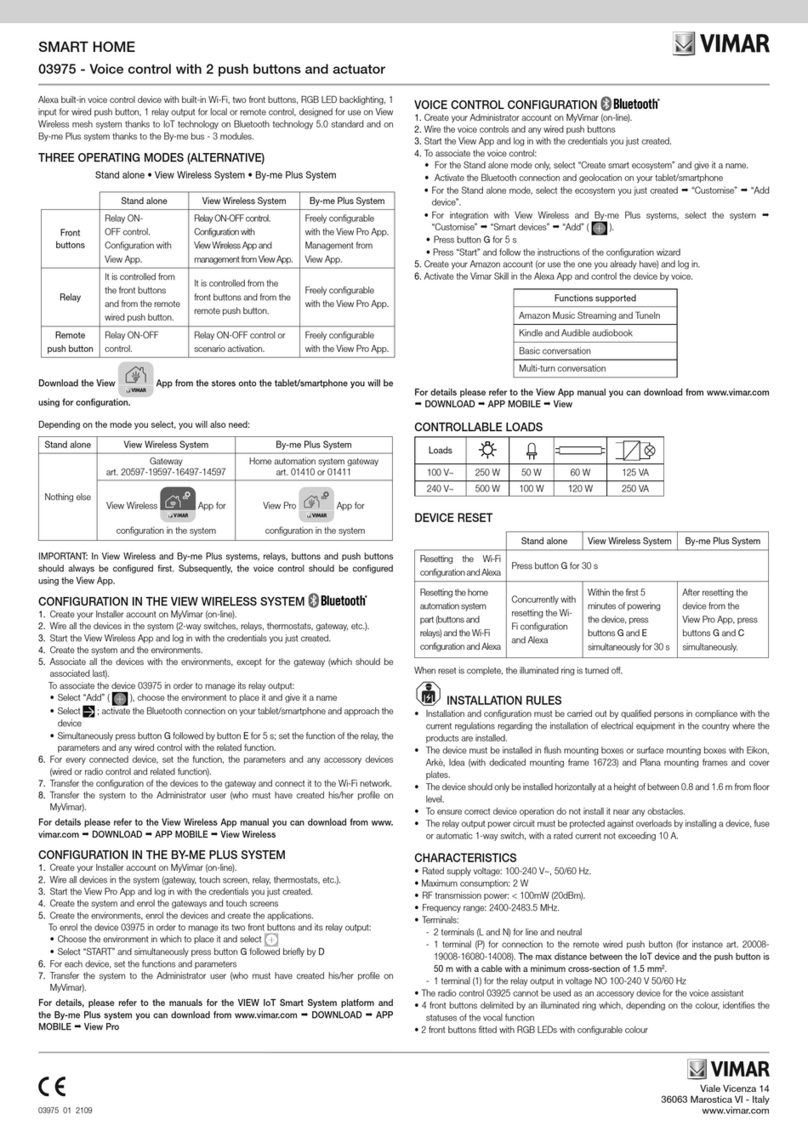
The HDFS3P1 is a 3 Amp, single pole Humidity Sensor and Fan Control
Switch. This sensor helps conserve energy and automates the fan in which
it is connected, which provides energy savings and reduces the possibility
of mold and mildew. When the humidity sensor detects excess humidity in
a room, it automatically turns on the ventilation fan. The sensor continues
to monitor the air and automatically turns the fan off when the humidity
level drops below its preset level.
Turn the POWER OFF at the circuit breaker before installing the sensor
Read and understand these instructions before installing. This device is
intended for installation in accordance with the National Electrical Code
as well as local regulations. It is recommended that a qualified electrician
performs this installation. Make sure to turn off the circuit breaker or
fuse(s) and make sure power is off before wiring the device.
DIRECTIONS
The HDFS3P1 features three adjustable humidity levels for customizable
control to suit the specific ventilation needs of the room. These humidity
levels are as follows:
1. High Humidity (80% RH)
2. Medium Humidity (65% RH) *(default)
3. Low Humidity (45% RH)
OPERATING INSTRUCTIONS
Fan Mode: Manual ON, Auto OFF
a. The manual button is used to turn the fan off after a 20 minute time delay.
b. If the fan is in the ON state, the manual button is used to turn off the
fan before the time delay expires, the fan will immediately turn off and
the humidity sensor will stop working.
c. Turn ON the manual button and the humidity sensor will be operational
after 20 minutes.
Humidity Mode: Auto ON, Auto OFF
a. The Fan will turn ON automatically when preset humidity level is
reached and automatically turn OFF when the humidity level drops below
the preset.
b. If the humidity level is higher than preset for 3 minutes, then the fan will
continue to run for 5 minutes.
c. When the manual button is used to turn OFF the fan before the 20
minutes is reached, the fan will turn OFF immediately and the humidity
sensor will stop detecting. Only when the manual button is set to ON
then the humidity sensor will resume operation after 20 minutes. Expect
a 3 minute delay for the automatic sensor to turn on the fan.
• Function: Humidity Level
1. High Humidity
2. Medium Humidity *default
3. Low Humidity
STEP 1 : Enter Programming Mode
• Press and hold the fan button for eight seconds until the bi-color LED
light comes on. The sensor is now in programming mode.
STEP 2 : Choose the Setting
• Press the fan button the same number of times for that function
PROGRAMMING
Use copper wires only. NEUTRAL WIRE IS REQUIRED.
WIRING DIRECTIONS
1. Connect RED wire from sensor to the FAN wire.
2. Connect BLACK wire from sensor to the HOT wire.
3. Connect WHITE wire from sensor to the NEUTRAL wire.
4. Connect GREEN wire from sensor to the GROUND wire.
Neutral
Neutre
Neutro
Black
Noir
Negro
Red
Rouge
Rojo
Line
Ligne
Línea
Load
Charge
Fase
Green
Vert
Verde
Ground
Mise à la terre
Conexión a
tierra
Neutral
Neutre
Neutro
White
Blanc
Blanco
Fan
Ventilateur
Ventilador

ENGLISH
HDFS3P1 - INSTALLATION INFORMATION FOR HUMIDITY SENSOR AND FAN CONTROL
Programming Example: To change the humidity level of the switch from
high to medium, follow the steps shown below:
1. Press and hold the fan button for eight seconds. The bi-color LED light
will come on.
2. The bi-color LED light will now flash once every 2 seconds indicating
the current setting, which is at High Humidity.
3. Press the fan button two times to choose “Medium Humidity” the bi-col
or LED light will now flash two times every 2 seconds indicating the
new setting at “Medium Humidity”
4. Press and hold the fan button for eight seconds. The bi-color LED light
will flash 3 times and turn to white indicating that the setting is saved
and the load will turn OFF.
EXAMPLE
The switch button is not functional:
Check if the device is wired properly. This device requires a NEUTRAL wire
for operation. Often the WHITE wire is used as a LOAD wire. Be sure to test
ALL wires. Also make sure that the HOT and LOAD wires are not reversed.
Press the Fan Button:
• If the load does not work and the indicator light is not on.
TURN OFF the power at the circuit breaker then check wire connections.
Confirm that the NEUTRAL wire is connected.
• If the Humidity Sensor does not turn on the fan.
Change the humidity level to match the appropriate condition or
manually turn ON the fan, after 20 minutes the humidity sensor will be
operational.
TROUBLESHOOTING
www.eaton.com
www.eaton.com/wiringdevices
EIS-0268-EFS (REV. A)
EATON WIRING DEVICES LIMITED 2 YEAR WARRANTY Eaton Wiring Devices warrants its Humidity Sensor and Fan Control to be free of defects in materials and workmanship in normal use and
service for a period of two years from date of original purchase. THIS TWO (2) YEAR LIMITED WARRANTY IS IN LIEU OF ALL OTHER WARRANTIES, OBLIGATIONS, OR LIABILITIES, EXPRESSED OR
IMPLIED (INCLUDING ANY IMPLIED WARRANTY OF MERCHANTABILITY OR FITNESS FOR A PARTICULAR PURPOSE THAT IS IN DURATION IN EXCESS OF TWO YEARS FROM THE DATE OF ORIGINAL
CONSUMER PURCHASE). NO AGENT, REPRESENTATIVE, OR EMPLOYEE OF EATON HAS AUTHORITY TO INCREASE OR ALTER THE OBLIGATIONS OF EATON UNDER THIS WARRANTY. To obtain
warranty service for any properly installed Eaton Humidity Sensor and Fan Control that proves defective in normal use send the defective Humidity Sensor and Fan Control prepaid and insured to
Quality Control Dept., Eaton Wiring Devices, 203 Cooper Circle, Peachtree City, GA 30269; in Canada: Eaton Wiring Devices, 5925 McLaughlin Road, Mississauga, Ontario L5R 1B8. Eaton will repair
or replace the defective unit, at its option. Eaton will not be responsible under this warranty if examination shows that the defective condition of the unit was caused by misuse, abuse, improper
installation, alteration, improper maintenance or repair of damage in shipment to Eaton. EATON SHALL HAVE NO RESPONSIBILITY FOR INSTALLATION OF THE HUMIDITY SENSOR AND FAN CONTROL
OR FOR ANY PERSONAL INJURY, PROPERTY DAMAGE, OR ANY SPECIAL, INCIDENTAL, CONTINGENT, OR CONSEQUENTIAL DAMAGES OF ANY KIND, RESULTING FROM DEFECTS IN THE HUMIDITY
SENSOR AND FAN CONTROL OR FOR BREACH OF ANY EXPRESS OR IMPLIED WARRANTY ON THIS PRODUCT. THE EXCLUSIVE REMEDY FOR BREACH OF THE LIMITED WARRANTY CONTAINED
HEREIN IS THE REPAIR OR REPLACEMENT OF THE DEFECTIVE PRODUCT AT EATON’S OPTION. IMPLIED WARRANTIES (IF ANY) INCLUDING, BUT NOT LIMITED TO IMPLIED WARRANTIES OF FITNESS
FOR A PARTICULAR PURPOSE AND MERCHANTABILITY, ARE LIMITED IN DURATION TO A PERIOD ENDING TWO YEARS FROM THE DATE OF ORIGINAL CONSUMER PURCHASE. IN NO CASE SHALL
EATON’S LIABILITY UNDER ANY OTHER REMEDY PRESCRIBED BY LAW EXCEED THE PURCHASE PRICE. Some states do not allow the exclusion or limitation of incidental or consequential damages or
allow disclaimers or modifications of or limitations on how long an implied warranty lasts, so the above limitations may not apply to you. Some Canadian provinces do not allow exclusion or variance
of implied warranties so that some or all of the above limitations may not apply to you. This warranty gives you specific legal rights and you may also have other rights which vary from state to state
and province to province. Read enclosed instructions carefully. If you have any questions concerning use or care of this product, please write: Consumer Service Division, Eaton Wiring Devices, 203
Cooper Circle, Peachtree City, GA 30269.
WARRANTY INFORMATION
( For example: Press the fan button (1) time for High Humidity; (2) times
for Medium Humidity; (3) time for Low Humidity).
° After the last button is pressed the bi-color LED will flash
back the current setting for that function 10 times at
two-second intervals. If no selection had been made, the
device will exit programming mode.
STEP 3 : Enter Programming Mode
• Press and hold the fan button for eight seconds. The bi-color LED light
will flash 3 times and turn to white indicating that the settings are
saved and the load will turn OFF.

www.eaton.com
www.eaton.com/wiringdevices
EIS-0268-EFS (REV. A)
ÉTAPE 3 : Entrer dans le mode de programmation
Maintenir le bouton du ventilateur enfoncé pendant huit secondes. Le voyant à DEL
bicolore clignote trois fois et passe au blanc pour indiquer que les réglages sont
enregistrés et que la charge s’ÉTEINDRA.
EXEMPLE
Exemple de programmation – Pour régler le niveau d’humidité de l’interrupteur de
élevé à moyen, suivre les étapes ci-dessous :
1. Maintenir enfoncé le bouton du ventilateur pendant huit secondes. Levoyant à
DEL bicolore s’allume;
2. Le voyant à DEL bicolore clignote une fois toutes les deux secondes pour indiquer
le réglage actuel, soit humidité élevée;
3. Appuyer deux fois sur le bouton du ventilateur pour choisir « humidité moyenne
». le voyant à DEL bicolore clignote deux fois toutes les deux secondes pour
indiquer le nouveau réglage à « humidité moyenne »;
4. Maintenir enfoncé le bouton du ventilateur pendant huit secondes. Levoyant à
DEL bicolore clignote trois fois et passe au blanc pour indiquer que le réglage est
enregistré et que la charge s’ÉTEINDRA.
DÉPANNAGE
Le bouton de l’interrupteur ne fonctionne pas :
Vérifier si l’appareil est bien branché. Ce dispositif nécessite un fil NEUTRE pour
fonctionner. Souvent, le fil BLANC est utilisé comme fil de CHARGE. S’assurer de
vérifier TOUS les fils. S’assurer également que les fils de PHASE et de CHARGE ne
sont pas inversés.
Appuyer sur le bouton ventilateur :
• Si la charge ne fonctionne pas et que le témoin lumineux n’est
pasallumé.
COUPER l’alimentation au disjoncteur, puis vérifier le branchement des fils.
Confirmer que le fil NEUTRE est branché;
• Si le capteur d’humidité ne met pas le ventilateur en marche.
Changer le niveau d’humidité pour qu’il corresponde à l’état approprié ou
mettre le ventilateur en MARCHE manuellement. Après 20 minutes, le capteur
d’humidité sera en fonction.
INFORMATION SUR LA GARANTIE
GARANTIE LIMITÉE DE 2 ANS D’EATON WIRING DEVICES Eaton Wiring Devices garantit que
son capteur d’humidité avec commande de ventilateur est exempt de défauts de fabrication
et de matériaux dans des conditions d’utilisation et de service normales pour une période de
deux ans à compter de la date d’achat initiale. CETTE GARANTIE LIMITÉE DE (2) DEUX ANS
REMPLACE TOUTEAUTRE GARANTIE, OBLIGATION OU RESPONSABILITÉ, QU’ELLE SOIT
EXPLICITE OU IMPLICITE (Y COMPRIS TOUTE GARANTIE IMPLICITE DE QUALITÉ MARCHANDE
ET D’ADAPTATION ÀUNUSAGE PARTICULIER QUI DURE PLUS DE DEUX ANS À COMPTER
DE LA DATE D’ACHAT INITIALE). AUCUN AGENT, REPRÉSENTANT OU EMPLOYÉ DE EATON
N’EST AUTORISÉ À AUGMENTER OUÀ MODIFIER LES OBLIGATIONS DE EATON DANS LE
CADRE DE CETTE GARANTIE. Pour obtenir un service au titre de la garantie pour tout capteur
d’humidité avec commande de ventilateur Eaton correctement installé qui s’avère défectueuse
dans des conditions d’utilisation normales, envoyer le capteur d’humidité avec commande de
ventilateur en question affranchi et assuré à l’adresse suivante : Quality Control Dept., Eaton
Wiring Devices, 203 Cooper Circle, Peachtree City, GA 30269; in Canada: Eaton Wiring Devices,
5925 McLaughlin Road, Mississauga, Ontario L5R 1B8. Eaton réparera ou remplacera l’unité
défectueuse, à sa discrétion. Eaton ne pourra être tenu responsable en vertu de la présente
garantie si l’examen prouve que le problème a été causé par une mauvaise utilisation, une
utilisation abusive, une installation inadéquate, une altération, un mauvais entretien ou une
réparation inappropriée avant l’envoi à Eaton. EATON DÉCLINE TOUTE RESPONSABILITÉ
QUANT À L’INSTALLATION DU CAPTEUR D’HUMIDITÉ AVEC COMMANDE DE VENTILATEUR
OU POUR TOUT DOMMAGE MATÉRIEL OU TOUT DOMMAGE PARTICULIER, CONSÉCUTIF OU
INDIRECT
DE TOUTE SORTE DÉCOULANT DES DÉFAUTS DU CAPTEUR OU DE LA VIOLATION D’UNE
GARANTIE EXPLICITE OU IMPLICITE DU PRODUIT. LE SEUL RECOURS EN CAS DE VIOLATION
DE LA GARANTIE LIMITÉE DÉCRITE DANS LES PRÉSENTES EST LA RÉPARATION OU LE
REMPLACEMENT DU PRODUIT DÉFECTUEUX, À LA DISCRÉTION D’EATON. LES GARANTIES
IMPLICITES (LE CAS ÉCHÉANT) IMPLIQUENT, SANS TOUTEFOIS S’Y LIMITER, LES GARANTIES
IMPLICITES DE QUALITÉ MARCHANDE ET D’ADAPTATION À UN USAGE PARTICULIER,
ET DURENT DEUX ANS À COMPTER DE LA DATE D’ACHAT INITIALE. EN AUCUN CAS LA
RESPONSABILITÉ D’EATON NE PEUT DÉPASSER LE PRIX D’ACHAT EN VERTU DE TOUT
AUTRE RECOURS AUTORISÉ PAR LA LOI. Dans la mesure où certains États n’autorisent pas
l’exclusion ou la limitation de responsabilité en cas de dommage particulier ou indirect ou
autorisent l’exonération de responsabilité ou encore la modification ou la limitation de la durée
d’une garantie implicite, les limitations ci-dessus peuvent ne pas s’appliquer à vous. Certaines
provinces canadiennes n’autorisant pas l’exclusion ou les écarts de garanties implicites,
certaines des limitations ci-dessus, ou l’intégralité de celles-ci, peuvent ne pas s’appliquer à
vous. La présente garantie vous donne des droits légaux précis, et d’autres droits peuvent vous
être accordés d’un État à l’autre ou d’une province à l’autre. Lire attentivement les instructions.
Si vous avez des questions concernant l’utilisation ou l’entretien de ce produit, veuillez écrire à :
Consumer Service Division, Eaton Wiring Devices, 203 Cooper Circle, Peachtree City, GA 30269.
FRANÇAIS
HDFS3P1 – RENSEIGNEMENTS D’INSTALLATION DU CAPTEUR D’HUMIDITÉ ET DE LA COMMANDE DE VENTILATEUR
HDFS3P1
Capteur d’humidité et commande de ventilateur
SPÉCIFICATIONS
Alimentation...................................................................................120 V c.a., 60 Hz
Charge maximale du ventilateur...........................................................3 ampères
Temporisation du ventilateur........................................................................20 min
Plage d’humidité.............................................................................45 % À 80 % HR
INSTRUCTIONS
Le HDFS3P1 est un capteur d’humidité avec interrupteur de commande de
ventilateur unipolaire de 3 ampères. Ce capteur aide à conserver l’énergie et
automatise le ventilateur aulequel il est branché, ce qui permet d’économiser de
l’énergie et de réduire les risques de moisissure. Lorsque le capteur d’humidité
détecte un excès d’humidité dans une pièce, il active automatiquement le
ventilateur. Le capteur continue de surveiller l’air et arrête automatiquement le
ventilateur lorsque le niveau d’humidité descend sous le niveau prédéfini.
AVERTISSEMENT
COUPER L’ALIMENTATION au disjoncteur avant d’installer le capteur
Lire et comprendre ces instructions avant de procéder à l’installation. Cetappareil
est conçu pour être installé conformément au Code national de l’électricité et aux
règlements locaux. Il est recommandé qu’un électricien qualifié effectue cette
installation. S’assurer de désactiver le disjoncteur ou de retirer les fusibles, et
s’assurer que l’alimentation est coupée avant de brancher l’appareil.
Utiliser des fils en cuivre seulement. UN FIL NEUTRE EST REQUIS.
INSTRUCTIONS DE CÂBLAGE
1. Brancher le câble ROUGE du capteur au câble du VENTILATEUR.
2. Brancher le câble NOIR du capteur au câble de PHASE.
3. Brancher le fil BLANC du capteur au fil NEUTRE.
4. Brancher le fil VERT du capteur au fil de MISE À LA TERRE.
INSTRUCTIONS DE FONCTIONNEMENT
Le HDFS3P1 est doté de trois niveaux de réglage de l’humidité pour un contrôle
personnalisable en fonction des besoins particuliers de ventilation de la pièce. Ces
niveaux d’humidité sont les suivants :
1. Humidité élevée (80 % HR);
2. Humidité moyenne (65 % HR); * (par défaut)
3. Humidité faible (45 % HR).
Mode ventilateur : mise en MARCHE manuelle, ARRÊT automatique
a. Le bouton manuel sert à arrêter le ventilateur après un délai de
20minutes.
b. Si le ventilateur est en MARCHE, le bouton manuel sert à arrêter le
ventilateur avant la fin du délai. Le ventilateur s’arrête immédiatement
et le capteur d’humidité cesse de fonctionner.
c. Mettre le bouton manuel en position de MARCHE et le capteur d’humidité
fonctionne après 20 minutes.
Mode d’humidité : mise en MARCHE automatique, ARRÊT automatique
a. Le ventilateur DÉMARRE automatiquement lorsque le niveau d’humidité prédéfini
est atteint, et il s’ARRÊTE automatiquement lorsque le niveau d’humidité baisse
sous le préréglage.
b. Si le taux d’humidité est supérieur au niveau prédéfini pendant 3minutes, le
ventilateur continue de fonctionner pendant 5 minutes.
c. Lorsque le bouton manuel est utilisé pour ARRÊTER le ventilateur avant que les
20 minutes ne soient écoulées, le ventilateur s’ARRÊTE immédiatement et le
capteur d’humidité n’assure plus la détection. Le capteur d’humidité reprend son
fonctionnement après 20 minutes seulement lorsque le bouton manuel est réglé en
position de marche. Prévoir un délai de
3 minutes pour que le capteur automatique active le ventilateur.
PROGRAMMATION
• Fonction : Niveau d’humidité
1. Humidité élevée
2. Humidité moyenne * par défaut
3. Humidité faible
ÉTAPE 1 : Entrer dans le mode de programmation
• Maintenir le bouton du ventilateur enfoncé pendant huit secondes jusqu’à ce
que le voyant à DEL bicolore s’allume. Le capteur est maintenant en mode de
programmation.
ÉTAPE 2 : Choisir le réglage
• Appuyer sur le bouton du ventilateur le même nombre de fois que pour cette
fonction.
(Par exemple : appuyer sur le bouton du ventilateur (1) fois pour une humidité
élevée, (2) fois pour une humidité moyenne et (3) fois pour une humidité faible).
° Après avoir appuyé sur le dernier bouton, le voyant à DEL bicolore
indique le réglage actuel en clignotant 10 fois à intervalles de 2
secondes. Si aucune sélection n’a été faite, l’appareil quitte le mode de
programmation.

° Después de presionar el último botón, el LED bicolor parpadeará
nuevamente y el ajuste actual para esa función 10 veces a intervalos
de dos segundos. Si no se ha realizado ninguna selección, el
dispositivo saldrá del modo de programación.
PASO 3: Ingrese al modo de programación
• Mantenga presionado el botón del ventilador durante 8 segundos. Laluz LED
bicolor parpadeará 3 veces y se pondrá de color blanco para indicar que los
ajustes se guardaron y la carga se apagará.
EJEMPLO
Ejemplo de programación: Para cambiar el nivel de humedad del interruptor de alto
a medio, siga los pasos que se muestran a continuación:
1. Mantenga presionado el botón del ventilador durante 8 segundos. La luz LED
bicolor se encenderá.
2. La luz LED bicolor parpadeará una vez cada 2 segundos para indicar la
configuración actual, que es en humedad alta.
3. Presione el botón del ventilador dos veces para elegir “Humedad media”. A
continuación, la luz LED bicolor parpadeará dos veces cada
2 segundos, lo que indica el nuevo ajuste en “Humedad media”
4. Mantenga presionado el botón del ventilador durante 8 segundos. La luz LED
bicolor parpadeará 3 veces y se pondrá de color blanco para indicar que el ajuste
se guardó y la carga se apagará..
SOLUCIÓN DE PROBLEMAS
El botón del interruptor no funciona:
Compruebe si el dispositivo está conectado correctamente. Este dispositivo requiere
un cable NEUTRO para su funcionamiento. A menudo, el cable BLANCO se utiliza
como un cable de CARGA. Asegúrese de probar TODOS los cables. También,
asegúrese de que las FASES no estén invertidas.
Presione el botón del ventilador:
• Si la carga no funciona y la luz indicadora no está encendida.
DESCONECTE la alimentación en el disyuntor y a continuación, revise las
conexiones de los cables. Confirme que el cable NEUTRO esté conectado.
• Si el sensor de humedad no enciende el ventilador.
Cambie el nivel de humedad para que coincida con la condición apropiada o
encienda manualmente el ventilador. Después de
20 minutos, el sensor de humedad estará en funcionamiento.
INFORMACIÓN SOBRE LA GARANTÍA
GARANTÍA LIMITADA A 2 AÑOS OTORGADA POR EATON WIRING DEVICES. Eaton Wiring
Devices garantiza que su sensor de humedad y control de ventilador no presentarán defectos
en los materiales, ni en la instalación en condiciones normales de uso y servicio durante
un período de 2 años a partir de la fecha de compra original. ESTA GARANTÍA LIMITADA
DE DOS (2) AÑOS REEMPLAZA TODAS LAS DEMÁS GARANTÍAS, OBLIGACIONES O
RESPONSABILIDADES, EXPRESAS O IMPLÍCITAS (QUE INCLUYE TODA GARANTÍA IMPLÍCITA
DE COMERCIABILIDAD O IDONEIDAD PARA UN PROPÓSITO DETERMINADO QUE, EN CUANTO
A DURACIÓN, EXCEDA LOS DOS AÑOS A PARTIR DE LA FECHA DE LA COMPRA ORIGINAL
POR PARTE DEL CONSUMIDOR). NINGÚN AGENTE, REPRESENTANTE O EMPLEADO DE EATON
TIENE LA AUTORIDAD PARA AUMENTAR O ALTERAR LAS OBLIGACIONES DE EATON BAJO
ESTA GARANTÍA. A fin de obtener servicios de garantía para todo sensor de humedad y control
del ventilador instalado correctamente en el que se comprueben defectos en condiciones
normales de uso, envíe el sensor de humedad y control del ventilador defectuoso prepagado
y asegurado al Departamento de Control de Calidad, Eaton Wiring Devices, 203 Cooper
Circle, Peachtree City, GA 30269; en Canadá: Eaton Wiring Devices, 5925 McLaughlin Road,
Mississauga, Ontario L5R 1B8. Eaton reparará o reemplazará la unidad defectuosa, a su libre
elección. Eaton no se responsabilizará de la presente garantía si la inspección indica que el
estado defectuoso de la unidad se debe a un uso inadecuado, a una instalación incorrecta,
a una alteración, a mantenimiento o reparación inapropiados, o a daños en el envío a Eaton.
EATON NO SERÁ RESPONSABLE DE LA INSTALACIÓN DEL SENSOR DE HUMEDAD Y CONTROL
DEL VENTILADOR NI DE NINGUNA LESIÓN PERSONAL, DAÑO MATERIAL, CONCRETO Y
CUANTIFICABLE, INCIDENTAL, EVENTUAL O INDIRECTO DE NINGÚN TIPO, QUE RESULTE
DE LOS DEFECTOS EN EL SENSOR DE HUMEDAD Y CONTROL DEL VENTILADOR O DEL
INCUMPLIMIENTO DE ALGUNA GARANTÍA EXPRESA O IMPLÍCITA DE ESTE PRODUCTO. LA
ÚNICA COMPENSACIÓN POR INCUMPLIMIENTO DE LA GARANTÍA LIMITADA CONTENIDA
EN EL PRESENTE DOCUMENTO ES LA REPARACIÓN O REEMPLAZO DEL PRODUCTO
DEFECTUOSO A LA LIBRE ELECCIÓN DE EATON. INCLUIDAS LAS GARANTÍAS IMPLÍCITAS (SI
LAS HUBIERA), PERO NO LIMITÁNDOSE A LAS GARANTÍAS IMPLÍCITAS DE IDONEIDAD PARA
UN PROPÓSITO EN PARTICULAR Y COMERCIABILIDAD, ESTÁN LIMITADAS EN DURACIÓN A
UN PERÍODO QUE TERMINARÍA A LOS DOS AÑOS DE LA FECHA DE LA COMPRA ORIGINAL
DEL CONSUMIDOR. EN NINGÚN CASO, LA RESPONSABILIDAD DE EATON, BAJO CUALQUIER
OTRA COMPENSACIÓN ORDENADA POR LEY, SUPERARÁ EL PRECIO DE COMPRA. Algunos
estados no permiten la exclusión o limitación de los daños incidentales o eventuales, como
tampoco las renuncias de responsabilidad, modificaciones o limitaciones a la duración de una
garantía implícita, de modo que las limitaciones anteriores pueden no aplicarse a su caso.
Algunas provincias de Canadá no permiten la exclusión o variación de las garantías implícitas,
por lo que es posible que algunas o todas las limitaciones anteriores no se apliquen en su caso.
Esta garantía le otorga derechos legales específicos y también puede tener otros derechos
que varían de un estado a otro y de una provincia a otra.Lea cuidadosamente las instrucciones
incluidas. Si tiene alguna pregunta sobre el uso o el cuidado de este producto, escriba a la
División de Servicio al Cliente, Eaton Wiring Devices, 203 Cooper Circle, Peachtree City, GA
30269.
www.eaton.com
www.eaton.com/wiringdevices
EIS-0268-EFS (REV. A)
HDFS3P1
Sensor de humedad y control del ventilador
ESPECIFICACIONES
Alimentación....................................................................................120 V CA, 60 Hz
Carga máxima del ventilador..............................................................................3 A
Tiempo de retardo del ventilador....................................................................20 m
Rango de humedad...........................................................................45 %-80 % HR
INSTRUCCIONES
El HDFS3P1 es un sensor de humedad y control del ventilador de 1 polo a 3 Amp.
Este sensor ayuda a conservar la energía y automatiza el ventilador al que está
conectado, lo que proporciona ahorro de energía y reduce la posibilidad de que
aparezca moho. Cuando el sensor de humedad detecta un exceso de humedad
en una habitación, enciende automáticamente el ventilador. El sensor continúa
monitoreando la zona y apaga automáticamente el ventilador cuando el nivel de
humedad disminuye por debajo del predeterminado.
ADVERTENCIA
Desconecte la alimentación del disyuntor antes de instalar el sensor.
Lea cuidadosamente estas instrucciones antes de realizar la instalación. Este
dispositivo está diseñado para su instalación según el Código eléctrico nacional y
los reglamentos locales. Se recomienda que un electricista calificado realice esta
instalación. Asegúrese de apagar el disyuntor o los fusibles y de que la alimentación
esté desconectada antes de conectar el dispositivo.
Solo utilice cables de cobre. SE REQUIERE UN CABLE NEUTRO.
INSTRUCCIONES PARA REALIZAR EL CABLEADO
1. Conecte el cable ROJO del sensor al cable del VENTILADOR.
2. Conecte el cable NEGRO del sensor a la FASE.
3. Conecte el cable BLANCO del sensor al cable NEUTRO.
4. Conecte el cable VERDE del sensor al cable de CONEXIÓN A TIERRA.
INSTRUCCIONES DE FUNCIONAMIENTO
El HDFS3P1 ofrece tres niveles de humedad ajustables para un control
personalizable que se adapta a las necesidades de ventilación específicas de la
sala. Estos niveles de humedad son los siguientes:
1. Humedad alta (80 % HR)
2. Humedad media (65 % HR) *(predeterminado)
3. Humedad baja (45 % HR).
Modo de ventilador: ENCENDIDO manual, APAGADO automático
a. El botón manual se utiliza para apagar el ventilador después de
20 minutos de retraso.
b. Si el ventilador está en estado ENCENDIDO, el botón manual se utiliza para
apagar el ventilador antes de que expire el retraso de tiempo.
El ventilador se apagará inmediatamente, y el sensor de humedad
dejará de funcionar.
c. ENCIENDA el botón manual, y el sensor de humedad funcionará después de 20
minutos.
Modo contra humedad: ENCENDIDO automático, APAGADO automático
a. El ventilador se encenderá automáticamente cuando alcance el nivel de
humedad predeterminado y se apagará automáticamente cuando el nivel de
humedad disminuya y quede por debajo del valor predeterminado.
b. Si el nivel de humedad es superior al valor predeterminado durante
3 minutos, el ventilador seguirá funcionando durante 5 minutos.
c. Cuando el botón manual se utiliza para apagar el ventilador antes de que se
alcancen los 20 minutos, el ventilador se apagará inmediatamente y el sensor
de humedad dejará de funcionar. Solo cuando el botón manual se ajuste en
ENCENDIDO, el sensor de humedad reanudará su funcionamiento después de
20 minutos. Considere una demora de 3minutos para que el sensor automático
encienda el ventilador.
PROGRAMACIÓN
• Función: Nivel de humedad
1. Humedad alta
2. Humedad media * predeterminada
3. Humedad baja
PASO 1: Ingrese al modo de programación
• Mantenga presionado el botón del ventilador durante 8 segundos hasta que
se encienda la luz LED bicolor. El sensor ahora se encuentra en modo de
programación.
PASO 2: Seleccione el ajuste
• Presione el botón del ventilador la misma cantidad de veces para esa función
(Por ejemplo: Presione el botón del ventilador [1] vez para humedad alta, [2]
veces para humedad media y [3] veces para humedad baja).
ESPAÑOL
HDFS3P1 - INFORMACIÓN DE INSTALACIÓN DEL SENSOR DE HUMEDAD Y CONTROL DEL VENTILADOR

Folding and Printing Instructions-
Document Dimensions: 8.5” W x 11” H
2-sided printing, Accordian fold in fourths
logo at top, fold in fourths again.
Final Size: 2.25” W x 2.75” H
Table of contents
Languages:
Other Eaton Home Automation manuals

Eaton
Eaton EBMAFDD14 Manual

Eaton
Eaton xComfort CSAP-01 Series User manual

Eaton
Eaton xComfort CTAA-01/04 User manual

Eaton
Eaton GFCI Manual

Eaton
Eaton 93PM IAC-D User manual

Eaton
Eaton xComfort CRSZ-00/01 User manual

Eaton
Eaton xComfort CROU-00/01-S Manual

Eaton
Eaton Holec Capitole 40 User manual

Eaton
Eaton Xanura User manual

Eaton
Eaton xComfort CDAP-01/13 User manual