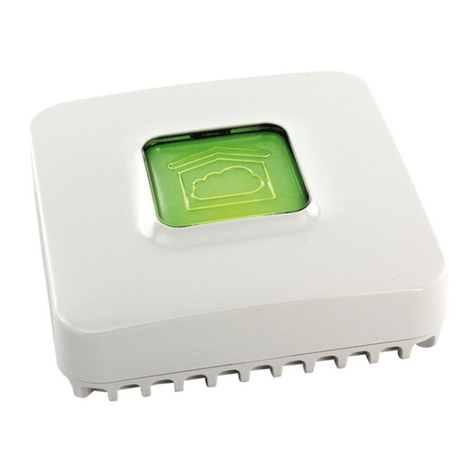
DELTA DORE TYDOM 3.0 User manual

CONFIGURATION GUIDE
TYDOM 3.0

P. 2 CONFIGURATION GUIDE TYDOM 3.0
ABOUT THIS GUIDE
If this guide is in your hands it is because you are about to perform your (rst) conguraon of the Lifedomus
or Tydom 3.0 mul-protocol home automaon server.
This guide aims to assist you in compleng your rst Project installaon and will help you to become
competent in conguring Lifedomus and Tydom 3.0 supervision using the basic equipment and simple
funcons.
You will learn how to acvate a number of connected appliances and how to customise your basic interface.
This guide, which includes a number of useful ps, will help you to become familiar with our various
applicaons.
TRAINING SERVICES
As a supplement to this guide, you can connue learning about our soware soluons via the Lifedomus
and Tydom 3.0 training courses. For more informaon about these products please visit our Website using
the following links:
hps://www.deltadore.fr/pro/formaons/integraon-domoque-lifedomus
hps://www.deltadore.fr/pro/formaons/mulmedia-domoque-tydom-3
TECHNICAL SUPPORT
Our technical support teams are available to respond to any quesons you may have. In order that we may
improve our service quality, please prepare the following elements before contacng us:
• Make sure that your server and applications are up to date, if necessary download the latest
available versions.
• Make sure that you have the serial number of your server beginning with “G6“ that you will nd:
→On the label aached to the back of the server module, beside the barcode
→ Via the administraon interface (see chapter A, paragraph 7 of this guide), by clicking “system
informaon”
Technical support:
• Tel.: 0207 660 2919
• Email: technical.inf[email protected]
• www.deltadore.co.uk

GUIDE DE CONFIGURATION TYDOM 3.0 P. 3
BEFORE GOING INTO DETAILS
This summary page outlines the main steps that you are advised to follow and verify during your inial
installaons of Lifedomus.
Each paragraph is developed in the conguraon guide and/or further expanded upon in the training
modules.
PROCEDURE
Connecon of your server module and connecon
to the administraon interface
Changing the administrator password
(chapter A;3)
Updang of the mul-protocol home automaon
server
and applicaons (chapter A ;6)
Network parameters & remote access
Installaon of Cong Studio & Design Studio
Conguraon of the installaon
on Cong Studio (chapter B)
Conguraon of the graphical aspect
on Design Studio (chapter C)
Saving the Project sengs and downloading the
back-up

P. 4 CONFIGURATION GUIDE TYDOM 3.0
A. WEB CONFIGURATION INTERFACE
❶ Network overview 05
❷ First Connecon 05
❸ Administrator password and language selecon 06
❹ System parameters 06
❺ Management of backups and restoraon 06
❻ Update 07
❼ System informaon 09
B. PROJECT SETUP: CONFIG STUDIO
❶ General presentaon 10
❷ Creang the site 12
❸ Creaon of a room 14
❹ Creaon of the X3D connector 15
❺ Creaon of the KNX connector 22
❻ Creaon of equipment 24
A) X3D Equipment 25
B) KNX Light On/O 25
C) KNX rolling shuers 26
❼ Creaon of a user 28
❽ Creaon and planning of a scenario 30
C. INSTALLATION GRAPHIC: DESIGN STUDIO
❶ Discovery: Interface automac generaon 35
❷ Customizaon 35
A) Smart Vision 37
B) Images importaon 40
C) Re-posionable widget 42
D) Painter widget and example with a On/O light 43
CONTENTS

GUIDE DE CONFIGURATION TYDOM 3.0 P. 5
❶NETWORK OVERVIEW
With your server module powered on and connected to your IT network, you can connect
directly to the administraon interface via a Web browser by entering the following address:
hps://votre.adresse.IP : 8443
TIP: for details on connecng the server module, the product packaging includes helpful instrucons in paper
format. Once connected to the Web interface of the box you can access this guide via the download link available
on the Welcome page.
The characteriscs of your network can have a signicant impact on the correct funconing of your
installaon : IP addressing, roung of ports, quality of switches, quality of network cabling, a change of ISP,
etc. are all parameters to be considered. The technical support service cannot provide assistance for network
characteriscs issues. More informaon concerning IP networks is covered in our training courses.
You are now connected to the rst conguraon interface of you new mul-protocol home automaon server.
The Welcome page also allows you to download the Lifedomus applicaons for: PC, Mac and Android.
The installaon of the applicaons Cong Studio and Design Studio necessitates the administrator rights
of your PC or MAC as well as installaon of the Adobe Air applicaon. Please note, your anvirus could also
cause the installaon to be blocked.
❷FIRST CONNECTION
During your rst connecon to a new server module you need only enter the default administrator Password:
1234.
Several conguraon menus are displayed, throughout this document parts are presented in detail. Points not
discussed in this guide are presented during our training courses.
A. WEB CONFIGURATION INTERFACE

P. 6 CONFIGURATION GUIDE TYDOM 3.0
❸ADMINISTRATOR PASSWORD AND LANGUAGE SELECTION
Dene a new administrator Password to replace the default Password 1234.
To change this Password, click on “Opons > Change Password”.
The following page is displayed:
You can now enter the new Password of your choice and click on
This Password will enable you to connect later to the Cong Studio applicaon.
The Flag buon next to “Opons” allows you to display the list of available languages.
❹SYSTEM PARAMETERS
In this tab, in the le-hand menu, you can change the name of the Lifedomus or Tydom 3.0 server. This name will
be displayed in the search for your server in the Finder, Cong Studio and Design Studio applicaons.
TIP: for example you could enter the locaon of your installaon or the name of the user.
❺MANAGEMENT OF BACKUPS AND RESTORATION
The mul-protocol home automaon server performs a weekly automac backup every Sunday night. This
backup is stored on the server module’s hard disk. Only the 3 most recent automac backups are stored.
: We recommend outsourcing the backup of your server onto a NAS or a network share for increased
security. To do this, go to the tab “Backup parameters” and and click “Add a storage server”. If
the network share does not exist or if it is not writeable, an error message will be displayed.
.

GUIDE DE CONFIGURATION TYDOM 3.0 P. 7
You can also perform backups manually. To do this, go to the tab “Backup and restoraon”
.
A backup contains the enre conguraon of your mul-protocol home automaon server, as well as images
downloaded by the user and can be transferred to any other server.
TIP : We recommend saving an external copy of the conguraon backup of your box (on your PC or on a USB
key for example).
There are 4 acons that can be carried out:
• Carry out a new complete backup.
• Carry out a new backup without the log les (smaller le size)
• Transfer a backup: download a backup from your PC or MAC onto this server (this backup will be added
to the list below).
• Reinialisaon of manufacturer parameters: this will reset the server to its original status (Password
1234).
You then have the list of backups present on the server. For each backup, you have the creaon (or download)
date, its name, size and a menu of possible acons.
The possible acons are:
• Rename the backup
• Delete the backup
• Download a copy of the backup onto your PC or Mac
• Restore the backup onto the Lifedomus server
❻UPDATE
The “Update” tab in the le-hand menu allows you to download and install the latest available update for your
Lifedomus server .

P. 8 CONFIGURATION GUIDE TYDOM 3.0
There are 2 types of update, stable versions and beta versions. By default only stable versions are indicated.
You can change to beta versions update mode via the drop-down list at the top of the page.
A reminder that beta versions are versions that are in the process of being validated (they may comprise bugs)
and allow you to test new funconalies. We recommend that you install them ONLY on test servers.
Below the “Download the update” buon are listed all the update notes of the latest available version and at the
boom of the page a link to all of the update notes since the rst version of Lifedomus.
To launch the update procedure click on "Download the update": the download then begins.
When the downloading has completed, the page is refreshed and a buon “Install the update” is displayed, click
on this buon to launch the installaon procedure
During the installaon of the update, the mul-protocol home automaon server will restart and will not be
operaonal during this period. It is important to to avoid powering-o during the installaon.
The update process rst creates a backup of your installaon. The older the server, the longer the backup process
will take.
The server update also comprises the update of Cong Studio and Design Studio applicaons for PC and Mac
during the opening of these applicaons following the upgrade.
It is essenal to allow the update to be completed, however long is required.

GUIDE DE CONFIGURATION TYDOM 3.0 P. 9
Some updates are longer, following the installaon of soware components or restructuring. The update notes
are available on this page to inform you of correcves and improvements provided.
An update can not be reversed. If you switch into beta update mode and you encounter a problem, contact the
technical support team.
❼SYSTEM INFORMATION
In this tab you will nd basic informaon on your server:
• Soware version
• Serial number
• Public IP address
• Available disk space
• UUID of your server
Do not forget to check the soware version and note the serial number before contacng technical support.

P.10 CONFIGURATION GUIDE TYDOM 3.0
❶GENERAL PRESENTATION
To congure an installaon, you will use the Cong Studio applicaon that you have previously downloaded from
the Web conguraon interface (see previous chapter). This applicaon is available on Windows PC and MAC.
This applicaon allows you to dene, inially, using connectors, how the Lifedomus or TYDOM 3.0 server will
communicate with the products installed. Then, in a second stage, you will create the elements used to control
the installaon.
A) CONNECTION IN A LOCAL NETWORK
If a single mul-protocol home automaon server is present on the local network, Cong Studio connects to it
and directly proposes the idencaon page.
The Password is the same as that used for accessing the Web conguraon interface.
Enter the Password to access conguraon, then validate by clicking on the blue hand.
REMINDER : the default Password is 1234. Remember to modify it to secure access to your installaon.
If several mul-protocol home automaon servers are available on the same network, the applicaon will display
a page with the list of these server modules. Select the one you want using the mouse pointer and click on it. You
are directed to the idencaon page where you will enter your Password.
B. INSTALLATION SETUP: CONFIG STUDIO

GUIDE DE CONFIGURATION TYDOM 3.0 P. 11
If your server is not visible in the nder, you will have to manually enter its IP address.
TIP: the pin allows you to bookmark your server.
The server appears in the list.
To Delete a bookmarked server, a press & hold will cause a thrash can to be displayed.
EXPLANATION OF ICONS:
Display/Hide all the servers to which the PC or the MAC is connected for EASYLIFE access (remote
Access).
Parameters
Full screen

P.12 CONFIGURATION GUIDE TYDOM 3.0
During the 1st connecon the secured connecon must be validated.
B) REMOTE CONNECTION
If you are already connected to the mul-protocol home automaon server with your PC click on then click
on the server that appears in the list.
In the case where you are never connected locally, enter the public IP address and the ports (which are by default
51100 and 51101).
When idened, you arrive at a page that proposes two accesses, one to the site and another to the connectors.
We will begin with the connectors.
HELP: CONFIG STUDIO PROCEDURE
❷CREATING THE SITE
The “site” corresponds to your installaon: house, apartment, oce, etc.
In the “Cong Studio” welcome menu click on the “sites” thumbnail.
If you have not yet created anything, as for the connectors that we will deal with later, you will nd a list on the le
of possible types of sites and you can create one by clicking on the + buon.
TIP: these are just models of proposed sites, the names, photos and other parameters are completely customizable
at a later stage.
Aer pressing on the “+” buon, a thumbnail is displayed:

GUIDE DE CONFIGURATION TYDOM 3.0 P. 13
The pencil icon enables you to edit the parameters and the thrash can icon allows you to delete the site.
The icon: enables a copy of your installaon to be exported in CSV le format.
The icon: enables access to site elements edion and to begin conguraon.
Once the site has been congured, you arrive at the site menu by clicking the eye icon:
Once the site is created, a click from the welcome menu sends you by default directly into the site conguraon
menu and no longer into this menu. It can be accessed by clicking on the thumbnail in the rest of the applicaon:
The site parameters are its name, descripon and image (see chapter C, 2,b ), as well as the input of the electricity
tari that enables in the rest of the applicaon to make an esmaon of equipment consumpon costs.

P.14 CONFIGURATION GUIDE TYDOM 3.0
You can enter the currency and the KWh price. You can also manage the peak hours/o-peak hours modulaon
by specifying the mes and the price during o-peak hours:
❸CREATION OF A ROOM
A room is a grouping of items of equipment. This noon is signicant as the division of control applicaons into
dierent secons is by default made according to the rooms of your installaon.
On the site dashboard, click on the “Rooms” thumbnail.
There is a library of rooms with a default image on the le, click on the + buon to create a room. Each element
in this list can be selected to create a lter in the list of created rooms.
A thumbnail then appears on the right.
The “thrash can” icon enables the room to be deleted and the “pencil” icon enables the parameters to be edited.
If you delete a room that contains items of equipment, the equipment must be placed in another room in order to
be managed on a Lifedomus or Tydom HD applicaon.
Next there are 2 duplicaon icons:
• : duplicaon of the room with all of the associated equipment. Useful for example, if
you are conguring a hotel installaon where each room contains the same items of
equipment. Please note, you must congure the properes of new items of equipment.
• : duplicaon of the room alone
In the parameters of the room, the name, descripon and image can all be changed (see chapter C, 2,b). The list of
items of equipment present in this room are displayed below.
On the boom le is a ck box “Synchronise the Design Studio installaons” that allows you to synchronise the
operaons of: “creaon”, “deleon” or “modicaon of a room, between Cong Studio and Design Studio.

GUIDE DE CONFIGURATION TYDOM 3.0 P. 15
❹CREATION OF THE X3D CONNECTOR
In the connector secon, open the “Delta Dore X3D” protocol tab.
There are 2 X3D connectors available, a USB connector (USB key provided with the server) or an IP connector
that corresponds to a Tydom 1.0 gateway. In both cases the conguraon and funconalies will be idencal.
Click on the “+” next to the intended connector.
A) USB KEY
In the case of a USB connector, it is necessary to go into the properes of the connector and select the USB port
of the server that the USB key is connected to.

P.16 CONFIGURATION GUIDE TYDOM 3.0
Click on Save, the connector will start automacally.
Conguraon OK :
TIP : the symbol AUTO signies that if the connector disconnects, it will reconnect automacally.
B) TYDOM 1.0
In the case of a Tydom 1.0 gateway, it is necessary to go into the properes of the connector, enter the 6 last
characters of the MAC address, the IP address and nally your Password.
Click on Save, the connector will start automacally.
If you need to use several Tydom 1.0 gateways, then you must create as many connectors as there are gateways.

GUIDE DE CONFIGURATION TYDOM 3.0 P. 17
C) CONFIGURATION:
To access the conguraon of modules, click on the icon . This is displayed only if the connector is powered
on.
This screen is divided into 2 parts: on the le is the list of X3D “Roles” and on the right the corresponding X3D
modules.
There are 2 types of funconing for these acvies: mesh network or direct connecon.
D) COMPATIBILITY
E) MESH NETWORK
The mesh network is a grouping of X3D modules to assure communicaon with each other. It is categorised per
acvity and can comprise a maximum of 16 modules. If a module of a dierent acvity is included in a network, it
will be considered as an X3D frame repeater.
This concerns the roles of lighng, rolling shuers, heang and other automaon systems.
: You can create up to 12 networks per gateway.
To create a network, click on the “+” associated with a Role.

P.18 CONFIGURATION GUIDE TYDOM 3.0
Now in the middle you have a buon enabling the peering of modules with your gateway. First you must associate
one or more X3D products (refer to the product documentaon to establish an associaon). When completed,
click on this buon. A message requests that you wait during the discovery process.
Once discovery has terminated, this window expands with the list of discovered modules
.
The specics of the acvity will be displayed (e.g. light-bulb or dimmer). Click on ‘Create equipment’ in order to
congure equipment and make it controllable using your applicaon.
You can now name the 1st module in the list or make it blink to idenfy it physically by clicking on the “magnifying
glass” icon.

GUIDE DE CONFIGURATION TYDOM 3.0 P. 19
Click on “Create equipment” to launch the equipment creaon wizard. You can associate the module with an
equipment type on your server, this will give it a dierent graphic appearance on your control applicaon. This
can then be customized according to your interface requirements.
You can then associate it with a room. Click “Validate” and you will be automacally sent to the modules discovery
page.

P.20 CONFIGURATION GUIDE TYDOM 3.0
You can then go onto the next object and create all of your equipment in this way.
Once this step has been completed, you can view all of the modules in the form of a list of thumbnails.
Each thumbnail comprises several icons:
• enables the product to be idened (blinking for a light, rising and descending for a shuer, ashing
of the product LED for a heang system).
• enables the product to be placed in associaon logically rather than physically as previously, in
order to associate for example a switch with your light.
• enables the module conguraon page to be opened to modify the name or create an item of
equipment for this module.
• enables the status of “connected” or “not connected” of the module to be known, with respect to
the mul-protocol home automaon server. If an exclamaon mark is present, this means that
the module is not controlled by the server, because it is not associated with an item of equipment.
• enables the module to be deleted from the network. It the deleon does not work, a message
is displayed inving you to force the deleon. This means that the product did not receive the
deleon request. If you decide to force the deleon, the gateway will no longer recognise the
point, but the module will connue to recognise the gateway, leaving a used idener on the
product for no reason.
If the thumbnail is red, this means that the communicaon is not funconning correctly with the product.
If you want to add an addional product to this network, below you have the possibility of relaunching a discovery
process on the network.
Other manuals for TYDOM 3.0
1
Table of contents
Other DELTA DORE Home Automation manuals
