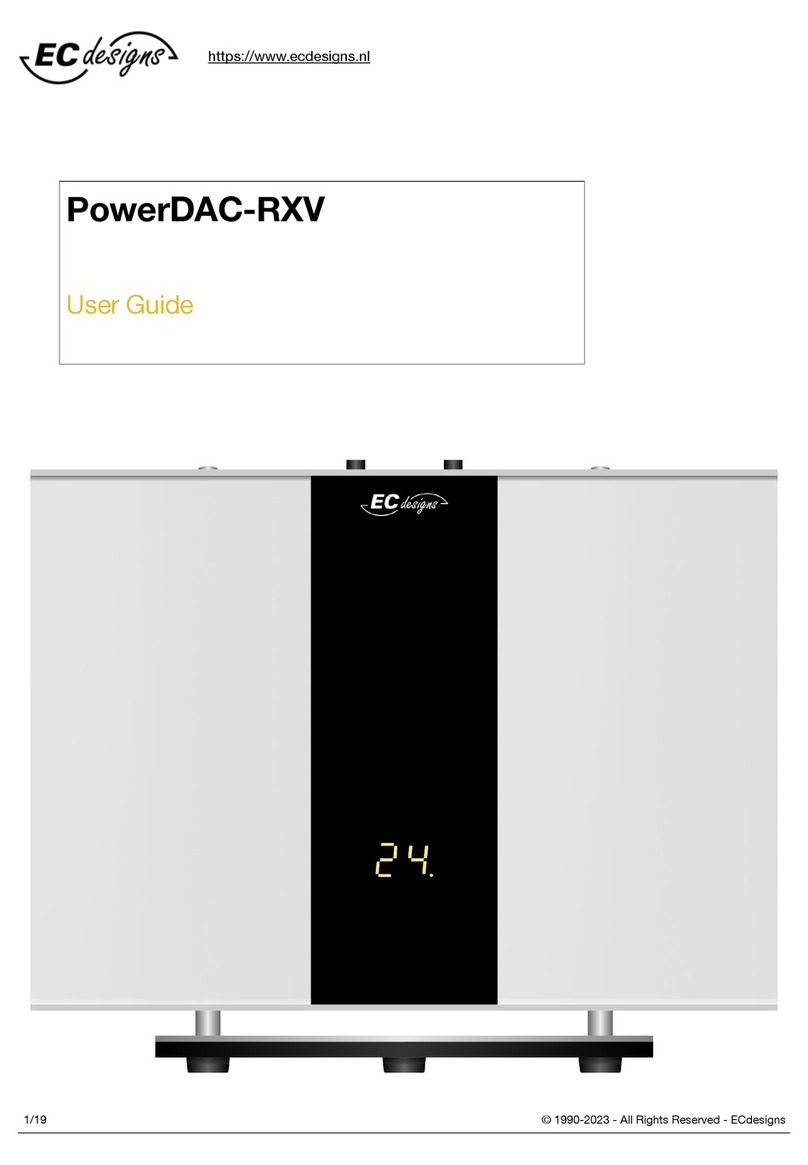
ECdesigns PowerDAC-SX User manual

© 1990-2023 - All Rights Reserved - ECdesigns!
https://www.ecdesigns.nl
/!2 19
Introduction
The PowerDAC-SX is a discrete multi-bit, high power bridge mode DA converter without
-any- amplifiers or buffer circuits in the signal path from digital source to speaker.
PowerDAC-SX has integrated lossless volume control.!
Single programmable linear power supply, bit shifts, resistor attenuator and switch matrix
are used to generate the output signal.!
The PowerDAC-SX is intended for directly driving amplifiers and headphones.!
Highlights
•Custom DAPI receiver offers high source immunity!
•Toslink input!
•Bit-perfect tester built-in!
•IR remote control included!
•Local volume control keys integrated in the display, press left/right!
•Connect speakers using 4mm speaker sockets, plus is indicated!
•Firmware upgradable!

© 1990-2023 - All Rights Reserved - ECdesigns!
https://www.ecdesigns.nl
/!3 19
Block diagram

© 1990-2023 - All Rights Reserved - ECdesigns!
https://www.ecdesigns.nl
/!4 19
Battery is used in the examples above to simplify the theory of operation, in reality these are
programmable linear power supplies as shown in block diagram above. We have: speaker output, speaker
polarity switches (left), two equal resistors, two electronic switches and a battery. Batteries are a short
circuit for AC signals (audio signals). The resistors attenuate the battery voltage in order to generate an
analogue output signal.
A/D) Both switches to minimum, zero output voltage regardless of speaker polarity switch.
B/E) Battery voltage is divided in half by two equal resistors, speaker polarity switch determines output
signal polarity, attenuated output voltage.
C/F) Both resistors connect to plus, speaker polarity switch determines output polarity, maximum output
voltage.
In all 3 cases we have two resistors with value R in parallel and batteries are short circuit for AC. So
output impedance in all examples remains constant 0.5R regardless of switch position.
By changing the electronic switch settings we can have no voltage, half positive, full positive, half negative
and full negative output voltage.
In the practical converter we have one converter that is used in 4 different ways for generating the
balanced output signal (bridge matrix system).
This ensures that only the lowest bits have to change state around the zero crossing as the converter
starts at minimum and progresses up in small steps, not in the middle like with most multi-bit DACs.
The lower bits are switched with R2R, the upper bits are split up in sub bits (fractal system). This helps to
further lower output impedance to 2 Ohms, increase accuracy and minimise glitches.
The end result is an accurate and clean high power multi-bit bridge DA converter with low enough output
impedance to directly drive speakers This way all lossy analogue circuits and related unavoidable
degrading, typically required for conventional DACs and connected (pre)amplifier can be avoided.

© 1990-2023 - All Rights Reserved - ECdesigns!
https://www.ecdesigns.nl
/!5 19
PowerDAC-SX
PAGE 1
DAC type
2 x 28 bit Fractal-15 bridge matrix, discrete, switch & resistor-based multi-bit high power
bridge converters
Digital input
1 x Toslink 16/24 bit: 44.1 kHz / 48 kHz / 88.2 kHz / 96 kHz / 176.4 kHz / 192 kHz
Power Supply
Programmable internal linear
Standard 230V (option: 115V)
Power Consumption
Approx. 120 Watt peak power, approx. 7W with low signal
Output impedance
2 Ohms for balanced output, regardless of volume setting
Volume control
Volume is controlled by a combination of supply voltage programming (1.5 dB steps) and
bit shifting (6dB steps). This way we can realise lossless volume control with no extra
components in the signal path and with 36dB range.!
This integrated volume control enables us to directly drive Speakers
Output voltage
179 mV rms ... 11.35 V rms
Output
2 x balanced speaker output
LED display
Volume 0 … 24, -= stand-by, P= bit perfect test passed.
PowerDAC-SX and
headphones
The PowerDAC-SX can directly drive balanced headphones or headphones with common
ground using suitable balanced to single-ended transformers
Bandwidth
Theoretically 100 MHz (based on switching speed)
Distortion
< 0.001% (0dB)
Technical specifications

© 1990-2023 - All Rights Reserved - ECdesigns!
https://www.ecdesigns.nl
/!6 19
PowerDAC-SX
PAGE 2
POWER
Output
Voltage (rms)
shifts
attenuation
(dB)
Output
Power (rms)
Output
Power (rms)
Output
Power (rms)
-
2 Ohms
4 Ohms
8 Ohms
0
179 mV
4
-36 dB
4 mW
3.6 mW
2.6 mW
1
213 mV
4
-34.5 dB
5.6 mW
5 mW
3.6 mW
2
253 mV
4
-33 dB
8 mW
7 mW
5.1 mW
3
301 mV
4
-31.5 dB
11.3 mW
10 mW
7.2 mW
4
358 mV
3
-30 dB
16 mW
14 mW
10 mW
5
425 mV
3
-28.5 dB
22.5 mW
20 mW
14 mW
6
505 mV
3
-27 dB
32 mW
28 mW
20 mW
7
600 mV
3
-25.5 dB
45 mW
40 mW
29 mW
8
713 mV
2
-24 dB
63 mW
56 mW
41 mW
9
848 mV
2
-22.5 dB
90 mW
80 mW
57 mW
10
1.01 V
2
-21 dB
127 mW
113 mW
82 mW
11
1.2 V
2
-19.5 dB
180 mW
160 mW
115 mW
12
1.42 V
1
-18 dB
252 mW
224 mW
161 mW
13
1.69 V
1
-16.5 dB
375 mW
317 mW
228 mW
14
2.01 V
1
-15 dB
505 mW
449 mW
323 mW
15
2.39 V
1
-13.5 dB
714 mW
635 mW
457 mW
16
2.84 V
0
-12 dB
1 W
896 mW
645 mW
17
3.36 V
0
-10.5 dB
1.41 W
1.25 W
903 mW
18
4.01 V
0
-9 dB
2.01 W
1.79 W
1.29 W
19
4.77 V
0
-7.5 dB
2.84 W
2.53 W
1.82 W
20
5.67 V
0
-6 dB
4 W
3.57 W
2.57 W
21
6.73 V
0
-4.5 dB
5.7 W
5.03 W
3.62 W
22
8.01 V
0
-3 dB
8 W
7.13 W
5.13 W
23
9.51 V
0
-1.5 dB
11.3 W
10W
7.6 W
24
11.31 V
0
0 dB
16 W
14 W
10 W
Technical specifications

© 1990-2023 - All Rights Reserved - ECdesigns!
https://www.ecdesigns.nl
/!7 19
PowerDAC-SX
PAGE 3
Integrated bit-
perfect tester
With muting on (display:"-") and using supplied bit-perfect test wav files, the display
will show "P" when test wav file is received by the PowerDAC-SX without
modification.
Auto-mute
When no Toslink data is received the PowerDAC-SX will switch to muting after
about 15 minutes. When Toslink data is received again the previous volume setting
will be restored.
DAPI firmware
update!
The DAPI firmware can be updated using the USB socket and jumper setting
positions for firmware update.
Dimensions
Width: 40cm, Height: 5,5cm, depth: 31cm
Weight
6 kg
Technical specifications

© 1990-2023 - All Rights Reserved - ECdesigns!
https://www.ecdesigns.nl
/!8 19
Bit-perfect test
It is essential to test if the Toslink source that is connected to the PowerDAC-SX is setup to pass music without
any alterations. Alterations of original music data could cause serious SQ degradation !!
WHEN SOURCE IS NOT BIT-PERFECT PLAYBACK THROUGH POWERDAC AND OTHER DACS WILL NOT
REPRODUCE THE MUSIC AS INTENDED !!
Alteration to original (CD) recordings could have numerous causes e.g.!
•Software volume control in streamer/player/pc music application!
•Equalisation in streamer/player/pc music application!
•Sample-rate conversion in streamer/player/pc music application!
•Compression in streamer/player/pc music application!
•DSP alterations in streamer/player/pc music application!
•Re-clocker devices in digital signal path to PowerDAC-SX!
•Isolators in digital signal path to PowerDAC-SX!
•Other devices in digital signal path to PowerDAC-SX!
•Use of MQA (test) files converted to MQA!
•Streaming services you can’t test but they might do any of the above.!
To make sure that music data is received by the PowerDAC-SX without alterations you can use the built-in !
bit-perfect tester in the PowerDAC-SX.!
For this we have 4 wav test files (44.1kHz / 48kHz / 88.2kHz / 96kHz*) that can be played on your !
source (streamer/player/pc music application) to check if the music data arrives in the PowerDAC-SX !
without alteration.!
This can only be tested with the PowerDAC-SX in the muting volume setting (“-“ on display).
You have to wait until the streaming on PowerDAC-SX stops (the decimal point “.” is off)
before (re)trying (next) track !!
Make sure that sample rate is correctly set before playback (in streamer/player/pc music application).!
Now play the track, when track play is finished a “P” should be displayed, if not then playback is NOT bit-perfect.!
The “P” will become “-“ after stream stops (“.” is off).!
You will have to re-run bit-perfect test if anything (any setting) is changed in your steamer/player/pc music
application.!
Download and unzip the bit-perfect test wav files using this link: pd-bitperfect-wav-files.zip!

© 1990-2023 - All Rights Reserved - ECdesigns!
https://www.ecdesigns.nl
/!9 19
Jumper settings
Disconnect the mains power cable from the PowerDAC-SX !
In order to access the jumpers, remove the PowerDAC-SX TOP cover by removing 8 x 2mm hex bolts.!
Carefully remove or place jumpers using tweezers.!
WARNING! Make sure to re-install the jumper on the far right after programming !
When replacing the top cover, make sure rear and front panels lock into the top cover slots correctly before
tightening the 8 hex bolts.!

© 1990-2023 - All Rights Reserved - ECdesigns!
https://www.ecdesigns.nl
/!10 19
Firmware update
To update the PowerDAC-SX firmware you need to download the STM32CubeProgrammer.!
You need to ACCEPT Licence Agreement (click button) and on the next screen you need to fill-in your E-mail
address to be able to download STM Cube programmer (you need to use confirm via email sent to you before
you can download the STM Cube-programmer).!
The email sent to you contains the Download now button to start the download.!
Goto link below to download the STM Cube programmer (Win/Lin/Mac):!
https://www.st.com/en/development-tools/stm32cubeprog.html#get-software!
Download and install STM32CubeProgrammer!
Disconnect mains power cable from the PowerDAC-SX !
Use tweezers to set jumpers to PROGRAM configuration (see Jumper settings on previous page).!
Download and unzip latest pdrs-firmware.zip!
Now connect a USB cable from the PowerDAC-SX to your computer and start the STM32CubeProgrammer.!

© 1990-2023 - All Rights Reserved - ECdesigns!
https://www.ecdesigns.nl
/!11 19
Screenshots here from
STM32CubeProgrammer
On the right hand side of the screen you should see:!
Port: USB1, if not then try the refresh button on the right
side of the Port dropdown button.!
If not working check jumper settings and USB cable
connection.!
Now press the Connect button.!
Then use the Open file button to load the firmware file.!
Click the Download button to load firmware file in the
PowerDAC-SX.!
After message: File download complete!
Press the OK button on message window.!
Finally click on the Disconnect button to finish session.!
You can then close the STM32CubeProgrammer.!
Remove the USB cable between PowerDAC-SX and PC.!
Set jumpers to the normal positions.!
After power-up PowerDAC-SX the new firmware is used.

© 1990-2023 - All Rights Reserved - ECdesigns!
https://www.ecdesigns.nl
/!12 19
Alternate firmware update
If you don't want to register and download STM32CubeProgrammer then you can also use the dfu-util
command-line utility to download new firmware into the PowerDAC-SX.!
For this you will have to use the command-line to update firmware.!
Download dfu-util here: http://dfu-util.sourceforge.net/releases/dfu-util-0.11-binaries.tar.xz!
After unpacking open shell/command window and change directory to “dfu-util-0.11-binaries“!
Depending on your operating system change directory to the directory containing the dfu-util executable for
your operating system.!
Disconnect the mains power cable from the PowerDAC-SX !
Us tweezers to set jumpers to PROGRAM configuration (see Jumper settings on page 9).!
Now connect a USB cable from the PowerDAC-SX to your computer.!
Now copy the firmware file (see page 10) e.g. PDRS140.bin into the same directory containing the dfu-util
executable.!
From this directory execute:$dfu-util -a 0 --dfuse-address 0x08000000 -D PDRS140.bin!
If this completes without errors (File downloaded successfully) your firmware should be updated.!
Disconnect the USB cable from PowerDAC-SX and set jumpers back to their original position.
Close the housing !
After power-up the new firmware is used.!

© 1990-2023 - All Rights Reserved - ECdesigns!
https://www.ecdesigns.nl
/!13 19
IR Remote Control
The IR Remote Control is an optional product that can be!
used with the PowerDAC-SX.!
The IR Remote Control can be used to:!
•Increase volume!
•Decrease volume!
•Mute/Un-mute!
The IR Remote Control can be recharged with the !
included USB mini cable.!
Connect to a 5V source like PC or 5V USB charger to charge.!

© 1990-2023 - All Rights Reserved - ECdesigns!
https://www.ecdesigns.nl
/!14 19
UT96
The UT96 is an optional USB to Toslink converter that!
can be used with the PowerDAC-SX.!
It supports USB full-speed:!
44.1kHz / 48kHz / 88.2kHz / 96kHz!
Use standard USB cable to connect to PC/Host/Streamer.!
UT192 (Optical + ElectroTos output)
The UT192 is an optional high-speed USB to Toslink converter that!
can be used with the PowerDAC-SX or other Toslink DACs.!
It supports USB high-speed:!
44.1kHz / 48kHz / 88.2kHz / 96kHz / 176.4kHz / 192kHz !
The UT192 is based on the XMOS processor.!
Use high-speed USB cable to connect to PC/Host/Streamer.!
The UT192 has both optical Toslink output + ElectroTos output.!
We found that using highest sample rates some optical Toslink cables would not work.!
Depending on the quality of the Toslink cable, optical reflections can prevent reliable (bit-perfect) output !!
Therefore we also fitted the UT192 with an ElectroTos output.!
ElectroTos (using standard S/PDIF output) uses an electrical cable with a LED on the other end.!
This eliminates optical reflections but can still use standard Toslink input.!
So the UT192 can also be used with other DACs that use Toslink.!
A 1 mtr. ElectroTos cable ET100 is included with UT192.!
An 2 mtr. ElectroTos cable ET200 option is also available in webshop.!
An 4 mtr. ElectroTos cable ET400 option is also available in webshop.!

© 1990-2023 - All Rights Reserved - ECdesigns!
https://www.ecdesigns.nl
/!15 19
ElectroTos
“New” digital audio interface!
Backwards compatible with Toslink interface and S/PDIF protocol. Our “new” electro-optical digital audio
interface eliminates -unwanted- jitter in digital audio source, digital audio interlink, and all DAC circuits even
when significant crosstalk is present.!
This new digital audio interface maintains low noise and low jitter. It can be used to improve the sound quality of
all existing Toslink DACs. The transmitter side (digital audio source) is connected to a coaxial cable through a
RCA connector. At the end of the coaxial cable there is an optical connector compatible with the Toslink input
on the DAC. So this is a combination of an electrical interface (low jitter) and an optical interface (low noise,
elimination of ground loops). The required signal level is higher compared to existing coaxial S/PDIF interlinks,
so a suitable translator or source are required. We offer a USB to ElectroTos translator that outputs ElectroTos.
ElectroTos can operate with standard S/PDIF protocol (compatible with existing DACs)!
This measurement compares a high quality Toslink
interlink (top) and the “new” ElectroTos interlink
(bottom). The signal is measured inside the DAC at the
Toslink optical receiver chip output. sample rate equals
96 KHz, standard S/PDIF protocol.!
The Toslink optical fibre interlink causes time distortion
(jitter). This is visible as unsharp and not clearly
defined vertical green lines (X-shape on this picture).
This Toslink jitter problem is well known.!
The new ElectroTos interlink offers significantly lower
time distortion (jitter). This is visible as sharp, clearly
defined vertical lines (X-shape in this picture). Good
coaxial S/PDIF interfaces can offer similar low jitter, but
fail to block RF ground loop noise and very large
bandwidth noise in general.!
ElectroTos offers low jitter, blocks RF ground loop
noise and offers a clean, band-limited output signal.!
Below you can see two oscilloscope screen captures

© 1990-2023 - All Rights Reserved - ECdesigns!
https://www.ecdesigns.nl
/!16 19
Volume control and Inputs
The DAPI controller has 4 S/PDIF inputs, so why not use all of them ?!
The whole point of the PowerDAC is to achieve Digital to Analog conversion with minimal noise input and the
lowest possible distortion without -any- amplifiers or buffer circuits in the signal path.!
We initially wanted to use all of the 4 S/PDIF inputs but by doing so we would let up-to 4 S/PDIF sources
into the DAPI controller simultaneously. Now the not used inputs that contain a live S/PDIF stream will inject
noise into the DAPI board even if this input is not selected.!
The only solution to use multiple S/PDIF inputs without causing extra noise injection into the PowerDAC is to
move them outside the PowerDAC.!
One possible solution is using an external input switch like the one below.!
It has 4 S/PDIF inputs and includes a remote control for selecting the active input.!
Digital Audio-Switch!
!
The PowerDAC Volume control consists of data bit-shifts combined with programmable voltage levels.!
The smallest volume change we can hear is about 3 dB, when the received audio data is shifted by one bit,
this corresponds to a 6 dB attenuation per shift.!
We use a combination of programmable voltages + bit shifts (max 4) to change the volume.!
Bit shifts only drop bits from the 4 least significant bits.!
We use 9 voltages and up to 4 bit shifts in the PowerDAC-SX giving a total of 25, 1.5dB volume steps.!
!

© 1990-2023 - All Rights Reserved - ECdesigns!
https://www.ecdesigns.nl
/!17 19
piCorePlayer
If you are looking for simple music player for stand-alone or even multi-room to use with the PowerDAC-SX
checkout piCorePlayer.!
When run from an RPI4 you could connect your music to the RPI4 directly by USB or to NAS via network.!
By using the JustBoom Digi HAT or the HifiBerry Digi(+) HAT you can connect the PowerDAC-SX !
using a Toslink cable.!
It supports 44.1kHz / 48kHz / 88.2kHz / 96kHz / 176.4kHz / 192kHz.!
Be sure to set Audio Volume Control to fixed at 100%, set Audio Crossfade to No, Volume gain to None.!
Then install “Material Skin” in LMS and choose in LMS pages under “Web Interface” and you will have a very
nice user interface using any browser on any PC in your network.!
Use Deezer and Tidal.!
Through plugins you can also use Spotify and Qobuz!
For more info see:!
https://www.picoreplayer.org/landingzone_option3.html!

© 1990-2023 - All Rights Reserved - ECdesigns!
https://www.ecdesigns.nl
/!18 19
Software that is able to produce bit perfect
output to PowerDAC:
•Foobar (with correct settings and special driver on Windows)!
•Foobar (with correct settings on MacOS)!
•Vox (with correct settings on MacOS)!
•Swinsian (with volume push to max after program start on MacOS)!
•VLC (with volume set to 100% on MacOS)!
•VLC (with volume set to 100% and special driver on Windows)!
•
If you use playback software with our PowerDACs and you have successfully run bit-perfect test (44.1, 48,
88.2 and 96) please let us know so we can update bit-perfect player software here.!

© 1990-2023 - All Rights Reserved - ECdesigns!
https://www.ecdesigns.nl
/!19 19
Hardware player that is able to produce bit perfect !
output to PowerDAC:
•piCore player (with correct settings and volume 100% on RPI)!
•
If you use playback hardware with our PowerDACs and you have successfully run bit-perfect test (44.1, 48,
88.2 and 96) please let us know so we can update bit-perfect player hardware here.!
Table of contents
Other ECdesigns Media Converter manuals

