ECG AP1 Compact Pearl User manual

AP1 Compact Pearl
Always read the safety&use instructions carefully before using your appliance for the rst time. The user´smanual must be always included. Bitte lesen Sie vor der Inbetriebnahme des Produktes diese Anleitung und
die darin enthaltenen Sicherheitshinweise aufmerksam durch. Die Bedienungsanleitung muss dem Gerät immer beigelegt sein. Před uvedením výrobku do provozu si důkladně pročtěte tento návod abezpečnostní
pokyny, které jsou v tomto návodu obsaženy. Návod musí být vždy přiložen kpřístroji. Enne seadme esmakordset kasutamist lugege ohutus- ja kasutusjuhised alati hoolikalt läbi. Kasutusjuhend peab alati kaasas
olema. Uvijek pročitajte sigurnosne upute iupute za uporabu prije prvog korištenja vašeg uređaja. Upute moraju uvijek biti priložene. Pirms ierīces pirmās lietošanas reizes vienmēr rūpīgi izlasiet drošības un
lietošanas norādījumus. Rokasgrāmata vienmēr jāpievieno ierīcei. Prieš naudodamiesi prietaisu pirmąjį kartą, visuomet atidžiai perskaitykite saugos ir naudojimo instrukcijas. Kartu su gaminiu visada privalo
būti jo naudotojo vadovas. Atermék használatba vétele előtt gyelmesen olvassa el ezt a használati útmutatót és az útmutatóban található biztonsági rendelkezéseket. Ahasználati útmutatót tartsa a készülék
közelében. Секогаш внимателно прочитајте ги упатствата за безбедност и употреба внимателно пред да го користите апаратот за прв пат. Упатството за корисникот мора да биде секогаш вклучено. Przed
pierwszym użyciem urządzenia prosimy ouważne zapoznanie się zinstrukcjami dotyczącymi bezpieczeństwa iużytkowania. Instrukcja obsługi musi być zawsze dołączona. Citiți întotdeauna instrucțiunile de siguranță
și utilizare cu atenție înainte de a utiliza aparatul pentru prima dată. Manualul utilizatorului trebuie să e întotdeauna inclus. Pred uvedením výrobku do prevádzky si dôkladne prečítajte tento návod abezpečnostné
pokyny, ktoré sú vtomto návode obsiahnuté. Návod musí byť vždy priložený kprístroju.
Pred vklopom izdelka temeljito preberite ta navodila in varnostne napotke, ki so navedeni vteh navodilih. Navodila morajo
biti vedno priložena knapravi.
Uvek pažljivo pročitajte uputstva za sigurnost iupotrebu pre upotrebe uređaja po prvi put. Korisničko uputstvo mora uvek biti priloženo.
Πριν χρησιμοποιήσετε τη συσκευή
σας για πρώτη φορά, διαβάστε οπωσδήποτε τις οδηγίες ασφάλειας και χρήσης. Το εγχειρίδιο χρήστη πρέπει να περιλαμβάνεται πάντα στη συσκευασία.
Завжди уважно читайте інструкції з техніки безпеки та
використання перед першим використанням пристрою. Посібник користувача повинен бути завжди включений.
AIR PURIFIER
INSTRUCTION MANUAL ПРОЧИСТУВАЧ НА ВОЗДУХ
УПАТСТВО ЗА КОРИСТЕЊЕ
LUFTREINIGER
BEDIENUNGSANLEITUNG OCZYSZCZACZ POWIETRZA
INSTRUKCJA OBSŁUGI
ČISTIČKA VZDUCHU
NÁVOD K OBSLUZE PURIFICATOR DE AER
INSTRUCȚIUNI DE UTILIZARE
ÕHUPUHASTI
KASUTUSJUHEND ČISTIČKA VZDUCHU
NÁVOD NA OBSLUHU
PROČIŠĆIVAČ ZRAKA
UPUTE ZA UPORABU ČISTILEC ZRAKA
NAVODILA
GAISA ATTĪRĪTĀJS
ROKASGRĀMATA PROČIŠĆIVAČ VAZDUHA
UPUTSTVO ZA UPOTREBU
ORO VALYTUVAS
INSTRUKCIJŲ VADOVAS ΚΑΘΑΡΙΣΤΉΣ ΑΈΡΑ
ΕΓΧΕΙΡΙΔΙΟ ΟΔΗΓΙΩΝ
LÉGTISZTÍTÓ
HASZNÁLATI ÚTMUTATÓ ОЧИЩУВАЧ ПОВІТРЯ
ІНСТРУКЦІЯ З ЕКСПЛУАТАЦІЇ
English
Deutsch
Čeština
Eesti keel
Hrvatski
Bosanski
Latviešu valoda
Lietuvių kalba
Magyar
Македонски
Polski
Română
Slovenčina
Slovenščina
Srpski
Crnogorski
Ελληνικά
Українська мова

DESCRIPTION / BESCHREIBUNG / POPIS / KIRJELDUS / OPIS / APRAKSTS /
APRAŠYMAS / AKÉSZÜLÉK RÉSZEI / ОПИС / OPIS / DESCRIERE / POPIS / OPIS /
OPIS / ΠΕΡΙΓΡΑΦΗ / ОПИС
A
B
C
D
F
E
English
1. Air purier body
2. HEPA lter
3. Aroma sponges
4. Bottom cover
5. Touch control panel
6. Air quality sensor
Deutsch
1. Körper des Luftreinigers
2. HEPA Filter
3. Aroma-Schwamm
4. Untere Abdeckung
5. Berührungsdisplay
6. Sensor für Luftqualität
Čeština
1. Tělo čističky vzduchu
2. HEPA ltr
3. Aroma houbičky
4. Spodní kryt
5. Dotykový ovládací panel
6. Čidlo kvality vzduchu
Eesti keel
1. Õhupuhasti korpus
2. HEPA lter
3. Lõhnaaine käsnad
4. Alumine kate
5. Puutetundlik juhtpaneel
6. Õhukvaliteedi andur
Hrvatski/Bosanski
1. Tijelo pročišćivača zraka
2. HEPA ltar
3. Aroma spužve
4. Donji poklopac
5. Senzorska upravljačka ploča
6. Senzor kvalitete zraka
Latviešu valoda
1. Gaisa attīrītāja korpuss
2. HEPA ltrs
3. Aromāta sūkļi
4. Apakšējais vāks
5. Skārienvadības panelis
6. Gaisa kvalitātes sensors
Lietuvių kalba
1. Oro valytuvas
2. HEPA ltras
3. Aromatinės kempinėlės
4. Apatinis dangtelis
5. Jutiklinis valdymo skydelis
6. Oro kokybės jutiklis
Magyar
1. Légtisztító ház
2. HEPA szűrő
3. Aroma szivacs
4. Alsó fedél
5. Érintős működtető panel
6. Levegő minőség érzékelő
Македонски
1. Тело на прочистувач на
воздух
2. ХЕПА филтер
3. Сунѓери за арома
4. Долен капак
5. Допир контролен панел
6. Сензор за квалитет на
воздухот

Polski
1. Korpus oczyszczacza powietrza
2. Filtr HEPA
3. Gąbki aromatyczne
4. Pokrywa dolna
5. Dotykowy panel sterowania
6. Czujnik jakości powietrza
Română
1. Corpul puricatorului de aer
2. Filtru HEPA
3. Bureți aromatici
4. Capac inferior
5. Panou de control tactil
6. Senzor pentru calitatea aerului
Slovenčina
1. Telo čističky vzduchu
2. HEPA lter
3. Aróma hubky
4. Spodný kryt
5. Dotykový ovládací panel
6. Snímač kvality vzduchu
Slovenščina
1. Telo čistilca zraka
2. HEPA-lter
3. Dišavne gobice
4. Spodnji pokrov
5. Upravljalna plošča na dotik
6. Senzor kakovosti zraka
Srpski/Crnogorski
1. Telo pročišćivača vazduha
2. HEPA ltar
3. Aroma sunđeri
4. Donji poklopac
5. Senzorska upravljačka ploča
6. Senzor kvaliteta vazduha
Ελληνικά
1. Σώμα καθαριστή αέρα
2. Φίλτρο HEPA
3. Σπόγγοι αρώματος
4. Κάτω κάλυμμα
5. Πίνακας ελέγχου αφής
6. Αισθητήρας ποιότητας αέρα
Українська мова
1. Корпус очищувача повітря
2. HEPA фільтр
3. Ароматичні губки
4. Нижня кришка
5. Сенсорна панель управління
6. Датчик якості повітря

English
English
4
AIR PURIFIER
SAFETY INSTRUCTIONS
Read carefully and save for future use!
Warning: The safety measures and instructions, contained in this
manual, do not include all conditions and situations possible. The user
must understand that common sense, caution and care are factors
that cannot be integrated into any product. Therefore, these factors
shall be ensured by the user/s using and operating this appliance. We
are not liable for damages caused during shipping, by incorrect use,
voltage uctuation or the modication or adjustment of any part of
the appliance. To protect against a risk of re or electric shock, basic
precautions shall be taken while using electrical appliances, including
the following:
1. Make sure the voltage in your outlet corresponds to the voltage
provided on the appliance label and that the socket is properly
grounded. The outlet must be installed in accordance with
applicable electrical codes according to EN. It must also be freely
accessible so that the appliance can be quickly disconnected from
electricity if necessary.
2. Never use the appliance if the power cable is damaged. If the
appliance has fallen on the ground, has been immersed in water or
is not working properly.
If the appliance emits an unusual odor, smoke, or abnormal sound,
unplug it immediately and visit a service center with the appliance.
All repairs, including cord replacements, must be carried out
at a professional service centre! Do not remove the protective
covers from the appliance; there is a risk of electric shock! If you
interfere with the appliance, it exposes you to the risk of losing
the legal right to claim defective performance or a quality
warranty.
3. Protect from direct contact with water and other liquids to prevent
electric shock.
Air purier
English

English
English
5
4. Do not use the appliance outdoors or in a humid environment,
nor touch the power cord or the appliance with wet hands. Risk of
electric shock.
5. As well, do not use the turned on appliance:
- close to bathtub, shower or a pool - danger of electric shock,
- close to ammable materials, e.g. drapes - risk of re,
- very close to the places where heat accumulates (stove, heater),
or close to open re - risk of re,
- in rooms where are stored ammable or explosive materials –
danger of re,
- in an industrial environment or an environment with fumigation-
type pesticides (chemical residues may accumulate inside the
device and their subsequent release into the air may be harmful
to your health),
- Directly under an electrical outlet.
6. Do not use the device in places where particles of fat are present.
Placing in a kitchen, for example, can reduce the life of the lter. The
air purier should not be used as a ventilation or exhaust device.
7. Close supervision is necessary for operating the device near
children!
8. Do not expose children to the air outlet of the appliance for too
long. Keep children away from the air outlet. It could cause them
illness or have another adverse eect on their health.
9. Place the device away from other objects so that the free air
circulation required for its proper operation is ensured.
10.Never cover the air intake or outlet openings or insert any objects or
ngers into them! It could cause damage to the appliance or injury.
11.Do not use this appliance with a programmer, timer, stand-alone
remote control system, or any other device that automatically
switches the unit on, as there is a risk of re if the unit is covered or
improperly placed.
12.Do not use insecticides or ammable sprays near the appliance.You
could damage the appliance.
Air purier
English

English
English
6
13.Never place the appliance on soft surfaces such as a bed, sofa,
carpet with thick, long bers, etc. It must be placed on a stable and
level surface.
14.Do not switch the appliance on or o by plugging in or pulling out
the power supply plug. First, always turn o the appliance using the
ON/OFF button! Then you can unplug the power cord!
15.We recommend that you do not leave the appliance unattended
with the plugged-in power cord. Do not remove the power cord
from the outlet by yanking the cord. Unplug the power cord from
the outlet by grasping the plug.
16.In the following cases, always disconnect from the electrical socket:
- before relling the water tank if you are no longer using it
- before moving it,
- before cleaning
- switch does not work,
- circuit breaker or fuses are blown,
- power cable or the plug are unusually hot,
- you smell the odor of burning or if you noted unusual noises or
vibration,
- in case of any other unusual phenomena or malfunctions.
17.Do not allow the power cord to touch hot surfaces or run the cord
over sharp edges.
18.The appliance is intended exclusively for domestic and indoor use.
It is not intended for commercial use. Do not use the product for
any other purpose than the one for which it is designed.
19.Do not use the appliance without properly installed lters.
20.Move, store and transport the appliance in vertical position only.
21.It is strictly forbidden to manipulate the air lter during operation.
22.This appliance may be used by children 8 years of age or older and
persons with reduced physical, sensory or mental capabilities or
lack of experience and knowledge if supervised or instructed to use
the appliance in a safe way and understand the potential hazards.
Children shall not play with the appliance. User cleaning and
maintenance must not be performed by unsupervised children.

English
English
7
23.Install the power cable so that no one trips over it.
Do not immerse in water! – Do not immerse in water!
DANGER TO CHILDREN: Children must not play with the packaging
material. Do not let the children play with
plastic bags. Risk of suocation.
1. Please remove the lter bag before you start to use the air
purier.
2. To access the lter, turn the bottom lter cover by the handle
counterclockwise (towards the unlock symbol) to remove it.
Lift the lter out of the air purier. Remove the plastic bag
and reinstall the lter. Replace the lter cover by turning it
clockwise (towards the lock symbol) until it locks in place.
Quick Start Guide
Bottom cover handle
Filter plastic bag

English
English
8
CONTROL PANEL OVERVIEW
N
N
N
N
9RKKV
2U]
.OMN
'[ZU
A
B
C
D
E
1. Setting the air ow speed
Press the button sequentially to switch between
low (LOW) and high (HIGH) airow speed and
between (AUTO) and (SLEEP) mode for the
appliance's night mode.
Note: Color backlight turns o in Night mode
(Sleep). In (AUTO) mode, the air velocity changes
automatically according to the air quality in the
room.
2. Resetting the lter life counter
Press and hold the button to reset the counter of
the remaining lter life cycle. Use only after you
replace the lter.
3. On / O
Press to turn the appliance on/o. In stanby mode
the light is red, when on, the indicator lits white.
4. Timer function
By pressing the button, you can set the timer
functions to 1, 2, 4 or 8 hours.
5. Ionizer
Press briey to turn on or o the air ionization.
When the unit is switched on, ionization is on; the
ionization icon is on the display. After pressing
the button again, the icon disappears from the
display. To turn it on again, press the place on the
display where the icon was before being turned
o.
INSTALLATION
WARNING:
Before using the air purier, remove the lter cover in the appliance according to the instructions below:
Replacement of lter and aroma sponges
Remove all packaging from the appliance before rst connecting the appliance, both from outside and from
the inside.The lter is packaged. Hold the unplugged so that you can open the lower cover lock. On the bottom
of the appliance and the lid are shown locks for easier handling. Aromatic oil sponges are located in the lter
cover. Return the lter before use and lock the lid carefully.
Risk of property damage: The appliance may only be used if it is properly and completely assembled.

English
English
9
Aroma sponges
Filter cover handle
Filter
Filter replacement
Take care of your health and change the lter regularly.
The lter life cycle counter is set to approx. 2000 hours. After the device counts these hours of operation, the
"Filter Counter" indicator starts ashing and a beep sounds. Change the old lter for a new one and press the
"Filter Counter" icon for about 3 seconds. The audio signal is switched o and the light is continuously lit white.
Note: Always remember to remove the packaging before inserting the lter into the appliance.
Preparing the aroma sponges
You can add a few drops of essential oil on the sponges. Then when the appliance will be in operation, it will
emit clean air enriched by the aroma of oil.
USE
Turning the device on
After connecting to power, a beep sounds and all the indicators ash 2 x and then go out, only the power
indicator light ("Turning on / o") remains red and the appliance enters standby mode.
Press the "On / O" button to start the appliance automatic mode. The appliance will ash colors after it is
turned on. The air quality is checked at that moment. The backlight color remains permanently on after a few
seconds. The backlight color indicates the air quality.
Air quality indicator
Blue - Excellent
Green - Good
Purple - Bad
Red - Very bad
Using the application
ATTENTION:
If you change the name of your home WiFi network or password, you will need to restore connection with your
appliance.
• The application supports the operating system version of the IOS 9.0 and higher, Android 6.0 and higher;
in general, the system version can be checked using setting in a mobile phone or tablet.
• This model supports WiFi network security with WEP, WPA, WPA2, WPA3, AES and TKIP.
• Conguring the appliance to access the network requires a 2.4 GHz WiFi network, the 5 GHz frequency
range is not currently supported.

English
English
10
• WiFi conguration is required to access the appliance to the network; if the network is already once
successfully congured, the application can be operated on the WiFi / 2G / 3G / 4G networks and can be
controlled remotely.
• If the name of your homeWiFi network is changed or the router is replaced, the appliance will be displays in
the app as oine; just congure network access without any changes to your application account number.
• If others want to use the application to run the same appliance, they must be invited to an application
from the "family administrator" to join (provided that the user downloads the application and registration).
• If the application changes, the original users are prompted to delete the device in their mobile application
and new users can only congure direct network connection in accordance with the network access
instructions (if the original users do not delete their device in the mobile application, it will be automatically
Deleted after new users successfully congured network access).
Connection
1. Ensure that the mobile phone is connected to your homeWiFi
network
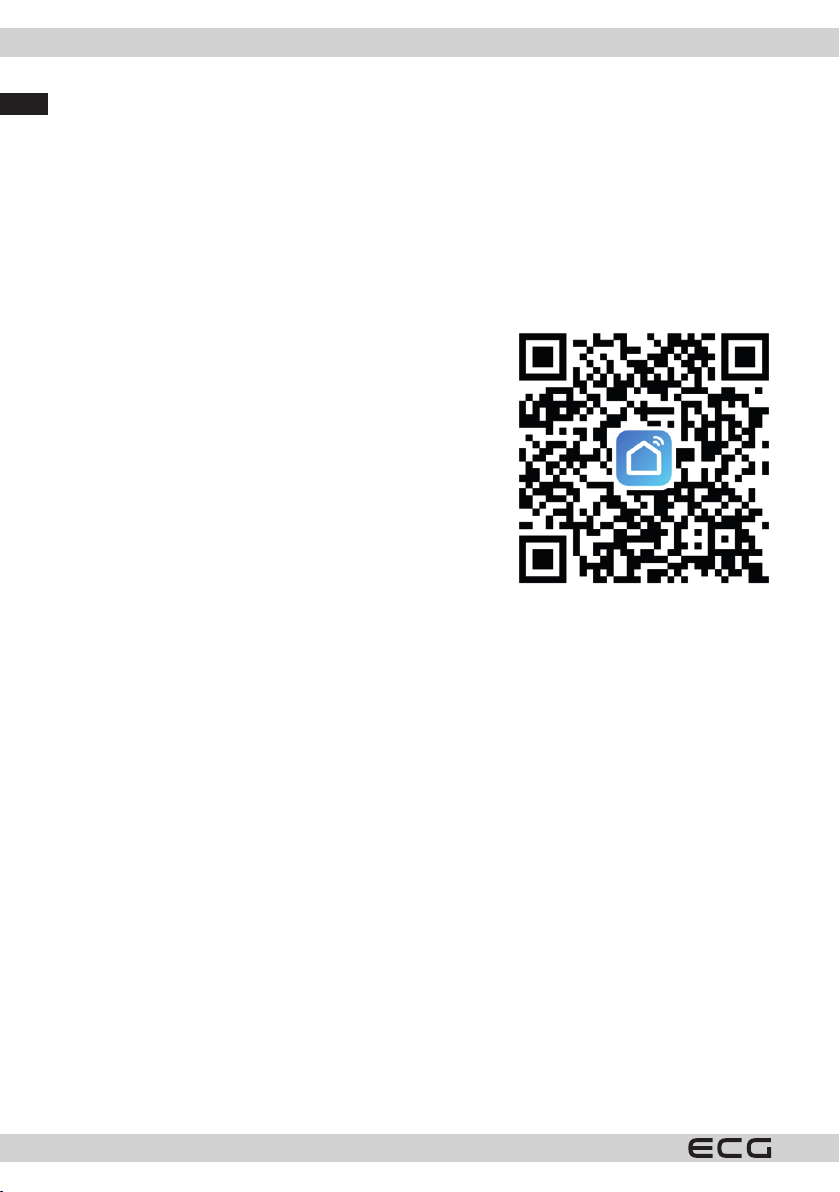
2. Download the Smart Life application and register:
a. Scan the QR code or search for the Smart Life application in
the Apple store or Google Play. Download the application.
b. Open the application and create your personal account.
Connect the appliance to your home network with your mobile
phone using the WiFi function.
Note: The text displayed in the application is informative. The
appearance and text of the application screen can be modied
with new updates.
1) Connection via AP mode (AP1)
1. Plug the purier in.
2. Briey press the "on / o" button on the purier.
3. Press the air ow speed setting button on the purier for 5 seconds.
4. You will hear a beep (the icon will ash quickly and after about 2 minutes the icon will start ashing slowly).
5. Open the Smart Life application in your mobile phone.
6. Use the "+" icon on the top right of the application to locate the appliance (Small Home Appliance -> Air
Purier (WiFi)).
7. Set the WiFi and network password in the application according to the application instructions.
8. Click on the next step and set the AP mode in the upper right corner of the application screen (change the
basic preset mode EZ to AP).
9. Wait until the icon on the purier display ashes slowly, conrm this in the application by checking the
"Conrm the indicator is blinking slowly" option *.
10. Click on the next step "next" in the application.
11. Follow the application instructions.
12. Go to the WiFi network settings on your mobile phone and connect to the "SmartLife" air purier hotspot.
13. Once connected, return to Smart Life.
14. The purier should connect automatically; follow the instructions of the application.
* If the icon no longer ashes, you need to start the setting from the beginning.
2) Connection via EZ mode (AP1)
1. Plug the purier in.
2. Briey press the "on / o" button on the purier and immediately afterwards press the button for setting
the air ow rate for approx. 5 seconds. A beep sounds and the WiFi icon ashes quickly on the display.
3. Open the Smart Life application on your mobile phone.
4. Use the "+" icon in the application, on the top right nd the appliance (Small Home Appliance -> Air
purier (WiFi)).

English
English
11
5. Enter the WiFi and network password in the application according to the application instructions.
6. Click on the next step and set the EZ mode in the upper right corner of the application screen (basic preset
EZ mode). Check to conrm that the WiFi icon on the display is ashing quickly. *
7. Click on the next step "next" in the application.
8. The purier will connect automatically, follow the application instructions.
* If the icon no longer ashes, you need to start the setting from the beginning.
CLEANING AND MAINTENANCE
Switch o and unplug the appliance before cleaning and maintenance. Never immerse the appliance in water.
Wipe the surface of the appliance with a soft cloth. Do not use aggressive abrasive cleaners or scourers.
Store the appliance in a cool, dry and ventilated place. Only turn the appliance up very slowly and carefully to
avoid damaging it. Never turn the appliance when in operation!
TROUBLESHOOTING
In the event of a malfunction, follow the table below.
If you are unable to solve the problem according to the possible solutions in the table below, contact the
service center. Never try to repair the appliance yourself.
Problem Possible cause Solution
The appliance cannot be switched
on
The plug is not inserted in the
electrical outlet.
Connect the appliance to the
power supply and switch it on.
The lter cover is tted incorrectly. Install the lter cover according to
the operating instructions.
The plug or cable is damaged. Contact a service center.
The power source is not working. Check that there is power in the
outlet.
The fan does not work
The air inlet or outlet is blocked. Remove all packaging from the
lter/s.
The appliance is not on. Connect the appliance to the
power supply and switch it on.
The motor is loose or damaged. Contact a service center.
There are loose or foreign objects
inside the appliance.
If the items cannot be removed
without tampering with the
appliance, contact a service
center.
The appliance is placed on an
uneven surface.
Place the appliance on a at
surface.

English
English
12
The air is not puried enough.
The lters are clogged or have not
been replaced in time.
Clean the washable lters if the
appliance contains them and
replace the other lters with new
ones. Reset the lter life cycle
counter.
The lter was not replaced.
Replace the lter (s) with new
ones and reset the lter life
counter.
The air inlet or outlet is blocked. Remove all packaging from the
lter/s.
There is not enough free space
around the appliance.
Place the appliance so that there
is enough free space around it for
air intake and exhaust.
The appliance is located in a larger
space than it is intended for.
Place the device in a room where
it can work eectively.
The appliance is missing a lter.
Make sure that there are all
necessary lters in the appliance.
Make sure that the lter is inserted
correctly in the appliance. If the
appliance contains more than
one lter, make sure that they are
inserted in the correct order.
The appliance beeps.
The lter/s has not been changed.
Replace the lter (s) with new
ones and reset the lter life
counter.
The lter/s was changed, but the
counter was not reset. Reset the lter life cycle counter.
The air quality indicator is red There is a source of pollution close
to the appliance.
Remove the source of pollution.
After a certain time, the air is
cleaned and the indicator changes
color according to the air quality
in the room.

English
English
13
Basic application troubleshooting
Problem Possible cause Recommendation Possible solution
Application shows
disconnection.
Broken connection
between mobile phone
and device.
Check whether the
mobile phone is
connected to the
network.
Reconnect the mobile
phone to the network.
Check, if the router works
correctly. Restart the router.
The appliance must be
connected to a power
supply.
Turn the appliance o
and on again.
Wi device
congurations are
erased.
Remove the appliance
from the application and
perform the installation
again.
The network or WiFi
password changed.
Delete all WiFi network
congurations and
reconnect the appliance
to your network.
Your WiFi does not meet
the standard of operation
of the appliance.
Check all the parameters
of your home WiFi
network.
The app works slowly. Weak network
connection.
Busy network.
Restart the router and
reduce the number of
users with access.
Poor cell phone WiFi
signal reception.
Check the settings of the
mobile phone itself.
Network bandwidth is
not adequate.
Extend the bandwidth of
the WiFi network.
The application cannot
be installed
The application is not
compatible with the
phone's operating
system.
You have to use a mobile
phone according to the
conguration above. (iOS
9.0 and higher, Android
6.0 and higher)
Install the application
in the appropriate store
(GooglePlay AppStore)
and add the appliance
via the application.
TECHNICAL DATA
Model: AP1 Compact Pearl
Nominal voltage: 220–240 V
Rated frequency: 50–60 Hz
Nominal input power: 30 W
CADR: 120 m3/h
Recommended room size: 9–14m2
Noise level: 25–55 dB(A)
Weight: 2,5 kg

English
English
14
USE AND DISPOSAL OF WASTE
Wrapping paper and corrugated paperboard – deliver to scrapyard. Packing foil, PE bags, plastic elements – throw into plastic
recycling containers.
DISPOSAL OF PRODUCTS AT THE END OF LIFETIME
Disposal of electric and electronic equipment (valid in EU member countries and other European
countries with an implemented recycling system)
The represented symbol on the product or package means the product shall not be treated as domestic waste.
Hand over the product to the specied location for recycling electric and electronic equipment. Prevent negative
impacts on human health and the environment by properly recycling your product. Recycling contributes to
preserving natural resources. For more information on the recycling of this product, refer to your local authority,
domestic waste processing organization or store, where you purchased the product.
This product meets the requirements of the EU directives on electromagnetic compatibility and
electrical safety and the issue of heavy metals in electrical and electronic equipment.
The operating manual is available at www.ecg-electro.eu.
Changes of text and technical parameters reserved.
Hereby, K + B Progres, a.s. declares that the ECG AP1 Compact Pearl radio equipment type complies with
Directive 2014/53 / EU. The full text of the EU declaration of conformity is available at the following internet
address: www.ecg-electro.eu.
08/05

Deutsch
Deutsch
15
LUFTREINIGER
SICHERHEITSHINWEISE
Bitte aufmerksam lesen undgut aufbewahren!
Warnung:DieindieserAnleitungangeführtenSicherheitsvorkehrungen
und Hinweise umfassen nicht alle Umstände und Situationen, zu denen
es kommen könnte. Der Anwender muss begreifen, dass der gesunde
Menschenverstand, Vorsicht und Sorgfalt zu Faktoren gehören, die
sich in kein Produkt einbauen lassen. Diese Faktoren müssen durch
den Anwender bzw. mehrere Anwender bei der Verwendung und
Bedienung dieses Gerätes gewährleistet werden. Wir haften nicht
für Schäden, die durch Transport, eine unsachgemäße Verwendung,
Spannungsschwankungen sowie eine Änderung oder Modikation
des Gerätes entstehen. Um das Risiko von Bränden oder Stromschlägen
zu vermeiden, sollten bei der Verwendung elektrischer Geräte immer
grundlegende Vorsichtsmaßnahmen befolgt werden, einschließlich
der folgenden:
1. Vergewissern Sie sich, dass die Spannung der Steckdose mit der
Spannung auf dem Etikett übereinstimmt und die Steckdose
ordnungsgemäß geerdet wurde. Die Steckdose muss gemäß
geltender elektrotechnischer Norm (EN) installiert werden. Sie muss
außerdem frei zugänglich sein, damit das Gerät bei Bedarf schnell
vom Netz getrennt werden kann.
2. Verwenden Sie das Gerät nicht, wenn das Netzkabel beschädigt ist.
Wenn das Gerät zu Boden gestürzt ist, in Wasser getaucht wurde
oder nicht richtig funktioniert.
Wird vom Gerät ungewöhnlicher Geruch, Rauch oder Geräusch
abgegeben, trennen Sie das Gerät unverzüglich vom Stromnetz
und suchen eine Kundendienststelle auf.
Sämtliche Reparaturen und das Auswechseln des Netzkabels
sollten einem Fachservice anvertraut werden! Demontieren
Sie niemals die Schutzabdeckungen des Gerätes. Dies könnte
zu einem Stromunfall führen! Durch Eingrie in das Gerät
können Sie Ihr gesetzliches Recht auf Mängelhaftung oder die
Beschaenheitsgarantie verlieren.
Luftreiniger
Deutsch

Deutsch
Deutsch
16
3. Schützen Sie das Gerät vor direktem Kontakt mit Wasser und
anderen Flüssigkeiten, um eventuelle Stromunfälle zu vermeiden.
4. Gerät niemals im Freien oder in einer feuchten Umgebung
verwenden. Netzkabel oder Gerät niemals mit nassen Händen
berühren. Es könnte zu einem Stromunfall kommen.
5. Das eingeschaltete Gerät sollte nicht an folgenden Orten benutzt
werden:
- in der Nähe einer Badewanne, einer Duschecke oder eines
Schwimmbeckens - Stromschlaggefahr,
- in der Nähe von brennbaren Materialien, wie z.B. Vorhängen -
Brandgefahr,
- in unmittelbarer Nähe von Orten, an denen Wärme kumuliert
wird (Kochherd, Heizung) sowie in der Nähe eines oenen Feuers
- Brandgefahr,
- in Räumen, in denen brennbare oder explosive Chemikalien
gelagert sind – Brandgefahr,
- in industriellen Umgebungen oder in Umgebungen mit
gasförmigen Pestiziden (chemische Rückstände können sich
im Inneren des Geräts ansammeln und ihre anschließende
Freisetzung in die Luft kann gesundheitsschädlich sein),
- direkt unter einer Steckdose.
6. Verwenden Sie das Gerät nicht in Bereichen, in denen Fettpartikel
vorhanden sind. Wird er beispielsweise in der Küche aufgestellt,
kann sich die Lebensdauer des Filters verkürzen. Das Luftgerät
sollte nicht als Be- oder Entlüftungsgerät verwendet werden.
7. Seien Sie besonders aufmerksam, wenn Sie das Gerät in der Nähe
von Kindern verwenden!
8. Setzen Sie Kinder nicht zu lange dem Luftauslass des Geräts aus.
Halten Sie Kinder von der unmittelbaren Nähe des Luftauslasses
fern. Sie könnten krank werden oder es könnte sich anderweitig
negativ auf ihre Gesundheit auswirken.
9. Platzieren Sie das Gerät außer Reichweite von anderen
Gegenständen, um eine freie Luftzirkulation zu gewährleisten, die
für seine richtige Funktionsweise erforderlich ist.

Deutsch
Deutsch
17
10.Decken Sie niemals die Saugönungen oder den Luftauslass ab
und stecken Sie keine Gegenstände oder Finger hinein! Andernfalls
kann es zu Schäden am Gerät oder zu Verletzungen kommen.
11.Benutzen Sie dieses Gerät nicht mit einem Programmiergerät,
einer Zeitschaltuhr, einem separaten Fernbedienungssystem oder
anderen Vorrichtungen, die das Gerät automatisch einschalten
könnten, um das Risiko eines Brandes zu vermeiden, wenn das
Gerät verdeckt oder falsch aufgestellt wurde.
12.Verwenden Sie keine Insektizide oder brennbare Sprays in der Nähe
des Geräts. Das Gerät könnte beschädigt werden.
13.Stellen Sie das Gerät auf keine weichen Oberächen wie z.B. Betten,
Sofas oder Teppiche mit dichtem und langen Fasern auf. Das Gerät
muss auf einer stabilen und geraden Oberäche stehen.
14.Schalten Sie das Gerät nicht durch Einstecken oder Herausziehen
des Netzsteckers ein oder aus. Schalten Sie das Gerät immer zuerst
mit der Taste ON/OFF aus. Danach können Sie das Netzkabel aus
der Steckdosen herausziehen!
15.Das Gerät sollte nicht unbeaufsichtigt gelassen werden, wenn
dieser an das Stromnetz angeschlossen ist. Ziehen Sie nicht am
Kabel, um den Stecker aus der Steckdose zu ziehen. Ziehen Sie am
Stecker, um das Kabel aus der Steckdose zu ziehen.
16.Ziehen Sie infolgendenFällen immer denSteckeraus derSteckdose:
- bevor Sie den Wassertank nachfüllen, wenn Sie es nicht mehr
benutzen
- vor dem Umstellen,
- vor der Reinigung,
- der Schalter funktioniert nicht,
- durchgebrannter Leitungsschutzschalter oder durchgebrannte
Sicherungen,
- das Netzkabel oder der Stecker sind ungewöhnlich warm,
- wenn Sie einen Brandgeruch wahrnehmen oder ungewöhnliche
Geräusche oder Vibrationen bemerken,
- bei anderen ungewöhnlichen Erscheinungen oder Störungen.

Deutsch
Deutsch
18
17.Das Netzkabel darf nicht mit heißen Teilen in Berührung kommen
oder über scharfe Kanten führen.
18.Das Gerät ist ausschließlich für den Haushalt- und Innengebrauch
vorgesehen. Es ist nicht für kommerzielle Zwecke vorgesehen.
Benutzen Sie das Gerät für den Zweck, für den es konzipiert
wurde.
19.Verwenden Sie das Gerät nicht ohne ordnungsgemäß installierte
Filter.
20.Bewegen, lagern und transportieren Sie das Gerät nur in aufrechter
Position.
21.Es ist verboten während des Betriebs mit dem Luftlter zu
manipulieren.
22.Kinder im Alter von 8 Jahren und älter sowie Personen mit
verminderten physischen, sensorischen und mentalen Fähigkeiten
sowie mangelnden Erfahrungen und Kenntnissen, dürfen dieses
Gerät nur unter Aufsicht benutzen, oder nachdem diese über
einen gefahrlosen Gebrauch belehrt wurden und mögliche
Gefahren verstehen. Kinder dürfen nicht mit dem Gerät spielen.
Die Reinigungs- und Wartungsarbeiten, die durch den Benutzer
vorgenommen werden, dürfen nicht von unbeaufsichtigten
Kindern durchgeführt werden.
23.Installieren Sie das Nezukabel so, dass man nicht darüber stolpern
kann.
Do not immerse in water! – Nicht ins Wasser tauchen!
GEFAHR FÜR KINDER: KinderdürfennichtmitdemVerpackungsmaterial
spielen. Kinder dürfen nicht mit den
Kunststobeuteln spielen. Erstickungsgefahr.

Deutsch
Deutsch
19
1. Please remove the lter bag before you start to use the air
purier.
2. To access the lter, turn the bottom lter cover by the handle
counterclockwise (towards the unlock symbol) to remove it.
Lift the lter out of the air purier. Remove the plastic bag
and reinstall the lter. Replace the lter cover by turning it
clockwise (towards the lock symbol) until it locks in place.
Quick Start Guide
Bottom cover handle
Filter plastic bag
1. Bitte entfernen Sie den Filterbeutel, bevor Sie den Luftreiniger in Betrieb
nehmen.
2. Um an den Filter zu gelangen, drehen Sie den unteren Filterdeckel am
Gri gegen den Uhrzeigersinn (in Richtung des Entriegelungssymbols),
um ihn abzunehmen. Nehmen Sie den Filter aus dem Luftreiniger
heraus. Entfernen Sie den Plastikbeutel und setzen Sie den Filter
wieder ein. Setzen Sie den Filterdeckel wieder auf, indem Sie ihn im
Uhrzeigersinn (in Richtung des Schlosssymbols) drehen, bis er einrastet.
Schnellstart-Anleitung
Gri für die untere
Abdeckung
Filter Plastikbeutel

Deutsch
Deutsch
20
BEDIENFELDÜBERSICHT
N
N
N
N
9RKKV
2U]
.OMN
'[ZU
A
B
C
D
E
1. Einstellung der Luftstromgeschwindigkeit
Drücken Sie die Taste nacheinander, um zwischen
den Luftstromgeschwindigkeiten LOW und HIGH
sowie zwischen (AUTO) und (SLEEP) für den
Nachtmodus des Geräts umzuschalten.
Bemerkung: Im Nachtmodus (SLEEP)
ist die farbige Hintergrundbeleuchtung
ausgeschaltet. Im Modus (AUTO) ändert sich
die Luftstromgeschwindigkeit automatisch
entsprechend der Luftqualität im Raum.
2. Zurücksetzen des Filterstandzeitzählers
HaltenSiedieTastegedrückt,um denZählerfür die
verbleibende Filterlebensdauer zurückzusetzen.
Erst nach dem Filterwechsel verwenden.
3. Ein-/ausschalten
Ein-/Ausschalten des Geräts. Im Standby-
Modus leuchtet die Kontrollanzeige rot, im
eingeschalteten Modus leuchtet die Anzeige
weiß.
4. Timer-Funktion
Sie können die zeitgesteuerte Abschaltfunktion
auf 1, 2, 4 oder 8 Stunden einstellen, indem Sie
die Taste nacheinander drücken.
5. Ionisator
Durch kurzes Drücken schalten Sie den Ionisator
ein oder aus. Wenn das Gerät eingeschaltet
ist, leuchtet das Ionisationssymbol auf dem
Display auf. Wenn die Taste gedrückt wird,
verschwindet das Symbol vom Display. Um
es wieder einzuschalten, drücken Sie auf die
Stelle des Displays, an der sich das Symbol beim
Ausschalten befand.
INSTALLATION
HINWEIS:
Bevor Sie den Luftreiniger benutzen, entfernen Sie die Verpackung des Filters im Gerät gemäß den
nachstehenden Anweisungen:
Auswechseln des Filters und der Aroma-Kugeln
Bevor Sie das Gerät zum ersten Mal an das Stromnetz anschließen, entfernen Sie alle äußeren und inneren
Verpackungen vom Gerät. Der Filter wird mit einer Verpackung geliefert. Fassen Sie das Gerät bei gezogenem
Netzstecker so an, dass Sie die Verriegelung der unteren Abdeckung önen können. An der Unterseite des
Geräts und des Deckels sind Verriegelungen angebracht, um die Handhabung zu erleichtern. Die Schwämme
Table of contents
Languages: