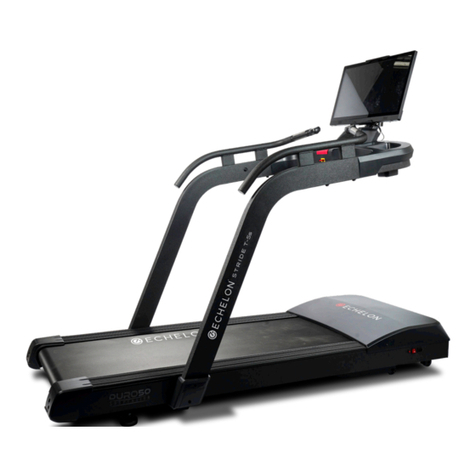
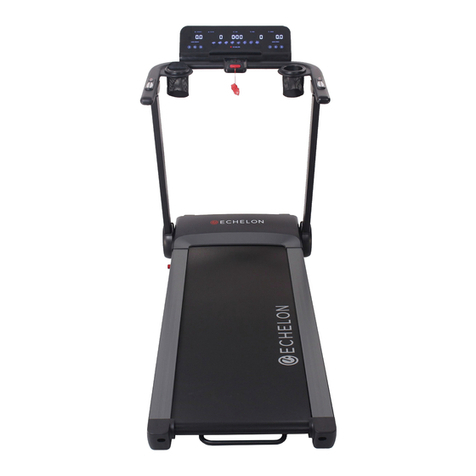
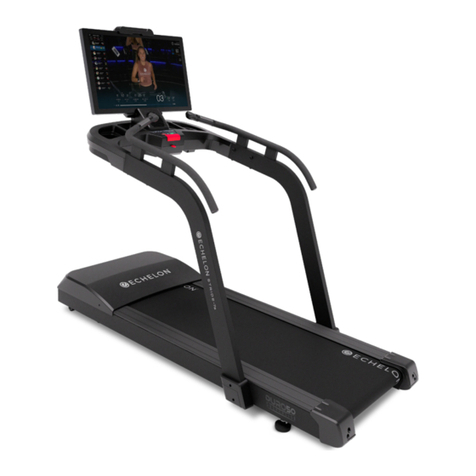
Echelon STRIDE-s User manual

INSTRUCTION MANUAL

Lou Lentine
CEO
Echelon Fitness
Multimedia, LLC

Hello,
I am Lou Lentine, CEO of Echelon, and I would like to welcome you to the
Echelon community. You’ve made a great decision for yourself and your
family. The Echelon Experience is an innovative combination of fitness
products integrated with our state-of-the-art Echelon Fit app. This brand-
new, fitness lifestyle connects your family, friends, the Echelon community,
and Echelon instructors together to help you with your fitness goals. With
thousands of live and on-demand classes, no matter your schedule or
experience, there is always a new and exciting class for you to join.
We embrace your decision to join our Echelon family in the pursuit of living
a healthier lifestyle. We are committed to continue engineering cutting
edge, world-class fitness products to improve quality of life through workout
experiences that make an active lifestyle more accessible and sustainable.
Thank you again for choosing Echelon and I look forward to seeing you
in the next live class!
Best personal regards,
Lou Lentine
CEO, Echelon Fitness Multimedia, LLC

15.21
You are cautioned that changes or modifications not expressly approved
by the party responsible for compliance could void the user’s authority to
operate the equipment.
15.105B
This equipment has been tested and found to comply with the limits for a
Class B digital device, pursuant to part 15 of the FCC rules. These limits are
designed to provide reasonable protection against harmful interference in
a residential installation. This equipment generates, uses and can radiate
radio frequency energy and, if not installed and used in accordance with
the instructions, may cause harmful interference to radio communications.
However, there is no guarantee that interference will not occur in a particular
installation. If this equipment does cause harmful interference to radio or
television reception, which can be determined by turning the equipment off
and on, the user is encouraged to try to correct the interference by one or
more of the following measures:
• Reorient or relocate the receiving antenna.
• Increase the separation between the equipment and receiver.
• Connect the equipment into an outlet on a circuit different from that
to which the receiver is connected.
• Consult the dealer or an experienced radio/TV technician for help.
FCC RF RADIATION EXPOSURE STATEMENT:
1. This Transmitter must not be co-located or operating in conjunction with
any other antenna or transmitter.
2. This equipment complies with RF radiation exposure limits set forth for
an uncontrolled environment. This equipment should be installed and
operated with a minimum distance of 20 cm between the radiator and
your body.
THIS DEVICE COMPLIES WITH PART 15 OF
THE FCC RULES. OPERATION IS SUBJECT
TO THE FOLLOWING TWO CONDITIONS:
1. This device may not cause harmful interference and
2. This device must accept any interference received, including interference
that may cause undesired operation.
FEDERAL COMMUNICATIONS COMMISSION FCC STATEMENT

THIS CLASS B DIGITAL APPARATUS COMPLIES WITH
CANADIAN ICES003.
CET APPAREIL NUMÉRIQUE DE CLASSE B EST
CONFORME À LA NORME NMB003.
CANADIAN NOTICE
This device complies with ISED license-exempt RSS standard(s). Operation is
subject to the following two conditions:
1. This device may not cause interference, and
2. This device must accept any interference, including interference that may
cause undesired operation of the device.
AVIS CANADIEN
Le présent appareil est conforme aux CNR d’ISED applicables aux
appareils radio exempts de licence. L’exploitation est autorisée aux deux
conditions suivantes :
1. L’appareil ne doit pas produire de brouillage, et
2. L’utilisateur de l’appareil doit accepter tout brouillage radioélectrique
subi, même si le brouillage est susceptible d’en compromettre
le fonctionnement.
CAUTION: EXPOSURE TO RADIO
FREQUENCY RADIATION
1. To comply with the Canadian RF exposure compliance requirements, this
device and its antenna must not be co-located or operating in conjunction
with any other antenna or transmitter.
2. To comply with RSS 102 RF exposure compliance requirements, a
separation distance of at least 20 cm must be maintained between the
antenna of this device and all persons.
ATTENTION: EXPOSITION AU
RAYONNEMENT RADIOFRÉQUENCE
1. Pour se conformer aux exigences de conformité RF canadienne
l’exposition, cet appareil et son antenne ne doivent pas être co-localisés
ou fonctionnant en conjonction avec une autre antenne ou transmetteur.
2. Pour se conformer aux exigences de conformité CNR 102 RF exposition,
une distance de séparation d’au moins 20 cm doit être maintenue entre
l’antenne de cet appareil et toutes les personnes.
INNOVATION, SCIENCE AND ECONOMIC DEVELOPMENT CANADA ISED
INNOVATION, SCIENCE ET DÉVELOPPEMENT ÉCONOMIQUE CANADA ISED

CONTENTS
IMPORTANT SAFETY INSTRUCTIONS���������������������������������������
WARNING LABEL�������������������������������������������������������
DESCRIPTION/PARTS LIST �����������������������������������������������
ECHELON MEMBERSHIP ACTIVATION���������������������������������������
ASSEMBLY������������������������������������������������������������
Folding Instructions �������������������������������������������������������������������
Storage�������������������������������������������������������������������������������
Belt Adjustment�����������������������������������������������������������������������

CONTENTS
CONSOLE OPERATION ������������������������������������������������������
Console Display��������������������������������������������������������������������������
Display Definition������������������������������������������������������������������������
Control Button Definition�����������������������������������������������������������������
Features���������������������������������������������������������������������������������
Body Fat Measurement�������������������������������������������������������������������
Bluetooth App���������������������������������������������������������������������������
ERROR CODES & TROUBLESHOOTING �����������������������������������������
CUSTOMER SERVICE�������������������������������������������������������

8|IMPORTANT SAFETY INSTRUCTIONS
The manufacturer recommends to place the Echelon®STRIDE-s treadmill in a
space where you have the following minimum clearance dimensions for safe
mounting and dismounting of the treadmill:
• The minimum clearance area behind the treadmill is 2.0 m (78.7 in) × the
treadmill width. This area must be free of any and all obstructions.
• The minimum clearance area on each side of the treadmill is:
500 mm (19.7 in).
IMPORTANT SAFETY INSTRUCTIONS READ BEFORE USE
• Obtain a medical exam before beginning any exercise program. If at any
time during exercise you feel faint, dizzy, or experience pain, stop and
consult your physician.
• Read, understand, and carefully follow all warnings, instructions, and
procedures on the treadmill and in the owner’s / user’s manual before
using the treadmill.
• Keep children away from the treadmill.
• Inspect the treadmill for incorrect, worn, or loose components and then
correct, replace, or tighten prior to use.
• Read, understand, and test the emergency stop procedures before use.
• Do not operate electrically powered treadmills in damp or wet locations.
• Keep the top side of the moving surface clean and dry.
• Do not wear loose or dangling clothing while using the treadmill.
• Care should be used when mounting and dismounting the treadmill. Before
mounting or dismounting, lower the incline of the treadmill all the way and
ensure the treadmill has come to a complete stop.
• Disconnect all power before servicing the treadmill.
WHILE CLEANING YOUR ECHELON®STRIDES
TREADMILL, PLEASE USE A SOFT RAG WITH MILD
DETERGENT OR WATER TO WIPE DOWN THE MACHINE.
DO NOT USE CORROSIVE CHEMICAL LIQUIDS WHICH
MAY DAMAGE THE COVER.
IMPORTANT SAFETY INSTRUCTIONS
When using an electrical appliance, basic precautions should always be
followed, including the following: Read all instructions before using the
Echelon®STRIDE-s.
DANGER TO REDUCE THE RISK OF ELECTRIC SHOCK:
1. Always unplug this appliance from the electrical outlet immediately after
using and before cleaning.
WARNING TO REDUCE THE RISK OF BURNS, FIRE,
ELECTRIC SHOCK, OR INJURY TO PERSONS:
1. An appliance should never be left unattended when plugged in. Unplug
from outlet when not in use, and before putting on or taking off parts.
2. Do not operate under blanket or pillow. Excessive heating can occur and
cause fire, electric shock, or injury to persons.
3. This appliance is not intended for use by persons with reduced physical,
sensory or mental capabilities, or lack of experience and knowledge,
unless they have been given supervision or instruction concerning use
of the appliance by a person responsible for their safety. Keep children
under the age of 13 away from this machine.
IMPORTANT SAFETY INSTRUCTIONS

IMPORTANT SAFETY INSTRUCTIONS |9
IMPORTANT SAFETY INSTRUCTIONS
4. Use this appliance only for its intended use as described in this manual.
Do not use attachments not recommended by the manufacturer.
5. Never operate this appliance if it has a damaged cord or plug, if it is
not working properly, if it has been dropped or damaged, or dropped
into water. Return the appliance to a service center for examination
and repair.
6. Do not carry this appliance by supply cord or use cord as a handle.
7. Do not stack weight on the cord and keep the cord away from
heated surfaces.
8. Never operate the appliance with the air openings blocked. Keep the air
openings free of lint, hair, and the like.
9. Never drop or insert any object into any opening.
10. Do not use outdoors.
11. Do not operate where aerosol (spray) products are being used or where
oxygen is being administered.
12. When this appliance is not in use, unplug power cord and remove safety
key. Refer to page 15 of this manual for auto-folding and proper storage
instructions.
13. Do not use a GFCI outlet or GFCI circuit breaker. A dedicated line will
assure that adequate power is available for safe operation over the life of
your Echelon®product.
14. This appliance is intended for consumer use only.
BEFORE starting any fitness or strength program, consult with your
physician or health official. This will ensure that you engage in the proper
strength or fitness program for your age and physical condition.
Before using the Echelon®STRIDE-s, answer these questions:
• Have you been sick recently?
• Have you had prolonged dizziness recently?
• Have you been out of breath for no reason recently?
• Have you had chest pain recently?
• Do you currently have any injuries preventing you from exercise?
• Are you pregnant?
• Do you have any conditions or reasons you should NOT exercise?
• Are you over 35 years old and physically inactive?
• Have you been told by a doctor that you should NOT exercise?
If you answered “yes” to any of the above questions, you should seek
further advice from your doctor prior to using the Echelon®STRIDE-s.
NEVER overexert yourself or work to exhaustion. If you feel faint, dizzy,
short of breath, or if you have chest or other pains, STOP IMMEDIATELY!
Consult your physician before using the Echelon®STRIDE-s again.
Read the user manual fully and follow all instructions. This ensures
your safety.
• NEVER exceed the weight limit for this treadmill. The weight limit for this
treadmill is 300 lbs / 135 kg. Do not use the Echelon®STRIDE-s if your body
weight is in excess of 300 lbs / 135 kg.
• ALWAYS use the Echelon®STRIDE-s on solid, level ground and in a well-lit
and ventilated area. Do not place the treadmill on thick carpet as it may
interfere with ventilation.
• ALWAYS check the treadmill for wear or loose components before use.
• NEVER use the treadmill if it is not properly / completely assembled or is
damaged in any way.

10 |IMPORTANT SAFETY INSTRUCTIONS
IMPORTANT SAFETY INSTRUCTIONS (cont’d.)
• NEVER allow children or pets to play on or around the treadmill during
operation. This helps protect them from injury from moving parts.
• ALWAYS set the treadmill up properly for your specific body type.
• NEVER use the Echelon®STRIDE-s when sick or fatigued.
• ALWAYS warm up / stretch before starting exercise.
• ALWAYS ensure that you have a water bottle filled with at least
12 oz. of water and a towel close by to absorb sweat from your body
and the handrails.
• NEVER start the treadmill while you are standing on the running belt. After
turning the power on and adjusting the speed control, there may be a
pause before the running belt begins to move. Always stand on the side
rails of the frame until the belt begins to move.
• ALWAYS hold the handrails when initially walking or running on the
treadmill until you are familiar with the use of the treadmill.
• Do not stand or climb on the handrails.
• ALWAYS wear proper attire and footwear that fully covers your feet. Do
not wear loose or dangling clothing while using the treadmill. Long hair
should be tied back or tucked away. Ensure that shoelaces are tucked
into your shoes.
• ALWAYS keep hands away from moving parts and ensure that hands are
safely placed on handlebars during use.
• ALWAYS be cautious when getting on and off the Echelon®STRIDE-s.
• ALWAYS wait until the incline is lowered all the way running belt comes to
a complete stop before dismounting.
• NEVER use accessory attachments that have not been recommended by
the manufacturer. Using such attachments may cause injury or damage to
the treadmill and will affect the warranty of the treadmill.
• ALWAYS ensure that the Echelon®STRIDE-s is wiped down after each use to
keep it sanitary.
• Cleaning and user maintenance shall not be made by children without
supervision.
If any problems arise affecting the performance of the Echelon®STRIDE-s,
contact the manufacturer immediately. Always ensure that parts which
undergo wear are checked regularly.
THIS SAFETY INFORMATION AND USER MANUAL
DO NOT REPLACE THE NEED TO BE ALERT AND
TO USE COMMON SENSE WHEN USING THE
ECHELON®STRIDES!

WARNING LABELS |11
WARNING LABELS
Review the above labels to ensure none are missing from the Echelon®STRIDE-s. If any of the above labels are
missing or need replaced, contact Customer Service at cs@echelonfit.com or 833-937-2453.
Rating Label
Icon + Voltage Label
Product Warning Label Warning Label
WARNING - AVERTISSEMENT - ADVERTENCIA
CAUTION: Risk of Injury to Persons.
To avoid injury, use extreme
caution when stepping onto or off
of a moving belt. Read instruction
manual before using.
CAUTION: To reduce the risk of
injury from moving parts, unplug
before servicing.
Caution: To reduce the risk of
electric shock, unplug before
cleaning or servicing.
CAUTION: Risk of Personal Injury.
Keep children under the age of
13 away from machine.
CAUTION: The heart rate displayed
may be inaccurate and should be
used for reference only.
ATTENTION : Risque de blessure.
Pour éviter toute blessure, soyez
extrêmement prudent(e) au
moment de monter sur le tapis
ou d’en descendre, Lisez le mode
d’emploi avant de l’utiliser.
ATTENTION : Pour limiter le risque
de blessure liée aux pièces en
mouvement. Débranchez avant de
réaliser l’entretien.
ATTENTION : Pour limiter le risque
de choc électrique. Débranchez
avant de nettoyer ou de réaliser
l’entretien.
ATTENTION : Risque de blessure.
Tenez les enfants de moins de 13
ans à distance de la machine.
ATTENTION : La fréquence
cardiaque affichée peut être
inexacte et ne doit être utilisée qu’à
titre de référence.
PRECAUCIÓN: Riesgo de lesiones.
Para evitar lesiones, tenga mucho
cuidado al subirse o bajarse de
una banda en movimiento. Lea el
manual instrucciones antes de usar.
PRECAUCIÓN: Para reducir el riesgo
de lesiones por piezas móviles,
desenchufa antes de reparar.
PRECAUCIÓN: Para reducir el riesgo
de descarga eléctrica, desenchufe
antes de limpiar o reparar.
PRECAUCIÓN: Riesgo de lesiones
personales. Mantenga a los niños
menores de 13 aÑos lejos de la
máquina.
PRECAUCIÓN: La frecuencia
cardíaca que se muestra puede ser
inexacta y debe usarse solo como
referencia.
Tip-Over Hazard Label
Motor LabelPower Cord
Label
Pinch Warning LabelLubrication Label
7
SAFETY INFO AND WARNINGS
IMPORTANT SAFETY INSTRUCTIONS
When using an electrical appliance, basic precautions should always be followed, including the following:
Read all instructions before using the Echelon®STRIDE-s.
DANGER — To reduce the risk of electric shock:
1. Always unplug this appliance from the electrical outlet immediately after using and before cleaning.
Review the above labels to ensure none are missing from the ECHELON®STRIDE-s. If any of the above labels are missing
or need replaced, contact Customer Service at cs@echelonfit.com or 833-937-2453.
Rating Label
Icon + Voltage Label
Product Warning Label Warning Label
Tip-Over Hazard Label
Motor LabelPower Cord
Label
Pinch Warning LabelLubrication
Label
THE BELT ON THE ECHELON®STRIDE-S IS A WAXED BELT, ELIMINATING THE
NEED FOR ADDING ANY LUBRICATION OVER THE LIFE OF THE TREADMILL�
DO NOT LUBRICATE.
ADDING LUBRICANT COULD DAMAGE THE BELT�
IMPORTANT!

12 |DESCRIPTIONPARTS LIST
DESCRIPTIONPARTS LIST
STRIDE-S DESCRIPTION
1. Console
2. Smartphone Holder
3. Folding Joint Cover
4. Button Platform
5. Handlebar
6. Upright
7. Motor Upper Cover
8. Side Cover
9. Folding Lever
10. Side Rail
11. Solid Side Rail
12. Running Belt
13. Rear Support Cover
14. Lift Handle
15. End Cap
PARTS LIST
16. Allen Wrench
17. Safety Key
18. (2) Safety Straps
19. (2) Anchors
20. (2) Screws
1
2
3
6
7
10 20
18
19
16 17
11
13
12
14
15
9
8
5
4

ECHELON MEMBERSHIP ACTIVATION |13
ECHELON MEMBERSHIP ACTIVATION
Account Creation
If this product was purchased on the echelonfit.com website, you should
have received an activation email.
Go to member.echelonfit.com and follow the on-screen instructions to
choose a plan and set up your account. This info will be needed to login to
your account on the Echelon Fit™ app.
All account info and plans are managed at member.echelonfit.com
and use the same login. After creating your account login on member.
echelonfit.com, write down your login info. This will be the same login
for the app.
1. CHOOSE “SIGN UP NOW”
2. SELECT PURCHASE LOCATION
Select purchase location and follow the on-screen instructions.
3. CHOOSE YOUR PLAN
Monthly / 1-Year / 2-Year
4. SET UP PAYMENT METHOD
5. ENTER PERSONAL ACCOUNT INFO
6. VIEW YOUR ACCOUNT
Where you can edit your billing info, add family members,
manage subscriptions, and (if on your mobile device) download
the app and sign in.
ACCOUNT ACTIVATION
If this product was purchased on the echelonfit.com website, you should
have received an activation email. Click the link in the activation email and
follow the on-screen instructions. Enter your information to verify payment
information. You will not be charged until the next month.

14 |ASSEMBLY
ATTENTION: Complete the following operations after making sure all screws are tightened and secure.
Move the treadmill unit out from the packaging box,
and place on a level surface.
Plug in the Power Cord (#C15) and insert the
Safety Key (#C13).
Hold left and right Handlebar (#A4) and lift it up
until you hear a “click” to lock the Left Upright/Right
Upright (#A3L/ #A3R) in the upright position.
For smartphone: Fix the Smartphone Holder (#B94)
on top of either water bottle holder, and place your
smartphone on top.
Hold left and right Handlebar (#A4) and push down
until you hear a “click” to lock it into position. Rotate
the Console Set (#B1) to the desired reading angle.
A3R
A4 A4
B1
A3L
C13
C15
B94
After installation, press the start button, adjust
speed level under 2 mph (3kph). Then check the
running belt to see if it runs smoothly or not.
Please refer to the Belt Adjustment section if the
belt is not running smoothly.
After thoroughly checking the belt, move the
treadmill to an appropriate location with ample
space for use.

FOLDING INSTRUCTIONS |15
Rotate the Console (#B1) backwards to be horizontal
with the Handlebar (#A4).
Hold the Lift Handle (#A1-H) for transportation or lift
one end of the treadmill up to standing position.
Simultaneously push down the Handlebar (#A4) and
press the Folding Button (#B100). Once unlocked,
rotate Handlebar back to attach Uprights (#A3L/#A3R).
Recommended Storage: upright position using straps. Place treadmill at standing position against a wall for
storage, or place it under the bed to save space. The height of the treadmill is 10.25 in (26 cm). If the space is
less than 10.25 in (26 cm) under your bed, please keep it somewhere else for storage.
Step down on the Pedal Lever (#A44) for auto
folding process until the Left Upright/Right Upright
(#A3L/ #A3R) is horizontal with the running deck.
Upright Store Against Wall Store Under Bed
A1H
CABINET
WALL
BED
B1
A4
A4
B100
B100 B100
A4
A3R
A3L
A3R
A3L
A44

16 |BELT ADJUSTMENT
Place treadmill on a level surface. Make treadmill
run at approximately 3-4 mph (6-8 kph), and observe
the running belt deviate condition.
SAFETY STRAPS, ANCHORS, & SCREWS SAFETY STRAP POSITION
BELT ADJUSTMENT: If the treadmill belt is swerving to the right, unplug the safety lock and turn off the
power. Turn the right adjusting bolt 1/4 turn clockwise, then insert the power switch and safety lock, make the
treadmill run, observe the running belt deviate condition. Repeat the above steps until belt is centered.
If the treadmill belt is swerving to the left, unplug the safety lock and turn off the power. Turn the left
adjusting bolt 1/4 turn clockwise, then insert the power switch and safety lock, make the treadmill run, and
observe the running belt deviate condition. Repeat the above steps until belt is centered.
The treadmill belt will gradually relax after above steps or after a period of use.
Unplug the safety lock and turn off the power, using the two adjusting bolts turn 1/4 turn clockwise.
Insert the power switch and safety lock to make treadmill run, then stand on the belt to confirm the tightness.
Repeat the above steps until the belt moderate tightness.
WHEN STORING THE TREADMILL
IN AN UPRIGHT POSITION, PLEASE
INSTALL SAFETY STRAPS TO THE
WALL TO SECURE AND PREVENT
TREADMILL FROM TIPPING OVER.
Use the provided anchors and screws to install the
safety straps. For concrete walls, drill two 0.315 in
(8 mm) pilot holes with 1.6 in (40 mm) depth, 32 in (81
cm) apart, and 47.2 in (120 cm) above floor. NOTE:
For wood walls, locate two wall studs 32 in (81 cm)
apart and drill appropriate pilot holes. Drive screws
into pilot holes without anchors.
32 IN (81 CM)
WIDTH APART
47.2 IN (120 CM)
ABOVE FLOOR
BELT ADJUSTMENT

CONSOLE OPERATION |17
CONSOLE OPERATION
CONSOLE DISPLAY

18 |CONSOLE OPERATION
CONSOLE OPERATION (cont’d.)
DISPLAY DEFINITION
Pulse & Distance
Show “Distance” when no heart rate detected.
Once heart rate signal detected, display switches
between “Distance” and “Pulse.”
Incline & Altitude
Display switches between “Incline” and “Altitude”
every 5 seconds.
Incline unit = 0 – 12 levels.
Altitude unit = meter or feet.
Speed & Calories
Display switches between “Speed” and “Calories”
every 5 seconds.
Time
Shows duration of the exercise.
CONTROL BUTTON DEFINITION
PROG (Program)
Select training program file
8 pre-set programs: P01 to P08
3 user programs: U01 to U03
1 body fat program: FAT
Manual
MODE
Select countdown program file
Time Countdown
Distance Countdown
Calories Countdown
START
Press “Start” button for begin of exercise after 3 seconds countdown
PAUSE/STOP
Press “Pause/Stop” button for 1st time to temporarily stop the exercise.
Both speed and incline go to zero and then stop.
When it’s in “Pause Status”, press “Pause/Stop” button for 2nd time
to end the exercise.
When it’s in “Pause Status” for 10 minutes or above, console goes into
“Sleep Mode” and display disappears. All data is saved at current stage.
To wake up console from “Sleep Mode”, press any buttons on the console
and display lights up again.
Press “Start” to begin the exercise. Adjust the speed and incline
to appropriate setting.

CONSOLE OPERATION |19
CONSOLE OPERATION (cont’d.)
Quick Speed
Quick speed has 3 buttons for 3km/h, 6km/h, and 9km/h (metric setting).
Quick speed has 3 buttons for 3m/h, 6m/h, and 9m/h (imperial setting).
Quick Incline
Quick incline has 3 buttons for level 3, level 6, and level 9.
Speed Control Buttons & Speed Control Buttons On Right Handlebar
Press “Increase” or “Decrease” buttons to adjust up or down the speed.
Min. speed: 0.8 km/h (0.5 m/h).
Max. speed: 19.2 km/h (12 m/h).
Emergency Stop
Always attach safety key clip to bottom of your clothes during workout. If any
emergency occurs, treadmill stops automatically when the safety key is pulled
out from the panel.
Incline Control Buttons & Incline Control Buttons On Left Handlebar
Press “Increase” or “Decrease” buttons to adjust up or down the incline level.
Min. incline level: level 0.
Max. incline level: level 12.
Switch Distance Unit
Press “PROG” and “MODE” together for over 5 seconds.
Find “F01” factory mode by pressing “SPEED CONTROL BUTTONS”. Press
“MODE” button to enter “F01.”
0 = Metric.
1 = Imperial.
Switch to preferred distance unit system by pressing “SPEED CONTROL
BUTTONS,” and then press “MODE” button to confirm the setting.

20 |CONSOLE OPERATION
CONSOLE OPERATION (cont’d.)
FEATURES
1. When power is on, display lights up for 2 seconds on all windows and
enter standby mode.
2. To start “Manual Mode”, insert safety key firmly into correct position and
press “Start” button. Console starts countdown for 3 seconds and belt
starts to run at lowest speed of 0.8 km/h (0.5 m/h).
To adjust “Speed” or “Incline”, press “Quick Speed”, “Quick Incline”,
Speed Control Buttons”, and “Incline Control Buttons” for appropriate
setting. To end the session, press “Stop” or fully remove safety key.
3. To start “Countdown Program”, press “Mode” button to choose
countdown mode in sequence: Time Countdown, Distance Countdown,
and Calories Countdown.
To adjust the default time/ distance/ calories setting, press “Speed
Control Buttons” or “Incline Control Buttons” to adjust up or down the
value. After the setting is completed, press “Start” button to begin the
exercise. During the session, adjust the speed or incline based on your
personal condition.
4. To start pre-set programs, press “Program” buttons to choose any of the
8 programs, and the corresponding program number will be displayed on
“Speed & Calories Display Window”. To adjust the default time setting,
press “Speed Control Buttons” or “Incline Control Buttons” to set the total
time duration.
Each pre-set program has 10 segments and the time duration of each
segment is the 1/10 of setting time.
When one segment is completed, console automatically runs the setting
speed and incline based on the next segment. User can adjust the speed
and incline to fit one’s personal condition. Press “Start” button to begin
the training after setting is completed.
Table of contents
Other Echelon Treadmill manuals
Popular Treadmill manuals by other brands

Healthstream
Healthstream HC10TM owner's manual
Weslo
Weslo Cadence C32 Treadmill Manuel de l'utilisateur
cecotec
cecotec DRUMFIT WAYHOME 1400 SPRINT instruction manual
Pro-Form
Pro-Form 700 Zlt Cwl Treadmill Bedienungsanleitung
BLADEZ
BLADEZ BLADEZ T4 PRO Illustrated parts manual
Pro-Form
Pro-Form 10.0 Tpi manual
