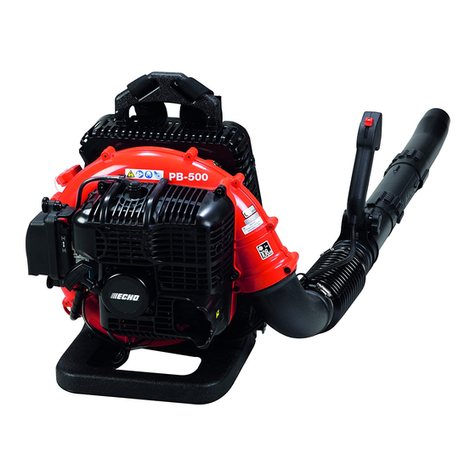
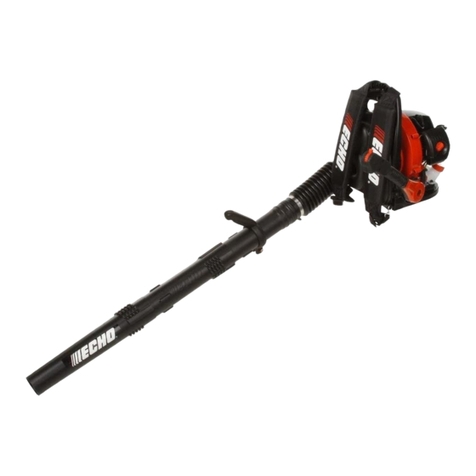
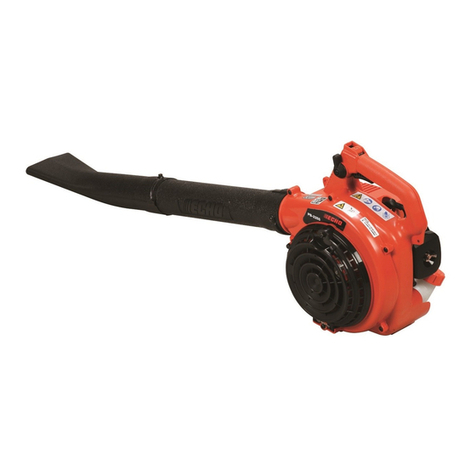
Echo PB-200 User manual

OPERATOR’S
MANUAL
ECHO
POWER
BLOWER
PB-SOO
898
561-0096
2
CAUTION
Read
Rules
for
Safe
Operation
and
Instructions
Carefully

IMPORTANT
RULES
FOR
SAFE
OPERATION
1.
Handle
gasoline
with
care.
It
is
highly
inflammable.
—
Refuel
before
starting
work.
—
Do
not
smoke
while
handling
fuel.
—
Do
not
refuel
a
hot
engine.
—
Avoid
spilling
fuel
or
oil.
Always
wipe
unit
dry
before
using.
—
Move
at
least
3meters
(10
feet)
away
from
the
fueling
point
before
starting
engine.
—
Always
store
gasoline
in
approved
container.
2.
Do
not
operate
in
unventilated
area.
3.
Do
not
allow
bystanders
in
work
area.
4.
Do
not
point
the
blower
pipe
in
the
direction
of
people.
5.
Always
wear
safety
glasses.
6.
Always
wear
ear
protectors
wherever
possible.
7.
Avoid
wearing
loose
clothing
or
loose
scarf.
8.
Always
use
a
face
filter
mask
to
avoid
breathing
dust.
9.
Do
not
block
blower
pipe
in
order
to
avoid
engine
damage
due
to
over
revolution.

CONTENTS
Page
Rules
for
Safe
Operation
..
1
Technical
Data...
2
Nomenclature
of
Parts..
3
Assembling..
Operation..
Maintenance
and
Care
.
6
Troubleshooting
...
Storage
After
Use
.
g
Optional
parts
..
Parts
Catalogue
.
1
1
TECHNICAL
DATA
Dimension
LxWxH
cm
(in.)
20.8x28.2x35.5(8.2x
11.1
x
14.0)
Weight
kg
(lbs)
4.4
(9.7)
Engine
Type
Displacement
cc
(cu.in.)
Carburetor
Ignition
Spark
plug
Starter
Air
cooled
2
cycle
single
cylinder
21.2(1.29)
Walbro
diaphragm
type
WA
Flywheel
magneto:
contact
breaker
point
system
NGK
BM-6A
or
CHAMPION
CJ-8
Recoil
starter
*
Technical
data
subject
to
change
without
notice.
-
2
-

NOMENCLATURE
OF
PARTS
Throttle
trigger
Carburetor
Ignition
switch
Spark
plug
Air
cleaner
Fuel
tank
cover
Rubber
band
Recoil
starter
Muffler
ASSEMBLING
•
Assemble
adapter
pipe
to
the
blower
(Fan
case)
and
tighten
clamp
as
shown.
•
Assemble
both
straight
pipes
to
adapter
pipe.
•
Assemble
curved
pipe
and
fan
head
nozzle
to
the
straight
pipe.
•
Rotate
the
curved
pipe
to
a
convenient
angle
for
opera¬
tion.
-
3
-

OPERATION
CHECK
UP
OF
NUTS
AND
OTHER
HARDWARES
•
Check
up
loose
nuts,
bolts
and
screws
before
using
the
unit
every
day.
FUEL
•
Fuel
used
for
this
model
is
a
mixture
of
regular
grade
gasoline
and
ECHO
brand
motor
oil
or
an
aircooled
two
stroke
engine
oil
of
a
reputable
brand
name.
•
Mixture
ratio
is
Gasoline
32
parts:
Oil
1
part.
iz:
o
—
Fuel
mixture
at
a
ratio
other
than
32
:
1
may
cause
malfunction
of
the
engine*
(NOTE)
32:1
Ratio
is
applicable
with
special
oil
approved
by
ECHO*
—
Pour
1/2
gasoline
into
safe
container,
add
oil
and
mix
thoroughly.
—
Now
add
the
remainder
of
gasoline
and
mix
again.
—
Do
not
use
motor
oil
other
than
that
recommended
above.
—
Do
not
mix
directly
in
engine
fuel
tank.
(32
:
1)
Fuel
mix
chart
150
:
D
US
METRIC
US
METRIC
After
refuel
to
tank,
secure
filler
cap
and
GAS
OIL
GAS
OIL
GAL
OIL
GAS
OIL
wipe
all
spilled
fuel
with
a
dry
cloth.
GAL
FL
02
LITERS
CC
GAL.
FL
0Z
LITERS
CC
1
4.0
4
125
1
2.6
4
80
2
3,0
0
250
2
5.1
8
160
5
20.0
20
625
5
12.8
20
400
STARTING
COLD
ENGINE
•
Stand
engine
upright
on
a
level
surface.
•
ignition
switch
to
"start/run"
position.
•
Turn
choke
shutter
to
START
(close)
position.
(Towards
the
flexible
pipe)
•
Open
throttle
trigger
to
a
fast
idle.
(Squeeze
it
slightly)
•
Pull
recoil
starter
until
engine
fires.
•
Turn
choke
shutter
to
full
RUN
(open)
position,
and
if
necessary,
start
engine
again
and
allow
to
warm
up
before
using
(Caution)
Recoil
starter:
Use
short
pulls-only
1/2
—2/3
of
the
starter
rope
for
starting.

STARTING
WARM
ENGINE
•
Ignition
switch
to
"start/run"
positron.
•
Puli
starter
handle
until
engine
fires.
“
Do
not
use
the
choke.
STOPPING
ENGINE
•
Release
throttle
trigger
and
allow
engine
to
cool
at
an
idle
for
a
few
minutes,
*
Ignition
switch
to
"stop"
position.
(Note)
When
engine
does
not
stop,
shift
choke
shutter
to
close
position.
Check
and
repair
switch
before
starting
engine
again.
OPERATING
BLOWER
•
Allow
the
engine
to
warm
up
at
a
fast
idle
for
a
few
minutes,
•
ECHO
PB-200
can
be
run
at
any
speed
between
an
idle
of
2300-2700
RPIV1
and
maximum
load
speed
of
7500
RPIVL
The
velocity
of
the
air
stream
can
therefore
readily
be
controlled
from
a
gentle
breeze
to
a
high
speed
blast
moving
at
approximately
103
MPH
(46
m/sec)
which
will
move
debris
ranging
from
garden
leaves
to
bottles
and
can
accumulated
in
sports
stadiums.
—
Use
a
low
speed
to
blow
dry
leaves
from
a
lawn
or
flower
bed,
—
Use
a
medium
to
high
speed
to
clean
grass
and
leaves
from
walks,
patios
and
drives,
—
Use
a
high
speed
to
move
gravel,
dirt,
snow,
bottles
or
cans
from
a
driveway,
street,
parking
lot,
or
stadium.
(Caution)
Do
not
point
the
blower
pipe
in
the
direction
of
people
or
pets.
Always
wear
safety
glasses
and
use
a
face
f
ilter
mask.
Read
carefully
"Rules
for
safe
operation"
on
page
1.
-
5
-

MAINTENANCE
AND
CARE
REMOVING
ENGINE
COVER
(Remove
engine
cover
to
clean
air
filter,
spark
plug
and
muffler.)
•
Unfasten
rubber
band
at
bottom
of
machine.
•
Pull
out
engine
cover,
pushing
two
holders
as
shown.
•
Do
not
adjust
carburetor
unless
necessary,
•
To
adjust
carburetor,
proceed
as
follows:
—
Low
speed
needle:
7/8
—
13/8
—
High
speed
needle:
7/8
—
1-3/8
—
Turn
the
corresponding
needle
clockwise
until
lightly
seated
and
return
the
screw
by
the
number
of
turns
indicated
above.
•
Idle
adjustment:
(2300-2700
rpm)
Adjust
idle
speed
to
a
smooth
and
consistent
minimum.
•
If
you
have
trouble
with
carburetor,
see
your
distributor/
dealer*
CARBURETOR
Low
speed
needle
High
speed
needle
idle
adjust
needle
AIR
FILTER
•
Clean
every
day.
—
Take
out
retaining
spring
and
pull
up
grid
and
air
filter
to
clean*
—
Brush
off
dust
lightly
or
wash
it
in
gasoline.
—
When
you
wash
it
in
gasoline,
dry
completely
before
put
it
-
6
-

FUEL
STRAINER
•
Check
periodically,
—
Do
not
allow
dust
to
enter
into
fuel
tank.
—
Clogged
strainer
will
cause
difficulty
in
starting
engine
or
abnormalities
in
engine
performances,
-
Pick
up
fuel
strainer
carefully
through
fuel
inlet
port
with
a
piece
of
steel
wire
or
the
like.
—
When
strainer
is
dirty,
wash
it
in
gasoline.
SPARK
PLUG
CYLINDER
FINS
MUFFLER
AND
EXHAUST
PORT
•
Check
periodically.
—
The
standard
spark
gap
is
0,6—0,7
mm
(0.023-
0.028
in,}.
—
Correct
spark
gap
if
it
is
wider
or
narrower
than
the
standard
gap,
—
When
it
is
deposited
with
carbon
or
stained,
clean
it
before
fitting
to
engine.
•
Fastening
torque
=
145—155
kg.cm
(125—135
in.lb).
(Caution!
Do
not
over
tighten
plug.
•
Check
periodically.
—
Clogged
fins
result
in
poor
engine
cooling.
-
Clean
passage
of
air
between
cylinder
fins
to
let
cooling
air
pass
easily.
•
Carbon
deposit
in
cylinder
exhaust
port
and
muffler
will
cause
drop
of
engine
output
and
sparking
from
muffler.
—
Muffler
can
be
removed
by
taking
off
muffler
cover.
—
Be
careful
not
to
scratch
cylinder
or
piston
when
cleaning
cylinder
exhaust
port.
TROUBLE
SHOOTING
•
FAILURES
such
as
difficulty
in
starting
engine,
irregularity
in
functions
and
abnormality
in
blowing
performances
can
normally
be
prevented
completely
if
a
little
attention
is
paid
in
advance,
•
Such
failures
can
be
readily
disposed
of
even
by
a
beginner.
•
When
engine
does
not
function
properly,
check
following
3
points
systematically
in
particular:
—
Whether
compression
of
engine
is
adequate
or
not.
—
Whether
fuel
system
is
in
good
condition
and
fuel
is
supplied
fluently,
or
not.
—
Whether
electrical
system
is
in
good
condition
and
spark
plug
sparks
correctly,
or
not,
•
When
there
is
serious
trouble
with
the
unit,
do
not
try
to
repair
by
yourself,
but
have
your
distributor
or
dealer
do
it
for
you.
•
Details
of
TROUBLE
SHOOTING
refer
to
Table
1
and
2.
—
Refer
to
chart
to
locate
the
problem
and
repair
as
necessary.
-
7
-

Fuel
is
reaching
carburetor
Table
1
Fuel
is
not
p
Fuel
strainer
clogged.
Clean.
reaching
.
carburetor
*
■
—Fuel
pipe
clogged.
Clean.
Fuel
is
not
reaching
...
Cylinder
—
Suction
insufficient
.
Make
sufficient.
—
Strainer
clogged...
Clean.
—
Carburetor
out
of
order.
Disassemble
and
check.
r
P
oints
in
bad
condition
....
o
c
2
S
Points
in
good
.
condition
No
spark
at
plug
—Fuel
does
not
keep
running
Accelera¬
tion
and
—
low
speed
function
defective
E
Stained
with
oil
or
water
Points
oxidized
or
burnt
—
Condenser
defective
.
—
Coil
defective
.
—
Wire
connection
defective
.
—
High-tension
cord
connection
defective.
pSwitch
is
open
.
Wiring
defective..
—
Insulator
cracked
.
^Spark
gap
incorrect
..
—
Covered
with
carbon..
—
Fouled
with
fuel
.
—
Starting
procedures
incorrect
.
p
Low
and
high
speed
needle
setting
too
lean
.
—
Metering
lever
spring
too
strong
.
—
Fuel
pump
diaphragm
defective
.
*—
Fuel
passage
clogged
with
dust
.
“Fuel
leaking
from
fixing
surfaces
of
carburetor
—
Air
valve,
fuel
tank
cap
does
not
work
normally
""
*—
Fuel
pump
does
not
operate
.
Clean
with
paper
or
cloth.
Remove
oxidation
with
sandpaper
or
replace
as
necessary.
Remove
and
replace.
Remove
and
replace.
Reconnect.
Repair
as
necessary.
Switch
on.
Check
switch
and
wiring.
Replace
plug.
Adjust.
Clean
or
replace.
Clean
or
replace.
Start
correctly.
Readjust.
Readjust.
Replace.
Disassemble
and
clean.
Retighten
all
screws.
Replace
or
Clean.
Check
impulse
drilling.
1
—
Carburetor
overflow
’
[
Fuel
inlet
needle
valve
clogged
with
dust
.
Metering
lever
spring
not
placed
in
dent
of
lever
**
Clean.
Correct.
Engine
does
not
crank
This
is
because
fuel
mixture
is
too
rich.
Muffler
sticky
Start
engine
several
times
with
fuel
.
with
choke
shutter
fully
open
and
run
at
fast
idle
until
engine
does
not
smoke.
—
Bearing
damaged
.
Disassemble
and
—
Piston
and/or
cylinder
seized***Disassemble
and
“Crankshaft
worn
.
Disassemble
and
1
—Crankshaft
contacting
crankcase
.
Disassemble
and
replace.
replace.
replace.
replace.
8
-

Table
2
■
E
n
g
i
n
e
overheated
i—
Improper
fuel,
used
Use
fuel
with
correct
mixing
ratio.
Never
use
gasoline
of
poor
quality.
—
Spark
plug
defective
(burnt)..
Replace.
—
As
cooling
fins
clogged,
air
does
not
pass
well
.
—
Excessive
deposits
in
combustion
chamber
.
Clean
fins.
Disassemble
and
remove
carbon
—
Point
gap
incorrect
.
Adjust
to
0.35
mm
(0.014").
Firing
function
defective
.—
Plug
damaged
or
fouled
.
Replace
or
clean.
1
—Combustion
poor
due
to
defective
wiring.
.
Check
wiring.
Carburetor
defective
—
High-speed
needle
setting
incorrect
—
Carburetor
overflow
Readjust.
Refer
to
Table
1.
L—
Air
cleaner
clogged
.
Clean
as
necessary.
Other
troubles
—
Compression
insufficient
Disassemble,
check
and
replace
(piston
ring
stuck
or
.
if
necessary.
worn
out)
Cylinder
chromium
plating
peeled
or
worn
out
.
Replace
cylinder.
r
Exhaust
port
clogged
with
carbon
.
Clean
as
necessary.
—
Throttle
is
not
fully
open
.
Readjust.
STORAGE
AFTER
USE
•
Inspect
and
adjust
every
part
of
the
unit.
—
Completely
clean
every
part/and
repair,
if
necessary.
—
Apply
thin
coating
of
clean
oil
on
metal
parts
to
prevent
rust.
—
Remove
flexible
and
other
pipes
from
the
unit.
•
Drain
fuel
tank,
pull
starter
handle
slowly
a
few
times
to
drain
fuel
from
carburetor.
•
Pour
a
little
amount
of
clean
motor
oil
into
spark
plug
hole
of
cylinder,
puli
starter
handle
and
then
manually
crank
engine
until
the
TOP
DEAD
CENTER.
•
Store
in
a
dry
area,
free
from
dust.
-
9
-
Other manuals for PB-200
4
Table of contents
Other Echo Blower manuals

Echo
Echo PB-2520 User manual

Echo
Echo PB-265L User manual

Echo
Echo 99944200490 User manual

Echo
Echo PB-265LN User manual

Echo
Echo LEAF BLOWER Installation guide

Echo
Echo Power Blower PB-230LN User manual

Echo
Echo PB-460LN User manual

Echo
Echo PB-500H User manual
Echo
Echo PB-770H User manual

Echo
Echo PB-265ESL Mounting instructions

Echo
Echo PB-2620 User manual

Echo
Echo PB-650H User manual

Echo
Echo DPB-600 User manual

Echo
Echo PB-2155 User manual

Echo
Echo PB-261 i User manual
Echo
Echo PB-770 User manual

Echo
Echo PB-4600 User manual

Echo
Echo Pro Attachment ES-210 User manual

Echo
Echo PB-46LN User manual

Echo
Echo PB-200 - 01-09 User manual