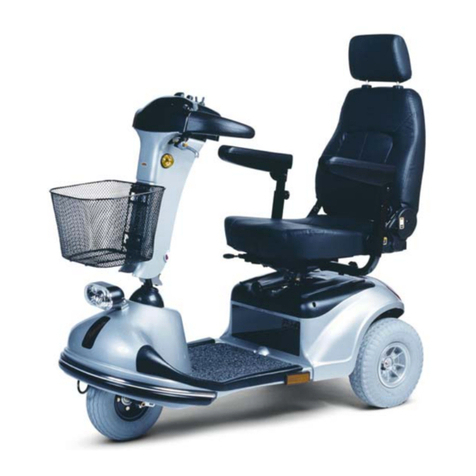
Eclipse Pioneer S148 User manual

S148
Owner’s Manual

2
Table of Contents
Contents
Introduction ....................................................................................................................................3
EMI Warning...................................................................................................................................4
Safety Guidelines ...........................................................................................................................5
Safety Summery.............................................................................................................................9
Features.......................................................................................................................................10
Free Wheel Mode.........................................................................................................................16
Operating Your Scooter................................................................................................................17
Batteries and Charging.................................................................................................................20
Care and Maintenance.................................................................................................................23
Trouble Shooting..........................................................................................................................25
Warranty.......................................................................................................................................26
Specifications...............................................................................................................................27
Accessories..................................................................................................................................28

3
Introduction
Congratulations on the purchase of your Eclipse scooter. Please carefully read this owner’s manual
before attempting to use your scooter. After reading the manual if you still have any questions or
concerns please feel free to contact your local authorized dealer.
Before reading the rest of the manual please register your product online at
www.eclipsemedical.com.
You must keep your receipt as proof of purchase for the warranty to be valid: you will need
to present the receipt when you service or repair your product under warranty.
Please fill in the information below for your records.
Model: __________________________
Serial # __________________________
Date Purchased: __________________________
Dealer Name: __________________________
Dealer Telephone #: __________________________

4
EMI Warning
Electromagnetic interference
This vehicle has an immunity level of 20 Vim which should protect it from
Electromagnetic Interference (EMI) from Radio Wave Sources. The rapid development of
electronics, especially in the area of communications, has saturated our environment with
electromagnetic (radio) waves that are emitted by television, radio and communication signals.
These EM waves are invisible, and their strength increases as one approach the source. All
electrical conductors act as antennas to the EM signals and, to varying degrees, all power
wheelchairs and scooters are susceptible to electromagnetic interference (EMI). This
interference could result in abnormal, unintentional, movement and/or erratic control of the vehicle.
The United Statement is incorporated to the user's manual for all electric scooters.
Powered wheelchairs and electric scooters (in this text, both will be referred to as
powered wheelchairs) may be susceptible to electromagnetic interference (EMI), which is
interfering electromagnetic energy emitted from sources such as radio stations, TV stations,
amateur radio (HAM) transmitters, two-way radios and cellular phones. The interference (from radio
wave sources) can cause the powered wheelchair to release its brakes, move by itself or move in
unintended directions. It can also permanently damage the powered wheelchair's control system.
The intensity of the EM energy can be measured in volts per meter (V/m). Each
powered wheelchair can resist EMI up to certain intensity. This is called the "immunity level." The
higher the immunity level the greater the protection. At this time, current technology is capable of
providing at least 20 V/m of immunity level which would provide useful protection against common
sources of radiated EMI.
Following the warnings listed below should reduce the chance of unintended brake release or
powered wheelchair movement that could result in serious injury:
•Do not turn on hand-held personal communication devices such as citizens band (CB) radios
and cellular phones while the powered wheelchair is turned on.
•Be aware of nearby transmitters such as radio or TV stations and try to avoid coming close
to them.
•If unintended movement or brake release occurs, turn the powered wheelchair off as soon
as it is safe.
•Be aware that adding accessories or components, or modifying the powered wheelchair,
may make it more susceptible to interference from radio wave sources. (Note: there is no
easy way to evaluate their effect on the overall immunity of the powered wheelchair).
The FDA has written to the manufacturers of power wheelchairs, asking them to test their
new products to be sure they provide a reasonable degree of immunity against EMI. The
letter says that powered wheelchair should have an immunity level of at least 20 V/m, which
provide a reasonable degree of protection against the more common sources of EMI. Higher
the level, the greater the protection.
•Report all incidents of unintended movement or brake release to the powered wheelchair
manufacturer and note whether there is a radio wave source nearby.
WARNING
The scooter might disturb the operation of devices in its environment that emit
electromagnetic fields (e.g. alarm systems of shops, automatic doors etc.)

5
Safety Guidelines
Read and follow all instructions, warnings, and notes in this manual before operating the scooter
for the first time. In addition, your safety depends upon you, as well as your provider, caretaker, or
healthcare professional in using good judgement.
If there is any information in this manual which you don't understand, or if you require additional
assistance for setup or operation, please contact your local Eclipse Medical dealer. Failure to
follow the instructions, warnings, and notes in this manual and those located on your product can
result in personal injury or product damage and will void your product warranty.
Modifications
WARNING
Do not modify your scooter or change the programmed parameters of your scooter controller in any
way. Modifications may result in personal injury and damage to the scooter.
Pre-ride safety check
Get to know the feel of your scooter and its capabilities. We recommend that you perform a
safety check before each use to make sure your scooter operates smoothly and safely.
Find an open area such as a park and have an assistant to help you practice until you
have confidence operating the scooter.
•Check for proper tire inflation.
•Make sure all electrical connections are tight and not corroded.
•Check the brakes.
•Check the battery charge.
Tire inflation
Your scooter is equipped with pneumatic tires, you should have the air pressure checked at least
once a week. Proper inflation pressures will prolong the life of your tires and help ensure the smooth
operation of your scooter.
WARNING
Do not underinflate or overinflate your tires. Low pressure may result in loss of control
and overinflate may burst. It is very important that correct tire pressure be maintained in
pneumatic tires at all times.
Weight limitations
Stay within the specified weight capacity for your scooter. Exceeding the weight capacity voids your
warranty. We will not be held responsible for injuries or property damage resulting from failure to
observe weight limitations.

6
WARNING
Do not carry passengers on your scooter or exceed the maximum weight capacity. Carrying
passengers on your scooter may affect the center of gravity, resulting in a tip or a fall.
Incline information
Most buildings have ramps with specified degree of inclination, designed for easy and safe access.
Pay attention when driving down an incline and keep the scooter's speed adjustment set to the
slowest speed setting to ensure a safe controlled descent. Avoid sudden stops and starts on the
ramps.
WARNING
•When driving up an incline, try to keep your scooter moving. If you must stop, start up again
slowly and accelerate cautiously. When driving down an incline, set your scooter to the
slowest setting and drive in the forward direction only.
•Do not zigzag or drive at an angle up the face of the incline. Drive your scooter straight up
the incline. This greatly reduces the possibility of a tip or a fall. Always exercise
extreme caution when negotiating an incline.
•You should not travel up or down a potentially hazardous inclines, such as area covered with
snow, ice, or wet leaves.
•When on any type of incline or decline, never place the scooter in "Free wheel" mode while
seated on or off the scooter. It may result in personal injury and damage to your scooter.
Never travel down an incline backwards; it may result in personal injury.
(Picture 1.1 with driving position- Increased stability driving position)
Picture 1.1 Incline Information

7
Braking information
Your scooter is equipped with a powerful braking system:
Electromagnetic regenerative brake: Uses electricity to rapidly slow the vehicle when the throttle control
lever returns to the center/stop position and act as a parking brake.
Manual brake: Activates mechanically when power is removed from the system for any reason. The
manual brake is not a parking brake. It can be used as a running brake in freewheel mode.
In freewheel mode an assistant must operate the parking brake by engaging the drive system again. No
battery power is necessary for this function.
Outdoor driving surface
Avoid driving on uneven terrain or soft surface.
Avoid tall grass that can become tangled in the running gear.
Avoid loosely packed gravel and sand.
If you feel unsure about a driving surface, avoid the surface.
Obstacles (steps, curbs, etc.)
Do not attempt to drive your scooter backwards down a step, curb, or any other obstacle. This
may cause the scooter to tip. We recommend that you do not attempt to negotiate a curb that has a
height greater than 2” in. (5 cm). Doing so could cause instability in your scooter.
Pictures 1.2 & 1.3 Incline Information
Inclement weather precautions
Exposure of your scooter to inclement weather conditions should be avoided whenever possible. If
suddenly caught up in rain, snow, severe cold or heat while operating your scooter, proceed to
shelter at theearliest opportunity. Thoroughly dry your scooter before storing, charging, or operating
your scooter.
Freewheel mode
When your scooter is in freewheel mode, the braking system is disengaged. Disengage the drive
motors only on a level surface. Stand to the side of the scooter to engage or disengage freewheel
mode. Do not sit on a scooter to do this. Freewheel mode is only to be used with an assistant,
who can engage the freewheel mode.

8
Stairs and elevators
Electric scooters are not designed to travel up or down on stairs or escalators. Always use an
elevator.
Batteries
Scooter batteries are very heavy and should be lifted by two people. Always protect the batteries
from freezing. Charging a frozen battery may result in damage to the battery.
Transport
Do not remain seated in your scooter while traveling in a motor vehicle. The scooter should be
stowed secured in the vehicle trunk or within a van, or on some type of scooter lift.
Getting on and off your scooter
Getting on and off your scooter requires a good sense of balance. Please follow these safety tips
when getting on and off your scooter:
•Remove the key from the key switch.
•Ensure that your scooter is not in freewheel mode.
•Make certain that the seat is fixed into place.
WARNING
Avoid putting all your weight on the scooter armrests and do not use the armrests for weight bearing
purposed, such as transfers. It may cause the scooter to tip, resulting in a fall from the scooter.
Alcohol
Do not operate your scooter while you are under the influence of alcohol, as this may impair your
ability to drive safely.

9
Safety Summery
•Do not carry passengers or exceed the maximum weight capacity of the scooter.
•Do not exceed any incline over 12°. Ask for assistance when descending or ascending
steep gradients.
•Do not attempt to mount a curb higher than 5 cm (2")
•Do not use on the road, except when crossing between pavements. When crossing a
public road always take extra care and observe the rules of the road.
•Do not turn off the controls by switching the key off while the scooter is moving. This will
bring engage the brakes immediately and could cause damage to the scooter and yourself.
•Do not drive through water, deep soft terrain (soft dirt, loose gravel, deep grass or sand).
•Do not mount or dismount the scooter unless the brakes are engaged, and the controls are
switched off.
•Do not operate the scooter if the unit is in freewheel mode.
•We recommend that you do not sit on your scooter when in a vehicle, but transfer to a
vehicle seat and stow the scooter in the vehicle storage space.
•Do not turn suddenly at full speed. Always stop before making a sharp change of direction.
•Always turn the speed dial to the slowest setting (turtle symbol) when going down a hill.
•Always keep your feet on the footplate when moving.
•Do not expose the scooter to direct rain or high humidity as it may cause it to malfunction
(electrically or mechanically).
•Always make sure that the batteries are sufficiently charged before setting out on a
journey.
•Do not use parts, accessories or adapters other than those authorized by Eclipse Medical
Inc.

10
Features
Controls (Digital dashboard)
The tiller includes a speed adjustment knob, throttle control lever, LCD display, half speed button,
hazard light button, headlight button, turn signal buttons, and horn button.
WARNING
User should not modify the controller parameters; it may result in personal injury and damage to
your scooter.
Speed Adjustment Knob (1)
This dial allows you to preselect and limit your scooter's top speed. The image of the turtle
represents the slowest speed setting. The image of the hare represents the fastest speed setting.
Half Speed Button (2)
Half Speed is activated by pressing the Half Speed button. Once pressed an image of a turtle will
show on the right side of the LCD display. Pressing the button, a second time will turn it off.
Horn Button (3)
The horn button activates a warning horn sound. Releasing the button deactivates the horn.
Headlight Button (4)
The headlights are activated by pressing the headlight button. Pressing the button, a second time
will turn them off.
Hazard Light Button (5)
The hazard lights are activated by pressing the hazard light button. Pressing the button, a
second time will turn them off.

11
Turn Signals (6 & 7)
Right turn signal button (6):
•Pressing the button will activate the right turn signal lights. Pressing a second time will
turn them off.
Left turn signal button (7):
•Pressing the button will activate the left turn signal lights. Pressing a second time will
turn them off.
Throttle Control Lever (8 & 9)
This lever allows you to control the forward speed and the reverse speed of your scooter up to the
maximum speed you pre-set with the speed adjustment dial.
To Move Forward (8):
•Use your right-hand fingers to pull back on the right side of the throttle control lever.
To Move Backwards (9):
•Use your left-hand fingers to pull back on the left side of the throttle control lever.
Release the throttle control lever and allow your scooter to come to a complete stop before
engaging the other side of the lever. When the throttle control lever is completely released, it
automatically returns to the center "stop" position and engages your scooter's brakes.

12
Key Switch (10)
Insert the key into the key switch and turn to a vertical position. The scooter is on and readyto drive.
When the key is turned to a horizontal position, the scooter is OFF.
Tiller Angle Adjustment Lever (11)
The tiller angle adjustment lever allows you to position the tiller closer or further away from you.
Using your left hand squeeze the lever and the pull or push the tiller into a conformable position.
Release the leaver to lock in place.
Battery Charger Port (12)
Off board battery charger receptacle
Power Port (13)
5A fuse only for GPS/Mobile Phone
LCD Display
The LCD display shows battery condition, speedometer, odometer, temperature and maintenance
messages.
1. Battery condition
Be aware when the battery becomes depleted. Estimate the distance and expected time for
your trip before you start. We recommend you charge the battery after using you scooter.
(See Battery and Charging section)
2. Speedometer
The LCD display shows current speed.
1
2
3
5
4
6

13
3. Odometer
The LCD display shows km’s or miles driven.
4. Temperature
The LCD display shows current air temperature.
5. Time
The LCD display shows current time.
6. Diagnostic fault code
If your scooter requires service an image of a wrench will flash on the LCD display along
with a code number.
1. Battery’s need recharging.
2. Battery voltage too low
3. Battery voltage too high
4. Current time limit out
5. Brake fault
6. Not in neutral at power up
7. Speed potentiometer error
8. Motor volts error
9. Other internal error
WARNING
Be careful when you perform any adjustments to avoid any injury. It is recommended that two
people help in the removal of the seat.
Tiller Adjustment
The tiller angle adjustment allows you to move the tiller dashboard to
a comfortable driving position.
1. Locate the angle adjusting lever located on the left side of
the control panel dashboard.
2. Squeeze the lever and pull the tiller towards you or away from you.
3. Once your desired angle is achieved release the lever.
**NOTE: Make sure the tiller is securely locked in place before
driving.

14
Adjusting Your Scooter Seat
Seat swivel adjustment
The seat swivel lever located on the right side of the side allows
the seat to rotate in 45-degree increments. You may use this
feature to make it easier to transfer in and out of the seat.
1. Pull up on the lever located on the lower right side of the
seat.
2. Rotate the seat left or right to the desired position.
3. Release the lever to secure the seat into place. Try to turn
the seat back and forth slightly allowing the lever to
lock completely into place.
**NOTE: Make sure the seat is securely locked in place before
driving.
Seat recline adjustment
You can recline the seatback angle to provide a more comfort while
driving.
1. Pull up on the seat back recline lever located on the right side
of your seat.
2. Slowly and carefully adjust the seat back angle
3. Release the lever to lock seat back into position.
**NOTE: Make sure the seat is securely locked in place before
driving.
Seat Slide Adjustment
The seat can be moved closer or farther away from the tiller.
1. Pull up on the lever located under the front right corner of the
seat.
2. Slide the seat forward or back into your desired position.
3. Release the lever.
**NOTE: Make sure the seat is securely locked in place before
driving.

15
Armrest Width Adjustment
The armrest width can be adjusted inward or
outward.
1. Loosen the armrest adjustment knobs.
2. Slide the armrests in or out to the
desired width.
3. Tighten the armrest adjustment knobs.
Armrest height adjustment
The armrest height can be adjusted up or down.
1. Loosen the knob at the rear of the armrest.
2. Lift or lower the armrest.
3. Tighten the armrest knob at the desired armrest height.
Seat Height Adjustment
The seat can be set to 4 different heights.
1. Remove the seat.
2. Remove the rear chassis cover. (Fig. A)
3. Loosen the seat height adjustment nut and remove it from the bolt. Remove the bolt. (Fig. B)
4. Raise or lower the seat post to the desired seat height.
5. While holding the seat post at that height, match up the holes in the seat post with those of the
outer seat post frame.
6. Insert the seat height adjustment bolt.
7. Install the washer & nut onto the bolt and tighten.
8. Reinstall the rear shroud and the seat.
Fig. A Fig. B

16
Free Wheel Mode
Free-wheeling is used when you want to move your unit without riding on it.
If for reasons of convenience you need to free wheel your scooter, follow the instructions below.
1. To activate manually, turn the scooter off and remove key.
2. Locate the RED free-wheel lever at the back of the
scooter.
3. Pull the lever to “UP” position to disengage the brake and
allow the scooter to be pushed freely.
4. Push the lever to the “DOWN” position to reengage the
brake.
Caution Notes:
Never sit on your scooter with the free wheel in the disengaged position. When the free-wheel
device is disengaged, you do not have braking function. Do not park your scooter on a slope with
the free wheel disengaged.
If your scooter is in the free-wheel mode, when you depress the speed control you will not be able
to move under motor power. Depress the free-wheel switch once again. You will hear a clicking
sound of the brakes being re-applied to be able to start driving your scooter.
General: If you can push your scooter, the free-wheel switch is on and the electromagnetic brakes
are disengaged. Please check once more the above-mentioned procedure for re-engaging the
drive.

17
Operating Your Scooter
Getting onto your scooter
For your first drive, make sure that you and your scooter are on a level surface.
1. Make sure the scooter is turn is off before sitting on it.
2. Stand at the side of your scooter.
3. Disengage the seat rotation lever and rotate the seat until it is facing you.
4. Make certain that the seat is fixed securely in position.
5. Position yourself comfortably and securely in the seat.
6. Disengage the seat rotation lever and rotate the seat until you are facing forward.
7. Make certain that your feet are safely on the floorboard and the seat is securely locked into
position.
Getting off your scooter
1. Bring your scooter to a complete stop.
2. Turn off your scooter.
3. Disengage the seat rotation lever and rotate the seat until you are facing toward the side of
your scooter.
4. Make certain that the seat is fixed securely in position.
5. Carefully and safely get out of the seat and stand to the side of your scooter.
6. You can leave the seat facing to the side to facilitate boarding your scooter next time.
Parking in Public
If you need to park and leave your scooter, simply remove your key. This will keep the brake on
and will make your scooter difficult to move. It is best to leave it in sight of someone (like a store
assistant etc.) who can watch it for you. Another precaution is to record your serial number and the
date of purchase.
Your serial number can be found under the seat on the seat post.
Operating your scooter
Make certain that you are properly sitting on your scooter. Ensure that the ‘speed control dial’ is
turned to slow for your first drive. When you have become more confident, you can increase the
setting to a higher speed. Push the ‘thumb lever control’, as described earlier. You will very gently
accelerate. Release the lever, and you will gently stop. Practice these two basic functions until you
get used to them.
Steer the scooter by turning the handlebars in the direction you wish to maneuver. Be sure to
remember to give a wide clearance when turning, so that the rear wheels follow the path of the front
ones, instead of cutting short. Cutting short on pavement corners can mean that a back wheel will
go off the pavement, causing a stability problem.
If you must steer in a tight spot, such as entering a doorway or when turning around, stop and turn
the handle bars to where you want to go, then apply the power gently. This will make the scooter

18
turn sharply. It will still go gently and with complete stability. Practice in an open area until you are
proficient.
Reversing requires attention. Be sure your ‘speed control dial’ is turned to ‘slow’ before you reverse.
Push the left thumb reverse lever. Remember; when you reverse you must steer in the opposite
direction of the way you want to go. Practice is required, again use open space.
REMEMBER: If it is a tight turn, turn your steering column before applying power. Steer wide of
all corners and obstacles; please move slowly and with care.
WARNING NOTE: Do not turn off your scooter while it is in motion. Failure to observe this
warning may irreparably damage the main electronic speed control unit or drive
transmission. Always slow your scooter down to a stationary position before you switch the
scooter off.
Control Through Tight Spots
When you start using your scooter you will meet some obstacles that will require some practice to
drive through smoothly.
Here are some common problems, with tips that will help you master them quickly. You will soon
be in control through doors, up and down ramps, up and over curbs, through grass and gravel, with
surprising ease by following these tips.
Control Through Doors
Approach an unfamiliar door slowly, sizing it up. Does it have a knob or a push bar? Does it open
towards you, or away? Think in terms of using the power of the scooter to do the work for you! You
need not strain.
Hold the doorknob or bar in one hand and apply power with the other hand (remember that you can
drive forward by using your left thumb to move the throttle lever towards you). If the door is
self-closing, you can go through, allowing the door to close behind you. If the door is not self-closing,
just stop when you are clear of the door and push it closed.
If the door opens towards you, hold the knob or bar with one hand and gently let the reverse power
do the work. When the door is open wide enough, go ahead quickly, leaving your hand on the door
to keep it free of the scooter and letting go as you pass the doorjamb. This is an easy technique.
Practice makes perfect. Remember; let your scooter do the work without wearing you out!
Control on Ramps
More and more buildings have ramps for wheelchair access. Some have a change of direction in
the middle, and good cornering is required. Make a wide maneuver with your front wheel(s)
around tight corners, so that your back wheels follow a wide arc to stay clear of the corner.
If you stop while facing uphill, the automatic parking brake will hold you safe. To start again, simply
push the forward direction lever, the parking brake will release, and you will start to move.
Going down the ramp, keep the speed dial set on ‘slow’. This will keep you in a
safely controlled descent. If you wish to stop completely, release the control lever, and you will come
to a gentle stop.

19
Control Over Grass, Gravel and Inclines
The scooter performs admirably on grass, gravel and on hills. BUT YOU MUST NOT EXCEED THE
PARAMETERS ESTABLISHED IN THIS MANUAL. Please refer to the ‘Rules for Safe Use' section.
Safety must come first. If you are unsure about a situation, avoid it.
Packed gravel, such as on driveways or roads, will present few problems. Loose, deep gravel
should be avoided, as well as loosely packed sand.
CAUTION: Because of the power of your scooter, you will be able to climb small inclines. But the
maximum gradient limit is 8 degrees. The reason for this is to ensure good stability.
Always make certain your scooter is in full working order before attempting to climb obstacles.
Never attempt to drive beyond the design capability of your scooter. Observe weather conditions.
Tires can slip on wet or icy conditions.
DO NOT DRIVE THROUGH DEEP WATER OR LEAVE YOUR SCOOTER EXPOSED TO HEAVY
RAIN (i.e., during or after a thunderstorm).
Only make a turn when all wheels are on or off the sidewalk. Failure to observe this
warning could result in the machine becoming unstable and toppling over.
Always lean forward when ascending curbs. This will enable you to climb easily and eliminate
any chance of instability.
PLEASE NOTE: The rear stability of your scooter is dependent on several factors which you
should consider before attempting to climb a steep slope or other obstacle: a) your height; b) the
angle of your backrest; c) your weight; and d) the angle of slope or height of the obstacle you are
attempting to climb. All these factors can affect the rear stability of your scooter. If you are unsure
of your capability to climb an obstacle, always think ‘safety first’.
REMEMBER SAFETY IS THE KEY TO ENJOYING YOUR SCOOTER
Power down timer feature
Your scooter is equipped with an energy saving automatic power down timer feature designed to
preserve your scooter's battery life. If you mistakenly leave the key in the key switch and in the "on"
position but do not use your scooter for approximately 30 minutes, the scooter's controller shuts
down automatically. Although the controller is shut down, power will still be supplied to the scooter's
lighting system.
If the power down timer feature takes effect, perform the following steps to resume normal operation:
1. Remove the key from the key switch.
2. Reinsert the key and power up your scooter.

20
Batteries and Charging
**MANDATORY**
Read the battery charging instructions in this manual and in the manual supplied with the
battery charger before charging the batteries.
Batteries and Charging
Your scooter is equipped with maintenance free, sealed lead acid batteries. The batteries require
no maintenance other than ensuring that they are properly charged. If other batteries are
used, check with your battery supplier for proper battery care and maintenance instruction.
Your scooter batteries are sealed, so they are most likely to be accepted for transport on all
commercial aircrafts. Please consult your carrier prior to departure, as they will need advanced
notice asking them to carry your scooter and batteries on the flight.
Your scooter comes supplied with two batteries. **NOTE: No warranty on batteries**
WARNING
Your batteries may only have a partial charge when you first receive your scooter, you may not
experience full riding time until you fully charge them. Your scooter is equipped with a compatible
battery charger. Charging your batteries as specified below will ensure maximum life, power
and range.
Keep the batteries fully charged to keep your scooter running smoothly.
Using off-board charger
Follow the steps to charge your batteries:
1. Position your scooter close to a standard electrical outlet.
2. Turn off the power to the scooter.
3. Plug the power charger cable into an electrical outlet.
4. Plug the round 3-pin charger cable into the power socket on
the scooter tiller. You will need to flip aside the
plastic safety cover on the scooter charger port.
5. Extend the charger power cord and plug it into the electrical
outlet. We recommend that you charge the batteries for 8 to
14 hours. As it charges, you will see progress lights on
the charger unit. A RED light means the charger is ready to
use. A WHITE light means charging is in progress. A GREEN light means the charger is
finished, and the scooter batteries are fully charged.
Table of contents
Other Eclipse Mobility Aid manuals
Popular Mobility Aid manuals by other brands

Innova
Innova AirRise260 user manual

Eurovema
Eurovema Volaris Compact user manual

Petermann
Petermann Alpha PM-6013 manual

Invacare
Invacare Non-Removable Device 1820 Installation and operating instructions

RHYTHM
RHYTHM 925 quick start guide

Invacare
Invacare Rollites 65100 Assembly and operating instructions