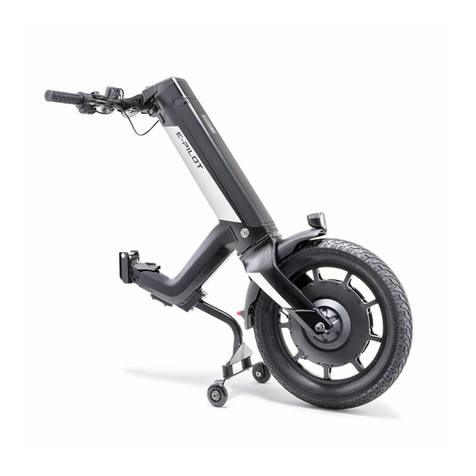
Alber viamobil User manual

Schieben und Bremsen
leicht gemacht
Gebrauchsanweisung DE
User manual GB/US
Instructions d’utilisation FR
Kullanma talimati TR
Istruzioni per l‘uso IT
Brugsvejledning DK
Gebruiksaanwijzing NL
Bruksanvisning NO
Instruktionsbok SE
Käyttöohjeet FI

Service Center (Deutschland)
Montag bis Donnerstag von
8.00 - 18.00 Uhr
Freitags von
8.00 - 16.00 Uhr
erreichbar unter
Telefon (0800) 9096-250
(gebührenfrei)
Das viamobil ist klassifiziert
als Gerät Typ B.

1
2
3
4
5
6
7
8
910
11
12
13 14 1516
17
18
19
20
22
23
21
24
25
26
27
31
32
33
35
34
28
29
30
13
50
45
46
47
48

8
1
Contents
1. Introduction 2
1.1 Important safety notes– please observe carefully at all times 2
1.2 Proper use of the viamobil 2
1.3 Permissible operating conditions/locations of operation 3
1.4 Standard scope of delivery 3
1.5 Optional accessories 3
1.6 The main elements at a glance 4
2. Start-up and driving mode 5
2.1 Attaching the viamobil to the wheelchair 6
2.2 Inserting the quickpins 7
2.3 Removing the quickpins 7
2.4 Inserting the battery pack 7
2.5 Attaching the control unit 8
2.6 Switching on the viamobil 9
2.7 Selecting the direction of travel 9
2.8 Selecting the speed 10
3. Driving mode 10
3.1 Starting to drive 10
3.2 Safety circuit 11
3.3 Automatic brake engagement 11
3.4 Anti-theft protection 12
3.5 Downhill travel with the battery pack fully charged 12
3.6 Traversing obstacles 13
3.7 Manually engaging/disengaging the drive wheel
(Emergency release 14
3.8 Switching off the viamobil 15
4. Removing the viamobil from the wheelchair 16
4.1 Disconnecting the control unit 16
4.2 Removing the viamobil from the wheelchair 17
4.3 Detaching the battery pack 18
4.4 Removing the viamobil from the wheelchair 18
5. Battery pack 19
5.1 Charging the battery pack 19
5.2 Capacity indication on the battery pack display 21
5.3 Temperature indicator 21
5.4 Safety and warning notices regarding the battery pack 22
5.5 Safety and warning notices on how to store the
battery pack 22
5.6 Safety and warning notices on how to transport and
ship the battery pack 23
5.7 Safety and warning notices regarding the charger 24
26.0001.4.99.03
As of: 2012-10-05
6. Control unit 25
6.1 Display symbols 25
6.2 Capacity indication on the control unit display 25
6.3 Display of the selected maximum speed 26
6.4 Warnings 26
6.5 Error indicators 27
7. Anti-tippers (optional accessories) 29
7.1 Installing the Alber anti-tippers 29
7.2 Removing the Alber anti-tippers 29
8. Additional push handles (optional accessories) 30
8.1 Installing the additional push handles 30
8.2 Removing the additional push handles 30
9. Transport and storage 31
9.1 Using the viamobil as a vehicle seat in combination with a
wheelchair 31
9.2 Safety note regarding transport of the viamobil 31
9.3 Safety instruction on how to hold the viamobil 32
9.4 Safety note regarding the electrical connections 32
9.5 Storage 33
10. Safety and hazard information 33
10.1 Safety instructions 33
10.2 Obstacles 34
10.3 Danger areas and hazardous situations 35
11. Maintenance, care and disposal 35
11.1 Charging the battery pack 35
11.2 Cleaning and disinfection instructions 36
11.3 Disposal 37
11.4 Re-use 37
11.5 Maintenance 37
12. Warranty and liability 37
12.1 Warranty for defects 37
12.2 Guarantee of durability 37
12.3 Liability 38
13. Technical data 39

2
1. Introduction
1.1 Important safety notes– please observe carefully at all times
The viamobil is a push and braking aid to be used exclusively by the person accompanying the wheelchair user. The viamobil must under
no circumstances be used as an electric drive system by the wheelchair user alone.
For safety reasons, the viamobil must only be operated by persons who
- have been instructed in its handling,
- are physically and mentally in a position to operate the device properly and according to the given operating conditions and
situations.
The viamobil must not be operated by patients who are visually or acoustically impaired.
Instruction in the handling and operation of the device is included in the scope of delivery. Please contact your specialist dealer or an
Alber agent to arrange for a training session. The instruction is free of charge.
If you feel a little unsure how to handle the viamobil, please contact your authorised dealer or Ulrich Alber GmbH agent for advice.
While operating the viamobil, observe the specifications of the wheelchair manufacturer (e.g. maximum slope, air pressure of tyres,
etc.), and strictly adhere to the operating instructions of the wheelchair. Never exceed any of the specified limit values.
Before using a mobile phone or similar device, always secure the wheelchair on level ground and switch off the viamobil. Avoid strong
electromagnetic fields (for example, near large electric motors), as they may interfere with the viamobil.
In rare cases, the operation of the viamobil may interfere with other electrical devices such as anti-shoplifting barriers in department
stores.
Therefore, do not start the viamobil before you have been properly instructed in its operation by an authorised
specialist dealer or an agent of Ulrich Alber GmbH!
1.2 Proper use of the viamobil
The viamobil is an add-on drive attached to a manually operated wheelchair to assist the attendant of a wheelchair user in pushing
the wheelchair. It thus enables people to take long drives without tiring as the effort for pushing and braking is greatly reduced. The
electric motor of the viamobil makes it easy to push the wheelchair up a slope. When travelling down a slope, the viamobil reduces the
speed to the set level, which makes operation of the wheelchair safer even on steep slopes.
It is forbidden to make any technical modifications to the device. Do not attach any parts other than accessories approved by Ulrich
Alber GmbH for operation with the device. The viamobil must only be operated under the following conditions:
•Full compliance with the information, instructions, and recommendations contained in this operating manual.
•The device is operated by a person who has been instructed in its use.
•No technical modifications have been made to the device by the user or by any third party.
•While the viamobil is in use, the arms of the person sitting in the wheelchair must not project over the armrests of the wheelchair.
A trained operator is a person who has been instructed in the operation of the viamobil and in related tasks and who has been made
aware of the possible hazards associated with the improper use of the device. The instruction session is provided by the authorised
dealer or by an agent of Ulrich Alber GmbH. The operation of the viamobil by non-instructed or unqualified persons is strictly prohib-
ited.
The viamobil must not be used for transportation tasks that contravene the intended use of the device. This applies in particular to any
types of load transport such as the transport of household objects by means of a wheelchair plus viamobil.
The use of the viamobil for any of the following purposes is deemed improper by Ulrich Alber GmbH:
•Use or operation of the device that contravenes the instructions and recommendations in this operating manual.
•Exceedance of the technical limits laid down in this operating manual.
•Technical modifications to the device.
•Attachment and/or use of parts and accessories that have not been supplied or approved by Ulrich Alber GmbH.
Damage resulting from
•using the device improperly or
•use by a person who has not been instructed in the handling of the device
shall not be deemed by Ulrich Alber GmbH as part of the company's liability.
While the viamobil is in use, the person sitting in the wheelchair must remain still. Please note that their specific condition may cause
some patients to move in an uncoordinated manner. Stop using the device in these cases until the patient has settled down.
The person operating the device should be capable at all times to react to such sudden movements of the person being conveyed. It is,
therefore, up to the person operating the viamobil to decide whether a person can be safely transported on the device.
!

8
3
Before using the device, carefully read all safety and hazard information contained in the individual chapters of
this operating manual.
1.3 Permissible operating conditions/locations of operation
The viamobil must only be used at ambient temperatures between -25°C and +50°C.
Observe the permissible operating conditions of the wheelchair to which the viamobil is attached (see wheelchair manual). Any limits
regarding the operation of the wheelchair (e.g. maximum climbing capability, maximum permissible height of obstacles, max. load, etc.)
must also be observed during the use of the viamobil!
Avoid using the wheelchair on soft ground (e.g. loose chipping, sand, mud, snow, ice or deep puddles).
Observe the safety and hazard information provided in the individual chapters of the operating manual.
1.4 Standard scope of delivery
•Drive unit
•Control unit
•Automatic charger
•Battery pack
•Operating instructions
1.5 Optional accessories
•Anti-tippers
•Additional push handles
We recommend using only original accessories supplied by Ulrich Alber GmbH.
The viamobil is designed in such a way that best performance is achieved when using Alber original accessories. Ulrich Alber GmbH shall
not be liable for damage to the product or accidents (e.g. fire) caused by a malfunction of non-original accessories or spare parts (e.g.
fire due to explosion of the battery pack, leaks, etc.). The warranty does not cover repairs for damage caused by the malfunction of
non-original accessories. Ulrich Alber GmbH will, however, carry out such repairs for you at a charge.
!

4
1.6 The main elements at a glance
(please fold out overview drawing in document cover)
Drive unit
Lower bolt 1
Mount 2
Upper bolt 3
Push handle holder 4
Carrying handle 5
Releasing device 6
Drive wheel 7
Holder for anti-tippers 8
Battery pack
Battery pack housing 9
Battery pack display 10
Automatic charger / control unit connection 11
Releasing device 12
Control unit
Control unit housing 13
ON/OFF button 14
Sensor field anti-theft protection 15
Display 16
Adjustment wheel for preselecting the speed 17
Driving direction switch 18
Driving lever 19
Locking wheel 20
Plug 21
Holder (on the wheelchair) 22
Key for anti-theft protection 23
Automatic charger
Automatic charger housing 24
LED display 25
Charging plug 26
Mains plug 27
Anti-tippers
Anti-tipper, complete 28
Release button 29
Toothed section 30
On the wheelchair
Lower holder 31
Upper holder 32
Fork of the upper holder 33
Quickpin 34
Quickpin releasing device 35

8
5
2. Start-up and driving mode
The viamobil is supplied to you ready for operation. This means that
•special brackets ([31] and [32]) to which the viamobil is attached have been mount-
ed on either side of the wheelchair,
•the viamobil has been fitted to the wheelchair,
•the viamobil control unit [13] has been mounted on the push handles of the wheel-
chair or the additional push handles of the viamobil, which are available as optional
accessories,
•and, if necessary, anti-tippers have been attached to the wheelchair or the viamobil
(see chapter 7 for more information).
Your viamobil is, thus, ready for operation and can be started and operated by follow-
ing the instructions in the chapters contained in this operating manual and the instruc-
tions given in the free instruction session of your authorised dealer or an agent of
Ulrich Alber GmbH.
The installation of the brackets ([31] and [32]) on the wheelchair
and all necessary adjustments to the viamobil must be carried out by
Ulrich Alber GmbH, its agents or your authorised specialist dealer.
Regularly check the brackets ([31] and [32]) to ensure that they
are firmly screwed to the wheelchair. If a screw connection has
become loose, contact your specialist dealer or Alber agent to have
it retightened. It may be necessary to readjust the device.
Alber provides brackets of various designs (single-part or multiple-
part brackets). The bracket shown in the figures of this operating
manual may, therefore, deviate from that attached to your bracket.
Follow the operating and safety instructions as well as the hazard
information contained in this operating manual before putting your
viamobil into operation.
31
32
!
!
!
!

6
2.1 Attaching the viamobil to the wheelchair
•Make sure that both manual drive wheels have been properly attached to the wheel-
chair.
•Apply the parking brake of the wheelchair so that it cannot roll away.
•Remove the quickpins [34] if they are seated in both forks [33] (see chapter 2.3).
•Remove the battery pack [9] from the viamobil.
•Use the carrying handle [5] to slide the viamobil under the wheelchair as shown in
the diagram.
With the battery pack inserted:
Do not grab the releasing device [12] of the battery pack to slide or
lift the viamobil as this may cause the battery pack to come loose
(see chapter 9.3).
•Slide the lower bolt [1] of the viamobil into the lower holder [31] on the wheelchair
until it reaches the stop.
•Once the lower bolt [1] of the viamobil is fully seated in the lower holder [31],
slightly lift up the viamobil.
When doing so, make sure the upper bolt [3] on the viamobil is inserted in the fork
[33] of the upper holder.
•Close the forks [33] on both sides with the quickpin [34] as soon as the upper bolt
[3] of the viamobil is seated in the fork [33] (see also chapter 2.2).
The drive wheel [7] of the viamobil is now approx. 15 mm above the ground to allow
the wheelchair to be moved manually if necessary and without the need to make use of
the viamobil.
5
!
31
1
31
1
33
3
33 34
7

8
7
2.2 Inserting the quickpins
•Hold the quickpin [34] between your index and middle finger as shown in the dia-
gram.
•Push in the releasing device [35] at the centre of the quickpin, using your thumb.
•Insert the quickpin through the upper bracket fully into the fork [33] until it reach-
es the stop.
•Release the releasing device [35]. The quickpin now locks the fork so that the upper
bolt of the viamobil cannot become dislodged.
2.3 Removing the quickpins
•Hold the quickpin [34] between your index and middle finger.
•Push in the releasing device [35] at the centre of the quickpin, using your thumb.
•Pull the quickpin from the fork [33] of the upper bracket.
Ensure that the quickpin cannot be inserted into or removed from
the fork without pushing in the releasing device [35].
If it can be inserted or removed without pushing in the releasing
device, the quickpin is defective and must be replaced without delay.
If one or both quickpins are defective or not properly locked in the
forks, do not attempt to use the viamobil.
2.4 Inserting the battery pack
You can insert the battery pack when the viamobil is safely connected to the wheel-
chair as described in the previous chapter.
•Make sure the electrical connections on the viamobil and the battery pack are clean
and do not contain any metal particles. If you detect such particles, use a dry and
clean cloth to remove them.
•Hold the battery pack by its releasing device [12].
•Place the battery pack slightly slanted onto the holder of the viamobil as shown in
the diagram.
•Release the battery pack. It will automatically slide forward and engage by magnetic
force.
Protect the battery pack against humidity, moisture, heat and
extreme cold.
34
35
33
33
34 35
!
!
12
!

8
2.5 Attaching the control unit
Two holders [22] have been fitted to the push handles of your wheelchair which are
used for the installation of the control unit [13] and one push handle.
If the control unit [13] and the push handle have not yet been attached, proceed as
described below.
•Insert the control unit [13] into the holder [22] of the wheelchair.
•Fold down the locking wheel [20] by 90 degrees.
•Turn the locking wheel [20] clockwise until the control unit [13] is seated firmly in
the holder [22].
•Insert the plug of the control unit [21] into the socket [11] on the battery pack.
The connection is secured automatically and conveniently by magnetic force.
Make sure the plug of the control unit [21] and the socket
[11] are clean and do not contain any metal particles.
If you detect such particles, use a dry and clean cloth to
remove them.
For details, see chapter 12.2.
22
13
20
20
20
11
21

8
9
2.6 Switching on the viamobil
To switch on the viamobil, press and hold the ON/OFF button [14] for approx. 1 second.
The button lights up green, the drive wheel [7] is extended until it reaches the floor,
and an arrow symbol [38] starts flashing on the display.
Once the wheel is fully extended, the display [16] indicates the selected direction of
travel (see chapter 2.7) and the charge status of the battery pack (see chapter 5.2).
In addition, the selected speed (see chapter 2.8) is indicated on the display for a few
seconds.
When switching on the viamobil, make sure your leg is not under-
neath the extended wheel. Risk of crushing injuries!
The charge status of the battery pack is also constantly indicated
on the display [16]. For an overview of all possible indications, see
chapter 5.2.
2.7 Selecting the direction of travel
You can use the ergonomically shaped driving direction switch [18] to set the direction
of travel.
•Slide the driving direction switch [18] forward (diagram A); the viamobil will move
forward when you actuate the driving lever [19].
•Slide the driving direction switch [18] back (diagram B); the viamobil will move
backward when you actuate the driving lever [19].
•If the driving direction switch [18] is adjusted when the device is standing still, the
viamobil will immediately move in the set direction when the driving lever [19] is
actuated.
•If the driving direction switch [18] is adjusted during travel, the viamobil will stop
automatically and switch the direction of travel as soon as the device is standing
still. You will then have to release the driving lever [19] before pressing it again.
This is necessary for the device to move in the indicated direction.
•The set direction of travel is indicated on the display [16] by an arrow
(see chapter 6.1).
14 16
38
!
!
A B
16
18

10
2.8 Selecting the speed
You can use the adjustment wheel [17] to set the maximum speed you want to reach
before and during travel.
When starting the device, always turn the adjustment wheel [17] to the position with
the lowest speed and then gradually increase the speed to the desired walking speed.
•Turn the adjustment wheel [17] in the direction of travel to increase the speed.
•Turn the adjustment wheel [17] against the direction of travel to decrease the
speed.
The set maximum speed can be adjusted continuously from 1.1 km/h to 5.5 km/h and
0.5 km/h to 2.7 km/h for travelling forward and backward, respectively, while the
device is standing still or in motion.
While being adjusted, the speed (set value in relation to the maximum speed; see also
chapter 6.3) is shown on the display [16] for a few seconds.
We recommend that drivers who use the viamobil for the first time
start at a low final speed in order to become adequately familiar
with the viamobil's driving characteristics.
Refrain from making your first driving attempts in narrow areas such
as hallways.
3. Driving mode
3.1 Starting to drive
When you have made all the settings described in the previous chapters, you can start
using the device. The driving lever [19] acts like the accelerator pedal on your car.
•Pressing lightly on the driving lever [19] causes the viamobil to slowly move in the
set direction of travel.
•If you depress the driving lever [19] all the way until you feel noticeable resistance,
the viamobil will move in the set direction of travel and at the maximum speed you
selected (see chapter 2.8).
•When you release the driving lever [19], the viamobil will come to a standstill.
When the driving lever [19] is released, the viamobil will not come
to an immediate standstill, but keep moving in the direction of
travel for a short distance.
Therefore, stop in time before you run into an obstacle.
16
17
41
!
!
19
!

8
11
3.2 Safety circuit
Avoiding sudden obstacles or dangerous situations requires an immediate stop of the
viamobil, which is triggered by a safety circuit.
•Press the driving lever [19] all the way and past its regular resistance.
•The viamobil will stop immediately.
•The display shows the code "02" and a flashing info symbol [40]. In addition, the
device will sound an audible signal.
•Releasing the driving lever [19] will turn off all indications and the audible signal.
•The viamobil will then be standing still.
•To resume driving, press the driving lever [19] again.
The regular way to bring the viamobil to a standstill is by releasing
the driving lever [19].
If the safety circuit is triggered by pressing the driving lever [19] in
a dangerous situation, the viamobil will come to an immediate and
abrupt standstill. This may cause the wheelchair user to fall out of
the wheelchair, especially if the device is stopped at maximum speed
or during (possibly too rapid) downhill travel.
We, therefore, recommend that the user drive with care and wear a
lap belt!
Also follow the instructions given in chapter 3.5
3.3 Automatic brake engagement
If the viamobil is switched on and the driving lever [19] is not actuated within 30
seconds, the electromagnetic brake will engage automatically. This prevents the wheel-
chair from rolling away, in particular if it is stopped at an incline. The brake is disen-
gaged automatically when the driving lever [19] is actuated.
The display will only show the direction of travel [37] and the charge status of the
battery pack [36] instead of any particular indicators.
When stopped at an incline, the wheelchair must also always be
secured with the brakes on the wheelchair.
40
19
!
36
37
!

12
3.4 Anti-theft protection
To prevent it from being misused, the viamobil is equipped with an anti-theft device.
The device can only be activated/disabled when the viamobil is switched on.
Activating anti-theft protection
•Place the key [23] directly onto the sensor field of the control unit that is marked
with a key symbol [15].
•All indications shown on the display [16] go out, while the key symbol [39] remains
visible.
•The anti-theft device is now activated.
•Switching off the viamobil (see chapter 3.8) does not affect the activation of the
anti-theft device, i. e. anti-theft protection will be enabled when the device is
switched back on.
Disabling anti-theft protection
•Place the key [23] directly onto the sensor field of the control unit that is marked
with a key symbol [15].
•The display [16] stops showing the key symbol and shows the set direction of travel
([37] or [38]) and the charge status of the battery pack [36] instead.
3.5 Downhill travel with the battery pack fully charged
As a result of various environmental conditions and, in particular, during downhill
travel with the battery pack fully charged, the increased feedback of energy that is
intended to protect the battery pack will reduce the speed automatically. This is indi-
cated to the driver by a flashing battery symbol on the display.
In extreme cases, this may cause the system to shut down automatically, which, in
turn, will bring the viamobil to an immediate standstill. This is indicated on the dis-
play [16] of the control unit by error code "81" [41] and the adjacent info symbol
[40]. In addition, the device will sound a 3-second audible signal.
To resume driving, you should travel uphill in order to consume energy.
If you are required to drive uphill immediately - for instance, because of the location
of your home - you should not fully charge the battery pack of your viamobil. This pro-
cess is completed automatically when you drive downhill due to energy feedback.
15
23
16
39
41 40

8
13
3.6 Traversing obstacles
Use special caution when negotiating obstacles such as kerbs.
You can traverse obstacles both when driving forward and backward. Higher obstacles
make it necessary to lift up or push down the wheelchair by its push handles (instead
of using the control unit or the additional handle on the viamobil). You do not have to
switch off the viamobil for this purpose.
The height of some obstacles you need to traverse may no longer make it possible to
push the viamobil as the drive wheel may no longer be in contact with the ground
depending on the wheelchair's angle of inclination. In such cases, approach the obsta-
cle at a 20 degree angle rather than at a right angle.
Approach every obstacle at a slow pace and brake in good time
before you reach it!
Make absolutely sure not to approach the obstacle at maximum
speed, prevent the wheels to bump into the obstacle and never
attempt to traverse the obstacle at maximum speed.
Such driving manoeuvres may especially damage the front wheels of
the wheelchair or (in extreme cases) cause them to break off.
When traversing obstacles (see chapter 3.6), do not lift up or push
down the wheelchair by means of the control unit or the additional
handle.
Similarly, do not tilt the wheelchair by pressing down on the battery
pack with your foot.
20
!
!

14
3.7 Manually engaging/disengaging the drive wheel (Emergency release)
If your viamobil can no longer be operated, for instance due to a drained battery pack,
the device will switch off automatically. In this case, the display will show code "41"
next to the info symbol (see also chapter 6.5). The residual energy remaining in the
battery pack is usually sufficient to switch the viamobil on and off again, which will
automatically retract the drive wheel [7].
If this is not possible, you can manually disengage the drive wheel by following the
instructions below.
•Pull the handle of the releasing device [6], which is located on the right side of the
drive wheel, outward while turning it in any direction by approx. 90°.
•The coupling has now been released (see fig. A), the drive wheel can be moved
manually and the wheelchair can be pushed.
•Recharge the battery pack (see chapter 5.1).
You must re-engage the wheel before putting the viamobil back into operation.
•Turn the handle of the releasing device [6] in any direction until it locks back into
the drive wheel.
•Check if the drive wheel is properly locked in place - it must no longer be possible
to turn it manually.
•If the drive wheel has been locked correctly (see fig. B), the viamobil can be oper-
ated again as normal.
Before disengaging the drive wheel [7], you must tighten the manual
brakes on the wheelchair (in particular, at an incline) in order to
prevent the wheelchair from rolling away.
If the drive wheel [7] is still engaged when the viamobil is switched
on, the display will show error code "72". Engage the drive wheel.
If the error message ‘70’ appears on the display, then the drive
wheel [7] is still disengaged. Engage the drive wheel.
6
!
!
!
A
B

8
15
3.8 Switching off the viamobil
When you are finished driving, you should switch off the viamobil - not least, in order
to conserve the power stored in the battery pack.
•To switch off the viamobil, press and hold the ON/OFF switch [14] for approx. 1 sec-
ond.
•The drive wheel [7] lifts off the ground, and the arrow symbol [37] shown in the
adjacent diagram flashes on the display.
When the wheel is fully off the ground, all indications shown on the display [16], the
green light of the ON/OFF switch [14], and the capacity indication [42] on the battery
pack will go out.
Never switch off the viamobil when parked at an incline!
Switching off the viamobil will lift its drive wheel off the ground,
robbing the device of its brake force.
If switching the device off at an incline cannot be avoided, you must
engage the manual brakes on the wheelchair before switching off the
viamobil.
When experiencing a technical fault, the viamobil will shut down
automatically. In this case, too, the drive wheel remains on the
ground at first before lifting off the ground when the system
restarts. Consequently, the manual brakes on the wheelchair must be
applied to prevent the wheelchair from rolling away.
Before switching off the viamobil, always apply the manual brakes
on the wheelchair to prevent the wheelchair from rolling away.
14 16 37
!
!

16
4. Removing the viamobil from the wheelchair
Normally, the viamobil is permanently attached to the wheelchair. Proceed as follows
if detaching the viamobil becomes necessary, for example, to allow for the transport of
the device.
4.1 Disconnecting the control unit
•Apply the brakes on the wheelchair to prevent the wheelchair from moving inadvert-
ently.
•Switch off the viamobil (see chapter 3.8).
•Pull the plug of the control unit [21] from the socket [11] on the battery pack as
shown in the diagram.
If the plug of the control unit [21] is pulled from the battery pack
while the viamobil is switched on, the drive wheel will lock up. Con-
sequently, the viamobil must always be switched off before the plug
[21] can be pulled.
Do not disconnect the control unit from the viamobil by pulling on
the cable of the control unit! This may cause the plug to snap back
and hit you.
21
!
!

8
17
4.2 Removing the viamobil from the wheelchair
•Turn the knob [20] counter-clockwise by approximately 3 rotations
•Fold up the knob [20] by 90 degrees
•Pull the control unit out of its holder [22] on the wheelchair.
•Store the control unit in a location where it is safe from damage and unauthorised
access.
•Proceed in the same manner when removing the push handle that is located on the
other side of the wheelchair.
20
20
22
Other manuals for viamobil
2
Table of contents
Other Alber Mobility Aid manuals