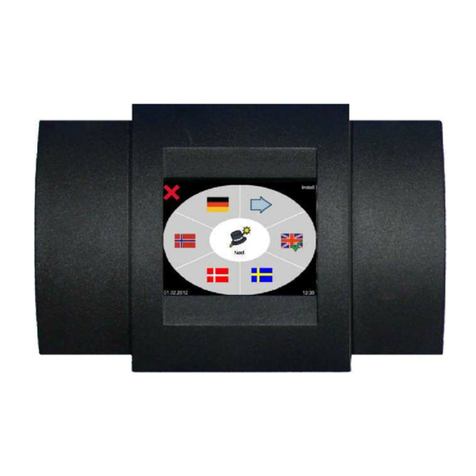
Econlux CON1 User manual

Manual for CON1
Based on Firmware 1.3 to 2.4
1. Connection and control panel…………..………………..…. Page 1
2. Compatible products …………………………………..………… Page 2
3. Firmware updates…………..……………………………..………. Page 3
4. Menu……………….………………………………………………….... Page 4
4.1 Menu structure……………………..………….......... Page 4
4.2 Start screen……………….………………………………. Page 5
4.3 Status screen………………..…………………………... Page 5
4.4 Main menu………………………………………………… Page 5
4.5 Output menu…………..………………………………… Page 5
4.6 System time……..……………………………………….. Page 7
4.7 System………………………………………………………. Page 7
5. Example……………………..…………………………..……………… Page 8

1
Manual for CON1
1. Connections and control panel
Output 1-3
Connections for the following product range SolarRaptor® and SolarStinger® with 6-Pin plugs (refer
to page 2 compatible products).
Entrance
Connection for DRV (Switching Power Supply) with a 6-pin socket.
Mini USB Port
USB Port for transferring firmware updates (available at http://www.econlux.de/updates).
Control Panel
With the push button, „up „and „down“, you can navigate within the menu and respectively change
values. The buttons „confirm „is there to choose various menu points and values and confirm them.
Output 1 Output 3 Output 2
Entrance
DRV
Mini USB
Port
Up
Down
Confirm

2
Manual for CON1
2.
Compatible products
SolarStinger
® SunStrip 35 Fresh
SolarStinger
® SunStrip 70 Fresh & Marine Serie
SolarStinger® SunStrip 140 Marine Serie
SolarStinger® SunStrip
WaterTube Day & Moon Serie
SolarRaptor® SunStrip 35 Reptile Serie
SolarRaptor® SunStrip 20 Day & Moon Serie
SolarRaptor®
HeatStrip Series
The power of the connected
product
power supply).
3. Firmware u
pdates
To update the CON1 firmware you need
Firmware t
ool & Firmware
Mini USB cable
PC ( with Windows XP or latest version
Remove all connected products and the DRV (switching power supply
using the tiny USB cable.
The
only connection CON 1 should have right now is the USB cable one
during the update is done via the USB
Should you connect CON1
for the first time with your
driver“ (
http://www.econlux.de/update
1.
Please choose the COM p
Compatible products
® SunStrip 35 Fresh
Series
® SunStrip 70 Fresh & Marine Serie
s
SolarStinger® SunStrip 140 Marine Serie
s
WaterTube Day & Moon Serie
s
SolarRaptor® SunStrip 35 Reptile Serie
s
SolarRaptor® SunStrip 20 Day & Moon Serie
s
HeatStrip Series
product
shall not exceed the maximum power of t
he
pdates
To update the CON1 firmware you need
:
ool & Firmware
PC ( with Windows XP or latest version
)
Remove all connected products and the DRV (switching power supply
) from CON1 and connect to PC
only connection CON 1 should have right now is the USB cable one
.
The power supply
during the update is done via the USB
cable.
for the first time with your
PC,
it is necessary to install the „CP210x VCP
http://www.econlux.de/update
s). Now you can start the software with
„CON1
Please choose the COM p
ort which is connected to the
CON1 and click the button „c
he
DRV (switching
) from CON1 and connect to PC
The power supply
it is necessary to install the „CP210x VCP
„CON1
- Tool“.
CON1 and click the button „c
onnect“.

3
Manual for CON1
2. Please click on the button „Select Sourcefile“and chose the Firmware you like to install.
(„Firmware - CON1 v1.3.hex“).
3. Please click the button „Upload“
4. Following the successful transfer of the data please click the button „Exit Bootloader“.

4
Manual for CON1
4.1 Menu structure
Start Screen
Status
Screen
Main Menu
System Time System
Output
Menu 1-3
Info Used Product
Sunrise
Sun
Sunset
Moon
Language
Reset
Manuel
On/Off
(Since Firmware 2.4)

5
Manual for CON1
4.2 Start Screen
The main screen appears approximately five seconds after connection of the power supply. The hard-
and software version of the device are displayed, additionally, in background, the stored data is
loaded. Then the calibration of the buttons takes place.
4.3 Status Screen
The main screen displays the actual status of the lighting and the time.
After about one minute the display is turned off, when pressing the enter button (middle button) the
display is again available for a minute.
When pressing the enter button (middle button) when the display is active, the main menu appears.
4.4 Main Menu
From the main menu one can access, by pressing the navigation buttons, the following menu points:
Output Menu 1-3
System Time
System
4.5 Outout Menu
The output menu includes the following menu points:
Connected product
Sunrise
Sun
Sunset
Moon
Output Menu – Connected product
In this menu you can chose the connected product. The outputs are allocated as follows: (please see
here picture on page 1, connectors and panels):
Left - Output 1
Middle - Output 2
Right - Output 3

6
Manual for CON1
Main Menu – Sunrise
The menu option has four points (Start time, starting performance, end time and final output).
The sunrise begins at the pre-programmed time with the corresponding starting power and ends at
the pre-programmed end time with the related final performance.
Output Menu – Sun
The sun menu consists of the sub menu points „Info „and „Break“.
The menu point info displays the pre-programmed start- and end time of the sun. There is no need to
program these times precise, as they result from the end time of the sunrise and the start time of the
sunset!
With the menu point break you can interrupt the sun phase at any time. If this is not desired, no
further adjustments have to be made for this point, as it is deactivated upon delivery.
The menu point “break“, has four subtopics (Start time, end time, ramp, performance).
Start- and end times define the time frame of the breaks; the value ramp indicates how long it takes
to adjust the actual sun-value to the programmed value of the break.
Output Menu – Sun set
The menu option has four points (Start time, start performance, end time and end performance).
The sun set starts at the programmed start time, with the set start time and the corresponding start
performance; it ends at the programmed end time and the corresponding end performance.
Output Menu – Moon
The moon menu has the sub points „Info „and „Break“.
The menu point info displays the programmed start- and end time of the sun. There is no need to
program these times, they result from the end time of the sunset and the start time of the sunrise!
With the menu point „break“ you can interrupt the moon phase at any given point in time. If this is
not desired, no further programming of this point is necessary as he has been deactivated upon
delivery.
The menu point „break „has four sub points (Start time, end time, ramp, performance).
With the start- and end time one defines the time of the breaks, the value „Ramp“ informs you how
long it takes to adjust the present moon value towards the programmed value of the break.

7
Manual for CON1
4.6 System time
In menu point „System time “ it is possible to set the time and time format. One can choose to
display the time in a 24-hour format or in 12-hour format.
4.7 System
In this menu option system related settings can be made and retrieved.
Info
Hard- and software version from the controller can be retrieved.
Language
In this menu point you can choose the language (German/English),
Reset
This menu item allows you to reset CON1 towards the delivery status.
5. Example

8
Manual for CON1
Sunrise: 08:00 a.m. Light colour: white (0-100%)
Sun: 08:30 a.m. until 07:00 p.m. Light colour: white (100%)
Sunset: 07:00 p.m Light colour: white (100-0%)
Moon: 07:30 p.m until 10:00 p.m. Light colour: blue (1,1%)
06:00 a.m. until 08:00 p.m. Light colour: blue (1,1%)
Info: The values for the sun phase result from the value end time of sunrise and start time of sunset.
The values for the moon phase result from the value end time of sunset and start time of sunrise.
1. Choose from the „Main Menu” the output, where the configured lamp is connected.
2. Choose now from the menu point „Connected Product“ the connected product.
3. Go to the menu point „Sunrise“. Adjust the start time to 08:00 a.m., the RGB-blue value to 1,
1% and the value from white to 0%. The end time adjust to 08:00 p.m., the value from white
to 100% the value RGB-blue to 0%.
Now the sun rise starts at 08:00 a.m. and dims within 30 minutes, the blue RGB canal from
1,1% to 0% and the white canal from 0% to 100%.
4. Please go now to the menu point „Sunset“. Adjust the start time to 07:00 p.m., the value
from RGB-blue to 0% and the value from white 1000%. Program the end time, here 07:30
p.m., the value from white to 0% and the value RGB-blue to 1, 1%.
Now the sunset starts at 07:00 p.m. and dims within 30 min the blue RGB canal from 0% to 1,
1% and the white canal from 100% to 0%.
5. Please go now to the menu point „Moon“ and here to the submenu point „break“. Here you
program the start time to 10:00 p.m., the end time to 06:00 a.m., the ramp time to 5
minutes, the RGB-blue value to 0% and the switch break needs to be on.
At 10:00 p.m. the moon light is dimmed within 5 minutes from 1,1% to 0% and at 05:55 a.m.
within 5 minutes again from 0% to 1,1%.
Table of contents
