ECOWITT GW1000 User manual

1
Wi-Fi Gateway with Temperature, Humidity
and Barometric Sensor
Operation manual
Model: GW1000
Thank you for purchasing this Wi-Fi Gateway with
built-in temperature, humidity and barometric pressure
sensor. Your sensor data will be available on your local
Wi-Fi network and the Internet. Supported sensors (sold
separately) include: outdoor temperature and humidity,
multi-channel temperature and humidity, rain, wind, soil
moisture, particulate matter (PM2.5). In the future
additional sensors will be supported, such as: water
leakage sensor, lightning detector, etc.
To ensure the best product performance, please read this
manual and retain it for future reference.

2
Contents
1 Unpacking ................................................................... 3
2 Overview..................................................................... 4
2.1 Features ............................................................ 4
3 Setup Guide................................................................. 6
3.1 Gateway Introduction....................................... 6
3.1.1 LED Indicators ...................................... 7
3.1.2 Button Function..................................... 8
3.2 Publish to Internet Weather Services................ 9
3.3 Gateway Wi-Fi Configuration ........................ 10
3.4 Adding weather services................................. 13
3.5 Ecowitt Weather.............................................. 16
3.6 Weather Underground..................................... 17
3.6.1 WU Dashboard vs Live Data............... 18
3.7 Calibration or Rain totals................................ 19
3.8 Registering with and using wunderground.com
.............................................................................. 20
3.9 Device Settings............................................... 22
3.10 Sensor ID...................................................... 23
3.11 Viewing data on wunderground.com............ 23
4 Specification.............................................................. 27
5 Warranty Information ................................................ 28

3
1Unpacking
Open your Wi-Fi gateway box and inspect that the
contents are intact (nothing broken) and complete
(nothing missing). Inside you should find the following:
QTY
Item Description
1
GW1000 Wi-Fi gateway
1
Cable clip
1
User Manual
Table 1: Package Content
If components are missing from the package, or broken,
please contact customer service to resolve the issue.
Note: The gateway must be plugged into a USB (2.0 or
later) port for its power supply. You may want to
use a USB extension cable (USB type A - Male
straight to female straight; not included) to allow
for better placement.

4
2Overview
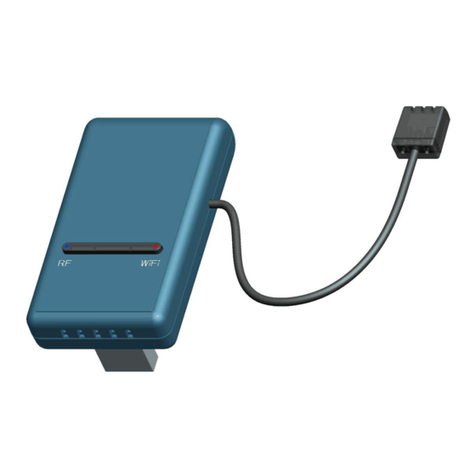
Figure 1: Wi-Fi Gateway
2.1 Features
•Built-in temperature, humidity and atmospheric
pressure sensors (cabled probe attached to unit).
•Receives sensor data from external sensors, if
installed and configured (sold separately): outdoor
temperature and humidity, multi-channel (max 8)
temperature and humidity, rain, wind, soil moisture
(max 8), PM2.5 (max 4) and so on.
•Makes all sensor data available to mobile application
(WS View for iOS or Android) on your local
network.
•Mobile application is also used for local viewing of
sensor data, and to assist in configuration of
services.
•Pushes sensor data to Internet based weather
services.

5
•Supports uploading all the sensors data to Ecowitt
Weather server: https://www.ecowitt.net.
•Other supported weather services for uploading:
wunderground.com, Weathercloud, and WOW. Only
sensor data supported by each specific service will
be uploaded.
•View historical records from your WU station
(temperature, humidity, wind, rain).
•View all the sensor current and history records,
graph on Ecowitt Weather server. History records
can also be exported from the server.
•The gateway is powered by USB connection.
•Supports MAX 8 WH31 multi-channel temperature
and humidity sensor (optional)
•Supports MAX 8 WH51 soil moisture sensor
(optional) and MAX 4 WH41 PM2.5 air quality
sensor (optional)

6
3Setup Guide
3.1 Gateway Introduction
See Figure 2 to help you identify elements of the gateway.
Figure 2: Gateway Introduction
1 Wi-Fi Configure/Reset Button
2. RF Status Indicator Light
3. Wi-Fi Status Indicator Light
4. USB Connector for system power supply
5. Temperature, humidity and barometric 3-in-1 sensor
Figure 3:Gateway parts identification

7
Before configuring the gateway with your mobile
application, please read the description of the LED
indicators (2 and 3), and button function for better
understanding.
3.1.1 LED Indicators
RF (Blue): Indicates RF data receiving status
•Flash (each): indicates one packet of RF data from a
sensor was received.
•Off (steady): indicates no RF data received.
Wi-Fi (Red): Indicates Wi-Fi connection status
•On (steady): indicates connected to Wi-Fi network;
network communication normal and data uploaded
to configured weather service(s) successfully.
•Off (steady): Wi-Fi connection failed.
•Flash (slow - 1Hz), indicates connected to Wi-Fi
network; network communication normal, but
upload to one or more configured weather services
failed. First confirm Internet access through your
router is functioning, and then check whether the
upload server account and password are correct (use
WS View application).
•Flash (faster - 2Hz), indicates that Wi-Fi
configuration mode is active. Use the WS View
mobile application to complete the configuration.

8
3.1.2 Button Function
The black button is used for the following two modes:
Wi-Fi Configure Mode: Press and hold the button for
about 5 seconds until the Wi-Fi status LED is fast flashing
indicating the gateway is ready for Wi-Fi configuration.
Reset Mode: Press and hold the button for about 10
seconds will reset the gateway and clear the history data.
Note:
1. When powered up, and when there is no valid Wi-Fi
configuration (including very first time), the Wi-Fi
status LED will be fast flashing. It means that the
gateway is in the Wi-Fi configuration mode. Use the
mobile application to complete the configuration
process.
2. If you purchased optional sensor(s), you can power up
the new sensor at any time and use mobile
application’s live data view to confirm whether the
sensor has been added successfully.
3. To add multi-channels sensors WH51 or
WH41(optional), GW1000 firmware V1.4.6 or above
will be required. No specific channel sensor needed
to purchase, for each new sensor will be recognized
as a new channel according to the Power-on
sequence on the app.
Please follow the operation tips:
1. Go to your app store and download the latest WS
View app and install it.

9
2. Open the app and update the firmware to
V1.4.6(or above) as instructed on the app.
3. After the update, power on your first WH51 or
WH41 sensor and wait for several minutes.
4. Open the Live data page and check whether the
sensor is added as CH1.
5. If succeeded, you can power on other sensors one
by one and please attach a label on each sensors for
distinction.
3.2 Publish to Internet Weather Services
Your gateway can send your sensor data to WS View APP
via local network or selected internet-based weather
services. The supported services are shown in the table
below:
Service
Description
Ecowitt
Weather
Site: https://www.ecowitt.net
Ecowitt’ s new weather server that can
host a bunch of sensors that other
services don’t support at this time.
Weather
Underground
Site: https://wunderground.com
provides local & long-range weather
forecasts, weather reports, maps &
tropical weather conditions for
locations worldwide.

10
WOW
Site: https://wow.metoffice.gov.uk
A UK based weather observation
website.
Weather
Cloud
Site: https://weathercloud.net
A large network of weather stations
reporting data in real time from all
over the world.
Table 2: Supported weather services
3.3 Gateway Wi-Fi Configuration
The gateway can function as an independent Wi-Fi access
point during Wi-Fi configuration. This will be used to
allow your mobile application to connect to it directly
during configuration (temporarily), passing configuration
information about your normal Wi-Fi network to the
Gateway so that it can later connect to your preferred
Wi-Fi network.
Please follow the following procedure:
1. Download the mobile application from the iOS App
Store or Google Play store, as appropriate for your
device.
2. Plug your gateway into an available USB port that
supplies power and ensure it is in Wi-Fi
configuration mode (RED LED flashing fast). If it is
not, follow the procedure to put it in that mode (hold
down button for about 5 seconds).

11
3. Start the application and choose “Configure New
Device”. This may be automatic on the very first use
of the application.
4. Tap on the appropriate device type and select “Next”.
Follow the prompts.
5. Confirm Wi-Fi configuration mode is active, as
prompted. Correct if necessary (see above). Press
“Next”.
6. Enter your preferred Wi-Fi SSID (network name)
and security password. Press “Next”. This will be
communicated to the gateway in a later step.
7. Now switch your mobile device to the ad-hoc Wi-Fi
network created by your gateway. It will be named
something like “GW1000-WIFI” followed by some

12
numbers. Wait until connected. You may see a
message such as “Unsecured Network” and “No
Internet connection”: this is normal and can be
ignored.
8. Return to the mobile application. The connection
should be recognized, and you should see a few
messages about connecting to the gateway and
configuring it. The RED LED on the gateway should
now no longer be flashing red.
9. Your mobile device should have been returned to
your normal Wi-Fi network setting and the “Live
Data” screen should be providing a read-out of your
sensors.

13
10. Check the data quality and make sure sensor(s) are
properly detected by the gateway.
11. With your obtained sensor ID or MAC address,
register your GW1000 on the dedicated weather
service you submitted.
12. If you register with WU, the current day history data
can be viewed on WS View app.
3.4 Adding weather services
You may have configured weather services during the
initial configuration, or you may do so later. To do so,
open the mobile application and select your gateway from
the device list. This will bring you to the “Live Data”
screen for the gateway.

14
On the “Live Data” screen, press the “More” button in
the upper right and select “Weather Services” from the
menu.

15
Navigate to the weather service you wish to configure by
pressing “Next” and enter the appropriate data.

16
3.5 Ecowitt Weather
It’s recommended to use the Ecowitt Weather server to
monitor and record your sensors data. You may do so
as the following tips:
On the ecowitt.net uploading page, enable the ON
button(displayed blue) and set the uploading interval
time.
Copy the MAC address(will be used to add the device
on the server later)
Press Save on the page.
Press Register at ecowitt.net and finish the registration

17
on the page.
Press the upper left menu button and select Devices.
Press Add Device and input all the information needed.
Press Save.
Press Dashboard on the menu. Your sensor data would
be available on the dashboard within several minutes.
Note: When select device address on map, please wait
till the map display before select your address.
You may add a shortcut of the ecowitt.net website on
the home page of your phone for quick access.
3.6 Weather Underground
If you are planning to use wunderground.com you
must have an account and register a (new) personal
weather station. You may do so on the Wunderground
uploading page :
Press Register at Wunderground.com and finish the
registration on the page.
Take note of the PWS identifier (ID) and the
password that will be generated for you.

18
Back to the app and input the Station ID and Key.
Press Save.
Back to the Menu page and select WU Dashboard.
You’ll see the current WU data, including graphs on
the “WU Dashboard” screen within hours.
To add additional WU stations, please follow this
procedure:
Press “Menu” icon (upper left) and choose Manage
Wunderground.
Press “Add WU Station ID” to add a new station, The
next screen will let you enter the appropriate
information.
You may also press the “Delete” button next to a
specific station to remove it.
3.6.1 WU Dashboard vs Live Data
You should be aware that the sensor information
presented here represents the latest as seen by WU (from
the last successful upload), and may not be identical what
is on your live data screen!

19
Here is a short explanation showing data difference:
Live Data is obtained by the mobile app by connecting
directly to the gateway. This can only happen when your
mobile device and gateway are connected to the same
Wi-Fi network. It will then show up after you select
“Device List” from the main settings menu. If your
mobile device is in another network, no device(s) will
show up in this list and you will not be able to select a
device for displaying the “Live Data” screen.
WU Dashboard shows the data obtained from WU
server. This requires that your mobile device can reach
the Internet and therefore this is possible even when you
are not on your home Wi-Fi network, such as when
using cellular data.
3.7 Calibration or Rain totals
When one the “Live Data” screen, you can press the
“More” button (upper right) to enter the calibration
screen or the rain totals screen.
When you select “Calibration” you can change sensor
calibration values on the next screen:
If you tap on “Rain Totals” instead, you can edit the rain
total for the current day, week, month, or year. This is
useful when you start using this system instead of
another one that has accumulated data, or simply if you
know the values to be incorrect.

20
3.8 Registering with and using
wunderground.com
If you have not already done setup forwunderground.com
during the Wi-Fi setup, you can do so later. Perform the
following steps:
1. Visit Wunderground.comand click Join as the right top
arrow indicates and select the Sign up for free option.
2. Click More and select Add Weather Station to
register your station
Other manuals for GW1000
2
Table of contents
Other ECOWITT Gateway manuals
