Ecreso Silver User manual

ecreso WorldCast Systems Group
web: www.broadcast-silver.com - e-mail: contact@broadcast-silver.com
FM RECEIVER SILVER
USER MANUAL
Date : 2013/08/30
Silver ® and Ecreso ® are registered trademarks.

FM Receiver Silver - User Manual –08/2013
Page 2
Head Office : Parc d’activites Kennedy - 20, avenue Neil Armstrong –33700 Bordeaux-Merignac (France)
Tel +33(0) 557 928928 –Fax+33(0)557 928929 –contact@broadcast-silver.com–www.broadcast-silver.com
TABLE OF CONTENTS
1. INTRODUCTION.......................................................................................................................................4
1.1. General information..........................................................................................................................4
1.1.1. About Ecreso...............................................................................................................................4
1.1.2. About the FM Receiver Silver .....................................................................................................5
1.2. Safety warning..................................................................................................................................5
2. PRODUCT PRESENTATION....................................................................................................................7
2.1. General presentation........................................................................................................................7
2.2. List of included accessories.............................................................................................................7
2.3. General specifications......................................................................................................................7
2.4. Front panel.....................................................................................................................................10
2.5. Rear panel......................................................................................................................................11
3. STARTING UP ........................................................................................................................................13
3.1. Setting the reception frequency .....................................................................................................13
3.2. Checking expected output levels ...................................................................................................14
3.3. Installing the FM Receiver in racks................................................................................................14
3.4. Setting Alarms................................................................................................................................15
3.5. Locking the FM Receiver Silver .....................................................................................................15
3.6. Connecting and setting the IP/IO version.......................................................................................16
4. THE FRONT PANEL APPLICATION .....................................................................................................17
4.1. Working principle............................................................................................................................17
4.2. Application presentation.................................................................................................................18
4.3. Menus.............................................................................................................................................18
5. REMOTE CONTROL AND MONITORING WITH THE GPIO BOARD..................................................22
5.1. Introduction.....................................................................................................................................22
5.2. Description of monitoring functions................................................................................................22
5.3. Remote monitoring function pinout ................................................................................................22
5.4. Physical representation of the GPIOs............................................................................................23
6. THE EMBEDDED WEBSITE ..................................................................................................................24
6.1. Introduction.....................................................................................................................................24
6.2. Connecting to the embedded web site...........................................................................................24
6.3. Viewing the Status..........................................................................................................................25
6.4. Receiver configuration....................................................................................................................26
6.5. System Configuration.....................................................................................................................28
6.5.1. Product ID .................................................................................................................................28
6.5.2. Date / Time................................................................................................................................29
6.5.3. Users.........................................................................................................................................30
6.5.4. Network.....................................................................................................................................31
6.5.5. Support......................................................................................................................................32
6.5.6. SNMP Agent .............................................................................................................................33
6.5.7. Notifications...............................................................................................................................34
6.5.8. Traps.........................................................................................................................................35
6.6. About..............................................................................................................................................36
APPENDIX A: USING A TERMINAL CONNECTION ................................................................................37
A.1. Setting up the connection.................................................................................................................37
A.2. Protocol definition.............................................................................................................................37
A.3. Serial commands list ........................................................................................................................38
APPENDIX B: TRAP DESCRIPTION.........................................................................................................41

FM Receiver Silver - User Manual –08/2013
Page 3
Head Office : Parc d’activites Kennedy - 20, avenue Neil Armstrong –33700 Bordeaux-Merignac (France)
Tel +33(0) 557 928928 –Fax+33(0)557 928929 –contact@broadcast-silver.com–www.broadcast-silver.com
APPENDIX C: DESCRIPTION OF SNMP MONITORING PARAMETERS ...............................................43
C.1. Measured values..............................................................................................................................43
C.2. Alarms ..............................................................................................................................................44
APPENDIX D: RDS ACCRONYMS............................................................................................................45
APPENDIX E: FOR FURTHER INFORMATION........................................................................................46

FM Receiver Silver - User Manual –08/2013
Page 4
Head Office : Parc d’activites Kennedy - 20, avenue Neil Armstrong –33700 Bordeaux-Merignac (France)
Tel +33(0) 557 928928 –Fax+33(0)557 928929 –contact@broadcast-silver.com–www.broadcast-silver.com
1. INTRODUCTION
1.1. General information
1.1.1. About Ecreso
Founded in 1956 near Bordeaux, ECRESO was created by radio broadcasting enthusiasts and counts
today as one of the most important players on the international broadcasting stage.
ECRESO offers analog and digital radio as well as digital TV transmitters (FM, DAB, DAB+, T-DMB, DVB-
T/H), low power transmitters, which are air-cooled, as well as high power devices either air or water-
cooled, receivers and retransmitters.
ECRESO is part of the WorldCast Systems group of companies which combines the collective expertise &
extensive product portfolio of several major broadcast brands to offer turnkey systems in all major analog
and digital technologies. Other brands within the group include:
Audemat who designs monitoring equipment for analog and digital radio and TV as well as an
extensive range of facility remote control solutions.
APT Codecs who offer reliable and cost effective broadcast codec platforms delivering high quality
content over IP, T1, E1, ISDN & Leased Lines.
As such, WorldCast Systems can offer complete broadcast solutions for the delivery, transmission and
monitoring of broadcast content throughout the broadcast chain.
The group is founded on three core values:
1) Product innovation:
Audemat places a key emphasis on Research & Development and its innovative approach has
been repeatedly recognized by the industry. WorldCast Systems has won awards for innovation at
consecutive NAB Shows for over 10 years.
2) Customer satisfaction:
Audemat is dedicated to ensuring the best quality, value and service for its customers and has
achieved IS0 9001 certification.
3) Sustainable Development:
Audemat is committed to sustainable development and demonstrates this commitment in several
ways: it adheres to the UN Global Compact project and all new products are developed in keeping
with an eco-design philosophy and built within Audemat’s low energy consumption factory.
Audemat/Ecreso employs around 80 employees at headquarters in Bordeaux-Merignac, France.
Audemat/Ecreso also has a subsidiary in Miami, USA that manages the North & South American markets
as well as sales offices in the UK and India. An extensive network of international dealers and distributors
means that the company is represented in over 45 countries throughout Europe, Middle East, Africa and
Asia.

FM Receiver Silver - User Manual –08/2013
Page 5
Head Office : Parc d’activites Kennedy - 20, avenue Neil Armstrong –33700 Bordeaux-Merignac (France)
Tel +33(0) 557 928928 –Fax+33(0)557 928929 –contact@broadcast-silver.com–www.broadcast-silver.com
1.1.2. About the FM Receiver Silver
The FM Receiver Silver monitoring, controlling and re-broadcasting FM receiver has been designed for
the professional FM broadcasting world.
This receiver’s ergonomics and performance enable it to be integrated with low, medium or high power
(re-transmission) FM transmission and re-transmission equipment, a studio or a CDM (control) or into a
remote-monitoring system.
The FM Receiver Silver has a RS232C port and a LAN port (option) authorizing partial receiver
management: remote-control, status, alarm and level return.
The FM Receiver Silver is particularly adaptable to automatic transmitting and re-transmitting systems,
and makes up the basis of high performance remote-monitoring equipment.
Versions
Two versions of the FM Receiver Silver are available:
Standard version
IP/IO version: it includes a GPIO board with 6 relays and 8 digital inputs and a TCP/IP board for
remote configuration via a web site and SNMP management. The 8 digital inputs are reserved for
future use.
1.2. Safety warning
This equipment complies with international mechanical and electrical standards. To maintain this
compliance, as well as to ensure proper and safe working conditions and avoid electrical shocks and fire
hazards, you must comply with the following recommendations:
The device should only be utilized in the conditions described in the user manual.
The device is designed for industrial usage and must only be operated by qualified personnel.
The device may be heavy; it must be lifted and handled with care, specifically during unpacking
and set up.
Electrical precautions
Unplug from mains outlet before any intervention.
Any maintenance, adjustment or repair must be carried out by personnel specifically trained by
WorldCast Systems.
Before switching on the device, make sure the nominal voltage specified on the device matches
the mains nominal voltage.
The device should only be operated on a stable electrical network. If the electrical network is not
stable, a power conditioner, such as a UPS, must be used
The device must only be used with a plug that incorporates a protective ground contact.
To avoid any risk of electrocution, the protection conductor must not be cut, intentionally or
accidentally, either on the device or on the power cord.
High quality shielded cables are mandatory.
Environmental precautions
It is necessary to verify that environmental conditions comply with those recommended in the
manual.
Nothing must obstruct the ventilation.
To avoid any electromagnetic interference, the device must only be used when it is closed,
installed in a cabinet and connected to the earth as per the instructions.

FM Receiver Silver - User Manual –08/2013
Page 6
Head Office : Parc d’activites Kennedy - 20, avenue Neil Armstrong –33700 Bordeaux-Merignac (France)
Tel +33(0) 557 928928 –Fax+33(0)557 928929 –contact@broadcast-silver.com–www.broadcast-silver.com
The device should not be exposed to dripping or splashing and no objects filled with liquids, such
as coffee cups, should be placed on the equipment.
Connectors may be hot on high power units.
Precautions regarding the lithium battery
This device includes a lithium battery.
If the battery is not correctly replaced, there is a risk of explosion.
Only replace it with a battery of the same type. Contact us before attempting to use another type
Do not puncture the battery
Do not throw the battery in fire
Do not immerse the battery in water
Do not throw away the used battery, recycle it instead. You may send it back to us if needed.
If these precautions are not followed, the guarantee will be void.

FM Receiver Silver - User Manual –08/2013
Page 7
Head Office : Parc d’activites Kennedy - 20, avenue Neil Armstrong –33700 Bordeaux-Merignac (France)
Tel +33(0) 557 928928 –Fax+33(0)557 928929 –contact@broadcast-silver.com–www.broadcast-silver.com
2. PRODUCT PRESENTATION
2.1. General presentation
The FM Receiver Silver is a rackable 19" wide and 1 Unit high, making it easy to integrate into all types of
standard cabinets.
Reliability and simple operation have been the main concern while designing it.
All the functions can be set using only using the front panel LCD screen and its control keypad.
A series of 6 red indicator LEDs allow the user to quickly view the status of alarms.
Operating reliability is increased thanks to the use of protected, large size components.
Maximum operating security is made possible by locking the data acquisition command by software and
by using modern back-up components, excluding all external energy (neither batteries nor accumulators).
Finally, mechanical and electrical procedures have been developed to ensure maximum safety during any
operations in an electrically active environment (CEM).
Generally speaking, the FM Receiver Silver complies with the latest European specifications (mains
supply voltage, insulation, etc...).
2.2. List of included accessories
Check that all elements are present in the box:
Power supply cable
1 box including the documentation CD, a quick start notice and a quality control form.
2.3. General specifications
Main characteristics
External dimensions (W x H x D mm)
483 (19’’) x 1U x 379
Weight
about 3.4 kg
Power supply voltage
88 V –264 V AC
Power supply frequency
47 Hz - 63 Hz
Power consumption
about 45 VA
Temperature
Optimal performance temperatures
Guaranteed working temperatures
Storage
+5°C - +45°C
0°C - +50°C
-20°C - +70°C
Humidity
10-95% non-condensing relative humidity

FM Receiver Silver - User Manual –08/2013
Page 8
Head Office : Parc d’activites Kennedy - 20, avenue Neil Armstrong –33700 Bordeaux-Merignac (France)
Tel +33(0) 557 928928 –Fax+33(0)557 928929 –contact@broadcast-silver.com–www.broadcast-silver.com
RF Section *
Tuning frequencies
87.5 to 108.00 MHz
Programming step
User defined at 10 kHz or 100 kHz (default: 100 kHz)
Frequency accuracy
10 ppm at 25°C
RF connector and impedance
2 x BNC / 50 Ω
Max input RF level
120 dBµV (+13 dBm)
RF Attenuation
0 / 40 dB
IF selectivity
Wide / Middle / Narrow / Auto selection*
Static selectivity
Wide @ -3 dB
Wide @ -60 dB
Middle @ -3 dB
Middle @ -60 dB
Narrow @ -3 dB
Narrow @ -60 dB
350 kHz
500 kHz
120 kHz
400 kHz
80 kHz
300 kHz
Sensitivity
S/N 60 dB RMS 20~23 kHz (mono)
AF output
< 40 dBµV
MPX output
< 50 dBµV
MPX *
Signal / Noise, 1 kHz AF at 75 kHz excursion:
RMS
Weighted QP CCIR
62dB
50 dB
Separation
< -45 dB @ 1 kHz
Distortion
0.1% @ 1 kHz (typical)
Bandwidth
40 Hz~15 kHz, ± 0.4 dB
Stereo decoder *
Signal / Noise , 1 kHz AF at 75 kHz excursion:
RMS
Weighted QP CCIR
65 dB
53 dB
Separation
< -40 dB @ 1 kHz
Distortion
0.2% @ 1 kHz (typical)
Bandwidth (48 ksps)
40 Hz~15 kHz, ± 0.85 dB
19 kHz suppression (32 ksps)
> 50 dB
* Auto selection with IP/IO version only

FM Receiver Silver - User Manual –08/2013
Page 9
Head Office : Parc d’activites Kennedy - 20, avenue Neil Armstrong –33700 Bordeaux-Merignac (France)
Tel +33(0) 557 928928 –Fax+33(0)557 928929 –contact@broadcast-silver.com–www.broadcast-silver.com
Measurements
Receiver modulation level
Front panel LED meters (L&R)
MPX deviation level
from 0 to 99 kHz (Step 1 kHz) 10%
RF level
from 0 to 75 dBµV (Step 1 dBµV) 10%
RDS
Presence / absence
PILOT
Presence / absence
RDS data
PI, PS, AF, DI, TP, TA, PTY, MS, CT
Outputs
AF
type: XLR
levels: -31 to +15 dB (1.5 dB) **
AES
type: XLR, complete EIAJ CP1201, IEC-60958, AES3
Audio Sample rate: 32 ksps
MPX
type: BNC
levels: 0, +6, +12 dB (+ manual adjustment from - to
+2 dB)
Phones
6.35 mm stereo jack > 50 Ω
Other connectors
RS-232
Complies to EIA RS232C standard
USB
Reserved for future use
* Readings taken in “Stereo WILDE” mode
** Be aware that an audio level greater than +6 dB will lead to saturation of the signal.
FM Receiver Silver - User Manual –08/2013
Page 10
Head Office : Parc d’activites Kennedy - 20, avenue Neil Armstrong –33700 Bordeaux-Merignac (France)
Tel +33(0) 557 928928 –Fax+33(0)557 928929 –contact@broadcast-silver.com–www.broadcast-silver.com
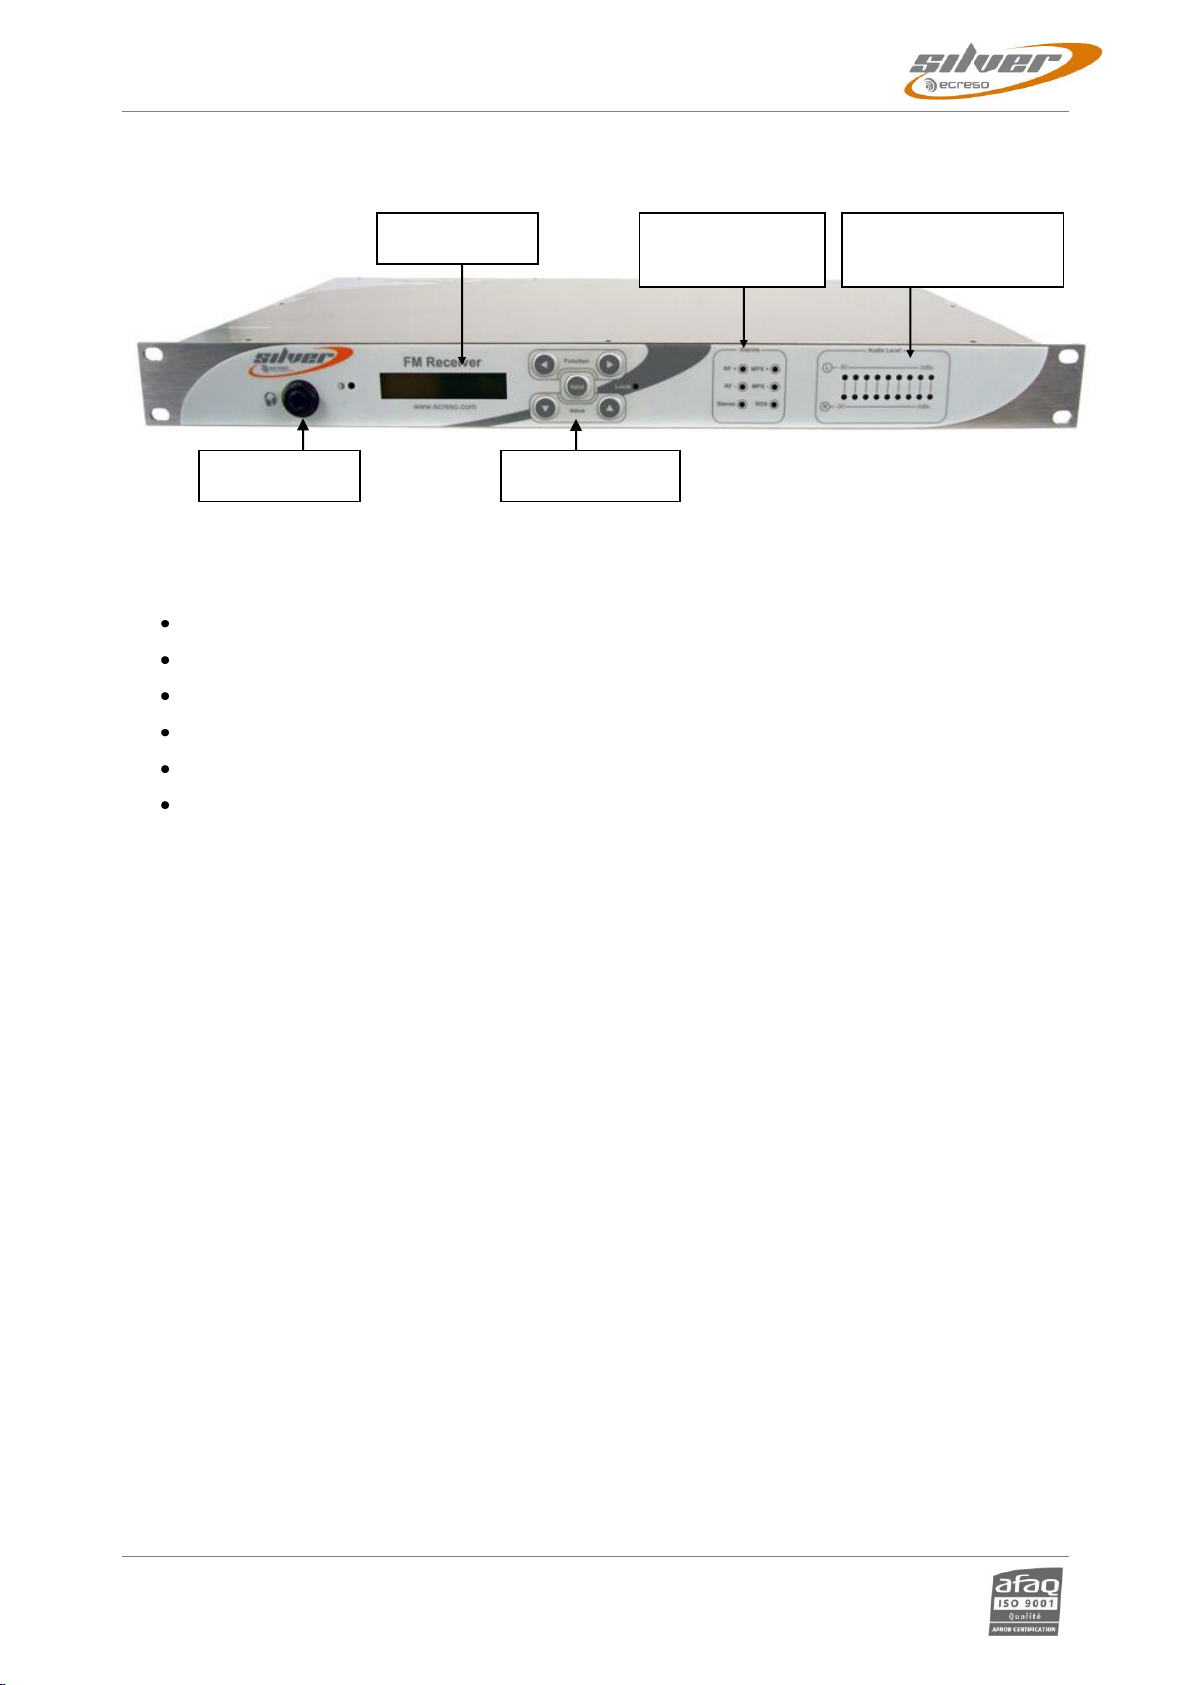
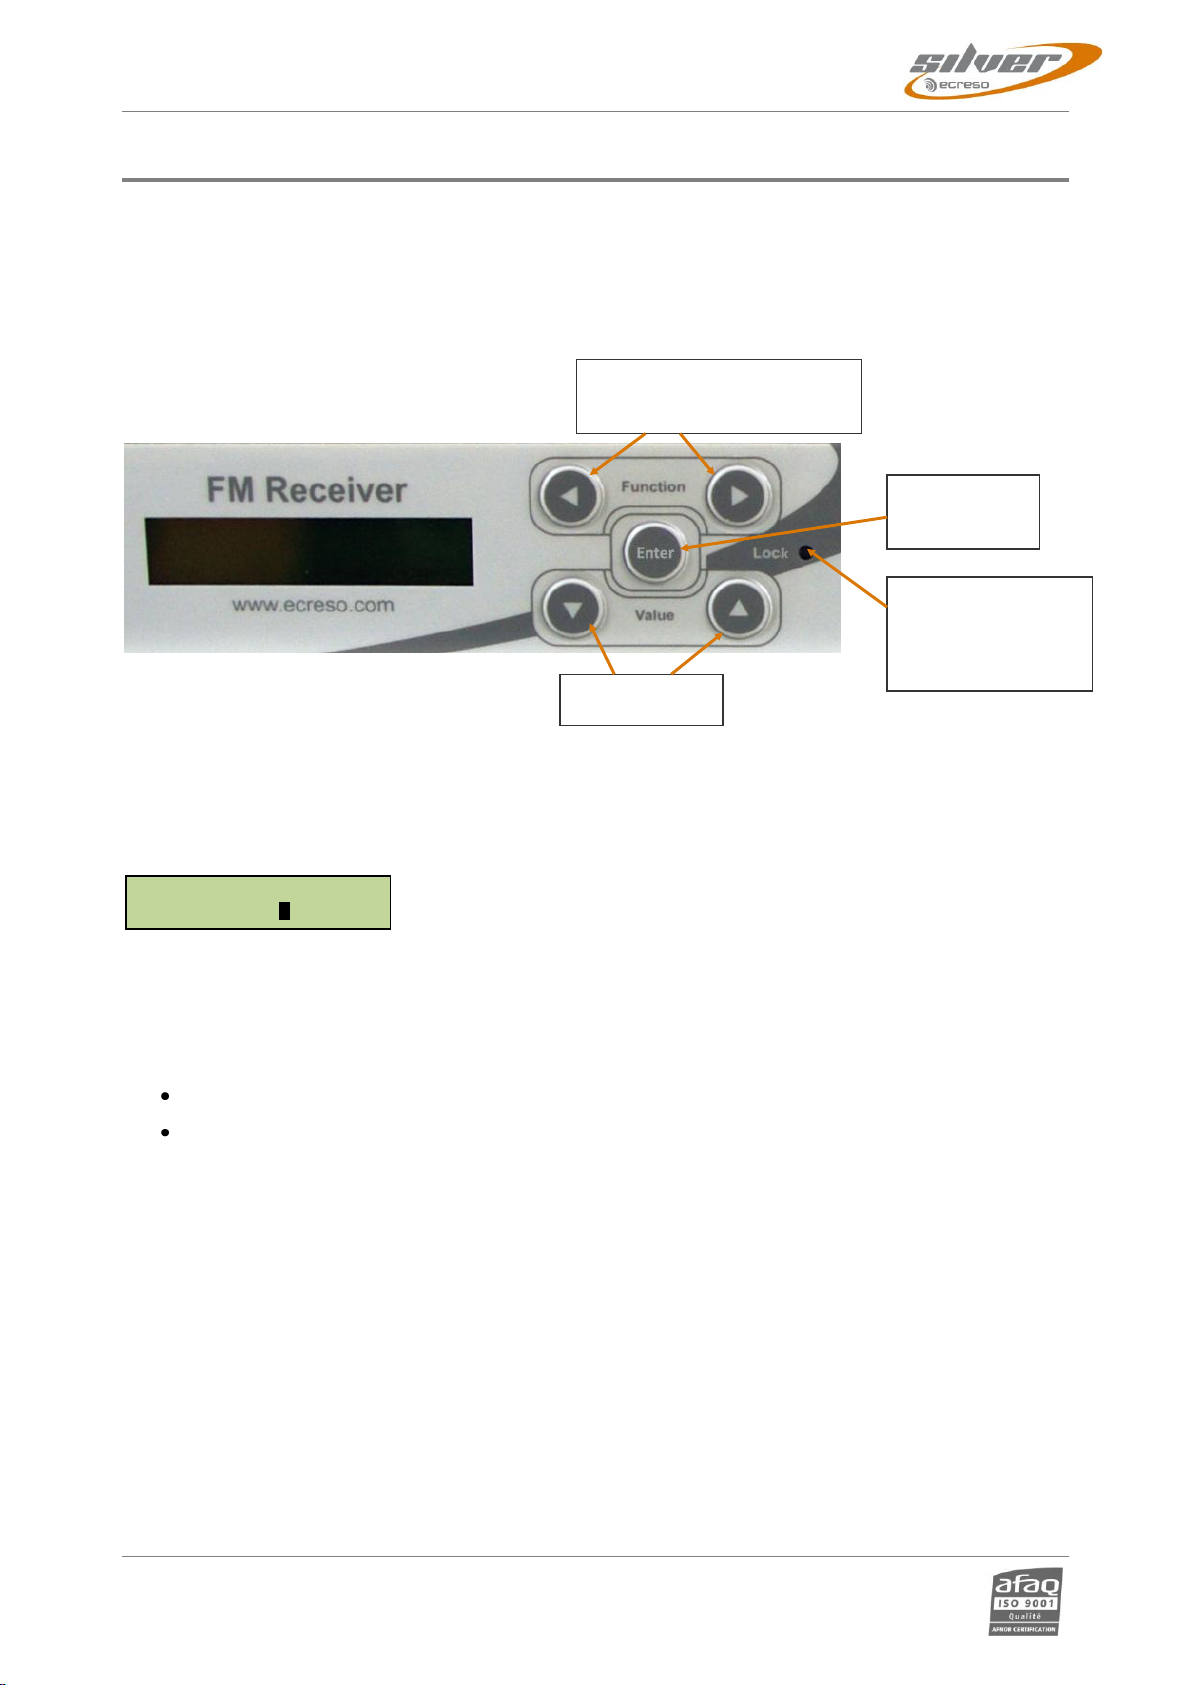
2.4. Front panel
When an alarm is on, the corresponding LED will turn red. The following events can trigger alarms:
The RF level is lesser than the minimum threshold (RF-)
The RF level is greater than the maximum threshold (RF+)
The MPX level is lesser than the minimum threshold (MPX-)
The MPX level is greater than the maximum threshold (MPX+)
The pilot signal is not detected (Stereo)
The RDS signal is not detected (RDS)
On the IP/IO version, if all alarms blink, it means the unit switched to the backup configuration.
The peak meter shows the modulation level.
To reset your FM Receiver Silver to factory settings, turn it off, then keep the Right and Left arrow
function keys pressed while turning it on.
When the FM Receiver Silver is turned off, the state of the alarms is not memorized.
LCD screen
Alarm indicator
LEDs
Receiver modulation
indicator LEDs
Audio output
Control keypad
FM Receiver Silver - User Manual –08/2013
Page 11
Head Office : Parc d’activites Kennedy - 20, avenue Neil Armstrong –33700 Bordeaux-Merignac (France)
Tel +33(0) 557 928928 –Fax+33(0)557 928929 –contact@broadcast-silver.com–www.broadcast-silver.com
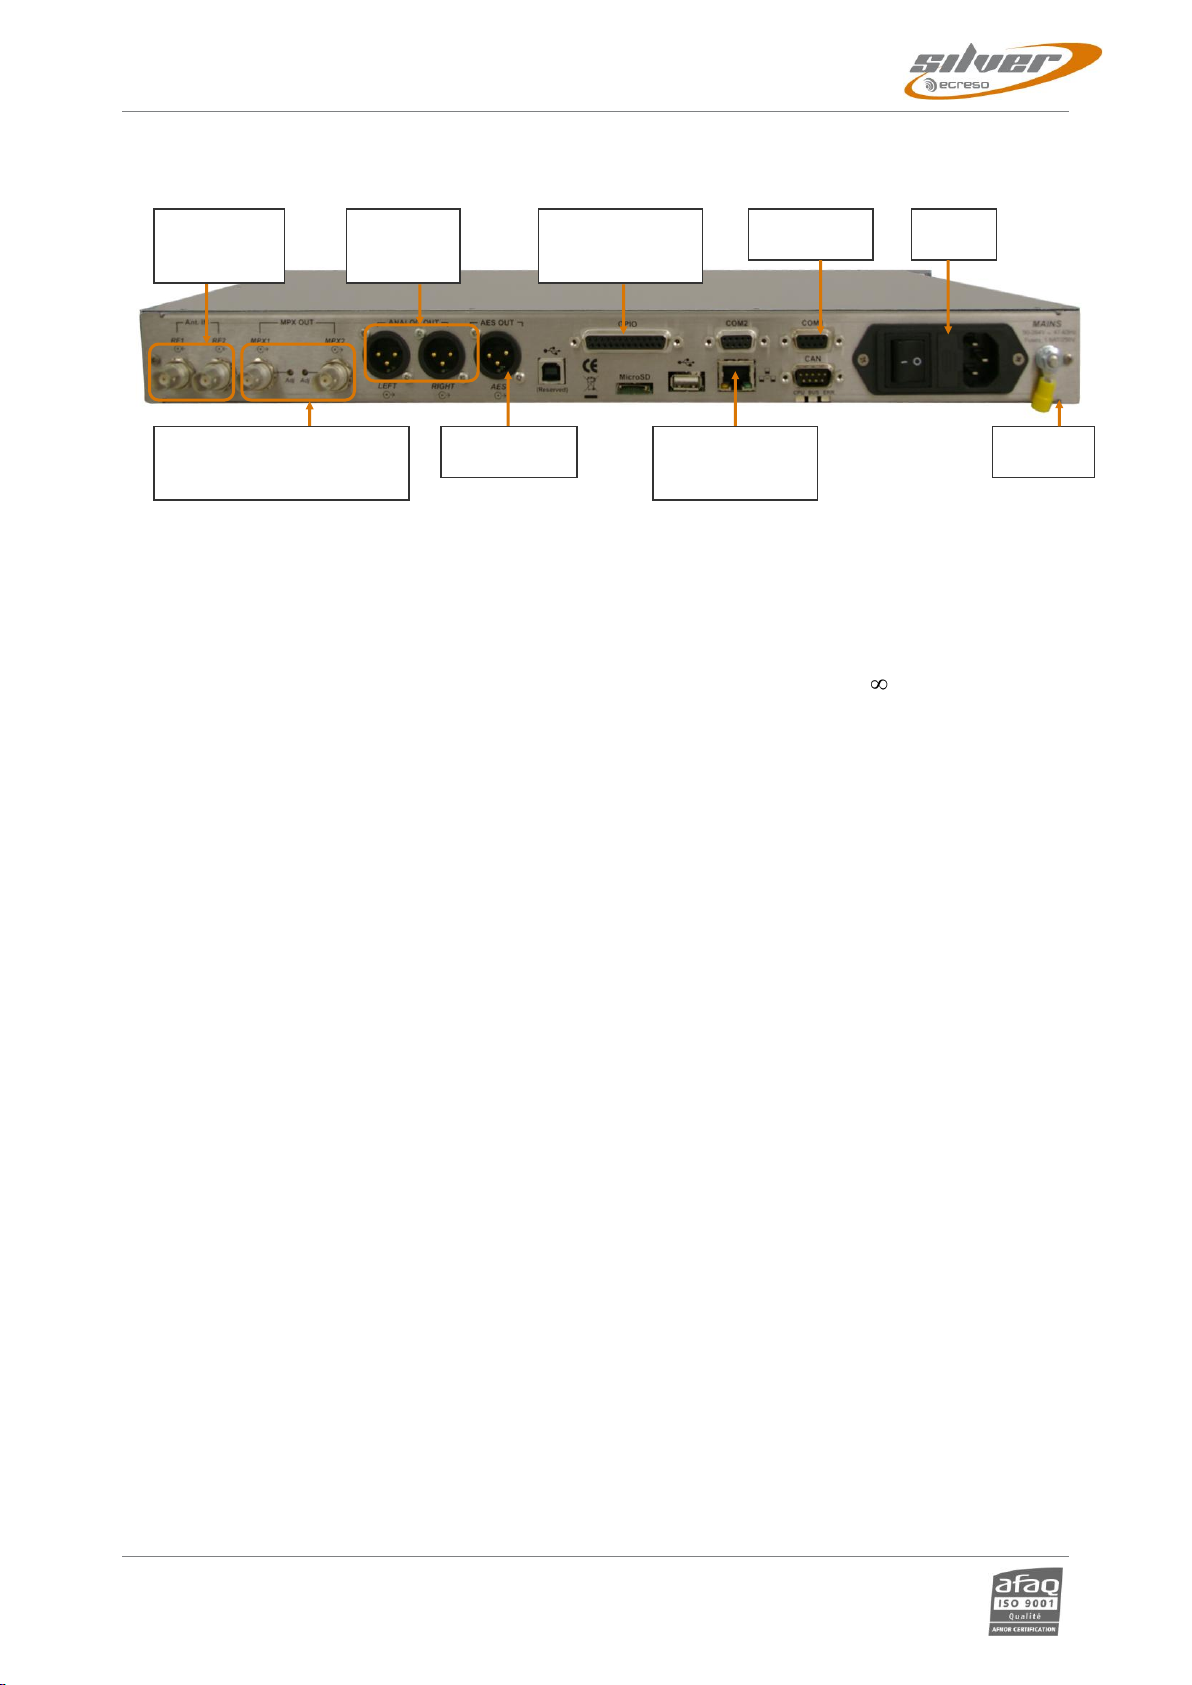
2.5. Rear panel
The MPX outputs:
Default setting is +12 dBu. They can be set by jumper, see procedure below.
The output level can be fine-tuned with a tuning screwdriver: turn the adjustment pot clockwise to
decrease and counterclockwise to increase the level. The adjustment range is from - to +2 dB.
The AF outputs:
Default setting is 12 dBu. They can be set by jumper, see procedure below.
The AES output:
It is set to 32 ksps, nominal -14 dBFS. The speed can be modified using a serial/Telnet command (see
APPENDIX A:).
Additional ports are reserved for future use.
MPX1, MPX2 outputs
and their adjustment pots
R + L AF
outputs
Serial port
Ground
Mains
RF1 and
RF2 inputs
AES output
Ethernet port
(IP/IO version)
Relay outputs
(IP/IO version)

FM Receiver Silver - User Manual –08/2013
Page 12
Head Office : Parc d’activites Kennedy - 20, avenue Neil Armstrong –33700 Bordeaux-Merignac (France)
Tel +33(0) 557 928928 –Fax+33(0)557 928929 –contact@broadcast-silver.com–www.broadcast-silver.com
Before setting the jumpers, make sure that all cables are disconnected.
Remove the 8 screws securing the cover.
R output L output MPX2 MPX1
FM Receiver Silver front panel
For each output, set the jumpers according to your needs and as indicated on the
printed circuit.
Once set, put the cover back in place and screw all 8 screws.
12
dB
6 dB
0 dB
All jumpers on this
board are set at 12 dB.

FM Receiver Silver - User Manual –08/2013
Page 13
Head Office : Parc d’activites Kennedy - 20, avenue Neil Armstrong –33700 Bordeaux-Merignac (France)
Tel +33(0) 557 928928 –Fax+33(0)557 928929 –contact@broadcast-silver.com–www.broadcast-silver.com
3. STARTING UP
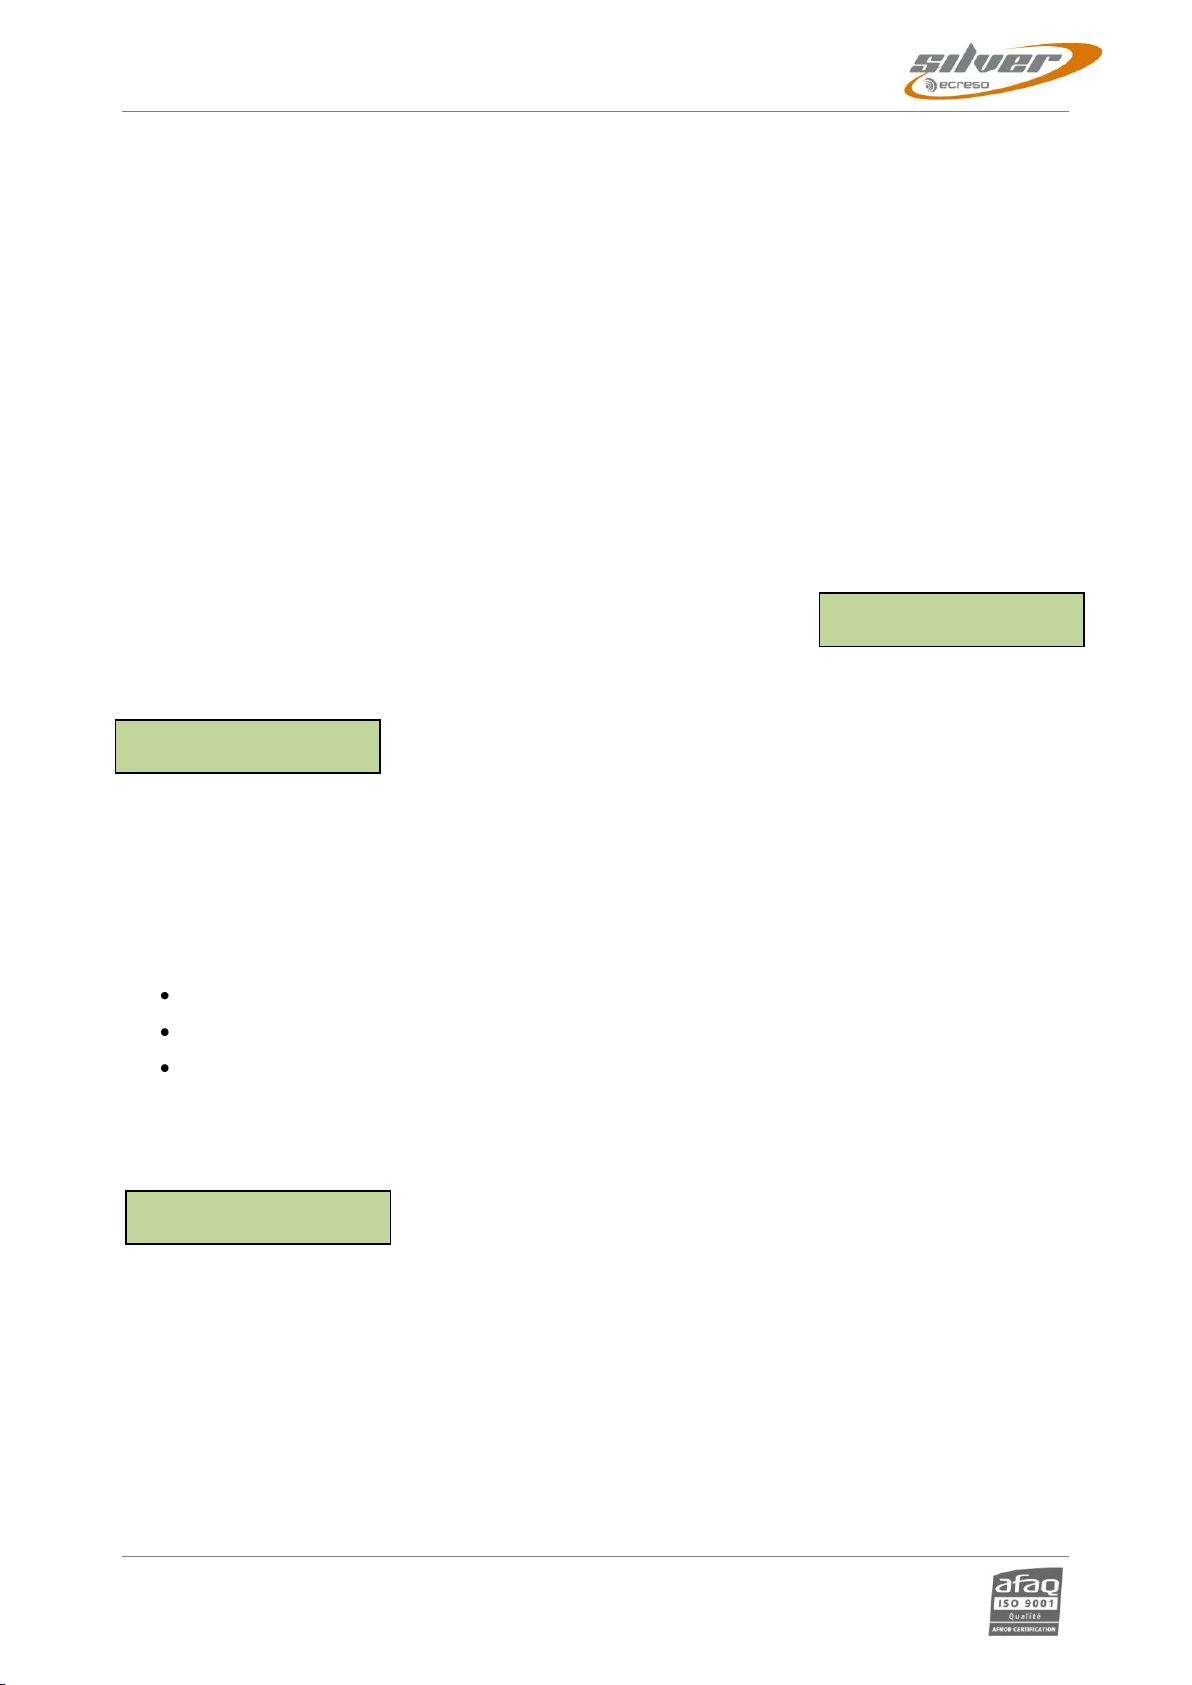
3.1. Setting the reception frequency
Connect the reception antenna to the RF1 connector and connect the FM Receiver Silver to the mains.
See connection diagram section 2.5.
Turn on the FM Receiver Silver using the switch on the rear panel.
Now use the front screen application to set your FM Receiver Silver
A set of keys allow you to browse through the menus.
This is the 1st screen you will see. When the cursor blinks on the
frequency, use the Up and Down arrow keys to find the frequency you
need.
The frequency is already set.
Control the RF level displayed on the same screen. This value includes the
effects of attenuation.
If the RF level is over 100 dBµV, we strongly advise you to set the internal
RF attenuator.
Press the Function arrow keys until you reach this screen, and keep using
the Function keys until the ATT value is selected (“0dB” is highlighted).
Press the Value keys to adjust the attenuation to 40 dB.
Use the Function keys to go back to the main RF screen: the level value is
now attenuated.
Check the front panel LED peak meter: if the signal reception is correct, you will see no red light. A red
light could indicate an issue with the reception frequency.
Press the “Enter” key then the Up arrow key to save the settings you just
modified.
Conf Recall / Save
Set1 val- val+
Mode Ant ATT
AutoS 1 0dB
Freq Level
098.50MHz 035dBµ
Navigate from one screen or
one function to the next
Adjust values
Save current
settings
Lock LED: when
on, parameters
cannot be modified
on the front panel
FM Receiver Silver - User Manual –08/2013
Page 14
Head Office : Parc d’activites Kennedy - 20, avenue Neil Armstrong –33700 Bordeaux-Merignac (France)
Tel +33(0) 557 928928 –Fax+33(0)557 928929 –contact@broadcast-silver.com–www.broadcast-silver.com
3.2. Checking expected output levels
Default output levels are +12 dBu for MPX1, MPX2 and AF outputs. They can be set by internal jumpers
at +12 dBu, +6 dBu or 0 dBu.
!See section 2.5 if you need to set the jumpers.
MPX BNC output fine tuning:
See connection diagram section 2.5.
Connect cable from the MPX output of the FM Receiver Silver to the transmitter’s MPX input.
Adjust MPX1 and/or MPX2 levels with the rear panel potentiometers using a tuning screwdriver. Turn
clockwise to decrease and counterclockwise to increase the MPX output level.
AF XLR outputs fine tuning:
Connect cables from the AF outputs of the FM Receiver Silver to the transmitter’s AF inputs.
Adjust the AF outputs levels (AfLev) using the front side application. Press
the Function arrow keys until you reach this screen, and keep using the
arrow keys until the AfLev value is selected (“0dB” is highlighted). Press the
Value keys to fine tune the level; we recommend you do not exceed + 6 dB
for this parameter.
Press the “Enter” key then the Up arrow key to save the settings you just
modified.
Turn off the FM Receiver Silver.
3.3. Installing the FM Receiver in racks
See connection diagram section 2.5.
Connect the chassis ground to the rack ground.
Connect cables (MPX BNC and/or AF output XLR) to the transmitter’s input.
Connect the FM Receiver Silver to the mains and turn on the unit.
Adjust the complete retransmission chain for expected total signal deviation (see previous section if you
need to fine tune)
If you adjusted the AF level value, press the “Enter” key then the Up arrow
key to save the settings you just modified.
Conf Recall / Save
Set1 val- val+
Conf Recall / Save
Set1 val- val+
Loc AfLev HeadP
N 0dB 92%
FM Receiver Silver - User Manual –08/2013
Page 15
Head Office : Parc d’activites Kennedy - 20, avenue Neil Armstrong –33700 Bordeaux-Merignac (France)
Tel +33(0) 557 928928 –Fax+33(0)557 928929 –contact@broadcast-silver.com–www.broadcast-silver.com
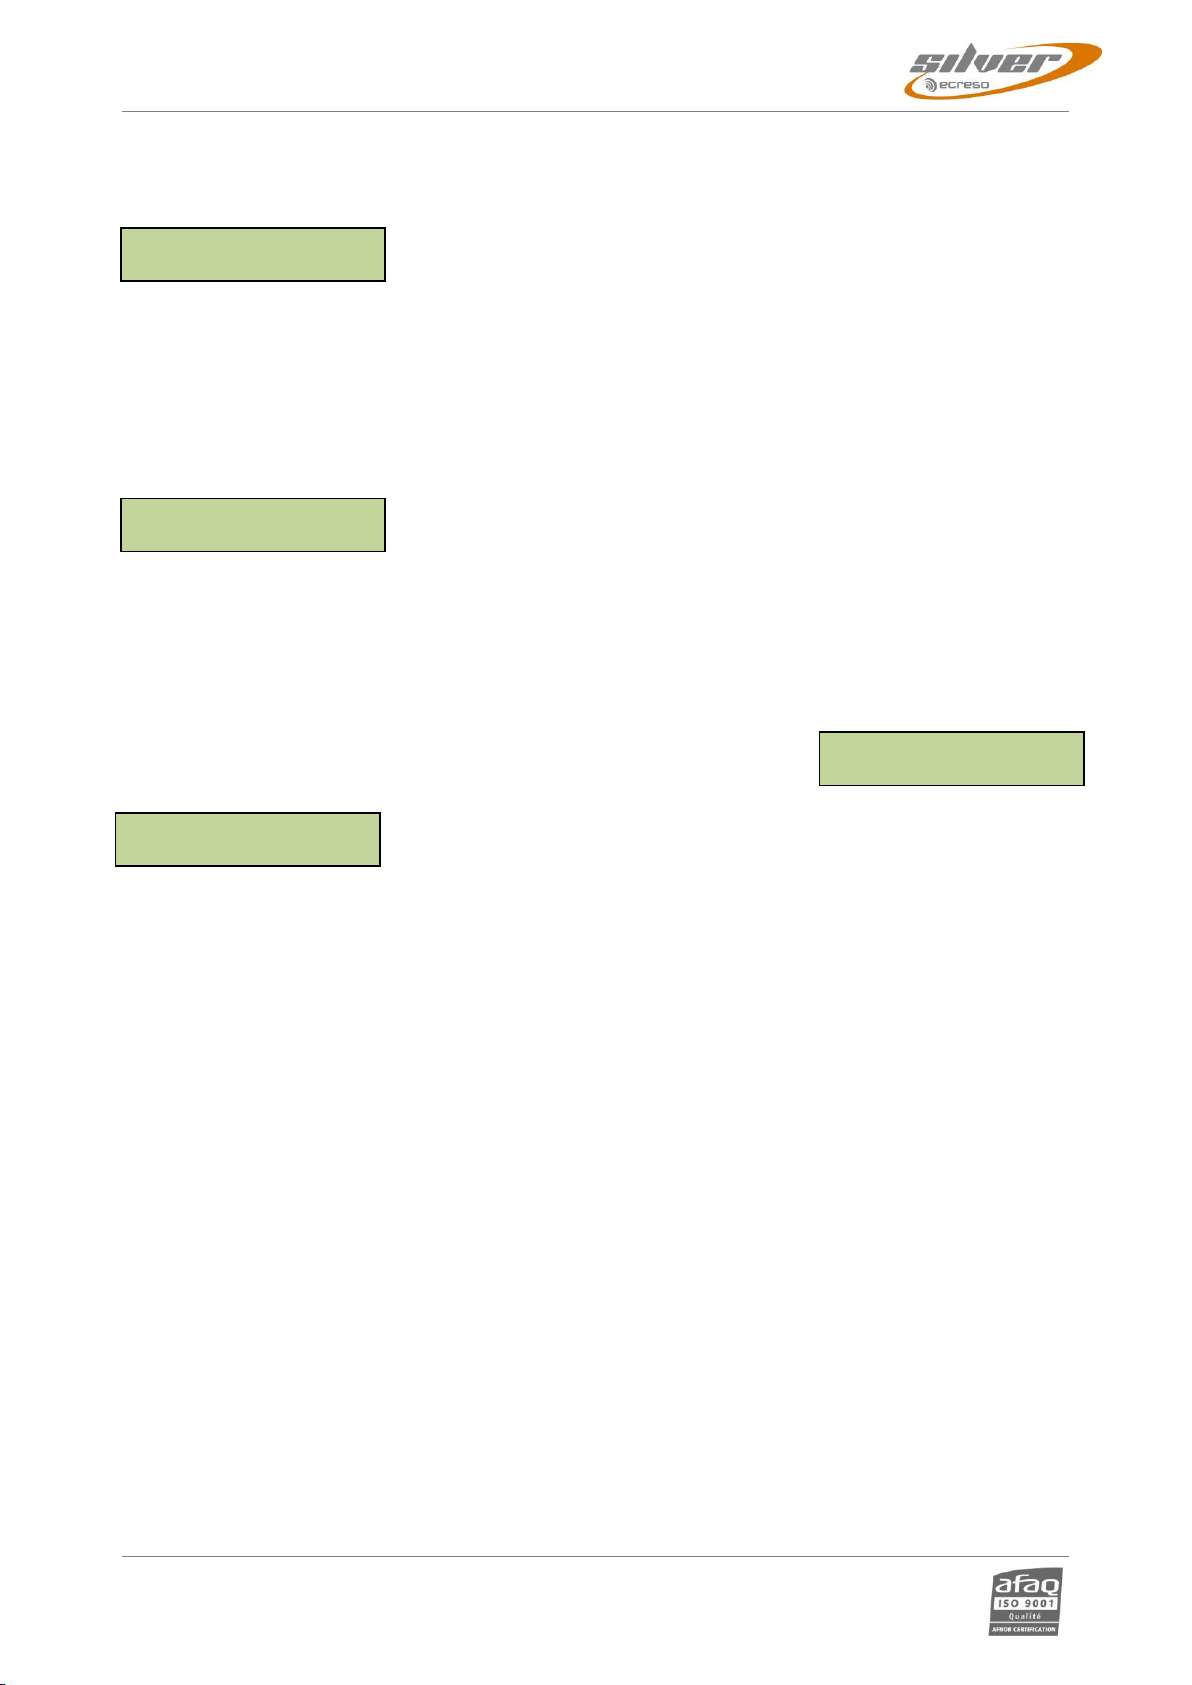
3.4. Setting Alarms
Press the Function arrow keys until you reach the RF alarm screen, and
keep using the Function keys until the desired parameter is selected
(corresponding value is highlighted). Press the Value keys to adjust: the
minimum threshold (MI, in dBµV), the maximum threshold (MA, in dBµV)
and the alarm triggering delay (Del, in s).
Note that the RF level is given after the attenuation (as set in section 2). This is read-only value.
Enable monitoring the RF signal by setting the En parameter to “Yes”.
Press the “Enter” key then the Up arrow key to save the settings you just
modified.
3.5. Locking the FM Receiver Silver
Once your FM Receiver Silver is set, lock it to avoid unintentional changes:
Press the Function arrow keys until you reach this screen and the Loc value
is selected (“N” is highlighted). Press the Value keys to switch the setting to
“Y”.
Press the “Enter” key then the Up arrow key to save the settings you just
modified.
The front panel Lock LED will be lit when the FM Receiver Silver is locked.
Loc AfLev HeadP
N 0dB 92%
Conf Recall / Save
Set1 val- val+
Conf Recall / Save
Set1 val- val+
RF En Mi Ma Del
65 Y30 120 127
FM Receiver Silver - User Manual –08/2013
Page 16
Head Office : Parc d’activites Kennedy - 20, avenue Neil Armstrong –33700 Bordeaux-Merignac (France)
Tel +33(0) 557 928928 –Fax+33(0)557 928929 –contact@broadcast-silver.com–www.broadcast-silver.com
3.6. Connecting and setting the IP/IO version
Press the Function arrow keys until you reach this screen. Press the Value
keys to modify the IP address.
Press the Function arrow keys until you reach this screen. Press the Value
keys to modify the Netmask.
Connect the network cable (B) between the FM Receiver Silver’s Ethernet port and a PC. See connection
diagram on the last page of this notice.
You will need to set an address on the PC in the same range as the new IP address, so it is compatible
with the IP address in the FM Receiver Silver.
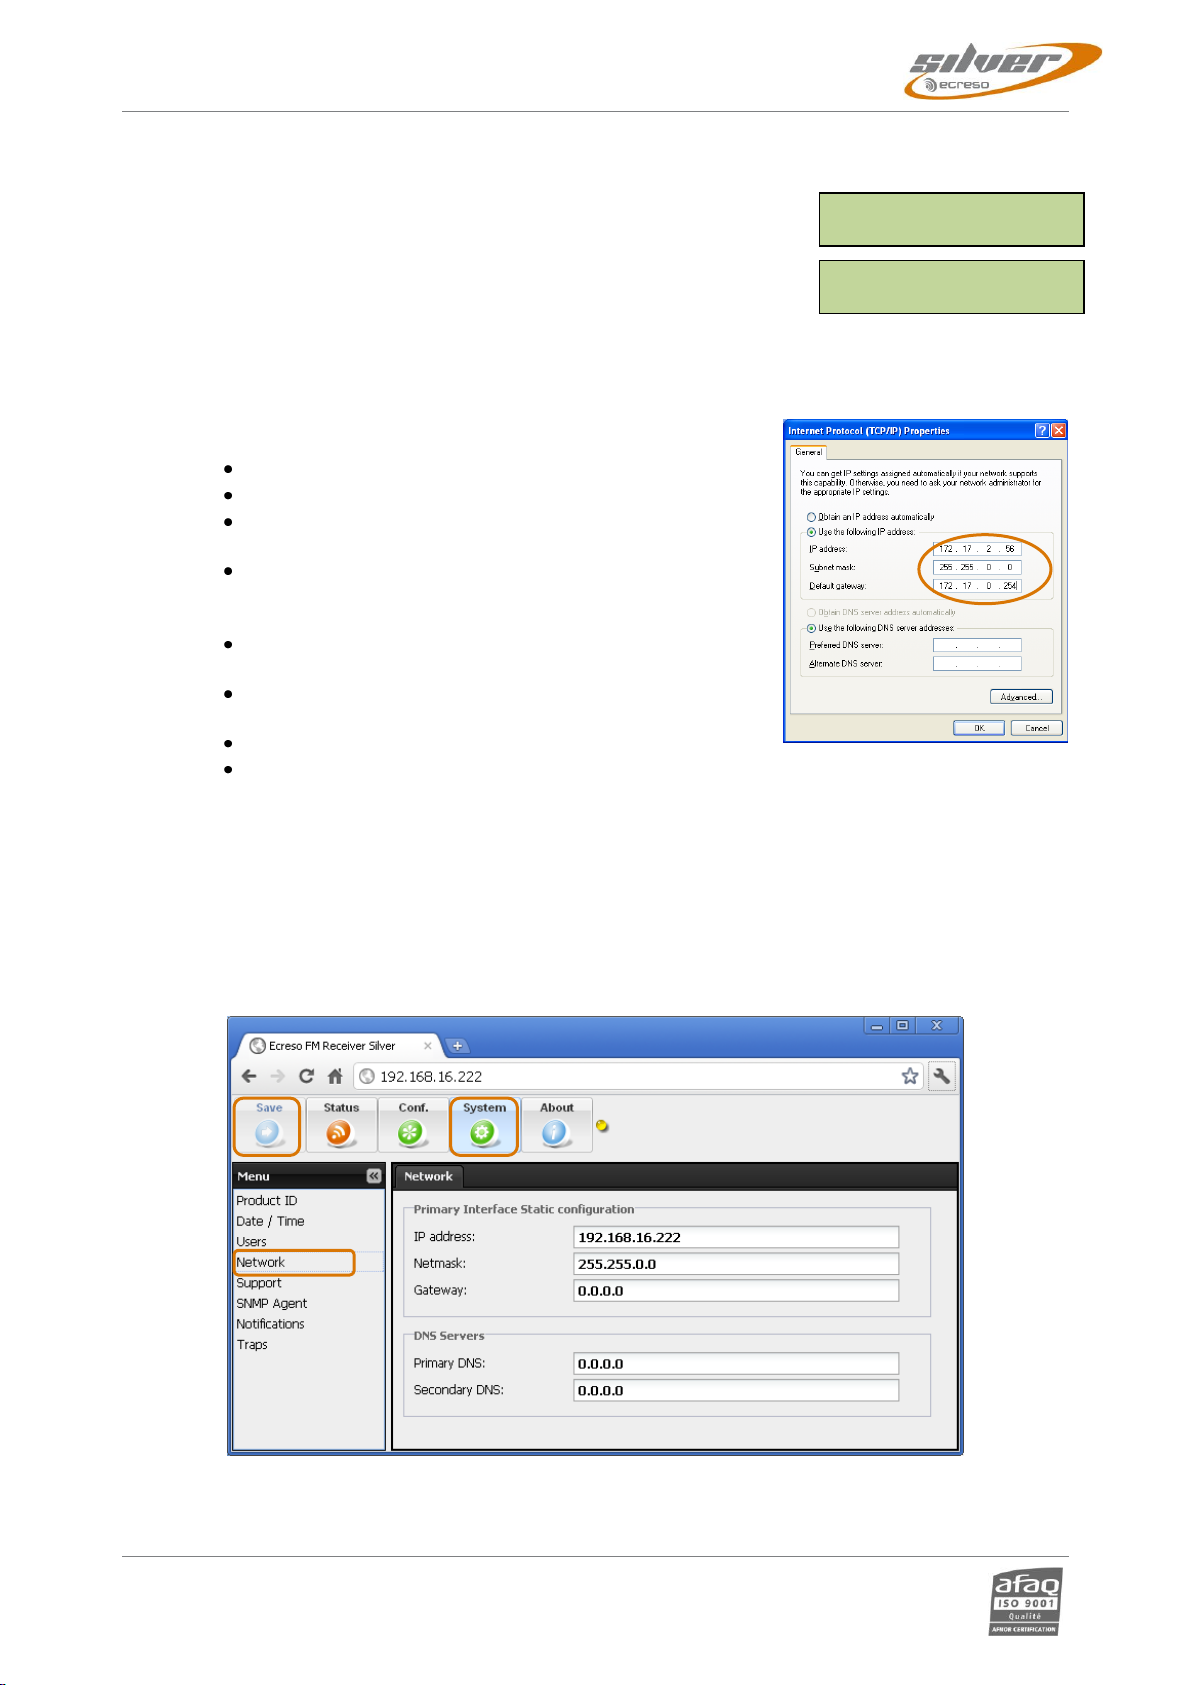
For this, if using Windows 2000 or Windows XP, go to:
Control panel/Network connections/
Local Area Connection / Properties
Click on Internet Protocol (TCP/IP) in the scroll-down
menu then on “Properties”.
Add the IP address and the sub-network mask.
With Windows Vista or 7, go to:
Control panel / Network and Internet / Network and
Sharing Center.
Click on “View Status” for your local area connection, and
on Properties
Click on Internet Protocol 4 then on Properties.
Add the IP address and the sub-net mask.
Open a Web Browser (Google Chrome, Mozilla Firefox, Internet Explorer…) and enter the new IP address
in the address bar.
The default login and password are “Admin” and “admin”.
Click the ‘System’ button and display the ‘Network’ page.
Modify the gateway.
Click the ‘Save’ button.
You will be able to view and modify all parameters using this web interface.
Device Netmask
2 55.255.000.00 0
Device IP addr
172.017.002.172
FM Receiver Silver - User Manual –08/2013
Page 17
Head Office : Parc d’activites Kennedy - 20, avenue Neil Armstrong –33700 Bordeaux-Merignac (France)
Tel +33(0) 557 928928 –Fax+33(0)557 928929 –contact@broadcast-silver.com–www.broadcast-silver.com
4. THE FRONT PANEL APPLICATION
4.1. Working principle
A set of keys allow you to browse through the menus.
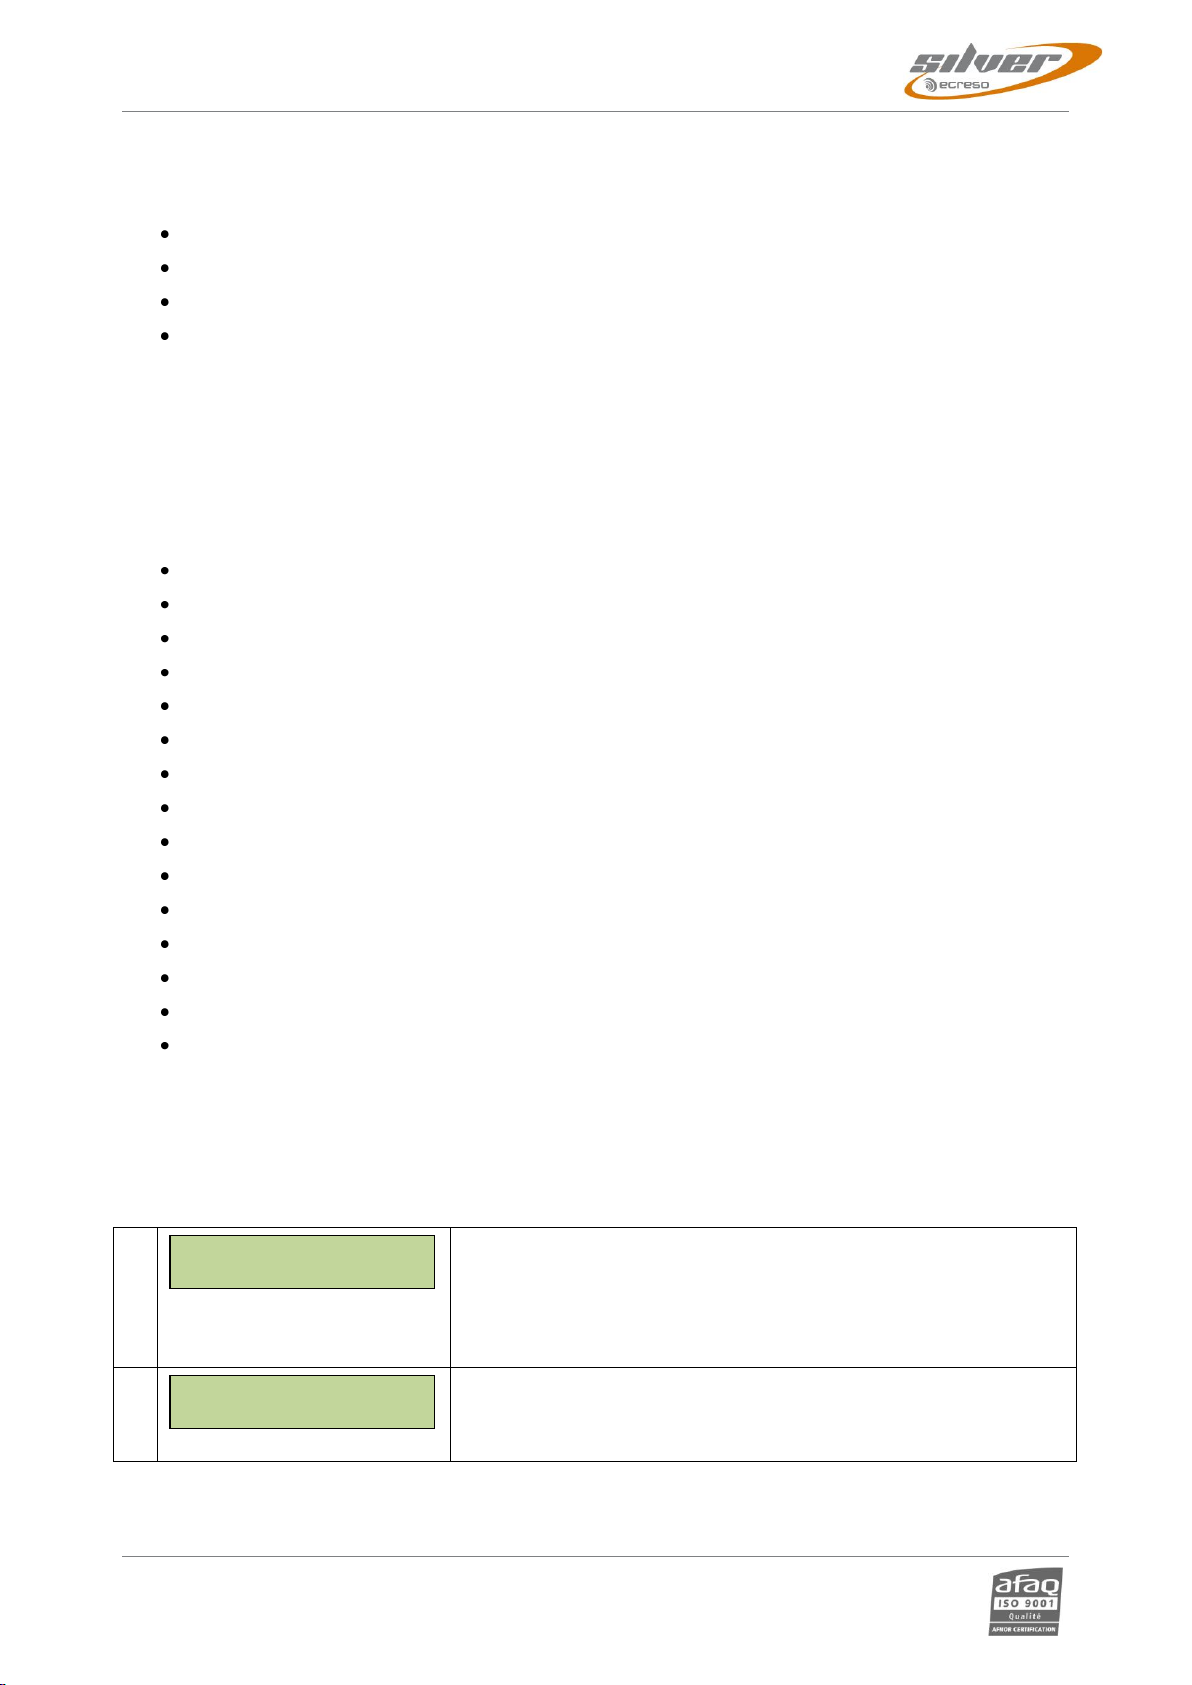
When a parameter can be adjusted, the cursor blinks on this parameter.
Example:
On this screen, the reception is in Mono, this cannot be modified
The frequency step however can be set to either 10 or 100 kHz, the cursor is on the step.
Two different types of values can be adjusted:
Text values: the Up and Down arrows scroll through a preset list
Number values: the Up and Down arrows increase or decrease the value; keep the key pressed to
increment faster.
!Please note that all changes are applicable immediately but need to be saved so they can be
retrieved after the FM Receiver Silver is turned off and on again.
To save in the current preset: press the “Enter” key and then the Up arrow key.
See the last screen in the next section for more details.
SteRx FreqStep
M 100kHz
Navigate from one screen or
one function to the next
Adjust values
Save current
settings
Lock LED: when
on, parameters
cannot be modified
on the front panel
FM Receiver Silver - User Manual –08/2013
Page 18
Head Office : Parc d’activites Kennedy - 20, avenue Neil Armstrong –33700 Bordeaux-Merignac (France)
Tel +33(0) 557 928928 –Fax+33(0)557 928929 –contact@broadcast-silver.com–www.broadcast-silver.com
4.2. Application presentation
Using the front panel application, you will be able to view the following information:
Frequency (screen 1)
Level (screen 1)
Mode, stereo or mono (screen 2)
RDS information:
oPI, PS (screen 6),
oTP/TA, MS, DI, PTY (screen 7),
oAF list (screen 8)
oUTC time (screen 9)
You will also be able to set the following parameters:
Frequency (screen 1)
Frequency step (screen 2)
RF alarm (screen 3)
MPX alarm (screen 4)
RDS alarm (screens 5 and 4)
Stereo alarm (screens 5 and 4)
IF filter and receiving mode (screen 10)
Antenna selection (screen 10)
AF attenuation (screen 10)
Deemphasis (screen 11)
RF backup (screen 11)
Front panel lock (screen 12)
AF output level (screen 12)
Headphone output level (screen 12)
IP address and Netmask (screens 13 and 14)
Screen numbers refer to numbers in the next section.
4.3. Menus
1
The frequency can be modified: when this screen is first displayed,
the cursor blink on the set frequency. Use the Up and Down arrows
to adjust the frequency, starting with the last digit.
The level (in dBµV) is of course read-only. This level is given after
the attenuation selected screen 10.
2
SteRx: Indicates if the current station is in mono (M) or stereo (S)
(read-only value).
FreqStep: Select the frequency step, 10 or 100 kHz.
SteRx FreqStep
M 100kHz
Freq Level
098.50MHz 035dBµ

FM Receiver Silver - User Manual –08/2013
Page 19
Head Office : Parc d’activites Kennedy - 20, avenue Neil Armstrong –33700 Bordeaux-Merignac (France)
Tel +33(0) 557 928928 –Fax+33(0)557 928929 –contact@broadcast-silver.com–www.broadcast-silver.com
3
RF: RF level measured after attenuation (in dBµV).
En: Select yes (Y) or no (N) to enable or disable RF level
monitoring. Default value: N
Mi: Set the minimum threshold in dBµV for the RF level. If the level
is less than this threshold, it will trigger the RF- alarm. Default value:
0
Ma: Set the maximum threshold in dBµV for the RF level. If the level
is greater than this threshold, it will trigger the RF+ alarm. Default
value: 127
Del: Set the delay in seconds before the alarm is triggered or turned
off. Default value: 255
4
Mp: MPX level measured after attenuation (in kHz).
En: Select yes (Y) or no (N) to enable or disable MPX level
monitoring. Default value: N
Mi: Set the minimum threshold in kHz deviation for the MPX level. If
the level is less than this threshold, it will trigger the MPX- alarm.
Default value: 0
Ma: Set the maximum threshold in kHz deviation for the MPX level.
If the level is greater than this threshold, it will trigger the MPX+
alarm. Default value: 127
Del: Set the delay in seconds before the alarm is triggered or turned
off. This delay applies to the MPX alarms, but also to the RDS and
to the stereo alarms. Default value: 255
5
RDS: Select yes (Y) or no (N) to enable or disable RDS presence
monitoring. Default value: N
Ste: Select yes (Y) or no (N) to enable or disable stereo monitoring.
Default value: N
RstAlm: Select yes (Y) or no (N) to reset all current alarms. The
alarms are immediately reset and the parameter is automatically set
back to no. Default value: N
6
RDS: Indicates if RDS is present.
This screen also gives the PI and the PS decoded from the received
station.
7
This screen shows if the TP and TA are enabled (1) or not (0), if the
M/S parameter is set to music (M) or speech (S), the DI (Decoder
Identification) and the PTY
8
If alternative frequencies exist, the 1st AF will be displayed; use the
Up and Down arrow keys to scroll through the whole AF list (method
A only). The AF list is not available for AM frequencies.
9
This screen shows the RDS UTC time received
Tp/Ta MS DI PTY
0 0 M. 01 00
RDS UTC
13:22 +02 1/2Hrs
AF List
01 = 101.60MHz
RDS PI PS
Yes CC03 KPOP
MyStation
RDS Ste RstAlm
Y Y N
Mp En Mi Ma Del
6 2 Y30 120 1 2 7
255
RF En Mi Ma Del
3 5 Y30 120 1 2 7
255

FM Receiver Silver - User Manual –08/2013
Page 20
Head Office : Parc d’activites Kennedy - 20, avenue Neil Armstrong –33700 Bordeaux-Merignac (France)
Tel +33(0) 557 928928 –Fax+33(0)557 928929 –contact@broadcast-silver.com–www.broadcast-silver.com
10
Mode: 10 preset profiles are available, each sets the receiver so it
will best be adapted to the reception conditions.
Mode and Filters for reception with optimal quality for all reception
conditions (Good or with nuisances):
Auto Stereo Selection (AutoS): Auto reception mode for
stereo signal with difficult reception
Filter for reception with optimal quality with perfect reception
conditions (good RF field, no aggressive co-channels):
Stereo Wide (STwid): Stereo, sensitive, wide IF filter
Filters for complex reception:
Stereo Middle (STmid): Stereo, sensitive, middle IF filter
Stereo Narrow (STnar): Stereo, sensitive, narrow IF filter
Mono Wide (MOwid): Mono, sensitive, wide IF filter
Mono Middle (MOmid): Mono, sensitive, middle IF filter
Mono Narrow (MOnar): Mono, sensitive, narrow IF filter
Dynamic Selectivity (DynSe): IF filter auto switch to
eliminate adjacent channels (mostly affects MPX output)
Noise reduction (Nless) : Smooth auto reduction of the
audio bandwidth, stereo separation, and noise level for
cases of weak RF level (on audio outputs only)
Auto Mono selection (AutoM) : Auto reception mode for
mono signal with difficult reception
Default value: AutoS in the IP/IO version or STwid in the basic
version.
Ant: Set to 1 or 2 depending on whether the RF1 or RF2 input is
used.
ATT: Set the attenuation to 0 or 40 dB. The 40 dB attenuation is
useful when the RF level at the antenna is greater than 100 dBµV;
such a level can indeed lead to disturbances in the receiver’s
working process. Default value: 0.
The modes AutoS, AutoM, DynSe and Nless are only available
in the IO/P version.
11
Deemph: Set the pre-emphasis to 50 or 75 μs depending on your
country (50 μs in Europe, 75 μs in the USA).
RfBackup: with the standard version; if enabled, the unit will
automatically switch to the other RF input when an RF alarm is
triggered on the current input. If RF alarms are present on both
inputs, the unit will switch back and forth between RF1 IN and RF2
IN until the alarm disappears on one of the inputs. With the IP/IO
version, see section 6.4.
12
Loc: Select yes (Y) or no (N) to lock the front screen or not. We
recommend you lock it after your receiver is set. Default value: N
AfLev: Set the level for the AF outputs. Default value: 0 dB +
amplification set by jumpers (see section 2.5).
HeadP: Set the level for the headphone output. Default value: 92%
13
On this screen (only available with the IP/IO version), view and
modify the IP address of the FM Receiver Silver. The IP address is
not associated with a specific configuration.
Device IP addr
192.168.020.030
Deemph RfBackup
50µs No
Loc AfLev HeadP
N 0 dB 9 2 %
Mode Ant ATT
AutoS 1 0dB
Table of contents
Popular Receiver manuals by other brands


Listen Technologies
Listen Technologies LR-100 user manual

Savant
Savant IRX-LN01 Quick reference guide

Laird
Laird CommandPro 23 Series user manual

Topcon
Topcon GR-5 Operator's manual

Hanwha Techwin
Hanwha Techwin SBP-300HM7 manual

BWI Eagle
BWI Eagle AIR-EAGLE XLT 441-8000-R1NC-DC Product information bulletin


