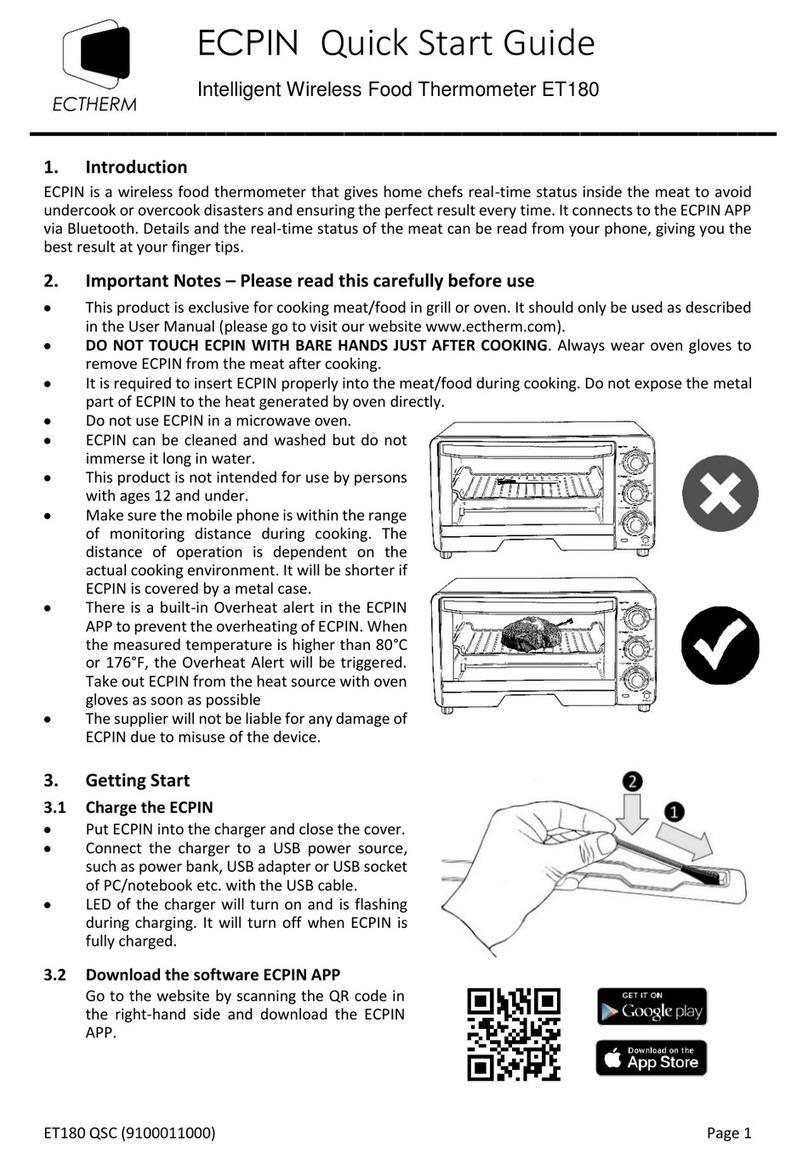
ECTHERM ECPIN Operation instructions

1.1 Before you start using ECPIN
1. Please make sure to read the instruction manual carefully. This
information will help you to familiarise yourself with your new
device, to find out important details about its first use and how
to operate it and to get advice in the event of malfunction.
2. Following these instructions will prevent damage to your
device and loss of your statutory rights arising from
malfunction due to incorrect use.
3. We shall not be liable for any damage due to non-compliance
with these instructions or misuse of the device.
1.2 Product Description
1.2.1 Intelligent Wireless Food Thermometer (ECPIN)
1.2.2 Charger
Wireless Thermometer ECPIN Tutorial
!"#$%&'()"$*(
+,$&-."//(+,"".(012"(
!3$#4&-4(56."
7&41#"(89(:-,"..&4"-,(;&#"."//(766*(03"#%6%","#(<=!5:>?(
!3$#4&-4(5&-
@+A(
!$2."
=!5:>()6.*"#
!6B"#(
7&41#"(C9(!3$#4"#(D6#(=!5:>(

1.3 Product Specification - ECPIN
Item
Specification
Dimension (metal part)
Length : 81 mm
Diameter : 6 mm
Oven temperature
Up to 300 °C (572 °F) (1)
Connectivity
2.4GHz Bluetooth (BLE) (2)
Transmission Range
Up to 10 meter (33 feet)
Operating Time
Up to 4 hours
Standby Time
Up to 6 hours
Charging Time
Less than 3 minutes
Temperature precision
1 °C
Waterproof
Water-resistant
Multi-probe
Support
OS Software for ECPin APP
iOS version 11 or above;
Android version 6.0 or above
Remarks:
(1) The maximum operating temperature of the
probe, ECPIN, is 100 °C. Please make sure the
probe is inserted in the meat during cooking.
(2) Bluetooth RF Frequency and transmit power
Frequency Range : 2402MHz to 2480MHz;
Transmit power : 0~4dBm

1.4 Important Notes – Please read this carefully before use
1. This product is not intended for using by persons with ages
12 and under.
2. This product is exclusively for cooking meat/food in grill or
oven. It should only be used as described within these
instructions.
3. DO NOT TOUCH THE WIRELESS THERMOMETER
(ECPIN) WITH BARE HANDS AFTER COOKING. Always
wear oven gloves to remove ECPIN from the meat/food
after cooking.
4. Before and after use, clean ECPIN with cloth and soapy
water; and dry it thoroughly.
5. ECPIN can be cleaned and washed but do not immerse it
long in water.
6. Do not use ECPIN in microwave oven.
7. Always use the given charger to charge ECPIN before
cooking.
8. Since the charging time is short (less than 2 minutes) and
ECPIN starts consuming power after charging, it is
recommended to charge ECPIN just before cooking.
9. While putting ECPIN into the charger, please make sure
the charging pole of ECPIN is facing downward and
contact with the charging pin of the charger.
Figure 3. Insert ECPIN to the charger

10. After charging ECPIN, it is easily to take it out with your
fingers at the lower part (closer to the tip) of ECPIN.
11. Do not expose the metal part of ECPIN to direct heat.
12. ECPIN has to be inserted into the meat/food during
cooking.
13. Make sure the mobile phone is within the range of
monitoring distance during cooking, i.e. stay closer to
ECPIN when there is “Signal Loss”.
Figure 5. Safety in using Wireless Thermometer
Figure 4. Safety in using Wireless Thermometer

1.5 Getting Started
1. Install the mobile phone software APP (ECPin Pro) in
your mobile phone.
2. Clean ECPIN with cloth and soapy water. Dry it thoroughly
with a clean cloth.
3. Charge ECPIN. Connect the charger to USB power source
with the USB cable. Put ECPIN into the charger. Please
make sure that the charging pole of the ECPIN is
connected to the charging pin of the charger. The LED of
the charger will be switched on and flashing during
charging. When the LED is switched off, ECPIN is fully
charged.
4. Turn on Bluetooth and launch the software APP.
5. The APP will search for ECPIN. When you see the reading
of ECPIN (see example in Figure 6), it is now ready for use
89!1##"-,(0"%E"#$,1#"(
C9A$F"#G(H"B".((
I9=!5:>(:J(<5#62"('6.61#(&-*&'$,"*(2G(
,"K,(2$'L4#61-*('6.61#?(
M95#62"(+&4-$.(:-*&'$,6#(
N9A66L%$#L(O(5#&6#&P/"(E#62"(,6(
/36Q(
R90$#4",(0"%E"#$,1#"(
S9!66L&-4(+,$,1/(
T90"%E"#$,1#"(U&"Q(
V9!66L&-4(W"'6#*/(
8X9=!5:>(!6--"',(<=K,"-*(=!5:>(
#$-4"(Q&,3(;&Y?(
88901,6#&$.(
8C9+"Z-4
❿
❾
❽
❼
❻
❸
❶
❷
❺
❹
⓬
⓫
Figure 6. Example of ECPIN Reading

2.1 Cooking with Guided Cook
1. Insert ECPIN to the meat/food.
Please make sure ECPIN is fully charged. To obtain the
best result, please make sure the tip of the metal tube is at
the centre of the meat/food.
2. Tap the area of the information of the probe on the
“Available Probes” screen, the “Cook Setup” screen will be
shown in Figure 7.
3. Choose type of meat by tapping “I want to cook” once and
then select the meat type. (see Figure 7)
4. Choose cut of meat to cook by tapping “Cut of meat” once
and then select the cut of meat. (see Figure 7)
5. Choose the doneness by tapping “Doneness” once and
then select the desirable doneness. (see Figure 7)
Figure 7. Guide Cook Setup

6. Setup temperature reminder or time reminder(optional) by
tapping “Add Reminder”
7. Preheat the oven to the desirable temperature and put the
meat/food into the oven.
8. Tap “Start Cook” to create a cooking task.
9. Customise cooking name (optional) and start monitoring.
10. During cooking. You will see the cooking screen in your
mobile phone as shown in Figure 8.
11.When the temperature is close to the target, you will
receive an alert and the corresponding message will be
shown as in Figure 9. Please start get close to the oven.
Figure 8.(+,$#,(!66L&-4(5#6'"//
Figure 9. Close to Target

12. When the temperature reaches the target temperature,
you will receive an alert and the corresponding message
will be shown in the cooking screen as shown in Figure 10
and 11. Please wear the oven gloves and use tools (if
needed) to take out the meat/food from the oven.
NOTE : Please note that the ceramic head of ECPIN is
HOT just after cooking. If you want to take out ECPIN from
the meat/food, please use the oven gloves.(
13. If user finish cooking custom cook, beef or lamb, there will
be a rest time setting button and a start rest button above
finish cook button. Resting count down starts once “Start
Rest” is pressed.
Figure 10. Cooking Completed
(If not custom cook, beef or lamb)
Figure 11. Cooking Completed
(If custom cook, beef or lamb)
Figure 12. Set up and Start Resting after cooking finish

2.2 Use Previous Cooking Records for Cooking
1. You can use previous cook record to setup the cook
instead of entering type of meat, cut of meat and doneness
information every time.
2. In the cook setup screen, tap previous cook to show a list
of previous records.
3. Scroll and choose which cooking record you want to
repeat.
4. The corresponding setting is chosen automatically.
5. Simply tap “Start Cook” to start monitoring.
89(0$E([5#"B&61/(!66L\($-*(
$(.&/,(6D(E#"B&61/('66L('$-(
2"(/""-9
C9(+'#6..($-*('366/"(
Q3&'3(E#"B&61/('66L(,3$,(
1/"#(Q$-,/(,6(#"E"$,9
Figure 13. Previous Cook

2.3 Customise Target Temperature
1. You can select the final temperature of the meat/food
instead of using the temperature setting in Guide Cook
menu in order to cook the meat/food to your desirable
texture and taste.
2. In the Cook Setup screen, you can touch the blue target
bar and move to the final meat/food temperature or click
the target text box to input target with keyboard. Tap “Start
Cook” when you put the meat/food into the oven.
2.4 Custom Cook(
1. Select “Custom Cook” in “I want to cook” section, you can
customise the target temperature
!.&'L(,3"(,$#4",(,"K,(26K(,6(
&-E1,(,$#4",(Q&,3(L"G26$#*
Figure 14. Adjust the Target Temperature
+",(,3"(,$#4",(
,"%E"#$,1#"(%$-1$..G(2G(
%6B&-4(,3&/(2$#
Figure 15. Setting Up Custom Cook

2.5 Setup of Reminder/Alert
There are two types of reminders, Temperature and Time, that
you can set during the monitoring and cooking process. For
each cooking, you can set maximum of two reminders in order
to help you to take actions during cooking, such as flip over
the steak. Please follow the following steps to setup the
reminder.
2.5.1 Temperature Reminder setup
In Cook Setup screen, tap “ADD REMINDER”. Select the
“Temperature reaches” and slide the temperature bar to the
temperature that you want to have. Tap “Add Reminder” to
finish the setup.
2.5.2 Time Reminder setup
In Cook Setup screen, tap “ADD REMINDER”. Select the
“Time reaches” and scroll the dials to setup the timer. Tap
“Done” to finish the setup.
Select the “Temperature
reaches”
Select the “Time reaches”
Figure 16. Setting Up Alerts

2.6 Low Battery Alert, changing probes and pause cook(
When ECPIN is nearly running out of power, a low battery
reminder will ask you to pause the cook or continue cooking
with another ECPIN (probe). Please make sure you have
charged up the other ECPIN.
Besides, you may use another ECPIN to carry out cooking or
pause by pressing the buttons as shown below.
Figure 17. Low Battery Reminder when cooking
Figure 18. Positions of change probe button and pause cook button
Change probes
Pause cooking

2.7 Overheat Alert(
To prevent ECPIN from damage by applying high temperature
directly to the electronic parts, there is a built-in Overheat
Alert. When the measured temperature is equal to or higher
than 80°C or 176°F, the Overheat Alert will be triggered.
Please take out ECPIN from the heat source with the oven
gloves as soon as possible. Please do not immediately
immerse ECPIN into cold water after taking out from the heat
source.
Figure 19. Overheat Alert

3.0 Cooking Records
You can view the previous cooking records by tapping the
icon.
After tapping the icon, a list of previous cook records can
be seen. You can prioritise a record with the bookmark
icon
Tap on the records, corresponding cooking curve will be
displayed.
4.0 Sharing Cooking Fun
After completing the cooking, you can share the photos of
your delicious food with your friends immediately by
tapping the sharing icon at the bottom. You can take the
photos after cooking and share with other people by using
ECPIN APP.
Figure 20. Accessing Cook Record Detail and Share Cooking

5.0 Extend ECPIN Range with Wi-Fi
89To use the ECPin connect feature, make sure you have two
smart phones and they are in the same Wi-Fi network. It can
be either a network hosted by a router or a mobile Wi-Fi
hotspot
C9 Click the circle button to set up the roles of your phones.
+Q&,'3"/(6D(#6."/
Figure 21. Setting Up ECPIN Connect

6.0 ECPIN Range Extender SR200
Smart Repeater SR200 is designed dedicated for the
Wireless Food Thermometer ECPIN. It can automatically
search the signal sent by ECPIN, duplicate the data and
resend out. In addition, SR200 provides the charging
function to ECPIN. SR200 can be powered up either by
USB power source or AAA battery. With the AAA battery
and the magnets, SR200 can stick onto the metal surface
where is close to the cooking equipment, such as oven,
grill, or smoker etc. to extend the operating range of
ECPIN. With the smart design of SR200, there is no
installation nor setup required. You just need to power
up the SMART Repeater SR200 and place it close to
ECPIN. Then, you can enjoy the extended range of
operation in using ECPIN.
Power
Source
Magnets
Battery Door
LED
Micro USB
Lid
Front View
Rear View
Figure 22. Front and Rear views of Smart Repeater (SR200)

6.1 Product Specification – Repeater SR200
*The operating time depends upon the type of battery used. It is recommended to use alkaline
battery.
6.2 Important Notes for SR200
1. This product is not intended for using by persons with
ages 12 and under.
2. This product is exclusively used for charging and
repeating signals of ECPIN. It should only be used as
described within this User Manual.
3. Take out the battery whenever you are not using the
repeater.
4. Always slide the power source selector to “USB” position
after use.
5. Make sure the mobile phone is within the range of
monitoring distance during cooking. The distance of
operation is dependent on the actual working
environment. It will be shorter if ECPIN or SR200 is
covered or blocked by a metal case.
6. Do not let the Range Extender stay at high temperature.
7. The supplier will not be liable for any damage of SR200
due to misuse of the device.
Item
Specification
Connectivity
2.4GHz Bluetooth (BLE) for both
sending and receiving
Transmission Range
Up to 150 feet
Operating Time
Up to 10 hours* (with Battery) for
repeater function
Charging Time
Less than 2 minutes to fully
charge up ECPIN.
Power
1 AAA cell Battery or external USB
power
Multi-probe
Support
OS for Software APP
iOS version 11 or above;
Android version 6.0 or above

6.3 Using Repeater for charging ECPIN
6.3.1 With Battery
1. Put a AAA cell battery into the battery compartment
of the Range Extender SR200.
2. Slide the power source selector to “BAT” location.
3. Insert ECPIN to the repeater and close the lid.
4. The LED will be flashing during charging process and
turn off after completing the charging process.
5. If Amber LED colour is shown, the battery level is low
and it requires to replace a new battery.
6. Slide the power source selector to “USB” location
when you have completed the charging process.
7. Please take out the battery if you do not intend to use
battery as the power source or you will not use the
repeater for a long period of time.
6.3.2 With USB power source
1. Connect the external USB power source and the
repeater with the USB cable.
2. Slide the power source selector to “USB” location.
3. Insert ECPIN to the repeater and close the lid.
4. The LED will be flashing during charging process and
turn off after completing the charging process.
5. The LED will be flashing again with a slow flashing
rate which the repeater starts repeating the signal.
6. If you want to turn off the repeater, please disconnect
the repeater with the USB power source.
Figure 23. Using Repeater for charging ECPIN

6.4 Using Repeater to extend the range of operation of
ECPIN
6.4.1 With Battery
1. Put a AAA battery into the battery compartment of the
repeater.
2. Slide the power source selector to “BAT” location.
3. The LED will be flashing during the signal repeating
process.
4. If Amber LED colour is shown, the battery level is low
and it requires to replace a new battery.
5. Slide the power source selector to “USB” location if
you want to turn off the Repeater.
6. Please take out the battery if you do not intend to use
battery as the power source or you will not use the
Range Extender for a long period of time.
6.4.2 With USB power source
1.Connect the external USB power source and the
repeater with the USB cable.
2.Slide the power source selector to “USB” location.
3.The LED will be flashing during the signal repeating
process.
4.If you want to turn off the repeater, please disconnect
the repeater with the USB power source.
When the repeater is powered on, the mobile application
will connected to the repeater automatically, same as the
ECPIN connection process.
If you see the reading of ECPIN with a repeater icon (see
example in Figure 24), ECPIN Range Extender and
ECPIN are functioning normally.

6.5 Repeater Battery Display
;3"-( #"E"$,"#( &/( #1--&-4( Q&,3( 2$F"#G]( ,3"( #"E"$,"#( &'6-(
'6.61#(Q&..('3$-4"($''6#*&-4(,6(2$F"#G(."B".^(
6.6 Accessing Repeater Details and Change Repeater
Display When More Than One Repeater Exist
1. Click the ECPIN in the probe list page (Figure 24), you
can see the cook set up page with a repeater icon
(Figure 25)
2. Click the repeater icon, a dialog box will pop up with
details of the smart repeater (Figure 26)
3. If more than one repeater exist, you will be able to see
the repeaters found by the application. Click on the
repeater id to change the current repeater being
shown.
A$,,"#G(&/(."//(,3$-(
CN_
A$,,"#G(&/(2",Q""-(
CN_($-*(NX_
A$,,"#G(&/(2",Q""-(
NX_($-*(SN_
A$,,"#G(&/(%6#"(,3$-(
SN_
❷
❶
Repeater Signal Icon
ECPIN Signal Icon
❶
❷
Figure 24. ECPIN Reading with Repeater Signal Icon
Table of contents
Other ECTHERM Thermometer manuals
