ECUE light-drive elite User guide

light-drive elite
Setup Manual
light-drive elite - Setup Manual
© e:cue control GmbH
An OSRAM Company
Rev. 1_06/2009www.ecue.de


light-drive elite - Setup Manual
table of contents
1. Device Overview ............................................................4
2. Included in the Package .....................................................5
3. Hardware Installation .......................................................6
3.1 Mounting ..............................................................6
3.2 Power and Data ........................................................8
4. Using the light-drive elite ...................................................9
4.1 Overview ..............................................................9
4.2 Using light-drive elite controls ..........................................9
On/O Key .............................................................9
Touch Wheel ...........................................................9
Intensity Mode ........................................................10
Color Mode ...........................................................10
White Mode...........................................................11
Memory Mode ........................................................11
Conguring the Spread................................................12
Replay Mode ..........................................................12
4.3 Cleaning mode........................................................13
4.4 Reset .................................................................13
4.4 Idle / Stand by.........................................................13
4.5 Remote Control .......................................................14
5. Technical Data .............................................................15
5.1 Technical specications. . . . . . . . . . . . . . . . . . . . . . . . . . . . . . . . . . . . . . . . . . . . . . . .15
5.2 Dimensions ...........................................................16
6. Warning Notices ...........................................................18
7. Imprint, copyright..........................................................19

light-drive elite - Device Overview
4
1. Device Overview
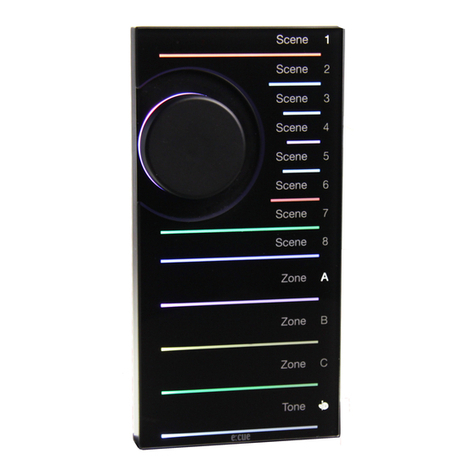
Light-drive
Light-drive is a new e:cue product category of devices that combine a standalone
DMX controller and a user interface in a single unit. Designed to allow end-users
to setup custom light scenes and color-changing eects directly on the device,
light-drives are easy to use and require no software to setup light scenes. By
outpuing directly DMX512 protocol, light-drives can control LED xtures
through a single RJ-45 connection for power and data.
Dear valued customer,
Thank you very much for purchasing
light-drive elite.
light-drive elite is a wall-mounted
standalone DMX controller and
interactive user interface for dynamic
lighting. End-users can easily setup
color changing eects and control
lighting directly using the device.
The user interface features touch-
sensitive keys and wheel with color
LEDs for intuitive selection of colors
and adjustment of intensity and speed.
Memory function allows end-users to
dene four colors for color-changing
eects. It can be easily connected to
LED RGB xtures through an RJ-45
connection for power and data.
The interface glassy nish is designed
for an elegant appearance as well as
easy maintenance.
Key features
• Standalone DMX controller and
user interface
• 512 channels DMX output (RGB)
• 4 mode keys to select intensity,
color, white and memory mode.
• On/o key and a play/pause key
• 4 user-dened memory slots
• 5 status LEDs
• Touch wheel with 12 RGB LEDs
• Built-in IR receiver for remote
control
• Glass nish
• Ultra thin design
• Available in black or white
• Color chase on up to 12 RGB
xtures / light-points with spread
eect

light-drive elite - Included in the Package
5
2. Included in the Package
light-drive elite
black
or
white
• this setup manual
• micro ber cloth
• hex socket screw key
• power and data merger

light-drive elite - Hardware Installation
6
The light-drive elite is designed for in-wall mounting.
Mounting the light-drive elite:
1. Mount the backplate
2. Connect the cable
3.1 Mounting
3. Hardware Installation
12

light-drive elite - Hardware Installation
7
3
4
3. Place light-drive elite on the
backplate
4. Tighten hex screws
Side View
13 mm / 0.51 inch
Hex xing screw
Hex xing screw
Front glass plate
Metal backplate
Wall

light-drive elite - Hardware Installation
8
3.2 Power and Data
The light-drive elite has a single RJ-45 connector for power input and data
output.
pin no. signal
1 DMX -
2 DMX +
3 GND
4 nc
5 VCC in: 24V DC
6 GND
7 nc
8 nc
For a simple connection to LED xtures, light-drive elite package includes a
power and data merger, which combines power and data into a single cable
according to the specication below.
power/da ta
power in
DMX out
screw terminal s RJ-45
24 V
GND
DMX+
DMX-

light-drive elite - Using the light-drive elite
9
4.1 Overview
4. Using the light-drive elite
IR receiver
touch wheel play/pause key LED ring
intensity key
color key
memory key
white key
on/o key
4.2 Using light-drive elite controls
The on/o key turns the unit on or o. Fixtures will fade
out when the device is turned o. When the device is
turned on, it will start in the last used mode.
On/O Key
The touch wheel is backlit with 12 RGB LEDs and it is
used to select and adjust intensity, colors, white color
temperature, speed, spread and memory function.
Touch Wheel

light-drive elite - Handling
10
Touching the intensity key activates intensity mode.
Intensity Mode
For a quick change of the
intensity simply touch
the wheel at the desired
intensity displayed on the
LED ring.
For ne adjustment, scroll the wheel clockwise
to increase the intensity, or counterclockwise to
decrease the intensity.
For ne adjustment, scroll the touch wheel
slowly clockwise or counterclockwise to adjust
the color.
Touching the color key activates color mode.
Color Mode
For a quick change of the
color simply touch the
wheel at the desired color
displayed on the LED ring.

light-drive elite - Handling
11
Touching the white key activates white mode.
White Mode
For a quick change of the
intensity simply touch the
wheel at the desired color
temperature displayed on
the LED ring.
For ne adjustment, slide the wheel clockwise
to for a colder white, and counterclockwise for a
warmer white.
Touching the memory key activates memory mode.
Memory Mode
Selecting saved colors
Four saved colors are
displayed on four separate
areas of the LED ring. Touch
the wheel next to two color
LEDs to select the displayed
color.
Saving colors with the memory function
After selecting a color in any other mode, touch
and hold memory key for more than 3 seconds.
LED ring will blink to signal that you can now
save the current color in one memory slot. Touch
the wheel at one of the memory slots, displayed
by LED ring (see the encircled areas below).

light-drive elite - Handling
12
Replay Mode
Touching the play/pause key starts or stops the replay mode. In
replay mode, user-dened colors change gracefully from one color
to the next using a congured spread. See Conguring the Spread
for details.
The LED ring will display a rotating color-chase
according to the previously congured speed. Scroll the
wheel clockwise to increase and counterclockwise to
decrease the speed.
The spread conguration allows the user to apply a color chase eect spread over
up to 12 RGB xtures (i.e. light-points) at a time. If the spread is set to one, then
colors will fade from one color to another, saved in memory mode, on all RGB
xtures at the same time.
If the spread is set to greater than one, then fading between colors is distributed
over the number of chosen xtures. As a result, all xtures will have dierent
colors equal to the number of chosen xtures. Press
and hold the play/pause key for 5 seconds to cong-
ure the spread. The LED-Ring shows the number of
dened RGB-xtures that are used to calculate the
spread. Minimum number of xtures is 1 (all RGB-
xtures show the same color), maximum is 12 (color
spread will be repeated after 13th xture).
Touch the wheel at the desired number of xtures.
When nished, wait a few seconds and the unit will
go back to replay mode.
Conguring the Spread
If you choose four colors for the user
memories, that are close to each other
on the color circle (e.g. orange, red, blue,
green) the sequence looks much beer as
the path from one color to another does
not need to go through whole color circle.
e.g. three xtures activated
1
2
3
4
5
6
7
8
9
11
12
10

13
light-drive elite - Handling
Touch and hold the on/o key for 5 seconds until the on/o LED is blinking, to
activate the cleaning mode.
In cleaning mode, touching the keys or the wheel will be ignored. This option is
useful to clean the device without aecting the controls. When nished, wait a
few seconds and the unit will automatically come back in the last used mode.
4.3 Cleaning mode
Touch and hold the memory key for more than 10 seconds until you hear a beep
to reset the device to its default values. This includes memory color, speed,
intensity and the spreading.
4.4 Reset
If the keys or wheel are not touched for a few seconds, the unit will go into idle
mode, which means that the LED ring and the LEDs will be dimmed.
If the keys or wheel are not touched for one minute, then the unit will go into
standby mode, which means that the LED ring on the device will be turned o.
4.4 Idle / Stand by

14
light-drive elite - Handling
All previously described features are
also accessible via remote control,
except “conguration of spread”,
“cleaning mode” and “reset”.
The unit´s on/o LED will blink
when it is receiving IR-remote control
signals.
In addition to the four user-dened
colors, you can recall four xed
colors (red, green, blue, white) via
the buons “5” to “8” on the remote
control.
Store:
Press and hold the “ ” buon for one
second, then press the desired number
(“1” to “4”) on the remote control to
store the adjusted color.
4.5 Remote Control

15
light-drive elite - Technical Data
5.1 Technical specications
Order numbers
light-drive elite black AA439160138
light-drive elite white AA439170138
General Specications
Dimensions (WxHxD) 160 x 80 x 11 mm/6.3 x 3.15 x 0.43 in
Weight kg / lbs 0,3 kg / 0.66 lbs
Power 24 V DC, 100 mA (RJ-45)
Operating temperature °C / °F 0 ... 40 °C/32 ... 104 °F
Storage temperature °C / °F -20 ... 80 °C/-4 ... 176 °F
Operating / storage hum. 0 ... 80%, not condensing
Environment IP20
Housing Glass (surface), aluminium (housing)
Mounting In wall mounting
Certications CE
light-drive Specications
User interface Capacitive touch sensor
DMX output RJ-45
Input IR (RC5)
5. Technical Data

16
light-drive elite - Technical Data
5.2 Dimensions
All dimensions in mm and inch
(mm/inch).
160 / 6.3
80 / 3.15
13 mm / 0.51 inch
Power and data merger
24 V
GND
DMX+
DMX-
31 mm / 1.22 inch
19 mm / 0.74 inch

17
A B C
light-drive elite - Technical Data
Mounting Plate
120 mm / 4.72 inch
155 mm / 6.1 inch
60 mm / 2.36 inch
83,5 mm / 3.29 inch
75 mm / 2.95 inch
A
B
C

18
light-drive elite - Warning Notices
The electronic components are very sensitive to electrostatic
discharge (ESD). Be careful not to touch the components. Please do
all preparation work on a static-free surface. Please always ensure
to wear an antistatic wrist strap.
Any usage other than described in this manual is not permied,
can damage the device and lead to associated risks such as short-
circuit, re or electric shock. If not otherwise noted, no part of the
product may be modied or rebuilt.
6. Warning Notices

19
light-drive elite - imprint, copyright
lighting control is a registered trademark of the e:cue control GmbH.
Windows is a trademark of the Microsoft Corporation, Redmond, United States
of America. All other company names and / or product names are trademarks
and / or registered trademarks of the concerning manufacturer. The products
under circumstances don’t exactly correspond with the representation. Proper-
ties, capacity and technical data depending on the operating system and used
hardware can dier. Subject to change without notice!
does not grant guarantee on validity for a particular reason, the
marketability or other properties of the product. There is no way to assert a claim
to e:cue, not on the legal way nor other ways.
e:cue is not responsible for damages, including all disadvantages that are not just
limited on loss of sales, that are accrued
• By the use of the product.
• By the loss of serviceability of the product.
• By misuse, happenings, circumstances or actions that e:cue does not have
inuence, no maer if the damages as well as consequential damages are
direct or indirect; whether they are special damages or others, nor if the
damage is caused by the owner of the guarantee or third persons.

© 2009 - e:cue control GmbH - An OSRAM Company - Germany - www.ecue.de
Table of contents
Other ECUE Controllers manuals
Popular Controllers manuals by other brands
ComAp
ComAp InteliLite NT MRS19 quick start guide
Extron electronics
Extron electronics MLC 104 IP PLUS quick start guide

IFM Electronic
IFM Electronic ecomot100 ExtendedController CR0253 installation instructions
SYCLOPE electronic
SYCLOPE electronic TERE'O Touch XL Installation and operating instructions
Johnson Controls
Johnson Controls TEC3310 installation instructions
PI
PI E-625 user manual
TMS Lite
TMS Lite High Current Series user manual
Eclipse
Eclipse EC1020M user guide
Hanson Electronics
Hanson Electronics DMX36Mk2 user manual
Full Gauge Controls
Full Gauge Controls MT-531Ri plus quick start guide
Viconics
Viconics VT8000 Series installation guide
RKC INSTRUMENT
RKC INSTRUMENT CB Series Connection manual
