Eden SNK-01 User manual

1
©
2021 Eden Immersive Limited. All Rights Reserved.
W
elco
m
e
t
o
VR ma
d
e easy
.

2
©2021 Eden Immersive Limited. All Rights Reserved.
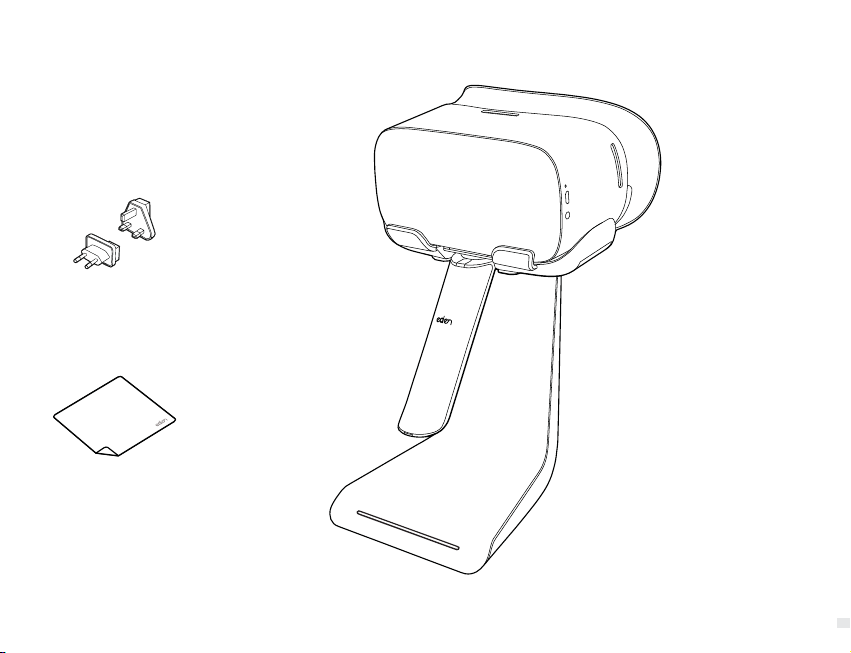
Thank you for purchasing Eden Snacker. Our team has put years of
research and development into this product to deliver a hassle-free
VR system that best serves you and your audience.
This is a quick guide to get you up and running, should you have any

3
3

4
©2021 Eden Immersive Limited. All Rights Reserved.
Co
nt
e
nt
s
What’s in the box?
Hardware Overview
Headset Charge & Startup
Grip Attachment
Connecting Stand to Eden Station
ˇ˘˧˛˘˥˘˗ʶˢˡЃ˚˨˥˔˧˜ˢˡ
Headset Straps
Health & Safety
5
7
11
12
15
16
23
24

5
©
2021 Eden Immersive Limited. All Rights Reserved.
Wh
a
t’
s
i
n th
e
bo
x
?
Eden Snacker
VR Headset
Link Cable 0.5m
Grip
Power Cable 1.5m
Charging Stand
Tether Cable 2m
Power Adapter
Headset Straps (optional)

6
©2021 Eden Immersive Limited. All Rights Reserved.
Regional Adapters
ˀ˜˖˥ˢЃ˕˥˘ʶ˟ˢ˧˛

7
©
2021 Eden Immersive Limited. All Rights Reserved.
a
e
b
c
d
H
a
r
d
w
a
r
e
Ov
e
rv
iew
Front View
b
a
c
4K Virtual Reality Headset
LED Charge Indicator
d
e
Grip
Wireless Charging Stand
LED Status Bar

8
©2021 Eden Immersive Limited. All Rights Reserved.
i
j
h
g
k
f
H
a
r
d
w
a
r
e
Ov
e
rv
iew
Back View
Hygienic PU Leather Foam
Viewer Sensor
Lenses
Kensington Lock Slot
USB-C Power Port
USB-C Communication Port
i
k
j
h
f
g

9©2021 Eden Immersive Limited. All Rights Reserved.
c
b
d
a
Stand & Cradle
b
a
c
Cradle
Wireless Induction Charger
NFC Antenna
Stand
d

10
©2021 Eden Immersive Limited. All Rights Reserved.
e
H
a
r
d
w
a
r
e
Ov
e
rv
ie
w
Stand Base
LED Status Bar
e
The LED Status Bar displays important
information, notifications and warnings
regarding the device. These include
charging status changes, operation modes,
WiFi connectivity, error messages and more.
For details on the different status signals,
scan the QR code or visit the URL below.
madebyeden.com/support
/snacker/ledstatus

11 ©2021 Eden Immersive Limited. All Rights Reserved.
ON/OFF
90 - 100%
LED Charge
Indicator
20 - 89%
00 - 19%
1
2
To maximise the lifetime of the Li-ion battery, the headset
is not fully charged when leaving the factory. Connect the
Micro-USB Tether cable to the supplied Power Adapter, and
wait for the LED Charge Indicator to turn blue. This may
take up to one hour.
Locate the power button on the underside of the
headset, press and hold for 3 seconds until you hear
the startup sound. The headset will take another 6
seconds to boot up.
12
Hea
d
set C
h
ar
g
e & Startup
1
2

12
©2021 Eden Immersive Limited. All Rights Reserved.
ˇ˘˧˛˘˥˘˗ʶˢˡЃ˚˨˥˔˧˜ˢˡˊ˜˥˘˟˘˦˦ʶˢˡЃ˚˨˥˔˧˜ˢˡ
Gr
ip
Attachmen
t
ʶˢˡˡЃ˚˨˥˔˧˜ˢˡ˂ˣ˧˜ˢˡ˦
ʼˡ˔˗˗˜˧˜ˢˡ˧ˢ˧˛˘˗˘˙˔˨˟˧ˊ˜˥˘˟˘˦˦ʶˢˡЃ˚˨˥˔˧˜ˢˡʟˆˡ˔˖˞˘˥
features a tethered mode for continous charging and
˔˗˗˘˗˦˘˖˨˥˜˧ˬ˜ˡ˛˜˚˛ʠ˧˥˔˙Ѓ˖˟ˢ˖˔˧˜ˢˡ˦ˢ˥˨˦˘˖˔˦˘˦ʡ˅˘˙˘˥
to page 17 for this mode, or continue on the next page to
run Snacker wirelessly.
Page 13 Page 16

13
©
2021 Eden Immersive Limited. All Rights Reserved.
Align the Grip locator pins to the recesses of the cold shoe
underneath the headset at 45 degrees.
The thumb indent should line up with the unlock
symbol and the triangle locator ( )
12
Gr
ip
Attachmen
t
ˊ˜˥˘˟˘˦˦ʶˢˡЃ˚˨˥˔˧˜ˢˡ
1
2

14
©2021 Eden Immersive Limited. All Rights Reserved.
Place the assembled unit onto the Cradle.
34
Twist the Grip to face forward, locking it into place.
Gr
ip
Attachmen
t
ˊ˜˥˘˟˘˦˦ʶˢˡЃ˚˨˥˔˧˜ˢˡ
3
4

15
©
2021 Eden Immersive Limited. All Rights Reserved.
Connect the left USB-C port of the Stand marked with the
( ) icon, to either port 2 or port 3 of Station, using the 0.5m
Link Cable.
12Alternatively, connect the left USB-C port on the Stand
marked with the ( ) icon, to the Power Adapter using
the 1.5m USB-C Power Cable.
1
2

16
©2021 Eden Immersive Limited. All Rights Reserved.
The following steps will help you set up
ˬˢ˨˥ˆˡ˔˖˞˘˥˙ˢ˥ˇ˘˧˛˘˥˘˗ʶˢˡЃ˚˨˥˔˧˜ˢˡʡ
ʹˢ˥˛˜˚˛ʠ˧˥˔˙Ѓ˖˟ˢ˖˔˧˜ˢˡ˦
ˇ˘˧˛˘˥˘˗ʶˢˡЃ
˚
˨˥˔˧
˜
ˢ
ˡ

17 ©2021 Eden Immersive Limited. All Rights Reserved.
Keep us safe!
2x 160 mm
6 inches
Remove the Grip cover and store the cable channel
caps located on the top and bottom of the grip safely
in your accessory box.
Measure about 6 inches or 160mm from the right-angle
Micro-USB connector to the top recess in the Grip.
12
ʹˢ˥˛˜˚˛ʠ˧˥˔˙Ѓ˖˟ˢ˖˔˧˜ˢˡ˦
ˇ˘˧˛˘˥˘˗ʶˢˡЃ
˚
˨˥˔˧
˜
ˢ
ˡ
1
2

18
©2021 Eden Immersive Limited. All Rights Reserved.
˃˨˧˧˛˘ʺ˥˜ˣ˖ˢ˩˘˥˕˔˖˞˜ˡ˧ˢˣ˟˔˖˘˕ˬЃ˥ˠ˟ˬˣ˥˘˦˦˜ˡ˚˜˧
back onto the Grip, until it clicks into place securely.
34
Lay the cable into the cable channel from the top down
˔ˡ˗Ѓ˥ˠ˟ˬˣ˥˘˦˦˧˛˘˖˔˕˟˘˜ˡ˧ˢ˧˛˘˖˛˔ˡˡ˘˟˥˘˖˘˦˦ʡ
ʹˢ˥˛˜˚˛ʠ˧˥˔˙Ѓ˖˟ˢ˖˔˧˜ˢˡ˦
4
3

19
©
2021 Eden Immersive Limited. All Rights Reserved.
Insert the Grip into the headset at a 45 degree angle,
ensuring the cable is allowed to move freely.
Rotate the Grip clockwise to lock it into position.
56
ˇ˘˧˛˘˥˘˗ʶˢˡЃ
˚
˨˥˔˧
˜
ˢ
ˡ
ʹˢ˥˛˜˚˛ʠ˧˥˔˙Ѓ˖˟ˢ˖˔˧˜ˢˡ˦
5
6
Table of contents