Edis EA56 Sound Bar Specification sheet

EA56 Sound Bar
Manual and installation instructions

Thank you for buying this product. We are confident it will provide you with a long reliable
service, but just in case you experience a problem, it is supplied with a 1-year return to base
warranty.
This warranty and the product to which it relates applies to the original purchaser only and is
not transferable for the avoidance of doubt, this will be taken from the information held by the
appointed national distributor at the point of sale).
The liability of the manufacturer and its appointed service company is limited to the cost of
repair and or replacement of the faulty unit under warranty.
This warranty protects you against the following:
•Failure of any components.
•Damage when the product is first removed from its packaging if reported within 24
hours of purchase.
If you find you do have a problem with this product, you should contact the AV reseller you
purchased this product from. The original purchaser is responsible for shipment of the product
to the manufacturer's appointed service company for repair.
The manufacturer endeavours to replace the faulty parts of the product rather than replacing
the whole unit
This warranty does not protect this product against faults caused by abuse, misuse, incorrect
installation, unstable or faulty power input, which might be caused by ignoring the guidelines
set out in this guide.
WARNINGS
CAUTION: To reduce the risk of electric shock, do not remove cover or back) there are no
user-serviceable parts inside. Please refer servicing to qualified service personnel.
Power Supply : 230 volt 50 Hz
SAFETY INSTRUCTIONS
•The product shall be connected to a power supply only of the type described.
•To reduce the risk of fire or electrical shock, do not expose this product to rain or
moisture.
•Unplug the product from the wall socket when it is not to be used for a long period of
time.
•Adequate care shall be taken so that foreign objects do not fall, or liquids are not
spilled into the enclosure through openings.
•Do not remove the cover or back, as there are no user-serviceable parts inside.
PAC ING LIST
1. 1x Sound Bar
2. 2x Audio input cables with 3.5 Mini Jack plugs at either end
3. 1x User Guide

DESCRIPTION AND FUNCTIONS
This wall mounted Sound Bar is suitable for mounting underneath or on-top of an Interactive
whiteboard in a classroom or meeting room environment
ey Features
•36 Watt Amplifier with three inputs for a microphone and other equipment such as a
PC or DVD player
•The system has secure wall fixings and steel mesh grille as added protection in the
Classroom
•Full RoHS compliance and CE approval
Benefits
•The sound output of this system is designed specifically for a Classroom or small
meeting room – in addition the audio quality output is enhanced by the use of a
modern wooden speaker enclosure.
•The system is easy to install with key hole fixings for first fix and an individual
screwed wall fixing to secure the system from accidental abuse
•The system is fully approved product to CE and RoHS standards and so complies
with local government and education purchasing
Basic features
The Wall mounted speaker system is supplied with wall fixing brackets
•A red power LCD indicator lamp on the side panel indicates when the amplifier
system is switched on
•The Main Volume/Power on/off switch is also on the side panel with a separate
microphone volume control
•The audio Input selection switch on front panel selects the A or B input from the 3.5
mini jack sockets
•Fan cooling is fitted and needs air circulation at the rear to maintain cooling
Connections – Active Speaker
1. Two 3.5mm mini jack female sockets are provided for PC/DVD audio input to the
amplifier
2. A 3.5mm mini jack socket is provided for a microphone input
3. A 2 metre Mains power lead is fitted with a moulded plug

Amplifier Control Panel
Rear View showing mounting brackets
INSTALLATION GUIDE
1. Fix the wall mounting screws into a suitable wall plug in the wall in a position so that
the speaker can be hung on this screw using the “keyhole” wall mounts. Hang the
speaker unit on these fixings and mark a hole position on the wall for the position of
the security bracket at the base of the speaker unit.
2. Drill and install a suitable wall plug for the security bracket.
3. Hang the speakers using the “Keyhole” wall mount and secure the speaker to the
wall with screws into the wall plug position under the speaker.
4. Connect the PC Audio cables with 3.5 mm mini jack connectors into the side of the
speaker unit and into the audio sources
5. Check that both the on/off switch and the Volume control on the speaker are switched
off. Plug the power cable to the mains supply and switch the supply on.
6. Follow the Operating Instructions below

OPERATING INSTRUCTIONS
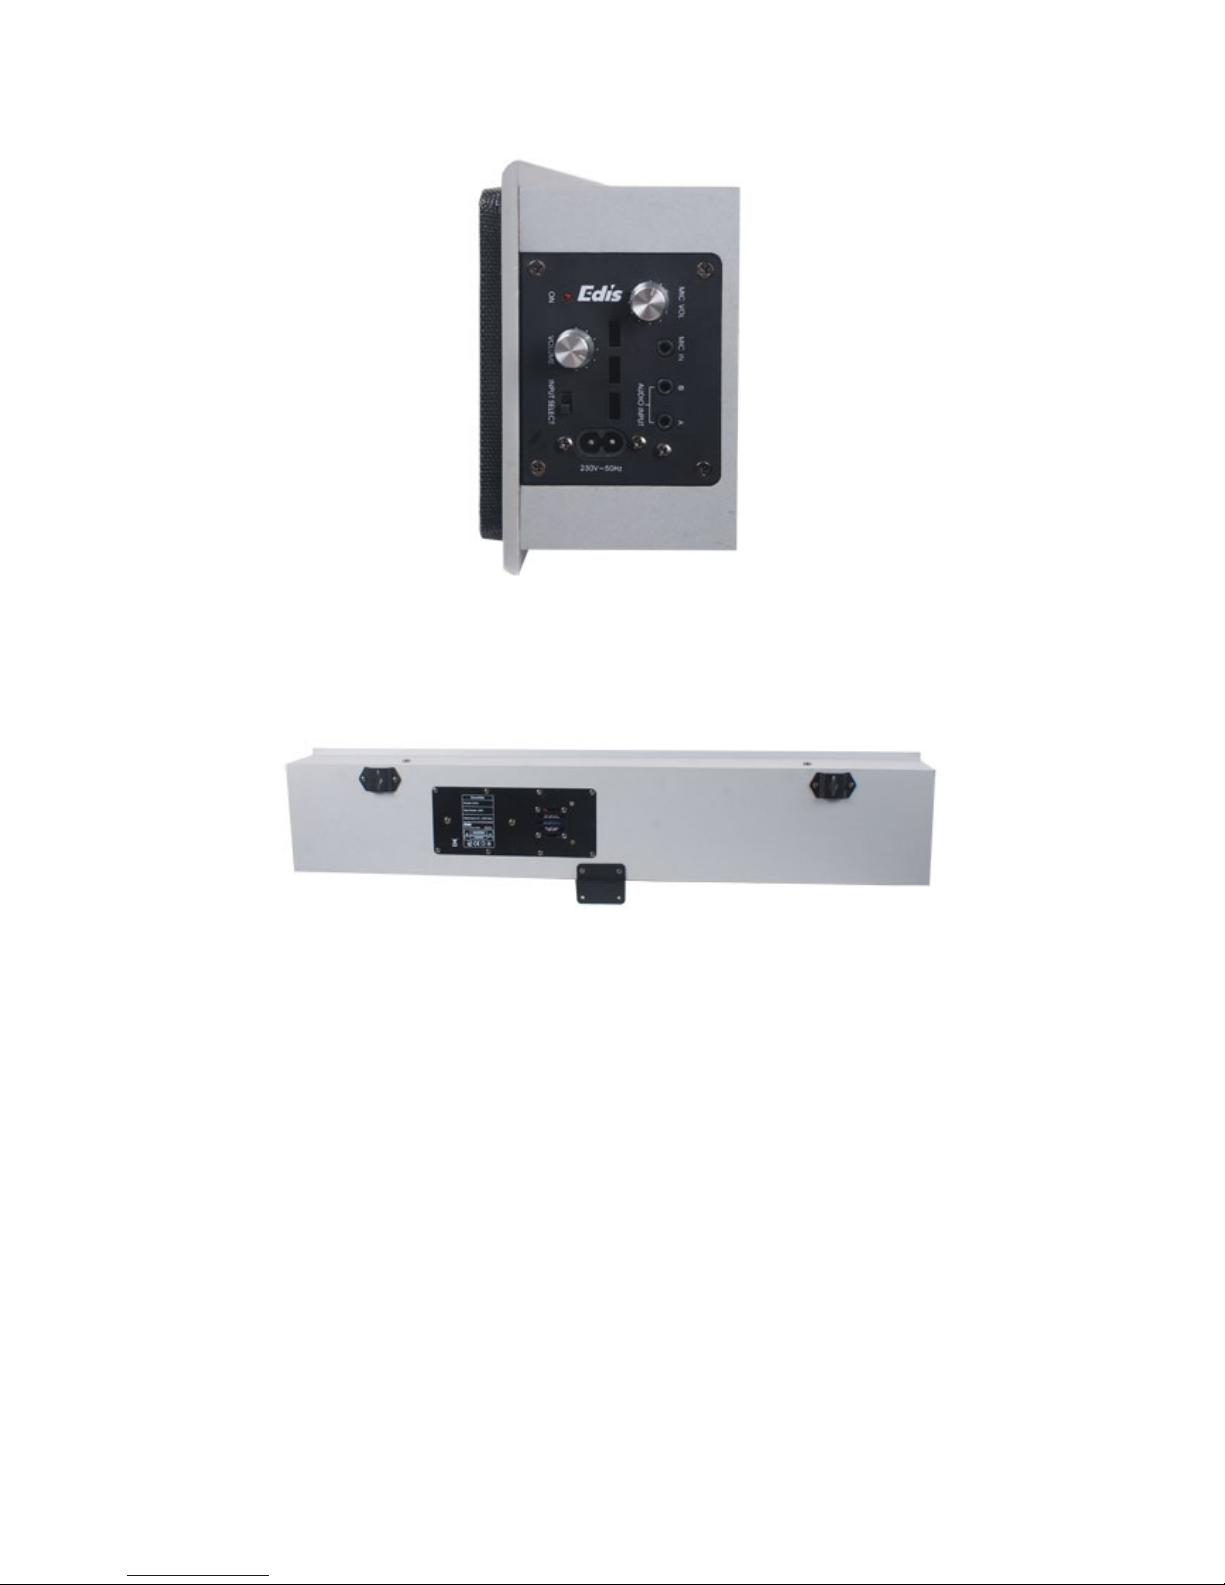
Before connecting the power cord turn the Main volume control fully anti-clockwise to it’s off
position – you will feel a click.
Select the input you would like to listen to using the Input A or Input B on the selector switch
on the amplifier panel on the side of the speaker
Turn on the volume control, the red amplifier light will come on, and adjust the volume control
clockwise to increase the output sound level to your preferred level.
WARNING: Always turn the unit on and wait for a moment before turning the volume control
up. High signals levels can damage the system on startup
The system accepts line-level audio signals from sources such as PCs, Notebooks, CD/DVD
players, Minidisc players, iPod, Tuners etc and unpowered microphones
TROUBLE SHOOTING
If the system is not operating correctly, please check the table below: If the problem persists
contact your AV reseller immediately and disconnect the system from the power.
Problem Checks to be made
No Sound from either speaker •Check that the mains supply is switched
on at the wall socket
•Check that the power switch at the
amplifier base panel of the active speaker
is switched on
•Check that the volume control is switched
on and red light showing. If no red light
shows the mains power source may be
faulty or the fuse blown in the power plug
•Check that the A and B selector switch is
switched to the correct input
•Check that the audio cables to your audio
source are connected properly
•Check that the audio source is active and
playing
No sound from Passive speaker •Check the RCA cable connection at the
active speaker and the connection at the
passive speaker end
No signal from USB devices •Check that the mains supply is switched
on at wall socket
•Check that the power switch at the
amplifier base panel of the active speaker
is switched on
•Check that the USB cables are connected
to PC or Notebook correctly
•Check USB device is active

WARNING
This product should be switched off when not in use. Leaving the product switched on without
the fan running may reduce the life of the product and result in warming.
SPECIFICATIONS
Output Power 18 Watts x 2
Drive Units 4" x 2 + 1"x 2
Impedance 4 ohms
Frequency response 20Hz - 20 kHz
Separation >35 dB
Signal/noise Ratio >80d B
Input Sensitivity 10% THD) <450 mV
Distortion THD <0.2%
Dimensions mm) 610x135x98
Power Supply 230 Volt/ 50Hz
STANDARDS
CE Approved product
BS 1363 standard for Electrical Plug alternatively a Europlug to CEE 7/16 plug rated at
3A/220-240V AC
Restriction of the Use of Certain Hazardous Substances in Electrical and Electronic
Equipment Regulations 2005 RoHS)
Waste Electrical and Electronic Equipment WEEE) Directive 2002/96/EC).
Copyright © 2010 Edis Trading HK) Limited
Protected by European Community Design Rights
www.edisav.com
Table of contents
Other Edis Speakers System manuals