Efco PA 1030 Manual

I
GB
F
D
E
NL
MANUALE DI USO E MANUTENZIONE
OPERATOR’S INSTRUCTION BOOK
MANUEL D’UTILISATION ET D’ENTRETIEN
BEDIENUNGSANLEITUNG
MANUAL DE INSTRUCCIONES
GEBRUIKSAANWIJZING
PA 1030
(30.5 cm3)
- PA 1050
(47.7 cm3)
- PA 1100
(98.2 cm3)
- PC 1050
(47.7 cm3)
Copertina 16-06-2006 15:33 Pagina 1

2
INTRODUZIONE
Per un corretto impiego della motopompa e per evitare incidenti, non iniziare il lavoro
senza aver letto questo manuale con la massima attenzione. Su questo manuale sono
indicate le spiegazioni di funzionamento dei vari componenti e le istruzioni per i
necessari controlli e per la manutenzione.
N.B. Le descrizioni e le illustrazioni contenute nel presente manuale si intendono
non rigorosamente impegnative. La Ditta si riserva il diritto di apportare
eventuali modifiche senza impegnarsi ad aggiornare di volta in volta questo
manuale.
INTRODUCTION
To correctly use the pump and prevent accidents, do not start work without having first
carefully read this manual. You will find explanations concerning the operation of the
various parts plus instructions for necessary checks and relative maintenance.
Note: Illustrations and specifications in this manual may vary according to
Country requirements and are subject to change without notice by the
manufacturer.
INTRODUCTION
Pour un emploi correct de la motopompe et pour éviter les accidents, ne commencez
pas le travail sans avoir d’abord lu attentivement le manuel. Vous trouverez les
descriptions du fonctionnement des divers composants et les instructions pour les
contrôles nécessaires et pour l’entretien.
N.B. Les descriptions et les illustrations contenues dans ce manuel n’engagent
pas rigoureusement le constructeur. La société se réserve le droit d’apporter
d’éventuelles modifications sans devoir mettre à jour à chaque fois le manuel.
EINLEITUNG
Lesen Sie diese Broschüre vor Arbeitsbeginn aufmerksam durch, um mit die
Motorpumpe richtig umgehen zu können und Unfälle zu vermeiden. In dieser
Bedienungsanleitung finden Sie die Erklärung der Funktionsweise der verschiedenen
Bauteile und Hinweise zu den anfallenden Kontroll- und Wartungsarbeiten.
Anm.: Die in dieser Broschüre enthaltenen Beschreibungen und Abbildungen
sind unverbindlich. Der Hersteller behält sich das Recht vor, eventuelle
Veränderungen vorzunehmen, ohne jeweils vorher eine Anpassung der
vorliegenden Bedienungsanleitung vorzunehmen.
INTRODUCCION
Para una correcta utilización de la motobomba y para evitar accidentes, no empiece a
trabajar sin haber leído atentamente este manual. Ud. encontrará las explicaciones de
funcionamiento de los diferentes componentes y las instruccciones para el control y
mantenimiento de la motosierra. P.D. Las descripciones contenidas en el presente
manual no se consideran rigurosamente obligatorias. La empresa se reserva el
derecho de aportar eventuales modificaciones sin obligarse a poner al día este
manual.
INLEIDING
Om de motorpomp op de juiste manier te kunnen gebruiken en ongelukken te
voorkomen eerst deze gebruiks-aanwijzing aandachtig doorlezen alvorens ermee te
gaan werken. In deze gebruiksaanwijzing zijn de uitleg van de werking van de
verschillende onderdelen en de instructies voor de noodzakelijke controles en het
onderhoud opgenomen.
N.B.: De beschrijvingen en de figuren in deze gebruiksaanwijzing zijn niet
bindend. De fabrikant reserveert zich het recht eventuele veranderingen aan te
brengen zonder zich te verplichten iedere keer deze gebruiksaanwijzing bij te
werken.
I
GB
F
D
E
NL
ATTENZIONE!!!
RISCHIO DI DANNO UDITIVO
NELLE NORMALI CONDIZIONI DI UTILIZZO,
QUESTA MACCHINA PUÒ
COMPORTARE PER L’OPERATORE ADDETTO,
UN LIVELLO DI ESPOSIZIONE
PERSONALE E GIORNALIERO A RUMORE PARI
O SUPERIORE A
85 dB(A)
WARNING!!!
RISK OF DAMAGING HEARING
IN NORMAL CONDITIONS OF USE,
THIS MACHINE MAY INVOLVE A DAILY LEVEL
OF PERSONAL EXPOSURE TO NOISE
FOR THE OPERATOR EQUAL TO
OR GREATER THAN
85 dB(A)
ATENCION!!!
RIESGO DE DAÑO AUDITIVO
EN NORMALES CONDICIONES DE UTILIZACIÓN,
ESTA MAQUINA PUEDE
TOLERAR, PARA EL OPERADOR ENCARGADO,
UN NIVEL DE EXPOSICÍON
DIARIO A RUIDO EQUIVALENTE O SUPERIOR A
85 dB(A)
ATTENTION!!!
DANGER D’ATTEINTE A L’OUIE
L’OPERATEUR UTILISANT NORMALEMENT
CETTE MACHINE
PEUTS S’EXPOSER QUOTIDIENNEMENT
A UN BRUIT EGAL OU DEPASSANT
85 dB(A)
LET OP!!!
HOORSCHADEGEFLUIT
IN ZIJN NORMAAL GEBRUIKSTOESTAND KAN
DEZE MACHINE VOOR DE
BESTEMDE OPERATOR EEN DAGELIJKS PERSOONLIJK
LAWAAIBLOOTSTELLING MET ZICH MEEBRENGEN, DIE
85 dB(A)
OF MEER BEDRAAGT
ACHTUNG!!!
HÖRSCHADEN - RISIKO
UNTER NORMALEN ANWENDUNGSBEDIGUNGEN
KANN DIESES GERÄT DIE BEDIENUNGSPERSON
EINEM TÄGLICHEN GERÄUSCHPEGEL VON
85 dB(A)
ODER MEHR AUSSETZEN
Impaginato 16-06-2006 15:49 Pagina 2

3
COMPONENTI DELLA MOTOPOMPA
1 - Interruttore di massa 8 - Tappo serbatoio carburante
2 - Protezione marmitta 9 - Rubinetto carburante
3 - Motore 10 - Impugnatura avviamento
4 - Filtro aria 11 - Tappo di carico
5 - Leva comando starter 12 - Tappo di scarico
6 - Leva acceleratore 13 - Raccordo aspirazione
7 - Serbatoio carburante 14 - Raccordo di mandata
PUMP SET COMPONENTS
1 - On/Off switch 8 - Fuel tank cap
2 - Muffler guard 9 - Fuel tank tap
3 - Engine 10 - Starter handle
4 - Air filter 11 - Pump load plug
5 - Choke lever 12 - Pump drain plug
6 - Throttle lever 13 - Intake union
7 - Fuel tank 14 - Delivery union
COMPOSANTS DE LA MOTOPOMPE
1 - Interrupteur d’arrêt du moteur 8 -
Bouchon du réservoir de carburant
2 - Protection du pot d’échappement 9 - Robinet du carburant
3 - Moteur 10 - Poignée démarrage
4 - Filtre à air 11 - Bouchon de charge pompe
5 - Levier starter 12 - Bouchon de vidange pompe
6 - Levier du l’accélérateur 13 - Raccord d’aspiration
7 - Réservoir de carburant 14 - Raccord de refoulement
13 13 13 13
Deutsch Nederlands
VEILIGHEIDSVOORSCHRIFTEN VEILIGHEIDSVOORSCHRIFTEN VEILIGHEIDSVOORSCHRIFTEN
Español
BAUTEILE DEN MOTORPUMPE
1 - Eim-/Aus- Schalter 8 - Kraftstofftankdechel
2 - Hitzeschutzgitter 9 - Kraftstoffhahn
3 - Motor 10 - Startergriff
4 - Luftfilter 11 - Einfüllstopfen Pumpe
5 - Chokehebel 12 - Ablassstopfen Pumpe
6 - Gashebel 13 - Ansauganschluss
7 - Kraftstofftank 14 - Auslassanschluss
COMPONENTES DE LA MOTOBOMBA
1 - Interruptor de parada del motor 8 - Tapón depósito combustible
2 - Protección del silenciador 9 - Grifo de combustible
3 - Motor 10 - Empuñadura
4 - Filtro de aire 11 - Tapón de carga de la bomba
5 - Palanca cebador 12 - Tapón de descarga de la bomba
6 - Palanca del acelerador 13 - Empalme de aspiración
7 - Depósito combustible 14 - Empalme de caudal
ONDERDELEN VAN DE MOTORPOMP
1 - Aaan/uitschakelaar 8 - Brandstoftankdop
2 - Vitlaatklep 9 - Brandstofkraan
3 - Motor 10 - Startgreep
4 - Luchtfilter 11 - Dop pompinlaat
5 - Chokehendel 12 - Dop pompuitlaat
6 - Geshendel 13 - Aanzuigkoppeling
7 - Brandstoftank 14 - Uitstroomkoppeling
GB
I
F
D
E
NL
Impaginato 16-06-2006 15:49 Pagina 3

4
Italiano English
NORME DI SICUREZZA SAFETY PRECAUTIONS
1 3 42
ATTENZIONE - La motopompa, se ben usata, è uno
strumento di lavoro comodo ed efficace; se usata in
modo non corretto o senza le dovute precauzioni
potrebbe diventare un attrezzo pericoloso. Perchè il
vostro lavoro sia sempre piacevole e sicuro, rispettare
scrupolosamente le norme di sicurezza riportate qui di
seguito e nel corso del manuale.
1 - Conservare con cura il seguente Manuale e consultarlo prima
di ogni utilizzo della macchina.
2 - Effettuare il pieno lontani da fonti di calore e a motore fermo
(Fig. 1). Non fumare durante il rifornimento (Fig. 1). Fare
attenzione a non rovesciare miscela per terra o sulla marmitta.
Se durante il rifornimento il carburante tracima, spostare la
motopompa prima di fare l'avviamento (Fig. 2). Non togliere il
tappo del serbatoio a motore avviato o ancora caldo.
3 - Prima di effettuare l'avviamento controllare che l'acceleratore
funzioni liberamente.
4 - Si raccomanda di non avviare mai la macchina senza
l'acqua di adescamento nella pompa. Ciò può causare danni
importanti alle parti del motore e l'immediato decadimento
della garanzia.
5 - Utilizzare la motopompa lontano da altre persone od animali
(Fig. 3).
6- Non Utilizzare la motopompa in vicinanza di cavi o
apparecchiature elettriche (Fig. 4).
7 - Utilizzare sempre il filtro sul tubo di aspirazione. Così facendo
si evita l'entrata di corpi estranei nella pompa, e possibili danni
alla girante.
8- Le motopompe di questa gamma sono progettate per
pompare acqua. Non usare la motopompa per convogliare
prodotti infiammabili, sostanze chimiche o prodotti alimentari.
Le sospensioni di prodotti abrasivi possono danneggiare la
tenuta e le parti rotanti della pompa.
9 - Dopo il pompaggio dell'acqua marina o di liquami, lavare
il corpo pompa con acqua pulita.
10 - Staccare il cappuccio della candela ogni volta che si effettuano
operazioni di manutenzione, pulizia o riparazione.
11 - Per controllare la scintilla della candela, non tenerla vicino al
foro del cilindro: potrebbe far accendere i gas che evaporano
dallo stesso.
12 - Verificare che tutti i bulloni ed altri elementi di fissaggio non
siano allentati o mancanti.
13 - Tenere la motopompa in funzione (o con motore ancora caldo)
lontana da eventuali materiali infiammabili.
14 - Stare attenti alla marmitta ed altri parti calde.
15 - Durante il trasporto chiudere il rubinetto del carburante e
serrare il tappo del serbatoio. Svuotare il serbatoio dal
carburante nel caso di trasporto su lunghe distanze o su
strade sconnesse.
16 - Usare la motopompa solo in luoghi ben ventilati, non utilizzare
in atmosfera esplosiva, infiammabile o in ambienti chiusi
(Fig. 5).
17 - Controllare giornalmente la motopompa per assicurarsi che
ogni dispositivo di sicurezza e non, sia funzionante.
18 - Seguire sempre le nostre istruzioni per le operazioni di
manutenzione.
19 - Non lavorare con una motopompa danneggiata, mal riparata,
mal montata o modificata arbitrariamente. Non togliere o
danneggiare o rendere inefficace alcun dispositivo di
sicurezza.
20 - Non effettuare mai da soli operazioni o riparazioni che non
siano di normale manutenzione. Rivolgersi soltanto ad officine
specializzate ed autorizzate.
21 - Non usare carburante (miscela) per operazioni di pulizia.
22 - Conservare la motopompa in luogo asciutto, sollevata dal
suolo e con i serbatoi vuoti.
23- In caso di necessità della messa fuori servizio della
motopompa, non abbandonarla nell'ambiente, ma consegnarla
al Rivenditore che provvederà alla corretta collocazione.
24 - RivolgeteVi sempre al Vostro rivenditore per qualsiasi altro
chiarimento o intervento prioritario.
WARNING - If correctly used, the pump is easy to handle
and efficient tool; if used improperly or without the due
precautions it could become a dangerous tool. For
pleasant and safe work,always strictly comply with the
safety rules that follow and throughout this manual.
1 - Keep this manual on hand and consult it before each use of
the tool.
2 - Refuel only with the engine off and away from open flames
(Fig. 1). Do not smoke while refuelling (Fig. 1). Take care not
to spill or splash fuel on the muffler. After refuelling, move the
engine pump to a different area before restarting (Fig. 2).
Don’t remove the fuel tank cap when the engine is still warm
or running.
3 - Before starting the engine, check the throttle for ease of
movement.
4- Never start the machine without priming water in the pump.
It will cause serious damages to the engine parts as well as
the withdrawal of the guarantee.
5 - Don’t use the engine pump near people or animals (Fig. 3).
6 - Do not use the pump set close to cables or electrical
equipment (Fig. 4).
7 - A strainer should always be used on the suction hose, to
prevent debris from entering the pump body, and causing
possible damage to the impeller.
8 - The pumps of this range have been designed to pump water.
Do not use the pump to convey inflammable products,
chemical substances, or food products. Liquids containing
abrasive solids in suspension will damage the seal and the
rotating parts of the pumps.
9 - After the pumping of sea water or sewage, wash the pump
with fresh water.
10 - Take the cap off the spark plug each time maintenance,
cleaning or repair work is carried out.
11 - Do not check the spark plug (for spark) while holding the plug
near the cylinder hole, to avoid igniting the fuel vapors
evaporating from the cylinder.
Impaginato 16-06-2006 15:49 Pagina 4

5
5
English
SAFETY PRECAUTIONS NORMES DE SECURITE
Français
12 - Be sure to check bolts and other fasteners to see if any of
them have become loose or missing.
13- Keep the running (or still hot) pump away from any
inflammable material.
14 - Be careful with the muffler or other hot engine parts.
15 - During transportation close the fuel cock and the fuel tank cap.
Empty the fuel tank during transportation on long distances or
rough roads.
16 - Only use the pump in well-ventilated places, do not operate
the pump in explosive or flammable atmospheres or in closed
environments (Fig. 5).
17 - Check the pump each day to ensure that each device, whether
for safety or otherwise, is functional.
18- Always follow the manufacturer’s instructions for the
maintenance operations.
19 - Never use a damaged, modified, or improperly repaired or
assembled pump. Do not remove, damage or deactivate any
of the safety devices.
20 - Never carry out operations or repairs on your own that are
other than routine maintenance. Call specialised and
authorised workshops only.
21 - Never use fuel for (mixture) cleaning operations.
22 - Keep the pump set in a dry place, raised off the ground and
with the tanks empty.
23 - If your pump is no longer usable, dispose of it properly without
damaging the environment by handing it in to your local
Dealer who will arrange for its correct disposal.
24 - But take it to your dealer who will dispose of it properly.
Always call your dealer for any clarification or priority action.
ATTENTION : Si vous utilisez correctement la motopompe,
vous aurez un instrument de travail pratique et efficace;
utilisé de façon non correcte ou sans adopter les
précautions nécessaires, cet instrument pourrait s’avérer
dangereux. Pour que votre travail soit toujours agréable et
sûr, respectez scrupuleusement les mesures de sécurité
reportées ici et au cours du manuel.
1 - Conservez ce manuel soigneusement et consultez-le à chaque
foisque vous devrez utiliser la machine.
2 - Le remplissage du carburant doit être effectué avec le moteur
arrêté (Fig. 1), loin d’une source de chaleur. Ne pas fumer
(Fig. 1) et ne pas renverser du carburant sur le pot
d’échappement. Si le carburant a débordé, lors du remplissage,
la motopompe doit être déplacée avant la mise en route
(Fig. 2). Ne jamais enléver le bouchon réservoir lorsque le
moteur est chaud ou en route.
3 - Avant de démarrer le moteur, contrôler que l’accélérateur
fonctionne correctement.
4- Ne jamais faire tourner la pompe sans eau dans le corps
sous peine de détérioration immediate du joint d’etanchéité.
Dans ce cas les pieces déterioreés ne sont pas couvertes par la
garantie.
5 - S’assurer qu’aucune personne, ou animal, et en particulier de
jeunes enfants, ne se trouve à proximité de la pompe (Fig. 3).
6 - N’utilisez pas la motopompe à proximité de câbles ou
d’appareils électriques (Fig. 4).
7 - Le filtre ou crepine doit toujours être utilisé sur le tuyau flexible
d’aspiration pour empêcher tous débris de pénétrer dans le
corps de la pompe et causer des dégâts éventuels au rotor.
8 - Les motopompes de cette série ont été conçues pour le
pompage de l’eau. N’utilisez pas la motopompe pour convoyes
des produits inflammables, des substances chimiques ou des
produits alimentaires. Les suspensions de produits abrasifs
peuvent endommager la garniture mécanique et les parties
tournantes de la pompe.
9 - Après avoir pompé de l’eau de mer, ou du purin, laver la pompe
avec de l’eau claire.
10 - Avant d’entreprendre les travaux d’entretien, de nettoyage ou
de réparation, s’assurer que le moteur est à l’arrêt et le fil de la
bougie débranché.
11 - Lors des essais du système d’allumage, placer la bougie a une
certaine distance afin d’éviter que le carburant vaporisé du
cylindre s’enflamme.
12 - Vérifier l’intégrité et le serrage des boulons, écrous et vis de
l’ensemble motopompe.
13 - Tenir la motopompe en fonction (ou encore chaude) bien
éloignée de matériels inflammables éventuels.
14 - Faire attention au pot d’échappement et à d’autres parties
chaudes.
15 - Durant le trasport fermer le robinet du carburant et bien serrer le
bouchon de réservoir. Vider le réservoir du carburant si la
pompe doit être transportée sur de longues distances ou sur
des routes difficiles.
16 - N’utilisez la motopompe dans des endroits bien aérés, ne
l’utilisez pas dans de atmosphères explosives ou inflammables
ou dans des endroits clos (Fig. 5).
17 - Contrôlez la motopompe tous les jours pour vous assurer que
tous les dispositifs, de sécurité et autres, fonctionnent bien.
18- Suivez toujours nos instructions pour les opérations d’entretien.
19 - Ne travaillez pas avec une motopompe endommagée, mal
réparée, mal montée ou modifiée arbitrairement. Évitez
d'enlever, de détériorer ou de neutraliser les dispositifs de
sécurité.
20 - N’effectuez jamais par vous-mêmes des opérations ou des
réparations qui ne sont pas d’entretien normal. Adressez-vous
seulement à des ateliers spécialisés et autorisés.
21 - N’utilisez pas de carburant (mélange) pour les opérations de
nettoyage.
22 - Rangez la motopompe dans un endroit sec, soulevée du sol et
après avoir vidé les réservoirs.
23 - Si votre motopompe ne marche plus, ne l'abandonnez pas dans
la nature ! Appelez votre revendeur habituel, qui saura résoudre
la situation.
24 - Addressez-vous toujours à votre revendeur habituel pour tout
autre application ou intervention importante.
Impaginato 16-06-2006 15:49 Pagina 5

6
Deutsch Español
SICHERHEITSVORKERUNGEN NORMAS DE SEGURIDAD
1 3 42
ACHTUNG: Bei richtiger Anwendung ist die Motorpumpe
ein bequemes und wirkungsvolles Arbeitsgerät; falls Sie
sie falsch oder ohne die nötige Vorsicht einsetzen, kann sie
zu einer Gefahr werden. Beachten Sie bitte daher unbedingt
die Sicherheitsvorschriften die Sie nachstehend in der
Betriebsanleitung finden, damit ihre Arbeit immer
angenehm und sicher ist.
1 - Bewahren Sie dieses Handbuch sorgfältig auf und lasen Sie es
vor jeder Inbetriebnahme der Maschine.
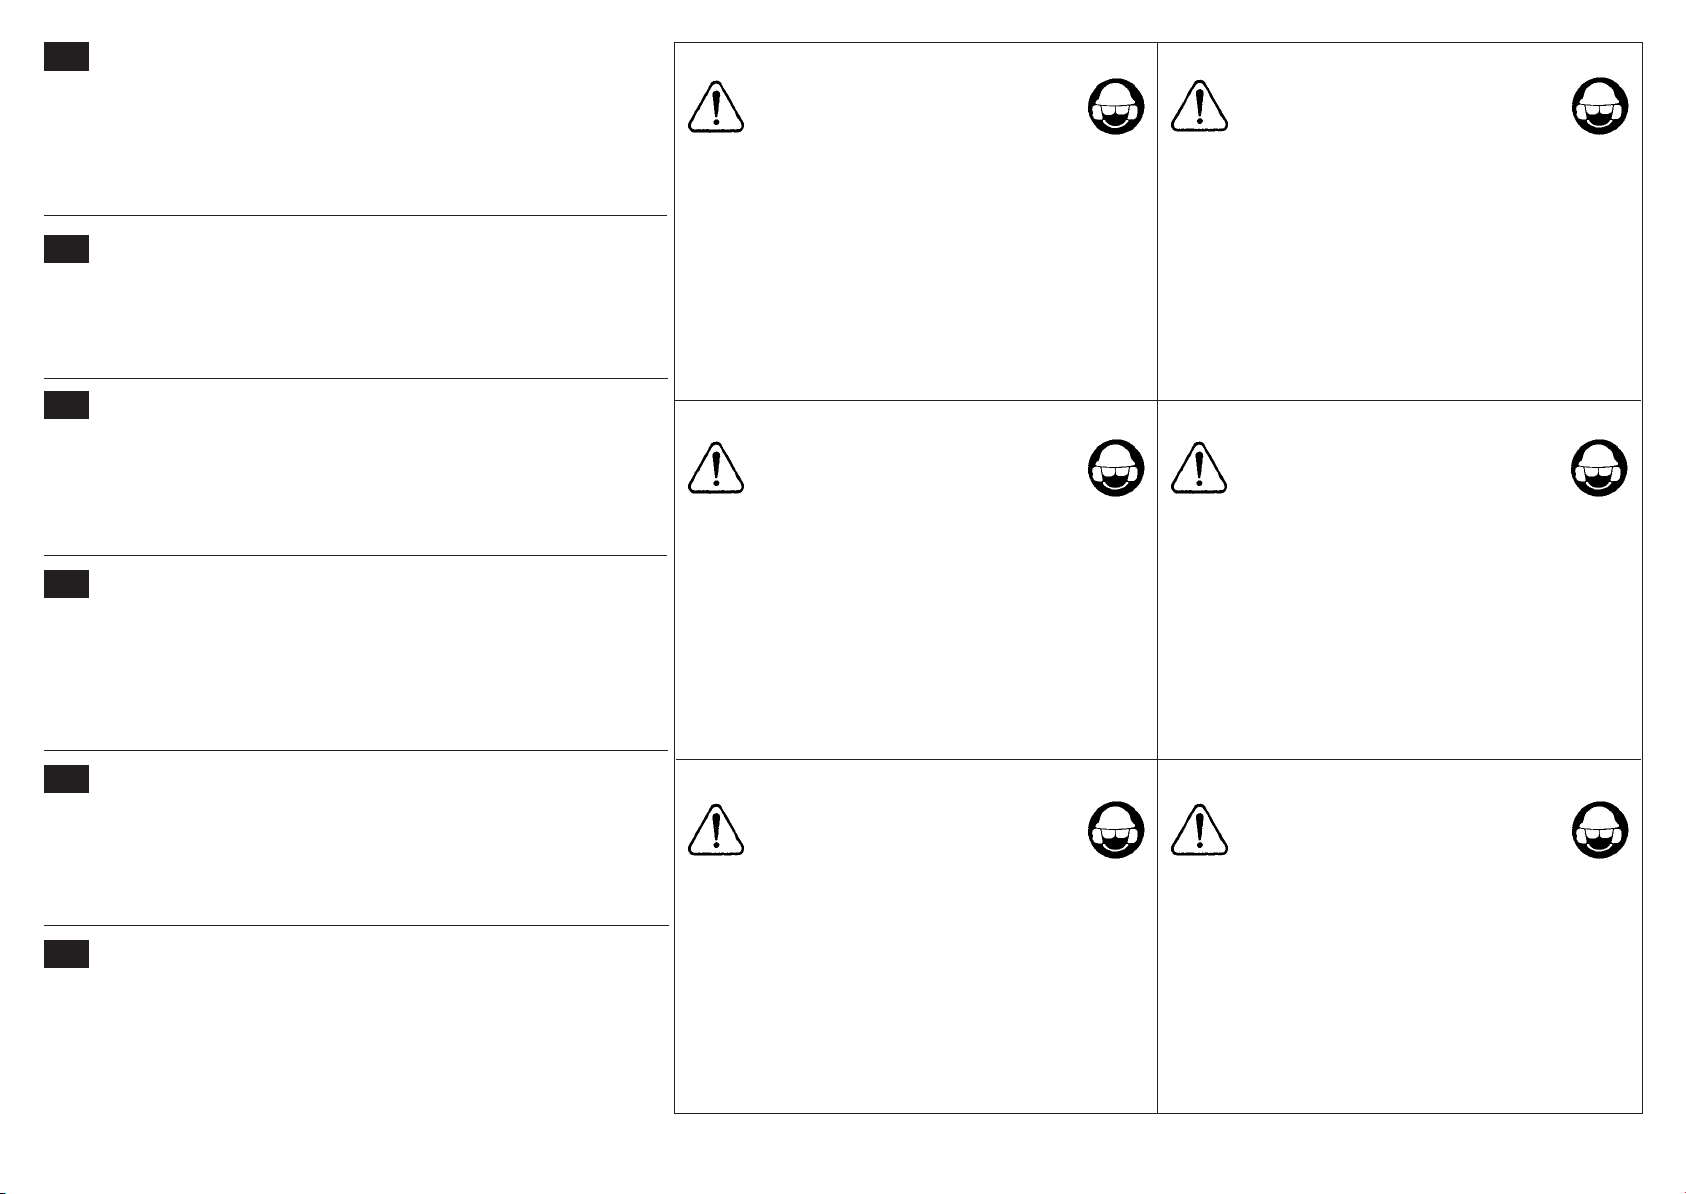
2 - Tanken Sie den Motor nur in ausgeschaltetem Zustand auf und
achten Sie darauf, daß kein offenes Feuer in der Umgebung iist,
Rauchen Sie auch nicht beim nicht Auftanken und vermeiden
Sie, Benzin auf den Schaldämpfer zu verschütten (Abb. 1). Nach
dem Auftanken die Motorpumpe zu einem anderen Platz tragen
zum Start (Abb. 2). Entfernen Sie nicht den Bezintankdeckel,
während der Motor noch warm ist oder während der Motor läuft.
3 - Vor dem Start überprüfen Sie den Gashebel auf einwandfreie
Funktion.
4 - Die Maschine nie ohne füllwaser in der Pumpe einschalten.
Es können sonst beträchtliche Schäden am Motor enstehen.
Der Hersteller kann in diesem Falle keine Garantie übernehmen.
5 - Halten Sie bei der Verwendung der Motorpumpe andere
Personen und Tiere fern (Abb. 3).
6 - Benutzen Sie die Motorpumpe nicht in der Nähe von
Elektrokabeln oder Elektro-Geräten (Abb. 4).
7 - Am Saugschlauch muss immer ein korb verwendet werden, da
mit kein Schlamm in das Pumpengehäuse dringt, was zu einer
Beschädigung der Flügel führen könnte.
8 - Die Motorpumpen dieser Baureihe sind zum Pumpen von
Wasser ausgelegt. Benutzen Sie die Motorpumpe nicht zum
Pumpen von entflammbaren Substanzen, Chemikalien oder
Labensmitteln, Suspensionen von Produkten, die abschleifende
Wirkung haben, können zur Beschädigung der Dichtung und der
sich drehenden Pumpenteile führen.
9 - Nach dem Pumpen von Meerwasser oder Schwarzwasser muß
die Pumpe mit frischem Wasser durchgespült werden.
10 - Den Kerzendeckel immer abnehmen, bevor Wartungs-,
Reinigungs- oder Reparaturarbeiten an der Maschine
durchgeführt werden.
11 - Unterlassen Sie die Funkenprüfung der Zündkerze in der Nähe
der Zylinderöffnung, um unbeabsichtigtes Zünden von Benzin-
dämpfen aus dem Zylinder zu vermeiden.
12 - Allen Schrauben und sonstigen Befestigungsmitteln nachprüfen.
Nichts darf locker sein.
13 - Die laufende (oder noch warme) Pumpe nicht in unmittelbarer
Nähe leicht entflammbarer Materialien aufbewahren.
14 - Auspuff und andere Teile sind heiß. Nicht anfassen!
15 - Wenn Sie den Pumpe transportieren, Schließen Sie den
Kraftstoffhahn und drehen den Tankverschluß gut zu. Bei
Transport über längere Entfernungen oder auf unebenem
Gelände ist auch der Kraftsofftank zu leeren.
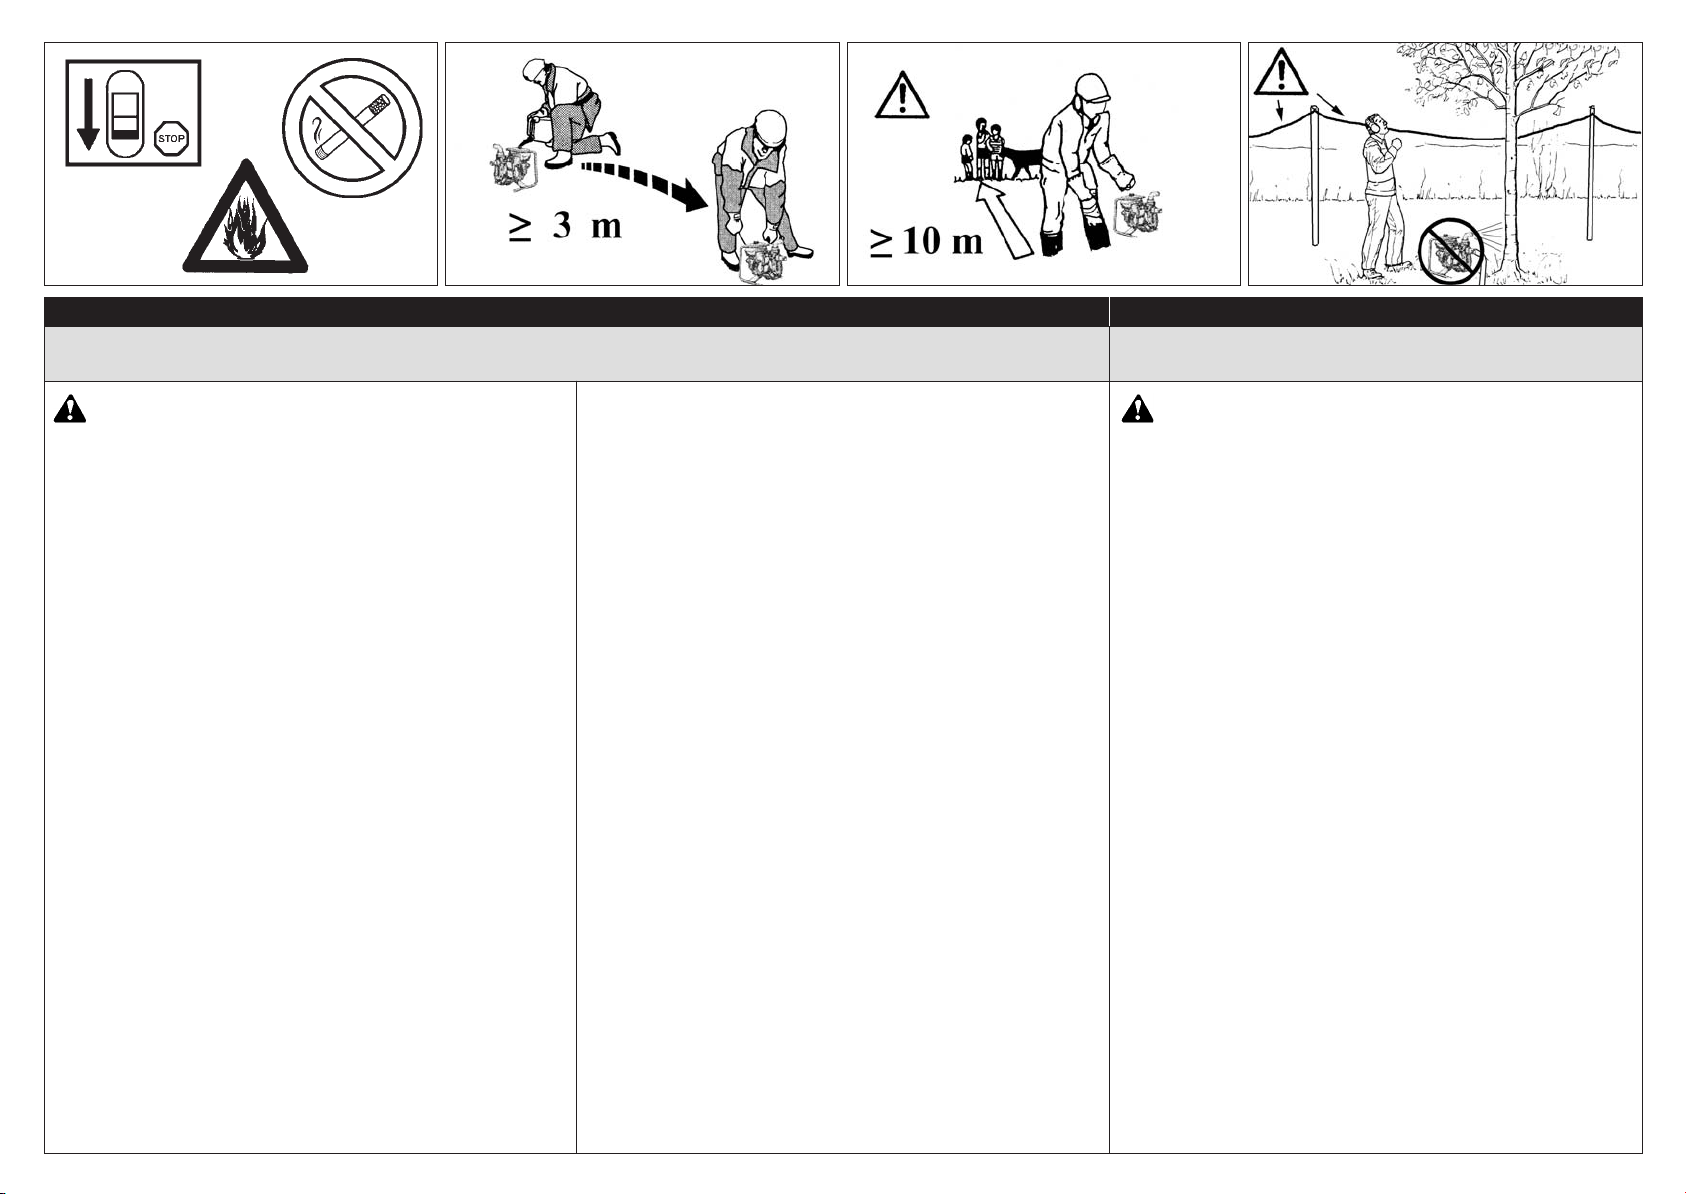
16 - Achten Sie auf gute Abzungsmöglichkeiten der Abgase.
Benutzen Sie das Gerät nicht in der Nähe von explosiven oder
brennbaren Stoffen oder in geschlossenen Räumen (Abb. 5).
17 - Kontrollieren Sie die Motorpumpe täglich, um sicherzustellen,
daß sowohl die Sicherheits-sowie auch alle anderen
vorrichtungen korrekt funktionieren.
18- Folgen Sie bei den Wartungsarbeiten stets unseren
Anweisungen.
19 - Arbeiten se nicht mit beschädigter, fehlerhaft reparierter, falsch
montierter oder willkürlich abgeänderter Motorpumpe. Entfernen,
beschädigen oder ändern Sie nie die Schutzvorrichtungen.
20 - Nehmen Sie nie alleine Reparaturen oder Arbeiten vor, die nicht
zur normalen Wartung gehören. Wenden Sie sich ausschließlich
an spezialisierte Vertragswerkstätten.
21- Benutzen Sie keinen Kraftstoff (Gemisch) für die
Reinigungsarbeiten.
22 - Bewahren Sie die Motorpumpe an einem trockenen Ort, vom
Boden entfernt und mit entleertem Tank auf.
23 - Sollte es notwendig sein die Motorpumpe aus dem Verkehr zu
ziehen, händigen Sie sie ihrem Vertragshändler aus, der für die
entsprechende Aufbewahrung sorgt.
24 - Wenden Sie sich füe eventuelle Klärungen oder Eingriffe immer
an den Händler hres Vetrauens.
ATENCION - La motobomba, si se emplea bien, es un
instrumento de trabajo cómodo y eficaz; si se usa
incorrectamente o sin las debidas precauciones puede
convertirse en un instrumento peligroso. Para que su trabajo
sea siempre agradable y seguro, respete escrupulosamente
las normas de seguridad indicadas a continuación en el
presente manual.
1 - Consevar cuidadosamente el presente manual de instrucciones y
consultarlo en cada ocasión en que la máquina sea utilizada.
2 - Llenar el deposito de combustible con el motor parado y lejos del
fuego (Fig. 1). No fume cuando llene ed deposito (Fig. 1).
Asegurese de no derramar el combustible sobre el escape.
Despues de llenar el deposito, lleve la motobomba a otro sitio antes
de volver a ponerlo en marcha (Fig. 2). No quite el tapon del
deposito cuando el motor aún esta caliente o en marcha.
3 - Antes de poner en marcha el motor, comprobar que el acelerador
se desplaza libremente.
4 - Nunca ponga en marcha la máquina sin agua de purga en la
bomba. Tal descuido ocasionará serios daños en las piezas del
motor, y la garantia quedará anulada en tal caso.
5 - Utilizar la motobomba lejos de personas y animales (Fig. 3).
6 - No se debe de utilizar la bomba cerca de cables o aparatos
eléctricos (Fig. 4).
7 - El filtro debe utilizarse siempre en la manguera de aspiración, a fin
de evitar la entrada de impurezas en el cuerpo de la bomba y
posibles daños en la turbina.
8 - Las motobombas de esta gama estàn pryectadas para bombear
agua. No usar la motobomba para recoger productos inflamables,
substancias quimicas o productos alimenticios. Las particulas de
productos abrasivos pueden dañar la junta y la parte rotante de la
bomba.
9 - Después de bombear agua de mar o purines, lave la bomba con
agua dulce.
10 - Quitar el capuchión de la bujia cada vez que se realizan
operaciones de mantenimiento, limpieza o reparaciones en la
máquina.
Impaginato 16-06-2006 15:49 Pagina 6

7
5
Español
NORMAS DE SEGURIDAD VEILIGHEIDSVOORSCHRIFTEN
Nederlands
11 - No comprobar la bujia (la chispa) cuando tenga la bujia cerca del
agujero del cilindro, para evitar que se inflamen los vapores que
emanan desde el cilindro.
12 - Revise todos los tornillos y tuercas para comprobar que no haya
piezas sueltas o faltantes.
13 - Mantener la motobomba alejada de eventuales materiales
inflammables, cuando estè en funcionamiento o todavìa caliente.
14 - Estar atentos al tubo de escape y otras partes calientes de la
màquina.
15 - Durante el transporte cerra la llave de la gasolina y ajustar el tapòn
del depòsito. Vaciar el depòsito de la gasolina en caso de recorrer
largas distancias o caminos en malds condiciones.
16 - Usar la motobomba solo en lugares bien ventilados, no usar en
atmósfera explosiva, inflamable o en ambientes cerrados (Fig. 5).
17 - Controlar diariamente la motobomba para asegurarse de que
funcionan todos los dispositivos.
18 - Seguir siempre nuestras instrucciones para las operaciones de
mantenimiento.
19 - No trabajar con una motobomba dañada, mal reparada, mal
montada o modificada arbitrariamente. No quite, dañe, o vuelva
ineficaz ningún dispositivo de seguridad.
20 - No efectuar nunca operaciones o reparaciones que no sean
de normal mantenimiento. Dirijirse a talleres especializados y
autorizados.
21 - No usar combustible (mezcla) para operaciones de limpieza.
22 - Consevar la motobomba en un lugar seco, levantada del suelo y
con los depósitos vacios.
23 - Si se necesita poner fuera de servicio la motobomba, no se debe de
abandonar en el medio ambiente, se aconseja entregarla al
Distribuidor que proveerá a su correcta colocación.
24 - Dirigirse siempre al distribudor para cuaquier tipo de aclaración o
intervención prioritaria.
LET OP - Als de pump op de juiste manier gebruikt wordt, is
het een gemakkelijk en efficiënt werktuig; als de pomp niet
op de juiste manier of zonder de nodige
voorzorgsmaatregelen gebruikt wordt, kan het een gevaarlijk
werktuig worden.
Opdat u altijd prettig en veilig kunt werken de hierna in de
loop van de handleiding volgende.
1 - Deze Hendleiding zorgvuldig bewaren en raadplegen voor ieder
gebruik van de machine.
2 - Vul de benzinetank wanneer de motor afstaat en weg van open
vuur (Fig. 1). Flook niet bij het vullen (Fig. 1). Opgelet: niet
morsen op de uitlaat. Zet ne hat vullen de pomp op een andere
plaats voor het starten (Fig. 2). Verwijder de benzinedop niet voor
te vullen alvorens de motor koud is of nog in werking is.
3 - Controleer voor het starten of de kabel gemakkelijk te bewegen is.
4 - Start de machine nooit zonder dat er zich water in de pomp
bevindt. Het veroorzaakt schade aan de motorstukken alsook het
vervallen van de garantie.
5 - Gebruik de pomp niet in de nabijheid van mensen of dieren
(Fig. 3).
6 - De motorpomp niet gebruiken in de buurt van electrische kabels of
apparatuur (Fig. 4).
7 - Gebruik steeds een filter voor de afzuigkap, om te vermijden dat
afval in het pomphuis komt, en eventueel de waaier zou
beschadigen.
8 - De motorpompen van deze serie zijn ontworpen om water te
pompen. De motorpomp niet gebruiken om brandbare producten,
chemische stoffen ot voedingsmiddelen aan te voeren. De
suspensies van schuurmiddelen kunnen de weerstand en de
draaiende onderdelen van de pomp beschadigen.
9 - Na het pompen van zeewater of rioolwater, de pomp spoelen met
zuiver water.
10 - Neem de bougiekap telkens van de bougie af bij onderhoud,
reinigen of reparatie.
11 - Controleer nooit de bougie wanneer u ze bij de cylinder houdt, dit
om ontbranding van de benzinedampen van de cylinder te
voorkomen.
12 - Controleer alle schroeven of andere klemmen tegen het loskomen.
13 - De motorpomp op afstand houden van eventueel brandbaar
materiaal, als deze draait (of als de motor nog warm is).
14 - Letten op de uitlaat en andere warme onderdelen.
15 - Tijdens het transport de brandstofkraan dicht doen en de tankdop
vastschroeven. De brandstoftank legen in geval van transport over
lange afetenden of over slechte wegen.
16 - De pomp alleen in heel goed gaventileerde ruimtes gebruiken, niet
gebruiken in ontplofbare, ontvlambare of gesloten ruimtes (Fig. 5).
17 - Dagelijks de pomp controleren om zich ervan te overtuigen,
dat ieder onderdeel, al dan niet ter bescherming, goed
functioneert.
18 - Altijd onze instructies voor de onderhoudswerkzaamheden
opvolgen.
19 - Geen beschadigde, slecht gerepareerde of gemonteerde of
naar eigen goeddunken aangepaste pomp gebruiken. Geen
enkele veiligheidsvoorziening verwijderen, beschadigen of
uitschakelen.
20 - Nooit zelf werkzaamheden of reparaties uitvoeren, die niet tot
het normale onderhoud behoren. Zich alleen tot
gespecialiseerde en geautoriseerde werkplaatsen wenden.
21 - Geen brandstof (mengsel) gebruiken voor het schoonmaken.
22 - De motorpomp op een droge plaate opslaan, niet op de grond en
met lege tanks.
23 - In geval men de pomp buiten gebruik moet stellen, deze niet
ergens laten liggen, maar aan de verkoper overhandigen, die zal
zorgen voor de juiste berging.
24 - Zich altijd tot de verkoper wenden voor iedere andere uitleg of
noodzakelijke tussenkomst.
Impaginato 16-06-2006 15:49 Pagina 7

8
Italiano Français
ABBIGLIAMENTO PROTETTIVO DI SICUREZZA SAFETY PROTECTIVE CLOTHING VÊTEMENTS DE PROTECTION
English
1 2 3
Quando si lavora con la motopompa usare sempre un
abbigliamento protettivo di sicurezza omologato. L’uso
dell’abbigliamento protettivo non elimina i rischi di
lesione, ma riduce gli effetti del danno in caso di
incidente. Fatevi consigliare dal vostro rivenditore di
fiducia per la scelta dell’abbigliamento adeguato.
L’abbigliamento deve essere adatto e non d’impaccio.
Indossare scarpe o stivali di sicurezza muniti di
suole antisdrucciolo e puntali d’acciaio (Fig. 1-2).
Applicare protezioni dai rumori; per esempio le cuffie
(Fig. 3) o i tappi. L’uso delle protezioni per l’udito
richiede maggior attenzione e prudenza, perché la
percezione di segnali acustici di pericolo (grida, allarmi,
ecc.) è limitata.
Calzare guanti (Fig. 4) che permettano il massimo
assorbimento delle vibrazione.
Efco offre una gamma completa di equipaggiamento
per la sicurezza.
While working with the pump, always use safety
protective approved clothing. The use of protective
clothing does not eliminate injury risks, but reduces injury
effects in case of accident. Consult your trusted supplier
to choose an adequate equipment.
The clothing must be proper and not an obstacle.
Safety shoes or boots having skid-proof sole and
anti-piercing insert (Fig. 1-2).
Use protections against noises; for example noise
reduction ear guards (Fig. 3) or earplugs. The use of
protections for the ear requests much more attention and
caution, because the perception of danger audio signals
(screaming, alarms, etc.) is limited.
Wear gloves (Fig. 4) that permit the maximum
absorption of vibrations.
Efco offers a complete range of safety equipments.
Toujours porter des vêtements de protection homologués
pour utiliser de la motopompe. Le port de vêtements de
protection n'élimine pas les risques de blessure mais il
peut en réduire les effets en cas d'accident. Demandez
conseil à votre revendeur habituel pour choisir le
vêtement qui répond le mieux à vos exigences.
Assurez-vous que le vêtement choisi ne gêne pas les
mouvements.
Portez des chaussures ou des bottes de protection
avec semelles antiglisse et pointes en acier (Fig. 1-2).
Utilisez des dispositifs protégeant contre les
émissions sonores; casque (Fig. 3) ou boules dans
les oreilles. Rappelez-vous d'être extrêmement
prudents lorsque vous utilisez ce genre de protection car
la perception des signaux acoustiques de danger (cris,
alarmes, etc. ..) est réduite.
Portez des gants (Fig. 4) qui absorbent le plus
possible les vibrations.
Efco offre une gamme complète d'équipements de
sécurité.
Impaginato 16-06-2006 15:50 Pagina 8

9
4
Deutsch Nederlands
SICHERHEITS-/SCHUTZKLEIDUNG INDUMENTOS DE SEGURIDAD BESCHERMENDE VEILIGHEIDSKLEDING
Español
Bei der Arbeit mit den Motorpumpe muss der Bediener
daher immer zugelassene Sicherheits-/Schutzkleidung
tragen. Durch die Benutzung der Schutzkleidung wird die
Verletzungsgefahr zwar nicht beseitigt, aber die
Auswirkungen des Schadens im Falle eines Unfalls
reduziert. Ihr Fachhändler berät Sie gern bei der Wahl
der richtigen Schutzkleidung.
Die Kleidung muss geeignet sein und darf die Arbeit
nicht behindern.
Tragen Sie Sicherheitsschuhe oder -stiefel mit
rutschfesten Sohlen und Stahlkappen (Abb. 1-2).
Benutzen Sie einen Gehörschutz; zum Beispiel den
Gehörschutz mit Bügel (Abb. 3) oder die
Gehörschutzstöpsel. Die Verwendung eines
Gehörschutzes erfordert erhöhte Aufmerksamkeit und
Vorsicht, denn die Wahrnehmung akustischer
Warnsignale (Rufe, Alarme usw.) wird dadurch
eingeschränkt.
Tragen Sie Handschuhe (Abb. 4), mit denen die
Vibrationen maximal gedämpft werden.
Efco bietet ein komplettes Sortiment von
Sicherheitsausrüstungen.
Para trabajar con la motobomba, colocarse siempre
indumentos de seguridad homologados. El uso de
elementos de seguridad no elimina los riesgos de
lesiones pero reduce los daños en caso de accidente.
Consultar con el vendedor de la máquina sobre los
indumentos adecuados.
La ropa debe ser cumplir su función de protección y ser
cómoda.
Utilizar zapatos o botas de seguridad con suela
antideslizante y punteras de acero (Fig. 1-2).
Emplear elementos de protección contra el ruido,
como auriculares (Fig. 3) o tapones. El uso de las
protecciones para el oído exige mayor atención y
prudencia porque se reduce la percepción de las señales
sonoras de peligro (gritos, alarmas, etc.).
Ponerse guantes (Fig. 4) que absorban el máximo
posible las vibraciones.
Efco ofrece un equipamiento de seguridad completo.
Draag daarom bij het werken met de motorpomp altijd
goedgekeurde beschermende veiligheidskleding. Het
gebruik van beschermende kleding vermindert niet de
risico's voor letsel, maar beperkt wel de gevolgen van
ongevallen. Vraag uw dealer om advies bij het kiezen
van de juiste kleding.
De kleding moet goed zitten, en mag de bewegingen niet
hinderen.
Draag veiligheidsschoenen of -laarzen met
antislipzool en stalen punten (Fig. 1-2).
Gebruik gehoorbeschermingen; bijvoorbeeld
oorkappen (Fig. 3) of oordoppen. Het gebruik van
gehoorbeschermingen vereist grotere aandacht en
voorzichtigheid, want geluidssignalen die waarschuwen
voor gevaar (schreeuwen, alarmen, enz.) worden minder
goed gehoord.
Draag handschoenen (Fig. 4) die de trillingen
optimaal absorberen.
Efco biedt een complete veiligheidsuitrusting.
Impaginato 16-06-2006 15:50 Pagina 9

10
Italiano Français
PRIMA DELL’USO BEFORE USE AVANT L’USAGE
English
123
Assicurarsi della perfetta tenuta dei raccordi serrandoli a
fondo.
Collegare il tubo di aspirazione e il tubo di mandata.Nel
collegamento tubo-raccordo usare una fascetta ben
stretta (Fig. 1-2).
ATTENZIONE: Non sostituire i raccordi originali
(in dotazione) con altri di differente materiale per
evitare di danneggiare il corpo pompa.
Tubo di aspirazione
Deve essere del tipo rigido non colassabile (per esempio
spiralato) (B, Fig. 3).
Deve essere munito di filtro o di filtro con valvola di fondo
ben serrati con fascetta (C, Fig. 3).
Ensure that all fittings are tighten and that their gaskets
are in place.
Connect the suction hose and the delivery hose.
Connect the hoses to the fittings using the hose bands
(Fig. 1-2).
WARNING - Do not replace the genuine fittings
(supplied) with others of different material in
order to avoid damaging the pump casing.
Suction hose
It should be of the non-colapsible type (such as spiral
PVC) (B, Fig. 3).
It should be securely fitted with strainer provided, by
means of a hose band (C, Fig. 3).
S’assurer de la parfaite étanchéité des raccords en les
serrant à fond.
Reliez le tube d’aspiration et la tubulure de refoulement.
Bien fixer le tuyau aux raccords d’aspiration et de
refoulement au moyen des colliers (Fig. 1-2).
ATTENTION - Afin d’éviter d’endommager le
corps de la pompe, ne remplacez pas les
raccords originaux (compris dans l’équipment)
par d’autres raccords de matériau différent.
Tuyau d’aspiration
Il doit être du type rigide (par example à spirale interne
(B, Fig. 3).
Il doit être muni de crépine ou de crépine avec clapet
antiretour bien serrée au moyen du collier (C, Fig.3).
Impaginato 16-06-2006 15:50 Pagina 10

11
Deutsch Nederlands
VOR DER BENUTZUNG ANTES DEL USO VÓÓR HET GEBRUIK
Español
Sicherstellen, daß Anschlüsse dicht sind und fest
angezogen worden sind.
Schließen Sie Ansaug- und Auslaßleitung.
An den Übergangsstellen von Rohrstutzen zu Schlauch
eine fest sitzende Schlauchschelle anbringen (Abb. 1-2).
ACHTUNG - Die (mitgelieferten)
Originalanschlüsse nicht gegen andere, aus
unterschiedlichem Material auswechseln, um
Beschädigungen der Pumpe zu vermeiden.
Saugrohr
Hierfür ist ein steifer, nicht zusammendrückbarer
Schlauch zu verwenden (z.B. mit Spiralversteifung) (B,
Abb. 3).
Das Saugrohr muß mit Filter oder mit Filter und
Bodenventil versehen sein, die mit einer Schelle gut
befestigt werden (C, Abb. 3).
Asegurarse del perfecto hermetismo de las conexiones
ajustàndoles a fondo.
Conectar el tubo de aspiración y el tubo de alimentación.
En el empalme tubo-conexiòn, usar una abrazadera bien
éestrecha (Fig. 1-2).
ATENCION - no sustituir las juntas originales (en
dotación) con otras realizadas en un material
diferente para evitar que se dañe el cuerpo de la
bomba
Tubo de aspiracion
Debe ser de tipo rigido (por ejemplo espiral) (B, Fig. 3).
Debe estar provisto de filtro o de filtro con valvula de
fondo ajustado con abrazadera (C, Fig. 3).
Controleer of alle bevestigingen en dichtingen op de
juiste plaats zijn.
De zuigslang en de sproeislang sansluiten.
Bevestig de darm op het koppelingsstuk met de klemring
(Fig. 1-2).
LET OP - De originele verbindingsstukken
(bijgeleverd) niet door andere van verschillend
materiaal vervangen om te vermijden het
pomplichaam te beschadigen.
Zuiglang
Moet van niet-breekbaar materiaal zijn (zoals PVC) (B,
Fig. 3).
Het moet steving op de filter aangesloten worden door
middel van een klemring (C, Fig. 3).
Impaginato 16-06-2006 15:50 Pagina 11

12
Italiano Français
AVVIAMENTO STARTING MISE EN ROUTE
English
9
10 11 12
MISCELA CARBURANTE (Fig. 9-10)
Usare carburante (miscela olio/benzina) al 4% (25:1).
Con olio PROSINT Efco usare miscela al 2% (50:1).
ATTENZIONE! - I motori 2 tempi sono dotati di
potenza specifica elevata, consigliamo quindi l’uso di
benzine con o senza piombo di marca conosciuta,
con un numero di ottani non inferiore ai 90. LEGGI
LOCALI REGOLANO IL TIPO DI BENZINA DA
UTILIZZARE (CON O SENZA PIOMBO). É
OBBLIGATORIO RISPETTARLE!
-Tenere la benzina, l’olio e la miscela in contenitori
omologati (Fig. 11).
- Nella preparazione della miscela usare solo olio
specifico per motori 2 tempi (Fig. 12).
- Agitare la tanica della miscela prima di procedere al
rifornimento (Fig. 13).
- Eseguire il rifornimento carburante (Fig. 14) sempre a
motore spento e lontano da fiamme.
- Prima di svitare il tappo del serbatoio posizionare la
motopompa su di una superficie piana e solida in modo
che non possa rovesciarsi. Aprire con cautela il tappo
per scaricare lentamente l’eccesso di pressione e per
evitare che il carburante schizzi fuori.
- Preparare solo la miscela necessaria all’uso; non
lasciarla nel serbatoio o tanica per molto tempo. Si
consiglia l’utilizzo di additivo ADDITIX 2000 (Fig. 15)
della Emak cod. 001000972, per conservare la miscela
per un periodo di un anno.
ATTENZIONE - Inalare i gas di scarico è nocivo per
la salute.
FUEL MIXTURE (Fig. 9-10)
Use a 4% (25:1) petrol/oil mixture.
With Efco PROSINT oil, use a 2% (50:1) mixture.
WARNING! - The 2-stoke engines have high power
ratings, we therefore recommend the use of leaded
or unleaded petrol of known brand, with an octane
rating no lower than 90. THE TYPE GASOLINE TO BE
USED (LEADED OR UNLEADED) IS REGULATED BY
LOCAL LAWS. IT MUST BE FOLLOWED!
- Store petrol, oil and the mixture in approved containers
(Fig. 11).
- To prepare the mixture, use only specific oil for 2-
stroke engines (Fig. 12).
- Stir the mixture well before refuelling (Fig. 13).
- Always refuel (Fig. 14) with the engine switched off and
away from naked flames.
- Before unscrewing the fuel tank cap, position the pump
on a solid, flat surface so that it cannot fall over. Open
the cap carefully to allow any excess pressure to escape
slowly without the fuel spraying out.
- Prepare only the quantity of mixture required for
immediate use; do not leave fuel in the tank or a
container for a long time. We recommend the use of the
additive Emak ADDITIX 2000 (Fig. 15) code 001000972
if the mixture is to be stored for up to a year.
WARNING - Inhalation of exhaust gases can be
harmful to your health.
MÉLANGE CARBURANT (Fig. 9-10)
Utiliser un mélange deux-temps (huile /essence) dans
les proportions 4% (25:1).
Avec l’huile PROSINT Efco utiliser un mélange de 2%
(50:1).
ATTENTION! - Les moteurs deux-temps ont une
puissance spécifique élevée. Nous préconisons, dès
lors, d’utiliser de l’essence avec ou sans plomb de
marque connue, avec un taux d’octane non inférieur
à 90. LES LOIS LOCALES RÉGLEMENTENT LE TYPE
D’ESSENCE À UTILISER (AVEC OU SANS PLOMB).
LES RESPECTER IMPÉRATIVEMENT!
- L’essence, l’huile et le mélange devront être
conservées dans des récipients homologués (Fig. 11).
- N’utiliser pour le mélange que de l’huile
spécifiquement appropriée pour les moteurs deux-
temps (Fig. 12).
- Agiter le bidon contenant le mélange avant de le verser
dans le réservoir (Fig. 13).
- N’effectuer le réapprovisionnement en carburant (Fig.
14) qu’avec le moteur éteint et à distance sûre de tout
foyer ou flamme.
- Avant de dévisser le bouchon du réservoir, placer la
motopompe sur une surface plane et stable pour qu’il
ne puisse pas se renverser. Ouvrir avec précaution le
bouchon afin de laisser échapper lentement l’excès de
pression et d’éviter les giclées de carburant.
- Ne pas préparer plus de mélange que la quantité
requise pour l’utilisation; ne pas laisser le mélange dans
le réservoir ou dans le bidon pendant trop de temps. Il
est recommandé d’utiliser un additif tel que
l’ADDITIX 2000 (Fig. 15) de la marque Emak code
001000972, lorsqu’on veut garder le mélange pendant
une période d’un an.
ATTENTION - L'inhalation des gaz d'échappement
est nuisible à la santé.
0,04 (40)
0,20 (200)
0,40 (400)
0,60 (600)
0,80 (800)
1,00 (1000)
BENZINA - ESSENCE
GASOLINE - BENZIN
GASOLINA - BENZINE
OLIO - HUILE - OIL
ÖL - ACEITE - OLIE
l(cm3)l (cm3)
1
5
10
15
20
25
0,02 (20)
0,10 (100)
0,20 (200)
0,30 (300)
0,40 (400)
0,50 (500)
l
2% - 50:1 4% - 25:1
p.n. 4175158
Impaginato 16-06-2006 15:50 Pagina 12

13
13 14 15
Deutsch Nederlands
ANLASSEN PUESTA EN MARCHA STARTEN
Español
KRAFTSTOFFGEMISCH (Abb. 9-10)
Verwenden Sie ein 4%ges (25:1) Kraftstoffgemisch
(Öl/Benzin).
Mit Öl PROSINT Efco verwenden Sie ein 2%ges (50:1)
Gemisch.
ACHTUNG! - 2-Takt-Motoren haben eine hohe
spezifische Leistung, so dass Sie verbleitem oder
unverblaitem Benzin bekannter Marken mit einer
Oktanzahl von mindestens 90 verwenden sollten.
ÖRTLICHE VORSCHRIFTEN REGELN DIE ZU
VERWENDENDE BENZINART (VERBLEIT ODER
BLEIFREI) DIESE VORSCHRIFTEN SIND STRIKT
EINZUHALTEN!
- Bewahren Sie das Benzin, Öl und Gemisch in
genormten Behältern auf (Abb. 11).
- Verwenden Sie zur Aufbereitung des Gemischs
ausschließlich Öl für 2-Takt-Motoren (Abb. 12).
- Schütteln Sie den Gemischkanister vor dem Auftanken
(Abb. 13).
- Tanken Sie stets bei abgestelltem Motor und von
Flammen entfernt (Abb. 14).
- Damit beim Aufdrehen des Tankverschlusses kein
Kraftstoffgemisch verschüttet wird, stellen Sie den
Motorpumpe auf eine ebene und standfeste Fläche ab.
Öffnen Sie den Verschluss äußerst vorsichtig, um den
Tankdruck langsam entweichen zu lassen und
ausspritzenden Kraftstoff zu vermeiden.
- Mischen Sie jeweils nur die erforderliche
Kraftstoffmenge an. Das fertige Kraftstoffgemisch darf
nur kurze Zeit im Tank bzw. Kanister bleiben. Mit
Beigabe des Zusatzstoffs ADDITIX 2000 (Abb. 15) von
Emak Bestellnummer 001000972 können Sie das
Gemisch für den Zeitraum eines Jahres aufbewahren.
ACHTUNG - Das Einatmen der Abgase ist
gesundheitsschädlich.
MEZCLA COMBUSTIBLE (Fig. 9-10)
Use combustible (mezcla aceite/gasolina) al 4% (25:1).
Con aceite PROSINT Efco utilice mezcla al 2% (50:1).
¡ATENCIÓN! Los motores de dos tiempos tienen
una potencia específica elevada, por lo cual se
aconseja el uso de gasolina con o sin plomo de marca
conocida, con un número de octanos no inferior a
90. LAS LEYES LOCALES REGLAMENTAN EL TIPO
DE GASOLINA QUE DEBE UTILIZARSE (CON O SIN
PLOMO). ES OBLIGATORIO RESPETARLAS.
- Conserve la gasolina, el aceite y la mezcla en
recipientes homologados (Fig. 11).
- En la preparación de la mezcla, utilice sólo aceite
específico para motores de dos tiempos (Fig. 12).
- Agite el bidón de la mezcla antes de verterla (Fig. 13).
- Cargue siempre el combustible (Fig. 14) con el motor
apagado y lejos de cualquier llama.
- Antes de desenroscar el tapón del depósito, apoye la
motobomba en una superficie llana y firme de modo
que no se tumbe. Abra con cuidado el tapón para aliviar
lentamente el exceso de presión y evitar que el
combustible salpique.
- Prepare sólo la mezcla necesaria para el uso; no la
deje en el depósito o en el bidón durante mucho
tiempo. Se aconseja utilizar aditivo ADDITIX 2000
(Fig. 15) de Emak, cód. 001000972, para conservar la
mezcla durante un año.
ATENCIÓN - Inhalar los gases de escape es nocivo
para la salud.
BRANDSTOFMENGSEL (Fig. 9-10)
Gebruik brandstof (mengsel olie/benzine) van 4% (25:1).
Gebruik met olie PROSINT Efco een mengsel van 2%
(50:1).
LET OP! - De tweetaktmotoren hebben een hoog
specifiek vermogen, wij adviseren derhalve het
gebruik van met lood of loodvrije benzine van een
bekend merk, met een octaangehalte van minstens
90. HET TYPE BENZINE DAT GEBRUIKT MOET
WORDEN (LOODHOUDEND OF LOODVRIJ) IS BIJ DE
WET GEREGELD. NEEM DEZE VOORSCHRIFTEN IN
ACHT!
- Bewaar de benzine, de olie en het mengsel in
goedgekeurde containers (Fig. 11).
- Gebruik bij de bereiding van het mengsel uitsluitend olie
die specifiek bedoeld is voor tweetaktmotoren
(Fig. 12).
- Schud de jerrycan met het mengsel alvorens de tank te
vullen (Fig. 13).
- Vul de brandstoftank (Fig. 14) altijd met uitgeschakelde
motor en uit de buurt van vlammen.
- Leg de motorpomp op een vlakke, stevige ondergrond
alvorens de dop van de tank los te schroeven, zodat het
apparaat niet kan omvallen. Maak de dop voorzichtig
open om de hoge druk langzaam af te voeren en om te
vermijden dat de brandstof naar buiten spat.
- Bereid alleen de hoeveelheid mengsel voor die nodig is
voor het gebruik; laat het niet lange tijd in de tank of de
jerrycan zitten. Het wordt geadviseerd de toevoeging
ADDITIX 2000 (Fig. 15) van Emak art. nr. 001000972 te
gebruiken, om het mengsel een jaar lang te kunnen
bewaren.
LET OP - Het inademen van het uitlaatgas is
schadelijk voor de gezondheid.
Impaginato 16-06-2006 15:50 Pagina 13

14
Italiano Français
AVVIAMENTO STARTING MISE EN ROUTE
English
17 18 19
AVVIAMENTO MOTORE
Portare l’interruttore in posizione “I” (solo per i modelli che ne
sono provvisti) (A, Fig. 20-21).
Assicurarsi che la leva acceleratore (B, Fig. 19) funzioni bene.
Aprire il rubinetto del carburante portonandolo in pos. «ON»
(Fig. 17).
Mettere la leva (1) (Fig. 18) in posizione «CLOSE» (solo per
partenze a motore freddo).
Tenendo ben ferma la macchina, tirare lentamente
l'impugnatura avviamento fino a che si incontra resistenza, poi
tirare energicamente fino a che il motore inizia a dare qualche
scoppio.
A questo punto riportare la leva (1) (Fig. 18) in posizione
«OPEN» e dare alcuni strappi decisi fino ad ottenere
l'avviamento del motore.
Dopo l'avviamento, riscaldare il motore prima di aumentare il
numero di giri al valore richiesto: quando durante l'uso non è
più necessario un alto numero di giri, riportare la leva
acceleratore al minimo.
ATTENZIONE! - Quando il motore è già caldo, non
usare lo starter (1) (Fig. 18) per l’avviamento.
Con motore al minimo la punta non deve girare.
RODAGGIO MOTORE
Il motore raggiunge la sua massima potenza dopo 5÷8 ore di
lavoro.
Durante questo periodo di rodaggio non fare funzionare il
motore a vuoto al massimo numero di giri per evitare eccessive
sollecitazioni.
ATTENZIONE! - Durante il rodaggio non variare la
carburazione per ottenere un presunto incremento di
potenza; il motore potrebbe esserne danneggiato.
STARTING THE ENGINE
Put the ON/OFF switch in the I position (Only for models
equipped with such a device) (A, Fig. 20-21).
Make sure that the throttle lever (B, Fig. 19) works properly.
Open the fuel cock, turning it onto pos. “ON” (Fig. 17).
Put choke lever (1) (Fig. 18) on «CLOSE» position (Only for
cold engine).
Holding the unit firmly, pull the starter handle until you meet
resistance, then pull quickly with a short sharp stroke.
Repeat this until the engine fires.
Put then the choke lever (1) (Fig. 18) in «OPEN» position and
pull the starter handle again till the engine starts.
After starting, warm up the motor before increasing the rpms to
the required value. During use, when a high number of rpms is
no longer necessary, move the accelerator lever back to the
minimum.
WARNING! - Do not use the choke (1) (Fig. 18) when
starting a hot engine. When the engine is idling, the bit
should not turn.
BREAKING-IN THE ENGINE
The engine reaches the maximum power after 5÷8 hours of
activity.
During this period of breaking-in do not make use the engine at
wide open throttle without load, to avoid excessive functioning
stress.
WARNING! - During the breaking-in period do not vary
the carburetion to obtain a presumed power
increment; the engine can be damaged.
DEMARRAGE DU MOTEUR
Tournez l’interrupteur sur la position “I” (Seulement pour les
modeles qui ne sont fournis) (A, Fig. 20-21).
S’assurer que l’accélérateur (B, Fig. 19) fonctionne
correctement.
Ouvrez le robinet du carburant en le mettant su la position
«ON« (Fig. 17).
Positionner le levier (1) (Fig. 18) dans la position «CLOSE»
(seulement pour démarrage à froid).
Tenir fermement la pompe et tirer la corde du demarreur
jusqu’à ce que le moteur démarre.
Placer le levier du starter (1) (Fig. 18) dans la position
«OPEN» et, si nécessarire, actionnez à nouveau le lanceur,
et laissez chauffer le moteur avant de travailler.
Après le démarrage, faites chauffer le moteur avant
d’augmenter la quantité de tours jusqu’à la valeur requise;
lorsqu’un nombre élevé de tours n’est plus nécessaire
pendant l’usage, reportez le levier de l’accélérateur au
minimum.
ATTENTION ! - Lorsque le moteur est chaud
n’utilisez pas le starter (1) (Fig. 18) pour démarrer.
Quand le moteur est au ralenti le mèche ne doit
absolument pas tourner.
RODAGE MOTEUR
Le moteur atteint sa puissance maximale au bout de 5 à 8
heures de travail.
Au cours de cette période de rodage, ne faites pas tourner
le moteur à vide au régime maxi pour lui éviter excessif
efforts de fonctionnement.
ATTENTION! - Durant le rodage, ne modifiez pas la
carburation en vue d'augmenter la puissance; vous
risquez seulement d'endommager le moteur.
20
Impaginato 16-06-2006 15:50 Pagina 14

15
Deutsch Nederlands
ANLASSEN PUESTA EN MARCHA STARTEN
Español
ANLASSEN DES MOTORS
Ein/Aus-Schalter in “I” Stellung bringen (NurbeiModellen mit
dieser Vorrichtung) (A, Abb. 20-21).
Überprüfen Sie vor dem Betrieb, ob der Gashebel (B, Abb. 19)
einwandfrei funktioniert.
Den Hahn des Vergasers öffnen, indem er in die Position «ON»
(Abb. 17) gestellt wird.
Habel (1) (Abb. 18) auf Stellung «CLOSE» stelen. (Nur bei
kaltem Motor).
Die Maschine gut festhalten und den Startgriff langsam ziehen,
bis man auf Winderstand stößt. Dann energisch ziehen, bis der
Motor beginnt zu laufen.
Nun Habel (1) (Abb. 18) auf Stellung «OPEN» bringen und ein
paar Mal kräftig ziehen, bis der Motor sicher läuft.
Nach dem Anlassen den Motor warmlaufen lassen, bevor die
Drehzahl auf den gewünschten Bereich heraufgesetzt wird;
stellen Sie den Gaszug auf das Minimum, wenn eine hohe
Drehzahl während des Betriebs nicht mehr erforderlich ist.
ACHTUNG! - Bei warmem Motor soll zum Starten (1)
(Abb. 18) der Starterhebel nicht verwendet werden.
Bei Leerlaufdrehzahl, darf die Bohspitze drehen.
EINLAUFEN DES MOTORS
Der Motor erreicht seine volle Leistungskraft nach 5-8
Arbeitsstunden.
Lassen Sie den Motor während dieser Einlaufzeit nicht leer auf
Hochtouren laufen, um eine übermäßige Beanspruchung zu
vermeiden.
ACHTUNG! - Während der Einlaufzeit darf die
Vergasung nicht verstellt werden, um eine
vermeintliche Leistungssteigerung zu erzielen; der
Motor könnte dadurch beschädigt werden.
PUESTA EN MARCHA
Llevar el interuptor a la posición “I” (Solamente en los modelos
provistos de este utensilio) (A, Fig. 20-21).
Asegurese que la palanca del acelerado (B, Fig. 19) funciona
correctamente.
Abrir el grifo del carburante colocándolo en la posición “ON”
(Fig. 17).
Ponga el mando del starter (1) (Fig. 18) en posicion «CLOSE»
(solo para arranque a motor frio).
Sostenga firme la maquina, tire lentamente la empunadura
hasta que ud. encuentre resistencia, entonces tire
energicamente. Repita esta operacion hasta que el motor
arranque.
Entonces ponga el mando del starter (1) (Fig. 18) in posicion
«OPEN» y tire el mando del starter de nuevo para arrancar el
motor.
Después de la puesta en marcha, calentar el motor antes de
aumentar el número de revoluciones hasta el valor requerido;
cuando durante el uso ya no sea necesario un número de
revoluciones alto, volver a colocar la palanca del acelerador al
mínimo.
ATENCION! - Cuando el motor ya está caliente, no
emplee el cebador (1) (Fig. 18) para la puesta en
marcha. Con el motor en ralenti la broca no tiene que
girar nunca.
RODAJE DEL MOTOR
El motor alcanza su potencia máxima al cabo de 5-8 horas de
trabajo.
Durante este período de rodaje, no haga funcionar el motor sin
carga al régimen máximo para evitar un esfuerzo excesivo.
ATENCIÓN. Durante el rodaje, no modificar la
carburación con el propósito de aumentar la potencia,
el motor podría dañarse.
STARTEN VAN DE MOTOR
Zet de aan/uitschakelaar op “I” (alleen bij modellen die zijn
uitgerust met dit soort voorzieningen) (A, Fig. 20-21).
Zorg dat de geshendel (B, Fig. 19) goed kan functioneren.
De brandstofkraan openen en op stand «ON» (Fig. 17) zetten.
Zet de chokehendel (1) (Fig. 18) op «CLOSE» (enkel bij koude
motor).
Hou het toestel steving vast, trek aan de starterhendel tot u
weerstand voelt, trek dan met een korte ruk.
Herhaal dit tot de motor aanslaat.
Zet de chokehendel (1) (Fig. 18) op «OPEN» en trek aan de
starterhendel tot de motor aanslaat.
Na het starten de motor eerst warm laten lopen alvorens het
aantal toeren te verhogen tot de verlangde waarde; als tijdens
het gebruik geen hoog toerental meer nodig is, de
versnellingshendel tot het minimum terugbrengen.
LET OP! - Gebruik de starter niet voor het starten (1)
(Fig. 18) wanneer de motor al warm is. Met de motor
op de minimumstand moet de boor.
INLOPEN VAN DE MOTOR
De motor bereikt het maximale vermogen na 5÷8 bedrijfsuren.
Om overmatige belasting te vermijden mag de motor tijdens
deze inloopperiode niet onbelast worden gebruikt op het
maximale toerental.
LET OP! - Tijdens de inloopperiode mag de carburatie
niet worden veranderd om het vermogen te vergroten;
de motor zou hierdoor beschadigd kunnen raken.
21
Impaginato 16-06-2006 15:50 Pagina 15

16
Italiano Français
ADESCAMENTO - ARRESTO MOTORE PRIMING - STOPPING THE ENGINE AMORÇAGE - ARRET MOTEUR
English
25
26 27
ADESCAMENTO
- Piazzare la pompa il più vicino possibile all'acqua.
- Posizionare in modo corretto (vedi Fig. 25).
- Riempire completamente la pompa (Fig. 26-27).
- Nel caso delle pompe centrifughe non autoadescanti è
necessario inoltre riempire anche il tubo di aspirazione (A,
Fig. 26) facendo attenzione che non rimanga aria.
ATTENZIONE: Se per una pompa l’erogazione non è
immediata o richiede più di 4 minuti, la causa
probabile va ricercata nello riempimento non
completo del tubo di aspirazione o in una aspirazione
d’aria, riempire quindi completamente la pompa
attraverso il foro di caricamento (Fig. 26-27) o,
nell’altra ipotesi, controllare tutte le tenute e il
serraggio dei raccordi.
Il valore della portata (si regola da min. a max) agendo sul
comando acceleratore del carburatore (A, Fig. 19).
ARRESTO MOTORE
Portare la leva acceleratore al minimo ed attendere alcuni
secondi per permettere il raffreddamento del motore.
Chiudere il rubinetto del carburante, riportandolo in pos. «OFF»
(Fig. 17)
Spegnere il motore, riportando l'interruttore di massa (A) nella
posizione STOP (Fig. 28-29-30).
Dopo l'uso non dimenticare di vuotare l'acqua rimasta nella
pompa autoadescante (Fig. 31). Lavarla accuratamente se
usata con acqua salata o liquidi corrosivi.
CARBURATORE
Prima di effettuare la regolazione del carburatore, pulire il filtro
dell’aria e riscaldare il motore. Questo motore è progettato e
costruito in conformità all’applicazione delle direttive 97/68/EC
e 2002/88/EC.
ATTENZIONE! - Non manomettere il carburatore.
PRIMING
- Place the pump as close as possible to the water.
- Install the pump in the correct position (see figure 25).
- Fill the pump completely (Fig. 26-27).
- In the case of a non-self priming pump, the suction (A, Fig. 26)
hose should also be completely filled with water taking care
that no air remains inside it.
WARNING - Delivery of water should be immediate o
takes more 4 minutes for a pump. If delivery of water
fails to occur as explained above, check that all
gaskets and connections are tight so as no air leaking
is possible and that the pump body is filled with water
(Fig. 26-27). In the particular case of a pump, check
that the suction hose is also full of water and
connections are tight.
The flow rate value (from min. to max.) is adjusted with the
accelerator control of the carburettor (A, Fig. 19).
STOPPING THE ENGINE
Set the throttle lever to idle position and wait a few seconds to
let the engine cool off.
Close the fuel cock, turning it back onto pos. «OFF» (Fig. 17).
Turn off the engine, putting the ON/OFF switch (A) in the STOP
position (Fig. 28-29-30).
Do not forged to empty any water remained in the self-priming
pump (Fig. 31).
Wash the pump with fresh water if it has been used with sea
water or corrosive solutions.
CARBURETOR
Before adjusting the carburetor, clean the air filter and warm up
the engine. This engine is designed and manufactured in order
to comply with the applicable 97/68/EC and 2002/88/EC
Directive.
WARNING! - Don’t tamper the carburetor.
AMORÇAGE
- Placer la pompe le plus près possible de l’eau.
- Positionner de façon correcte (voir Fig. 25).
- Riemplir complètement la pompe (Fig. 26-27).
- Dans le seul cas des pompes centrifuges non autoamorçantes
il est en outre nécessaire de remplir le tuyau d’aspiration (A,
Fig. 26) en faisant attention qu’il n’y reste pas de l’air.
ATTENTION - Si une pompe ne distribue pas
immédiatement le liquide qu’elle contient ou nécessite
plus de 4 minutes pour le faire, le problème peut être
dû au tuyau d’aspiration mal rempli ou à uneentrée
d’air; remplir à fond la pompe à travers l’orificede
remplissage (Fig. 26-27) ou, dans l’autre cas, contrôler
tous les joints d’étanchéité et vérifier si les raccords
sont serrés correctement.
Le valeur du débit (de min. à max.) se règle en intervenant sur
la commande d’accélération du carburateur (A, Fig. 19).
ARRET DU MOTEUR
Portez le levier de l’accélérateur au régime du ralenti et
attendez quelques seconds afin que le moteur se refroidisse.
Fermez le robinet du carburant en le remettant sur la position
«OFF» (Fig. 17).
Arrêtez le moteur en replaçant l’interrupteur de masse (A) en
position STOP (Fig. 28-29-30).
Ne pas oublier de vider l’eau restée dans la pompe
autoamorçante (Fig. 31).
Laver la pompe soigneusement si elle a été usée avec de l’eau
de mer ou des liquides corrosifs.
CARBURATEUR
Avant d’effectuer le réglage du carburateur, nettoyez le filtre à
air et faites chauffer le moteur. Ce moteur est conçu et réalisé
conformément aux directives 97/68/EC et 2002/88/EC.
ATTENTION! – Ne pas modifier les caractéristiques du
carburateur.
Impaginato 16-06-2006 15:50 Pagina 16

17
Deutsch Nederlands
FÜLLEN - MOTOR ABSTELLEN MODO DE CEBAR - PARADA DEL MOTOR POMPEN - STOPPEN VAN DE MOTOR
Español
28
FÜLLEN
- Die Pumpe so nah wie möglich am Wasser aufstellen.
- Richting positionieren (Abb. 25).
- Die Pump ganz anfüllen (Abb. 26-27).
- Bei den nicht selbstansaugenden Kreiselpumpen muß auch
das Saugrohr gefüllt werden. Dabei ist darauf zu achten, daß
keine Luftblasen darin bleiben (A, Abb. 26).
ACHTUNG - Wenn an einer Pumpe nicht sofort
Flüssigkeit austritt oder die Abgabe länger als 4
Minuten braucht, ist die wahrscheinliche Ursache die
unvollständige Füllung des Saugrohrs oder
angesaugte Luft, füllen Sie die Pumpe daher über den
Füllstutzen vollständig (Abb.26-27) oder kontrollieren
Sie im anderen Fall sämtliche Dichtungen und den
Anzug der Anschlüsse.
Der Wert der Förderleistung (von min. bis max.) wird mit dem
Gashebel am Vergaser eingestellt (A, Abb. 19).
MOTOR ABSTELLEN
Den Gashebel auf Leerlauf bringen und einige Sekunden
warten, damit der Motor abkühlt.
Den Hahn des Vergasers schließen, indem er in die Position
«OFF» (Abb. 17) gestellt wird.
Den Motor abstellen, indem der Ein-/Aus-Schalter (A) in STOP
- Stellung gebracht wird (Abb. 28-29-30).
Nach der Benutzung der selbstansaugend Pumpe muß das
Wasser, das noch darin enthalten ist, unbedingt entieert
werden (Abb. 31).
Die Pumpe gründlich durchspülen, wenn salzhaltiges Wasser
oder korrosionsfähige Flüssigkeiten gepumpt worden sind.
VERGASER
Vor der Vergasereinstellung den Luftfilter reinigen und den
Motor warmlaufen lassen. Dieser Motor wurde in Konformität
mit den Vorschriften der Richtlinie 97/68/EG und 2002/88/EG
konzipiert und gebaut.
ACHTUNG! - Keine Änderungen am Vergaser
vornehmen.
MODO DE CEBAR
- Colocar la bomba lo màs cerca posible del agua.
- Ubicar en modo correcto (ver figura 25).
- Cargar completamente la bomba a travès del tapòn de carga
(Fig. 26-27).
- En el caso de la bomba centrìfuga no autocebante, es
necesario cargar tambièn el tubo de aspiraciòn (A, Fig. 26)
cuidando que no quede aire.
ATENCIÓN - Si la emisión de una bomba no es
inmediata o requiere más de 4 minutos, es probable
que no se haya llenado completamente el tubo de
aspiración, o que se haya aspirado aire. Llenar
totalmente la bomba por el orificio de carga (Fig.26-
27) o, en el segundo caso, comprobar la estanqueidad
y el apriete de los empalmes.
El valor del caudal (de min. a max.) se regula mediante el
mando acelerador del carburador (A, Fig. 19).
PARADA DEL MOTOR
Ponga la palanca del acelerador al minimo y espere algunos
minutos para que el motor se enfrie un poco.
Cerrar el grifo del carburante colocándolo en la posición «OFF»
(Fig. 17).
Apague el motor poniendo el interruptor de masa (A) en la
posición STOP (Fig. 28-29-30).
No ovidar vaciar el agua restante en la bomba autocebante
(Fig. 31).
Lavarla cuidadosamente si ha sido usada con agua salada o
liquidos corrosivos.
CARBURADOR
Antes de regular el carburador, limpiar el filtro del aire y
calentar el motor. Este motor cumple las directivas 97/68/EC y
2002/88/EC.
ATENCIÓN – No altere de ninguna manera el
carburador.
POMPEN
- Plat de pomp zo dicht mogelijk bij het water.
- Zet de pomp in de juite positie (Fig. 25).
- Vul de pomp volledig (Fig. 26-27).
- In het geval van niet zelfaanzuigende centrifugale pompen is
het bovendien noodzakelijk de opzuigbuis (A, Fig. 26) te zuigen
en er hierbij op te letten dat er geen lucht in de buis blijft.
LET OP - Als de afgifte bij een pomp niet onmiddellijk
of pas na meer dan 4 minuten plaatsvindt, moet de
oorzaak waarschijnlijk worden gezocht in het feit dat de
zuigslang niet helemaal gevuld is of dat er lucht wordt
aangezogen. Vul de pomp daarom volledig door de
vulopening (afb.26-27) of controleer anders alle
afdichtingen en of de verbindingsstukken goed zijn
aangehaald.
De waterverplaatsingswaarde (van min. tot max.) regelt men
door de versnellingsbediening van de carburator te verzetten (A,
Fig. 19).
STOPPEN VAN DE MOTOR
Laat de motor stationair lopen door gashendel los te laten. Laat
de motor even stationair lopen om deze enigszins af te laten
koelen.
De brandstofkraan dicht doen en op stand «OFF» (Fig. 17)
zetten.
Zet de motor uit door de aan/uit schakelaar (A) in de STOP
positie te zetten (Fig. 28-29-30).
Maak steeds de zelfaanzuigend pomp volledig leeg (Fig. 31).
Spoel de pomp met zuiver water als bij zeewater of bijtende
substanties gebruikt is.
CARBURATOR
Alvorens de carburator af te stellen het luchtfilter schoonmaken
en de motor op bedrijfstemperatuur brengen. Deze motor is
ontworpen en gebouwd in overeenstemming met de
voorschriften van de richtlijnen 97/68/EG en 2002/88/EG.
LET OP! – De carburateur mag niet onklaar gemaakt
worden.
29 30 31
Impaginato 16-06-2006 15:50 Pagina 17

18
Italiano Français
MANUTENZIONE - RIMESSAGGIO MAINTENANCE - STORAGE ENTRETIEN - REMISSAGE
English
33 34 35 36
MANUTENZIONE
ATTENZIONE - Durante le operazioni di manutenzione
indossare sempre i guanti protettivi. Non effettuare le
manutenzioni con motore caldo.
FILTRO ARIA
Ogni 8-10 ore di lavoro, togliere il coperchio (A, Fig. 33-34), pulire il
filtro (B) con benzina, asciugarlo e rimontarlo.
Ogni 8-10 ore di lavoro, togliere il coperchio (A, Fig. 35), e il filtro (B). Il
filtro (B) va pulito scuotendolo bene e con un pennello morbido. Un
filtro intasato causa un funzionamento irregolare del motore,
aumentandone il consumo e diminuendone la potenza.
FILTRO CARBURANTE
Verificare periodicamente le condizioni del filtro carburante (situato
sotto il raccordo del carburatore). Per effettuare la pulizia (ogni 50 ore)
(Fig. 36-37), svitare la vite (A), rimuovere il raccordo (B) ed estrarre il
filtro (C) facendo attenzione a non danneggiarlo. Pulire il filtro con
benzina, asciugarlo e rimontarlo. Un filtro sporco provoca difficoltà di
avviamento e diminuisce le prestazioni del motore.
CANDELA
Periodicamente si raccomanda la pulizia della candela e il controllo
della distanza degli elettrodi (Fig. 38).
Utilizzare candela Champion RCJ-7Y o di altra marca di grado termico
equivalente.
RIMESSAGGIO
- Seguire tutte le norme di manutenzione precedentemente descritte.
- Togliere il carburante dal serbatoio e rimontare il tappo.
- Togliere la candela, versare un po' d'olio nel cilindro (Fig. 39).
- Ruotare l'albero motore alcune volte tramite la funicella avviamento
per distribuire l'olio (Fig. 40). Rimontare la candela.
- Conservare in ambiente secco, possibilmente non a diretto contatto
con il suolo e lontano da fonti di calore.
ATTENZIONE: Tutte le operazioni di manutenzione non
riportate sul presente manuale devono essere effettuate da
un'officina autorizzata. Per garantire un costante e regolare
funzionamento della motopompa, ricordate che le eventuali
sostituzioni delle parti di ricambio dovranno essere effettuate
esclusivamente con RICAMBI ORIGINALI.
MAINTENANCE
WARNING - Always wear protective gloves during
maintenance operations. Do not carry out maintenance when
the engine is hot.
AIR FILTER
Every 8-10 working hours, remove the cover (A, Fig. 33-34), clean the
filter (B) with gasoline, dry and refit it. Every 8-10 hours, remove the
cover (A, Fig. 35) and the filter (B). The filter (B) should be cleaned by
shaking it well and with a soft brush. The engine runs irregularly if the
filter is clogged, with consequent higher consumption and lower
performance.
FUEL TANK
Check fuel filter periodically (to be found under the carburetor
connection). To clean it (every 50 hours) (Fig. 36-37), unloosen the
screw (A), remove the fitting (B), and take out the filter (C) taking care
not to damage it. Clean the filter with petrol, dry it and fit it back on. A
dirty filter can cause difficult starting and lower engine performance.
SPARK PLUG
Clean spark plug and check electrode distance periodically (Fig. 38).
Use Champion RCJ-7Y or of other brand with the same thermal grade.
STORAGE
- Follow all the maintenance regulations previously.
- Empty the fuel tank and put the cap back on.
- Remove the spark plug, pour a small amount of oil into the cylinder
(Fig. 39).
- Rotate the crankshaft several times using the starting rope in order to
distribute the oil (Fig. 40). Put the spark plug back in.
- Store the pump in a dry place, preferably not in direct contact with the
floor and away from heat sources.
ATTENTION: All maintenance operations not reported in this
manual must be carried out by an authorized Service Center.
To ensure steady and regular pump operation, remember that
parts must only be replaced with ORIGINAL SPARES.
ENTRETIEN
ATTENTION - Pendant les opérations d’entretien, portez
toujours des gants. Laissez retroidir le moteur avant
d’intevenir.
FILTRE A AIR
Toutes les 8-10 heures de travail, ôtez le couvercle (A, Fig. 33-34),
nettoyez le filtre (B) avec de l’essence, séchezle et remontez-le. Toutes
les 8-10 heures de travail, enlevez le couvercle (A, Fig. 35), et le filtre
(B). Le filtre (B) il suffit de bienle secouer et de le nettoyer avec un
pinceau souple. Un filtre obstrué provoque un fonctionnement irrérulier
du moteur qui en augmente la consommation et en diminue la
puissance.
FILTRE DU CARBURANT
Vèrifier régulièrement le conditions du filtre du carburant (situé sous le
raccord du carburateur). Pour en effectuer le nettoyage (toutes les 50
heures) (Fig. 36-37), devissez la vis (A), ôtez le raccord (B) et extrayez
le filtre (C) en ayant soin de ne pas l’abimer. Nettoyez le filtre avec de
l’essence, assuyez-le et remontez-le. Un filtre sale entraîne des
difficultés de démarrage et diminue les performances du moteur.
BOUGIE
Il est recommandé de nettoyer régulièrement la bougie et de contrôler
la distance entre les électrodes (Fig. 38).
Utiliser une bougie Champion RCJ-7Y ou autre marque avec degré
thermique équivalent.
REMISSAGE
- Suivez toutes les règles d’entretien décrites ci-dessus.
- Otez le carburant du réservoir et remontez le bouchon.
- Otez la bougie, versez un peu d’huile dans le cylindre (Fig. 39).
Tournez plusierus fois l’arbre moteur à l’aide de la corde de
démarrage pour distribuer l’huile (Fig. 40). Remontez la bougie.
- Conservez l’appareil dans un endroit sec, si possible soulevé du sol
et loin des sources de chaleur.
ATTENTION: Toutes le opérations d’entretien qui ne figurent
pas dans ce manuel doivent être effectuées dans un atelier
autorisé.
Pour garantir un fonctionnement constant er régulier de la
motopompe, ne pas oublier que dans le cas de remplacement de
pièces il faut utiliser exclusivement des PIECES D’ORIGINE.
Impaginato 16-06-2006 15:50 Pagina 18

19
38 39 40 41
Deutsch Nederlands
INSTANDHALTUNG - LANGERUNG MANTENIMIENTO - ALMACENAJE ONDERHOUD - OPSLAG
Español
INSTANDHALTUNG
ACHTUNG - Tragen Sie bei den Wartungsarbeiten immer die
Schutzhandschube. Warten Sie das Gerät nie solange der
Motor noch heiß ist.
LUFTFILTER
Jeweils nach 8-10 Arbeitsstunden den Deckel (A, Abb. 33-34)
abnehmen, den Filter (B) mit Benzin reinigen, abtrocknen und wieder
aufsetzen. Alle 8-10 Betriebsstunden den Deckel (A, Abb. 35) und den
Filter (B) abnehmen. Der Filter (B) wird hingegen mit einem weichen
Pinsel und durch Schütteln gereinigt. Ein verschrnutzter Luftifilter
bewirkt unregelmaßiges Laufen des Motors, einen höheren Verbrauch
und eine geringere Leistung.
KRAFTSTOFFILTER
Der Kraftstoffilter muß regelmäßig überprüft werden (unter dem
Vergaseranschluß). Zur Reinigung (alle 50 Studen) (Abb. 36-37) die
Schraube (A) lösen, den Anschluß (B) entfernen, den Filter (C)
abnehmen und dabei darauf achten, daß er nicht beschädigt wird. Den
Filter mit Benzin reinigen, trocknen und wieder montieren. Ein
verschmutzter Filter bewirkt startschwierigkeiten und leistungs verlust.
ZÜNDKERZE
Die Zündkerze muß regelmäßig gereinigt und der Zündabstand der
Elektroden überprüft werden (Abb. 38).
Eine Zündkerze Champion RCJ-7Y bzw. einer anderen Marke mit
gleichwertigem Wärmewert verwenden.
LANGERUNG
- Alle vorangehenden Wartungsvorschriften befolgen.
- Den Kraftstofftank entleeren und den Deckel wieder aufschrauben.
- Die Zündkerze abnehmen un ein wenig Öl in den Zylinder geben
(Abb. 39).
- Um das Öl zu verteilen, einige Male den Starter ziehen (Abb. 40).
Zündkerze aindrehen.
- Das Gerät trocken lagern. Nach Möglichkeit nicht am Boden
aurliegend und fern von offenem Feuer.
ACHTUNG: Alle Wartungsarbeiten, die nicht in dieser
Bedienungsanleitung aufgeführt sind, müssen bei einer
Vertragswerkstatt durchgeführt werden. Zum Gewährleistung
eines konstanten und ordnungsgemässen Betriebs dürfen nur
ORIGINALERSATZTEILE verwendet werden.
MANTENIMIENTO
ATENCION - Durante las operaciones de manutención llevar
siempre los guantes de seguridad. No efectuar la
manutención con el motor caliente.
FILTRO DE AIRE
Coda 8-10 horas de trabajo,quite la tapa (A, Fig. 33-34), limpie el filtro
(B) con gasolina, séquelo y vuelva a montarlo. Cada 8-10 horas de
trabajo, quitar la tapa (A, Fig. 35) y el filtro (B). El filtro (B) Debe
limpiarse sacudiéndolo bien y con un pincel blando. Un filtro obturado
produce un funcionamiento irregular del motor, aumentando el
consumo y disminuyendo su potencia.
FILTRO DEL COMBUSTIBLE
Controle periodicamente el estado del filtro del combustible (situado
bajo el raccord del carburador). Para efectuar la limpieza (cada 50
horas) (Fig. 36-37), desatornillar el tornillo (A), quitar la junta (B) y
extraer el filtro (C) prestando mucha atención para no provocar dafios.
Limpiar el filtro con gasolina, secarlo y volverìo a montar. Un filtro sucio
crea dificultades en el arranque y disminuye las prestaciones del
motor.
BUJA
Periódicamente se debe de efectuar la limpieza de la candela y el
control de la distancia de los electrodos (Fig. 38).
Utilizar bujía Champion RCJ-7Y o de otra marca con grado térmico
equivalente.
ALMACENAJE
- Cumpla con todas las normas de mantenimiento antes descriptas.
- Quite el combustible del depósito y coloque el tapón.
- Quite la buija, vierta un poco de aceite en el cilindro (Fig. 39).
- Gire el cigueñal del motor algunas vueltas por medio de la cuerda de
arranque para distribuir el aceite (Fig. 40). Coloque la buija.
- Conservelo en un ambiente fresco, lejos de fuentes de calor y
posiblemente que no se encuentre en contacto directo con el suelo.
ATENCION: Todas las operaciones de mantenimiento no
indicadas en el presente manual deben ser efectuadas en un
taller autorizado. Para garantizar un constante y regular
funcionamiento de la motobomba, recuerde que las eventuales
sustituciones de sus piezas deben ser efectuadas exclusivamente
con REPUESTOS ORIGINALES.
ONDERHOUD
LET OP - Bij het uitvoeren van onderhoud-swerkzaamheden
altijd werkhandschoenen dragen. Geen onderhoud uitvoeren op
een warme motor.
FILTER
Elke 8-10 werkuren dient u de kap te verwijderen (A, Fig. 33-34). Reinig
het filter (B) dan met benzine, droog en herplaats het. Ledere 8-10
bedrijfsuren het deksel (A, Fig. 35) en het filter (B), verwijderen. Het filter
(B) schoongemaakt moet worden door het goed te schudden en het met
een zachte kwast af te nemen. De motor loopt onregelmatig als het filter is
vervuild. De machine verbruikt dan meer brandstof en levert minder
vermogen.
BENZINEFILTER
Controleer het benzinefilter regelmatig op vervuiling (dit bevindt zich onder
het aansluitetuk van de carburator). Om dit echoon te maken (iedere 50
uren) (Fig. 36-37) de schroef (A) losschroeven, het verbindingsstuk (B)
weg nemen en het filter (C) naar buiten halen en erop letten het niet te
beschadigen. Het filter met benzine schoonmaken, droog maken en weer
monteren. Een vuil filter veroorzaakt slecht starten en minder vermogen.
BOUGIE
Reining de bougie indien nodig (Fig. 38) en controleer de elektrode-
afstand.
Gebruik een Champion RCJ-7Y bougie of een bougie van een ander merk
met een equivalent thermisch bereik.
OPSLAG
- Volg alle onderhoudswerkzaamheden op zoals hiervoor vermeld bij
Onderhoud.
- Maak de brandstoftank leeg en draai de dop er weer op.
- Verwijder de bougie en laat een klein beetje olie in de cilinder lopen
(Fig. 39).
- Laat de zuiger enkele maten op en neer gaan m.b.v. de repeteerstarter
om de olie te verdelen (Fig. 40).
Plaats de bougie weer terug.
- Berg de pomp op op een droge plaats, vrij van de vloer en niet in de
buurt van hitterbroonnen.
LET OP: Alle niet in deze handleiding beschreven
onderhoudshandelingen moeten door een geautoriseerde
werkplaats uitgevoerd worden. Om een constant en regelmatig
functioneren van de pomp te garanderen, denk eraan, dat eventuele
vervanging van onderdelen alleen moet gebeuren met ORIGINELE
RESERVE-ONDERDELEN.
Impaginato 16-06-2006 15:50 Pagina 19

SI / YES
1.1
20
AUTOADESCANTE / SELF-PRIMING
CENTRIFUGA
/ MANUAL-
PRIMING
0.7 1.1 2.7
25.4 (1”)
150
35
7
3.7
38 (1” 1/2)
270
30
7.3
8
50.8 (2”)
580
40
7.5
14.2
38 (1” 1/2)
320
30
7.3
6.5
47.7
30.5 98.2 47.7
1.5
12.5 1.5
TIPO / TYPE
MOTORE / ENGINE
CILINDRATA / DISPLACEMENT
POTENZA / POWER
ACCENSIONE / IGNITION
CARBURATORE / CARBURETOR
CAPACITÀ SERBATOIO / FUEL TANK CAPACITY
SISTEMA ANTIVIBRANTE / ANTIBRATION SYSTEM
DIAMETRO ASPIRAZIONE E MANDATA /
SUCTION AND DISCHARGE DIAMETER
PORTATA MASSIMA / MAX. DISCHARGE CAPACITY
PREVALENZA MASSIMA / MAX. HEAD
ALTEZZA MASSIMA DI ASPIRAZIONE /
MAX. SUCTION HEAD
PESO GRUPPO / WEIGHT OF PUMP SET
cm3
kW
l
mm (in)
l/min
m
m
kg
PA 1030 PA 1050 PA 1100 PC 1050
2 TEMPI EMAK / 2 STROKE EMAK
ELECTRONICA / ELECTRONIC
A VASCHETTA / FLOAT TYPE
DATI TECNICI
TECHNICAL DATA
ITALIANO / ENGLISH
OUI / JA
1.1
AUTOAMORÇANTE / SELBSTANSAUGEND
AMORÇAGE
MANUEL /
ZENTRIFUGAL
0.7 1.1 2.7
25.4 (1”)
150
35
7
3.7
38 (1” 1/2)
270
30
7.3
8
50.8 (2”)
580
40
7.5
14.2
38 (1” 1/2)
320
30
7.3
6.5
47.7
30.5 98.2 47.7
1.5
12.5 1.5
TYPE / TYP
MOTEUR / MOTOR
CYLINDRÉE / HUBRAUM
PUISSANCE / LEISTUNG
ALLUMAGE / ZÜNDUNG
CARBURATEUR / VERGASER
CAPACITÉ RÉSERVOIRE / KRAFTSTOFFTANK-INHALT
SYSTÉME ANTIVIBRATION / SCHWINGUNGSDÄMPFUNG
DIAMÈTRE ORIFICES ASPIR. ET REFOULEMENT /
Ø ÖFFNUNGEN
DÉBIT MAXIMUM / MAX. FÖRDERMENGE
HAUTEUR MANOMÉTRICHE TOTALE / MAX. FÖRDER
HAUTEUR MAXIMA D’ASPIRATION /
MAX. SAUGHÖHE
POIDS DU GROUPE / GESAMTGEWICHT
cm3
kW
l
mm (in)
l/min
m
m
kg
PA 1030 PA 1050 PA 1100 PC 1050
CYCLE 2 TEMPS EMAK / EMAK 2-TAKTMOTOR
ÉLECTRONIQUE / ELEKTRONISCH
À CURVE / MIT SCHWIMMER
DONNEES TECHNIQUES
TECHNISCHE ANGABEN
PA 1050
PA 1030
FRANÇAIS / DEUTSCH
Impaginato 16-06-2006 15:50 Pagina 20
Other manuals for PA 1030
1
This manual suits for next models
3
Table of contents
Other Efco Water Pump manuals