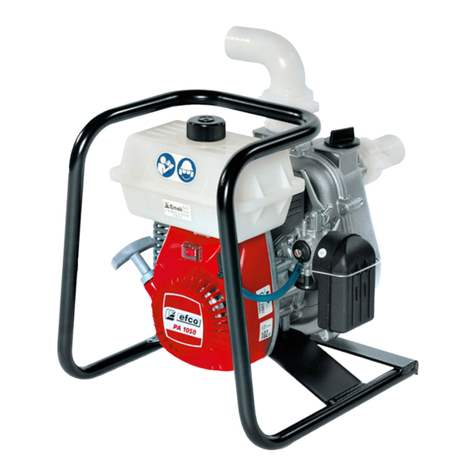
Efco MP 3000 Assembly instructions

OPERATOR’S INSTRUCTION MANUAL
MANUEL D’UTILISATION ET D’ENTRETIEN
MANUAL DE INSTRUCCIONES
en
fr
es
MP 3000
(1.86 cu.in)

en
2
To correctly use the water pump and prevent accidents, do not start work without having
first carefully read this manual. You will find explanations concerning the operation of
the various parts plus instructions for necessary checks and relative maintenance.
Note: Illustrations and specifications in this manual may vary according
to Country requirements and are subject to change without notice by the
manufacturer.
THE OPERATOR’S MANUAL
Your operator’s manual is for your protection. READ IT. Keep it in a safe place for
reference. Know what you are doing before you begin assembly of the unit. Proper
preparation and upkeep go hand-in-hand with satisfactory performance of the water
pump and safety.
Contact your dealer or the distributor for your area if you do not understand any of the
instructions in this manual.
In addition to the operating instructions, this manual contain paragraphs that require
your special attention.
Such paragraphs are marked with the symbols described below:
Warning: where there is a risk of an accident or personal injury or serious damage to
property.
Caution: where there is a risk of damaging the machine or its individual components.
WARNING-Toensuresafeandcorrectoperationofthewaterpump
this operator's manual should always be kept with or near the
machine. Do not lend or rent your water pump without the
operator's instruction manual.
WARNING: Allow only persons who understand this manual to
operate your water pump.
INTRODUCTION

en
3
PRODUCT IDENTIFICATION
Water pump Components. . . . . . . . . . . . . . . . . . . . . . . . . . . . . . . . . . . . . . . . . . . . . . . . . . . . . . . 4
SAFETY
Understanding Safety Labels . . . . . . . . . . . . . . . . . . . . . . . . . . . . . . . . . . . . . . . . . . . . . . . . . . . . 5
State and Local Requirements . . . . . . . . . . . . . . . . . . . . . . . . . . . . . . . . . . . . . . . . . . . . . . . . . . . 5
SAFETY RULES
Basic Safety Precautions . . . . . . . . . . . . . . . . . . . . . . . . . . . . . . . . . . . . . . . . . . . . . . . . . . . . . . . 6
Fuel Handling . . . . . . . . . . . . . . . . . . . . . . . . . . . . . . . . . . . . . . . . . . . . . . . . . . . . . . . . . . . . . . . . 7
Operation and Safety . . . . . . . . . . . . . . . . . . . . . . . . . . . . . . . . . . . . . . . . . . . . . . . . . . . . . . . . . . 7
Maintenance Precautions . . . . . . . . . . . . . . . . . . . . . . . . . . . . . . . . . . . . . . . . . . . . . . . . . . . . . . . 8
BEFORE USE
Before use. . . . . . . . . . . . . . . . . . . . . . . . . . . . . . . . . . . . . . . . . . . . . . . . . . . . . . . . . . . . . . . . . . . 9
OPERATION
Fueling. . . . . . . . . . . . . . . . . . . . . . . . . . . . . . . . . . . . . . . . . . . . . . . . . . . . . . . . . . . . . . . . . . . . . . 10
Preparation for Working . . . . . . . . . . . . . . . . . . . . . . . . . . . . . . . . . . . . . . . . . . . . . . . . . . . . . . . . 11
Starting the Engine . . . . . . . . . . . . . . . . . . . . . . . . . . . . . . . . . . . . . . . . . . . . . . . . . . . . . . . . . . . . 13
Breaking-in the Engine . . . . . . . . . . . . . . . . . . . . . . . . . . . . . . . . . . . . . . . . . . . . . . . . . . . . . . . . . 14
Stopping the Engine . . . . . . . . . . . . . . . . . . . . . . . . . . . . . . . . . . . . . . . . . . . . . . . . . . . . . . . . . . . 14
MAINTENANCE
Maintenance Chart . . . . . . . . . . . . . . . . . . . . . . . . . . . . . . . . . . . . . . . . . . . . . . . . . . . . . . . . . . . . 15
Idle Speed Adjustment . . . . . . . . . . . . . . . . . . . . . . . . . . . . . . . . . . . . . . . . . . . . . . . . . . . . . . . . . 16
Fuel Filter. . . . . . . . . . . . . . . . . . . . . . . . . . . . . . . . . . . . . . . . . . . . . . . . . . . . . . . . . . . . . . . . . . . . 16
Air Filter. . . . . . . . . . . . . . . . . . . . . . . . . . . . . . . . . . . . . . . . . . . . . . . . . . . . . . . . . . . . . . . . . . . . . 16
Starter Unit . . . . . . . . . . . . . . . . . . . . . . . . . . . . . . . . . . . . . . . . . . . . . . . . . . . . . . . . . . . . . . . . . . 16
Engine . . . . . . . . . . . . . . . . . . . . . . . . . . . . . . . . . . . . . . . . . . . . . . . . . . . . . . . . . . . . . . . . . . . . . . 16
Spark Plug. . . . . . . . . . . . . . . . . . . . . . . . . . . . . . . . . . . . . . . . . . . . . . . . . . . . . . . . . . . . . . . . . . . 16
Spark Arresting Muffler . . . . . . . . . . . . . . . . . . . . . . . . . . . . . . . . . . . . . . . . . . . . . . . . . . . . . . . . . 17
TROUBLE SHOOTING
Using Trouble shooting Chart . . . . . . . . . . . . . . . . . . . . . . . . . . . . . . . . . . . . . . . . . . . . . . . . . . . . 18
STORAGE
Storing. . . . . . . . . . . . . . . . . . . . . . . . . . . . . . . . . . . . . . . . . . . . . . . . . . . . . . . . . . . . . . . . . . . . . . 19
TECHNICAL DATA
MP 3000 . . . . . . . . . . . . . . . . . . . . . . . . . . . . . . . . . . . . . . . . . . . . . . . . . . . . . . . . . . . . . . . . . . . . 20
TABLE OF CONTENTS

en
4
Water pump components
PRODUCT IDENTIFICATION
1 - On/Off switch
2 - Muffler guard
3 - Air filter
4 - Choke lever
5 - Throttle trigger
6 - Fuel tank
7 - Fuel tank cap
8 - Primer bulb
9 - Starting handle
10 - Pump load plug
11 - Pump drain plug
12 - Intake union
13 - Delivery union
14 - Carrying handle
15 - Combination Wrench

en
5
SAFETY
- This symbol indicates Warning, and
Caution.
- Your manual contains special
messages to bring attention to
potential safety concerns, machine
damage as well as helpful operating
and servicing information. PLEASE
READ ALL THE INFORMATION
CAREFULLY TO AVOID INJURY
AND MACHINE DAMAGE.
- Wear eye, hearing and head
protection when operating this
equipment.
- WARNING: the surface can be hot!.
Understanding Safety Labels
State and Local Requirements
This engine is NOT equipped with a Spark Arrester System complying with the requirements of SAE
Recommended Practice J335 and California Codes 4442 and 4443. All national forest land and land
managed by the states of California, Maine, Washington, Idaho, Minnesota, New Jersey and
Oregon require internal combustion engines to be equipped with a spark arrester screen by law.
Other states and federal agencies are enacting similar regulations.
Operating this engine in a state or locale where such regulations apply, could result in a violation of the
law.
Note: When using this machine for logging purposes, refer to Code of Federal Regulations, Parts
1910 and 1928.
WARNING: The ignition system of your unit produces an electromagnetic field of a very
low intensity. This field may interfere with some pacemakers. To reduce the risk of
serious or fatal injury, persons with pacemaker should consult their physician and the
pacemaker manufacturer before operating this tool.
WARNING: Muffler surfaces are very hot during and after operation of the water pump,
keep all body parts away from the muffler. Serious burns may occur if contact is made
with the muffler.
WARNING: The engine exhaust from this product contains chemicals known to the State
of California to cause cancer, birth defects or other reproductive harm. Operate your
water pump outdoors only in a well ventilated area.

en
6
SAFETY RULES
1
Basic Safety Precautions
• Read this manual carefully until you completely understand
and can follow all safety rules, precautions, and operating
instructions before attempting to use the unit.
• Restrict the use of your water pump to adult users who
understand and can follow safety rules, precautions, and
operating instructions found in this manual. Minors should
never be allowed to use a water pump.
• Do not handle or operate a water pump when you are fatigued,
ill, or upset, or if you have taken alcohol, drugs, or medication.
You must be in good physical condition and mentally alert
(Fig. 1).
• Keep children, bystanders, and animals a minimum of 35 feet
(10 meters) away from the work area. Do not allow other
people or animals to be near the water pump when starting or
operating the water pump (Fig. 2).
• While working with the water pump, always use safety
protective approved clothing. The use of protective clothing
does not eliminate injury risks, but reduces the injury effects
in case of accident. Consult your trusted supplier to choose
equipment in compliance with legislation. The clothing must
be proper and not an obstacle. Wear adherent protective
clothing. Do not wear clothes, scarves, ties or bracelets
that get stuck in wood or twigs. Tie up and protect long hair
(example with foulards, cap, helmets, etc.). Wear safety boots
having skid-proof sole and anti-piercing insert (Fig.3). Use
protections against noises: for example noise reduction
ear guards (Fig.4) or earplugs. The use of protections for the
ear is very important, because the perception of danger audio
signals (screaming, alarms, etc.) is limited. Always remove
your hearing protection as soon as the engine stop. Wear
gloves (Fig.4) that permit the maximum absorption of
vibrations.
• Only loan your water pump to expert users who are completely
familiar with water pump operation and correct use. Give other
users the manual with operating instructions, which they have
to read before using the water pump.
• Check the water pump each day to ensure that each device,
whether for safety or otherwise, is functional.
• Never use a damaged, modified, or improperly repaired or
assembled water pump. Do not remove, damage or deactivate
any of the safety devices.
• Carefully plan your pumping operation in advance. Do not start
pumping until you have a clear work area, secure footing.
• All water pump service, other than the operations shown in
the present manual, have to be performed by competent
personnel.
• It is unadvisable to hitch tools or applications to the P.t.o. that
are not specified by the manufacturer.
2
3
≥ 35 ft
4

en
7
Fuel Handling
WARNING: Gasoline is an extremely flammable fuel.
Use extreme caution when handling gasoline or fuel
mix. Do not smoke or bring any fire or flame near the
fuel or the water pump (Fig. 6).
•To reduce the risk of fire and burn injury, handle fuel with
care. It is highly flammable.
• Mix and store fuel in a container approved for gasoline (Fig. 7).
• Mix fuel outdoors where there are no sparks or flames.
• Select bare ground, stop engine, and allow to cool before
refueling.
• Loosen fuel cap slowly to release pressure and to keep fuel
from escaping around the cap.
• Tighten fuel cap securely after refueling. Unit vibration can
cause an improperly tightened fuel cap to loosen or come off
and spill quantities of fuel.
• Wipe spilled fuel from the unit. Move 10 feet (3 m) away from
refueling site before starting engine (Fig. 8).
• Never attempt to burn off spilled fuel under any circumstances.
• Do not smoke while handling fuel or while operating the water
pump.
• Store fuel in a cool, dry, well ventilated place.
• Never place the water pump in a combustible area such as dry
leaves, straw, paper, etc.
• Store the unit and fuel in an area where fuel vapors cannot
reach sparks or open flames from water heaters, electric
motors or switches, furnaces, etc.
• Never take the cap off the tank when the engine is running.
• Never use fuel for cleaning operations.
• Take care not to get fuel on your clothing.
Operation and Safety
• Keep all parts of your body away from the water pump when
the engine is running.
• Always carry the water pump with the engine stopped. When
transporting in a vehicle properly secure your water pump
to prevent turnover, fuel spillage and damage to the water
pump.
• Only use the water pump in well-ventilated places, do not
operate the water pump in explosive or flammable atmospheres
or in closed environments (Fig. 9).
Warning: Beware of carbon monoxide poisoning.
• Always work from a firm-footed and safe position.
• Do not work near electric cables.
• Keep the handle dry, clean, and free of oil or fuel mixture.
• Place the machine in a stable position (Fig.10).
• Keep this manual on hand and consult it before each use of
the tool.
• All labels with health hazards must be kept in good conditions.
In case of damage or deterioration, immediately substitute
them (see pag.5).
• Never start the machine without rotor. It will cause serious
demages to the engine parts as well as the withdrawal of the
guarantee.
• Do not fit the impeller or pump casing to other engines or
transmissions.
• Do not utilize the machine for uses different from the ones
specified in the manual (see pag. 11).
SAFETY RULES
6
7
8
9
10
≥ 10 ft

en
8
SAFETY RULES
Maintenance Precaution
WARNING: Never operate a water pump that is damaged, improperly adjusted, or is not
completely and securely assembled.
WARNING: All water pump service, other than items in the Operator's Manual maintenance
instructions, have to be performed by competent water pump service personnel. (If improper
tools are used to remove the flywheel, or if an improper tool is used to hold the flywheel,
structural damage to the flywheel could occur which could subsequently cause the flywheel
to burst and serious injury could result.)
WARNING:
Never modify your water pump in any way.
WARNING: Use only accessories and replacement parts recommended.
• Never attempt to service the water pump while the engine is running.
• Never use fuel for cleaning operations.
• Keep the water pump in a dry place, off the ground and the tanks empty.
• If your water pump is no longer usable, dispose of it properly without damaging the environment by
handing it in to your local Dealer who will arrange for its correct disposal.
• Replace immediately any safety device when damaged or broken.
WARNING: The muffler and other parts of the engine (e.g. fins of the cylinder, spark
plug) become hot during operation and remain hot for a while after stopping the engine.
To reduce risk of burns do not touch the muffler and other parts while they are hot.

en
9
BEFORE USE
Before Use
Ensure that all fittings are tighten and that their gaskets are in
place.
Connect the suction hose and the delivery hose.
Connect the hoses to the fittings using the hose bands
(Fig. 11).
WARNING - Do not replace the genuine fittings
(supplied) with others of different material in
order to avoid damaging the pump casing.
Suction hose
It should be of the non-colapsible type (such as spiral PVC)
(B, Fig. 12).
It should be securely fitted with strainer provided, by means
of a hose band (C, Fig. 12). To prevent debris from entering
the pump body, and causing possible damage to the impeller.
PRIMING
- Place the pump as close as possible to the water.
- Install the pump in the correct position (see figure 15).
- Fill the pump completely (Fig. 13).
WARNING - Delivery of water should be
immediate o takes more 4 minutes for a pump. If
delivery of water fails to occur as explained
above, check that all gaskets and connections
are tight so as no air leaking is possible and that
the pump body is filled with water (Fig. 13). In the
particular case of a pump, check that the suction
hose is also full of water and connections are
tight.
The flow rate value (from min. to max.) is adjusted with the
accelerator control of the carburettor (B, Fig. 14).
Never start the machine without priming water in the
pump. It will cause serious damages to the engine parts as
well as the withdrawal of the guarantee.
CAUTION – Do not exceed the priming depth
indicated in the table on page 20.
11
13
14
15
12

en
10
OPERATION
Fueling (Do Not Smoke!) (Fig. 18)
This product is powered by a 2-cycle engine and requires
pre-mixing gasoline and 2-cycle oil. Pre-mix unleaded gasoline
and 2-cycle engine oil in a clean container approved for gasoline
(Fig. 16).
RECOMMENDED FUEL: THIS ENGINE IS CERTIFIED TO
OPERATE ON UNLEADED GASOLINE INTENDED FOR
AUTOMOTIVE USE WITH AN OCTANE RATING OF 89 ([R + M] / 2)
OR HIGHER (Fig. 17).
Mix 2-Cycle Engine Oil with gasoline according to the instructions
on the package.
We strongly recommend the use of 2% (1:50) Efco Two Cycle
Engine Oil, which is specifically formulated for all Efco air-cooled
two-stroke engines.
The correct oil / fuel proportions shown in the table below
are suitable when using the Efco Two Cycle Engine Oil or an
equivalent high-quality engine oil (JASO specification FD or ISO
specification L-EGD).
When oil specifications are NOT equivalent or unknown use 4%
(1:25) oil / fuel mixing ratio.
CAUTION: DO NOT USE AUTOMOTIVE OIL OR
2-CYCLE OUTBOARD OIL.
CAUTION: Never use a fuel with an alcohol percentage
higher than 10%; gasohol up to 10% alcohol or E10
fuel are acceptable.
When using an Oxygenated Gasoline a good practice of Fuel
Management is necessary.
Gasoline Oxygenated with alcohol readily takes/up water when it
is present; the water may be condensed out of humid air or be a
contaminant in the fuel system, including tank.
CAUTION:
- Match your fuel purchases to your consumption;
don’t buy more than you will use in one or two
months;
- Store gasoline in a tightly-closed container in a
cool, dry place.
The use of Oxygenated Gasoline may cause the occurrence of
vapor-lock easier.
NOTE: 2-Cycle Engine Oil contains a fuel stabilizer and will stay
fresh up to 30 days. DO NOT mix quantities larger than usable
in a 30 day period. A 2-cycle oil containing a fuel stabilizer is
recommended.
Fuel Mixture
2-Cycle Engine Oil (25:1) 4%
Gasoline Oil
1 Gallon (US) . . . . . . . . . . . . . . . . . . . . . . . . . . . 5.2 oz.
1 Liter . . . . . . . . . . . . . . . . . . . . . . . . . . . . . . . . . 40 cc (40 ml)
16
17
18

en
11
OPERATION
High Quality 2-Cycle Engine Oil (50:1) 2%
Gasoline Oil
1 Gallon (US) . . . . . . . . . . . . . . . . . . . . . . . . . . . 2.6 oz.
1 Liter . . . . . . . . . . . . . . . . . . . . . . . . . . . . . . . . . 20 cc (20 ml)
Filling the Tank
WARNING: Follow safety instruction for fuel handling.
Always shut off engine before fueling. Never add fuel
to a machine with a running or hot engine. Move at
least 10 feet (3 m) from refueling site before starting
engine (Fig. 19). DO NOT SMOKE!
1. Clean surface around fuel cap to prevent contamination.
2. Loosen fuel cap slowly.
3. Carefully pour fuel mixture into the tank. Avoid spillage.
4. Prior to replacing the fuel cap, clean and inspect the gasket.
5. Immediately replace fuel cap and hand tighten. Wipe up any
fuel spillage.
NOTE: It is normal for smoke to be emitted from a new
engine during and after first use.
WARNING: Check for fuel leaks, if any are found,
correct before use. Contact a Servicing Dealer if
necessary.
Preparation for Working
1. Operate the water pump only at reasonable hours, i.e. not
early in the morning or late at night when people might be
disturbed. Comply with times listed in local ordinances.
2. Check the condition of the water pump before operation,
especially the muffler, air intake and air filter.
Rules of Use
Water pumps are designed and built solely to pump water
and inert liquids at ambient temperature.
MACHINE USE IS HIGHLY PROHIBITED TO PEOPLE UNDER
THE AGE OF 18.
WARNING - Keep a constant watch on conditions
in the area being treated: do not direct the jet at
people or animals. Stop the machine immediately
if anyone approaches.
Precautions for the Work Area
- Do not work near electrical cables or buildings.
- Work only in conditions offering sufficient visibility and light
to see clearly.
- Be particularly cautious and alert when wearing ear
protectors, as these can restrict your ability to hear sounds
indicating danger (shouts, signals, warnings, etc.)
≥ 10 ft
19

en
12
OPERATION
- Be extremely careful when working on slopes or uneven
surfaces.
Prohibited Use
Use of this machine is strictly prohibited with these products:
- Paints of any kind or type
- Paint solvents or diluents of any kind or type
- Fuels or lubricants of any kind or type
- GPL or gases of any kind or type
- Inflammable liquids of any kind or type
- Liquids containing grains or consistent solids
- Liquids food both animal and uman
- Mixture of various non-compatible chemical products
- Liquids with temperatures higher than 40°C
- Products that do not pertain to the specific use of the
machine.
- Liquids containing weed-killer and pesticides.
Water pumps are not intended for use as a fire extinguishing
device or sprinkler system.
Do not pump liquids into containers which could explode due
to excessive pressure.
Rules of Courtesy
- Observe local bylaws and regulations regarding the times
when mistblowers can be used. Do not operate the machine
in early morning or late afternoon and evening.
- Use the lowest throttle setting possible for the job in hand.
Precautions Against Fire
Do not approach the water pump with fire or heat sources.

en
13
OPERATION
Starting The Engine
Fill the carburettor by pushing primer bulb (A, Fig.20). Make sure
that the throttle (B, Fig.22) works properly, rotating between MIN
and MAX. Put the ON/OFF switch in the MIN position (B, Fig.21).
Put choke lever (C, Fig.20) on CLOSE position (only for cold
engine). Holding the unit firmly, pull the starter handle until you
meet resistance, then pull quickly with a short sharp stroke.
Repeat this until the engine fires. Put then the choke lever (C,
Fig.23) in OPEN position and pull the starter handle again till the
engine starts. After starting, warm up the motor before increasing
the RPM to the required value. During use, when a high number
of RPM is no longer necessary, move the accelerator (B, Fig.21)
to the minimum (MIN).
WARNING! - Do not use the choke (C, Fig. 20) when
starting a hot engine.
NOTE - STARTING WARM ENGINE:
Follow above starting instructions, but do not use the Close
Choke position for start up again. To set fast idle for warm
engine starting, pull choke out completely and push back in
to the original Open Choke Position.
WARNING: Weather conditions and altitude may
affect carburetion. Do not allow bystanders close to
the water pump while adjusting the carburetor.
20
21
22
23

en
14
Breaking-in the Engine
The engine reaches the maximum power after 5-8 hours of
activity.
During this period of breaking-in do not make use the engine at
wide open throttle without load, to avoid excessive functioning
stress.
WARNING! - During the breaking-in period do not
vary the carburetion to obtain a presumed power
increment; the engine can be damaged.
Difficult Starting (or starting a flooded engine)
The engine may be flooded with too much fuel if it has not started
after 10 pulls. Flooded engines can be cleared of excess fuel
by following the warm engine starting procedure listed above.
Ensure the ON/STOP switch is in the ON position. Starting could
require pulling the starter rope handle many times depending on
how badly the unit is flooded. If engine fails to start refer to the
TROUBLE SHOOTING TABLE (page 18).
Engine is Flooded
If you did not move the choke lever to warm start quickly enough
after the engine began to fire, the combustion chamber is
flooded.
• Set the on/off swich to STOP.
• Engage a suitable tool in the spark plug boot (A, Fig. 24).
• Pry off the spark plug boot.
• Unscrew and dry off the spark plug.
• Open the throttle wide.
• Pull the starter rope several times to clear the combustion
chamber.
• Refit the spark plug and connect the spark plug boot, press it
down firmly – reassemble the other parts.
• Set the on/off swich to I, the starting position.
• Set the choke lever to warm start – even if engine is cold.
• Now start the engine.
Stopping The Engine
Set the throttle to idle position (MIN) and wait a few seconds to
let the engine cool off (Fig.25). Turn off the engine, putting the
ON/OFF switch (B) in the STOP position (Fig.26).
Do not forged to empty any water remained in the self-priming
pump (Fig. 27).
Wash the pump with fresh water if it has been used with sea
water.
Transportion
Transport the machine with the engine switched off
WARNING – When transporting the machine on a
vehicle, ensure that it is firmly and securely fastened
using straps or belts. The machine must be transported
with the tank empty, also ensuring compliance with
transport regulations applicable to such machines.
OPERATION
24
25
26
27

en
15
MAINTENANCE
MAINTENANCE CHART
Please note that the following maintanance intervals apply for
normal operating conditions only. If your daily work requires
longer than normal or harsh cutting conditions are present the
suggested intervals should be shortened accordingly.
Before Each Use
After Each
Refueling Stop
After Finishing
Daily Work
Weehly
Monthly
If Damaged or
Faulty
As Required
Complete Machine Inspect (Leaks, Cracks, and
Wear) XX
Clean X
Controls (Ignition Switch,
Choke Lever, Throttle Trigger) Check Operation XX
Fuel Tank Inspect (Leaks, Cracks, and
Wear) XX
Fuel Filter Inspect and clean X
Replace Filter Element XEvery 6
Months
All Accessible Screws and
Nuts (not Adjusting Screws) Inspect X
Retighten X
Alr Filter Clean XX
Replace XEvery 6
Months
Starter Rope Inspect (Damage and Wear) X
Replace X
Carburetor Check Idle XX
Spark Plug Check Electrode Gap X
Replace XEvery 6
Months
Gaskets Inspect and replace if necessary X

en
16
28
29
30
31
MAINTENANCE
Idle Speed Adjustment
Before adjusting the carburetor, clean the air filter (B) as shown
Fig. 28, refer Maintenance-Air Filter Sections for details. Allow
the engine to warm up prior to carburetor adjustment.
This engine is designed and manufactured in order to comply with
EPA (Environmental Protection Agency) Phase 2 regulations.
The carburetor is factory set and should not require adjusting.
The carburetor will permit only limited adjustment of the “T”
screw (Fig. 29).
WARNING: Don't modify the carburetor in any way in
such case the engine will not run in compliance with
emissions regulations.
• If the engine starts, runs, and accelerates but will not idle; turn
the idle speed screw “T” clockwise to increase idle speed
(Fig. 29).
Fuel Filter
Check fuel filter periodically.
To clean the pump, detach hose mount (A, Fig.30) and gasket (B,
Fig.31) and remove fuel filter (Fig.32).
CAUTION: When refitting, ensure that the hose mount is
correctly positioned (see Fig.33).
Replace it if too dirty (Fig. 32).
Air Filter
WARNING: Do not clean filter in gasoline or other
flammable solvent to avoid creating a fire hazard or
producing harmful evaporative emissions.
Every 8-10 operating hours, open the cover (A, Fig. 28) and
remove the filter (B). Wash with water and blow at a distance with
compressed air (Fig.34). A used air filter can never be completely
cleaned. It is advisable to replace your air filter with a new one
after six month of operation. Make sure the cover and the support
are clean before fitting the new filter.
CAUTION: Never run the engine without the air filter,
serious damage could result.
Make sure the air filter is correctly placed in the
air filter cover before reassembly. Always replace
damaged filters. Do not clean a filter with a brush.
Starter Unit
WARNING: The coil spring is under tension and
could fly apart causing serious injuries. Never try to
disassembly or modify it.
Engine
Clean the cylinder fins with compressed air or a brush periodically.
Dangerous overheating of engine may occur due to impurities on
the cylinder.
WARNING: Never run the water pump without all the
parts, including starting housing, securely in place.
Because parts can fracture and pose a danger of
thrown objects, leave repairs to the fan to trained
Servicing Dealers.
Spark Plug
This engine uses a Champion RCJ-4 with .02” (0.5 mm) electrode
gap (Fig. 35). Use an exact replacement and replace every six
months or more frequently, if necessary.
32

en
17
MAINTENANCE
WARNING: Never test the ignition system with ignition
wire connector removed from spark plug or with
unseated spark plug, since uncontained sparking
may cause a fire. A loose connection between spark
plug terminal and ignition wire connector in the boot
may create arcing that could ignite combustible
fumes and cause a fire.
Use only resistor type spark plugs of the approved range.
Factors such as:
- too much oil in fuel mix;
- dirty air filter;
- unfavourable running conditions, e.g. operating at part load;
may result in rapid deterioration of the spark plug.
Spark Arresting Muffler
The water pump is provided with a Spark Arrester System p.n.
8856560020A (Fig. 37) complying with the requirements of SAE
J335 standard; you can check the p.n. of the Spark Arrester
System on the muffler itself.
WARNING – This muffler incorporates a catalytic
converter, needed in order to ensure the engine
complies with current emissions standards. Never
attempt to modify or remove the catalytic converter:
in doing so, you will be breaking the law.
WARNING – Mufflers with catalytic converters
become very hot during operation, and retain heat
for a long time after the engine has been stopped.
This is the case even with the engine idling. Contact
can burn the skin. Always remember the potential
fire risk!
CAUTION – If the catalytic converter is damaged, it
must be replaced. If the catalytic converter frequently
becomes blocked, this could be an indication that
the efficiency of the muffler is limited.
Spark arrester screen
As the spark arrester screen (D, Fig.37) can become dirty during
normal use, it should be inspected weekly and cleaned as
required. In particular:
- check the spark arrester screen periodically, and replace it if
holed, bent or buckled;
- check carefully for any dust, debris or organic material that may
be in contact with parts of the spark arrester system; clean
regularly using tools or compressed air.
Cleaning:
• Allow the muffler to cool.
• Remove the two screws (A, Fig.36) securing the deflector.
• Remove the deflector (B, Fig.37), the gasket (C) and the spark
arrester screen (D).
• Clean and inspect the spark arrester screen.
WARNING – Replace the spark arrester screen if
damaged, faulty or worn (p.n. 56550143R).
• Reassemble the components removed previously, in reverse
order, and tighten the screws (A, Fig.37) torquing to 0.5 kgm
(4.9 Nm).
WARNING – Do not use the water pump if the muffler
is damaged or missing, or has been altered in any
way. Operating the machine with an improperly
maintained muffler will increase the risk of fire and
hearing loss.
36
35
34
33
37
RCJ-4

en
18
TROUBLE SHOOTING
Using Trouble shooting Chart
WARNING: Always stop unit and disconnect spark plug before performing
all of the recommended remedies below except remedies that require
operation of the unit.
When you have checked all the possible causes listed and you are still experiencing the
problem, see your Servicing Dealer. If you are experiencing a problem that is not listed
in this chart, see your Servicing Dealer for service.
PROBLEM POSSIBLE CAUSE SOLUTION
Engine will not start or will
run only a few seconds after
starting.
(Make sure Ignition switch
is in start position “I”)
1. No spark
2. Flooded engine.
1.Watch for spark at spark
plug tip. If there is no
spark, repeat test with a
new spark plug (RCJ-4).
2.Follow procedure page 14.
If engine still fails to start,
repeat procedure with a
new spark plug.
Engine starts but will not
accelerate properly or will
not run properly at high
speed.
Carburetor requires
adjustment. Contact a Servicing Dealer
for carburetor adjustment.
Engine does not reach
full speed and / or emits
excessive smoke
1. Check oil fuel mixture.
2. Air filter dirty.
3. Carburetor requires
adjustment.
1. Use fresh fuel and the
correct 2-cycle oil mix.
2. Clean per instruction in
Maintenance-Air Filter
Section.
3. Contact a Servicing
Dealer for carburetor
adjustment.
Engine starts, runs and
accelerates but will not idle. Carburetor requires
adjustment. Contact a Servicing Dealer
for carburetor adjustment.
The engine starts and
rotates, but the water flow
rate is poor.
1. Excessive priming depth.
2. The impeller is damaged
or worn.
3. Suction filter clogged.
1. See table on page 20.
2. Contact a servicing
dealer.
3. Clean the suction filter.

en
19
STORAGE
Storing
If the machine is to be stored for long periods:
- Drain and clean the fuel and oil tank in a well-ventilated area.
- Dispose of fuel and oil according to the rules and respecting the
environment.
- To drain the tank, start the engine and wait until the fuel is
exhausted and the engine stops (leaving fuel mixture in the
carburettor could damage the membranes).
- Thoroughly clean the air filter (Fig. 38) and the cylinder fins
(Fig. 39).
- Store the water pump in a dry place, preferably not in direct
contact with the ground, away from heat sources and the tanks
empty.
- The procedures for returning the machine to service following
winter storage are the same as for starting up during everyday
use (page 10-14).
DEMOLITION AND DISPOSAL
When the machine has finished it’s service life , due to service
exhaustion, wash it with the maximum attention as to remove
residual chemical products.
Most materials used for the machine manufacturing are recyclable;
metals (steel, aluminum, and brass) can be delivered to recycling
station.
For further information contact a recycling station service of your
area.
Machine disposal must be executed in respect to the environment,
avoiding soil, air and water pollution.
Local legislation enforced in matter should be respected in any
case.
39
38

en
20
TECHNICAL DATA
MP 3000
ENGINE:
Displacement: 1.86 cu. in (30.5 cc)
Bore: 1.42 in (36 mm)
Stroke: 1.18 in (30 mm)
PERFORMANCE:
WOT: 5.800 - 6.200 RPM
Power: 1.34 HP / 1.0 kW (6,000 RPM)
FUEL SYSTEMS:
Fuel Tank Capacity: 2,8 fl. oz. (830 ml)
Fuel Mix: See Operation-Fueling Section
IGNITION SYSTEM:
Spark Plug: Champion RCJ-4
Spark Plug Gap: 0.02 in. (0.5 mm)
SPECIFICATIONS:
Type: Self-Priming
Suction and discharge diameter: 1 inch (25.4 mm)
Max. Discharge capacity: 40 gal./min. (150 l/min)
Max. Head: 118 ft (36 m)
Max. Suction head 23 ft (7 m)
Weight: 12 lb (5.5 kg)
Table of contents
Languages:
Other Efco Water Pump manuals
Popular Water Pump manuals by other brands

Schrader International
Schrader International 7.5 & 10 HP Electric Operation & maintenance manual

Grundfos
Grundfos SRG 60 Hz Installation and operating instructions

Pentair
Pentair STA-RITE D Series owner's manual

Hanna Instruments
Hanna Instruments BL Series Pumps instruction manual

NIPPON PILLAR PACKING
NIPPON PILLAR PACKING PE-5MA Operation manual

fluimac
fluimac PHOENIX user manual