Egholm Park Ranger 2150 User manual

Operator´s
manual
Weed brush
Park Ranger 2150

2Operator’s Manual Park Ranger 2150 Weed brush
Dear Customer
Congratulations with your new Egholm product
The Park Ranger 2150 is a Danish designed and manufactured product, which offers a very exible
way of maintaining outdoor areas.
Optimal use of your Park Ranger 2150 Weed brush
To ensure optimal performance of your Park Ranger 2150 Weed brush, please read this manual
carefully before using the machine. Failure to do so can result in personal injury and damage to the
machine.
Safety
The Weed brush is equipped with various devices to ensure optimal operational safety both for the
user and the surroundings. We ask you to pay particular attention to section 1.1 Safety. The machine
must only be serviced by professionals.
The Weed brush is designed only for use by professionals. On delivery, the user will receive thorough
training to become a competent operator. Do not lend to anyone who has not been thoroughly
trained and who has not read this manual carefully.
The operator’s manual should be considered as a permanent part of the machine and must remain
with it if the machine is sold.
Warnings
Some items in this operator’s manual are marked with this warning symbol.
The warning indicates areas where extra care has to be taken to avoid personal
injury or damage to the machine and its accessories. The warning also shows
what you should pay special attention to.
Reservations
As it is the Egholm policy to make continuous improvements, we reserve the right to alter the
machine’s specications and equipment at any time without notice. Egholm accepts no liability for
errors or omissions in the operator’s manual.
Contact us
Do not hesitate to contact Egholm if you should have any questions regarding your new Egholm
product.
Best Regards
Egholm A/S · Transportvej 27 · DK-7620 Lemvig
T. +45 97 81 12 05 · F. +45 97 81 12 10
E-mail: info@egholm.dk · www.egholm.eu
Introduction

3Operator’s Manual Park Ranger 2150 Weed brush
1. General information
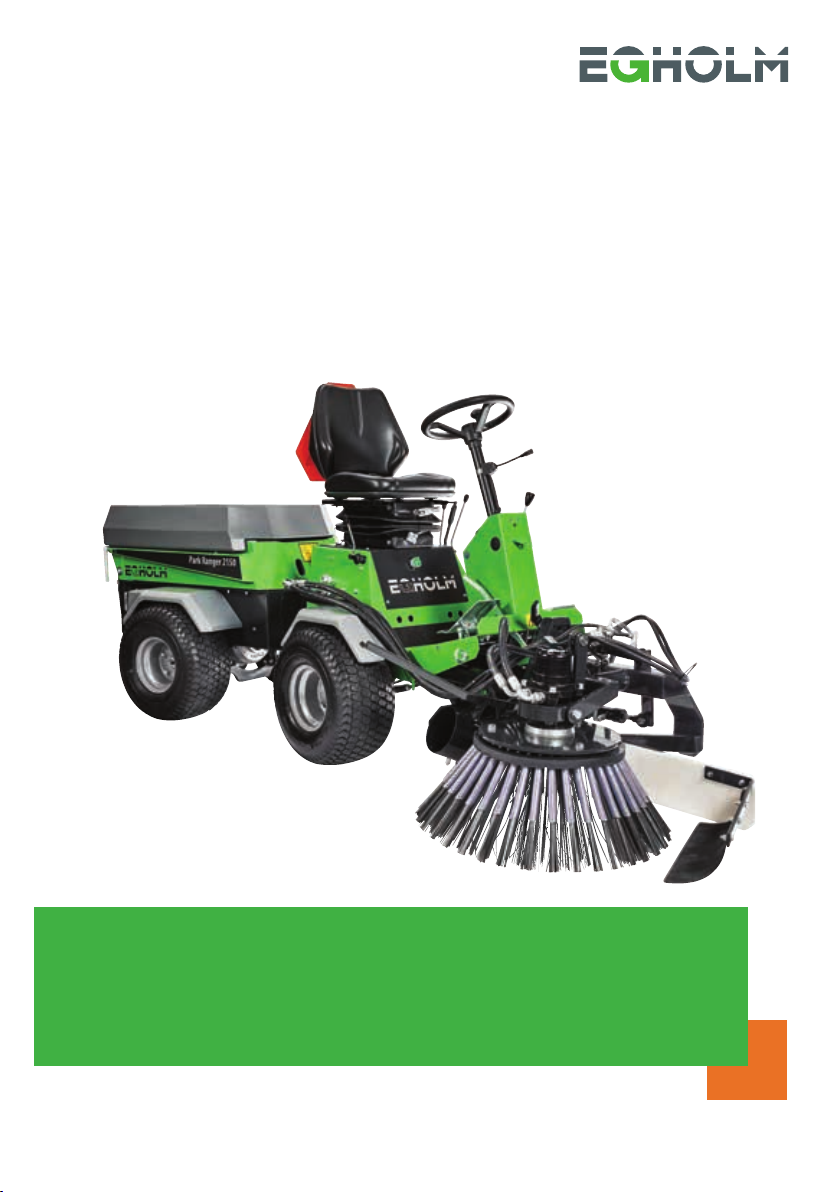
The Weed brush has been specially developed
for the Egholm utility machine
The Weed brush is used to remove weeds from
kerbs, pavements and roads.
The Weed brush features a sturdy, front-moun-
ted steel brush that is hydraulically adjustable in
two directions.
The Weed brush can be tted together with the
hopper from the Suction Sweeper Unit in order
to collect weeds and seeds loosened by the
brush.
The Weed brush can be assembled and
disassembled without using tools.
Useful tips
Always start your weed control in early spring. A
perfect result requires repeated efforts
throughout the summer.
Grass tufts by the edges of paths and
pavements are easiest to remove when they are
moist. Here, too, you should start weed removal
before the grass starts to grow.
Large, heavy or damp grass tufts can be dicult
for the machine to collect. Therefore, for a
perfect result, leave them to dry for a couple of
days before using the Suction Sweeper Unit to
remove them.
Contents
General information ..........................................................................5
1.1 Safety .................................................................................5
1.2 EC Declaration of Conformity ............................................................6
1.3 Technical data .........................................................................7
Operator’s manual ...........................................................................9
2.1 Assembly/Disassembly ................................................................10
2.2 Start-up ..............................................................................13
2.3 Emptying the hopper ..................................................................14
2.4 Adjustment ...........................................................................14
Service and maintenance ....................................................................17
3.1 Cleaning ..............................................................................17
3.2 Maintenance ..........................................................................17
3.3 Troubleshooting.......................................................................18
Conditions. . . . . . . . . . . . . . . . . . . . . . . . . . . . . . . . . . . . . . . . . . . . . . . . . . . . . . . . . . . . . . . . . . . . . . . . . . . . . . . . . .20
4.1 Warranty. . . . . . . . . . . . . . . . . . . . . . . . . . . . . . . . . . . . . . . . . . . . . . . . . . . . . . . . . . . . . . . . . . . . . . . . . . . . . . 20
4.2 Complaints ...........................................................................21
4.3 Disposal ..............................................................................21
Wearing parts...............................................................................23
5.1 Wearing parts - Park Ranger 2150 Weed brush ...........................................23
Notes .....................................................................................24

General information

5
Ophold i knækområdet
er forbudt
Aufenthalt im Knickbereich ist verboten
Activities around the articulation point is forbidden
Ne séjournez jamais dans la zone d’articulation
Max. 10°
3
2
1
Operator’s Manual Park Ranger 2150 Weed brush
Locked position
1.1 Safety
Mounting
Make sure that the attachment has been tted
correctly and that the locking handle can be
moved to locked position. (Picture 1)
Make sure no one is standing close
to the machine while it is in use
Make sure that no one is near the
machine while it is in use as there is a
danger of crushing.
N.B!
As it is articulated, the rear end of the
machine swings out when turning.
Make sure that no one is standing
near the machine while it is in use.
(Picture 1)
Avoid crushing ngers
Keep your hands and ngers away
from areas where there is a danger of
crushing.
Avoid roll-overs
Do not drive the machine in a place
where it can slide, tip or roll. Do not
drive on slopes with an incline of more
than 10°. (Picture 3)
Reduction of noise and energy
consumption
We recommend that you avoid driving
with a higher engine speed than
necessary to reduce noise and energy
consumption.
General information
Do not drive on slopes with an incline of
more than 10°
Prevent people from standing in the
working area

6Operator’s Manual Park Ranger 2150 Weed brush
General information
1.2 EC Declaration of Conformity
Manufacturer: Egholm A/S
Address: Transportvej 27 · DK-7620 Lemvig
Telephone: +45 97 81 12 05
hereby declares that
The machine: Weed brush
Type: UB1
· has been manufactured in conformity with the provisions of the Machinery Directive 2006/42/EU
Any alteration, rebuilding or addition of implements, accessories or other equipment not
manufactured by Egholm automatically results in the cancellation of type approval, CE approval,
any other approval, as well as any warranty on machine and attachments.
Unless otherwise agreed in writing between the operator, customer and Egholm, Egholm is the
data originator (data originator) of all data generated by the machine and attachments during use.
Place: Lemvig
Date:
Signature:
Rainer Flanz, R&D Manager

7
3
1
2
Operator’s Manual Park Ranger 2150 Weed brush
General information
1.3 Technical data
Dimensions Attached Storage dimensions
Length (L) - Incl.hopper . . . . . . . . . . . . . . . .3.300 mm . . . . . . . . . . . . 1.450 mm
Width (W) . . . . . . . . . . . . . . . . . . . . . . . .1.230 mm . . . . . . . . . . . . . 900 mm
Height without cab (H) - incl. hopper. . . . . . . . . 1.850 mm . . . . . . . . . . . . . 630 mm
Height with cab (H) . . . . . . . . . . . . . . . . . . . 1.935 mm
Technical data
Type . . . . . . . . . . . . . . . . . . . . . . . . . . . . . . . UB1
Ground clearance under brush . . . . . . . . . . . . . 160 mm
Ground clearance under vacuum nozzle . . . . . . . 30 mm
Brush diameter . . . . . . . . . . . . . . . . . . . . . . 700 mm
Weed brush weight . . . . . . . . . . . . . . . . . . . . . .85 kg
Revolutions . . . . . . . . . . . . . . . . . . . . . . . .114/min.
N.B!
Specications may be changed without prior notice.
Typeplate
Side view
Front view

Operator´s manual

9
1
2
Operator’s Manual Park Ranger 2150 Weed brush
2.1 Assembly
Delivery
The Weed brush is delivered on a pallet wrapped
in plastic. (Picture 1)
1. Unpack the Weed brush and lift it off the pallet.
(lifting point is the pipe below the top hydraulic
cylinder). (Picture 2)
Lifting point
Weed brush delivered on a pallet wrapped
in plastic.
Operator’s manual

10
1
2
4
3
Operator’s Manual Park Ranger 2150 Weed brush
Operator’s manual
2.1 Assembly/Disassembly
Assembly
1. The locking handle on the A-frame of the basic
unit must be in the open position. (Picture 1)
2. Drive the machine right up to the A-frame of
the Weed brush so that the A-frames t into
each other. NB! We recommend raising the basic
unit A-frame slightly to prevent damage to the
paintwork on the Weed brush when the two
A-frames make contact.
3. Use lever A to lift the A-frame until the brushes
are raised clear of the ground. (Picture 3)
4. Use the locking handle on the A-frame to lock
the Weed brush in position. (Picture 2)
5. Fit the two medium-sized hydraulic hoses to
the B-connectors. (Picture 3)
6. Use the rubber ring to attach the hydraulic
hoses under the running board to ensure that they
run correctly across the screen. (Picture 4)
Lever A B-connector
The hoses are fastened with a rubber strap
Locking handle on the A-frame - open
Locking handle - locked

11
1
3
2
4
Operator’s Manual Park Ranger 2150 Weed brush
Operator’s manual
2.1 Assembly, continued
7. Run the two small hydraulic hoses between the
D2 and D3 connectors and attach them to the
hopper. The hopper must must be connected to
the Basic machine C connectors.
(Pictures 1+2+3)
8. Fit the large male connector to D1. (Picture 1)
9. Connect the hydraulic hoses from the hopper
to D2, D3 and above the male connector on
D1.(Picture 4)
Note1
Connector tank
Without three-way valve (old version)
If the hopper is not tted with a three-way valve
the small hoses must be mounted directly on the
Basic machine C connectors.
Note 2
If the Weed brush is used without the hopper,
then mount the small hoses directly on the Basic
machine C connectors.
Leading the hydraulic D1 connector
hoses between the connectors
Mount the small hoses from the Weed brush
on the hopper connectors
Attaching the hydraulic hoses from the
hopper to C connector
Mount hydraulic hoses to D connectors

12
1
2
4
3
Operator’s Manual Park Ranger 2150 Weed brush
2.1 Assembly, continued
10. Connect the suction hose.
Mount the rubber ring from the Weed brush on
the suction hose. (Picture 1)
Mount the suction hose to the suction mouth with
the rubber lock handle. (Picture 2)
Fix the rubber ring to the Weed brush bracket.
(Picture 3)
Fix the suction hose to the cabin. (Picture 4)
(Without cabin: x to the hose holder behind the
seat)
Assembling the hopper
See Section 2.1 of the operator’s manual for the
Suction Sweeper Unit.
Disassembly
1. Position the Weed brush so that it is level with
the ground.
2 Tip the Weed brush forwards in the direction of
travel.
3. Stop the machine. (See the operator’s manual
for the basic unit, section 2.2)
4. Release the pressure from the hydraulic
hoses. Then simply reverse the procedure for
assembling the unit.
Rubber ring mounted on suction hose
Rubber ring mounted on Weed brush
bracket
Hose xed to cabin with rubber mount
Rubber lock handle
Operator’s manual

13
1
4
3
2
Operator’s Manual Park Ranger 2150 Weed brush
2.2 Start-up
1. Start the machine. (See the operator’s manual
for the basic unit, section 2.2)
2. Turn the throttle until it is at least half open.
(Picture 1)
3. Slowly move lever D up to position 1. The Weed
brush will begin to rotate and the suction will
start.(Picture 2)
4. Now fully engage the throttle (full power).
5. Start to drive forwards.
NB
If the machine stands still while
the Weed brush is operating, a ring
may be worn into the road surface.
Therefore, the Egholm Park Ranger
should always be in motion before the
Weed Brush is lowered!!
6. Use lever A to lower the brush. (Picture 3)
Warning!
Make sure no one is standing close to
the machine while it is in use.
N.B!
When turning, the rear of the machine
swings out, so there is a risk of
crushing or collision.
Operator’s manual
Lever A
The machine must be in motion while the
brush is rotating.
Throttle
Lever D

14
1
2
3
Operator’s Manual Park Ranger 2150 Weed brush
2.3 Emptying the hopper
With three-way valve
If the hopper is tted with a three-way valve, use
lever C to empty the the hopper. (Picture 2)
NB!
It is not possible to empty the hopper if
the Weed brush is started.
Without three-way valve (old version)
If the hopper is not tted with a three-way valve,
disconnect the Weed brush hydraulic hoses from C1
and C2 and connect the hopper hoses to C1 and C2
before emptying the the hopper. (Picture 1)
Reconnect the hydraulic hoses in the reverse order
after emptying the hopper.
N.B!
There is a risk of crushing ngers when
emptying the hopper.
2.4 Adjustment
Removing weeds from the side of the road
When removing weeds from the side of the road, we
recommend that you tilt the Weed brush to the right
towards the edge of the road. To do this:
- Move lever C up to position 1. (Picture 2)
NB
it is not possible to tilt the brush before
the Weed brush is started. If the brush is
stopped the hopper will start to tip.
To tilt the Weed brush to the left
- Move lever C down to position 2. (Picture 2)
To tilt the Weed brush forwards
This will result in pressure being applied to the front
part of the brush:
- Move lever B down into position 2. (Picture 2)
To tilt the Weed brush backwards
- Move lever B up to position 1. (Picture 2)
C connector
Lever A - B - C
Operator’s manual

15
1
3
2
Operator’s Manual Park Ranger 2150 Weed brush
2.4 Adjustment - continued
Adjusting the wearing rail
The centre brush ensures that the weeds are
collected in the hopper.
The wearing rail holds the centre brush and must
always be in contact with the ground to ensure
that the centre brush functions optimally.
(Picture 1)
If the wearing rail is correctly adjusted, it will
follow the terrain.
Correct setting of the wearing rail
The wearing rail is correctly adjusted if there are
2-3 mm of space between the metal and the
A-frame. (Picture 2)
If the gap is too large, the rail cannot be lifted
clear of the ground. The wearing rail is therefore
correctly adjusted when it is clear of the ground in
“lifted” position.
Adjusting the wearing rail
1. Lower the wearing rail.
2. Remove the forked bolt. (Picture 3)
3. Turn the fork end in towards the wearing rail.
(Picture 3)
The shorter the threaded section, the more the
wearing rail will be raised.
Wearing rail Centre brush
2-3 mm gap between the metal and the
A-frame
Operator’s manual
The forked bolt The fork end

Service and
maintenance

17
1
3
2
4
Operator’s Manual Park Ranger 2150 Weed brush
3.1 Cleaning
Clean the Weed brush with clean water.
When cleaning, check to see whether
any string, etc.has become wrapped
around the centre brush. If so, remove
it from the centre brush to allow the
centre brush to rotate freely.
3.2 Maintenance
Replacing the wearing rail
The wearing rail must not be worn down further
than to the casing.
New wearing rails may only be tted by
authorised Egholm distributors.
Replacing the steel brush
1. Stop the machine. Turn off main switch.
2. Loosen the nuts inside the steel brush.
(Picture 2)
3. Remove the steel brush.
4. Fit the new brush.
You can order new steel brushes from an
authorised Egholm distributor.
Replacing the centre brush
1. Stop the machine.
2. Loosen the bolt that holds the centre brush in
place.(Picture 3)
3. Loosen the nuts that hold the oil motor in
place.(Picture 4)
4. Remove the oil motor.
5. Remove the centre brush.
To t the new centre brush, reverse the
procedure. You can order new centre brushes
from an authorised Egholm distributor.
Centre brush Casing
Nuts holding the steel brush in place
Loosen the bolt holding the centre brush in
place
Loosen the nuts holding the oil motor in
place, 2 pcs
Service and maintenance

18
1
2
Operator’s Manual Park Ranger 2150 Weed brush
3.3 Troubleshooting
If weeds remain lying on the ground
For the machine to collect weeds in the hopper,
the centre brush must touch the ground. To
adjust the position of the centre brush, change
the setting of the wearing rail. (See Section 2.4)
If branches or twigs block the suction mouth
1. Stop the machine. (See Section 2.2 of the
operator’s manual for the basic unit)
2. Disconnect the suction hose from the suction
mouth. (Picture 2)
3. Remove branches and twigs manually.
4. Reconnect the suction hose.
If the suction hose is blocked
In extreme conditions, sand deposits can
gradually block the suction hose. To deal with this
situation:
1. Stop the machine. (See Section 2.2 of the
operator’s manual for the basic unit)
2. Disconnect the suction hose. (Picture 2)
3. Shake the hose to remove the unwanted
material.
4. Reconnect the suction hose.
NB!
When collecting heavy material
Iff you are using the machine to
collect heavy material such as sand,
make sure to empty the hopper from
becoming unstable on account of
excess weight.
Wearing rail Centre brush
Disconnect the suction hose
Service and maintenance

Conditions

20 Operator’s Manual Park Ranger 2150 Weed brush
4.1 Warranty
The warranty period for the materials and manufacture of the Weed brush is 12 months from the
date of purchase.
In case of errors or defects on the machine within the warranty period, Egholm will carry out the
necessary repairs at no charge for materials and working hours in accordance with the terms and
conditions listed below.
The scope of warranty
1. The Egholm warranty is only valid on presentation of the original receipt supplied with model
description, serial number and date of purchase.
2. Regular checks, adjustments, services and technical alterations are not covered by the warranty.
3. All inquiries concerning the warranty are to be addressed to the place where the machine was
purchased.
4. This warranty does not cover faults and defects which cannot be traced back to defects in
material or production errors.
5. This warranty is valid for persons who have legally acquired the machine within the warranty
period.
6. In the event of failure to perform and substantiate service in accordance with the applicable
instructions, Egholm reserves the right to reject any claim made within the warranty period.
7. Egholm reserves the right to make improvements and design-related alterations to the machine
without being obliged to modify previously delivered models in relation hereto.
The warranty does not cover
Wear and tear, accidents, damage to the equipment caused by operating errors, changes to the
construction of the machine or use of non-Egholm spare parts or attachments.
Machines with illegible serial numbers.
Damage caused by force majeure, such as lightning, ood, re, war, civil disturbance, etc., or other
causes over which Egholm has no control.
Conditions
Other manuals for Park Ranger 2150
18
Table of contents