manuals.online logo
Brands
  1. Home
  2. •
  3. Brands
  4. •
  5. Eibach
  6. •
  7. Automobile Accessories
  8. •
  9. Eibach ANTI-ROLL-KIT AS41-55-019-01-FA User manual

Eibach ANTI-ROLL-KIT AS41-55-019-01-FA User manual

D3432 www.eibach.com Page 1
Kit Contents Description Part Number Qty
Front Bar AS41-55-019-01-FA 1
Anti-Roll Hardware Kit AS41-55-019-01-FAHK 1
Information Kit EPAK 1
Instructions AS41-55-019-01-FAINST 1
NOTES: Read All Instructions Before Beginning Installation
Only qualified mechanics experienced in the installation and removal of suspension components should
perform this installation.
Use of a hoist and screw jack is highly recommended and will substantially reduce installation time.
Never work on or under a vehicle unless it is properly supported.
Tire Rotation: In order to increase the life of your tires, it is recommended to rotate your tires every 3,000 miles.
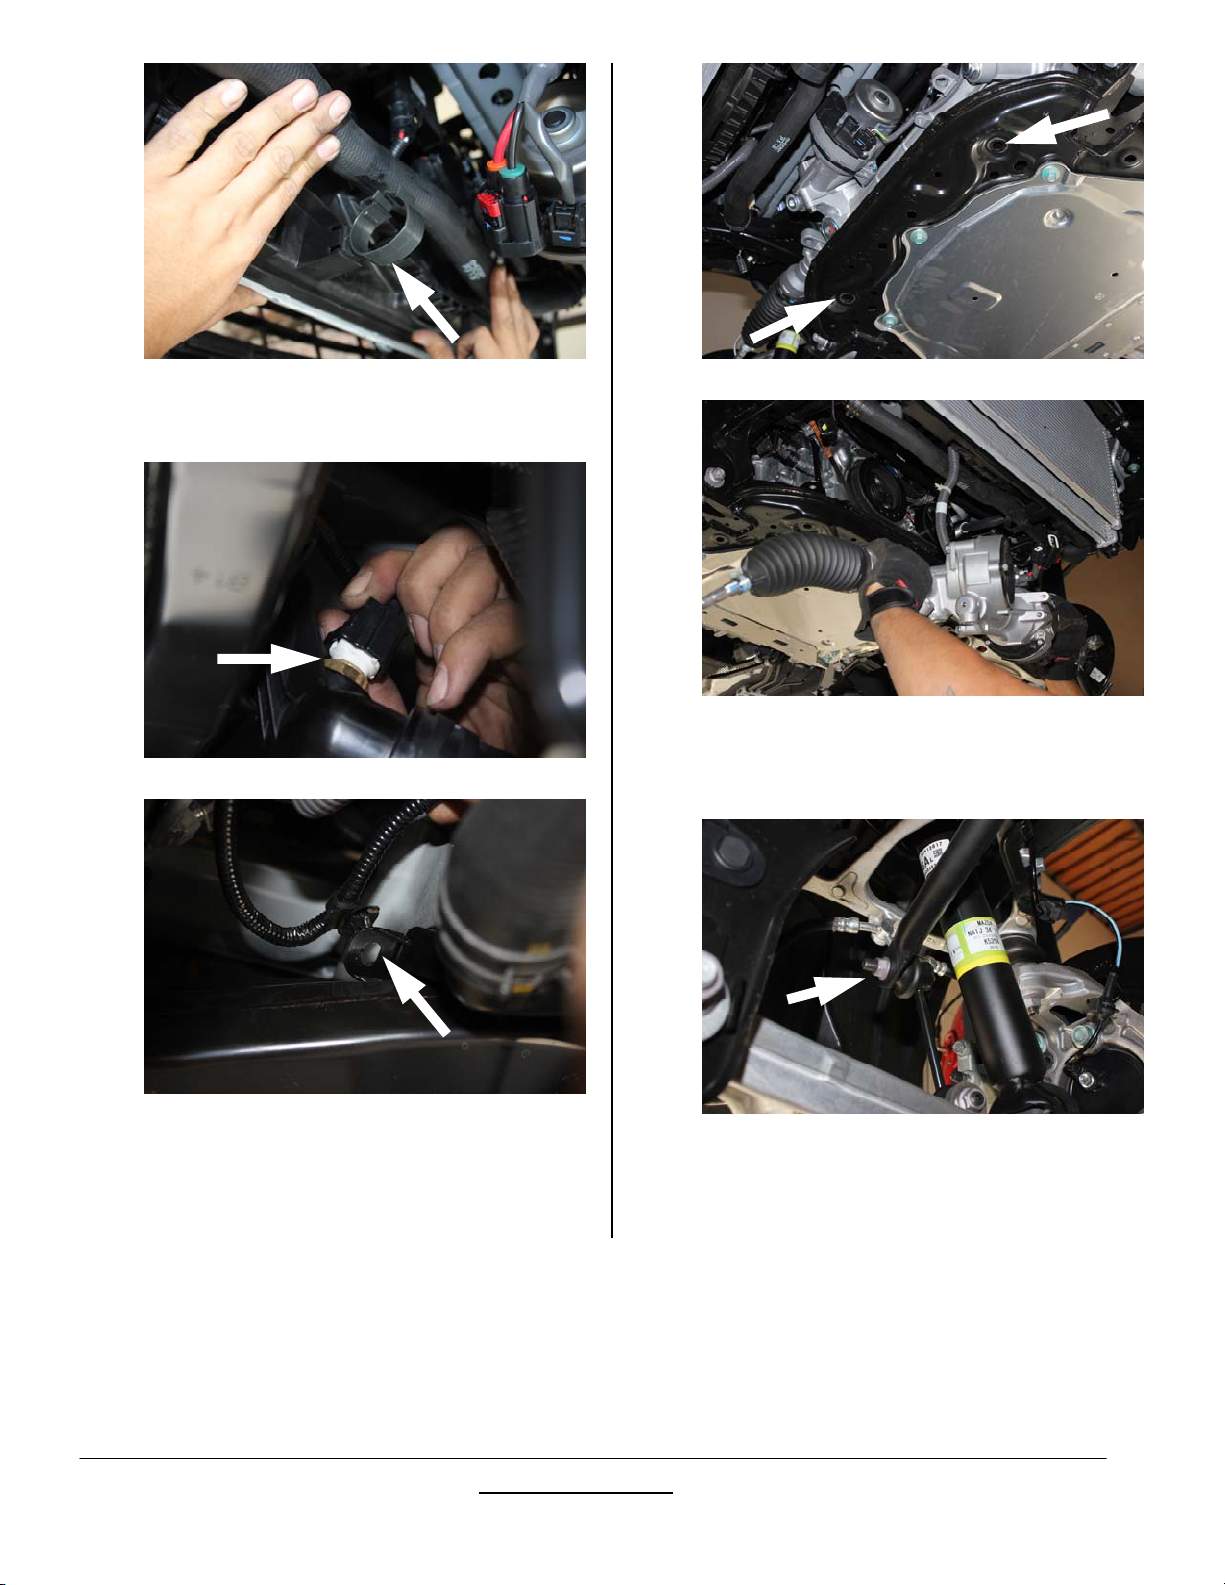
FACTORY FRONT BAR REMOVAL
1. Begin by raising the vehicle and supporting it with the
proper safety equipment, then, remove the front wheels.
Note: Never work on or under a vehicle that is not
supported by the proper safety equipment.
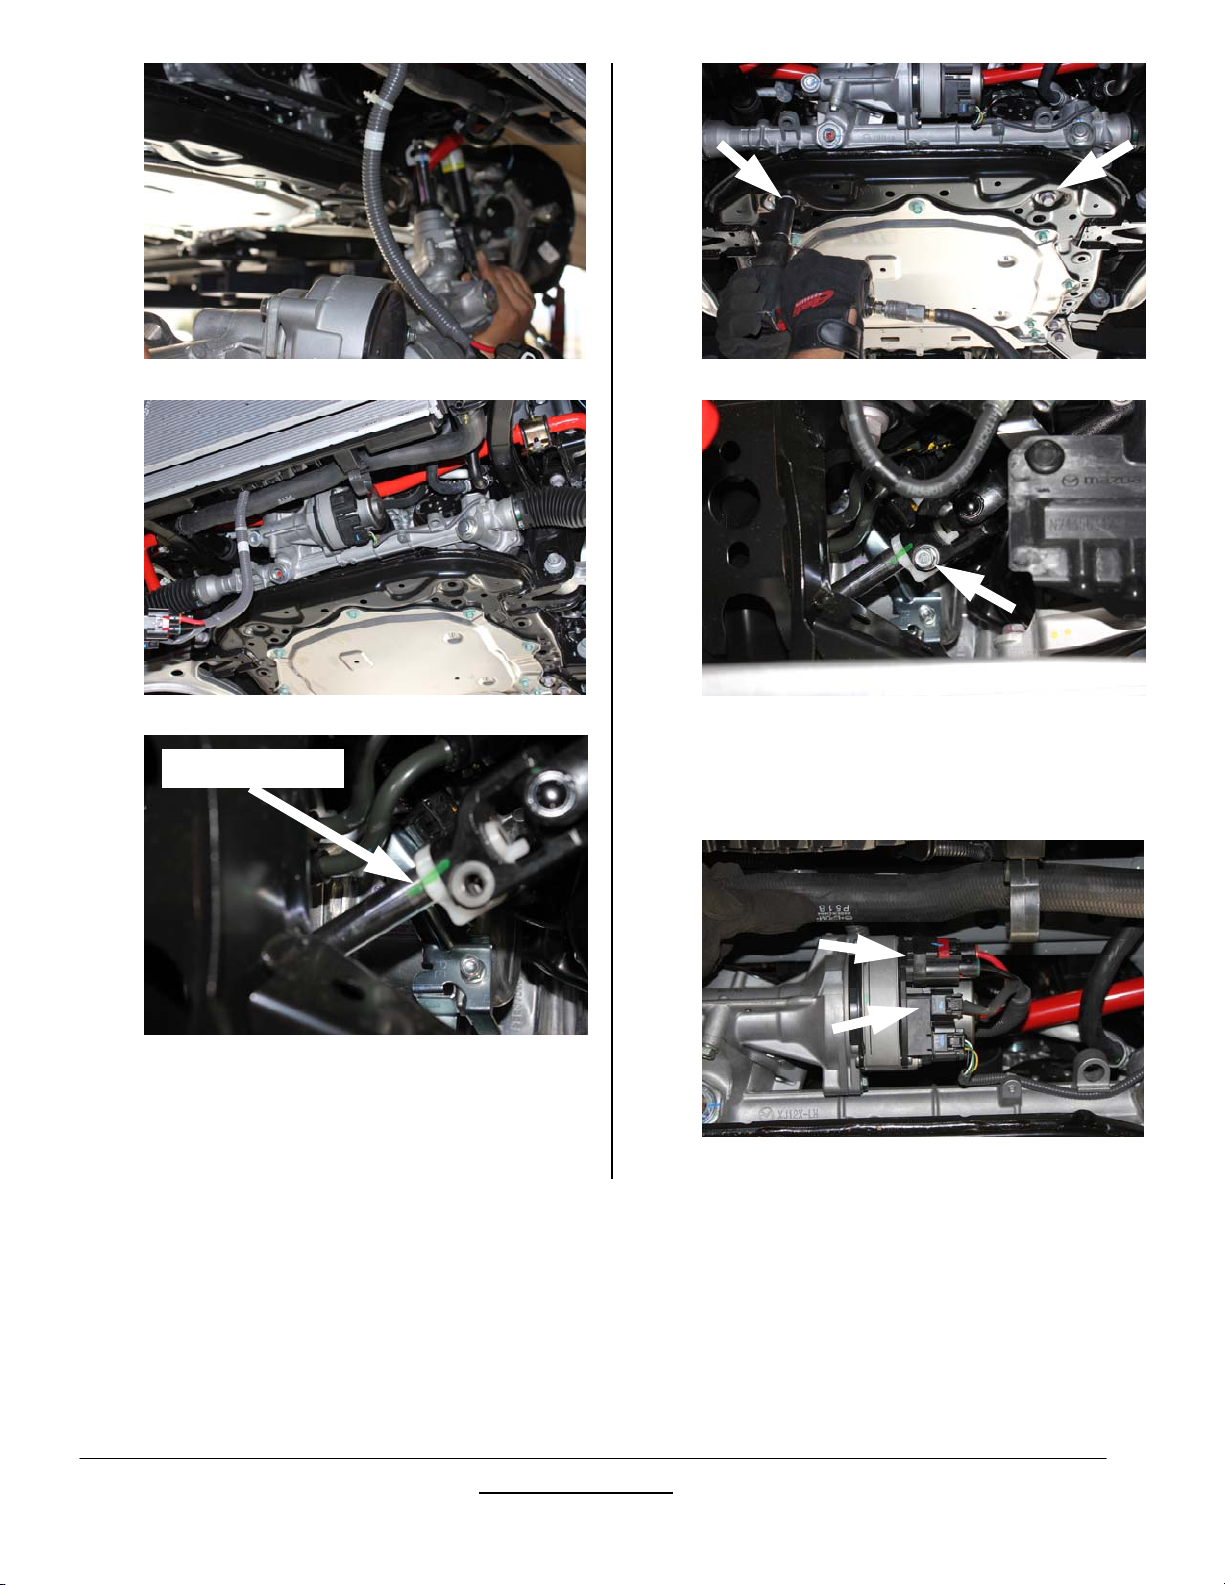
2. Remove the left and right side inner fender covers, and
the center splash shield as shown. (See Photos 1, 2, 3
& 4)
Installation Instructions
Ant
i
-Rol
l
-Ki
t
# AS41-55-019-01-F
A
2016+ Mazda, MX-5, ND
Eibach Springs, Inc. 264 Mariah Circle Corona, California 92879-1751 USA Tech Support 800-222-8811 Ext 114
Photo 1
Photo 3
Photo 4
Photo 2
D3432 www.eibach.com Page 2
3. Remove the reusable cotter pin and nut from both the
left and right side tie rods, then, separate the tie rods
from the spindles as shown. (See Photos 5, 6 & 7)
4. Rotate the steering shaft so that the bolt for the steering
coupler is visible to the driver side of the vehicle, then,
with a paint pen, mark the alignment/orientation of the
steering coupler to steering rack input shaft. You can
now remove the steering coupler bolt. Note: This is
necessary as the steering rack will need to be
removed, and must be reinstalled into the vehicle in
the exact same orientation. (See Photos 8 & 9)
5. Disconnect the two forward electrical connections on the
steering rack. (See Photo 10)
6. Unclip the wire harness from the top of the steering
rack. (See Photo 11)
Photo 7
Photo 9
Photo 8
Photo 11
Photo 5
Photo 6
Paint Mark
Photo 10
D3432 www.eibach.com Page 3
7. Unclip the radiator hose from the fan shroud. (See
Photo 12)
8. Disconnect the coolant temp sensor connection, then,
unclip the wire harness as shown. (See Photos 13 &
14)
9. Loosen and remove the two bolts that secure the
steering rack to the subframe, then, remove the steering
rack from the vehicle. (See Photos 15 & 16)
10. Loosen and remove the nuts that secure the end links to
both ends of the OE anti roll bar, then, disconnect the
end links. (See Photo 17)
Photo 12
Photo 17
Photo 15
Photo 14
Photo 13
Photo 16
D3432 www.eibach.com Page 4
11. Loosen and remove the bushing bracket hardware,
then, remove the brackets. (See Photos 18 & 19)
12. Rotate the bar forward on the passenger side, then,
push the bar inward under the plastic valance and over
the subframe as the bar will need to be removed from
the driver side of the vehicle. Note: Be careful to note
the orientation of the OE bar as the Eibach bar will
be installed in the same orientation. (See Photos
18, 19 & 20)
13. The bar should slide out the driver side of vehicle
vehicle as shown. (See Photos 21 & 22)
Photo 21
Photo 18
Photo 19
Photo 18
Photo 22
Photo 19
Photo 20
Passenger side
Driver side
D3432 www.eibach.com Page 5
EIBACH FRONT BAR INSTALLATION
1. Install the Eibach front bar into the vehicle in the reverse
of the removal of the OE bar. Note: Leave the poly
bag on the bar as this will help to limit any
scratching to the bar during installation. (See
Photos 23, 24, 25, 26 & 27)
2. Before proceeding to the next step, rotate the bar to its
normal orientation and confirm that the center section of
the bar has the center bend facing upwards to clear the
steering rack, then, remove the plastic wrap from the
bar. (See Photo 28)
Photo 24
Photo 23
Photo 25
Photo 29
Photo 26
Driver side
Passenger side
Photo 27
Photo 28

Popular Automobile Accessories manuals by other brands

Magneti Marelli AC161 Installation instruction

Magneti Marelli

Magneti Marelli AC161 Installation instruction

FDI uEZ GUI Start here

FDI

FDI uEZ GUI Start here

JCROffroad JT Install instructions

JCROffroad

JCROffroad JT Install instructions

Rostra VOXXElectronics 250-1930 owner's guide

Rostra

Rostra VOXXElectronics 250-1930 owner's guide

TOP VEHICLE TECH GR3FORD5 installation manual

TOP VEHICLE TECH

TOP VEHICLE TECH GR3FORD5 installation manual

Safe Fleet PRIME DESIGN AR-2000-BLK manual

Safe Fleet

Safe Fleet PRIME DESIGN AR-2000-BLK manual

Skoda Fabia Combi 5J Fitting instructions

Skoda

Skoda Fabia Combi 5J Fitting instructions

Camcar 40077 Al Mounting instructions

Camcar

Camcar 40077 Al Mounting instructions

Camcar 40089 AL Mounting instructions

Camcar

Camcar 40089 AL Mounting instructions

Impac Tradesman 2000 installation manual

Impac

Impac Tradesman 2000 installation manual

DVB OFFROAD BRSB-01 installation manual

DVB

DVB OFFROAD BRSB-01 installation manual

Safari Snorkel SS385HF installation guide

Safari Snorkel

Safari Snorkel SS385HF installation guide

ULTIMATE SPEED 279746 Assembly and Safety Advice

ULTIMATE SPEED

ULTIMATE SPEED 279746 Assembly and Safety Advice

SSV Works DF-F65 manual

SSV Works

SSV Works DF-F65 manual

ULTIMATE SPEED CARBON Assembly and Safety Advice

ULTIMATE SPEED

ULTIMATE SPEED CARBON Assembly and Safety Advice

Witter F174 Fitting instructions

Witter

Witter F174 Fitting instructions

WeatherTech No-Drill installation instructions

WeatherTech

WeatherTech No-Drill installation instructions

TAUBENREUTHER 1-336050 Installation instruction

TAUBENREUTHER

TAUBENREUTHER 1-336050 Installation instruction

manuals.online logo
manuals.online logoBrands
  • About & Mission
  • Contact us
  • Privacy Policy
  • Terms and Conditions

Copyright 2025 Manuals.Online. All Rights Reserved.