Galaxy GHDX2-2430S-24F4D User manual

Galaxy RAID
Model GHDX2-2430S-24F4D
24 bay FC-4G to SATA-II RAID Subsystem
Single Controller
Model GHDX2-2430R-24F4D
24 bay FC-4G to SATA-II RAID Subsystem
Dual Controller
Installation and Hardware
Reference Manual
Version 1007
Version 1.0 (08, 2005)

Galaxy Raid GHDX2-2430S/R-24F4D Installation and Hardware Reference Manual
ii
Contact Information
Americas
Rorke Data Inc
7626 Golden Triangle Drive
Eden Prairie, MN 55344
USA
Tel: +1-800 328 8147
Fax: +1-952 829 0988
http://www.rorke.com

Galaxy Raid Installation and Hardware Reference Manual
iii
Copyright 2007
This Edition First Published 2007
All rights reserved. This publication may not be reproduced, transmitted,
transcribed, stored in a retrieval system, or translated into any language or
computer language, in any form or by any means, electronic, mechanical,
magnetic, optical, chemical, manual or otherwise, without the prior written
consent of Rorke Data , Inc.
Disclaimer
Rorke Data makes no representations or warranties with respect to the contents
hereof and specifically disclaims any implied warranties of merchantability or
fitness for any particular purpose. Furthermore, Rorke Data reserves the right to
revise this publication and to make changes from time to time in the content
hereof without obligation to notify any person of such revisions or changes.
Product specifications are also subject to change without prior notice.
Trademarks
Galaxy and the Galaxy logo are registered trademarks of Rorke Data , Inc.
PowerPC®is a trademark of International Business Machines Corporation and
Motorola Inc.
Solaris and Java are trademarks of Sun Microsystems, Inc.
All other names, brands, products or services are trademarks or registered
trademarks of their respective owners.

Galaxy Raid GHDX2-2430S/R-24F4D Installation and Hardware Reference Manual
iv
Warnings and Certifications
Restricted Access Location:
This equipment is intended to be installed in a RESTRICTED ACCESS LOCATION only.
Electric Shock Warning!
To Prevent Electric Shock:
Access to this equipment is granted only to trained operators and service personnel who have
been instructed of and fully understand the possible hazardous conditions and the
consequences of accessing non-field-serviceable units. For example, accessing the backplane
may cause electric shock.
FCC (applies in the U.S. and Canada)
FCC Class A Note
This device complies with Part 15 of the FCC rules. Operation is subject to the
following two conditions: (1) this device may not cause harmful interference,
and (2) this device may accept any interference received, including interference
that may cause undesired operation.
NOTE:
This equipment has been tested and found to comply with the limits for a Class
A digital device, pursuant to Part 15 of the FCC Rules. These limits are designed
to provide reasonable protection against harmful interference when the
equipment is operated in a commercial environment. This equipment generates,
uses, and can radiate radio frequency energy and, if not installed and used in
accordance with the instruction manual, may cause harmful interference to radio
communications. Operation of this equipment in a residential area is likely to
cause harmful interference in which case the user will be required to correct the
interference at his own expense.
The changes or modifications not expressly approved by the party responsible
for compliance could void the user’s authority to operate the equipment.
WARNING:

Galaxy Raid Installation and Hardware Reference Manual
v
Use only shielded cables to connect I/O devices to this equipment.
You are cautioned that changes or modifications not expressly approved by the
party responsible for compliance could void your authority to operate the
equipment.
CB
This device meets the requirements of the CB standard for electrical
equipment with regard to establishing a satisfactory level of safety for
persons using the device and for the area surrounding the apparatus.
This standard covers only safety aspects of the above apparatus; it does
not cover other matters, such as style or performance.
CCC for Power Supplies’ compatibility to China Compulsory Certification.
This device is in conformity with UL standards for safety.
ITE BSMI Class A, CNS 13438 (for Taiwan)
This device is in conformity with the EMC.
This device is in conformit
y
with the CB safet
y
specifications.

Galaxy Raid GHDX2-2430S/R-24F4D Installation and Hardware Reference Manual
vi
This device is in conformity with UL standards for safety.
RoHS 2002/96/EC compliant
WEEE Disposal of Old Electrical and Electronic Equipment

Galaxy Raid Installation and Hardware Reference Manual
vii
Table of Contents
CHAPTER 1 INTRODUCTION
1.1. PRODUCT OVERVIEW ................................................................................................1-1
1.1.1 Product Introduction........................................................................................1-1
1.1.2 Enclosure Chassis ............................................................................................1-2
1.1.2.1 Chassis Overview........................................................................................................... 1-2
1.1.2.2 Physical Dimensions...................................................................................................... 1-3
1.1.2.3 Front Panel Overview .................................................................................................... 1-3
1.1.2.4 Hard Drive Numbering .................................................................................................. 1-4
1.1.2.5 Rear Panel Overview ..................................................................................................... 1-4
1.1.2.6 Back-plane Board........................................................................................................... 1-5
1.2. SUBSYSTEM COMPONENTS........................................................................................1-5
1.2.1 LCD Panel........................................................................................................1-5
1.2.2 Drive Trays.......................................................................................................1-6
1.2.3 RAID Controller Modules ................................................................................1-6
1.2.4 Controller Module Interfaces...........................................................................1-7
1.2.5 DIMM Modules ................................................................................................1-9
1.2.6 BBU..................................................................................................................1-9
1.2.7 PSUs...............................................................................................................1-10
1.2.8 Cooling Modules ............................................................................................1-11
1.3. SUBSYSTEM MONITORING.......................................................................................1-12
1.3.1 I2C bus ...........................................................................................................1-12
1.3.2 LED Indicators...............................................................................................1-12
1.3.3 Firmware (FW) and RAIDWatch GUI ...........................................................1-13
1.3.4 Audible Alarms...............................................................................................1-13
1.4. HOT-SWAPPABLE COMPONENTS..............................................................................1-13
1.4.1 Hot-swap Capabilities....................................................................................1-13
1.4.2 Components....................................................................................................1-14
1.4.3 Normalized Airflow ........................................................................................1-14
CHAPTER 2 HARDWARE INSTALLATION
2.1. INSTALLATION OVERVIEW...............................................................................2-1
2.2. INSTALLATION PRE-REQUISITES.....................................................................2-1
2.3. SAFETY PRECAUTIONS:......................................................................................2-2
2.3.1 Precautions and Instructions............................................................................2-2
2.3.2 Static-free Installation......................................................................................2-3
2.4. GENERAL INSTALLATION PROCEDURE.........................................................2-3
2.4.1 Installation Procedure Flowchart....................................................................2-4
2.5. UNPACKING THE SUBSYSTEM..........................................................................2-5
2.6. INSTALLATION OVERVIEW...............................................................................2-5
2.6.1 Pre-installed Components................................................................................2-5
2.6.2 Uninstalled Components ..................................................................................2-5

Galaxy Raid GHDX2-2430S/R-24F4D Installation and Hardware Reference Manual
viii
2.7. INSTALLING THE OPTIONAL BBU....................................................................2-6
2.7.1 BBU Installation Overview...............................................................................2-6
2.7.2 BBU Warnings and Precautions.......................................................................2-6
2.7.3 Installation Procedure......................................................................................2-7
2.8. HARD DRIVE INSTALLATION............................................................................2-9
2.8.1 Hard Drive Installation Prerequisites..............................................................2-9
2.8.2 SATA Drive Installation ...................................................................................2-9
2.9. DRIVE TRAY INSTALLATION ..........................................................................2-10
2.10. RACK/CABINET INSTALLATION.....................................................................2-12
CHAPTER 3 SUBSYSTEM MONITORING
3.1. SUBSYSTEM MONITORING OVERVIEW ......................................................................3-1
3.2. STATUS-INDICATING LEDS.......................................................................................3-2
3.2.1 Brief Overview of the LEDs..............................................................................3-2
3.2.2 LCD Panel........................................................................................................3-3
3.2.3 Drive Tray LEDs ..............................................................................................3-4
3.2.4 Controller Module LEDs..................................................................................3-5
3.2.5 LAN Port LEDs ................................................................................................3-6
3.2.6 BBU LED..........................................................................................................3-7
3.2.7 PSU LEDs.........................................................................................................3-8
3.2.8 Cooling Module LEDs......................................................................................3-9
3.3. AUDIBLE ALARM ....................................................................................................3-10
3.3.1 Default Threshold Values...............................................................................3-10
3.3.2 Failed Devices................................................................................................3-11
3.4. I2C MONITORING....................................................................................................3-11
CHAPTER 4 SUBSYSTEM CONNECTION AND OPERATION
4.1 FC HOST CONNECTION PREREQUISITES ........................................................4-1
4.1.1 Choosing the Fibre Cables...............................................................................4-1
4.1.2 FC Lasers.........................................................................................................4-2
4.1.3 FC Speed Auto-detection..................................................................................4-2
4.1.4 SFP Transceivers..............................................................................................4-2
4.2 TOPOLOGY AND CONFIGURATION CONSIDERATIONS ..............................4-3
4.2.1 Basic Configuration Rules................................................................................4-3
4.2.2 Fibre Channel Topologies................................................................................4-3
4.2.3 Host-side Topologies........................................................................................4-4
4.2.4 Unique Identifier ..............................................................................................4-4
4.2.5 ID/LUN Mapping..............................................................................................4-4
4.3 SAMPLE TOPOLOGIES.........................................................................................4-4
4.3.1 Sample Topology – Clustered Hosts.................................................................4-4
4.3.2 Sample Topology – Direct-Attached.................................................................4-5
4.4 POWER ON .............................................................................................................4-6
4.4.1 Check List.........................................................................................................4-6
4.4.2 Power On Procedure........................................................................................4-7
4.4.3 Power On Status Check....................................................................................4-8

Galaxy Raid Installation and Hardware Reference Manual
ix
4.4.4 LCD Screen ......................................................................................................4-9
4.5 POWER OFF PROCEDURE .................................................................................4-10
CHAPTER 5 SUBSYSTEM MAINTENANCE
5.1. OVERVIEW.............................................................................................................5-1
5.1.1 Maintenance.....................................................................................................5-1
5.1.2 General Notes on Component Replacement.....................................................5-1
5.2. REPLACING CONTROLLER MODULE COMPONENTS...................................5-2
5.2.1 Overview...........................................................................................................5-2
5.2.2 Notes on Controller Module Maintenance.......................................................5-3
5.2.3 Removing the Controller Module .....................................................................5-3
5.2.4 Replacing the Controller Module.....................................................................5-4
5.3. DIMM MODULE REPLACEMENT.......................................................................5-6
5.3.1 DIMM Module Considerations.........................................................................5-6
5.3.2 DIMM Module Replacement Procedure...........................................................5-6
5.4. REPLACING AFAULTY BBU ..............................................................................5-7
5.5. REPLACING AFAULTY PSU MODULE..............................................................5-9
5.5.1 PSU Module Overview .....................................................................................5-9
5.5.2 Replacing the PSU Module.............................................................................5-10
5.6. COOLING MODULE MAINTENANCE ..............................................................5-13
5.6.1 Cooling Module Overview..............................................................................5-13
5.6.2 Replacing a Cooling Module..........................................................................5-14
5.7. REPLACING AFAILED HARD DRIVE..............................................................5-16
5.7.1 Hard Drive Maintenance Overview................................................................5-16
5.7.2 Replacing a Hard Drive .................................................................................5-17
APPENDIX A SPECIFICATIONS
A.1. TECHNICAL SPECIFICATIONS..................................................................................A-1
A.2. CONTROLLER SPECIFICATIONS...............................................................................A-3
A.2.1 Configuration .................................................................................................A-3
A.2.2 Architecture....................................................................................................A-3
A.3. DRIVE TRAY SPECIFICATIONS ................................................................................A-4
A.4. POWER SUPPLY SPECIFICATIONS............................................................................A-4
A.5. COOLING MODULE SPECIFICATIONS ......................................................................A-5
A.6. RAID MANAGEMENT.............................................................................................A-5
A.7. FAULT TOLERANCE MANAGEMENT........................................................................A-6
APPENDIX B SPARE PARTS AND ACCESSORIES
B.1. SPARE PARTS ......................................................................................................... B-1
B.2. ACCESSORIES......................................................................................................... B-2
APPENDIX C PIN OUTS
C.1. SFP CONNECTOR PIN OUTS ................................................................................... C-1

Galaxy Raid GHDX2-2430S/R-24F4D Installation and Hardware Reference Manual
x
C.2. COM1 CABLE:DB9 AUDIO JACK PIN OUTS.......................................................... C-3
C.3. COM2 CABLE:DB9 AUDIO JACK PIN OUTS.......................................................... C-4
C.4. GAL-9011 NULL MODEM...................................................................................... C-5
C.5. ETHERNET PORT PIN OUTS..................................................................................... C-6
C.6. MAIN POWER ......................................................................................................... C-6

Galaxy Raid Installation and Hardware Reference Manual
xi
Safety Precautions
Precautions and Instructions
•Prior to powering on the subsystem, ensure that the correct power range is being
used.
•The Galaxy subsystem comes with twenty four (24) drive bays. Leaving any of these
drive bays empty will greatly affect the efficiency of the airflow within the
enclosure, and will consequently lead to the system overheating, which can cause
irreparable damage.
•If a module fails, leave it in place until you have a replacement unit and you are
ready to replace it.
•Airflow Consideration: The subsystem requires an airflow clearance, especially at
the front and rear.
•Handle subsystem modules using the retention screws, eject levers, and the metal
frames/face plates. Avoid touching PCB boards and connector pins.
•To comply with safety, emission, or thermal requirements, none of the covers or
replaceable modules should be removed. Make sure that during operation, all
enclosure modules and covers are securely in place.
•Be sure that the rack cabinet into which the subsystem chassis will be installed
provides sufficient ventilation channels and airflow circulation around the
subsystem.
•Provide a soft, clean surface to place your subsystem on before working on it.
Servicing on a rough surface may damage the exterior of the chassis.
•If it is necessary to transport the subsystem, repackage all disk drives separately.
•Dual redundant controller models come with two controller modules that must be
installed into the subsystem. Single controller modules come with a single controller
module and a metal sheet is placed over the lower controller bay at the rear of the
subsystem. Since single controller modules cannot be upgraded, this metal sheet
should NEVER be removed.
ESD Precautions
Observe all conventional anti-ESD methods while handling system modules.
The use of a grounded wrist strap and an anti-static work pad are recommended.
Avoid dust and debris in your work area.

Galaxy Raid GHDX2-2430S/R-24F4D Installation and Hardware Reference Manual
xii
About This Manual
This manual:
•Introduces the Galaxy RAID GHDX2-2430S/R-24F4D 400mhz ASIC
subsystem.
•Describes all the active components in the subsystem.
•Provides recommendations and details about the hardware installation
process.
•Briefly describes how to monitor the subsystem.
•Describes how to maintain the subsystem.
This manual does not:
•Describe components that are not user-serviceable.
•Describe the configuration options of firmware, using terminal emulation
programs, or the RAIDWatch GUI software that came with your subsystem.
•Give a detailed description of the RAID controllers embedded within the
subsystem.
Revision History
♦Initial release
Who should read this manual?
This manual assumes that its readers are experienced with computer hardware
installation and are familiar with storage enclosures.
Related Documentation
•User’s Operation Manual
•RAIDWatch User’s Manual

Galaxy Raid Installation and Hardware Reference Manual
xiii
These two documents can be found in the product utility CD included with your
subsystem package.
Conventions
Naming
From this point on and throughout the rest of this manual, the Galaxy series is
referred to as simply the “subsystem” or the “system” and Galaxy is frequently
abbreviated as “Gal.”
Lists
Bulleted Lists: Bulleted lists are statements of non-sequential facts. They can be
read in any order. Each statement is preceded by a round black dot “•.”
Numbered Lists: Numbered lists are used to describe sequential steps you
should follow in order.
Important information that users should be aware of is indicated with the
following icons:
NOTE:
These messages inform the reader of essential but non-critical
information. These messages should be read carefully as any directions
or instructions contained therein can help you avoid making mistakes.
CAUTION!
Cautionary messages should also be heeded to help you reduce the
chance of losing data or damaging the system.
IMPORTANT!
The Important messages pertain to use the Galaxy subsystem introduced
in this manual.
WARNING!
Warnings appear where overlooked details may cause damage to the

Galaxy Raid GHDX2-2430S/R-24F4D Installation and Hardware Reference Manual
xiv
equipment or result in personal injury. Warnings should be taken
seriously.
Software and Firmware Updates
Please contact Rorke Technical Support for the latest software or firmware
updates.
Problems that occur during the updating process may cause unrecoverable errors
and system down time. Always consult technical personnel before proceeding
with any firmware upgrade.
NOTE:
The firmware version installed on your system should provide the
complete functionality listed in the specification sheet/user’s manual.
We provide special revisions for various application purposes.
Therefore, DO NOT upgrade your firmware unless you fully understand
what a firmware revision will do.

Galaxy Raid Installation and Hardware Reference Manual
xv

Introduction 1-1
Chapter 1
Introduction
1.1. Product Overview
This hardware manual briefly introduces the Galaxy GHDX2-2430S/R-16F4D Fibre-4G
to SATA-II RAID subsystem as shown in Figure 1-1.
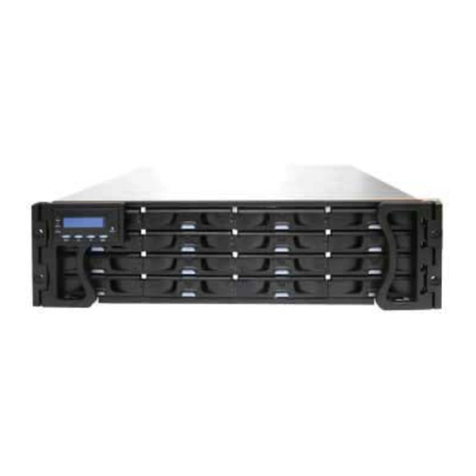
Figure 1-1: GHDX2-2430S/R-24F4D FC-to-SATA RAID Subsystem
The GHDX2-2430S-24F4D RAID subsystem is powered by a single RAID controller,
the GHDX2-2430R-24F4D by dual redundant RAID controllers. Each RAID controller
comes with two (2) 4Gbps Fibre host channels that are interfaced through four (4)
separate SFP ports. A total of eight (8) SFP ports are available in a redundant-controller
configuration. The additional SFP ports facilitate connection to multiple application
servers and for connecting fault-tolerant data paths. The subsystem houses twenty-four
(24) 3Gbps SATA-II disk drives each with dedicated channel bandwidth. Each controller
board comes with a pre-installed 512MB DDR RAM DIMM module and can support
memory modules with the capacities up to 2GB.
The Galaxy HDX2 series is built around a custom ASIC400 specifically designed with
the hardware RAID6 capability. RAID6 can sustain two member drives of a RAID array
to fail at the same time and thereby helps achieve a higher level of data availability.
There are six (6) dedicated RCC paths strung between the partner RAID controllers in a
dual-active configuration. The RCC chips reside on the third, separate PCI-X bus. This
design takes benefits of the abundant system bandwidth brought by the new architecture
and hence the inter-controller communications do not affect drive channel throughput.

Galaxy GHDX2-2430S/R-24F4D Installation and Hardware Reference Manual
Introduction
1-2
A SAS expansion port comes with each RAID controller and provides easy connectivity
to terabytes of expansion capacity over the 4x, wide SAS link cables.
Two (2) RS-232C (audio jack) serial port connectors are located on the controller
faceplate. One serial port (COM1) enables serial communication between the controller
and an external PC running terminal emulation software that can be used to configure and
manage the RAID subsystem. The second serial port (COM2) connects to an
uninterruptible power supply (UPS). An RJ-45 Ethernet connector allows telnet access
and web-based management using the included browser-based or Java-based versions of
the RAIDWatch manager software.
Disk drives in the front section of the subsystem are directly mated with a common
backplane. The backplane receives a maximum of twenty-four (24) SATA-II hard drives
that should be separately purchased.
Two (2) redundant, hot-swappable, dual-fan cooling modules protect the RAID
subsystem from overheating and three (3) redundant, hot-swappable, 1U 405W power
supply unit (PSU) modules provide constant power to the RAID subsystem. The modular
nature of the subsystem and the easy accessibility to all major components ensure that the
subsystem can be reliably and efficiently operated and maintained.
1.1.1 Enclosure Chassis
1.1.1.1 Chassis Overview
The Galaxy HDX2 24bay subsystem comes with a 4U compact steel chassis and
aluminum alloy framework for even distribution of component heat. A back-end PCB is
enclosed in thick gauge sheet metal that divides the enclosure internally into the front and
rear sections. (See Figure 1-2) The front section accommodates twenty-four (24) drive
trays (with their associated hard drives) and the rear section accommodates three (3) PSU
modules, two (2) dual-fan cooling modules, and RAID controllers in a single- or dual-
controller configurations. The two (2) foldable handles on the front of the chassis enable
you to easily extract the chassis from a rack cabinet. The subsystem enclosure can be
mounted into standard 19-inch rack cabinets using separately purchased slide rails.

Chapter 1: Introduction
1-3
Figure 1-2: Galaxy 24-bay SATA RAID Subsystem Overview
1.1.1.2 Physical Dimensions
The Galaxy HDX2 24bay subsystem comes in a standard 4U chassis with the following
dimensions:
♦With forearm handles: 482W x 174.4H x 514D mm (19 x 6.87 x 20.2 inches)
♦Without forearm handles: 445W x 174.4H x 498D mm (17.5 x 6.87 x 19.6
inches)

Galaxy GHDX2-2430S/R-24F4D Installation and Hardware Reference Manual
Introduction
1-4
1.1.1.3 Front Panel Overview
Figure 1-3: Galaxy HDX2 24bay RAID Subsystem Front View
As shown above, the front section of the subsystem features a 4-column by 6-row layout
to accommodate twenty-four (24) drive trays that are designed to house standard 3.5-inch
SATA drives. The left-side forearm handle comes with a 16 characters by 2 rows LCD
screen and four (4) function keys that can be used to configure and monitor the
subsystem.
1.1.1.4 Drive Slot Numbering
The front section of the enclosure houses twenty-four (24) hard drives. When viewed
from the front, the drive bays (slots) are numbered 1 to 24 from left to right, then from
top to bottom.
Slot-1 Slot-2 Slot-3 Slot-4
Slot-5 Slot-6 Slot-7 Slot-8
Slot-9 Slot-10 Slot-11 Slot-12
Slot-13 Slot-14 Slot-15 Slot-16
Slot-17 Slot-18 Slot-19 Slot-20
Slot-21 Slot-22 Slot-23 Slot-24
Figure 1-4: Hard Drive Slot Numbering

Chapter 1: Introduction
1-5
1.1.1.5 Rear Panel Overview
Figure 1-5: Galaxy GHDX2-2430R-24F4D Rear View
Figure 1-6: Galaxy GHDX2-2430S-24F4D Rear View
The rear panel of the Dual redundant controller version of the Galaxy HDX2 subsystem
is shown in Figure 1-5. The rear panel provides access to all the components located in
the rear half of the RAID subsystem enclosure. The rear panel of the single controller
version of the Galaxy HDX2 subsystem is shown in Figure 1-5.
Three (3) (N+1) redundant, hot-swappable 405W PSU modules provide converted power
from the power source. Two (2) redundant, hot-swappable, dual-fan cooling modules are
located above the PSU modules. One power switch on the chassis rear panel controls all
PSU modules. Each PSU module contains two cooling fans.
This manual suits for next models
1
Table of contents
Other Galaxy Computer Hardware manuals