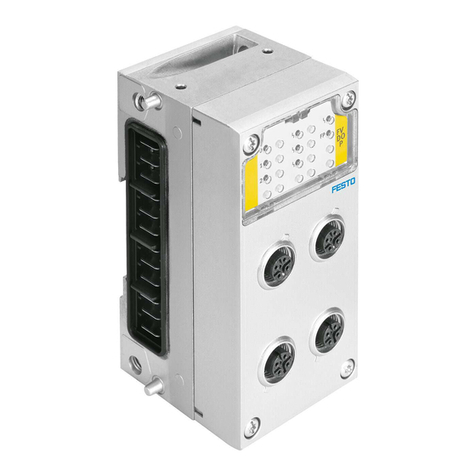
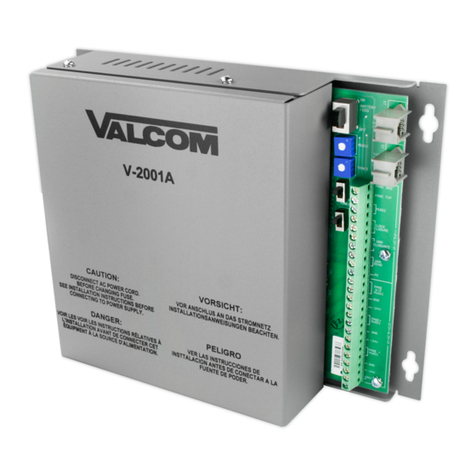
Eilersen 5024G User manual

Software: StdLim.140630.6v0x
Doc. no.: StdLim-140630-6v0a-OG-ExtModule-eng
Date: 2021-09-21
Rev.: 6v0a
Contact:
Eilersen Electric A/S
Kokkedal Industripark 4
DK-2980 Kokkedal
Denmark
www.eilersen.com
info@eilersen.com
Tel: +45 49 180 100
Fax: +45 49 180 200
5024G Options Guide External Module
5024G LCD weighing terminal
External module option: MCE9637, MCE2035, 2050 or 2070

2
WWW.EILERSEN.COM
Contents
Contents...................................................................................................................................... 2
Introduction................................................................................................................................ 5
Installation of external module .................................................................................................. 5
How to ........................................................................................................................................ 5
–Enable and configure external module on 5024G .............................................. 5
Enable or change Device Type .......................................................................... 6
Set/Read Device Address.................................................................................. 6
Set/Read Endian................................................................................................ 6
Read Status ....................................................................................................... 6
Read Error Counter........................................................................................... 6
Set/Read Bytes Out........................................................................................... 7
Set/Read Bytes In.............................................................................................. 7
–Monitor external module data on 5024G ........................................................... 7
Protocol description ................................................................................................................... 7
–External communication using PPO .................................................................... 7
–MOD .................................................................................................................... 8
MDS................................................................................................................... 8
–PCV Description................................................................................................... 9
PCA.................................................................................................................... 9
PNU ................................................................................................................. 10
PVA.................................................................................................................. 10
–PCD Description................................................................................................. 10
CTW/STW........................................................................................................ 10
MRV/MAV....................................................................................................... 11
–Communication overview ................................................................................. 11
–RS –Reference Value Selector, MRV –Main Reference Value......................... 11
–AS –Actual Value Selector, MAV –Main Actual Value ..................................... 11
–CTW –Control Word ......................................................................................... 12
–STW –Status Word............................................................................................ 12
–Parameters........................................................................................................ 13

3
WWW.EILERSEN.COM
Trouble shooting....................................................................................................................... 15
Appendices ............................................................................................................................... 16
Appendix A –Screens overview........................................................................... 16
Appendix B –Electrical connection of 5024G to external module ...................... 17
RS485 communication connector on 5024G .................................................. 17
Appendix C –MCE2035 Profibus-DP module....................................................... 18
MCE2035 Profibus-DP specification................................................................ 18
MCE2035 Checklist during installation ........................................................... 18
MCE2035 Connection ..................................................................................... 18
MCE2035 DIP-switch settings ......................................................................... 19
MCE2035 Jumper settings .............................................................................. 19
MCE2035 Light Emitting Diodes...................................................................... 20
MCE2035 Profibus-DP connector.................................................................... 20
Appendix D –2070 PROFINET module................................................................. 21
2070 Checklist during installation................................................................... 21
2070 Connection without MCE9601............................................................... 21
2070 Connection with MCE9601 .................................................................... 22
2070 DIP-switch settings................................................................................. 22
2070 Jumper settings...................................................................................... 22
2070 Light Emitting Diodes............................................................................. 23
2070 PROFINET connector.............................................................................. 24
Appendix E –MCE9637 DeviceNet module ......................................................... 25
MCE9637 DeviceNet specification.................................................................. 25
MCE9637 Checklist during installation ........................................................... 25
MCE9637 Connection ..................................................................................... 25
MCE9637 DIP-switch settings ......................................................................... 26
MCE9637 Jumper settings .............................................................................. 27
MCE9637 Light Emitting Diodes...................................................................... 27
MCE9637 DeviceNet connector...................................................................... 28
Appendix F –2050 Ethernet-IP module............................................................... 29
2050 Ethernet-IP specification........................................................................ 29
2050 Checklist during installation................................................................... 29
2050 Connection without MCE9601............................................................... 29

4
WWW.EILERSEN.COM
2050 Connection with MCE9601 .................................................................... 30
2050 DIP-switch settings................................................................................. 30
2050 Light Emitting Diodes............................................................................. 31
2050 RS232 connector (J4) ............................................................................. 33
2050 Ethernet connector (J8) ......................................................................... 33
Appendix G –2050 Setup and Terminal Interface............................................... 33
2050 IP address setting................................................................................... 34
Appendix H –2050 Ethernet-IP connection to Allen Bradley .............................. 35
Ethernet-IP communication –Master input................................................... 35
Ethernet-IP communication –Master output ................................................ 36
Appendix I –2070 Tips for PROFINET configuration............................................ 36
MAC addresses................................................................................................ 36
GSDML file....................................................................................................... 36
Factory settings............................................................................................... 36
Setting DeviceName, IP Address etc............................................................... 37
Data sizes ........................................................................................................ 37
Revision History ........................................................................................................................ 38
Contact...................................................................................................................................... 38

5
WWW.EILERSEN.COM
Introduction
This document describes the use of the External Module option on the 5024G Weighing Ter-
minal from Eilersen Electric. With the software version stated on the front page and with the
External Module option enabled as well as a on RS485 externally connected communications
module (MCE2035, 2070, MCE9637 or 2050) from Eilersen Electric the system can communi-
cate with an external controller/PLC using Profibus-DP, PROFINET, DeviceNet or Ethernet-IP.
With the later stated software versions installed in the external module the external commu-
nication module can transfer 14 input bytes from the 5024G terminal to the Profibus-DP /
PROFINET / DeviceNet / Ethernet-IP master, and transfer 14 output bytes from Profibus-DP /
PROFINET / DeviceNet / Ethernet-IP master to the 5024G terminal.
Exchange of data between 5024G terminal and the external controller/PLC is made according
to the profile/protocol described later (see Protocol description).
This manual only describes the External Module option. For general information on the oper-
ation of the 5024G please see the ‘Users guide’.
Installation of external module
The used external module (xxxx) must be connected to the 5024G weighing terminal and to
the external controller/PLC according to the description in the appropriate appendix.
Please notice:
•no matter what module type, the module must be connected to the 5024G terminal
using a RS485 connection.
•depending on module type, the module must be connected to the external control-
ler/PLC using bus type as described in the appendix belonging to the module.
•depending on module type, the 5024G terminal must be configured to exactly the
module used according to the guidelines below.
How to
–Enable and configure external module on 5024G
Below the EXTERNAL MODULE screen is shown when a MCE2035 (MCExx35) module has
been enabled.

6
WWW.EILERSEN.COM
In this screen the external module is shown and can be changed. A cursor (inverted text) in-
dicates the currently selected module. With this version of the software only one module can
be installed.
The line with module data shows in forth running order after the Device Index (always 0 in
this software version): Device Type, Device Address, Endian, Status, Error Counter, Bytes Out
and Bytes In, which all are described in detail below.
Enable or change Device Type
To enable or select a new module type (Device Type) press on the selected line, and from
the EXTERNAL MODULE menu select the DEVICE TYPE menu item to get the selection list
with possible module types. Possible module types are MCExx35 Profibus-DP module,
MCE9637 DeviceNet module, 2050 Ethernet module and 2070 PROFINET module. If no ex-
ternal module is enabled the 5024G display will show “-------”/ ”None”.
Once a module type is enabled/selected the other settings (see descriptions below) are set to
default values, which should normally be used.
Set/Read Device Address
The address is the entered address plus the base address for the module type selected.
During change enter a number in the interval 0-15. With this software version where only
one external module can be connected, 0 is the normally entered address value.
Set/Read Endian
Endian of the individual data values transferred: MSB most significant byte first: Big endian.
LSB least significant byte first: Little endian. MSB is normally used with Profibus-DP and
PROFINET while LSB is normally used with all other types of modules.
Read Status
00: Communication up and running.
40: Connection established earlier to the module has been lost.
80: No connection to the module has been established.
Read Error Counter
Current number off errors in communication.

7
WWW.EILERSEN.COM
Set/Read Bytes Out
Number of bytes to be sent from the 5024G to the external module and from there to the
Profibus-DP/PROFINET/DeviceNet/Ethernet master. This is the number of input bytes in the
Profibus-DP/PROFINET/DeviceNet/Ethernet master.
The value must be the same as the value in the external module. Normally this is 14.
Set/Read Bytes In
Number of bytes to be received in the 5024G from the external module and transmitted from
the Profibus-DP/PROFINET/DeviceNet/Ethernet master. This is the number of output bytes in
the Profibus-DP/PROFINET/DeviceNet/Ethernet master.
The value must be the same as the value in the external module. Normally this is 14.
–Monitor external module data on 5024G
Below the EXTERNAL MODULE DATA screen is shown when a MCE2035 (MCExx35) module
has been enabled.
This screen will show the data sent to the external module (OUT) and the data received from
the external module (IN).
The following keys can be used for the described special functions:
Selects entry of the selected input data byte for test purposes. If an external module
is communication the value will immediately be overwritten by the value receive
form the external module.
T
Toggles the cursor between the output and the input bytes.
Protocol description
–External communication using PPO
The communication with the external module is made using a 'parameter-process data object'
(PPO) consisting of 14 bytes data. This telegram (object) is used during both reception and
transmission of data. The structure of this telegram is as follows:

8
WWW.EILERSEN.COM
MOD
PCV
PCD
MDS
PCA
PNU
PVA
CTW
STW
MRV
MAV
1
2
3
4
5
6
7
8
9
10
11
12
13
14
Byte 1 Byte 14
The telegram is made up of 3 blocks; a MOD part (1 byte), a PCV part (the next 7 bytes) and a
PCD part (the last 6 bytes). The three blocks are as follows:
MOD (Mode)
MDS (Byte 1): Mode selector
PCV (Parameter-Characteristic-Value)
PCA (Byte 2): Parameter Characteristics
PNU (Bytes 3-4): Parameter number
PVA (Bytes 5-8): Parameter value
PCD (Process Data)
CTW (Bytes 9-10) (Master to Slave): Control Word
STW (Bytes 9-10) (Slave to Master): Status Word
MRV (Bytes 11-14) (Master to Slave): Main Reference Value
MAV (Bytes 11-14) (Slave to Master): Main Actual Value
In the following the meaning of the individual blocks of the telegram is explained further.
IMPORTANT: During transfer/reception of data (i.e. the MAV) it is up to the master
(the PLC) to ensure consistent data, when a parameter consisting of several bytes is
read/updated and when AS/MAV or RS/MRV is read/set.
–MOD
The MOD part of the telegram indicates which value is to be transferred as Main Reference Val-
ue (MRV) and as Main Actual Value (MAV). Please see below for further information.
MDS
MDS contains an RS part for selection of Main Reference Value (MRV) and an AS part for selec-
tion of Main Actual Value (MAV), as shown in the figure below.

9
WWW.EILERSEN.COM
Bit 7 Bit 0
7
6
5
4
3
2
1
0
RS
AS
RS: Reference value selector (Values: 0..15)
AS: Actual value selector (Values: 0..15)
–PCV Description
The PCV part of the telegram is made up of a PCA part, a PNU part and a PVA part. The function
of these different parts of the PCV part is described here.
PCA
The PCA part contains an RC part for 'request' and 'response' indication.
Bit 7 Bit 0
7
6
5
4
3
2
1
0
RC
RC: Request/Response Characteristics (Values: 0..255)
RC is used by the master to tell the slave which ’request’ is desired. Similarly the slave uses
RC to inform the master the status of the received 'request' (’response’). The contents of RC
has the following function during ’request:
REQUEST
FUNCTION
0
No request
1
Request parameter value
2
Change parameter value (2 bytes)
3
Change parameter value (4 bytes)
Others
Reserved for future use
The contents of RC has the following function during response:

10
WWW.EILERSEN.COM
RESPONSE
FUNCTION
0
No response
1
Transfer parameter value (2 bytes)
2
Transfer parameter value (4 bytes)
3
Request rejected (incl. Error#, see later)
4
Cannot be serviced by PCV interface
Others
Reserved for future use
PNU
The PNU part indicates the parameter number of the parameter to be read/changed. The pa-
rameters and their function is described below.
PVA
The PVA part contains 4 bytes for reception and transmission of parameter values. The PVA
part transfers '2 byte' parameters in bytes 5 and 6, while '4 byte' parameters are transferred
in bytes 5 and 8.
If the slave rejects a request from the master the RC part assumes the value 3 (see above)
and the error number itself is transferred in the PVA part (bytes 5 and 6). The following error
indications are possible:
ERROR #
CAUSE
0
Illegal command for this PNU or PNU not used.
1
Reserved for future use
2
Upper or lower limit exceeded
–PCD Description
The PCD part of the telegram is made up of a CTW/STW part and a MRV/MAV part. The func-
tion of these two parts of the PCD part is described here. Note that the PCD part (the last 6
bytes) always transfers these data disregarding the contents of the PCV part.
CTW/STW
During communication from the master to the slave, the first two bytes of the PCD part are used
as a Control Word (CTW). Using the Control Word (CTW) it is possible to tell the slave how to re-
act as different commands can be transferred to the slave.
During communication from the slave to the master, the first two bytes of the PCD part are used
as a Status Word (STW). Using the Status Word (STW) it is possible for the master to gain infor-
mation on the status of the slave.

11
WWW.EILERSEN.COM
MRV/MAV
During communication from the master to the slave the last four bytes of the PCD part are
used as a Main Reference Value (MRV); a setpoint. Using the RS defines exactly which value
is transferred as MRV.
During communication from the slave to the master the last four bytes of the PCD part are
used as a Main Actual Value (MAV); the actual value. Using the AS defines exactly which val-
ue is transferred as MAV.
–Communication overview
Please note the following:
1. All weights are transferred as shown in the display without a decimal point (i.e. 300.0 kg
is transferred as 3000 and 67.2 kg is transferred as 672).
2. All negative numbers are transferred as 2-complement numbers.
3. Actual unit and decimal point position can be read from the appropriate parameter.
–RS –Reference Value Selector, MRV –Main Reference Value
RS
Reference Value Selector
MRV
Main Reference Value
0
Not used
Others
Not used
–AS –Actual Value Selector, MAV –Main Actual Value
AS
Actual Value Selector
MAV
Main Actual Value
0
Not used
1
Actual gross weight
2
Actual net weight
Others
Not used
Actual gross weight is the actual gross weight on the 5024G terminal.
Actual net weight is the actual net weight on the 5024G terminal.

12
WWW.EILERSEN.COM
–CTW –Control Word
Bit
Function
0
Zero
1
Autotare (zero of net weight)
2
Start dosing
3
Stop dosing
4
Registration
Others
Not used
Zero must be activated if a zero of the gross weight is desired.
Autotare must be activated if a zero of the net weight is desired.
Start dosing must be activated if a start of dosing is desired.
Stop dosing must be activated if a dosing is to be stopped before the fine limit is reached. If the
terminal is set to perform automatic registration on time this will take place afterwards.
Registration must be activated if a registration of the actual net weight is desired. Any dosing in
progress will be aborted before registration.
–STW –Status Word
Bit
Function
0
Weight reading not possible
1
Zero OK
2
Zero not possible
3
Autotare OK
4
Autotare not possible
5
Start dosing OK
6
Start dosing not possible
7
Stop dosing OK
8
Stop dosing not possible
9
Registration OK
10
Registration not possible
11
Fine dosing
12
Coarse dosing
13
Not used
14
Registration ready
15
OK –always ON
Weight reading not possible is active when the 5024G terminal is unable to determine
weight.
Zero OK is active when zero was possible.*)

13
WWW.EILERSEN.COM
Zero not possible is active when zero was NOT possible.*)
Autotare OK is active when autotare was possible.*)
Autotare not possible is active when autotare was NOT possible.*)
Start dosing OK is active when start of dosing was possible.*)
Start dosing not possible is active when start of dosing was NOT possible.*)
Stop dosing OK is active when stop of dosing was possible.*)
Stop dosing not possible is active when stop of dosing was NOT possible.*)
Registration OK is active when registration of net weight was possible.*)
Registration not possible is active when registration of net weight was NOT possible.*)
Fine dosing is active during dosing until the fine limit (pos. adjusted for afterflow) is reached.
Coarse dosing is active during dosing when the net weight is below the coarse limit.
Registration ready is active when a registration is ready. The bit is cleared when a new dosing is
started.
OK –always ON is always activated. Can be used as a control of the communication.
Bits marked with *) are cleared again when the corresponding request bit is cleared.
–Parameters
NO
TYPE
PARAMETER
1
4, R
Actual gross weight
2
4, R
Actual net weight
3
4, RW
Fine limit
4
4, RW
Coarse limit
5
-
Not used
6
4, R
Last registered amount
7
4, R
Total dosed amount
8
4, R
Total number of weighings
10
2, R
Unit
0: kg
1: lbs
2: gram
11
2, R
Decimal point position
20 - 35
2, R
Load cell-Status[x]
40 - 55
4, R
Load cell-Gross[x]
Others
Not used
Actual gross weight is the actual gross weight on the 5024G terminal.
Actual net weight is the actual net weight on the 5024G terminal.

14
WWW.EILERSEN.COM
Fine limit contains the fine limit used during dosing.
Coarse limit contains the coarse limit used during dosing.
Last registered amount contains the result (registration) of the last dosing.
Total dosed amount contains the total dosed amount.
Total number of weighings contains the total number of weighings.
Unit indicates the unit used in the display reading. It should be used to scale weight indications
received/transmitted using the Profibus-DP/PROFINET/DeviceNet/Ethernet-IP communication.
Decimal point position indicates the number of digits after the decimal point in the display read-
ing. It should be used to scale weight indications received/transmitted using the Profibus-
DP/PROFINET/DeviceNet/Ethernet-IP communication.
Load cell-Status[x] contains the actual status for load cell x.
Load cell-Gross[x] contains the actual gross signal (not zeroed) on load cell x.

15
WWW.EILERSEN.COM
Trouble shooting
Problem
Explanation and possible solutions
PLC unable to re-
ceive/transmit data
from/to 5024G
Check connection between PLC and external module is ok (see below).
Check connection between 5024G and external module is ok (see below).
No connection be-
tween PLC and exter-
nal module
Check the field bus cabling between 5024G and PLC is made correctly.
Check possible termination of field bus is made correctly.
Check the external module is powered correctly.
Check the PLC is configured correctly possibly using the supplied configura-
tion file.
If possible check the field bus communication address is set correctly using
DIP switches or configuration tool.
Check if status lamps on external module indicate connection to PLC is ok.
No connection be-
tween 5024G and
external module
Check the RS485 connection between 5024G and external module is made
correctly.
Check the external module is powered correctly.
Check the AUX (RS485) communication address is set correctly on the ex-
ternal module using its DIP switches.
If possible check status lamps (typical TXBB and D1) on external module
indicate communication with 5024G (typical they will toggle).
Check parameters in EXTERNAL MODULE screen are configured correctly:
-Check ”Device Type” parameter matches external module type.
-Check ”Address” parameter corresponds to DIP switch setting on exter-
nal module.
-Check ”Bytes Out” parameter matches specification in configuration file;
typical 14 for this application.
-Check ”Bytes In” parameter matches specification in configuration file;
typical 14 for this application.
Values change rapidly
between random val-
ues
Check ”Endian” parameter selected in EXTERNAL MODULE screen corre-
sponds to the used field bus and PLC type.
Implemented protocol
does not behave as
expected
Use the EXTERNAL MODULE DATA screen to debug 5024G received data
from PLC (IN) results in expected transmit data to PLC (OUT).
-

16
WWW.EILERSEN.COM
Appendices
Appendix A –Screens overview
The system has the following screens, which are selected using the menu system. With the
external module option enabled an EXT. MODULE screen and a DATA screen is added:
NORMAL ─┬─ DOSING
│
├─ (STATUS)
│
├─ TOTALS
│
├─ SYSTEM INFO ──┬── SYSTEM SETTINGS
│ │
│ ├── LOAD CELL INFO.
│ │
│ ├── LOAD CELL SIGNALS
│ │
│ ├── LOAD CELL DIAGNOSTICS
│ │
│ └── ETHERNET STATUS
│
└─ SERVICE MODE ─┬─ SYSTEM (SETUP SYSTEM) ────INTELLIGENT SETUP
│
├─ WEIGHING ─────┬── LOAD CELLS ─AUTO. CONFIG.
│ │
│ ├── COARSETARE
│ │
│ ├── ZEROING
│ │
│ ├── CALIBRATION ── CORNER CAL.
│ │
│ ├── LINEARIZATION
│ │
│ └── DISPLAY
│
├─ DOSING PAR.
│
├─ ETHERNET ──────── PROTOCOLS
│
└─ EXT. MODULE ───── DATA

17
WWW.EILERSEN.COM
Appendix B –Electrical connection of 5024G to external module
The following describes the electrical connection of the 5024G terminal to a general external
module using a RS485 connection.
RS485 communication connector on 5024G
The 3 pin RS485 serial communication connector (J4) on the 5024G can be used for RS485
communication with external equipment. This connector has the following connections:
J4 pin
Function
Connection
1
RS485-B
(negative line)
External module MCE9601: B
or
RS485-B on communication connector on the external module.
2
RS485-A
(positive line)
External module MCE9601: A
or
RS485-A on communication connector on the external module.
3
RS485-GND
External module MCE9601: GND
or
RS485-GND on communication connector on the external module.
Please notice: A and B line definition may be switched on eternal equipment. Especially on
Siemens equipment and a few other German manufacturers A and B lines definitions are dif-
ferent.
IMPORTANT: Remember to supply power to any external communication module used. This
can be done by connecting +24V and GND (possibly taken from the J1 or J6 connector on the
5024G terminal) to the used MCE9601 connection module or directly to any power connect-
or on the external module.

18
WWW.EILERSEN.COM
Appendix C –MCE2035 Profibus-DP module
If a 2035 Profibus-DP module is connected it must have the following software version:
MCE2535.AUXSLAVE.050909.0 (O14_I14)
It is possible to connect the 2035 communication module on a PROFIBUS-DP network, where
it will act as a slave. It will then be possible from the PROFIBUS-DP master to transfer data
to/from the 5024G terminal (RS485 master).
MCE2035 Profibus-DP specification
The 2035 communication module confirms to the following PROFIBUS-DP specifications:
Protocol: Profibus-DP
Communications form: RS485
Module type: Slave
Baud rates [kbit/sec]: 9.6, 19.2, 93.75, 187.5, 500, 1500, 3000, 6000, 12000
Profibus-DP address: 0-127 (Sw2.2-Sw2.8)
Profibus-DP connection: 9-pin sub-D (female) connector
MCE2035 Checklist during installation
During installation of the system the following should be checked/performed:
1) The Profibus-DP master is configured to communicate with the Profibus-DP module
(2035) using the supplied GSD file.
2) The Profibus-DP module (2035) is connected to the Profibus-DP network, and a possi-
ble termination at the Profibus-DP slave is made.
3) The Profibus-DP module (2035) address is set using Sw2.2- Sw2.8. Power is applied,
and the Profibus-DP communication is started.
4) Check that yellow LEDs (DES and RTS) of the Profibus-DP module (2035) are
lit/flashing, and that the green LED (D1) flashes. Check that the TXBB LED on the Profi-
bus-DP module flashes and that the red LED (PBE) is not lit.
MCE2035 Connection
The 10-pole connector (J2) on the 2035 module is connected to the 10-pole connector on the
MCE9601 connection module using the supplied ribbon cable with mounted connectors.
Through this bus cable connection of power supply is achieved as well as connection to the
5024G terminal (RS485 master).
The MCE9601 module is connected to the 5024G terminal as follows:
MCE9601 CONNECTOR
CONNECTION
GND
-
B (DATA- )
5024G J4.1: RS485-B
A (DATA+)
5024G J4.2: RS485-A
GND
-
+24V
5024G J6.1: +24VDC (Vin)
GND
5024G J6.2: 0 VDC (GNDin)
I/O
-
Please notice that the internal Jumper JU 1 must be ON (inserted).

19
WWW.EILERSEN.COM
MCE2035 DIP-switch settings
The 2035 PROFIBUS-DP module is equipped with DIP-switch blocks that have the following
function:
SWITCH
FUNCTION
Sw1.1-Sw1.4
Selection of AUX communication address
The address is selected as the DIP-switches are binary coded, so that Sw1.1 is
MSB and Sw1.4 is LSB. Note that these switches are only read during power on.
The address should not be set so that the module has an address that matches
another Profibus-DP module on the same AUX bus. The modules should be
numbered from 0 and upwards without skipping any numbers. If only one mod-
ule of a given type is connected to the AUX bus all switches should be OFF.
SWITCH
FUNCTION
Sw2.1
Reserved for future use
Sw2.2-Sw2.8
Selection of PROFIBUS-DP communication address
The address is selected as the DIP-switches are binary coded, so that Sw2.2 is
MSB and Sw2.8 is LSB. Note that these switches are only read during power on.
MCE2035 Jumper settings
The 2035 PROFIBUS-DP module is equipped with 4 jumpers. These jumpers have the follow-
ing function:
JUMPER
FUNCTION
JU1
Baudrate on the AUX bus.
OFF: Communication at 9600 bps.
ON: Communication at 115200 bps.
(MUST be in this position for communication with 5024G)
(Normally the jumper will be mounted on delivery.)
JU2-JU4
Alternative termination of the Profibus-DP.
If R17, R21 and R22 are mounted these jumpers can be used to connect the
termination resistors, so this is done directly on the module and not the normal
way in the Profibus-DP connectors

20
WWW.EILERSEN.COM
MCE2035 Light Emitting Diodes
The 2035 PROFIBUS-DP module is equipped with 6 light emitting diodes (LED). These LED’s
have the following function:
LED
FUNCTION
TXBB
(Green)
Communication with AUX-master
2035 is communicating with AUX-master.
D1
(Green)
Communication with AUX-master
Toggles when the 2035 module receives a valid telegram on the AUX-bus.
D2
(Green)
Reserved for future use
PBE
(Red)
Profibus Error (when initializing the SPC3)
The SPC3 Profibus-DP controller was not initialized correctly.
DES
(Yellow)
Data Exchange State
Exchange of data between slave and master.
RTS
(Yellow)
RtS signal (SPC3)
The Profibus-DP module sends to the master.
MCE2035 Profibus-DP connector
The 2035 PROFIBUS-DP module is equipped with a nine pole female sub-D connector (J1) for
connection to the PROFIBUS-DP network. The connector is a standard PROFIBUS-DP con-
nector. Termination of the PROFIBUS-DP should take place in the sub-D connector (male) of
the cable. The specific terminals in the connector have the following function:
J1 Terminals Function
J1.1 Not used
J1.2 Not used
J1.3 RS485-A (positive line)
(Siemens designation: B line)
J1.4 Request to Send (RTS)
J1.5 0 VDC (Gnd)
J1.6 +5VDC (Vout)
J1.7 Not used
J1.8 RS485-B (negative line)
(Siemens designation: A line)
J1.9 Not used
Note that some companies use different designations for the RS485-A and the RS485-B lines.
Therefore the polarity of the lines has been listed.
Other manuals for 5024G
3
Table of contents
Other Eilersen Control Unit manuals
