3. Set up
Before starting the equipment
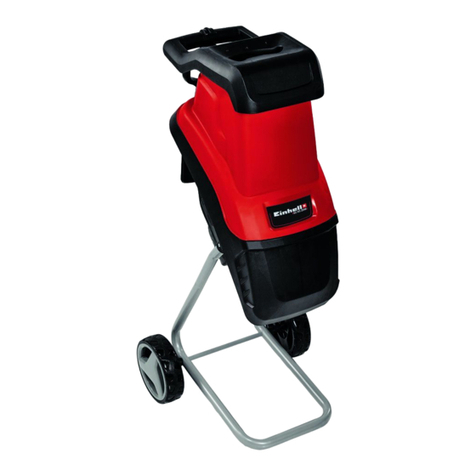
This impact shredder is delivered unassembled and requires complete assembly before use.
CAUTION!
Check that all parts of the impact shredder are in the box before starting
to assemble.
1. First Use
Checking the shredder and product contents
1. Carefully take the impact shredder out of the packaging.
2. Check to make sure that the delivery is complete (see fig. 1).
3. Check whether the impact shredder or the parts exhibit any damage.
4. In the event of damages or missing parts, do not use the impact shredder. Contact the
manufacturer via the service address indicated on the warranty card.
5. If possible, please keep the packaging until the end of the guarantee period.
2. Assembling the Shredder
WARNING!
Before start-up, assemble the shredder properly and completely,
including all covers and safety devices.
− Only once you have completed assembly, may you insert the mains
plug in the socket.
You will also need the following tools for assembly:
– PH2 star-headed screwdriver
(You may also need one AF 10 open-ended spanner - to hold the axle whilst the nuts are tightened).
Before starting the equipment
– Before you connect the equipment to the mains supply make sure that the data on the rating plate
matches that of your local supply.
– Always pull out the power plug before making adjustments to the equipment.
– The chassis and the wheels must be fitted before use. Follow the operating instructions step-by-
step and use the pictures provided as a visual guide to easily assemble the machine.
1. Assembling the chassis (Fig. 6a/6b)
– Place the motor housing
3
upside down on the floor.
– Insert the tubular chassis
5
into the provided openings as far as the tubes will go.
– Fit the washers
17
under the heads of the screws
16
and then use the screws with the washers to
secure the chassis, as shown in Fig. 6b using a PH2 star-headed screwdriver (not included).
Fig. 6b
5
17
16
Fig. 6a
2. Assembling the axle and wheels (Figs. 7a-7h)
– Remove the sleeves
18
&
19
, nuts
21
and washers
20
from both ends of the axle
5
.
– Mount the axle into the chassis
5
(Fig. 7a)
Fig. 7b
18
57
Fig. 7a
7
– Refit thick short sleeves
18
& thin long sleeves
19
(Figs. 7b-7d)
Fig. 7c
18
19
Fig. 7d
18
19
67
– Fit the wheels
6
the washers
20
and then fit the hexagon nuts
21
(Fig. 7d-7f).
Fig. 7f
21
Fig. 7e
20
– Tighten the nuts using the supplied ring wrench
14
and fit the wheel hubs
13
(Fig. 7g-7h).
Fig. 7g
14
Fig. 7h 13
3. Fitting the plunger mounting to the chassis (Fig. 8 & Fig. 9)
– Press the small “c” of the plunger mounting
10
onto the chassis
5
as shown in Fig. 8.
– Then the plunger
4
can fitted into the large “c” of the plunger mounting
10
(Fig. 9).
Fig. 9
10
4
Fig. 8
10
5
Connecting up the machine and switching it on
• Connect the 13A plug
9
on the shredder power
cable (Fig. 11/Item 9) either to a 13A socket on the
mains supply or via a 13A, 3-core extension power
cable to a 13A socket on the mains supply.
• The shredder can be switched ON (switch position 'I')
and OFF (switch position '0') by using the ON/OFF
switch
11
(Figure 11/Item 11).
Overload protection (motor circuit-breaker)
• The motor is protected from overloads by an
internal overload switch.
• In case of overloading the equipment will shut
down automatically. To restart, set the On/Off switch
11
to the position 'I' (Fig. 11/Item 11).
• If the motor fails to start, clean the ejector chute
26
.
WARNING!
Before using
– Wearing personal protective gear such as, safety gloves, non-slip
safety shoes, long trousers, snug fitting clothing, eye protection
and ear protection reduces the risk of injury. If you have long
hair, wear a hair net. Never use an impact shredder whilst
barefoot or in sandals.
– Before you connect the equipment to the mains supply make
sure that the data on the rating plate matches that of your local
supply. Failure to do this may result in an electric shock, fire and/
or serious injury and/or damage to the machine due to an incorrect
supply rating.
WARNING!
Read and follow the operating instructions and safety information
before using for the first time. Failure to follow the safety notes and
instructions may result in an electric shock, fire and/or serious injury
and/or damage to the machine.
Please refer to the operating instructions for all other information.
4
11
26
9
Fig. 11
1
66926_3430345_11026_qgs.indd 2 17/03/2016 9:23 pm
