eKids FR-553 User manual
XX-553 IB_Front Printing color: Black
XX-553 IB (English)
Size: 355mm x 195mm
Printing color: Black, 1C + 1C
Mar 5, 2019
• For questions or comments regarding this or other eKids products,
please call our toll-free number: 1-888-TOP-TOYS.
Also visit our website: www.ekids.com
If problems persist, please do not attempt to repair unit; see
warranty for factory service.
Important Message to Customers
Thank you for purchasing one of our top-quality electronic products. Please take a moment to read through these
instructions to help you understand the safe and proper way to use this toy to extend its usability.
Keep these instructions for future reference as they contain important information.
Model: DG-553/ FR-553
JJ-553/ DE-553
Printed in China 553_IB_070819-B
This device complies with Part 15 of the FCC rules. Operation is
subject to the following two conditions: (1) this device may not cause
harmful interference, and (2) this device must accept any interference
received, including interference that may cause undesired operation.
This equipment complies with FCC radiation exposure limits set forth
for an uncontrolled environment .
NOTE: This equipment has been tested and found to comply with the
limits for a Class B digital device, pursuant to Part 15 of the FCC rules.
These limits are designed to provide reasonable protection against
harmful interference in a residential installation. This equipment
generates, uses, and can radiate radio frequency energy and, if not
installed and used in accordance with the instructions, may cause
harmful interference to radio communications. However, there is no
guarantee that interference will not occur in a particular installation.
If this equipment does cause harmful interference to radio or television
reception, which can be determined by turning the equipment off and
on, the user is encouraged to try to correct the interference by one or
more of the following measures:
• Reorient or relocate the receiving antenna.
• Increase the separation between the equipment and receiver.
• Connect the equipment into an outlet on a circuit different from
that to which the receiver is connected.
• Consult the dealer or an experienced radio/TV technician for help.
WARNING: Changes or modifications to this unit not expressly
approved by the party responsible for compliance could void the user's
authority to operate the equipment.
CAN ICES-3 (B)/NMB-3(B)
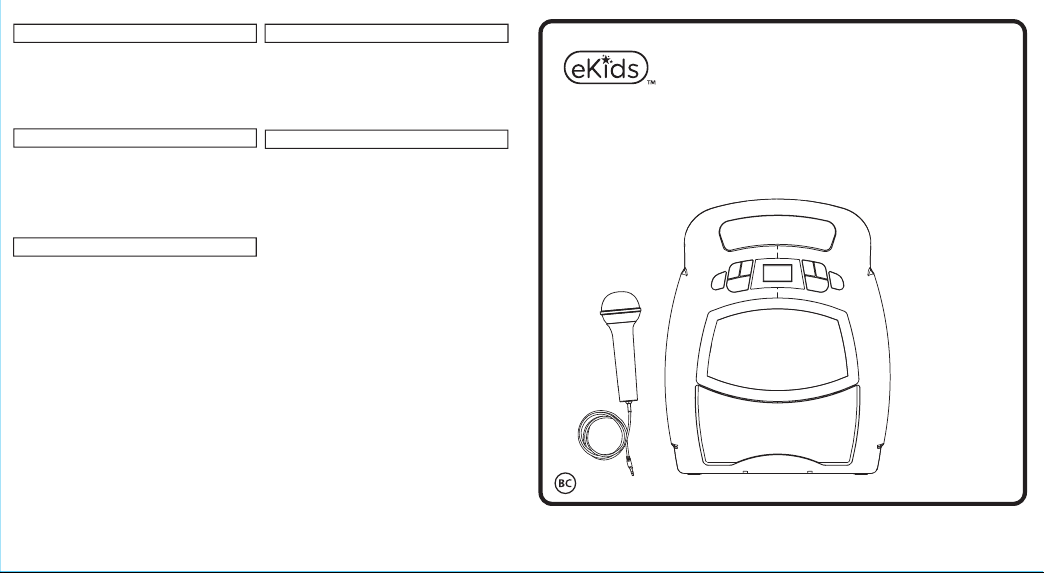
Bluetooth MP3 Karaoke
with Microphone
CHARGE
BEFORE
USE
If the unit does not respond:
• Make sure unit is completely charged.
• Use the extended wire of a paperclip or other thin tool to press
in the Reset Button.
• To re-pair your device, press the Bluetooth Pairing Button on
the back of the unit.
Note: The rechargeable battery can be replaced only by eKids
Consumer Repair Department.
Questions or Comments
Limited One-Year Warranty
FCC Information
Troubleshooting
eKids, LLC warrants this product to be free from defects in
workmanship and materials, under normal use and conditions, for a
period of one (1) year from the date of original purchase.
Should this product fail to function in a satisfactory manner, it is best
to first return it to the store where it was originally purchased.
Should this fail to resolve the matter and service still be required by
reason of any defect or malfunction during the warranty period,
eKids will repair or, at its discretion, replace this product without
charge. This decision is subject to verification of the defect or
malfunction upon delivery of this product to the Factory Service
Center authorized by Customer Service.
If service is required, please call Customer Service at
1-888-TOP-TOYS to obtain a Return Authorization Number and
shipping instructions. A copy of the sales receipt is required to
validate in-warranty coverage.
Disclaimer of Warranty
NOTE: This warranty is valid only if the product is used for the
purpose for which it was designed. It does not cover (i) products
which have been damaged by negligence or willful actions, misuse
or accident, or which have been modified or repaired by
unauthorized persons; (ii) cracked or broken cabinets, or units
damaged by excessive heat; (iii) damage to digital media players,
CD’s or tape cassettes (if applicable); (iv) the cost of shipping this
product to the Factory Service Center and its return to the owner.
This warranty is valid only in the United States of America and does
not extend to owners of the product other than to the original
purchaser. In no event will eKids or any of its affiliates, contractors,
resellers, their officers, directors, shareholders, members or agents
be liable to you or any third party for any consequential or incidental
damages, any lost profits, actual, exemplary or punitive damages.
(Some states do not allow limitations on implied warranties or
exclusion of consequential damages, so these restrictions may not
apply to you.) This warranty gives you specific legal rights, and you
may also have other rights which vary from state to state.
Your acknowledgment and agreement to fully and completely abide
by the above mentioned disclaimer of warranty is contractually
binding to you upon your transfer of currency (money order,
cashier's check, or credit card) for purchase of your eKids products.
© 2019 eKids, LLC
Questions? Visit www.ekids.com
or call 1-888-TOP-TOYS
1299 Main Street Rahway NJ 07065
FCC ID: EMO553
IC: 986B-553
• It is important to keep the unit as dry and clean as possible.
You may clean the cabinet with a cloth or sponge moistened
with mild soap and water. Do not attempt to use strong
cleansers or solvents, as they may cause damage.
• Battery chargers used with the toy are to be regularly examined
for damage to the cord, plug, enclosure and other parts, and
in the event of such damage, they must not be used until the
damage has been repaired.
Maintenance

XX-553 IB_back Printing color: Black
Charging The Unit
1. Connect the included micro USB cord to the micro USB
charging port on the back of the unit.
2. Connect the standard USB plug end of the cord to a power
USB port on a computer or other USB charging device.
For first time use, charge unit for about 5 hours.
Power
ON/OFF
Make sure the Mode Switch is set to USB.
• When the unit is OFF, connect a USB flash drive to the
USB port on the back of the unit.
• Press and hold the Power Button to turn the unit ON. The
“USB” icon will show on the top left of the display.
• When a USB drive is detected, the number of files on the
USB drive will appear on the LCD display.
• Press Play, then use the ”Forward” and “Reverse” buttons
to advance through the numbers of files on the USB drive.
• Pressing “Play” will change the display to show a countdown
time of the selected song file. After pressing “Play”, the
automatic play-all function will activate, and songs will play
in the order they were stored. Press again to pause.
There are three ways to listen to music with this unit:
• In USB Mode you can connect a flash drive to the unit and
listen to your stored songs.
• In MP3 Mode you can transfer music from your computer to
the unit via the micro USB Data Transfer port. The music
will save to internal memory and you can listen to it directly
from the unit itself.
•In Bluetooth Mode you can stream music from your
smartphone or other Bluetooth device.
Note: When using USB Mode or Internal Memory Mode, this
unit is compatible with .mp3 and .wav files ONLY.
iTunes music files are saved by default in .m4a format, and
must be converted to .mp3 format to play on the unit in MP3
mode. Check the Help section in iTunes (or other music
software program) to learn how to convert to .mp3 format.
Charge via USB AC adaptor, computer USB port, or other powered USB port
Computer connected
to working outlet Computer USB port
OR
USB Adaptor
(not included)
Recharge
when empty
battery icon
flashes
Using USB Mode
Getting Started Using MP3 Mode
Converting Files to MP3
Using Play/Pause/Shuffle
Make sure the Mode Switch is set to MP3 Mode and your
USB flash drive is disconnected from the unit.
Storing Songs:
• Turn the unit ON, connect the micro USB cord to the Data
Transfer port on the back of the unit. Connect the other
end to a USB port on your computer.
• The unit should show up on your PC or Mac as a ‘drive’ or
‘device’.
• Locate your music files on your PC or Mac (typically in
the ‘My Music’ folder). Note: on some computers, your
music files may be located elsewhere. Check your user
manual for details.
• Select your desired songs ( .mp3 and .wav files are
compatible) and drag them onto the connected drive.
When you are finished transferring files, ‘eject’ the device
from your computer and disconnect the USB from the unit.
Playing Songs:
• The LCD display on the unit will show the number of
songs stored. (ex: 100 songs would appear as “01:00”).
• Use the “Foward” and “Reverse” buttons to advance
through the numbers of files stored on the unit.
• After pressing “Play”, the automatic play-all function will
activate, and songs will play in the order they were stored.
• Select the “Bluetooth” position on the Mode Switch. The
Bluetooth Mode icon will appear and ‘bt’ will flash on the
LCD display while in pairing mode. Turn on your
Bluetooth device and make it “discoverable” by turning on
Bluetooth mode (check in Options or Settings).
•“BT-553” should appear in your device’s Bluetooth menu.
If “Not Connected” or a similar message appears, select
“BT-553” to connect it.
•A voice prompt will confirm once your device is paired.
Put your Bluetooth device in play mode to begin
streaming music.
•Use the “Forward” “Reverse” and “Play/Pause” buttons
on the unit to navigate tracks.
• Pairing automatically occurs in Bluetooth mode. Press the
Bluetooth Pairing button on the back of the unit to re-pair.
Using Bluetooth Mode
Light
Modes
Volume Up
Volume
Down
LCD
Display
Forward
Reverse
Play/Pause/
Shuffle
Microphone
ON/OFF
Inside the compartment:
USB port
(for USB Mode)
Press and hold to shuffle songs while playing music in USB
Mode or MP3 Mode. ‘SHU on’ will flash on the display. Press
and hold to disable shuffle. ‘SHU off’ will flash on the display.
DISPLAY ICONS
USB
Mode
Bluetooth
Mode MP3
Mode
Battery
Level
Microphone
ON/OFF
Mode Switch
Mic
Volume
Reset
USB Charging/Data Transfer
Bluetooth
Pairing
BACK OF UNIT
Mic
Jack
USING THE MICROPHONE
• Connect the microphone
to the Mic Jack on the
back of the unit.
• Press the Microphone
ON/OFF button on the
front of the unit.
• Control mic volume using
the rotary dial on the back
of the unit.
This unit ships in Demo Mode for in-store demonstration
purposes. Slide the Mode Switch to USB, MP3, or Bluetooth
Mode to exit Demo Mode.
Other manuals for FR-553
1
This manual suits for next models
3
Other eKids Karaoke System manuals

eKids
eKids 672 User manual

eKids
eKids Disney Frozen II User manual

eKids
eKids 553R Series User manual

eKids
eKids eK-553 User manual

eKids
eKids iHome iSF-36 User manual

eKids
eKids 555 Series User manual

eKids
eKids JJ-673 User manual

eKids
eKids FR-553 User manual

eKids
eKids JJ-673 User manual

eKids
eKids DG-556 User manual


Popular Karaoke System manuals by other brands


The Singing Machine
The Singing Machine SML2250 instruction manual

LG
LG HT902TR-XK owner's manual

Karaoke Warehouse
Karaoke Warehouse Player 2000 user manual

VocoPro
VocoPro DVG-888K II owner's manual

The Singing Machine
The Singing Machine SMVG-620 instruction manual

Singsation
Singsation CENTER STAGE FREESTYLE quick start guide


