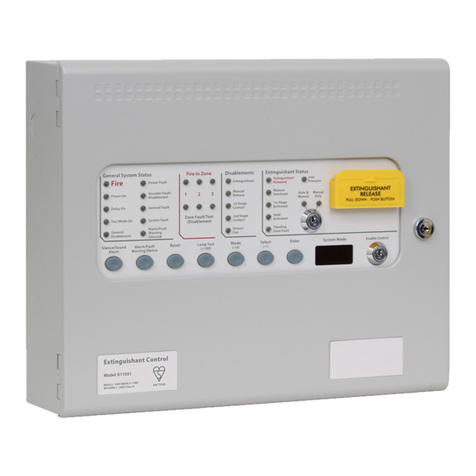
EL.MO. Spa TA4000 User manual

USER MANUAL
TA4000
Fire detection and fire
alarm control panel
090020950
Declaration of Performance
nº 0051 – CPR – 0515
17 Standards
EN54-2:1997/A1:2006
EN54-4:1997/A2:2006
IT08020000001624

TA4000 - USER MANUAL - 090020950
elmospa.com
2
FOREWORD
FOR THE INSTALLER:
Comply strictly with current standards governing the installation of electrical systems and security systems, and with the
manufacturer’s directions given in the manuals supplied with the products.
Provide the user with full information on using the system installed and on its limitations, pointing out that there are different levels
of security performance that will need to suit the user’s requirements within the constraints of the specific applicable standards.
See that the user looks through the warnings given herein.
FOR THE USER:
Check the system’s operation thoroughly at regular intervals, making sure the equipment can be armed and disarmed properly.
Make sure the system receives proper routine maintenance, employing the services of specialist personnel who meet the
requirements prescribed by current regulations.
Ask your installer to check that the system suits changing operating conditions (e.g. changes in the extent of the areas to be
protected, change in access methods, etc...).
-------------------------------
This device has been designed, built and tested with the utmost care and attention, adopting test and inspection procedures in
accordance with current legislation. Full compliance of the working specifications is only achieved in the event the device is used
solely for its intended purpose, namely:
The device is not intended for any use other than the above and hence its correct functioning in such cases cannot be assured.
Consequently, any use of the manual in your possession for any purpose other than those for which it was compiled - namely for
the purpose of explaining the product’s technical features and operating procedures - is strictly prohibited.
Production processes are closely monitored in order to prevent faults and malfunctions. However, the componentry adopted is
subject to an extremely modest percentage of faults, which is nonetheless the case with any electronic or mechanical product.
Given the intended use of this item (protection of property and people), we invite you to adapt the level of protection offered by the
system to suit the actual situation of risk (allowing for the possibility of impaired system operation due to faults or other problems),
while reminding you that there are specific standards for the design and production of systems intended for this kind of application.
We hereby advise you (the system’s operator) to see that the system receives regular routine maintenance, at least in
accordance with the provisions of current legislation, and also check on as regular a basis as the risk involved requires
that the system in question is operating properly, with particular reference to the control unit, sensors, sounders, dialler(s)
and any other device connected. You must let the installer know how well the system seems to be operating, based on the
results of periodic checks, without delay.
Work involved in the design, installation and maintenance of systems incorporating this product should be performed only by
personnel with suitable skills and knowledge required to work safely so as to prevent any accidents. It is vital that systems be installed
in accordance with current legislation. The internal parts of certain equipment are connected to the mains and therefore there is a risk
of electrocution when maintenance work is performed inside without first disconnecting the primary and emergency power supplies.
Certain products include batteries, rechargeable or otherwise, as an emergency backup power supply. If connected incorrectly, they
may cause damage to the product or property, and may endanger the operator (explosion and fire).
According to Directive 2012/19/EU on the Waste of Electric and Electronic Equipment (WEEE), it is here specified that
this Electrical-Electromechanic Device started to be commercialized after 13th August 2005, and it shall be disposed
of separately from ordinary waste products.
DISPOSAL INSTRUCTIONS - INFORMATION FOR THE USER
it08020000001624
CE DECLARATION OF CONFORMITY
This product needs batteries for correct functioning. Exhausted batteries have to be delivered to dumping grounds
authorized for battery collection. The materials used for this product are very harmful and polluting if dispersed in the
environment.
Fire detection and fire alarm control panel
The TA4000 control unit complies with current European EMC and LVD directives. You can log into the elmospa.com website to read
the full Declaration of Performance: registration is quick and easy.

090020950 - USER MANUAL - TA4000
elmospa.com
3
1. USER INTERFACE
TA4000 controls the devices of a fire detection and fire alarm system, monitoring up to 45 different zones: 4 conventional
ones, 1 manual call point (MCP) zone and 40 connected to up to 2 optional loop modules.
It is compatible with the EXTING extinguishing module and with the MDGSME SMS sender module.
The control unit can be commanded from the frontal control panel (or from a connected TAREPEATER keypad):
All states and functions of the control unit are shown and managed by the LCD and by the coloured indication LEDs. The
available control buttons provide for easy configuration and control operations.
• The LCD backlight colour changes according to the status of the control unit:
Standard functioning
GREEN
Fault/anomaly indication
YELLOW
Alarm indication
RED
Setup/programming
WHITE
• Fault (or alarm) indications include, at the bottom right, the number of the shown fault (or alarm) and the total number
of faults (or alarms) detected by the control unit. 001/003 = fault (or alarm) 1 of 3. The alarm screen also reports, at
the bottom left, the number of the last issued alarm.
• Fault indications take priority over the standard functioning screen. Fire alarm indications take priority over all other screens
and, if they take the place of active fault or configuration screens, they can be temporarily hidden by pressing ESC.
A new alarm or idling for 10 seconds brings back the alarm screen to the foreground.
The indication LEDs have the following meaning:
LED name Colour Indication
POWER Green 230 V power ON
SILENCE Yellow Silenced sounders
PRE-ALARM Red Alarm check+prealarm ongoing
INVEST. DELAY Yellow Acknowledgement timer or Investigation timer
ongoing
DAY / NIGHT Yellow Day / Night mode

TA4000 - USER MANUAL - 090020950
elmospa.com
4
LED name Colour Steady glow Blinking
FIRE Red Ongoing alarm events with silenced buzzer Ongoing alarm events
GSM ON Red Telephone dialler ON Waiting for confirmation
DISABLE Yellow Some elements are disabled
TEST Yellow Some system elements are being tested
GENERAL FAULT Yellow Ongoing alarm events with silenced buzzer Ongoing fault events
SYSTEM FAULT Yellow CPU fault with silenced buzzer CPU fault
SOUNDERS FAULT / DISABLED Yellow Sounders disabled Sounders fault
GSM FAULT / DISABLED Yellow GSM disabled GSM fault
The buttons and their function according to the Access levels (2) are detailed below:
Button Name Level 1 function Level 2 function
Enter --- Enters the selected menu.
Confirms data.
Up
()Scrolls events UP
Moves the selection upwards.
Increments a value (keep pressed for a faster
effect).
Down
()Scrolls events DOWN
Moves the selection downwards.
Decrements a value (keep pressed for a
faster effect).
Escape
(ESC)
If both alarm and fault events are available,
display fault events or go back to fire events.
Returns to the previous menu.
Cancel operation.
Evacuate
During acknowledgement/investigation (day
mode), resets the delay timers and sets the
panel to alarm condition.
Generates the Evacuate event and sets
the panel to alarm condition. During
acknowledgement/investigation, see level 1.
Silence Silences the buzzer.
Silences or activates again the sounders.
During the acknowledgement phase, starts
the investigation phase.
Reset ---
During the fault or alarm condition, resets
the control panel. This button does not work
if the alarm screen is visible: press ESC to
hide it.
Day/night --- Enables/disables the day/night mode.
To access level 2, insert and rotate the dedicated key.

090020950 - USER MANUAL - TA4000
elmospa.com
5
2. ACCESS LEVELS
The control unit functions are assigned to three different access levels:
• Level 1 (public) – no password needed;
• Level 2 (user) – accessed using the dedicated key;
• Level 3 (maintenance/programming) – only accessibile to authorized personnel.
Level 1 grants access to all functions freely available to everyone, such as those for the general monitoring of the control unit.
Level 2 holds the setup menu.
To go back to level 1, turn and remove the key. If a control unit at level 2 receives no inputs from the front panel for 15
minutes, the LCD backlight will start blinking and the last row of the display will show the “Panel on level 2” message.
Pressing any key makes the message disappear for 15 more minutes, but the screen will keep blinking until the panel
goes back to level 1.
3. MENU MAP
* These menu entries only appear if the corresponding modules are available. For loop modules (marked here with the grey background), an additional
menu lets you declare which loop you want to affect.
4. MENÙ AND FUNCTION BROWSING
The menu can be used to access several functions, divided in sub-menus a shown in the Menu MAp (3).
Press to select the next entry, for the previous one.
If the ▼symbol appears, press while on the last entry to go to the following screen.
If the ▲symbol appears, press while on the first entry to go to the previous screen.
ENT enters the selected entry or sub-menu, ESC goes back to the previous menu.
5. LEVEL 2 MENU
5.1 Disablements
LEVEL 2 MENU ►DISABLEMENTS
Each function in this menu can exclude a different kind of element (zones, modules, outputs, single devices).
Fault and alarm indications from the excluded elements will be ignored, excluded outputs won’t activate but the control unit
will keep monitoring the presence of the elements. An X at the right of this function indicates the presence of at least one
excluded element.
Previous page
indicator
Next page
indicator
Entries
Title
Selected entry

TA4000 - USER MANUAL - 090020950
elmospa.com
6
5.1.1 Zone
LEVEL 2 MENU ►DISABLEMENTS ►ZONE
A list of all conventional zones and of all analogue-addressable zones with at least one device is shown.
• ENTER disables or enables the selected zone. Disabled zones are marked with a X on the right.
note:if all analogue-addressable devices of a zone get disabled, the control unit will also disable the entire zone. Enabling
a zone that was disabled this way also enables all of its devices.
5.1.2 Device
LEVEL 2 MENU ►DISABLEMENTS ►DEVICE ►LOOP # (this entry is only available if at least one loop module is installed)
A list of all devices acquired on this loop is shown.
• ENTER disables or enables the selected device. Disabled devices are marked with a X on the right.
5.1.3 Output Modules
LEVEL 2 MENU ►DISABLEMENTS ►OUTPUT MODULES ►LOOP # (this entry is only available if at least one loop module is installed)
A list of all output modules acquired on this loop is shown. This list is a subset of the one shown on Device (5.1.2).
• ENTER disables or enables the selected module. Disabled modules are marked with a X on the right.
5.1.4 Sounders
LEVEL 2 MENU ►DISABLEMENTS ►SOUNDERS ►LOOP # (this entry is only available if at least one loop module is installed)
A list of all sounders acquired on this loop is shown. This list is a subset of the one shown on Device (5.1.2).
• ENTER disables or enables the selected sounders. Disabled sounders are marked with a X on the right.
5.1.5 UPanel Outputs
LEVEL 2 MENU ►DISABLEMENTS ►PANEL OUTPUTS
A list of all Zone (of an optional TAREL24 board), Aux and Bell output addresses.
If the EXTING extinguishing module is installed, the Aux 2 output can not be disabled and it does not appear here.
• ENTER disables or enables the selected output. Disabled outputs are marked with a X on the right.
5.1.6 Extinguishing Module
LEVEL 2 MENU ►DISABLEMENTS ►EXTINGUISHING MODULE (this entry is only available if the EXTING module is installed)
A screen with the single EXTING module appears.
• ENTER disables or enables the module. If disabled, it is marked with a X on the right.
5.1.7 GSM
LEVEL 2 MENU ►DISABLEMENTS ►GSM (this entry is only available if the MDGSME module is installed)
A screen with the single GSM module appears.
• ENTER disables or enables the module. If disabled, it is marked with a X on the right.
5.1.8 REPEATER
LEVEL 2 MENU ►DISABLEMENTS ►REPEATER (this entry is only available if at least one TAREPEATER panel is installed)
A list of all repeater panels appears.
• ENTER disables or enables the selected panel. Disabled panels are marked with a X on the right.

090020950 - USER MANUAL - TA4000
elmospa.com
7
5.2 Events (events log)
LEVEL 2 MENU ►EVENTS
A screen with the data of the last recorded event appears.
The log stores the last 2000 events. Event types are listed in the events (6) table.
• Use and to browse the list of events.
5.3 Devices
LEVEL 2 MENU ►DEVICES ►LOOP # (this entry is only available if at least one loop module is installed)
The first learned device on the chosen loop appears.
• Use and to browse the list of learned addresses.
• Press ENTER to switch to the advanced view: you can still use and to browse the list, but the screen also
includes the Type, Description, Zone and Group (if set) of the device.
• Press ESC to switch back to the basic view.
5.4 Test
5.4.1 Zones
LEVEL 2 MENU ►TEST ►ZONES
A list of all conventional zones and of all analogue-addressable zones with at least one learned device appears.
• Select a zone and press ENTER to enter/exit the test mode (an X appears at the right).
• While a zone is in test mode, manually cause an alarm. If the control unit correctly receives it, the alarm output
(REL.ALL) will turn on for 10 seconds.
• Pressing ESC to exit this function exits the test mode for all zones (also removing all X’s).
5.4.2 Outputs
LEVEL 2 MENU ►TEST ►OUTPUTS
A list of all Sounder, Zone (TAREL24 outputs), Fault and Aux outputs appears.
• Select an output and press ENTER to turn it ON/OFF (while it is ON, an X appears at the right).
• Pressing ESC to exit this function turns off all outputs (also removing all X’s).
5.4.3 Loop Outputs
LEVEL 2 MENU ►TEST ►LOOP OUTPUTS ►LOOP # (this entry is only available if at least one loop module is installed)
A list of the addresses of all output modules learned on the loop appears.
• Select a module and press ENTER to turn it ON/OFF (while it is ON, an X appears at the right).
• Pressing ESC to exit this function turns off all modules (also removing all X’s).
5.4.4 Loop Sounder
LEVEL 2 MENU ►TEST ►LOOP SOUNDER ►LOOP # (this entry is only available if at least one loop module is installed)
A list of the addresses of all sounder modules learned on the loop appears.
• Select a sounder and press ENTER to turn it ON/OFF (while it is ON, an X appears at the right).
• Pressing ESC to exit this function turns off all sounders (also removing all X’s).
Event date and time
Event type
Associated device and zone
Indication No. / total indications
Description

TA4000 - USER MANUAL - 090020950
elmospa.com
8
5.4.5 Display
LEVEL 2 MENU ►TEST ►DISPLAY
The display pixels light up, one column at a time, starting left.
The LCD backlight cyclically changes colour once per second.
5.4.6 Led
LEVEL 2 MENU ►TEST ►LED
All front panel LEDs light up at once for around 2 seconds.
After that, the display goes back to the Test menu on its own.
5.4.7 Buzzer
LEVEL 2 MENU ►TEST ►BUZZER
The control unit buzzer turns on for around 5 seconds.
After that, the display goes back to the Test menu on its own.
5.5 Display Contrast
LEVEL 2 MENU ►DISPLAY CONTRAST
• Use and to increase/decrease the display contrast.
5.6 Programming
LEVEL 2 MENU ►PROGRAMMING
• Press ESC to go back to the LEVEL 2 MENU.

090020950 - USER MANUAL - TA4000
elmospa.com
9
6. EVENTS
Event... ...generated by ...can activate
Activates the
following global
event
Loop Input
Module
Loop Call
Point or
MCP zone
Conventional
zones
Z001–Z012
Control unit
(automatic)
EXTING
module
Aux
outputs
Relay
and I/O
outputs
GSM
module
Loop
output
module
Any alarm Global event –
Fire alarm Any alarm
Bomb* Any alarm
Alarm* Any alarm
Safety* Any alarm
S.O.S.* Any alarm
Gas leak* Any alarm
Water leak EXTING –
Evacuation Button Any alarm
Prealarm Thresholds Confirm alarm –
Prealarm end End of the prealarm event or end of the confirm alarm timer –
Extinguishment ON EXTING –
Any fault Global event –
Device fault Global event Any fault
Zone fault Global event Any fault
Ext’ing fault Global event Any fault
PSU fault Global event Any fault
GSM fault GSM –
Exting lost EXTING Ext’ing fault
Ev. fault EXTING Ext’ing fault
No main power Power supply unit PSU fault
Main power ON End of the “No main power” event –
Any disablement Global event –
Any enablement Global event –
Silence Button –
Reset Button –
Acknowledgement Day/Night –
Investigation Day/Night –
Ext’ing PreAct EXTING –
Ext’ing ON EXTING –
Ext’ing run EXTING –
Ev. ON EXTING –
Minimum credit GSM –
SIM check expired GSM –
SIM periodic read GSM –
Ext’ing confirm EXTING –
No battery Power supply unit PSU fault
Battery overvolt Power supply unit PSU fault
Low battery Power supply unit PSU fault
Battery high res Power supply unit PSU fault
Short earth-pos Power supply unit Only displayed and logged PSU fault
Short earth-gnd Power supply unit PSU fault
Load fuse fault Power supply unit PSU fault
CPU fuse fault Power supply unit PSU fault
Battery disconnection Power supply unit PSU fault
Batt. 1 fault Power supply unit PSU fault
Batt. 2 fault Power supply unit PSU fault
Overvoltage Power supply unit PSU fault
Undervoltage Power supply unit PSU fault
No 24V Power supply unit PSU fault
PSU fault Power supply unit PSU fault
* these events do not comply with the EN54-2 standard
The following events are only logged:
login 2; login 3; exit 1; exit 2; login from PC;
disable; disable GSM; disable output; disable sounder; fault syncro;
enable; enable GSM; enable output; enable sounder; no syncro;
external fault; no data; end short earth-gnd;
pos wire open; TA Repeater 1 no data; TA Repeater 2 no data.

TA4000 - USER MANUAL - 090020950
elmospa.com
10
7. ISTRUZIONI PER L’OPERATORE
If the control unit is in
Alarm
-Alarms ON
-Red display backlight
-Alarm LED blinking
-Buzzer ON
• Press Silence to turn the buzzer off.
If you want to turn off the alarms:
• Insert and turn the key to access level 2.
• Press ESC.
• Press Silence.
The alarm LED stops blinking and becomes lit.
To visualize every alarm:
• Turn the key to go back to level 1.
• Use and to browse the messages.
Once the conditions that generated the alarm stop, run a reset procedure.
If any device is still sending alarm signals, the control unit will go back to the Alarm status.
If the contol unit is in
Acknowledgement/
Investigation
-Red display backlight
-pre-alarm and invest. delay LEDs ON
-Buzzer ON
-Countdown on screen
• Insert and turn the key to access level 2.
• Press Silence before the first countdown ends.
• Press Silence to turn the buzzer off.
• Investigate the affected area to check that it is not a false alarm.
• If it is, go back to the control unit and run a reset procedure before the second
countdown ends.
To confirm the alarm, run an evacuation procedure or let any countdown end.
If the control unit is in
Fault
-Yellow display backlight
-At least one fault LED blinking
-Buzzer ON
• Press Silence to turn the buzzer off.
The fault LED stops blinking and becomes lit.
• Run a reset procedure.
If the faults keep being reported:
• Press Silence to turn the buzzer off.
• Use and to browse the messages.
• Signal the faults to an authorized maintenance engineer. Follow their instructions and
organize a repair service.
Reset procedure This is used to stop the existing alarm events and to stop the acknowledgement/investigation
countdowns.
• Insert and turn the key to access level 2.
• Press ESC.
• Press Reset.
The faults and the alarms that are still being detected get signalled again.
Evacuation procedure This is used to manually activate the alarm status.
• Insert and turn the key to access level 2.
• Press Evacuate.
Keep a copy of this page near to the control unit and to any TAREPEATER keypad.

090020950 - USER MANUAL - TA4000
elmospa.com
11
8. INDICE
1. INTERFACCIA UTENTE......................................................................... 3
2. LIVELLI DI ACCESSO .......................................................................... 5
3. MAPPA DEL MENU ............................................................................ 5
4. NAVIGAZIONE DEI MENÙ....................................................................... 5
5. MENU LIVELLO 2 ............................................................................. 5
5.1 Esclusioni .............................................................................. 5
5.1.1 Zona .............................................................................. 6
5.1.2 Dispositivo ......................................................................... 6
5.1.3 Moduli Uscita ....................................................................... 6
5.1.4 Avvisatori Acustici................................................................... 6
5.1.5 Uscite Centrale ..................................................................... 6
5.1.6 Modulo Spegnimento ................................................................ 6
5.1.7 GSM .............................................................................. 6
5.1.8 REPEATER ......................................................................... 6
5.2 Storico Eventi ........................................................................... 6
5.3 Visual. Dispositivo ....................................................................... 7
5.4 Test ................................................................................... 7
5.4.1 Zone .............................................................................. 7
5.4.2 Uscite ............................................................................. 7
5.4.3 Uscite Loop ........................................................................ 7
5.4.4 Campane Loop...................................................................... 7
5.4.5 Display . . . . . . . . . . . . . . . . . . . . . . . . . . . . . . . . . . . . . . . . . . . . . . . . . . . . . . . . . . . . . . . . . . . . . . . . . . . . 7
5.4.6 Led ............................................................................... 7
5.4.7 Buzzer ............................................................................ 7
5.5 Contrasto Display........................................................................ 8
5.6 Programmazione ........................................................................ 8
6. EVENTI...................................................................................... 9
7. ISTRUZIONI PER L’OPERATORE .................................................................10
8. INDICE ......................................................................................11

TA4000 - Fire detection and fire alarm control panel
USER MANUAL - April 2017 edition 090020950
The information and product features herein are not binding and may be changed without prior notice.
EL.MO. SpA Via Pontarola, 70 - 35011 Campodarsego (PD) - Italy
Tel. +390499203333 - Fax +390499200306 - Help Desk +390499200426 - www.elmospa.com - [email protected]
Table of contents
Other EL.MO. Spa Control Panel manuals
Popular Control Panel manuals by other brands

Satel
Satel PERFECTA-IP user manual

Dea
Dea NET24N Operating instructions and warnings

NSC Sicherheitstechnik
NSC Sicherheitstechnik Solution F1 OPERATING AND INSTALLATION Manual

Ariston
Ariston Chaffoteaux 3301556 installation instructions

ICP DAS USA
ICP DAS USA TPD-432F-H quick start

Stahl
Stahl 8125/5 operating instructions