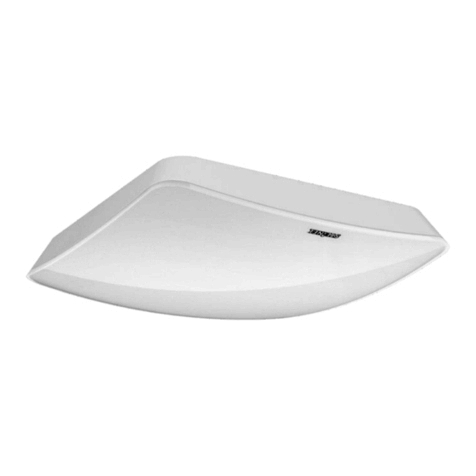
EL EL4855 User manual

Wireless 2-Way PIR / PET
Camera Detector
Models: EL4855/EL4855P
EN
Installation Instructions
Description
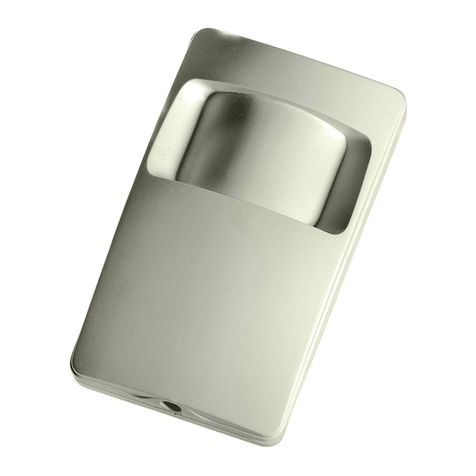
TheEL4855/EL4855PIisabatterypowered2‐Way
wirelessPIR/PETdetectorthatincludesanintegrated
cameraforvisualverificationandiscompatiblewithall
ElectronicsLine2‐Waysecuritysystems.
Features include:
14mcoverage(wideangle)with90°field‐of‐view
Installationheight2.4m
VGAorQVGAcameraresolution
DiscreetIRflashallowsimagingincomplete
darkness,upto10m(33’)
Sequenceofimagesuponevent,configurable
numberandfps
Duringdisarm,eventsareignoredtosavebattery
andforprivacy
On‐demandimagesinitiatedfromauthorized
Smartphoneorwebbrowser
TwoRFchannelswithseparateantennas:Onefor
control,secondchannelforimagetransmission
Imagesstoredondetectoruntiltransmissiontopanel
complete
2long‐lifelithiumbatteriesforextendedbatterylife
Frequency:868Mhzor433Mhz
PETImmunityoption(45Kganimals)
Installation
Step1: Selecting a Mounting Location
Selectthemountinglocationforbestcoverageofthearea
thatistobeprotected(seePreliminaryConsiderationsand
CoveragePatterns).
Step 2: Registering the Detector in the
System
Thedetectormustidentifyitselftothesystem’sreceiver
(controlpanel)duringtheregistrationprocess.
1.Setthesystemtoregistrationmode.
2.Gotothemainmenuandselect
[9]Programming>[1]Devices>[1]Zones.
3.Selectazoneandpressʹʹ.Thesystementersinto
Learnmode.
4.Unlockandremovethemountingbracketfrom
thedetector(seeFigure1andFigure3).
Insertthesuppliedbatteriesintothebattery
holderspayingattentiontothecorrectpolarityor
removetheplasticprotectorstripifthebatteries
arealreadyinplace(seeFigure3).Thedetector
sendsatransmissiontothesystem.
Ifthetransmissionissuccessfullyreceivedbythe
systemitplaysaconfirmationsound.
Ifnoconfirmationsoundisheard,sendanother
transmissionbypressingandreleasingthetamper
switchofthedevice(seeFigure3).
Oncethedetectorissuccessfullyregisteredthe
systemdisplayshows:Save?
5.Presstoconfirmandcontinueenteringother
parametersforthechosendevice(seeParameter
Configuration).
Step 4: Mounting the Detector
Thedetectormustbetestedontheexactmounting
positionbeforepermanentlymounting.
1.Opentheknockoutholesofthemountingbracket,
andusethemasatemplateformounting(see
Figure2).
ForPetfriendlymodel:Inordertooptimizepet
immunity,alwaysmountthedetectorverticallyataright
angletothefloor.Makesurethatananimalcannotget
abovetheheightof1.5m(5ʹ)byclimbingonfurniture,
shelvingorstairs.
2.Oncethebracketisinstalled,slideandlockthe
detectorontothemountingbracket.
3.PerformaWalkTest(seePerformingaWalkTest).
4.Insertandfastenscrewintotheholelocatedatthe
bottomofthedetectortolockthedetectortothe
mountingbracket(seeFigure4).
Step 5: Performing a Walk Test
NOTE:Thedetectorneedsapproximately90secondsto
warmupafterapplyingpower.
Gotothesystemsmainmenuandselect[7]Service>[6]
WalkTestandpressʹ.
DuringWalkTestmode,walkthroughtheentirefieldof
viewofthedetectorandconfirmthattheLEDactivates
anddeactivatesaccordingly(seeLEDIndication).
Verifythatthesystemreceiveralsoreceivesthesignals.
NOTE:Waitfortenseconds,aftereachdetection,before
continuingthetest.
Aftercompletingthewalktest,resetthesystemto
Normalmode.
LED Indication
TheLEDindicatorisliteverytimeatransmissionis
made.Toenable/disableLEDindication,referto
ParameterConfigurationsection.
Parameter Configuration
2‐Wayparameterscanbemodifiedfromthesystem.
Gotothemainmenuandselect[9]Programming>[1]
Devices>[1]Zones>[11].SensorPar.
LED:Enable*/Disable
PIRSensitivity:Low*/High
AlarmDelay:1‐20minutes(3mins.*)
CameraResolution: QVGA(320X240)*,
VGA(640X480)
Color:Color*/B&W
Compression:Low*/High
Flash:Enable/Disable*
#ofPictures:1‐9(3*)
#ofDifferentPictures.1‐9(0*)
PictureDelay:0‐450ms(480ms*)
UserMonitor:Enable*/Disable
ZoneAssignment:Anyofup‐tofourzones
cantriggerapicture
capture(00‐00‐00‐00*).
MedicalTrigger:Enable/Disable*
PanicTrigger:Enable/Disable*
FireTrigger:Enable/Disable*
*=default
ForadditionalinformationrefertotheSystemInstaller
Manual.
Camera Test and Snapshot Events
Acameratestimagecanbetakenusingweb/smartphone
appsonsystemssupportingtheseapplications.
SnapshoteventsdetectedbythePIRcameraarerecorded
intothecamera’smemory.Theeventrecordconsistsof
thedateandtimestamp,adetaileddescriptionofthe
eventincludingitssourceandanimagerecord.
Diagnostics
Youcanperformdiagnostictestsonyourdetectorusing
thesystemreceiver.Diagnosticsincludestestingthe
detectorbatterystatusandcommunicationbetweenthe
detectorandthesystem.
ForadditionalinformationrefertotheSystemInstaller
Manual.
Battery Replacement
1.Unlockandslidethedetectorfromthemounting
bracket.
2.Replacethebatteriespayingattentiontothe
correctpolarity.
3.Slideandlockthedetectortothemounting
bracket.
CAUTION–Riskofexplosionifbatteryisreplacedby
anincorrecttype.Disposeofusedbatteriesaccordingto
localregulations.
Specifications
Electrical
BatteryType:2xCR123,3VLithium
BatteryLife:2batteries–3yeartypical
lifetime
Current
Consumption:
58Astandby;
200mAmax.peakatcapture
withflash
Supervision
Transmission:
10minutes
RFtransmitting
frequencies:
868MHz,433MHz‐models
EL5855andEL5855PI
Optical
Filtering:WhiteLightProtection
Petfriendly:Uptoa45kganimal
immunity(petmodel)
Physical
Size(LxWxD):120x65x35mm(4.7x2.6x
1.8in)
Weight:100grams(3.52oz.)
Environmental
RFImmunity:AccordingtoEN50130‐4
Operating
Temperature:
‐10Ca55C(14Fa140F)
Storage
Temperature:
‐20Ca60C(‐4Fa140F)
Camera
Type:CMOSdigitalimagesensor
Lux:0Lux(totaldarkness)
ViewAngle:H90V73
Preliminary Considerations
Donotinstalloutside
Donotinstallnear
windows
Donotinstallnear
vents(air,heat,orAC)
Donotinstallnear
ceilingfans
Donotinstallin
extremetemperatures
Donotinstallindirect
sunlight
Okforsiteswithsmallpets
PIR Coverage Patterns
PIRModel
PETModel
Camera Coverage
SideViewTopView

Quick Install
Figure1
Figure2
Figure3
Figure4
Ordering Information
E8USX45PIR0A
E4USX45PIR0A
EL58451&2WayPIR,
868MHz/433MHz
E8USX45PET0A
E4USX45PET0
EL5845PI1&2WayPET,
868MHz/433MHz
RTTE Compliance Statement:
Hereby,ElectronicsLine3000Ltd.declaresthatthis
productisincompliancewiththeessentialrequirements
andotherrelevantprovisionsofDirective1999/5/EC.The
declarationofconformitymaybeconsultedat
www.electronics‐line.com
Electronics Line 3000 Ltd. Limited
Warranty
ELanditssubsidiariesandaffiliates(ʺSellerʺ)warrants
itsproductstobefreefromdefectsinmaterialsand
workmanshipundernormalusefor24monthsfromthe
dateofproduction.BecauseSellerdoesnotinstallor
connecttheproductandbecausetheproductmaybe
usedinconjunctionwithproductsnotmanufacturedby
theSeller,Sellercannotguaranteetheperformanceofthe
securitysystemwhichusesthisproduct.Sellersʹ
obligationandliabilityunderthiswarrantyisexpressly
limitedtorepairingandreplacing,atSellersoption,
withinareasonabletimeafterthedateofdelivery,any
productnotmeetingthespecifications.Sellermakesno
otherwarranty,expressedorimplied,andmakesno
warrantyofmerchantabilityoroffitnessforany
particularpurpose.Innocaseshallsellerbeliablefor
anyconsequentialorincidentaldamagesforbreachof
thisoranyotherwarranty,expressedorimplied,or
uponanyotherbasisofliabilitywhatsoever.Sellers
obligationunderthiswarrantyshallnotincludeany
transportationchargesorcostsofinstallationorany
liabilityfordirect,indirect,ornotbecompromisedor
circumvented;thattheproductwillpreventanypersona;
injuryorpropertylossbyintruder,robbery,fireor
otherwise;orthattheproductwillinallcasesprovide
adequatewarningorprotection.Buyerunderstandsthat
aproperlyinstalledandmaintainedalarmmayonly
reducetheriskofintruder,robberyorfirewithout
warning,butisnotinsuranceoraguaranteethatsuch
willnotoccurorthattherewillbenopersonalinjuryor
propertylossasaresult.Consequentlysellershallhave
noliabilityforanypersonalinjury,propertydamageor
lossbasedonaclaimthattheproductfailstogive
warning.However,ifsellerisheldliable,whether
directlyorindirectly,foranylossordamagearisingfrom
underthislimitedwarrantyorotherwise,regardlessof
causeororigin,sellersmaximumliabilityshallnot
exceedthepurchasepriceoftheproduct,whichshallbe
completeandexclusiveremedyagainstseller.No
employeeorrepresentativeofSellerisauthorizedto
changethiswarrantyinanywayorgrantanyother
warranty.
CAUTION:Thisproductshouldbetestedatleastoncea
week.
WARNING:Riskofexplosionifbatteryisreplacedby
anincorrecttype.Disposeofusedbatteriesaccordingto
localregulations.
Contacting Electronics Line
InternationalHeadquarters:
ElectronicsLine3000Ltd.
14HachomaSt.,75655
RishonLeZion,Israel
Tel:(+972‐3)963‐7777
הדלפה ילגלג16, הילצרה
09‐951‐0142Fax:(+972‐3)961‐6584
Pleasevisitusat:www.electronics‐line.com
Copyright2014,ElectronicsLine3000Ltd.Allrights
reserved.
09/20155IN2454
Wall
Mount
Corner
Mount
Battery
Holder
Tamper
Switch
+
-
This manual suits for next models
1
