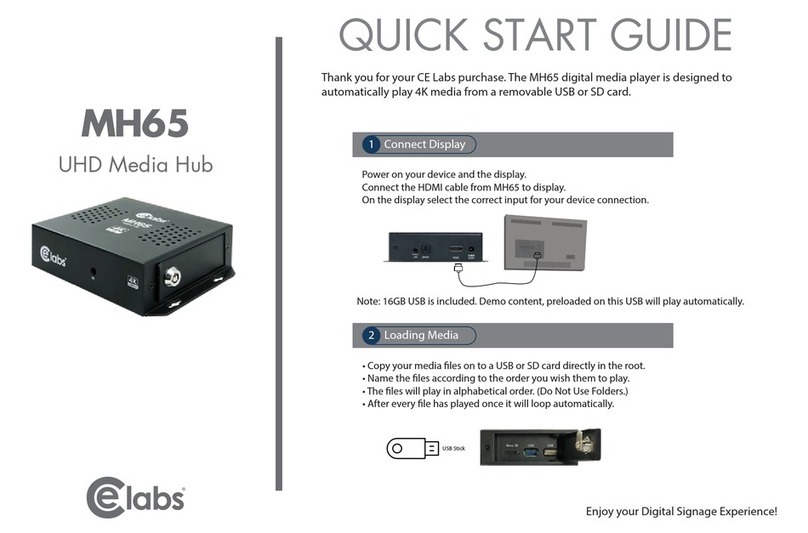
Elabs MP80RA User manual

MP80RA HD Media Player Manual Page 2of 32 Rev. 107- 06/21/16
Table of Contents
IMPORTANT SAFETY INSTRUCTIONS ......................................................................... 3
Chapter 1 –INTRODUCTION ............................................................................................. 4
Introduction to the MP80RA UHD Media Player ..................................................................4
Package Contents....................................................................................................................4
Chapter 2 –INSTALLATION............................................................................................... 5
Detailed Player View..............................................................................................................5
MP80RA Connections............................................................................................................6
Mounting.................................................................................................................................7
Chapter 3 –CONTROL SOFTWARE................................................................................. 8
Hardware and Software Requirements ...................................................................................8
Hardware.............................................................................................................................8
Software..............................................................................................................................8
CE Labs QuickSign for MP80................................................................................................8
Getting Started with QuickSign..........................................................................................9
Loading New Content.......................................................................................................10
Load Media into QuickSign..............................................................................................10
Create Media Playlist........................................................................................................11
GPIO Interface Programming - Optional..........................................................................12
Create Layouts and Templates..........................................................................................13
Send Content to the Player................................................................................................14
Quick Control....................................................................................................................15
Firewall Issues ..............................................................................................................16
CE Labs QuickSign CLOUD for MP80 ...............................................................................17
How do I start using QuickSign Cloud?...........................................................................18
QuickSign Cloud for Windows.............................................................................................18
Chapter 4 –MP80RA OPERATION.................................................................................. 20
Initial Startup Procedure.......................................................................................................20
Operation...............................................................................................................................20
HOME Screen Display menu................................................................................................21
Wi-Fi.....................................................................................................................................21
HDMI INPUT.......................................................................................................................22
MP80RA SPECIFICATIONS.............................................................................................. 23
Troubleshooting Tips:...........................................................................................................24
Warranty ...............................................................................................................................25
APPENDIX............................................................................................................................ 26
General Purpose Input/Output (GPIO) Options................................................................26
Media Encoding Preferences ................................................................................................27
Browser Layer Design Guidelines....................................................................................28
MP80 Network Communications Protocol...........................................................................29
Command Structure..........................................................................................................29
Network Command List:...................................................................................................30

MP80RA HD Media Player Manual Page 3of 32 Rev. 107- 06/21/16
IMPORTANT SAFETY INSTRUCTIONS
1. Read these instructions.
2. Keep these instructions.
3. Heed all warnings.
4. Follow all instructions.
5. Do not use this apparatus near water.
6. Clean only with dry cloth.
7. Do not block any ventilation openings. Install in accordance with the manufacturer’s instructions.
8. Do not install near any heat sources such as radiators, heat registers, stoves, or other apparatus (including amplifiers) that
product heat.
9. Do not defeat the purpose of the polarized or grounding-type plug. A polarized plug has two blades with one wider that
the other. A grounding type plug has two blades and a third grounding prong. The wide blade or the third prong is
provided for your safety. If the provided plug does not fit into your outlet, consult an electrician for replacement of the
obsolete outlet.
10. Protect the power cord from being walked on or pinched particularly at plugs, convenience receptacles, and the point
where the exit from the apparatus.
11. Only use the attachments/accessories specified by the manufacturer.
12. Use only with the cart, stand, tripod, bracket, or table specified by the manufacturer, or
sold with the apparatus. When a cart is used, use caution when moving the
cart/apparatus combination to avoid injury from tip-over.
13. Unplug this apparatus during lightning storms or when unused for long periods of time.
14. Refer all servicing to qualified service personnel. Servicing is required when the
apparatus has been damaged in any way such as power supply cord or plug is damaged,
liquid has been spilled or objects have fallen into the apparatus, the apparatus has been
exposed to rain or moisture, does not operate normally, or has been dropped.
WARNING: To Reduce the Risk of Fire or Electric Shock, Do Not Expose
This Apparatus to Rain or Moisture
CAUTION: To reduce the risk of electric shock, do not remove cover or back. No
user serviceable parts inside. Refer servicing to qualified personnel.

MP80RA HD Media Player Manual Page 4of 32 Rev. 107- 06/21/16
NOTICE:
We try to include the latest up to date information, but this document will require periodic updates. We
recommend you check at our web site, www.celabs.net, for the latest information available.
Getting Started
Chapter 1 –INTRODUCTION
Introduction to the MP80RA UHD Media Player
The MP80RA is a high quality advertising solution that allows users to play SD, HD and
UHD content from USB or standard SD cards. It has an extremely effective performance
versus cost ratio and provides a great return on investment.
The MP80RA is a commercial grade, application specific graphics processor, specifically
designed for driving digital signage. Do not let the small size fool you; the powerful
internal video processor rivals the performance of a PC costing many times more. The
graphics capability is on par with a BluRay player and higher but with much greater
reliability because there are no moving parts.
Package Contents
The packing box should contain the following items:
MP80RA Media Player
12 Volt DC Universal Input Power Supply
HDMI cable
(optional) 3.5mm Video / L/R Stereo Audio Cable
Quick Start Guide

MP80RA HD Media Player Manual Page 5of 32 Rev. 107- 06/21/16
Chapter 2 –INSTALLATION
Detailed Player View
The MP80RA may be ordered with or without the GPIO Interface. See the GPIO section in this document for a description of
the connector pin out.
POWER LED
IR Receiver
8 Port GPIO
Push Button Interface
Reset Switch
WiFi Antenna Jack
Ethernet Jack
HDMI Output
SD Memory Socket
HDMI Input (1080p max)
USB 1 & 2
TOSLINK Output
Composite Video
R&L Audio Output
Power Input
+12Vdc

MP80RA HD Media Player Manual Page 6of 32 Rev. 107- 06/21/16
MP80RA Connections
The MP80RA is capable of driving a wide variety of displays at up to 2160P resolution at bit rates up to 40 Mbps. Depending
upon your application, connect the following cables to operate the unit.
Display cable –The preferred connection between the MP80 and the display monitor is a high quality HDM I cable
of no longer than 15 feet. Depending on the application, plug in the cable from the media player to the display,
switch, or first distribution amplifier. The MP80 does support Composite video and analog audio output via the
3.5mm jack on the rear panel.
oThe R/L Video port is a 3.5mm combination jack that requires a 4 conductor 3.5mm TRRS plug.
Note: Video output resolution has been pre-set at the factory for automatic negotiations. The media player should select the
highest resolution reported available from the Display. The output and resolution can be specified at time of order and pre-set
to your requirements.
Audio cable –The analog audio output is via the 3.5mm jack labeled R/L Video. You should only use the proper
cable for this output.
Note: The analog R/L audio will not be synchronized with the Digital Audio routed to the HDMI output. Simultaneous use of
Analog and Digital Audio is discouraged as there is noticeable delay between the two.
Note: If HDMI cable is being used, a separate audio cable is not required as long as the monitor has internal speakers.
Toslink –Digital Multi-channel audio is available on the optical connector. This may be configured by accessing
the Android setup screen via USB mouse control. Select Sound Manager and set as desired.
Power –The MP80RA uses a 12VDC, 2A power supply. Total power consumption is approximately 6 Watts
which leaves a large reserve in the power supply. Insert the power supply 12 VDC plug into the MP80RA power
jack. Insert the AC Plug of the power supply into an electrical outlet. The green power LED will be illuminated and
the unit will boot up within 1 minute.
Ethernet –If this is a networked installation, connect the Ethernet Port to a Switch or Router via an Ethernet cable.
The unit will automatically obtain an IP address as long as unit’s DHCP is selected as ON and there is a DHCP
server somewhere on the local subnet.
oPlease wait for approximately 1 minute until the unit completes the boot-up process. The media player
can be configured to have a default start-up item such as a video file or photo playback. If the default
application is the CE labs MP75 Emulator, Video should start playing automatically when the unit has
completed its boot-up process. Most applications with use the QS Player as the default startup
application. This allows communication with the QuickSign local and QuickSign Cloud PC control
applications.
IR Remote –Optional.
GPIO - These ports are generally used to interface with pushbuttons that can be used to trigger certain videos.
Refer to the GPIO section later in this manual for a full description of the eight GPIO ports.
IR Receiver –There is an internal IR receiver just to the right of the IR input jack. This is for use with an optional
IR remote.
WiFi Antenna Jack–The MP80RA may be ordered with an optional WiFi module which includes an external
antenna.
Reset–There is a recessed Reset button just to the right of the SD security door. Use a paper clip to reset.

MP80RA HD Media Player Manual Page 7of 32 Rev. 107- 06/21/16
Mounting
The media player should be located in a well ventilated air conditioned space for best operation. The overall
dimensions of the units are 3.2” x 6.2” x 1.0”. It is recommended to reserve 3 inches to the rear of the unit for
routing cables. The mounting dimensions given below are measured from center to center of the mounting holes.
The mounting holes will accommodate a #6 screw.
1.8”
6.45”
The unit has ventilation holes all along the top. Theses should remain uncovered during operation. There are no
ventilation openings on the bottom of the chassis, so it may be bolted directly to a shelf or monitor.

MP80RA HD Media Player Manual Page 8of 32 Rev. 107- 06/21/16
Chapter 3 –CONTROL SOFTWARE
Hardware and Software Requirements
Hardware
Platform Pentium4 2.0GHz Class Processor or better
Operating System Windows XP Pro / Vista Premium, Windows 7, 8, or 10
RAM 1 GB or more
Ports Ethernet 10/100
Communications Players use port 80 for HTTP
Ports 12889, 12881, &12885 may be used for extended controls
Software
There are two methods to control the MP80:
1. Local LAN control via QuickSign PC application (free).
2. Internet based control via QuickSign Cloud (paid subscription).
CE Labs QuickSign for MP80
The MP80RA can be remotely controlled from within a LAN (restricted to local sub-net) via the CE labs QuickSign PC
control software if the unit has our CE labs QS Player application installed. QuickSign allows you to scan your network to
discover installed players or you can manually add them. Once the player is discovered, the software may be used to check
status, set up the GPIO ports, add or delete content, create playlists, etc.
Please refer to the Help tab in QuickSign for a complete reference of available command options.
The QuickSign software is available at no cost with the media player. It may be downloaded from our website Support
Section at http://www.celabs.net. Click on the Digital Signage Solutions site, then RESOURCES and then DOWNLOAD. If
you need assistance in acquiring QuickSign, please contact CE sales dept. The help tab in QuickSign will show you how to
use the software and get started controlling your players.

MP80RA HD Media Player Manual Page 9of 32 Rev. 107- 06/21/16
Getting Started with QuickSign
First Impressions
When QuickSign is launched, it will scan the local LAN to find any available players and will automatically populate the
Media Players column in the left window. The Player Status tab in the right window will show you the current status of the
player that is selected in the left window.
The first screen you see on QuickSign is
Player Search. Click OK to add the
discovered players to the Media Player
database.
The main screen with Player Status selected will show you what is loaded and playing on the selected media player. The TV
symbol will be green when content is playing. If you see the RED cross/circle, that unit is not communicating with the control
software.

MP80RA HD Media Player Manual Page 10 of 32 Rev. 107- 06/21/16
Loading New Content
Pre-requisites:
You have the QuickSign software loaded, the MP80 is all connected and communicating, so now how do we get our new
content on the TV screen? This software is very flexible and allows many avenues for digital signage content creation. There
are some basic steps to follow:
Procedure:
1. Load Media into QuickSign
2. Create Media Playlist
3. Optional –Configure GPIO push buttons
4. Create Layout (if desired to have signage around Video/Playlist Region)
5. Send Content to the player
Load Media into QuickSign
Click on the Videos tab and select Add Videos. Navigate to the folder that contains the videos that you wish to load on the
MP80. The files should be encoded according to MP80 Encoding Specification. Make certain that the file names do not
contain any spaces or unusual punctuation marks (such as @, %, &, *, etc.). Add all the video files you wish to use in your
content package.

MP80RA HD Media Player Manual Page 11 of 32 Rev. 107- 06/21/16
Create Media Playlist
1. Click on the Playlists tab and select
New Playlist (you may edit an
existing one if desired).
2. Give the Playlist a distinctive name (and description if desired).
3. You may filter the media by selecting the appropriate button in the Media List box.
4. Select the desired media in the left box, press the arrow button, and the media file icon will appear in the right box.
5. You may also drag and drop the file icons in the left box to the right box.
6. To change the playback order, simply highlight the file in the right Playlist box and use the Move UP/Move Down
arrow keys to park the files in the desired order.
7. If you add images to the playlist, you set the Image/Stream/Website Duration to show the media for the desired
time before moving to the next item in the playlist.
8. A loop command is added to the end of the list so the Playlist will play continuously until stopped.
9. Save the playlist. It is now available to send to the MP80.

MP80RA HD Media Player Manual Page 12 of 32 Rev. 107- 06/21/16
GPIO Interface Programming - Optional
The MP80RA can be ordered with a GPIO interface to allow customer interaction with the player using push
buttons or sensors. This allows the player to play a video or playlist upon receiving a button press from the GPIO
inputs of a MP80RA media player. Up to eight button inputs are supported. One can easily configure a wide
variety of media to play for each button. An ‘idle loop’ video is played when the video triggered by the button is
not playing.
The actions associated with each GPIO port may be assigned by using the Tools, Button Setup menu in
QuickSign Pro MP80.
Creating the Push Button configuration files with QuickSign:
Start QuickSign on a PC that resides on the same network as the target media player, select the correct player,
click on TOOLS and then click BUTTON SETUP. Assign content via the drop down windows and then click
Load Button Setup to send the media and configuration files over the network to the player. This may take quite
some time depending upon the size of the assigned media.
If you do not have network visibility to the player, the complete configuration and media can be sent to a SD
card plugged into your PC by pressing the Publish button. This copies all necessary configuration files, videos,
pictures, layouts, etc. and places them in the proper folders on the SD card. Simply take the newly loaded SD
card and plug it into the player and the unit will begin to play the files. Sometimes a reboot may be necessary.
Note:
If you load the player with the GPIO pushbutton configuration, this replaces the standard Playlist.

MP80RA HD Media Player Manual Page 13 of 32 Rev. 107- 06/21/16
Create Layouts and Templates
QuickSign for Windows has the ability to create and manage multi-zone screens via Layouts that you create.
Select Layouts from the
toolbar. You may create a
very media rich layout using
the included tools.
The image to the right is
showing the Layout creation
screen. The Zones in the left
column are dragged into the
Layout area.
Important: Set the desired
Layout resolution before
you begin placing zones.
This can be set under
“View” and “Resolution”.
The most common is 1920 x
1080.
The layout will be scaled to
fit the screen should the
output be set to 4K. The
Resolution may be set to
3840 x 2160 (4K). A layout
that is created in the native
output video resolution will
provide the optimum
appearance.

MP80RA HD Media Player Manual Page 14 of 32 Rev. 107- 06/21/16
Layouts
Position and size the zones in the Layout
area where you need them.
Drag the pictures you want into the image
zones.
If you placed a SlideShow zone, right click
on it and add the desired images to the box
that opens.
If there is a RSS feed in the layout, right
click and setup the needed RSS url
parameters.
A Weather zone will need the City, State,
and Zip Code in order to find the correct
information. For international weather feeds
outside the US, contact CE labs sales for
this paid service.
NOTE:
The Video / Playlist Zone will always be blank at this level. It is a placeholder for when we merge the
Layout with a Video Playlist later in the Load/Play procedure on the main application window.
Send Content to the Player
1. Once the layout is created and saved, click on the X to exit back to QuickSign main page.
2. Click on Players to see the available players and select the one you wish to load in the left column.
3. Select “Player Control in the right column and select the desired Playlist to load (this will fill in the video/playlist zone
in your layout) and Layout to Load (the layout you just created).
4. Click on the Load/Play button to send the complete content package to the MP80RA.
If you wish to display full screen video only, select “Full Screen (no Layout)” from the Layout to Load drop down.
For additional
information on operation
of QuickSign software,
please see the
comprehensive help files
in QuickSign or contact
your CE labs salesperson
for more information.
PLAYLIST ZONE

MP80RA HD Media Player Manual Page 15 of 32 Rev. 107- 06/21/16
Quick Control
While displaying the Player Control Tab on QuickSign, you may select the File Manager button in the lower right hand
corner to launch the Player File Manager window.
This page will let you see the files on the players SD card and how much space is still available for loading new content. You
may also highlight a video file in the window and click on Play Selected. This sends an immediate playlist to the player with
the selected file.
Note:
Only video files may be played directly. You may select the Hide Layout Files box to make it easier to find the
desired file.

MP80RA HD Media Player Manual Page 16 of 32 Rev. 107- 06/21/16
Software (continued)
Firewall Issues
Quick Sign uses HTTP protocol when downloading files to the media players. If Quick Sign fails to download files to the
players, a PC firewall or a firewall in the router may be blocking this operation. Virus protection programs may block this
operation also. Make certain you have allowed a firewall exception for QuickSign when you installed the software. Check
with your IT department to work through these issues.
Unblocking the Computer Firewall
When Quick Sign is first started, you will be prompted to unblock the firewall for Quick Sign. Please accept to unblock. This
does not pose much of security issue due to the fact that you are only unblocking the Quick Sign application as opposed to the
whole computer and it will only download video files that you have specified.
Usually no further action will be needed and Quick Sign will function properly.
Manually Unblocking the Computer Firewall
If video files fail to download, you may need to verify that the firewall is indeed off for Quick Sign.
You can temporarily turn the firewall completely off to test if this resolves the file transfer issue.
Windows7 / VISTA Operating System
To turn firewall completely off (not recommended):
1. Control Panel->Security->Windows Firewall-> Turn Windows Firewall on or Off
2. Select Off
3. Click OK
To allow just Quick Sign through the Firewall:
1. Control Panel->Security-Windows Firewall-> All a program through Windows Firewall
2. Click Add Program
3. Browse to C:\Program Files\CE labs\QuickSign\QuickSignPro.exe for QuickSign
(Typical, may be different location on some PCs)
4. Click OK
Now add port 7898 TCP
1. Click Add Port
2. Set Name: http port:7898 TCP.
3. Click OK
XP Operating System
To turn firewall completely off (not recommended):
1. Control Panel-> Security Center->Windows Firewall-> Turn Windows Firewall on or Off
2. Select Off
3. Click OK
To allow just Quick Sign through the Firewall:
1. Control Panel-> Security Center->Windows Firewall
2. Click Exceptions Tab
3. Click Add Program
4. Browse to C:\Program Files\CE labs\QuickSign\QuickSignPro.exe for QuickSign
(Typical, may be different location on some PCs)
5. Click OK
Now add port 7898 TCP
1. Click Add Port
2. Set Name: http port:7898 TCP.
3. Click OK
Virus Protection Programs
If you are running a virus protection program, the settings may need to be altered to allow Quick Sign to use the HTTP
protocol (TCP/IP). Virus protection programs vary widely so no details are provided here.

MP80RA HD Media Player Manual Page 17 of 32 Rev. 107- 06/21/16
MP80RA with
QS Player App
Internet
MP80RA with
QS Player App
MP80RA with
QS Player App
Monitor 1
New York
Monitor 2
Dallas
Monitor 3
Denver
CE labs
QuickSign Cloud
Servers
Sys Admin or User
PC with QuickSign
Cloud Application
CE Labs QuickSign CLOUD for MP80
In the CE QuickSign Cloud system, the players are configured with the server address for your account.
The MP80 will contact the Cloud Server and negotiate for any pending content assigned by the QuickSign Cloud application.
While logged into QuickSign Cloud, users have visibility of what the players are currently playing. Players can be operated
from any PC that has the QuickSign Cloud application loaded.
Typical QuickSign Cloud Application

MP80RA HD Media Player Manual Page 18 of 32 Rev. 107- 06/21/16
How do I start using QuickSign Cloud?
Prerequisites:
I have my MP80 media player and it is connected to the
Internet.
I have a QuickSign Cloud account and the log-In credentials.
The authorization key has been loaded on the player via USB
from the file that was emailed to me.
I downloaded the QuickSign Cloud application on my PC.
Using QuickSign Cloud:
Launch the QuickSign Cloud Windows application and log in with user name and password.
Select the UPLOAD tab and select the local media to load into your cloud media database. This will allow access to your desired media from
any PC that you log in to. Please wait for the media to complete the upload.
If you desire to have a Layout (Digital Signage Information around your
media / Playlist zone), enter the Layout editor and create your screen
using the drag and drop zones in the layout editor. You may edit the
zones with your own content or messaging. Saving this layout will upload
information automatically to your cloud account.
Go back to the QuickSign main application and create a Playlist that
contains the media (Video, Pictures, or Channels) that will play either
full screen or in the Playlist Zone if you have a layout.
Loading Content on Player:
Go to the QuickSign start page and select PLAYERS tab.
Select your player in the left player column.
Select Player Control Tab in the right column.
Inside the Player Control Box, select the desired Playlist and Layout.
Press Load/Play and the Media Player will download your Layout
and media in the Playlist and begin to play.
UPLOAD MEDIA
LAYOUT EDITOR
PLAYLIST ZONE
PLAYLIST EDITOR
QS Cloud Start Page

MP80RA HD Media Player Manual Page 20 of 32 Rev. 107- 06/21/16
Chapter 4 –MP80RA OPERATION
Initial Startup Procedure
Once the unit has been mounted and configured with the appropriate SD card and cabling, connect the power supply to a
suitable AC outlet. The power LED on the front of unit will illuminate. The media player may take about 30 seconds to fully
boot to the operational state depending upon the startup configuration.
Operation
The MP800 is capable of driving a wide variety of displays at up to 4K resolution at bit rates up to 40 Mbps. You must have a
SD card installed in the unit to enable playback of local content. Once connected, powered on, and fully booted, the unit is
ready to use. The MP80RA can be configured with different applications to perform different functions. The main application
that will be loaded on most players is the CE labs QS Player application. This allows communication with QuickSign and
QuickSign Cloud control software.
Create the desired content package using QuickSign or QuickSign Cloud and send to the player. If you do not have a network
connection, the content may be published to a SD card at your local PC and then inserted into the MP80. You will need a
Phillips screwdriver to access the SD card.
The unit will play this content until instructed to play something else. If no startup item has been defined, the screen may only
show the CE labs logo and then a black screen.
The player works well with a variety of media files at high bit rates, but please adhere to the media creation standards in the
appendix at the end of this document. Also, be aware of the bit rate versus the speed of the SD card if you are using local
storage. If the video experiences freeze frames or stuttering, the bit rate may be too fast for the card installed in the player.
The media player can play content from many sources:
Real Time Source
oWeb Page
oEthernet RTP IP Stream
Local Storage Source
oInternal SD Card (with external access) (optional)
oExternal USB Drive (optional)
The MP80 may be used as a stand-alone UHD / High Definition source (once content is loaded on the internal storage device)
or greater versatility is allowed when the player is connected to a network. The primary focus of the MP80RA is media
playback and control device that is part of a network of media players. The network interface is a powerful tool in managing
from one to thousands of players. The GPIO interface allows for local interaction through push buttons or external sensors.
The GPIO interface is programmed within the QuickSign Software.
Table of contents
Other Elabs Media Player manuals


