ELAC VARRO Premium Series User manual
P S S
M : PS250, PS350, PS500
O’ M
B

Thank you, and Congratulations on bringing home
an ELAC Premium Subwoofer.
ELAC Premium subwoofers embody 95 years of creating audio excellence through
tradition, craftsmanship, and innovation.
They are developed by a passionate group of individuals whose sole purpose is to bring
a new dimension of sound quality into your home - The life of Sound
ELAC subwoofers are best in class, designed for deep bass, power, and dynamic ability,
blending to any environment to be enjoyed at any listening level.
As the pioneer of APP-controlled subwoofers, all Elac subwoofers include APP control to
help with auto room correction and easy setup of multiple subwoofers. Visit the Apple®
App® Store or Google PlayTM Store and search Elac Sub Control 3.0.
Enjoy!
If you have any questions about your Premium Subwoofer, please contact us directly.
J T T - T L S
P 1P S PS250, PS350, PS500 | ..

C
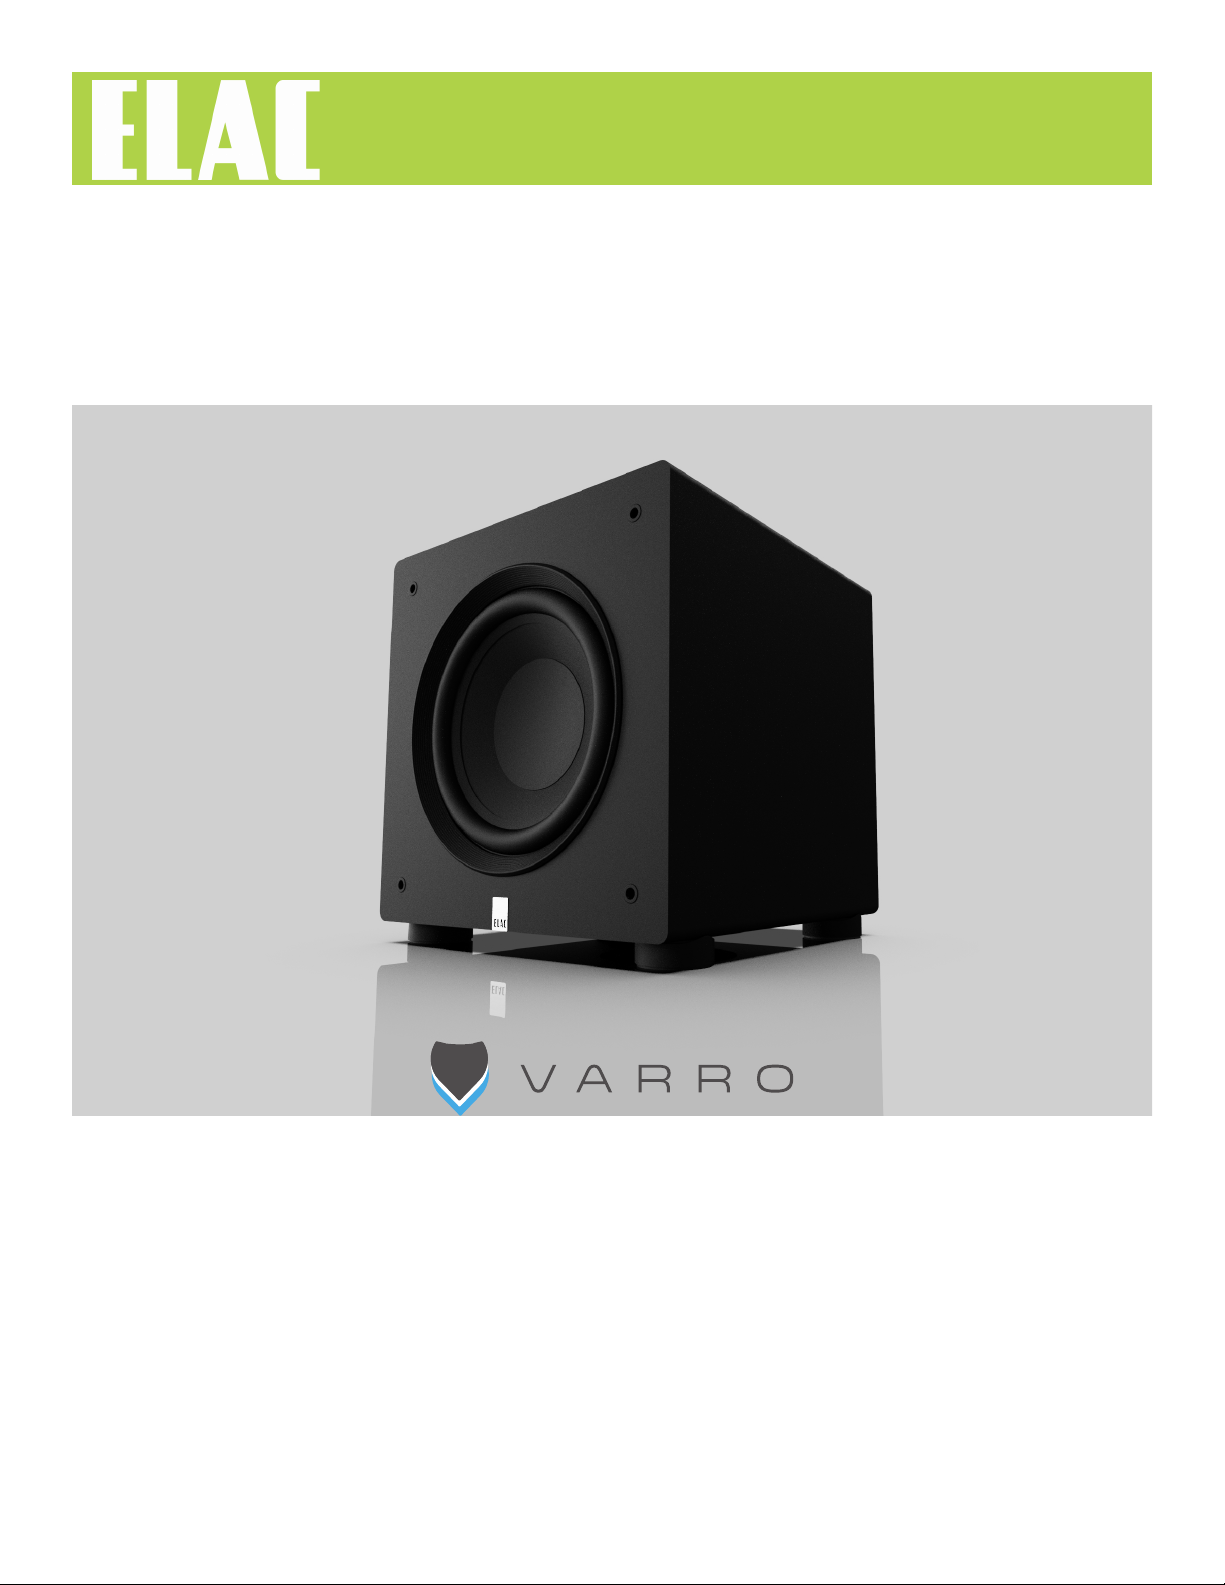
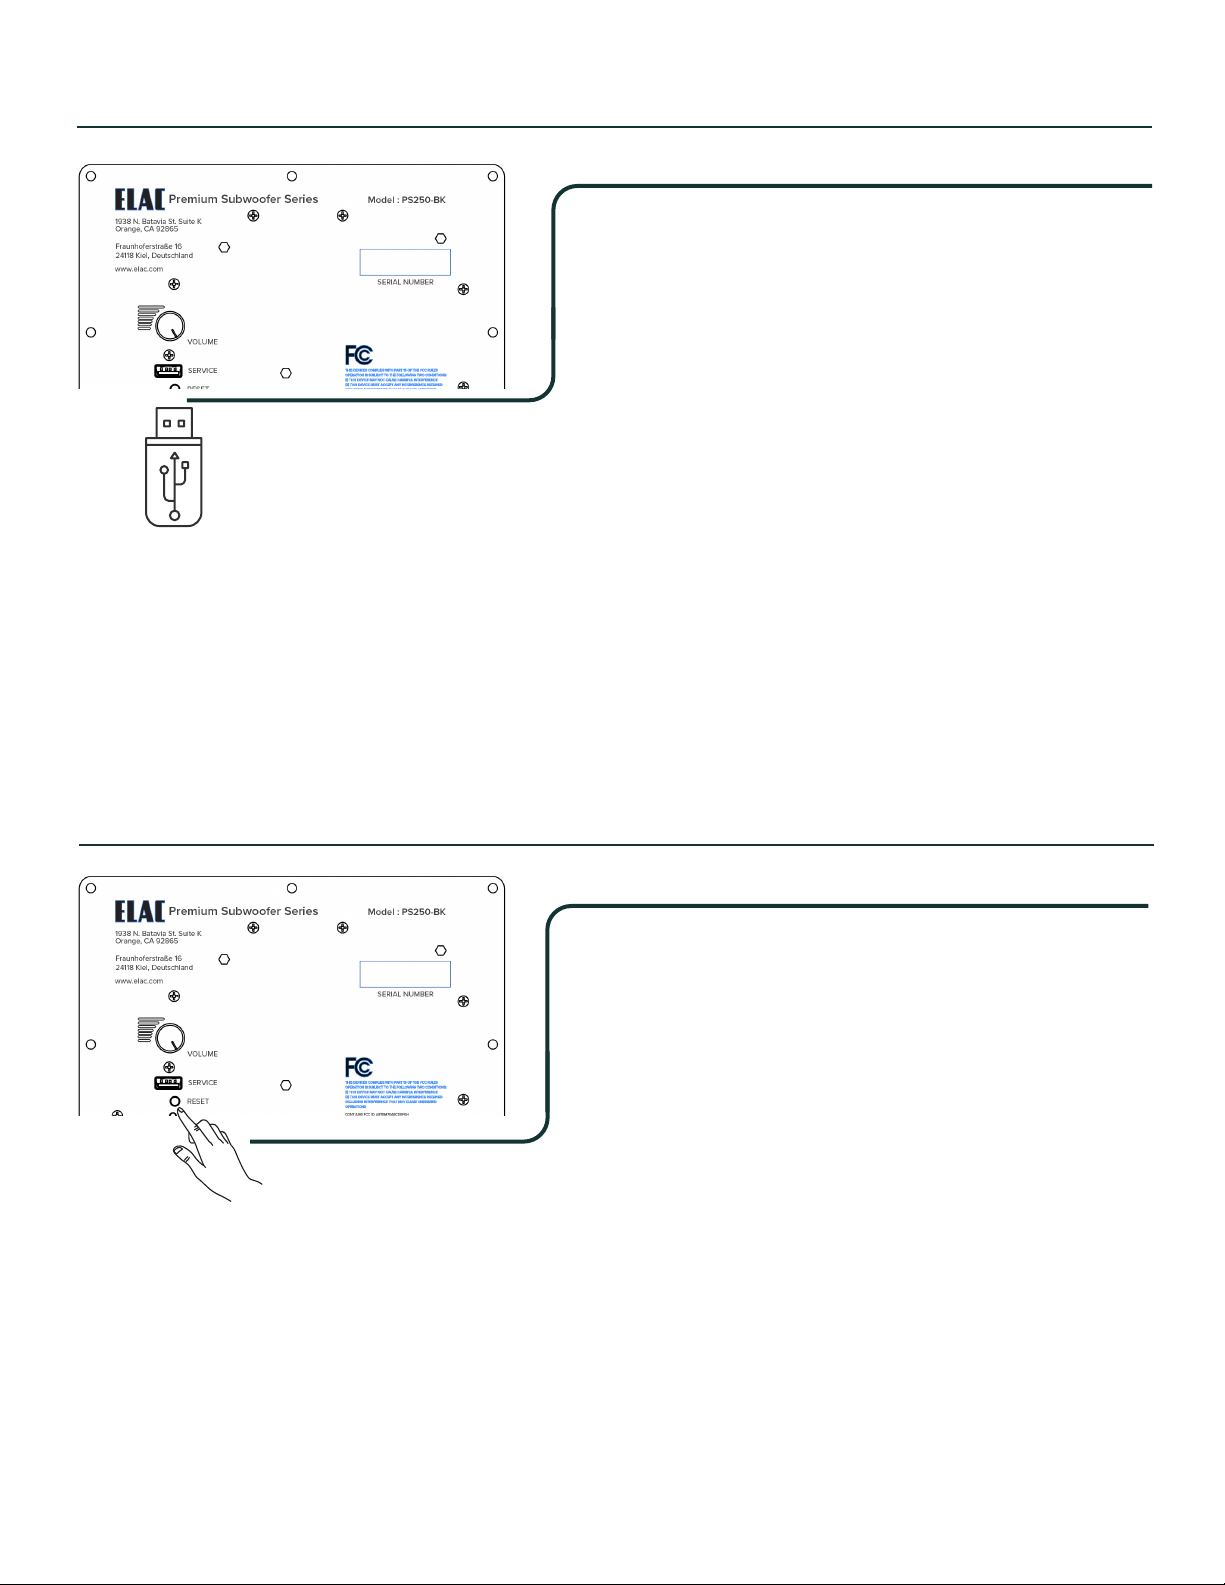
P C
Model : PS250-BK
Premium Subwoofer Series
1938 N. Batavia St. Suite K
Orange, CA 92865
Fraunhoferstraße 16
24118 Kiel, Deutschland
www.elac.com
SERIAL NUMBER
Desinged by Elac
Made in China
VOLUME
SERVICE
RESET
RIGHT/LFELEFT
T2.5A L 250V
100-120/220-240 VAC
50/60Hz 2.5A
LINE IN
POWER
ON
OFF
CONT AINS FCC ID: A8TBM70ABCDEFGH
CONT AINS IC ID: 12246A-BM70BLES1F2
CAN ICES-3(B)/NMB-3(E)
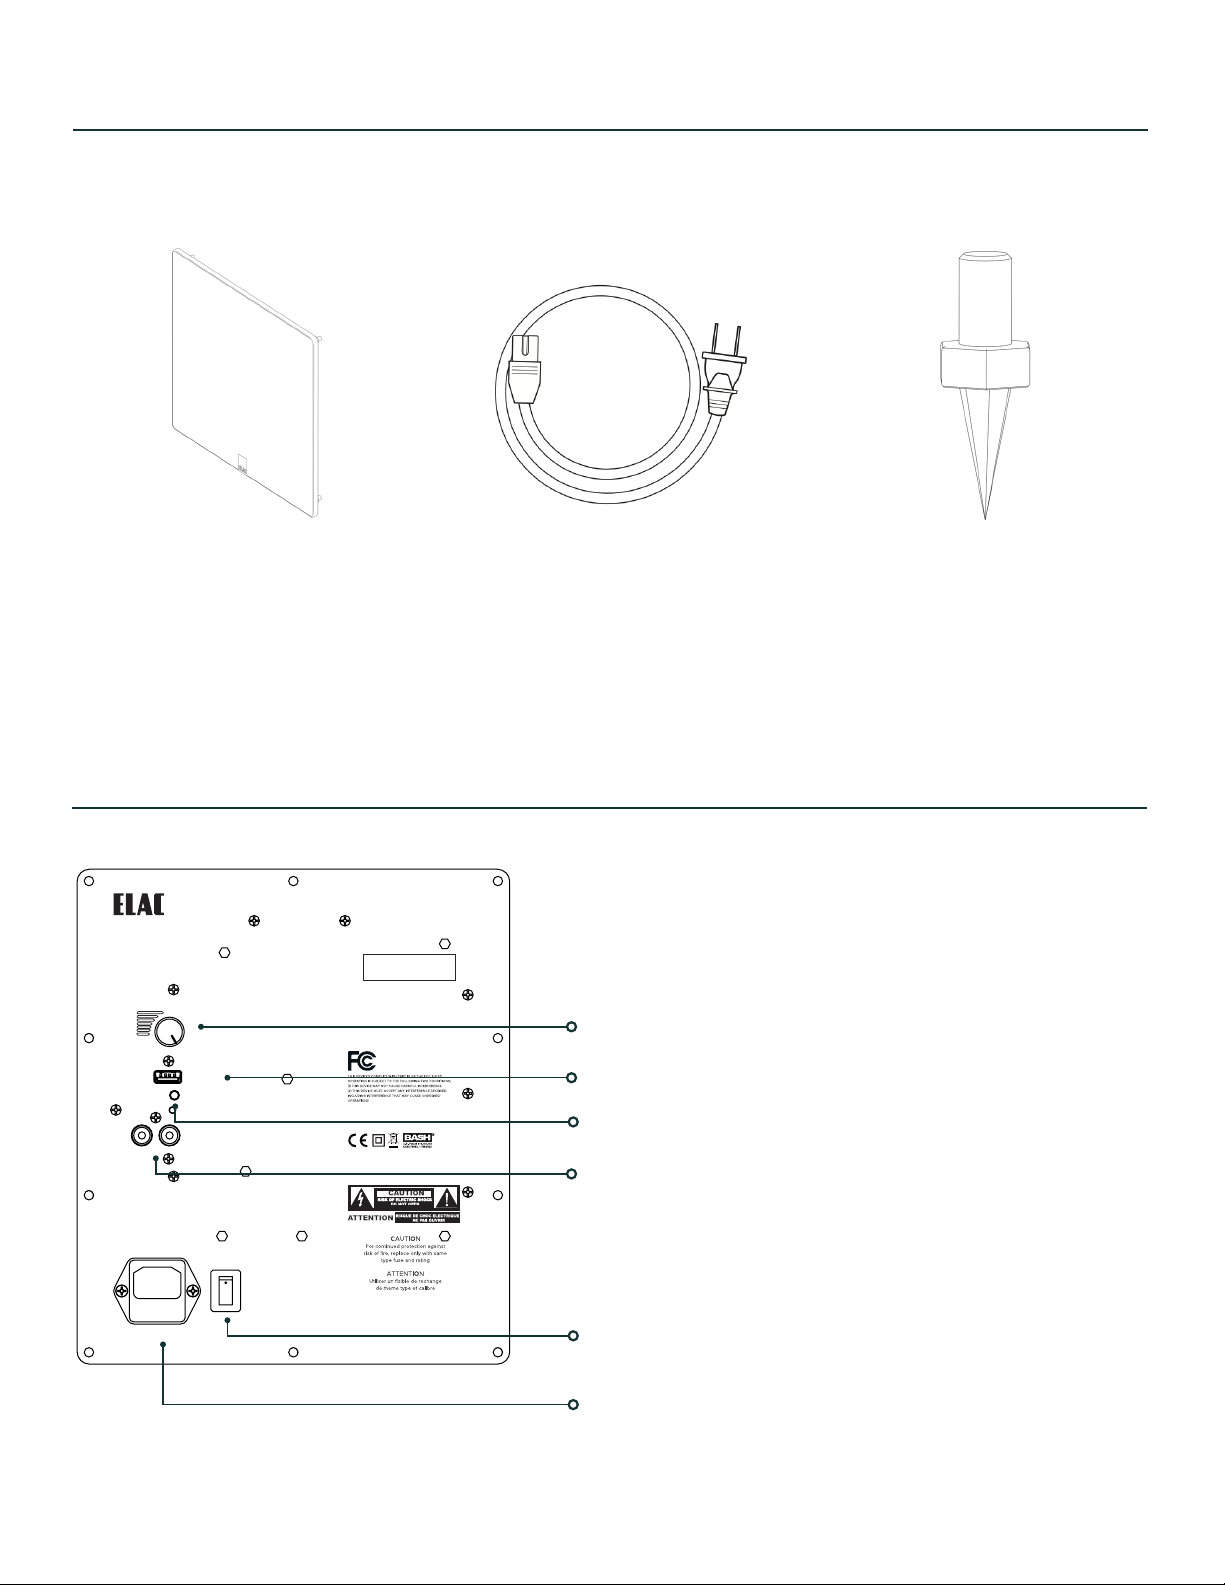
G
P 2
S (4)
B P F
AC P R
ON/OFF S
RCA L L I
F R
F U
V C
P S PS250, PS350, PS500 | ..

1. If using an AV receiver with a subwoofer output connect a single RCA cable
from the subwoofer out to the Right/LFE input on the subwoofer.
2. If your receiver, pre-amp, or integrated amplifier does not have a dedicated
subwoofer output connect a set of stereo RCA connectors from the pre-outs
(variable) from your pre-amp and integrated amp to the rca inputs on the
subwoofer.
3. Turn on power switch to “ON” position
Model : PS250-BK
Premium Subwoofer Series
1938 N. Batavia St. Suite K
Orange, CA 92865
Fraunhoferstraße 16
24118 Kiel, Deutschland
www.elac.com
SERIAL NUMBER
Desinged by Elac
Made in China
VOLUME
SERVICE
RESET
RIGHT/LFELEFT
T2.5A L 250V
100-120/220-240 VAC
50/60Hz 2.5A
LINE IN
POWER
ON
OFF
CONT AINS FCC ID: A8TBM70ABCDEFGH
CONT AINS IC ID: 12246A-BM70BLES1F2
CAN ICES-3(B)/NMB-3(E)
P 3
D S
C S
S
F F F
AVR
Pre-Amp / Integrated Amp
1. Volume 75%
2. Low pass at 70 Hz @ 12 dB
3. Preset defaulted to Music
P S PS250, PS350, PS500 | ..
F U
Note:
Firmware for your subwoofer can be downloaded from
www.elac.com under the troubleshooting and firmware
section.
USB drive must be compatible with USB 2.0 with a 512
byte hardware sector size.
1. Unzip the downloaded firmware file and place the “FIRMWARE_UPDATE_FILE.BL2”
file in the root directory of a FAT32 formatted USB flash drive. exFAT, NTFS and other
file systems are not compatible.
2. Power o the subwoofer, wait 60 seconds and plug the USB flash drive into the USB
port on the rear of the subwoofer.
3. Power on the Subwoofer. The firmware update will automatically begin.
4. The firmware update will be complete when the LED on the rear of the subwoofer
stops flashing.
5. Power Cycle the subwoofer. The firmware update is now complete.
6. You can check the firmware version of the subwoofer in the Sub Control 3.0 app on
the about page.
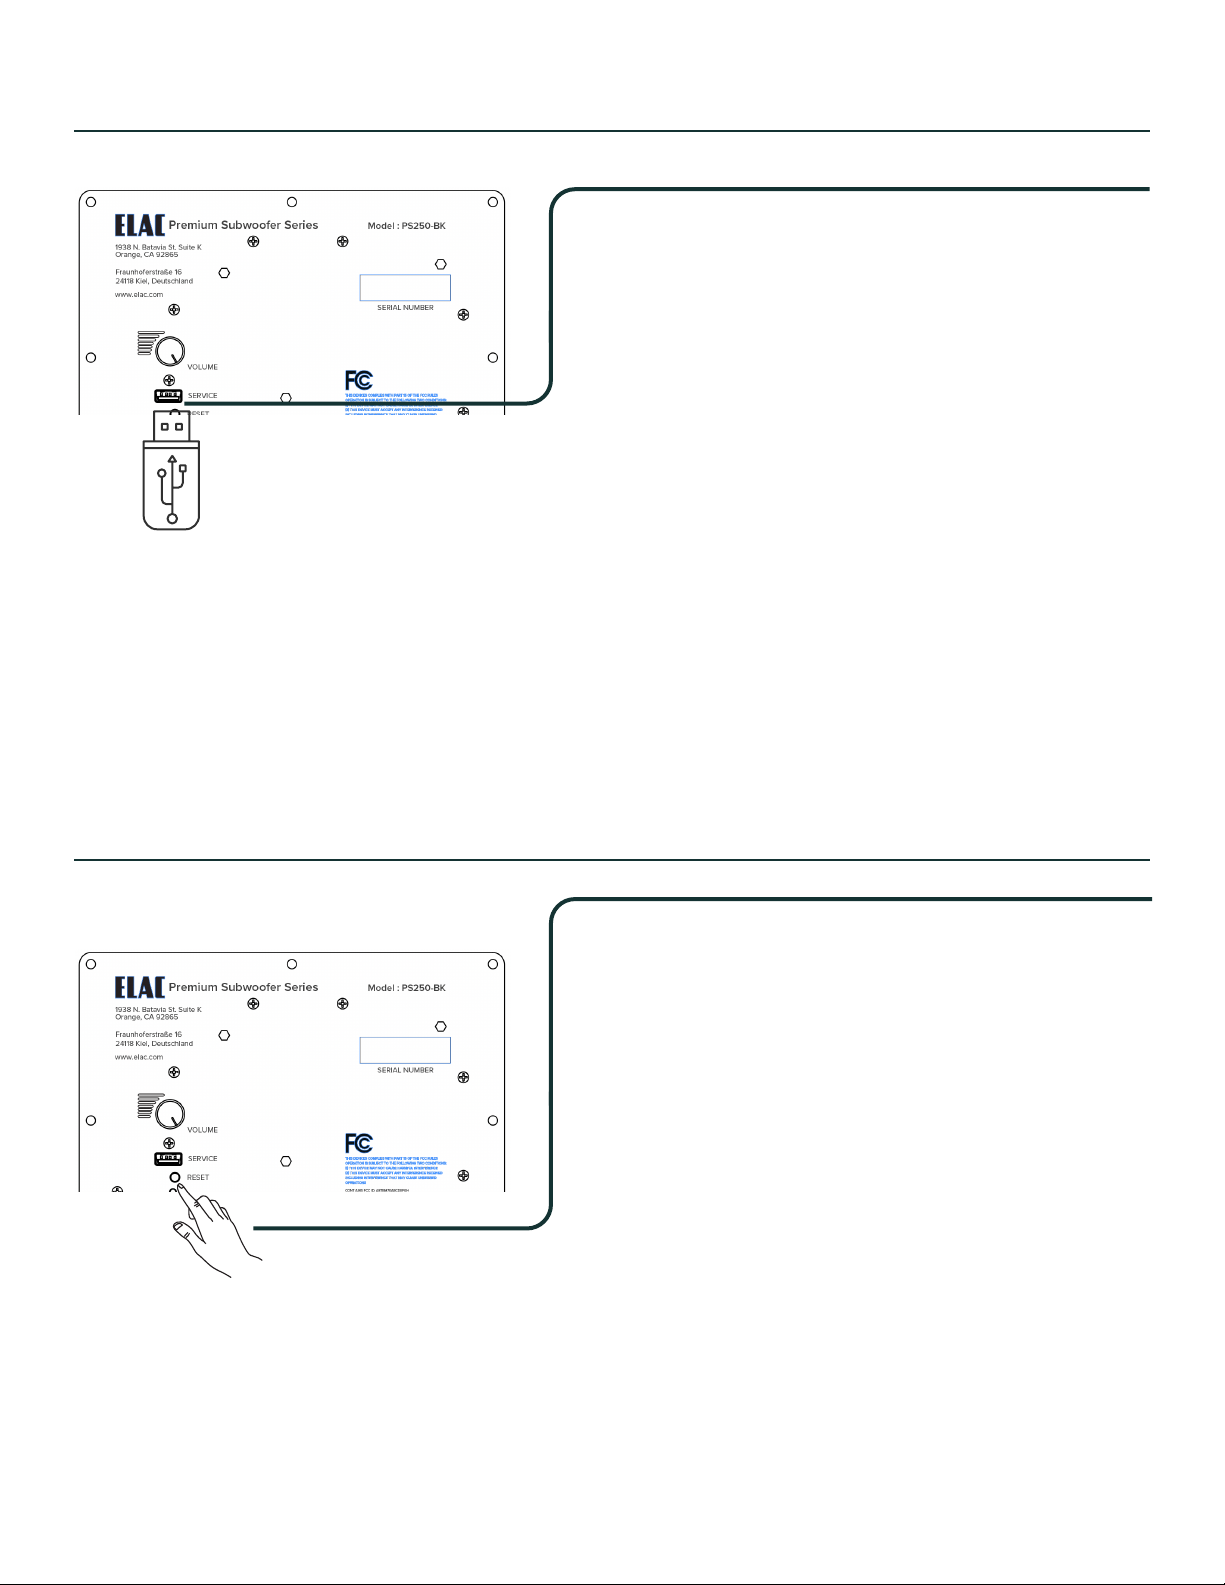
P 4
1. Press and hold down RESET button for minimum of 10 seconds
2. LED starts to blink (flash). LED blinking parameters: LED is on for 100 ms (millisec-
onds) then LED is o for 100 ms.
3. Release the RESET button before 15 seconds elapses in order to force the sub to
perform Factory Reset
4. If the RESET button is hold down for more than 15 seconds Factory Reset is can-
celled.
Note:
RESET erases all data and restores subwoofer firm-
ware and parameters to the original factory settings.
Firmware upgrade may be necessary post RESET.
F R
P S PS250, PS350, PS500 | ..

P 5
Included with your subwoofer are four optional spikes that
can be used` when the subwoofer is used on carpet.
If you are installing the subwoofer onto hardwood, tile or
other non-carpeted surfaces please use spike discs (Not
included), or do not install the spikes to prevent any dam-
age to your floor.
1. Attach the spikes by screwing them into the threaded inserts on each of the four cor-
ners on the bottom of the subwoofer.
2. The nut on the spike is used to the lock the spike at the desired height.
O S I
Placing a subwoofer in a corner excites most room
modes and oers the best chance of avoiding a null
area (a part of the room that experiences an acoustic
reduction in bass).
If placing the subwoofer in the corner creates an
excessive amount of bass, you can try moving the
subwoofer away from the wall or run Auto EQ feature
of the ELAC Sub Control APP to minimize the eect of
corner placement.
C P
S P
P S PS250, PS350, PS500 | ..

If you believe you are getting too much bass from having
your subwoofer located in a corner of the room, you can
position the subwoofer between your front left and right
speakers.
This will reduce “loading” of bass and can aid in reducing
localization of bass frequencies.
F P
D P
Front stage in the corners or adjacent to
the center channel.
Opposite diagonal front and rear.
P 6
Utilizing dual subwoofers can help distribute bass frequencies more evenly and provide better coverage in the
room.
Since every room is unique, If possible the best option is to move the subwoofers around the room and find the
location that sounds the best from your normal listening position. There are many test discs you can purchase that
provide the correct test signals for helping find this optimum location.
Note: The PHASE and DELAY functions built into the subwoofer will also help if you experience any placement
issues.
P S PS250, PS350, PS500 | ..

S
PS250-BK PS350-BK PS500-BK
S T B R
W 10” HE P C 12” HE P C 15” HE P C
F R 27H 150H 24H 150H 20H 150H
LFE@90B/1, H A-
/I 27H / 24H 24H / 21H 20H / 16H
M O L,
SPLB/1 107 dB 108 dB 115 dB
L , H 40H 150H 40H 150H 40H 150H
M , W@4
O (M) 250 W 350 W 500 W
App Controlled (BLE) OS A
Amplifier Topology BASH
Standby Power Consumption < 0.5W
Inputs RCA L L
Data Connection USB (F U)
Cabinet Finish B V
Accessories Included G, AC C, S
Height 381 437 480
Width 360 416 460
Depth 360 418 460
Net Weight 16.4 K 27.8 K 25.9 K
P 7P S PS250, PS350, PS500 | ..

1. General information
• Please read and follow these safety instructions.
• Keep them safe for future reference.
• Observe all warnings on the speaker and in the manual. Please check the speaker for damage
before use. The speaker must be in perfect working condition. Damaged parts may lead to
personal injury.
2. Use only as directed
• Connect the speaker(s) according to the instructions in the manual.
• Many ELAC speakers are equipped with spikes and/or anti-slip feet. They are explicitly provided
for leveling the speaker. For leveling on an uneven floor, unscrew the spikes or anti-slip feet by
2-3 turns of thread. The speaker should always be in perfect vertical alignment: the stability of the
speaker must not be compromised by using spikes or anti-slip feet as the speaker may tip-over.
3. Location
• Install the speakers on a level surface only.
• When choosing the location of these speakers do not place them in locations that are:
• In direct sunlight
• Very humid
• Prone to vibrations
• Exceptionally hot or cold
• Near CRT Televisions (the speakers are not magnetically shielded and may cause color
issues with a CRT based TV).sa
• Close to magnetic cards (Since the speakers are not magnetically shielded placing
magnetic cards such as credit cards or commuter cards may cause them to fail).
4. Overload
Please ensure the product is perfectly stable to avoid injury from tip-over. Please note, that
stability can be increased by using spikes on carpeted surfaces. However, the mounting of spikes
must be carried out carefully due to their very sharp ends which may cause injuries. The stability
on slippery floors can be increased by using Velcro fastening tape or double-sided adhesive
tape. Do not install the speaker near any heat sources such as radiators, heating valves, stoves,
or other apparatus (including amplifiers) that produce heat, or in areas where there is a risk of
explosion.
• Do not block any ventilation openings. Install in accordance with the manufacturer’s instructions.
• Do not install the speaker in a closed rack or in a closed cupboard.
• Do not put burning candles on or near the speaker.
• Do not install the speaker near transformers because electromagnetic stray fields can cause hum
noise on woofers.
• In combination with certain materials / lacquers / material surfaces, anti-slip feet or spike washers
may cause colored imprints on the surfaces.
S I
P 8P S PS250, PS350, PS500 | ..

5. Overload
Extreme overload of the device due to very high volume may cause individual components to
blow. Because of the possible danger, you should never leave loudspeakers under extreme
overload conditions unattended.
6. Service
DANGER! Do not open the cabinet because the components and conductors may carry
dangerous levels of electricity! Servicing to be carried out by qualified service personnel only.
Servicing is required when the loudspeaker has been damaged in any way, such as damage to
the power supply cord or the plug, or when liquid has been spilled or objects have fallen into the
loudspeaker, the speaker has been exposed to rain or moisture, does not operate normally, or
has been dropped. To reduce the risk of electric shock, do not open the loudspeaker. Servicing
to be carried out by qualified service personnel only .
7. Fuse links
Various faults in subwoofers or active speakers may cause the fuse to blow. If the fuse blows,
only replace it with the correct fuse type and rating as shown on the rear of the loudspeaker on
the fuse holder. A second fuse is included with the device (in the fuse holder beneath the mains
socket).
8. Cleaning
NOTE: Clean only with soft, smooth cloth or with dust brush. Do not use scouring agents, alcohol,
benzene, furniture polish or other agents for cleaning! Modern furniture is often coated with
multiple varnishes and plastics which can be treated with chemical agents. Some of these agents
contain substances which degrade or soften the rubber feet. Therefore, we advise you to place
an anti-slip mat underneath the loudspeaker.
9. Volume
CAUTION! Continuous high volume may cause severe damage to your hearing. Please listen
responsibly.
10.Disposal
The packaging is made from recyclable materials. Dispose of this in an environmentally friendly
manner. At end of product life do not dispose of the speaker(s) with standard household waste.
The speaker must be recycled in accordance with local legislation. Ask your local government
for further information on recycling as the device contains valuable raw materials. Disable the
speaker before disposal.
11. Power
This subwoofer is only intended to be connected to voltages that are listed on the rear panel of
the cabinet. Connection to any other voltage may cause irreversible damage to the subwoofer
and will void the warranty. Use of plug adapters is not recommended because they may allow
connection to voltages other than those printed on the back of this subwoofer.
P 9P S PS250, PS350, PS500 | ..

ELAC Americas Inc.
North America Limited Liability Warranty
ELAC Americas Inc. warrants to the original purchaser that this product be free from defects and or workmanship
for a period of 1 (One) year from the original date of purchase. During this time period, repair or replacement of
parts will be free of charge to the original owner (See below limitations). Shipping to and return from the repair
center will be the responsibility of the original purchaser.
Limitations
• Warranty begins on the date of original purchase from an authorized ELAC Americas Inc. dealer.
• Product is warranted only if used in home applications within the max power rating specified in this
manual. Commercial use of this product is not warranted.
• Product that has been modified or altered in anyway will not be warranted.
• Product that has been abused or subjected to faulty equipment will not be warranted.
• Products with defaced or removed serial numbers will not be warranted.
If service is required
In the event that service is required, please contact ELAC America at 888-541-0996 or at
[email protected] to arrange for service or replacement. You will be responsible to provide proof of
purchase (Copy or original sales receipt). Shipping to and from our repair center will be the responsibility of the
original purchaser.
Warranty Outside of North America
This warranty applies to products purchased in the United States and Canada. For warranty claims outside of
North America please contact the local dealer/distributor in the country of purchase.
W

Vielen Dank und herzlichen Glückwunsch zum
Erwerb des ELAC Premium Reference Subwoofers.
ELAC Premium Reference Subwoofer verkörpern ELAC’s 95-jährige Geschichte als
Audio-Experte mit Tradition, ausgezeichneter Handwerkskunst und Innovation.
Sie wurden von einer Gruppe passionierter Spezialisten entwickelt, deren Ziel es ist,
neue Klangdimensionen in Ihrem Zuhause zu schaen – The life of Sound
ELAC Subwoofer zeichnen sich durch abgrundtiefe Bässe, enorme Leistung und Dynamik
aus und lassen sich nahtlos in jedes Setup integrieren, egal für welches Lautstärkeprofil.
Vor ein paar Jahren noch war ELAC der Pionier der App-kontrollierbaren Subwoofer. Mit-
tlerweile sind alle ELAC-Subwoofer App-kontrollierbar. Suchen Sie im Apple® App® Store
oder Google PlayTM Store nach Elac Sub Control 3.0.
Viel Spaß!
Wenn Sie Fragen zu Ihrem Subwoofer haben, wenden Sie sich bitte direkt an uns:
J T T - T L S
S 1P S PS250, PS350, PS500 | ..
I
N
A
S 2
S (4 S.)
B
Model : PS250-BK
Premium Subwoofer Series
1938 N. Batavia St. Suite K
Orange, CA 92865
Fraunhoferstraße 16
24118 Kiel, Deutschland
www.elac.com
SERIAL NUMBER
Desinged by Elac
Made in China
VOLUME
SERVICE
RESET
RIGHT/LFELEFT
T2.5A L 250V
100-120/220-240 VAC
50/60Hz 2.5A
LINE IN
POWER
ON
OFF
CONT AINS FCC ID: A8TBM70ABCDEFGH
CONT AINS IC ID: 12246A-BM70BLES1F2
CAN ICES-3(B)/NMB-3(E)
N
N
L-E (C)
R-T
B F U
L
P S PS250, PS350, PS500 | ..

S 3
1. Wenn Sie einen AV-Receiver mit Subwoofer-Ausgang besitzen, verbinden Sie diesen mit Hilfe eines
Mono-Cinch-Kabels mit dem LFE-Eingang des Subwoofers.
2. Besitzt Ihr Receiver, Vorverstärker oder Vollverstärker keinen dezidierten Subwoofer-Ausgang,
schließen Sie ein Stereo-Cinch-Kabel an den Pre-Out des Verstärkers an und verbinden Sie dieses
mit den Cinch-Eingängen des Subwoofers.
3. Schalten Sie den Netzschalter ein (Position ON).
A S
Vorverstärker / Vollverstärker
G
1. Lautstärke: 75%
2. Lowpass auf 70 Hz bei 12 dB
3. Preset: Music
Model : PS250-BK
Premium Subwoofer Series
1938 N. Batavia St. Suite K
Orange, CA 92865
Fraunhoferstraße 16
24118 Kiel, Deutschland
www.elac.com
SERIAL NUMBER
Desinged by Elac
Made in China
VOLUME
SERVICE
RESET
RIGHT/LFELEFT
T2.5A L 250V
100-120/220-240 VAC
50/60Hz 2.5A
LINE IN
POWER
ON
OFF
CONT AINS FCC ID: A8TBM70ABCDEFGH
CONT AINS IC ID: 12246A-BM70BLES1F2
CAN ICES-3(B)/NMB-3(E)
S
F F F
AVR
P S PS250, PS350, PS500 | ..
S 4
F U
Anmerkung:
Die aktuelle Firmware für Ihren Subwoofer können Sie unter
www. elac.de herunterladen.
Der USB-Stick muss kompatibel mit USB 2.0 sein und eine
Sektorgröße von 512 Byte aufweisen.
1. Entpacken Sie die heruntergeladene Datei und kopieren Sie “FIRMWARE_UPDATE_FILE.
BL2” in das Basisverzeichnis eines in FAT32-formatierten USB-Sticks. Formate wie exFAT,
NTFS o.a. sind nicht kompatibel.
2. Schalten Sie den Subwoofer aus, bzw. trennen Sie ihn vom Netz, warten Sie 10 Sekunden
und stecken Sie den USB-Stick in den USB-Port auf der Rückseite des Subwoofers.
3. Schalten bzw. Stecken Sie den Subwoofer wieder ein. Das Firmware-Update wird nun autom-
atisch installiert.
4. Der Ladevorgang ist beendet, sobald die LED auf der Rückseite des Subwoofers nicht mehr
blinkt.
5. Trennen Sie den Subwoofer erneut für 10 Sekunden vom Netz. Das Update ist nun fertig
installiert.
6. Die erfolgreiche Installation können Sie unter dem Menüpunkt „About“ in der Sub Control 3.0
App überprüfen.
R
1. Drücken und halten Sie die RESET-Taste für min. 10 Sekunden.
2. Die LED blinkt schnell (100 Millisekunden ein, 100 Millisekunden aus).
3. Lassen Sie die RESET-Taste los, bevor 15 Sekunden vergangen sind, um den Reset-Vorgang
einzuleiten.
4. Wird die RESET-Taste länger als 15 Sekunden gehalten, wird der Reset-Vorgang abgebrochen.
Anmerkung:
RESET löscht alle Daten und versetzt den Subwoofer in den
Auslieferungszustand zurück.
Nach dem RESET kann es also nötig sein, ein Firmware-Up-
date durchzuführen.
P S PS250, PS350, PS500 | ..

Ihr Subwoofer wird mit 4 optional einschraubbaren Spikes aus-
geliefert. Diese sollten verwendet werden, wenn der Subwoof-
er auf Teppichen oder Auslegware aufgestellt wird.
Wenn Sie den Subwoofer auf harten Böden (Parkett, Fliesen
etc.) aufstellen, verwenden Sie Spike-Unterlegscheiben (nicht
im Lieferumfang enthalten), oder installieren Sie die Spikes
nicht, um Schäden am Fußboden zu vermeiden.
1. Schrauben Sie die Spikes in die Gewindeeinsätze an allen vier Ecken auf der Unterseite
des Subwoofers.
2. Die Kontermutter wird genutzt, um den Spike in der gewünschten Höhe zu arretieren.
O: S I
S 5
P S PS250, PS350, PS500 | ..

S 6
Die Aufstellung eines Subwoofers in einer Raumecke
regt die meisten Raummoden an, womit es wenige
Bereiche im Raum gibt, an denen kein Bass oder zu
wenig Bass zu hören ist.
Andererseits kann die Aufstellung in der Ecke zu einer
Überbetonung bestimmter Bassfrequenzen führen
(unkonturierter, unkontrollierter Bass). Um diesem
Eekt entgegenzutreten, kann der Sub aus der Ecke
hervorgeholt und die Wandabstände vergrößert
werden und die Auto-EQ-Funktion genutzt werden.
A R
S A
Sollte der Basspegel zu hoch sein, wenn der
Subwoofer in der Raumecke aufgestellt wird, kann
er auch innerhalb der Basisbreite (zwischen den
Hauptlautsprechern) aufgestellt werden.
Dies reduziert die Bassfülle und die Ortbarkeit des
Subwoofers.
A F
P S PS250, PS350, PS500 | ..

S 7
V S
Frontbereich in den Ecken, oder rechts
und links des Centers.
Diagonal auf gegenüberliegenden Seiten
des Raumes vorn und hinten.
Die Verwendung zweier Subwoofer kann helfen, Bassfrequenzen im Raum homogener zu verteilen und
eine bessere Bassabdeckung im Raum zu erzielen.
Da jeder Raum einzigartig ist, ist es immer ratsam, die Subwoofer auf unterschiedlichen möglichen
Stellplätzen aufzustellen und am Hörplatz das Optimum herauszufinden. Am Markt sind die
unterschiedlichsten Test-CDs erhältlich, die bei der Ermittlung der optimalen Position behilflich sein
können.
Anmerkung:
Weitere Möglichkeiten zur Optimierung der Aufstellung, bieten die Einsteller für PHASE und DELAY.
P S PS250, PS350, PS500 | ..

S 8
T D
PS250-BK PS350-BK PS500-BK
P B R
T 250 HEX P
K
300 HEX P
K
380 HEX P
K
F 27 H - 150 H 24 H - 150 H 20 H - 150 H
LFE @ 90 B / 1 H,
S / I R 27 HZ / 24H 24 HZ / 21 H 20 HZ / 16 H
SPL B / 1 ,
S 107 dB 108 dB 115 dB
L-F,
, H 40H - 150H 40H - 150H 40H - 150H
M. V
W 4 O 250 W 350 W 500 W
U
B OS A
V BASH
S L < 0.5W
E L-P (C)
D-I USB (F U)
F E S D
M Z A, N, S
H 381 437 480 mm
B 360 416 460 mm
T 360 418 460 mm
N 16.4 K 27.8 K 25.9 K
P S PS250, PS350, PS500 | ..

S 8
S
P S PS250, PS350, PS500 | ..
1. Allgemeines
• Lesen und beachten Sie die folgenden Sicherheitshinweise und bewahren Sie diese sorgfältig auf.
Beachten Sie alle Warnungen, die auf dem Gerät und in der Bedienungsanleitung vermerkt sind. Über
prüfen Sie das Gerät vor der Inbetriebnahme auf vorhandene Schäden. Das Produkt muss sich in einem
einwandfreien Zustand befinden. Beschädigte Teile können zu Verletzungen führen.
2. Bestimmungsgemäßer Gebrauch
• Schließen Sie den bzw. die Lautsprecher gemäß den Vorgaben in der Bedienungsanleitung an.
• Viele ELAC Lautsprecher sind mit Spikes und/oder rutschfesten Füßen ausgestattet. Diese sind
ausschließlich für den Niveauausgleich des Lautsprechers vorgesehen. Um Niveauunterschiede bei
unebenen Böden auszugleichen, drehen Sie die Spikes oder rutschfesten Füße um 2 bis 3
Gewindeumdrehungen heraus. Der Lautsprecher muss stets lotrecht stehen: Die Standfestigkeit des
Lautsprechers darf durch die Verwendung von Spikes oder Füßen nicht beeinträchtigt werden, da
der Lautsprecher andernfalls kippen kann.
3. Aufstellungsort
• Die Lautsprecher dürfen nur auf ebenen Untergründen aufgestellt werden.
• Vermeiden Sie als Aufstellort für die Lautsprecher Orte:
• mit direkter Sonneneinstrahlung
• mit hoher Feuchtigkeit
• die vibrationsanfällig sind
• an denen besonders heiße oder kalte Temperaturen auftreten
• die sich in der Nähe von Röhren-Fernsehgeräten befinden (die Lautsprecher sind nicht magnetisch
abgeschirmt und können das Farbbild von Röhren-Fernsehgeräten beeinträchtigen)
• in unmittelbarer Nähe von magnetischen Karten (die Lautsprecher sind nicht magnetisch abgeschirmt,
wodurch magnetische Karten wie z.B. Kreditkarten oder Fahrkarten mit Magnetstreifen Schaden
nehmen können).
4. Überlastung
Achten Sie bei dem Produkt auf einen sicheren Stand, um mögliche Verletzungen durch Umkippen zu
vermeiden. Die Standfestigkeit auf Teppichboden lässt sich durch die Verwendung von Spikes verbessern.
Achten Sie beim Anbringen von Spikes darauf, sich nicht an deren scharfen Enden zu verletzen. Auf
glatten Böden lässt sich die Standfestigkeit mithilfe von Klettverschlüssen oder doppelseitigen
Klebestreifen erhöhen. Positionieren Sie den Lautsprecher nicht in der Nähe von Wärmequellen wie
Heizungen, Heizungsventilen, Öfen oder anderen Geräten (einschließlich Verstärkern), die Hitze
entwickeln, oder in explosionsgefährdeten Bereichen.
• Blockieren Sie niemals Lüftungsschlitze. Beachten Sie beim Aufstellen die Anweisungen des Herstellers.
• Stellen Sie den Lautsprecher nicht in ein geschlossenes Regal oder einen geschlossenen Schrank.
• Stellen Sie keine brennenden Kerzen auf den Lautsprecher bzw. in dessen unmittelbare Nähe.
• Positionieren Sie den Lautsprecher nicht in unmittelbarer Nähe eines Transformators, da es sonst
durch elektromagnetische Einstreuung des Transformators zu einem Brummen der Tieftöner
kommen kann.
• Rutschfeste Füße oder Unterlegscheiben für Spikes können bei bestimmten Werkstoen / Lackierungen
/ Materialoberflächen Verfärbungen bzw. Abdrücke verursachen.
5. Überlastung
Bei extremer Überlastung des Geräts durch einen sehr hohen Lautstärkepegel kann es zu einer
Beschädigung einzelner Bauteile kommen. Daher sollten Sie Lautsprecher bei Betrieb mit extrem
hohem Pegel nicht unbeaufsichtigt lassen.
Other manuals for VARRO Premium Series
1
This manual suits for next models
3
Table of contents
Languages:
Other ELAC Subwoofer manuals


ELAC
ELAC SUB3010 User manual

ELAC
ELAC Muro Series User manual

ELAC
ELAC SUB3010E User manual

ELAC
ELAC MicroSUB 2010.2 User manual

ELAC
ELAC VARPO RS500 User manual

ELAC
ELAC VARRO Premium Series User manual

ELAC
ELAC S10 User manual

ELAC
ELAC SUB 2060 D User manual

ELAC
ELAC SUB3010 User manual

ELAC
ELAC S10EQ User manual


