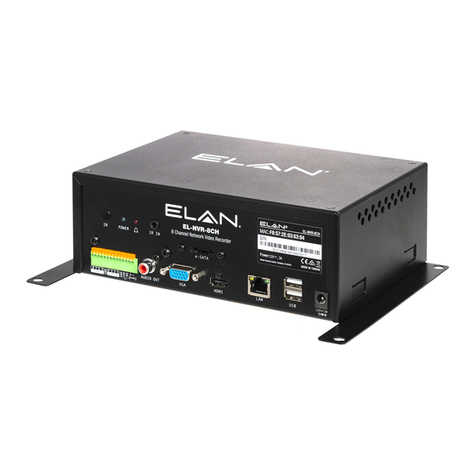
Elan EL-NVR series User manual

ENGLISH
EL-NVR
Owner’s Manual

OWNER’S MANUAL EL-NVR
2www.elanhomesystems.com
CONTENTS
About this document �������������������������������������������������������������������������������������������������������������� 4
Electromagnetic Compatibility (EMC) �������������������������������������������������������������������������������������� 4
Compliance����������������������������������������������������������������������������������������������������������������������������������������4
Features���������������������������������������������������������������������������������������������������������������������������������������������5
Caution ����������������������������������������������������������������������������������������������������������������������������������������������5
Hard Drives Install Instruction�������������������������������������������������������������������������������������������������� 6
EL-NVR 1U 19” 4-Bay NVR Installation ����������������������������������������������������������������������������������������������6
Remote control����������������������������������������������������������������������������������������������������������������������� 7
PRODUCT OVERVIEW ����������������������������������������������������������������������������������������������������������� 8
EL-NVR 1U 19” 4-Bay NVR ���������������������������������������������������������������������������������������������������������������8
Beginning using the NVR �������������������������������������������������������������������������������������������������������� 9
Important! ������������������������������������������������������������������������������������������������������������������������������������������9
OVERVIEW AND SUPPORTED FEATURES �������������������������������������������������������������������������� 10
The ELAN Survelliance System Supports the Following Features �����������������������������������������������������10
Locating NVR IP Address ����������������������������������������������������������������������������������������������������� 11
Language Setup/Switch Users ��������������������������������������������������������������������������������������������� 12
NVR System������������������������������������������������������������������������������������������������������������������������� 13
NVR System > General ��������������������������������������������������������������������������������������������������������������������13
NVR System > Time�������������������������������������������������������������������������������������������������������������������������14
NVR System > User �������������������������������������������������������������������������������������������������������������������������15
NVR System > Storage ��������������������������������������������������������������������������������������������������������������������16
NVR System > Event������������������������������������������������������������������������������������������������������������������������18
Network setup���������������������������������������������������������������������������������������������������������������������� 20
Network Setup > Advance ���������������������������������������������������������������������������������������������������������������21
Network Setup > E-Mail �������������������������������������������������������������������������������������������������������������������25
Network Setup > FTP ����������������������������������������������������������������������������������������������������������������������28
Network Setup > DDNS�������������������������������������������������������������������������������������������������������������������29
Network Setup > Other ��������������������������������������������������������������������������������������������������������������������30
Camera Setup ���������������������������������������������������������������������������������������������������������������������� 31
Camera Setup > General �����������������������������������������������������������������������������������������������������������������31
Camera Setup > Video���������������������������������������������������������������������������������������������������������������������33
Record Setup ����������������������������������������������������������������������������������������������������������������������� 34
Record Setup > General ������������������������������������������������������������������������������������������������������������������34
Record Setup > Schedule����������������������������������������������������������������������������������������������������������������35
Record Setup > Advanced���������������������������������������������������������������������������������������������������������������35
Alarm Setup ������������������������������������������������������������������������������������������������������������������������� 36
Alarm Setup > General���������������������������������������������������������������������������������������������������������������������36
Alarm Setup > Motion Area ��������������������������������������������������������������������������������������������������������������37
Alarm Setup > Output ����������������������������������������������������������������������������������������������������������������������38

OWNER’S MANUAL EL–NVR
3
www.elanhomesystems.com
Display Setup �����������������������������������������������������������������������������������������������������������������������41
Display Setup > General������������������������������������������������������������������������������������������������������������������ 41
Display Setup > Advanced �������������������������������������������������������������������������������������������������������������� 42
Display Setup > Sequence�������������������������������������������������������������������������������������������������������������� 43
PTZ Setup ����������������������������������������������������������������������������������������������������������������������������44
PTZ Setup > General ���������������������������������������������������������������������������������������������������������������������� 44
PTZ Setup > NVR Cascade������������������������������������������������������������������������������������������������������������� 45
Meta data Setup�������������������������������������������������������������������������������������������������������������������46
Meta Data Setup > General������������������������������������������������������������������������������������������������������������� 46
Other Setup��������������������������������������������������������������������������������������������������������������������������48
Other Setup > Smart Phone������������������������������������������������������������������������������������������������������������ 48
Other Setup (Cont�) ��������������������������������������������������������������������������������������������������������������49
Other Setup > IVS��������������������������������������������������������������������������������������������������������������������������� 49
Stream Setup �����������������������������������������������������������������������������������������������������������������������50
Stream Setup > Live ����������������������������������������������������������������������������������������������������������������������� 51
Stream Setup > Play ����������������������������������������������������������������������������������������������������������������������� 51
Stream Setup > Backup������������������������������������������������������������������������������������������������������������������ 52
Appendix������������������������������������������������������������������������������������������������������������������������������53
Hard Reset�������������������������������������������������������������������������������������������������������������������������������������� 53
Specifications���������������������������������������������������������������������������������������������������������������������������������� 53

OWNER’S MANUAL EL-NVR
ABOUT THIS DOCUMENT
This document includes instructions for basic operation of the EL-NVR 5-Megapixel Series Network Video
Recorder�
ELECTROMAGNETIC COMPATIBILITY (EMC)
This equipment generates, uses and can radiate radio frequency energy and, if not installed and used in
accordance with the instructions, may cause harmful interference to radio communications� However, there
is no guarantee that interference will not occur in a particular installation�
If this equipment does cause harmful interference to radio or television reception, which can be determined
by turning the equipment off and on, the user is encouraged to attempt correcting the interference by one or
more of the following measures:
• Re-orient or relocate the receiving antenna
• Increase the separation between the equipment and receiver
• Connect the equipment to an outlet on a different circuit to the receiver
• Consult your dealer or an experienced radio/TV technician for assistance
• Shielded (STP) network cables must be used with this unit to ensure compliance with EMC standards
Note: Changes or modifications not expressly approved by the party responsible for compliance could void
the user’s authority to operate the equipment�
Compliance
This equipment has been tested and found to comply with the limits for a Class B digital device, pursuant
to part 15 of the FCC Rules� These limits are designed to provide reasonable protection against harmful
interference in a residential installation� This equipment generates, uses and can radiate radio frequency
energy and, if not installed and used in accordance with the instructions, may cause harmful interference
to radio communications� However, there is no guarantee that interference will not occur in a particular
installation�
4www.elanhomesystems.com

OWNER’S MANUAL EL–NVR
Features
• Standalone NVR
• Supports 5-megapixel and 1080p 60 FPS H�264 IP cameras
• Up to 96 Mbps incoming network throughput
• Full HD 1080p HDMI and VGA output
• Compatible with iOS and Android devices via the ELAN mobile app
Caution
• Do not drop or strike the equipment
• Do not install the equipment near open flames or heat sources
• Do not expose this unit to rain, moisture, smoke or dusty environments
• Do not cover the opening of the unit with cloth or plastic or install this unit in a poorly
ventilated place
Note: Allow 10 cm between this unit and its surroundings�
• Do not continue to operate the unit under abnormal conditions such as detection of smoke,
strange smell, or malfunctioning screen while power is turned on
• Do not touch the power connection with wet hands
• Do not damage the power cord or leave it under pressure
• To avoid unnecessary magnetic interference, do not operate this unit near magnets,speaker
systems, etc�
• All connection cables must be grounded properly
CAUTION
Risk of explosion if battery is replaced with an incorrect type.
Dispose of batteries according to the instructions.
5
www.elanhomesystems.com

OWNER’S MANUAL EL-NVR
HARD DRIVES INSTALL INSTRUCTION
EL-NVR 1U 19” 4-Bay NVR Installation
1� Remove the upper casing�
2� Loosen the screws on the both sides of the hard drive bracket to remove it�
3� Install hard drives�
4� Tighten the hard drive screws as shown:
Screws loosened Screws tightened
5� Connect the SATA cables and power cables to the connectors following the instruction:
Wiring Configuration
Note: H1&H2 match to J75 and H3&H4 match to J74.
6. Close the hard drive upper casing.
7. Tighten screws.
6www.elanhomesystems.com

OWNER’S MANUAL EL–NVR
REMOTE CONTROL
The primary interface to the ELAN NVR
and Cameras is through the ELAN
User Interfaces: touch panels, remotes,
Mac & PC Viewers and iOS & Android
Applications� The Remote included can
be used for operation outside of the ELAN
experience, such as the On Screen Display
via the HDMI output on the NVR�
Keys and functions of the remote control
are described as follows:
KEY FUNCTION
Power switch
Start/stop manual recording
MENU Setup menu
ESC Escape/exit/stop
PIP (SHIFT) Switch between split and full screen
ZOOM Digital video zoom
FREEZE Freeze video
Pause
Playback
Stop
Fast forward
Rewind
Next channel
Previous channel
4 split screens
8 split screens
9 split screens
13 split screens
16 split screens
SEARCH View event log
SEQ Sequential display
AUDIO Audio on/off
BACKUP Video backup
DVR/NVR Addressable NVR control
LANGUAGE Language selection
BACKSPACE Delete character
Move up/tilt up
Move down/tilt down
Move left/pan left/fast rewind
Move right/pan right/fast forward
Enter/set
FREEZE Pause live video
AUTO PAN Perform auto pan feature
ZOOM IN Zoom in
ZOOM OUT Zoom out
PRESET Call preset point
7
www.elanhomesystems.com

OWNER’S MANUAL EL-NVR
8www.elanhomesystems.com
PRODUCT OVERVIEW
EL-NVR 1U 19” 4-Bay NVR
Front View
12
1� POWER LED, blue, power ON/OFF indicator
2. USB port
Rear View
1� VGA output connector
2� HDMI output connector
3� USB port
4� Power switch
5� Power socket
6� Power Cord Retainer Clip
7� RJ-45 Gigabit connector
8� AUDIO OUT
9� eSATA connector
10� RJ-45 Gigabit connector
11� Digital I/0
12� Keyboard-in connector

OWNER’S MANUAL EL–NVR
9
www.elanhomesystems.com
BEGINNING USING THE NVR
Important!
• It is recommended to use the ELAN Controller for setup of ELAN NVR and Cameras
• If installing an ELAN Cameras and/or ELAN NVR with an ELAN Controller, please refer to the “ELAN
Surveillance” Integration Note for setup and software configuration
• ELAN Integration Notes are served through the ELAN tools and on elanhomesystems�com/dealer-
resources
The software configuration information in this document can be used to extend device control parameters
for use within an ELAN controller environment, or for operating this hardware independent of an ELAN
controller�
You will see the following screen through the HDMI or VGA connection when the NVR is powered ON:
The information shown on the top of the screen is described as follows:
0.00/1000 (100) Mbps:
The left side of the slash is the combined transmission rate of all channels, and the right side is the your
network speed�
HDD (1):(2)%:
1� Shows the current number of the hard drive being used for recording
2� The storage capacity used as a percent (%)

OWNER’S MANUAL EL-NVR
10 www.elanhomesystems.com
OVERVIEW AND SUPPORTED FEATURES
The ELAN Surveillance devices include a variety of IP Cameras and NVRs that provide live and recorded
video review from within the ELAN interface via local touchscreens and/or remote mobile devices�
The ELAN Survelliance System Supports the Following Features
Auto-Discover/Auto-Configure:
All ELAN IP Cameras and ELAN NVRs support fast and simple configuration within ELAN systems using
the Configurator Discovery feature�
Live Video:
ELAN IP Cameras may be viewed live from any ELAN interface, local or remote�
Recorded Video:
ELAN NVRs provide up to 16 camera stream recordings per chassis and recordings may be reviewed
from any ELAN interface, local or remote�
HDMI OSD Interface:
The NVR includes an HDMI output that provides live and recorded video viewing that may be controlled
by the built-in ELAN interface and the ELAN HR Series remotes�
Motion Detection/Indication:
Video recorded from ELAN IP Cameras will provide motion event indications on the ELAN NVR within the
ELAN interface that may be reviewed on a timeline or as individual events�
NON-ELAN ONVIF IP Camera Recording:
NON-ELAN ONVIF IP Cameras may be configured for full time recording on the ELAN NVR for playback
and review from the ELAN interface (no motion events)�
Motion Detection/Indication:
Video recorded from NON-ELAN IP Cameras do not provide motion event indications within the ELAN
interface�
NON-ONVIF and Third Party Camera Recording:
IP Cameras that use streaming protocols other than ONVIF are not supported for connection or
recording with the ELAN NVR�
Important Note: 3rd party cameras are not recommended for setup with ELAN NVR� Always test 3rd
party cameras before deployment�

OWNER’S MANUAL EL–NVR
11
www.elanhomesystems.com
LOCATING NVR IP ADDRESS
ELAN NVRs are set to DHCP out of the box� Connect your ELAN NVR to the network, using your preferred
network scanning app, and scan for the NVR� The NVR’s name is EL-NVR-XTB, where ‘X’ represents the
number of TB�
Integrators TIP: Look for an ELAN MAC address with the following pattern “F8-57-2E-XX-XX-XX”
Once the IP address is determined, type the IP address into your browsers’ address bar and press Enter�
Authentication pop-up will appear requesting username and password to log in� For logging in the first time
use the default username and password�
Default Username: ELAN Default Password: 3526
Important: It’s recommended you change the default password. See section on how to change password.
Password Change Pop‑Up Box

OWNER’S MANUAL EL-NVR
12 www.elanhomesystems.com
LANGUAGE SETUP/SWITCH USERS
When setting the NVR up for the first time, click on the gear icon in the upper‑right corner of the user interface.
A dialog box with two options will appear, switch user and language.
To change the language of the NVR, select the drop–down menu and choose your preferred
language.

OWNER’S MANUAL EL–NVR
13
www.elanhomesystems.com
NVR SYSTEM
NVR System > General
To enter NVR settings, click system in the left pane where you are allowed to adjust the NVR’s configuration�
Device ID:
Assign an ID for the NVR to be controlled by the remote controller�
Audio Out Volume:
Adjust the volume of the NVR�
Live OSD:
On, off, or no camera name�
System Lock:
Switch on/off the system lock�
Sound On Button Press:
Switch on/off the sound when pressing remote control buttons�
Buzzer:
Switch on/off the sound when an alarm is triggered�
Last Boot Time:
Shows the last time the system is rebooted�
Device Name:
Name of the NVR
KBD Input Baud Rate:
Adjust Baud Rate, default is 9600�
Important: Click Apply to save settings�

OWNER’S MANUAL EL-NVR
14 www.elanhomesystems.com
Date/Time:
Set the date/time of the NVR�
ELAN Controller will sync time and date of the NVR automatically�
Date Format:
Modify the date display format�
Time OSD:
Switch on/off the time to be displayed on the screen�
Time Zone:
Change the time zone of the location where the NVR is installed�
Time Sync Mode:
Choose how you would like the time to be synced�
NTP Server:
Enter the NTP server you want to use�
Time Sync Interval:
Choose the interval for the time to be synced�
NTP Status:
The status of connection to selected NTP server will appear here�
Important: Click Apply to save settings�
NVR SYSTEM (CONT.)
NVR System > Time
To enter NVR settings, click system in the left pane where you are allowed to adjust the NVR’s configuration�

OWNER’S MANUAL EL–NVR
15
www.elanhomesystems.com
NVR SYSTEM (CONT.)
NVR System > User
To enter NVR settings, click SYSTEM in the left pane� This allows you to adjust the NVR’s configuration�
The NVR supports up to 15 sets of individual user settings (including default user administrator,
operator, and guest), allowing you to assign different access privileges.
User:
Enter the name of the user (applicable only to User01–12)�
Old Password, New Password, and Confirm Password:
If you would like to change the password, enter your previous password and enter the new password
and confirm the password� Press Show to reveal the password� The default passwords for administrator,
operator, and guest are 1111, 2222, and 3333, respectively�
User Permission:
Set the access privileges of the user to administrator, operator, or guest�
Load Default:
Restore to the default settings�

OWNER’S MANUAL EL-NVR
16 www.elanhomesystems.com
NVR SYSTEM (CONT.)
NVR System > Storage
To enter NVR settings, click system in the left pane where you are allowed to adjust the NVR’s configuration�
HDD Management:
In HDD MGT�, you are allowed to format, defrag, check malfunctioned blocks, or run an overall system
check on any of the devices� Select a desired device and click Format, File System Defrag, Bad Block
Check, or Regular Check�
Regular Check:
Allows you to set the interval between system checks�
Parameters...:
Click each device to enter the screen above. System Reserve Ratio allows you to allocate the
percentage of HDD space not occupied by recorded files. In Mount Option, choose the writing
mode for the hard drive.

OWNER’S MANUAL EL–NVR
17
www.elanhomesystems.com
NVR SYSTEM (CONT.)
NVR System > Storage (Continued)
S.M. A .R .T:
The S.M.A.R.T. status of your hard drive is displayed in S.M. A .R.T., where you can run analysis
(either short or extended) on the HDD. Choose between Short or Extended analysis and click
Analysis to start the process. You will see HDD status, information, attributes, and event history
under HDD S.M.A.R.T. Information.
USB MGT.
Connect a USB device (flash drive or hard drive) to the NVR, and check the one you want to
format under this page, and then click Format.

OWNER’S MANUAL EL-NVR
18 www.elanhomesystems.com
NVR SYSTEM (CONT.)
NVR System > Event
System:
The search field in this page allows you to search for specific event reports at different time and
of different content. Press Download to export the event report.
Operating:
You can examine the operating status of different users under this page. Press Download to
export the event report.

OWNER’S MANUAL EL–NVR
19
www.elanhomesystems.com
NVR SYSTEM (CONT.)
System > Maintenance
Firmware Update:
Choose a firmware file and click Update to proceed firmware update�
Export Settings:
Click Export to copy system settings to a USB flash drive�
Import Settings:
Click Import to apply a system setting that is stored in the plugged USB flash drive�
Factory Reset:
Click Reset to restore the system to the factory settings�
Soft Reboot:
Click to soft reset the system�
Watchdog Test:
Click to test the system watchdog function� This will reboot the NVR�
Kernel Version:
The kernel version of the system�

OWNER’S MANUAL EL-NVR
20 www.elanhomesystems.com
NETWORK SETUP
Network Setup > General
Enter the required information in the fields:
IP Mode:
Select the connection type of the NVR from Static, DHCP, and PPPoE�
IP Address:
Enter the IP address you want to use, and press IP Test if necessary�
IP Test Button:
Clicking on prompts NVR to scan and verify if the IP address you entered is available�
Subnet Mask:
Enter the desired subnet mask�
Default Gateway:
Enter the desired default gateway�
Primary DNS:
Enter the first priority DNS server�
Secondary DNS:
Enter the secondary DNS server in case the primary DNS is not available�
Video Port:
Specify a desired video port�
HTTP Port:
Specify a desired HTTP port�
Table of contents
Other Elan Network Hardware manuals