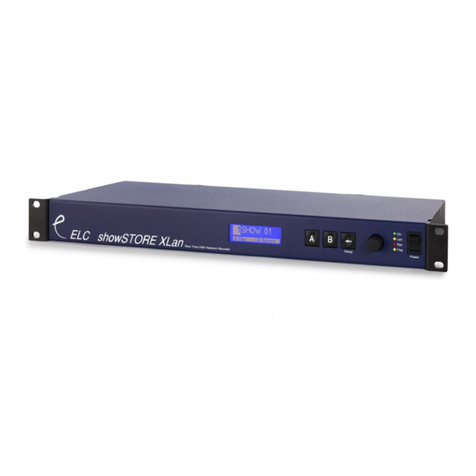
ELC sideKICK too User manual

AC612 XUB/XUF/DIN
sidekick too
512 channel houselight / architectural
controller and universal wing
Users Manual for Software version 2.05
Including Editor Software

AC 612 XU and sidekick too
The AC612 XU is available in 3 types:
- XUB Button version (16 buttons) with 12 memories + 1 blackout scene
- XUF Fader version (5 faders and 3 buttons) with 5 memories
- DIN Contact closure version for DIN-rail mounting. With 12 memories
The sidekick too has 20 button playbacks and 10 fader playbacks.
All units have a DMX input, DMX output and a built-in merger/ The merger has operating modes
like HTP/LTP and Priority. The memories are captured from the DMX input and have all 512
channels. In addition to the memories, there is a master intensity control that runs from 0% to
200%. The master is controlled by the Up and Down keys. The Master up/down can also be
setup as speed control.
The AC612XU units need and external power supply with an output voltage of 9V to 24V and with
200mA. The sidekick too is power via the USB connector, either via the supplied USB power
adapter or when connected to a computer.
The USB connector is available for future software upgrades and editor software.
The Editing software can be used to preprogram the AC612XU’s/sideKick’s memory. With this
software it is possible to create memories for each button or fader with multiple steps (device total
of 126). The software is available on Windows XP (or up) and mac OSX 10.4. A USB connection
is required to import or export the memories to and from the device.
Installation of the AC612XU
The AC612XU is a hardwired wall mounted lighting controller. Installing has to be done by a
qualified technician.
Installation steps:
1) open the cover of the unit (2 screws at the top and 2 at the bottom)
2) connect the external power supply (9V-24V) to the PWR + and – screw terminals
3) Connect the DMX input to the IN terminals:
G pin 1 (shield)
+ pin 3 (data +)
- pin 2 (data -)
4) Connect the DMX output to the OUT terminals:
G pin 1 (shield)
+ pin 3 (data +)
- pin 2 (data -)
5) (optional) Mount the unit to the wall
6) Close the cover with the 4 screws
Additional installation for the DIN version
The DIN version has 12 contact closure contact inputs on screw terminals. When connecting a
opto-coupler output to the contact closure input, care must be taken for the correct polarity.
Installation of the sideKick too
The sideKick too has normal contacts. A 5-pin male XLR for the DMX input, a 5-pin female XLR
for the DMX output and a USB connector.

Change operating modes (SETUP-MODE).
(note: setup is NOT available on the DIN version. The setup of the DIN version needs to be done
via the Editor software)
In the setup mode it is possible to change the operation of the unit (like merger mode and
memory handling). To enter the Setup mode follow the next steps:
1) Press and hold the STORE button
2) Press and hold the UP button
3) Wait about 10 seconds for the led’s to start flashing (except the UP and STORE leds
remain on).
4) Now you can change the settings described in the following sections)
5) When no button has been pressed for about 10 seconds, the unit will timeout the SETUP-
MODE and will store the current settings and go back to normal operation.
SETUP-MODE settings
Merger Mode
Key
Up Down
Function
HTP merge
LTP merge
Priority merge (memories of the unit are
disabled if a valid DMX signal is on the input)
Store Disable
If the LED on the store button is on, then storing new memories is disabled.
Next settings are only available on the button version.
Startup memory (at power on)
Key Key
1
2
3
4
Function
1
2
3
4
Function
No startup
Memory
Memory 1
Memory 7
Memory 2
Memory 8
Memory 3
Memory 9
Memory 4
Memory 10
Memory 5
Memory 11
Memory 6
Memory 12
Memory Mode
Key
5 6
Function
(Memory Hold)
Swap, only one memory active
Toggle, switch memory on / off
Flash, temporary memory
Fade Tables (see item “Creating Memories”)
Key Fade time tables
7 8 Table Fadetime 1 Fadetime 2 Fadetime 3 Fadetime 4
1 0 seconds 1 second 2 seconds 5 seconds
2 0 seconds 5 seconds 10 seconds 15 seconds
3 1 second 10 seconds 15 seconds 20 seconds
4 5 seconds 10 seconds 20 seconds 30 seconds

Up/Down Mode
Key
9 10
Function
Up / Down buttons control intensity
Up / Down buttons control speed
Up / Down buttons control intensity
Off / Store buttons control speed
(AC612XUB only)
Master / Slave (AC612XUB / DIN) / Operation Mode
Key
11 12 13 14
Function
(note keys 13 and 14 only available on sideKick too)
Normal standalone operation
Device is the master of a system (contains the memories)
Slave in a system
Last Slave in a system (RDM signal is blocked)
DMX Remote Wing with offset 1
DMX Remote Wing with offset 51
DMX Remote Wing with offset 101
DMX Remote Wing with offset 151
In Master / Slave mode, the master should be the first in the DMX line. The slaves are then daisy
chained to the master. In Daisy chaining, the Output of the Master is connected to the input of the
Slave. The Output of the Slave can then be connected to another Slave’s input, and so on. The
master communicates with the slaves thru RDM (bidirectional DMX). If devices after the last
Slave are not handling the RDM signal correctly, then program the last Slave as Slave-last (this
will block the RDM signal).
In DMX Remote mode, explained below section.
Operation
Creating Memories
AC612XUF (Fader version)
To store a memory (captured from the DMX input) into one of the 5 faders follow the next steps:
1) Press the store button (the button will now start flashing, indicating that no fader has
been selected). The built-in merger is now disabled and will pass thru the DMX input
signal.
2) Create the required memory by the external DMX source.
3) Move the chosen fader to it’s full position. The STORE LED will now be on. (if the fader is
already at the full position, move it first down and back up)
4) Selecting the same fader again will disable the selection and a different fader can be
selected.
5) Press the store button to save the memory
AC612XUB (Button version)
To store a memory (captured from the DMX input) into one of the 12 buttons, follow the next
steps:

1) Press the store button (the button will now start flashing, indicating that no button has
been selected). The built-in merger is now disabled and will pass thru the DMX input
signal.
2) Create the required memory by the external DMX source.
3) Press the chosen memory button (1-12) The STORE LED is now on.
4) Set the fade time for the memory, by using the next table:
Key
Up Down
Fadetime
(depends on fadetime table,
previous page)
Fadetime 1 (0,0,1,5 seconds)
Fadetime 2 (1,5,10,10 seconds)
Fadetime 3 (2,10,15,20 seconds)
Fadetime 4 (5,15,20,30 seconds)
5) Pressing the same button again will disable the selection.
6) Press the store button to save the memory
To set the blackout/fadeout timing, follow the steps above except that instead of selecting one of
the 12 memory buttons, select the blackout button (next to the store button)
AC612XU DIN
Memories on the DIN version can only be created via the Editor menu.
sideKick too
To create memories on the sideKick too, follow the steps indicated for the AC612XU fader and
button version.
Normal operation
In normal operation, you can recall memories via the faders or the buttons. The master intensity
control is handled by the Up and Down buttons. The master control runs from 0% to 200%. Is
both the Up and Down LED’s are off, then the master controller is at 100%. If the Up led is on,
then the Master is above 100%. With the Down led on, then the master is below 100%. To set the
master back to 100% press both Up and Down button together.
DMX remote wing operation (sideKick too)
In DMX remote wing operation, all buttons and faders are send as DMX separate channels.
Buttons 1-30 are send as channels 1-30. The Down button is send as channel 31, up button as
channel 32 and the store button as channels 33. The Faders are send as channels 41 till 50. The
DMX merge is set to HTP. Multiple sideKick too’s can be used when setting the offset to 51, 101
or 151.
Please NOTE: To get back into the setup menu, follow the next steps:
- Switch Off the unit (unplug the USB)
- Press and hold both Up and Down key
- Switch on the unit (plug in the USB)
The unit will now start up in setup mode (hence the blinking LED’s)
Firmware Upgrading
To load new firmware (software) into the unit you’ll need the “ELC USB firmware update” program
available on the www.elclighting.com website in the software area (available for windows XP and
up or mac osx 10.4 and up). Unzip the downloaded file and in stall it. (on windows rung setup.exe

and on mac drag the application into the application folder). Also download the latest version of
the firmware from the Firmware area on the same website.
To update the unit follow the next steps:
- power off the unit
- press and hold the STORE button
- connect the unit to the computer via USB
- on windows it might be needed to install the usb drivers. These are located in the
downloaded .zip-file.
- Start the update program
- Press update
- Select the downloaded firmware
- When update is done exit the program and disconnect the unit from the usb
- Power the unit back up
- PLEASE NOTE: previously created memories might get lost during the update,
Note for the DIN version.
To Upgrade the firmware on the DIN version follow the next steps.
- remove the power of the unit
- remove the white cover (2 clips, one on each side)
- locate the jumper called “Update”
- place the jumper on the Update position
- connect the USB
- on windows it might be needed to install the usb drivers. These are located in the
downloaded .zip-file.
- Start the update program
- Press update
- Select the downloaded firmware
- When update is done exit the program and disconnect the unit from the usb
- Put the jumper back to the original position
- Place back the cover and apply power
- PLEASE NOTE: previously created memories might get lost during the update,
Editor Software (on PC or Mac)
The editor software can be used to create the memories. Each memory can have multiple steps,
each with it’s own crossfade time and duration (in total 126 steps).
First download the latest version of the software from the website www.elclighting.com, in the
software area. Next unzip the file and install the software:
On Windows: run the setup.exe and follow the instructions on the screen. Also note that it
maybe needed to install the usb drivers when first time connecting the unit. These drivers are
located in the downloaded zipfile.
On mac: drag the application from the zip file into the application folder.
Main window (windows version shown)

File
me
nu
- New clear all memories and settings
- Open open a previously created setup of memories and settings
- Save store all memories and setting to disk
- Save as store all memories and settings to disk with a different file name
- Exit Quit the application
Device menu
- View DMX if the Device DMX windows is closed, reopen it
- Merge DMX if checked then the DMX output of the AC612XU will be an HTP merge of
the Device DMX and the Editor
- Grab DMX load the Device DMX data into the Editor
- Settings Open the settings window (explained later on)
- Import load all memories and settings from the device into the software
- Export store all memories and settings from the software into the device
Edit menu
- Record step This will open the Record Window to update the current step or store the
information into a different/new step
- Add step Same function and Record step, except that the step number is incremented
- Delete Step remove the currently selected step
- Clear Editor Set all channels in the Editor to 0%
- Clear Memory Delete all steps in the memory
View Mode
In then menu you can select the naming of the cuelist tabs, to match you device.
Help menu:
- About show version of the software
Using the Editor
The editor can be used either with the keyboard (commandline) and or the mouse.
Memories
with steps
DMX view
from the
Device
DMX in the
editor. Yellow
is selected
channels
Command line for editor
Device status

Using the keyboard (commandline):
By typing in the required channels and setting the levels you can create a scene. The keys used
are:
- 0,1,2,3,4,5,6,7,8 and 9 digit entry
- +, -
- T (or / on windows keypad) Thru
- ‘ (or * on windows keypad) At
- F (or . on windows keypad) Full
- Enter to activate the command
Examples:
1 T 12 ‘ 50 <enter> 1 12 @ 50 (channel 1 thru 12 at 50 %)
1 + 3 F 1 + 3 Full (channel 1 and 3 at 100%)
Using the mouse
Select by left clicking a channel in the Editor window. The channel will appear with a yellow ring
to indicate it is selected. To select multiple press the “Ctrl” key when left clicking. To change the
value left click and hold the left button and move it up and down, for more precise use the right
button.

Recording (or adding) a step.
Select Record Step (or Add Step) from the device menu or press R (or A). The record window
will come up.
Step number indicates the number of the step (the device can in
total have 126 memories)
Crossfade Time sets the fadetime for the step
Duration sets the time the step will last (time before the next step
comes. Setting the duration to STOP will end the playback of the
memory at that step. If no step in a memory has a STOP
programmed, then the memory will loop thru all steps.
Device Settings
The device settings window is and easy way to set the
settings like merge mode, store disable, etc. All these
functions are described in the “SETUP-MODE” selection of
this documents above.
sideKick too PC interface software
To use the sideKick too with offline software, please download the interface program form the
website (www.elclighting.com) in the software section.

General information
CE-product
The AC612XU permits to the CE requirements set up by the European Community, This can be
recognized by this label on the outside of the product.
Technical Information
Input: DMX512
Output: DMX512
Upgrade: USB
Power: External power supply 9V – 24V 200mA
Controls: 16 buttons or 5 faders and 3 buttons
Dimensions: 180mm x 80mm x 23mm
Weight: 450 grams
Designed and manufactured in the Netherlands by
ELC lighting bv
Support Contact
support@elclighting.com
World wide distribution
ANIMA lighting
Switzerland
Tel: (+41) (0)21-9672001
Fax: (+41) (0)21-9604282
Email: sales@elclighting.com
URL: www.elclighting.com
Other manuals for sideKICK too
1
This manual suits for next models
3
Table of contents
Other ELC Controllers manuals
Popular Controllers manuals by other brands

Isimet
Isimet LA Series Installation, Operations, Start-up and Maintenance Instructions
LOVATO ELECTRIC
LOVATO ELECTRIC DCRL3 instruction manual

GE
GE GFK-2741C manual
Hyperkin
Hyperkin CADETP REMIUM instruction manual
Berker
Berker 75341002 Technical documentation

Simplex
Simplex TrueAlert 4009-9401 installation guide


