ELC ShowSTORE User manual

ShowSTORE
Software Version 3.0

ShowSTORE
System description
The ELC ShowSTORE is a useful tool for replacing expensive
lighting desks in set ups with no experienced operator or fixed
installations. It’s capable of recording 512 DMX channels in
real time for up to 26 hours, within 99 shows.
Real time recording means that there is no need to program
levels and fade times on the unit, but you do it once on the
lighting desk and the ShowSTORE will mimic it time and time
again. The user can influence a running show by adjusting it’s
speed from 50% (slower) to 200% (faster), or by playing to
programmed markers (or cue points) by means of “GO”. A
show can also be set into an endless loop to be used in
display or exhibition lighting.
Control is possible with the keys and display, the internal real
time clock, 4 parallel contacts, RS-232 control by PC or laptop
and DMX control with for example an ELC focusHAND2 or
ELC AC612XL.
When using the 4 contact closure inputs it is even possible to
run 4 shows simultaneously, merged in HTP.
For complete multimedia shows connect an ELC DAM44 and
you can make a show with both light and sound in sync
without expensive SMPTE equipment.
This product may only be used for controlling
dimmers and moving lights. Using the product
out of these specifications will remove all
responsibility from the supplier

Getting Started
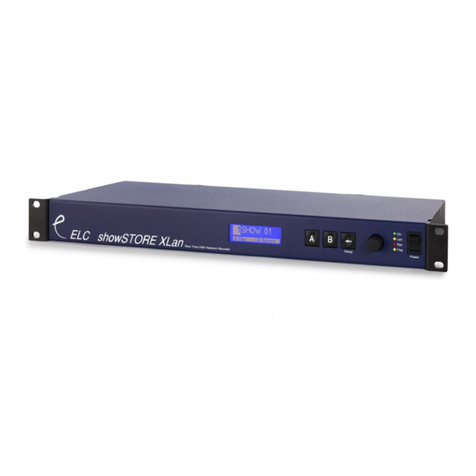
The ShowSTORE is a 19” 1HE rack unit with a 1.5m power
cord. On the front are 3 key’s (A, Band Quit/Set up), 4 leds, a
jog encoder with push switch, a 2x16 character LC-display and
a power on/off switch.
A
BQuit
Setu
p
LC Display
2x16 characters
The function of key’s A and B are described on the display.
The 4 leds indicate:
LED Meaning
On Power is on and the internal processor is working
Play On ÆPlaying Blink ÆHolding
Rec. On ÆRecording Blink ÆRecord hold
DMX DMX input OK
On the back are located the DMX input and output, a RS-232
DTE connector and a GPI connector.
DMX connection (input and output)
Pin Description
1 Ground/Screen
2 Data -
3 Data +
4 loop to other XLR5 pin 4
5 loop to other XLR5 pin 5
RS 232 connection (SUB D9 female) for control.
Pin Description
1 -
2 TX
3 RX
4 -
5 Ground
6-9 -

GPI connection (parallel contact closure) on 9p SUB-D.
Pin Description
1 Ground / Shield
2 GPI 1
3 GPI 2
4 GPI 3
5 GPI 4
6 Ground
7 Ground
8 Ground
9 Ground
Starting up the ShowSTORE
Connect the power and switch on the power switch. The
ShowSTORE will now start up and read the TOC from the
hard disk. This will take approximately 10 seconds.
ShowStore V2.0
- TOC Reading -
Main menu
The main menu is showing the current selected show number
and name, the jog encoder can change the number.
Show 01:showname
A
Play B Record
Press Ato start to playback of a show, or Bto record a show.
The Quit/Setup key will give access to the setup menu.

Recording a show
From the main menu press B. This will bring you in the record
menu. The show number will change to a free show.
Show 01:- free -
A
Record
To select a different show number use the jog encoder. Now it
is possible to replace an existing show by pressing Aor to
cancel press B.
Show 01:- free -
A
Replace BEsc
A new show is now created and is waiting for a change in the
DMX input, which is directly connected to the DMX output, to
start the recording.
Wait DMX Change
A
Continue
To start recording anyway press A.
When recording the screen will show the show number, cue
(or mark) number and elapsed time.
REC 01c01 01:02
A
Hold BInsert
Press Bto set a cue point while recording. Press Ato hold the
recording.
RECP 01c02 03:04
A
Continue
Press Quit to end the recording, or Ato continue the
recording. When continuing to recording a cue point will be
inserted and again will wait for a DMX change on the DMX
input.

Playback of a show
In the main menu select a show with the jog encoder and
press A. The screen will now show the playback menu, with
the show number, cue (mark) number and elapsed / remaining
time. HOLD 01:01 00:00
A
Start BGo
There are now 3 options to start the show:
1) Press A, this will start normal playback of the show
PLAY 01:01 00:00
A
Hold BSkip
2) Press and hold Afor 1 second, this will start the
playback of the show in and endless loop.
LOOP 01:01 00:00
A
Hold BSkip
3) Press B, this will start the playback of the show, but
stop at the next cue-point.
GO 01:01 00:00
A
Hold BSkip
Adjusting the playback speed can be done with the jog
encoder. Speed can vary between 50% and 200%. Pressing
Quit will switch between elapsed and remaining time. To put
the playback in hold (pause) press A. Now it’s possible to stop
by pressing Quit. To jump to the next cue-point press B.
Please note that in GO this will mean that the playback will
hold. In hold it’s possible to change the cue point with the jog
encoder.

Setup menu
To go into the set up menu press Quit/Set up from the main
menu. SETUP: Rename
A
Ok BNext
To select a menu item use the jog encoder or press Bfor the
next item. Set up items are:
1) Rename: rename the current selected show
2) Delete: delete the current selected show
3) GPI 1: set the function of parallel input 1
4) GPI 2: set the function of parallel input 2
5) GPI 3: set the function of parallel input 3
6) GPI 4: set the function of parallel input 4
7) DMX In: set the function of the DMX input
8) DMX Fail: set function DMX input fail event
9) Power On: set function for power on (start up)
10) MultiShw: Multi show enable
11) WProtect: Protect against recording/deleting a show
12) RS-232: Setup the function of the RS-232 port
13) DiskChk check the disk for FAT errors
14) RT Clock: Set Real Time Clock parameters
Press Ato select the set up item

Rename the current selected show
The screen will now show the current show number (top line)
and name (bottom line).
Rename Show 01
A
Ok SHOWNAME
A cursor under the name will point to the selected character, to
change the character use the jog encoder. Possible characters
are ‘A’ to ‘Z’, ‘0’ to ‘9’ and ‘_’. To change to the next character
press Bor the jog encoder. To confirm the change of the
name press A, or to cancel the operation press Quit.
Delete the current selected show
The screen will show the show number and name of the
selected show.
Show 01:SHOWNAME
Delete ? BOk
To delete the show press B, or to cancel press Quit.

Set the function of contact closure input 1 to 4
The ShowSTORE has 4 parallel input’s (GPI), that react on
contact closure. The function of these input’s can be set.
GPI 1: function
A
Ok
To change the function use the jog encoder. Functions are:
1) No Func: the input has no function
2) Start: the input will start a show in normal playback
3) Loop: the input will start a show in loop playback
4) Hold: the input will put a running show in hold
5) Go: the input will put a running show in GO
6) Skip: the input will skip to the next cue point in a
running show
7) Stop: the input will stop the playback of a running
show, or specific show if it’s running
8) Next: the input will set the selected show as the next
show to run, after the current show has ended
9) Insert: the input will insert a cue point while recording
a show
For function 2 and 3 (start, loop) it’s possible to select a show
number. To change the number, press and hold Band use the
jog encoder. “Show - -“ means the current selected show will
start/loop on input contact closure.
Press Ato confirm the function, or press Quit to cancel.

Set the function of the DMX input
The DMX input can have 3 functions, to change these use the
jog encoder. Dmx In: function
A
Ok
Press Ato confirm the function, or press Quit to cancel.
Possible DMX input functions are:
1) No Func: no function
2) Control: the DMX input can control the ShowSTORE
3) Merge: the DMX input is merged (in HTP) with
playback of shows
4) Thru: the DMX input is normally connected directly to
the DMX output, also the DMX input fail event is
activated (backup device)
5) C Insert: cue insert select a channel that will insert a
cue marker when recording. To set the channel
number press and hold Band change with the jog
encoder.
6) AC612XL: enable the DMX input to be used as a
direct remote input from AC612XL or focusHAND2
Using AC612XL or focusHAND2 remote
Each of the 16 buttons on the AC612XL can be used
programmed with the same functions as the contact closures.
Example:
Key 1 ÆStart show 1
Key 2 ÆLoop show 3
Key 3 ÆSet show 2 as the next show
The 16 buttons of a focusHAND2 can also be used, follow
the next conversion table:

focusHAND2 AC612XL
1 - 9 Key 1 - 9
0 Key 10
FUNC Key 11
AT (@) Key 12
THRU (Æ) OUT
ENTER STORE
+ UP
- DOWN
Set the function DMX input fail event
The ShowSTORE can be used as a backup device. The DMX
input must be set as Thru, so normaly the DMX from the
lighting desk is passed thru. On the event of DMX failure
(lighting desk fail) the DMX input fail event will be activated.
DmxFail:function
A
Ok
The DMX input fail event can be set to:
1) No Func: nothing happens on DMX input fail
2) Start: on input failure start a show in normal playback
3) Loop: on input failure start a show in loop playback
To change the function, use the jog encoder. Functions are:
For function 2 and 3 (start, loop) it’s possible to select a show
number. To change the number, press and hold Band use the
jog encoder. “Show - -“ means the current selected show will
start/loop on input contact closure.
Press Ato confirm the function, or press Quit to cancel.
Set the function power on (start up)
The ShowSTORE can automatically start the playback of a
show in normal or loop playback on power on (start up)

PowerOn:function
A
Ok
To change the function use the jog encoder. Functions are:
1) No Func: nothing happens when switched on
2) Start: starts a show in normal playback when switched
on
3) Loop: starts a show in loop when switched on
For function 2 and 3 (start, loop) it is possible to select a show
number. To change the number, press and hold Band use the
jog encoder.
“Show - -“ means the current selected show will start/loop
after switching on the ShowSTORE.
Press Ato confirm the function, or press Quit to cancel.
MultiShow enable / disable
The ShowSTORE can run up to 4 shows simultaneously,
controlled by the parallel (GPI-) input contacts.
MultiShow: off
A
Ok
Use the jog encoder to enable / disable and confirm with A.
The four GPI’s must than be set for show start or loop.
The main screen will show:
1:> 2: 3: 4:
S01 L02 S03 L04
1:> Æcontact 1 activated
S01 Æsingle playback of show 01 on closing of contact
L02 Æloop playback of show 02 while contact is closed

Write Protect enable / disable
To disable recording / deleting of shows set Write Protect to
ON.
WriteProtect:off
A
Ok
Use jog encoder to select on or off and confirm with A.
Setup RS-232 port
Functions for the RS-232 port are:
1) No Function: port is disabled
2) Control: the showSTORE can be controlled by ascii
commands
3) Backup: the RS-232 can be used with the file
exchange program, to backup or load files to PC and
back.
4) Timecode: not supported yet
5) MidiSlv: not supported yet
6) Master: unit functions as master to slaves
7) Slave: unit slaves to the commands of the master
RS-232 control
A PC or laptop computer can control the ShowSTORE via the
RS-232 input. The communication has to be set up to 9600
baud with 8 data bits, no parity bit and 1 stop bit. Commands
are character based, so a simple terminal program like
HYPERTERMINAL can be used.
A command is build up of 2 characters (‘A’ to ‘Z’) with or
without 2 digits (‘0’ to ‘9’) as data, followed by a carriage return
(0x0D 0x0A in hexadecimal).
Command’s:
RI<CR> Request Info: the ShowSTORE will return its
current status
RIxx<CR> Request Info every xx seconds

RI00<CR> End previous request command
LDxx<CR> Load show xx and put it in hold
STxx<CR> Start show xx, ending previous started shows
SP<CR> Stop current show
LPxx<CR> Loop show xx, ending previous started shows
HD<CR> Hold the current show
CT<CR> Continue the current show
GO<CR> Go in the current show
SK<CR> Skip an index in the current show
RCxx<CR> Start recording show xx
IN<CR> Insert cue marker when recording
RS-232 file backup
The file exchange program can be used to backup and
transfer show files to and from a show store. Show files are
compressed during transfer to increase the transfer speed and
decrease storage.
• Put the showstore RS232 function into BACKUP
• Connect the showstore to the PC
• Start the dss_fe.exe program
• Select the correct COM port in the Setup Menu
• Press Connect, a list with all the files will appear
• Select one or more files and press download
• To upload, press upload and select the files

Master / Slave
When more than 512 channels are required, multiple
showSTORE’s can be linked. One unit will be the master and
the other will be slaved to the master. A special cable is
needed to connect the master to the slaves.
On the SUBD 9 pin connector connect:
• Pin 2 of the master to pin 3 of all the slaves
• Pin 5 of the master to pin 5 of all the slaves
Setup Real Time Clock (if installed)
Setting up the RT clock is done in 22 submenu’s:
1) Set Clock: set time and day
2) Clear Markers: clear all clock markers
3) Mark 1 - 20: set clock marker 1 – 20
Use jog encoder to select the submenu and press Ato
confirm.
Set Real Time Clock
The real time clock is set to hours/minutes/day.
Clock: 12:23 Mo
A
Ok BNext
Use jog encoder to adjust the value and use Bto go to the
next parameter (hours/minutes/day). When the clock is set
press Ato confirm, or Quit to cancel the operation (or only to
view the current time/day).

Clear Time/Day Markers
To clear all time/day markers in a single action press Aand B
simultaneous. To cancel press Quit.
Clear Markers ?
Press Aand B
Set Time/Day Marker
A Time/Day marker can be set to a time (hour/minute), a day
mask and an action.
Use the jog encoder to change the value and Bto go to the
next parameter.
Mark 01: 12:00
A
Ok BNext
The day mask activates the days on which the marker is
active. A capital letter indicates the day is active, a lower case
character means inactive. Use the encoder to change.
Mark 01: MTwtFSs
A
Ok BNext
The action can be set to Stop, Play and Loop. For Play and
Loop a show number must be set.
Mark 01: Play 02
A
Ok BNext
When finished press Ato confirm or Quit to cancel.

DMX control
If the DMX input function is set to Control, it is possible to
start/hold shows by using 99 channels. Each channel
represents a show: channel1 Æshow 1, channel 2 Æshow 2,
etc.
Setting channel 1 to 100% will start the playback of show 1.
Channel 1 to 80% will put show 1 into loop.
Channel 1 to 50% holds the playback of show 1.
Channel 1 to 0% stops the playback of show 1.
When a show is running another show can be started,
replacing the current running show. In combination with an
ELC focus HAND/BRAIN, 1 Enter will start show 1, 2 Enter
will start show 2, etc.
General Information
CE – Product
The ShowSTORE System permits to the CE requirements set
up by the European Community. This can be recognized by
this label on the outside of the product.
Technical Specifications
ShowSTORE:
Output: DMX 512 (1990) on 5 pin female XLR
Input: DMX 512 (1990) on 5 pin male XLR
Bypass: Relay as failsafe link
Signalisation: 4 Leds
Power: 85-264 VAC 47-440 Hz 20VA max
Dimensions 19” 1HE rack unit 483 x 44 x 150 mm
Weight: 2 kg

Designed and manufactured in the Netherlands by:
ELC lighting
Distributed by:
Worldwide distribution:
AnimaLighting SA
Rte du Stand 20
CH-1897 Le Bouveret
Switzerland
Tel: (+41) (0)21-9672001
Fax: (+41) (0)21-9604282
URL: www.elclighting.com
Table of contents
Other ELC Controllers manuals
Popular Controllers manuals by other brands
Vimar
Vimar Eikon Evo Well-contact Plus 21849 instructions
Johnson Controls
Johnson Controls FEC26 Series installation instructions

Lights Alive
Lights Alive FireFly FF-511 owner's manual
Linak
Linak TECHLINE LA33 user manual
Trane
Trane ZN. LonWorks control manual
Generac Power Systems
Generac Power Systems PWRmanager owner's manual
