elco iNELS RFDSC-71N User manual
R L C LED ESL
RFDSC-71N
Dimming socket
EN
02-156/2021 Rev.0
Made in Czech Republic
1/8
Characteristics /
• The dimmed socket is used to control light sources that are connected by power cord - especially
lamps:
R - classic lamps.
L - halogen lamps with wound transformer.
C - halogen lamps with electronic transformer.
ESL - dimmable energy-efficient fluorescent lamps.
LED - LED light sources (230V).
• They can be combined with detectors, controllers, iNELS RF Control or system components.
• Thanks to the socket design, installation is simple by direct insertion into the existing socket.
• Output load 300W.
• Multi-function 6 light functions - smooth increase or decrease with time setting 2s-30 min.
• When switched off, the set level is stored in the memory, and when switched back on, it returns
to the most recently set value.
• Thanks to setting the min. brightness by potentiometer, you will eliminate flashing of the LED
and ESL light sources.
• The universal dimmer may be controlled by up to 32 channels (1 channel represents 1 button on
the controller).
• The programming button on the socket is also used for manual control of the output.
• Memory status can be pre-set in the event of a power failure.
• Range up to 160 m (in open space), if the signal is insufficient between the controller and unit, use
the signal repeater RFRP-20N or protocol component RFIO2that support this feature.
• Communication frequency with bidirectional protocol iNELS RF Control2(RFIO2).
• You will find more on light sources and dimming options at www.elkoep.com/solutions.
• Produced in 3 designs of sockets and plugs: French, Schuko, British
WARNING /
• Newly produced drivers work in the RFIO2data protocol mode. These driv-
ers are loaded in the actuators in a different way than before. Among other
things, it eliminates the risk of inadvertently loading another randomly occur-
ring controller within range.
• Drivers can still be switched to so-called compatibility mode, and loaded
in a simpler (older way)
• The mode in which the controller is located is indicated after inserting the
battery and after 5 seconds have passed, at which the LED is lit by subsequent
different intervals of flashing of the LED.
RFIO2mode
= Double flash (flash, flash, gap, flash, flash)
Compatibility mode
= Flash fast (flash, flash, flash, flash, flash)
• If you do not want to change the function of the controller, you must not press any buttons during
this time.
• If we need to change the operating mode of the controller, after inserting the battery, when the
LED is permanently lit, we press at the same time:
• button 1 and 3 on RF KEY-40/60
• button 1 and 2 on RFWB-20/40
• button 1 and 2 on RFGB-20/40
• button 1 and 2 on RF KEY
you hold the buttons until the LED starts to signal the changed mode (double flash or fast flash).
After that, the buttons must be released. The selected mode of the function is stored in memory
and after replacing the battery, the controller continues to operate in the same mode.
NOTE: after each removal of the battery, we press one of the buttons several times to discharge the
device and reinsert the battery
UPDATE THE CONTROLLER ACTUATORS IN RFIO2MODE
If the controller is used in RFIO2mode, then to update the controller actuators, it is necessary to
switch not only the actuator to the update mode (according to the instructions for the actuator),
but also the controller in the following way: You remove the battery from the controller, press some
of the buttons several times to discharge the device, and reinsert the battery. At the moment when
the LED lights up, you press the 1 button and hold it down until the controller starts signaling the
updating mode with a short flashing of the LED. Then you release the button and the controller
now works in RFIO2update mode. To end the update mode, you remove the battery, press one of
the buttons several times, and then reinsert the battery. Now you do not press any button and the
controller starts again in RFIO2operating mode,
!
!
11 111 11
22 22
33 2
RU
Диммирующая розетка
www.elkoep.com / www.elkoep.ru / www.elkoep.ua
ELKO EP, s.r.o. | Palackého 493 | 769 01 Holešov, Všetuly | Czech Republic | e-mail: [email protected] | Support: +420 778 427 366
ООО ЭЛКО ЭП РУС | 4-я Тверская-Ямская 33/39 | 125047 Москва | Россия | эл. почта: elko@elkoep.ru | Тел: +7 (499) 978 76 41, 978 77 42
ТОВ ЕЛКО ЕП УКРАЇНА | вул. Сирецька 35 | 04073 Київ | Україна | эл. почта: info@elkoep.com.ua | Тел.: +38 044 221 10 55
UA
Характеристики
• Диммирующая розетка служит для регулировки источников света, подключенных
проводом к электросети. Это такие лампы как:
R - классические лампы накаливания.
L - галогенные лампы с витым трансформатором.
C - галогенные лампы с электронным трансформатором.
ESL - диммируемые эконом лампы.
LED - LED осветительные устройства (230V).
• Можно комбинировать с Датчиками, Управляющими или Системными элементами iNELS
RF Control.
• Устанавливается в существующую стандартную розетку.
• Нагрузка на выходе 300W.
• Мультифункциональная: 6 световых функций: плавное разгорание / затухание с временной
настройкой 2с-30 мин.
• При выключении настроенный уровень сохранится в памяти и при повторном включении
вернется к последним настроенным значениям.
• Благодаря настройке мин. яркости потенциометром устраняется мерцание LED и ESL
осветительных устройств.
• Может может управляться до 32 каналами (1 канал соотвествует одной кнопке на
управляющем элементе).
• Кнопка Prog на розетке также служит для ручного управления выходом.
• Состояние памяти может быть восстановлено в случае сбоя питания.
• Дистанция до 160 м (на открытом пространстве), в случае недостаточного сигнала, можно
использовать повторитель сигнала RFRP-20 или элементы с протоколом RFIO2, которые
поддерживают данную функцию.
• Рабочая частота сигнала с двусторонним протоколом iNELS RF Control2(RFIO2).
• Выпускается в 5 версиях вилок и розеток.: French, Schuko, British, Australian, US.
• Недавно произведенные контроллеры работают в режиме протокола
данных RFIO2. Эти управляющие элементы обучаются исполнительным
элементам способом, отличающимся от того, который использовался
раньше. Это, среди прочего, устранило риск случайного обучения другого
постороннего контроллера в пределах досягаемости.
• Контроллеры по-прежнему можно переключать в так называемый
режим совместимости и обучать более простым (старым) способом.
• Режим, в котором находится контроллер, отображается после
установки батареи: через 5 секунд, в течение которых светодиод горит
непрерывно, он начинает мигать с разной периодичностью.
Режим RFIO2
= Двойное мигание (вспышка, вспышка, пробел, вспышка, вспышка)
Режим совместимости
= Быстрое мигание (вспышка, вспышка, вспышка, вспышка, вспышка)
• Если вы не хотите изменять функции контроллера то, в течение этого времени, не нажимайте
никакие кнопки
• Если необходимо изменить рабочий режим контроллера, после установки батарейки, пока
светодиод горит непрерывно, нажмите одновременно:
• кнопки 1 и 3 на RF KEY-40/60
• кнопки 1 и 2 на RFWB-20/40
• кнопки 1 и 2 на RFGB-20/40
• кнопки 1 и 2 на RF KEY
удерживайте кнопки до тех пор, пока светодиод не начнет сигнализировать об измененном
режиме (двойное мигание или быстрое мигание). Затем кнопки необходимо отпустить.
Выбранный режим работы сохраняется в памяти и после замены батарейки контроллер
продолжает работать в том же режиме
ПРИМЕЧАНИЕ: после каждого извлечения батарейки нажмите несколько раз одну из кнопок,
чтобы разрядить устройство, после чего вставьте батарейку обратно.
ОБУЧЕНИЕ КОНТРОЛЛЕРОВ ИСПОЛНИТЕЛЬНЫМ ЭЛЕМЕНТАМ В РЕЖИМЕ RFIO2.
Если контроллер используется в режиме RFIO2, то для обучения контроллеров исполнительным
элементам необходимо переключать не только исполнительный элемент (согласно
приложенной к нему инструкции), но и контроллер следующим образом: извлеките батарейку
из контроллера, несколько раз нажмите одну из кнопок, чтобы разрядить устройство и вставьте
батарейку обратно. В момент, когда загорится светодиод, нажмите кнопку 1 и удерживайте ее
нажатой до тех пор, пока контроллер не начнет сигнализировать о режиме обучения кратким
миганием светодиода. Затем отпустите кнопку, теперь контроллер работает в режиме обучения
RFIO2. Чтобы выйти из режима обучения, извлеките батарейку, несколько раз нажмите одну
из кнопок и затем вставьте батарейку обратно. После этого не нажимайте никакие кнопки и
контроллер снова перейдет в рабочий режим RFIO2.

R L C LED ESL
RFDSC-71N
Dimming socket
EN
02-156/2021 Rev.0
Made in Czech Republic
2/8
Indication, manual control /
• Green LED - stays lit upon connecting the supply voltage.
• Red LED STATUS - indication of a closed contact.
Indicators of memory function:
On - LED blinks x 3.
Off - The LED lights up once for a long time.
• Manual control is performed by pressing the PROG button for less than 0.5s.
• Programming is performed by pressing the PROG button for more than 1s.
In the programming and operating mode, the LED on the component lights up at the same time
each time the button is pressed - this indicates the incoming command.
RFRP-20N
Assembly /
Radio frequency signal penetration through various construction materials /
60 - 90 % 80 - 95 % 20 - 60 % 0 - 10 % 80- 90 %
brick walls wooden structures
with plaster boards
reinforced
concrete metal partitions common glass
For more information, see“Installation manual iNELS RF Control”:
http://www.elkoep.com/catalogs-and-brochures
1
2
3
4
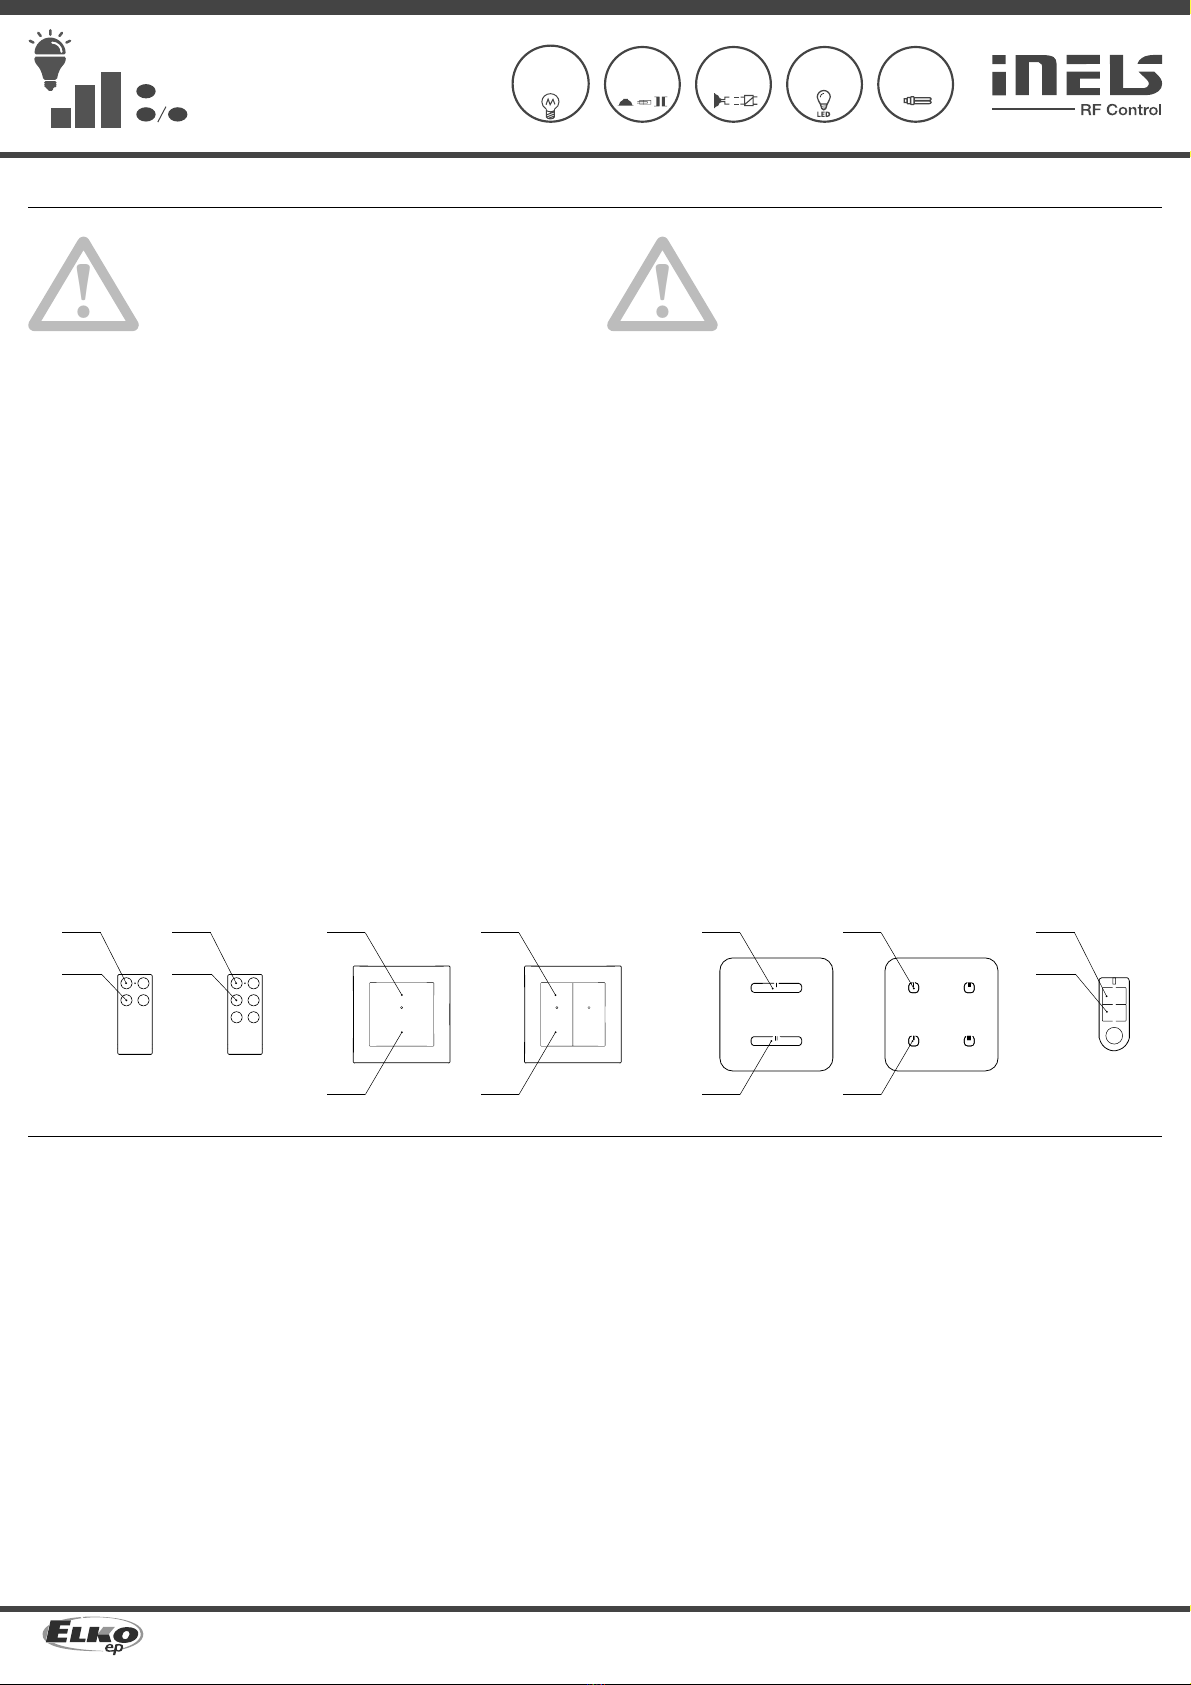
1. PROG button
2. LEDindication
• Green -input indication
• Red -output ON
3.Setting the load type
4.Set the minimum brightness
RU
Диммирующая розетка
www.elkoep.com / www.elkoep.ru / www.elkoep.ua
ELKO EP, s.r.o. | Palackého 493 | 769 01 Holešov, Všetuly | Czech Republic | e-mail: [email protected] | Support: +420 778 427 366
ООО ЭЛКО ЭП РУС | 4-я Тверская-Ямская 33/39 | 125047 Москва | Россия | эл. почта: elko@elkoep.ru | Тел: +7 (499) 978 76 41, 978 77 42
ТОВ ЕЛКО ЕП УКРАЇНА | вул. Сирецька 35 | 04073 Київ | Україна | эл. почта: info@elkoep.com.ua | Тел.: +38 044 221 10 55
UA
Индикация, ручное управление
• Зеленый LED - светится при подключении питания.
• Красный LED STATUS - сигнализация коммутации контакта.
Индикация функций памяти:
включено: LED 3x мигания.
выключено: LED 1x долгое свечение.
• Ручное управление: нажатием кнопки PROG < 0.5 сек.
• Программирование: нажатием кнопки PROG > 1 сек.
В режиме программирования и удаления светодиод на устройстве загорается одновременно с
каждым нажатием, что указывает на прием команды.
Монтаж
Прохождение радиочастотного сигнала через материалы
кирпичные
стены
деревянные
конструкции,
гипсокартон
железобетон металлические
перегородки
обычное
стекло
Более подробная информация находится в “Installation manual iNELS RF Control”:
http://www.elkoep.com/catalogs-and-brochures
1. КнопкаPROG
2. LEDИндикация
• Зеленый -Индикация питания
• Красный -выход ON
3.Настройка типа нагрузки
4.Настройка мин.яркости

R L C LED ESL
RFDSC-71N
Dimming socket
EN
02-156/2021 Rev.0
Made in Czech Republic
1 x
1
PROG > 1s
1 x
3
PROG < 1s
1 x
2
1 x
Functions and programming with RF transmitters /
Light scene function 1 /
Description of light scene 1 /
a) By pressing the programmed button for less than 0.5s, the light illuminates; it
goes out by pressing again.
b) By pressing the programmed button for more than 0.5s, fluid brightness regula-
tion will occur. After releasing the button, the brightness level is saved in the
memory, and pressing the button shortly later will switch the light on /off to
this intensity.
c) It is possible to readjust the change in intensity at any time by a long press of
the programmed button.
The socket remembers the adjusted value even after disconnecting from the
power supply.
Programming /
Press of programming but-
ton on socket RFDSC-71N for
1second will activate socket
RFDSC-71N into programming
mode. LED is flashing in 1s in-
terval.
A press of your selected button
on the RF transmitter assigns
the function light scene 1.
Press of programming button
on socket RFDSC-71N shorter
then 1 second will finish pro-
gramming mode. The LED
lights up according to the pre-
set memory function.
3/8
type of source / symbol / description /
R
resistive /
ordinary light bulb, halogen lamp /
L
inductive /
coiled transformer for low-voltage halogen lamps /
C
capacitive /
electronic transformer for low-voltage halogen lamps /
LED LED lamps and LED light sources, 230 V /
ESL dimmable energy-saving fluorescent tubes /
Set the minimum brightness - min. :
- Minimum brightness setting turned on when we perform load by turning the po-
tentiometer min. brightness to the desired value.
- Min. brightness is automatically stored after cca. 3 seconds since the last potenti-
ometer position change.
Setting min. brightness by potentiometer on the front side of device eliminates
flashing of various types of light sources.
Setting the load type - LOAD:
- Setting the type of load is performed with disconected load by turning the light
source selector to the desired position.
For the ESL load, when the lamp is switched off, a short press increases the bright-
ness to the maximum level (when the energy saver “lights up“) and then drops to
the preset level.
Compatibility /
The device can be combined with all system components, controls and devices
of iNELS RF Control and iNELS RF Control2.
The detector can be assigned an iNELS RF Control2(RFIO2) communication pro-
tocol.
RU
Диммирующая розетка
www.elkoep.com / www.elkoep.ru / www.elkoep.ua
ELKO EP, s.r.o. | Palackého 493 | 769 01 Holešov, Všetuly | Czech Republic | e-mail: [email protected] | Support: +420 778 427 366
ООО ЭЛКО ЭП РУС | 4-я Тверская-Ямская 33/39 | 125047 Москва | Россия | эл. почта: elko@elkoep.ru | Тел: +7 (499) 978 76 41, 978 77 42
ТОВ ЕЛКО ЕП УКРАЇНА | вул. Сирецька 35 | 04073 Київ | Україна | эл. почта: info@elkoep.com.ua | Тел.: +38 044 221 10 55
UA
Функции и программирование RF выключателя
Функция "Световой сценарий 1"
Описание функции "Световой сценарий 1"
a) Нажатие кнопки < 0.5 сек включит свет, следующее нажатие - выключит.
b) Нажатие кнопки > 0.5 сек приведет к плавной регулировке яркости. При
отпускании кнопки яркость сохранится в памяти и следующее краткое на-
жатие включит свет на данную яркость.
c) Изменить яркость можно в любое время длительным нажатием кнопки.
Розетка сохраняет в памяти настроенную яркость и при выключенном пи-
тании.
Программирование
Нажатием кнопки Prog на
розетке RFDSC-71N (> 1 сек)
переведите розетку в режим
программирования. LED ми-
гает с интервалом в 1 сек.
Нажатие выбранной кнопки на
RF выключателе добавит функ-
цию "Световой сценарий 1".
Завершите программиро-
вание нажатием (< 1 cек)
кнопки Prog на розетке RFD-
SC-71N. LED загорается в со-
ответствии с установленной
функцией памяти.
Настройка минимальной яркости - min. :
- Настройка мин. яркости проводится при включенной нагрузке поворотным
потенциометром "min. " до выбранного положения.
- Сохрание минимальной яркости произойдет через 3 сек. от последнего из-
менения положения потенциометра.
Настройка мин. яркости служит для устранения самопроизвольного мерцания
осветительного устройства.
Настройка типа нагрузки - LOAD:
- Настройка типа нагрузки проводится при отключенной нагрузке поворотным
потенциометром "LOAD" до выбранного положения.
Для ESL нагрузки, если свет выключен, краткое нажатие выведет яркость на
макс. уровень (эконом лампа „загорится“) и потом яркость уменьшится до на-
строенной величины интенсивности света.
тип устройства
резистивные
индуктивные
емкостные
описание
лампа накаливания, галогенная лампа
витой трансформатор для низковольтных галогенных ламп
электронный трансформатор для низковольтных галогенных ламп
LED лампы и LED осветительные устройства, 230 V
диммируемые эконом лампы
обозначение
Элемент можно комбинировать со всеми системными, управляющими и
другими элементами системы iNELS RF Control a iNELS RF Control2.
К элементу можно присоединить датчики с коммуникационным протоко-
лом iNELS RF Control2(RFIO2).
Cовместимость

R L C LED ESL
RFDSC-71N
Dimming socket
EN
02-156/2021 Rev.0
Made in Czech Republic
4/8
3
PROG < 1s
1 x
2
3 x
1
PROG > 1s
1 x
Programming /
Press of programming but-
ton on socket RFDSC-71N for
1second will activate socket
RFDSC-71N into programming
mode. LED is flashing in 1s in-
terval.
Three presses of your selected
button on the RF transmitter
assigns the function light scene 3
(must be a lapse of 1s between
individual presses).
Press of programming button
on socket RFDSC-71N shorter
then 1 second will finish pro-
gramming mode. The LED
lights up according to the pre-
set memory function.
1 x
Light scene function 4 /
Description of light scene 4 /
a) By pressing the programmed button for less than 0.5s, the light illuminates. By
pressing the button shortly again, the light will continuously switch off for 3 sec-
onds (at 100% brightness).
b) By pressing the programmed button for more than 0.5s, fluid brightness regula-
tion will occur. After releasing the button, the brightness level is saved in the
memory, and pressing the button shortly later will switch the light on /off to
this intensity.
c) It is possible to readjust the change in intensity at any time by a long press of
the programmed button.
The socket remembers the adjusted value even after disconnecting from the
power supply.
1 x
1
PROG > 1s
1 x
2
2 x
3
PROG < 1s
1 x
Light scene function 2 /
Description of light scene 2 /
a) By pressing the programmed button for less than 3s, the light illuminates; it goes
out by pressing again.
b) In order to limit undesirable control of brightness, fluid brightness control oc-
curs only by pressing a programmed button for over 3s. After releasing the but-
ton, the brightness level is saved in the memory, and pressing the button shortly
later will switch the light on / off to this intensity.
c) It is possible to readjust the change in intensity at any time by pressing the
programmed button for over 3s.
The socket remembers the adjusted value even after disconnecting from the
power supply.
Programming /
Press of programming but-
ton on socket RFDSC-71N for
1second will activate socket
RFDSC-71N into programming
mode. LED is flashing in 1s in-
terval.
Two presses of your selected
button on the RF transmitter as-
signs the function light scene 2
(must be a lapse of 1s between
individual presses).
Press of programming button
on socket RFDSC-71N shorter
then 1 second will finish pro-
gramming mode. The LED
lights up according to the pre-
set memory function.
1 x
Light scene function 3 /
Description of light scene 3 /
a) By pressing the programmed button for less than 0.5s, the light fluidly illumi-
nates for a period of 3s (at 100% brightness). By pressing the button shortly
again, the light will continuously switch off for 3 seconds.
b) By pressing the programmed button for more than 0.5s, fluid brightness regula-
tion will occur. After releasing the button, the brightness level is saved in the
memory, and pressing the button shortly later will switch the light on /off to
this intensity.
c) It is possible to readjust the change in intensity at any time by a long press of
the programmed button.
The socket remembers the adjusted value even after disconnecting from the
power supply.
RU
Диммирующая розетка
www.elkoep.com / www.elkoep.ru / www.elkoep.ua
ELKO EP, s.r.o. | Palackého 493 | 769 01 Holešov, Všetuly | Czech Republic | e-mail: [email protected] | Support: +420 778 427 366
ООО ЭЛКО ЭП РУС | 4-я Тверская-Ямская 33/39 | 125047 Москва | Россия | эл. почта: elko@elkoep.ru | Тел: +7 (499) 978 76 41, 978 77 42
ТОВ ЕЛКО ЕП УКРАЇНА | вул. Сирецька 35 | 04073 Київ | Україна | эл. почта: info@elkoep.com.ua | Тел.: +38 044 221 10 55
UA
Программирование
Нажатием кнопки Prog на
розетке RFDSC-71N (> 1 сек)
переведите розетку в режим
программирования. LED ми-
гает с интервалом в 1 сек.
Три нажатия выбранной кнопки
на RF выключателе (с интер-
валом не более 1 сек) добавят
функцию "Световой сценарий 3".
Завершите программиро-
вание нажатием (< 1 cек)
кнопки Prog на розетке RFD-
SC-71N. LED загорается в со-
ответствии с установленной
функцией памяти.
Функция "Световой сценарий 4"
Описание функции "Световой сценарий 4"
a) Нажатие кнопки < 0.5 сек включит свет. После следующего краткого на-
жатия свет плавно погаснет течении 3 сек (при 100% яркости).
b) Нажатие кнопки > 0.5 сек приведет к плавной регулировке яркости. При
отпускании кнопки яркость сохранится в памяти и следующее краткое на-
жатие включит свет на данную яркость.
c) Изменить яркость можно в любое время длительным нажатием кнопки.
Розетка сохраняет в памяти настроенную яркость и при выключенном пи-
тании.
Функция "Световой сценарий 2"
Описание функции "Световой сценарий 2"
a) Нажатие кнопки < 3 сек включит свет, следующее нажатие - выключит.
b) Для предотвращения нежелательной регулировки яркости, плавная регу-
лировка проводится кнопкой > 3 сек. При отпускании кнопки яркость со-
хранится в памяти и следующее краткое нажатие включит свет на нужную
яркость.
c) Изменить яркость можно в любое время нажатием кнопки > 3 сек.
Розетка сохраняет в памяти настроенную яркость и при выключенном пи-
тании.
Программирование
Нажатием кнопки Prog на
розетке RFDSC-71N (> 1 сек)
переведите розетку в режим
программирования. LED ми-
гает с интервалом в 1 сек.
Два нажатия выбранной кнопки
на RF выключателе (с интер-
валом не более 1 сек) добавят
функцию "Световой сценарий 2".
Завершите программиро-
вание нажатием (< 1 cек)
кнопки Prog на розетке RFD-
SC-71N. LED загорается в со-
ответствии с установленной
функцией памяти.
Функция "Световой сценарий 3"
Описание функции "Световой сценарий 3"
a) После нажатия кнопки < 0.5 сек свет плавно разгорится в течении 3 сек (до
100% яркости). После следующего краткого нажатия свет плавно погаснет
течении 3 сек.
b) Нажатие кнопки > 0.5 сек приведет к плавной регулировке яркости. При
отпускании кнопки яркость сохранится в памяти и следующее краткое на-
жатие включит свет на данную яркость.
c) Изменить яркость можно в любое время длительным нажатием кнопки.
Розетка сохраняет в памяти настроенную яркость и при выключенном пи-
тании.

R L C LED ESL
RFDSC-71N
Dimming socket
EN
02-156/2021 Rev.0
Made in Czech Republic
5/8
5
PROG < 1s
1 x
After the desired time has
elapsed, the timing mode
ends by pressing the but-
ton on the RF transmitter, to
which the sunrise function is
assigned. This stores the set
time interval into the socket
memory.
Press of programming button
on socket RFDSC-71N shorter
then 1 second will finish pro-
gramming mode. The LED
lights up according to the pre-
set memory function.
4
1 x
t = 2s . . . 30min.
1 x
Function sunset /
Description of sunset function /
After pressing the programmed button, the light begins to dim in the pro-
grammed time interval in a range of 2 seconds to 30 minutes.
1
PROG > 1s
1 x
2
4 x
3
PROG < 1s
1 x
Programming /
Press of programming but-
ton on socket RFDSC-71N for
1second will activate socket
RFDSC-71N into programming
mode. LED is flashing in 1s in-
terval.
Four presses of your selected
button on the RF transmitter
assigns the function light scene 4
(must be a lapse of 1s between
individual presses).
Press of programming button
on socket RFDSC-71N shorter
then 1 second will finish pro-
gramming mode. The LED
lights up according to the pre-
set memory function.
1 x
3
PROG >5s
1 x
2
5 x
1
PROG > 1s
1 x
Function sunrise /
Description of sunrise function /
After pressing the programmed button, the light begins to illuminate in the pro-
grammed time interval in a range of 2 seconds to 30 minutes.
Programming /
Press of programming but-
ton on socket RFDSC-71N for
1second will activate socket
RFDSC-71N into programming
mode. LED is flashing in 1s in-
terval.
Assignment of the sunrise func-
tion is performed by five presses
of the selected button on the RF
transmitter (must be a lapse of
1s between individual presses).
Press of programming button
longer then 5 seconds, will
activate socket into timing
mode. LED flashs 2x in each
1s interval. After releasing the
button, the time of the sun-
rise function begins to count
down (period of complete il-
lumination of the light).
RU
Диммирующая розетка
www.elkoep.com / www.elkoep.ru / www.elkoep.ua
ELKO EP, s.r.o. | Palackého 493 | 769 01 Holešov, Všetuly | Czech Republic | e-mail: [email protected] | Support: +420 778 427 366
ООО ЭЛКО ЭП РУС | 4-я Тверская-Ямская 33/39 | 125047 Москва | Россия | эл. почта: elko@elkoep.ru | Тел: +7 (499) 978 76 41, 978 77 42
ТОВ ЕЛКО ЕП УКРАЇНА | вул. Сирецька 35 | 04073 Київ | Україна | эл. почта: info@elkoep.com.ua | Тел.: +38 044 221 10 55
UA
После завершения выбора
времени (2 c ... 30 мин.) на
таймере, выйдите из вре-
менного режима нажатием
на RF выключателе кнопки, к
которой добавлена функция
"Восход солнца". Настроен-
ный интервал времени со-
хранится в памяти розетки.
Завершите программиро-
вание нажатием (< 1 cек)
кнопки Prog на розетке RFD-
SC-71N. LED загорается в со-
ответствии с установленной
функцией памяти.
Функция "Закат солнца"
Описание функции "Закат солнца"
При нажатии кнопки свет начнет гаснуть в течении заданного интервала вре-
мени (от 2 секунд до 30 минут).
Программирование
Нажатием кнопки Prog на
розетке RFDSC-71N (> 1 сек)
переведите розетку в режим
программирования. LED ми-
гает с интервалом в 1 сек.
Четыре нажатия выбранной
кнопки на RF выключателе (с
интервалом не более 1 сек)
добавят функцию "Световой
сценарий 4".
Завершите программиро-
вание нажатием (< 1 cек)
кнопки Prog на розетке RFD-
SC-71N. LED загорается в со-
ответствии с установленной
функцией памяти.
Функция "Восход солнца"
Описание функции "Восход солнца"
При нажатии кнопки свет начнет рагораться в течении заданного интервала
времени (от 2 секунд до 30 минут).
Программирование
Нажатием кнопки Prog на
розетке RFDSC-71N (> 1 сек)
переведите розетку в режим
программирования. LED ми-
гает с интервалом в 1 сек.
Пять нажатий выбранной кноп-
ки на RF выключателе (с интер-
валом не более 1 сек) добавят
функцию "Восход солнца".
Удержание кнопки Prog
(> 5 cек) переведет розетку
во временной режим. LED
2 раза мигнет в секудных
интервалах. При отпуска-
нии кнопки, начнется отсчет
времени "Восхода солнца"
(постепенного разгорания
света).
Table of contents
Other elco Accessories manuals


