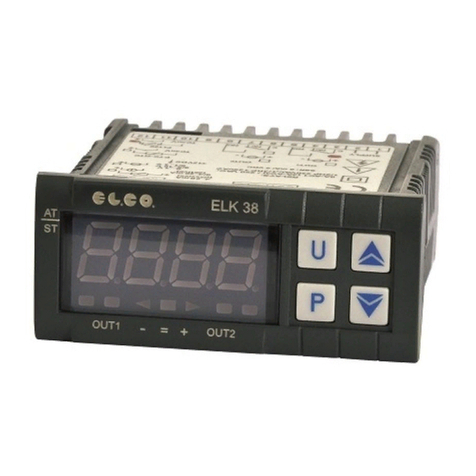
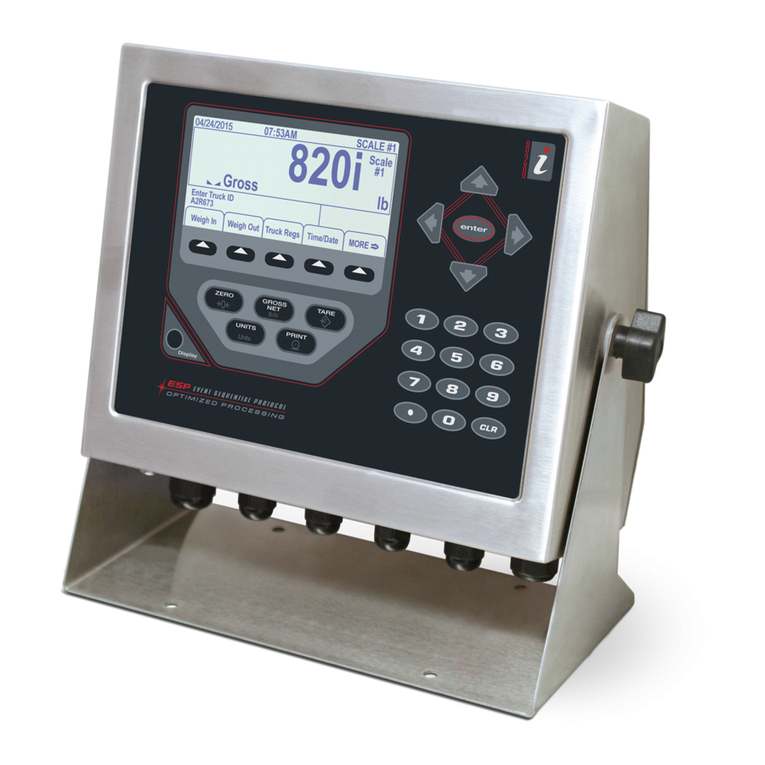
elco ELKM43 User manual

ELKM43
CONTROLLER AND
MINI-PROGRAMMER
Quick guide
ELKM43-GB-06-05-B
EL.CO. S.r.l.
Via Lago di Molveno, 20 - 36015 Schio (VI)
ITALY
Tel.: +39 0445 661722 - Fax: +39 0445 661792
www.elco-italy.com
e-mail: [email protected]
PREFACE
m This manual contains the information necessary for
the product to be installed correctly and also in-
structions for its maintenance and use; we therefore
recommend that the utmost attention is paid to the
following instructions and to save it.
This document is the exclusive property of EL.CO. S.r.l.
which forbids any reproduction and divulgation, even
partially, of the document, unless expressly authori-
zed. EL.CO. S.r.l. reserves the right to make any formal
or functional changes at any moment and without
notice.
EL.CO. S.r.l. and its legal representatives do not assume
any responsibility for any damage to people, things or
animals deriving from violation, wrong or improper
use or in any case not in compliance with the instru-
ment features.
m Whenever a failure or a malfunction of the control
device may cause dangerous situations for persons,
thing or animals, please remember that the plant
has to be equipped with additional safety devices.
1. DIMENSIONS AND CUTOUT mm)
Controller with non removable terminals
48
48
4811 14
Panel cut-out
65 mm min.
45
+0.6
mm
45
+0.6
mm
65 mm min.
Mounting requirements
This instrument is intended for permanent installa-
tion, for indoor use only, in an electrical panel which
encloses the rear housing, exposed terminals and
wiring on the back. Select a mounting location having
the following characteristics:
1. It should be easily accessible;
2. There is minimum vibrations and no impact;
3. There are no corrosive gases;
4. There are no water or other uids (i.e. condensation);
5. The ambient temperature is in accordance with the
operative temperature (0... 50°C);
6. The relative humidity is in accordance with the
instrument specications (20... 85%);
The instrument can be mounted on panel with a
maximum thickness of 15 mm.
When the maximum front protection (IP65) is desired,
the optional gasket must be mounted.
2. ELECTRICAL CONNECTIONS
ELECTRICAL CONNECTIONS
RS485
Thermo-
couple
DI1
OP3
OP2
OP1
OP4
(note)
DI2 (note)
Analogue input
mV, V mA
12 VDC
(note)
PV
4... 20 mA
3 wire transmitter
12 VDC
(note)
PV
Pt100Pt1000/NTC/PTC
4... 20 mA
2 wire transmitter
Neutral
Line
Power
supply
Terminals
Pin: q1.4 mm max. (0.055 in.)
Stropped wire: L: 5.5 mm (0.21 in.)
L
Note: Terminal 4 can be programmed as:
- Digital Input (DI2) connecting a free of voltage
contact between terminals 4 and 16;
- 0... 12 V SSR Drive Output (OP4) connecting the load
between terminals 4 and 16;
- 12 Vdc (20 mA) transmitter power supply connect-
ing the 2 wire transmitter between terminals 4
and 1; for 3 wire transmitter connect terminal
4 to transmitter power supply input and termi-
nal 1 and 2 to transmitter signal output.
Power supply voltage: 100... 240 Vac/20... 30 Vdc/
18... 28 Vac/24... 240Vac/dc;
Out1 relay: 4 (4) A/250 VAC, SPST;
Out2, 3 relay: 2 (1) A/250 VAC, SPST NA (*);
Out1, 2, 3 SSR:
10 VDC/15 mA;
Linear Out1: 0/4... 20 mA, 0/2... 10 V;
Out4 SSR: 12 VDC/20 mA.
*For
ELKM43 servodrive models both Out2 and Out3
are to be selected as “M” in Conguration code;
Out2: open, Out3: close.
General notes about wiring
1. Safety regulations require a line switch marked as
instrument disconnecting device. This switch must
be easily reachable by the operator;
2. Do not run input wires together with power cables;
3. External components (like zener barriers, etc.) con-
nected between sensor and input terminals may cause
errors in measurement due to excessive and/or not
balanced line resistance or possible leakage currents;
4. When a shielded cable is used, it should be con-
nected at one point only;
5. Pay attention to the line resistance, a high line
resistance may cause measurement errors.
6. To avoid electrical shocks, connect power line at last;
7. Before connecting the instrument to the power
line, make sure that line voltage is equal to the
voltage shown on the identication label;
8. The power supply input is NOT fuse protected.
Please, provide an external fuse T type 1A, 250 V.
3. CONFIGURATION PROCEDURES
Setting the parameters
Press the ke
y
for 3 seconds
Access to
parameters
Insert
password
(default: 30)
PV
AT
PV
AT
PV
AT
Key Editing Mode
Conrm and go to Next parameter
Increasethedisplayedvalueorselectthenextelement
Decreasethedisplayedvalueorselectthepreviouselement
ExitfromOperatorcommands/Parametersetting/Configuration
How to exit the“Conguration mode”
To exit from the Conguration mode,
press the key for 3 seconds.
Code conguration procedure
For ELKM43 version (without timer and programmer) a
simplied code conguration method is available. Only
essential functions can be set up with code congura-
tion procedure. See the “Engineering User Manual” for
more details.
4. LIST OF THE PARAMETERS pAss: 30
]inP Group - Main and auxiliary input configuration
no. Par. Description Dec. Values Default Notes
SEnS
Model C
J TC J (-50... +1000°C/-58... +1832°F);
crAL TC K (-50... +1370°C/-58... +2498°F);
S TC S (-50... 1760°C/-58... +3200°F);
r TC R (-50... +1760°C/-58... +3200);
t TC T (-70... +400°C/-94... +752°F);
Ir.J Exergen IRS J(-46... +785°C/-50... +1445°F);
Ir.cA Exergen IRS K(-46... +785°C/-50... +1445°F);
Pt1 RTD Pt 100(-200... +850°C/-328... +1562°F);
Pt10 RTD Pt 1000(-200... +850°C/-328... +1562°F);
0.60 0... 60 mV linear;
12.60 12... 60 mV linear;
0.20 0... 20 mA linear;
4.20 4... 20 mA linear;
0.5 0... 5 V linear;
1.5 1... 5 V linear;
0.10 0... 10 V linear;
2.10 2... 10 V linear. J
Model E
J TC J (-50... +1000°C/-58... +1832°F);
crAL TC K (-50... +1370°C/-58... +2498°F);
S TC S (-50... 1760°C/-58... +3200°F);
r TC R (-50... +1760°C/-58... +3200);
t TC T (-70... +400°C/-94... +752°F);
Ir.J Exergen IRS J(-46... +785°C/-50... +1445°F);
Ir.cA Exergen IRS K(-46... +785°C/-50... +1445°F);
Ptc PTC KTY81-121(-55... +150°C/-67... +302°F);
ntc NTC 103-AT2 (-50... +110°C/-58... +230°F);
0.60 0... 60 mV linear;
12.60 12... 60 mV linear;
0.20 0... 20 mA linear;
4.20 4... 20 mA linear;
0.5 0... 5 V linear;
1.5 1... 5 V linear;
0.10 0... 10 V linear;
2.10 2... 10 V linear.
2 dp Decimal Point Position (linear inputs) 00... 3 0
DecimalPointPosition(non linearinputs) 0/1
3 SSC Initial scale read-out for linear inputs dp -1999... 9999 0
4 FSc Full Scale Readout for linear inputs dp -1999... 9999 1000
5 unit Engineer unit °C/°F °C
6Fil Digital lter on the measured value 1 0 (= OFF)... 20.0 s 1.0
7 inE Sensorerrorusedtoenablethesafetyoutput
value
or Over range;
ur Under range;
our Over and under range.
our
8 oPE Safety output value (% of the output) -100... 100 0
9 IO4.F I/O 4 function
on Output used as PWS for TX;
out4 Output 4 (digital output 4);
dG2c Digital input 2 driven by contact;
dG2U Digital input 2 driven by voltage.
out4
9 IO4.F I/O 4 function
on Output used as PWS for TX;
out4 Output 4 (digital output 4);
dG2c Digital input 2 driven by contact;
dG2U Digital input 2 driven by voltage.
out4
10 diF1 Digital Input 1 function
oFF Not used;
1 Alarm reset;
2 Alarm acknowledge (ACK);
3 Hold of the measured value;
4 Stand by mode;
5 Manual mode;
6 HEAt with SP1 and CooL with SP2;
7 Timer RUN/Hold/Reset;
8 Timer Run;
9 Timer Reset;
10 Timer Run/Hold;
11 Timer Run/Reset;
12 Timer Run/Reset with lock;
13 Program Start;
14 Program Reset;
15 Program Hold;
16 Program Run/Hold;
17 Program Run/Reset;
18 Sequential SP selection;
19 SP1 - SP2 selection;
20 SP1... SP4 binary selection;
21 Digital inputs in parallel to / keys.
oFF
12 di.A Digitalinputaction(DI2onlyifcongured)
0 DI1directaction,DI2(ifcongured)directaction;
1 DI1inverseaction,DI2(ifcongured)directaction;
2 DI1directaction,DI2(ifcongured)inverseaction;
3
DI1
inverse action
, DI2 (
if congured
)
inverse
action
.
0
]Out group - Output parameters
no. Par. Description Dec. Values Default Notes
13 o1t Output 1 type (when Out 1 is a linear
output)
0-20 0... 20 mA;
4-20 4... 20 mA;
0-10 0... 10 V;
2-10 2... 10 V.
0-20
14 o1F
Out 1 function (when Out 1 is a linear
output) 0
NonE Output not used;
H.rEG Heating output;
c.rEG Cooling output;
r.inP Measure retransmission;
r.Err Error (SP - PV) retransmission;
r.SP Set point retransmission;
r.SEr Serial value retransmission.
H.reG
Out 1 function (when Out1 is a digital
output) 0
NonE Output not used;
H.rEG Heating output;
c.rEG Cooling output;
AL Alarm output;
t.out Timer output;
t.HoF Timer out -OFF in hold;
P.End Program end indicator;
P.HLd Program hold indicator;
P.uit Program wait indicator;
P.run Program run indicator;
P.Et1 Program Event 1;
P.Et2 Program Event 2;
or.bo Out of range or burn out indicator;
P.FAL Power failure indicator;
bo.PF
Outofrange/burnout/Powerfailureindicator;
St.bY Stand by status indicator;
diF.1 Theoutputrepeatsthedigitalinput1status;
diF.2 Theoutputrepeatsthedigitalinput2status;
on Out 1 always ON;
riSP Inspection request.
15 Ao1L Initialscalefortheanalogretransmission dP -1999 ... Ao1H -1999
16 Ao1H Full scale for the analog retransmission dP Ao1L ... 9999 9999
17 o1AL Alarms linked up with the out 1 0
0... 63:
+1 Alarm 1;
+2 Alarm 2;
+4 Alarm 3;
+8 Loop break alarm;
+16 Sensor Break;
+32 Overload on output 4.
1
18 o1Ac Out 1 action 0
dir Direct action;
rEU Reverse action;
dir.r Direct with reversed LED;
ReU.r Reverse with reversed LED.
dir
19 o2F Out 2 function 0 See O1F - Out 1 function (digital output) AL
20 o2AL Alarms linked up with the out 2 0 See O1AL - Alarms linked up with the out 1 1
21 o2Ac Out 2 action 0 See O1Ac - Out 1 action dir
22 o3F Out 3 function 0 See O1F - Out 1 function (digital output) AL
23 o3AL Alarms linked up with the out 3 0 See O1AL - Alarms linked up with the out 1 2

no. Par. Description Dec. Values Default Notes
24 o3Ac Out 3 action 0 See O1Ac - Out 1 action dir
25 o4F Out 4 function 0 See O1F - Out 1 function (digital output) AL
26 o4AL Alarms linked up with the out 4 0 See O1AL - Alarms linked up with the out 1 AL1+AL2
27 o4Ac Out 4 action 0 See O1Ac - Out 1 action dir
Alarm types
ON
ONON
ONON
ONON
ONON
ON
ON ON
ONON
ON ONON
PV
PV
PV
Time
PV
External
band
alarm
Internal
band
alarm
Time
Relative band alarm
Deviation
low
alarm
Deviation
High
alarm
Deviation alarm
Absolute band alarm
External
alarm
Iternal
alarm
Time
ON
PV Alarm not active at power ON
Time
Absolute alarm
Absolute
high
alarm
Absolute
low
alarm
Time
PV
Time
Relative alarm not active at set point change
Ab1 = +1
Ab1 = +0
ON
ON
PV Latched alarm
Time
Alarm Reset Alarm Reset
Ab1 = +2
Ab1 = +0
Ab1 = +8
Ab1 = +0
Alarm ACK Alarm ACK
PWR ON
ONON
ON
PV Acknowledgeable alarm
Time
Ab1 = +4
Ab1 = +0 ON ONON
ONON
Sp2
Sp1
ALX
ALX
]AL1 Group - Alarm 1 parameters
no. Par. Description Dec. Values Default Notes
28 AL1t Alarm 1 type 0
nonE Alarm not used;
LoAb Absolute low alarm;
HiAb Absolute high alarm;
LHAo Windowsalarminalarmoutsidethewindows;
LHAI Windowsalarminalarminsidethewindows;
SE.br Sensor Break;
LodE Deviation low alarm (relative);
HidE Deviation high alarm (relative);
LHdo Relativebandalarminalarmoutoftheband;
LHdi Relativebandalarminalarminsidetheband.
HiAb
29 Ab1 Alarm 1 function 0
0... 15:
+1 Not active at power up;
+2 Latched alarm (manual reset);
+4 Acknowledgeable alarm;
+8
Relative alarm not active at set point change.
0
30 AL1L
ForHigh/lowalarm,AL1thresholdlowlimit;
Forbandalarm,AL1lowalarmthreshold dp From -1999 to AL1H (E.U.) -1999
31 AL1H
ForHigh/lowalarm,AL1thresholdhighlimit;
Forbandalarm,AL1highalarmthreshold dp From AL1L to 9999 (E.U.) 9999
32 AL1 AL1 threshold dp From AL1L to AL1H (E.U.) 0
33 HAL1 AL1 hysteresis dp 1... 9999 (E.U.) 1
34 AL1d AL1 delay 0 From 0 (oFF) to 9999 (s) oFF
35 AL1o Alarm1enablingduringStand-bymode
and out of range conditions 0
0
Alarm1disabledduringStandbyandoutofrange;
1 Alarm 1 enabled in stand by mode;
2 Alarm 1 enabled in out of range condition;
3 Alarm 1 enabled in stand by and overrange.
0
]AL2 Group - Alarm 2 parameters
no. Par. Description Dec. Values Default Notes
36 AL2t Alarm 2 type 0 See AL1t Loab
37 Ab2 Alarm 2 function 0 See Ab1 0
38 AL2L
ForHigh/lowalarm,AL2thresholdlowlimit;
Forbandalarm,AL2lowalarmthreshold dp See AL1L -1999
39 AL2H
ForHigh/lowalarm,AL2thresholdhighlimit;
Forbandalarm,AL2highalarmthreshold dp See AL1H 9999
40 AL2 AL2 threshold dp See AL1 0
41 HAL2 AL2 hysteresis dp See HAL1 1
42 AL2d AL2 delay 0 See AL1d oFF
43 AL2o Alarm2enablingduringStand-bymode
and out of range conditions 0 See AL1o 0
]AL3 Group - Alarm 3 parameters
no. Par. Description Dec. Values Default Notes
44 AL3t Alarm 3 type 0 See AL1t nonE
45 Ab3 Alarm 3 function 0 See Ab1 0
46 AL3L
ForHigh/lowalarm,AL3thresholdlowlimit;
Forbandalarm,AL3lowalarmthreshold dp See AL1L -1999
47 AL3H
ForHigh/lowalarm,AL3thresholdhighlimit;
Forbandalarm,AL3highalarmthreshold dp See AL1H 9999
48 AL3 AL3 threshold dp See AL1 0
49 HAL3 AL3 hysteresis dp See HAL1 1
50 AL3d AL3 delay 0 See AL1d oFF
51 AL3o Alarm3enablingduringStand-bymode
and out of range conditions 0 See AL1o 0
]LBA Group - Loop break alarm
no. Par. Description Dec. Values Default Notes
52 LbAt LBA time 0 From 0 (oFF) to 9999 (s) oFF
53 LbSt
DeltameasureusedbyLBAduringSoftstart
dP From 0 (oFF) to 9999 (E.U.) 10
54 LbAS Delta measure used by LBA dP 1...9999 (E.U.) 20
no. Par. Description Dec. Values Default Notes
55 LbcA Condition for LBA enabling 0
uP Active when Pout = 100%;
dn Active when Pout = -100%;
both Active in both cases.
both
]rEG Group - Control parameters
no. Par. Description Dec. Values Default Notes
56 cont Control type 0
Pid PID (heat and/or);
On.FA ON/OFF asymmetric hysteresis;
On.FS ON/OFF symmetric hysteresis;
nr Heat/CoolON/OFFcontrolwithneutralzone;
3Pt Servomotor control.
Pid
57 Auto Autotuning selection 0
-4Oscillatingauto-tunewithauto-restartatpowerON
and after all point change;
-3Oscillating auto-tune with manual start;
-2
Oscillatingtunewithauto-startatrstpowerONonly;
-1
Oscillatingauto-tunewithauto-restartatallpowerON;
0 Not used;
1
Fast auto tuning with auto-restart at all power ON;
2
Fastauto-tunewithauto-starttherstpowerONonly;
3 FAST auto-tune with manual start;
4 FASTauto-tunewithautomaticrestartatpowerON
and after a set point change;
5 Smart-tune with auto-restart at all power ON;
6 Smart-tunewithauto-startatrstpowerONonly;
7 Smart-tune with manual start;
8 Smart-tunewithauto-restartatpowerONandafter
a set point change.
7
58 Aut.r Manual start of the Autotuning 0 oFF Not active;
on Active. oFF
59 SELF Self tuning enabling 0 no Theinstrumentdoesnotperformtheself-tuning;
YES The instrument performs the self-tuning. no
60 HSEt Hysteresis of the ON/OFF control dP 0... 9999 (E.U.) 1
61 cPdt Time for compressor protection 0 From 0 (oFF) to 9999 (s) oFF
62 Pb Proportional band dP 1... 9999 (E.U.) 50
63 ti Integral time 0 From 0 (oFF) to 9999 (s) 200
64 td Derivative time 0 From 0 (oFF) to 9999 (s) 50
65 Fuoc Fuzzy overshoot control 2 0.00... 2.00 0.50
66 tcH Heating output cycle time 1 0.1... 130.0 (s) 20.0
67 rcG Powerratiobetweenheatingandcool-
ing action 2 0.01... 99.99 1.00
68 tcc Cooling output cycle time 1 0.1... 130.0 (s) 20.0
69 rS Manual reset (Integral pre-load) 1 -100.0... +100.0 (%) 0.0
70 Str.t Servomotor stroke time 0 5...1000 seconds 60
71 db.S Servomotor dead band 0 0...100% 50
72 od Delay at power up 2 From 0.00 (oFF) to 99.59 (hh.mm) oFF
73 St.P Maximumpoweroutputusedduring
soft start 0 -100... 100 (%) 0
74 SSt Soft start time 2
0.00 (oFF);
0.01... 7.59 (hh.mm);
inF (always ON).
oFF
75 SS.tH Threshold for soft start disabling dP -1999... +9999 (E.U.) 9999
]SP Group - Set point parameters
no. Par. Description Dec. Values Default Notes
76 nSP Number of used set points 0 1... 4 1
77 SPLL Minimum set point value dP From -1999 to SPHL -1999
78 SPHL Maximum set point value dP From SPLL to 9999 9999
79 SP Set point 1 dP From SPLL to SPLH 0
80 SP 2 Set point 2 dP From SPLL to SPLH 0
81 SP 3 Set point 3 dP From SPLL to SPLH 0
82 SP 4 Set point 4 dP From SPLL to SPLH 0
83 A.SP Selection of the active set point 0 From 1 (SP 1) to nSP 1
84 SP.rt Remote set point type 0
RSP Thevalue comingfrom seriallink is usedas
remote set point;
trin Thevaluewillbeaddedtothelocalsetpoint
selectedby A.SPand thesum becomesthe
operative set point;
PErc The value will be scaled on the input range
and this value will be used as remote SP.
trin
85 SPLr Local/remote set point selection 0 Loc Local;
rEn Remote. Loc
86 SP.u RateofriseforPOSITIVEsetpointchange
(ramp UP) 2 0.01... 99.99 (inF) engineering units per minute inF
87 SP.d Rate of rise for NEGATIVE set point
change (ramp DOWN) 2 0.01... 99.99 (inF) engineering units per minute inF
]TIN Group - Timer function parameter
no. Par. Description Dec. Values Default Notes
88 tr.F Independent timer function 0
NonE Timer not used;
i.d.A Delayed start timer;
i.uP.d Delayed start at power up;
i.d.d Feed-through timer;
i.P.L
Asymmetrical oscillator with start OFF
;
i.L.P Asymmetrical oscillator with start ON.
nonE
89 tr.u Timer unit 0
hh.nn Hours and minutes;
nn.SS Minutes and seconds;
SSS.d Second and tenth of seconds.
nn.SS
90 tr.t1 Time 1 2 When tr.u < 20: 0.01... 99.59 1.00
1 When tr.u = 200: 0.1... 995.9
91 tr.t2 Time 2 2 When tr.u < 2: From 00.00 (oFF) to 99.59 (inF) 1.00
1 When tr.u = 2: From 000.0 (oFF) to 995.9 (inF)
92 tr.St Timer status 0
rES Timer reset;
run Timer run;
HoLd Timer hold.
rES

i.d.a Delayed ON at Start command
i.up.d Delayed ON at Power ON
i.d.d At Start command
i.p.l Asymmetrical oscillator with start in OFF
i.L.p Asymmetrical oscillator with start in ON
Start
OUT ON
off
Tr.t1 Tr.t2
off
OUT
PWR ON
ON
off
Tr.t1 Tr.t2
off
Start
OUT
Reset
ON
Tr.t1
off
Start
OUT
Reset
ONoff
Tr.t2
ONoff
Tr.t1Tr.t1
Tr.t2
ON
off
Tr.t1
Tr.t2
Start
OUT
Reset
ON off
Tr.t2
off
Tr.t1Tr.t1
Tr.t2
off
Tr.t1
Tr.t2
ON ON
PWR ON
PWR ON
Timer Types (selected by tr.f) (option)
]PRG Group - Programmer function parameters
Time
SPx
Status
Temperature
OFF
Pr.e= SPAt
Pr.S1
P
r.S4
P
r.S2
P
r.S3
Prog.
END
prg.1
prt.1
prg.3
prt.3
prg.4
prt.4
prg.2
prt.2
Program RUN
Start
Program Step
no. Par. Description Dec. Values Default Notes
93 Pr.F Program action at power up 0
nonE Programmer not used;
S.uP.d
Start at power up with a first step in stand-by
;
S.uP.S Start at power up;
u.diG
Start at Run command detection only
;
u.dG.d
StartatRuncommandwithafirststepinstand-by.
nonE
94 Pr.u Time unit of the soaks 2 hh.nn Hours and minutes;
nn.SS Minutes and seconds. hh.nn
95 Pr.E Instrumentbehaviourattheendof
the program execution 0
cnt Continue;
SPat Go to the set point selected by SPat;
St.by Go to stand-by mode.
SPat
96 Pr.Et Timeoftheendprogramindication 2 From 0.00 (oFF) to 99.59 (inF) minutes and seconds oFF
97 Pr.S1 Set point of the rst soak dP From SPLL to SPHL 0
98 Pr.G1 Gradient of the rst ramp 1 0.1...999.9EngineeringUnit/minute(inF=Steptransfer) inF
99 Pr.t1 Time of the 1st soak 2 0.00... 99.59 (time unit of the soaks) 0.10
100 Pr.b1 Wait band of the 1st soak dP 0 (oFF)/1... 9999 (E.U.) oFF
101 Pr.E1 Events of the 1st group 2 00.00... 11.11 (0= Event OFF; 1= Event ON) 00.00
102 Pr.S2 Set point of the 2nd soak dP OFF or from SPLL to SPHL 0
103 Pr.G2 Gradient of the 2nd ramp 1 0.1...999.9EngineeringUnit/minute(inF=Steptransfer) inF
104 Pr.t2 Time of the 2nd soak 2 0.00... 99.59 (time unit of the soaks) 0.10
105 Pr.b2 Wait band of the 2nd soak dP 0 (oFF)/1... 9999 (E.U.) oFF
106 Pr.E2 Events of the 2nd group 2 00.00... 11.11 (0= Event OFF; 1= Event ON) 00.00
107 Pr.S3 Set point of the 3rd soak dP OFF or from SPLL to SPHL 0
108 Pr.G3 Gradient of the 3rd ramp 1 0.1...999.9EngineeringUnit/minute(inF=Steptransfer) inF
109 Pr.t3 Time of the 3rd soak 2 0.00... 99.59 (time unit of the soaks) 0.10
110 Pr.b3 Wait band of the 3rd soak dP 0 (oFF)/1... 9999 (E.U.) oFF
111 Pr.E3 Events of the 3rd group 0 00.00... 11.11 (0= Event OFF; 1= Event ON) 00.00
112 Pr.S4 Set point of the 4th soak dP OFF or from SPLL to SPHL 0
113 Pr.G4 Gradient of the 4th ramp 1 0.1...999.9EngineeringUnit/minute(inF=Steptransfer) inF
114 Pr.t4 Time of the 4th soak 2 0.00... 99.59 (time unit of the soaks) 0.10
115 Pr.b4 Wait band of the 4th soak dP 0 (oFF)/1... 9999 (E.U.) oFF
116 Pr.E4 Events of the 4th group 0 00.00... 11.11 (0= Event OFF; 1= Event ON) 00.00
117 Pr.St Program status 0
rES Program reset;
run Program start;
HoLd Program hold.
rES
]PAn Group - Operator HMI
no. Par. Description Dec. Values Default Notes
118 PAS2 Level 2 password
(limited access level) 0oFF (Level 2 not protected by password);
1... 200. 20
119 PAS3 Level 3 password
(completeconguration) 0 3... 200 30
120 PAS4 Level 4 password
(CODEcongurationlevel) 0 201... 400 300
121 uSrb button function
during RUN TIME
nonE No function;
tunE Auto-tune/self-tuneenabling.Asinglepress(longerthan1
second) starts the auto-tune;
oPLo
Manual mode. The first pressure puts the instrument in
manualmode(oPLo)whileasecondoneputstheinstrument
in Auto mode;
AAc Alarm acknowledge;
ASi Alarm reset;
chSP Sequential set point selection;
St.by
Standbymode.Thefirstpressputstheinstrumentinstandby
modewhileasecondoneputstheinstrumentinAutomode;
Str.t Timer run/hold/reset;
P.run Program run;
P.rES Program reset;
P.r.H.r Program run/hold/reset.
tunE
no. Par. Description Dec. Values Default Notes
122 diSP Display management
nonE Standard display;
Pou Power output;
SPF Final set point;
Spo Operative set point;
AL1 Alarm 1 threshold;
AL2 Alarm 2 threshold;
AL3 Alarm 3 threshold;
Pr.tu -
Duringasoak,theinstrumentshowsthesoakelapsedtime;
-
Duringarampthedisplayshowstheoperativesetpoint
.
Atprogramend,theinstrumentalternatelydisplays
P.End and the measured value;
- Whennoprogramisrunning,theinstrumentshowsthe
standard display;
Pr.td - Duringasoak,theinstrumentshowsthesoakremai-
ning time (count down);
-
Duringarampthedisplayshowstheoperativesetpoint.
Atprogramend,theinstrumentalternatelydisplays
P.End and the measured value;
- Whennoprogramisrunning,theinstrumentshowsthe
standard display;
P.t.tu When the programmer is running, the display shows
thetotalelapsedtime. Atprogramend,theinstrument
alternately displays P.End and the measured value;
P.t.td
Whentheprogrammerisrunning,thedisplayshowsthetotal
remainingtime(countdown).Atprogramend,theinstru-
mentalternatelydisplaysP.End andthemeasuredvalue;
ti.uP Whenthetimerisrunning,thedisplayshowsthetimer
countingup. Atcount end,the instrumentalternately
displays t.End and the measured value;
ti.du Whenthetimerisrunning,thedisplayshowsthetimer
countingdown.Atcountend,theinstrumentalternately
displays t.End and the measured value;
PErc
Percentofthepoweroutputusedduringsoftstart(whenthe
softstarttimeisequaltoinfinite,thelimitisalwaysactive
anditcanalsobeusedwhenON/OFFcontrolisselected);
PoS Valve position (servomotor control).
0
123 di.cL Display colour
0
The display colour shows the actual deviation (PV - SP);
1 Display red (fix);
2 Display green (fix);
3 Display orange (fix).
0
124 AdE Deviationfordisplaycolour
management 1... 999 (E.U.) 5
125 di.St Display Timeout 2oFF (display always ON);
0.1... 99.59 (mm.ss). oFF
126 Ld Filter on the displayed
value 1oFF (filter disabled);
From 0.0 (oFF) to 20.0 (E.U.). oFF
128 dSPu Instrumentstatusatpower
ON
AS.Pr
Starts in the same way it was prior to the power down;
Auto Starts in Auto mode;
oP.0 Starts in manual mode with power output = 0;
St.bY Starts in stand-by mode.
AS.Pr
129 oPr.E Operativemodesenabling
ALL All modes will be selectable by the next parameter;
Au.oP Autoandmanual(oPLo)modeonlywillbeselectableby
the next parameter;
Au.Sb AutoandStand-bymodesonlywillbeselectablebythenext
parameter
ALL
130 oPEr Operativemodeselection
If oPr.E = ALL: - Auto = Auto mode;
- oPLo = Manual mode;
- St.bY = Stand by mode;
If oPr.E = Au.oP:
- Auto = Auto mode;
- oPLo = Manual mode;
If oPr.E = Au.Sb: - Auto = Auto mode;
- St.bY = Stand by mode.
Auto
]Ser Group - Serial link parameter
no. Par. Description Dec. Values Default Notes
131 Add Instrument address oFF;
1... 254. 1
132 bAud baud rate
1200 1200 baud;
2400 2400 baud;
9600 9600 baud;
19.2 19200 baud;
38.4 38400 baud.
9600
133 trSP Selection of the value to be
retransmitted (Master)
nonE Retransmissionnotused(theinstrumentisaslave);
rSP TheinstrumentbecomesaMasterandretransmitsthe
operative set point;
PErc
TheinstrumentbecomeaMasteranditretransmitsthe
power output.
nonE
]COn Group - Consumption parameters
no. Par. Description Dec. Values Default Notes
134 Co.tY Count type
oFF Not used;
1 Instantaneous power (kW);
2 Power consumption (kW/h);
3 Energyusedduringprogramexecution.Thismeasurestarts
fromzerowhenaprogramrunsendstopsattheendofthe
program. A new program execution will reset the value;
4 Totalworkeddays:numberofhourstheinstrumentisturned
ON divided by 24;
5
Totalworkedhours:numberofhoursthattheinstrumentis
turned ON;
6
Totalworkeddayswiththreshold:numberofhourstheinstru-
mentisturnedONdividedby24,thecontrollerisforcedinstand-
bywhenCo.tyvaluereachesthethresholdsetin[137]h.Job;
7 Totalworkedhourswiththreshold:numberofhoursthatthe
instrumentisturnedON,thecontrollerisforcedinstand-by
whenCo.tyvaluereachesthethresholdsetin[137]h.Job;
8 Totalizerofcontrolrelayworkeddays:numberofhoursthe
control relay has been in ON condition, divided by 24;
9 Totalizerofcontrolrelayworkedhours:numberofhoursthe
control relay has been in ON condition;
10 Totalizerofcontrolrelayworkeddayswiththreshold:number
ofhoursthecontrolrelayhasbeeninONconditiondivided
by24,thecontrollerisforcedinstand-bywhenCo.tyvalue
reaches the threshold set in [137] h.Job;
11 Totalizer of control relay worked hours with threshold:
numberofhoursthecontrolrelayhasbeeninONcondition,
thecontrollerisforcedinstand-bywhenCo.tyvaluereaches
the threshold set in [137] h.Job.
oFF
135 UoLt NominalVoltageoftheload 1... 9999 (V) 230
136 cur Nominalcurrentoftheload 1... 999 (A) 10
137 h.Job Threshold of the working
period
oFF Threshold not used;
0... 9999 days (when [134] cotY = 4);
0... 9999 hours (when [134] cotY = 5).
0
138 t.Job Workedtime(notresettable) 0... 9999 days
]CAL Group - User calibration group
no. Par. Description Dec. Values Default Notes
139 AL.P Adjust Low Point From -1999 to (AH.P - 10) in engineering units 0
140 AL.o Adjust Low Oset -300... +300 (E.U.) 0
141 AH.P Adjust High Point From (AL.P + 10) to 9999 engineering units 9999
142 AH.o Adjust High Oset -300... +300 0
Note: To access all the instrument features, please see the“Complete conguration procedure”in the “Engineering User
Manual”.
Complete Conguration and Parameter setting can be easily uploaded from the controller and downloaded to
other controllers using the: Conguration Key ELCO: KEY A-01.

Factory reset - Default parameters loading procedure
Sometime, e.g. when you re-congure an instrument previously used for other works or from other people or
when you have made too many errors during conguration and you decided to re-congure the instrument, it
is possible to restore the factory conguration.
This action allows to put the instrument in a dened condition (the same it was at the rst power ON).
The default data are those typical values loaded in the instrument prior to ship it from factory.
To load the factory default parameter set, proceed as follows:
1. Press the button for more than 5 seconds. The upper display will show PASS while the lower display
shows 0;
2. Using and buttons set the value -481;
3. Push button;
4. The instrument will turn OFF all LEDs for a few seconds, then the upper display will show dFLt (default) and
then all LEDs are turned ON for 2 seconds. At this point the instrument restarts as for a new power ON.
The procedure is complete.
5. OPERATIVE MODES
Keyboard function when the instrument is in Auto mode
Key Operator Mode
Access to:
- Operator Commands (Timer, Setpoint selection ...)
- Parameters
- Conguration
Access to
Operator additional information (Output value, running time ...)
Accesso to Set Point
Start programmed function with usrb parameter (Autotune, Auto/Man, Timer ...)
Operator Commands
run
tr.st
248.0
sp
Confirm/Next
Confirm/Next
Confirm/Next
Confirm/Next
Operator Command
Increase
Decrease
run : Start
hold : Hold
res : Reset
Active
Set Point
selection
1
a.sp
If more than
1 Set Point
active
(nsp > 1)
Confirm/Next
1
st
SP
value
change
If timer
activated
( tr.F )
250
AL1
If AL1 is active
Back to the
first parameter
To return to the Normal Mode, press the key for 3 seconds or wait for the 10s timeout
run : Start
hold : Hold
res : Reset
run
pr.st
Confirm/Next
If program
activated
( pr.F )
sp4
nsp > 1
nsp > 2
nsp > 3
340.0
225.0
sp3
120.0
sp2
Additional information
t45.2
248.0
h854
248.0
C045
248.0
Additional Information
Output Value %
(e.g. heating = 35%,
cooling = 45%)
Program
Segment
If active
To return to the Normal Mode, press the key for 3 seconds or wait for the 10s timeout
H035
248.0
s1.00
248.0
r1.00
248.0
d854
248.0
U854
248.0
Heating
Cooling
Worked time
(days)
Worked time
(hours)
Power (kW)
or
Energy (Wh)
Program/Timer
remaining time
P04.8
248.0
Soak
Ramp
Timer
Program
Set Point Change
Press the key (3 s) or wait
for the 10s time out to
store the new Set Point
and return to Normal Mode
Increase value
Decrease value
Operative
Set Point
Changed
operative
Set Point
248.0
sp
250.0
sp
Set Point Change
Running the Tuning functions
Press the key
for 3 s
Auto-tune
started
Auto-tune
in progress
tunE
248.0
248.0
248.0.
Note:
The key could be assigned by the user to other functions using the Usrb parameter
setting
Dot flashes while the Smart TUNE is in progres
s
Smart TUNE
is a fast and fully automatic procedure that can be
started in any condition, regardless the deviation
from SP. The controller selects automatically the
best tune methodand computes the optimum
PID parameters.
Smart TUNE Start
6. ERROR MESSAGES
Out of range signals
The instrument points out, on the upper display, the OVER-RANGE and UNDER-RANGE conditions using the fol-
lowing indications:
Over-range Under-range
The sensor break will be signalled as an out of range:
Note: When an over-range or an under-range is detected, the alarms operate as in presence of the maximum
or the minimum measurable value respectively
.
To check the out of span Error condition, proceed as follows:
1. Check the input signal source and the connecting line.
2. Make sure that the input signal is in accordance with the instrument conguration.
Otherwise, modify the input conguration (see section 4).
3. If no error is detected, send the instrument to your supplier to be checked.
List of possible errors
ErAT Fast Auto-tune cannot start. The measure value is too close to the set point.
Push the button in order to delete the error message.
ouLd Overload on output 4. The message shows that a short circuit is present on Out 4 when it is used as ou-
tput or transmitter power supply. When the short circuit disappears the output restarts to operate.
NoAt Auto-tune not nished within 12 hours.
ErEP Possible problem in the instrument memory. The message should automatically disappear, if the error
persists, send the instrument to your supplier.
RonE Possible problem of the rmware memory. If this error is detected, send the instrument to your supplier.
Errt Possible problem of the calibration memory. If this error is detected, send the instrument to your supplier.
7. GENERAL NOTES
Proper use
Every possible use not described in this manual must be consider as a improper use.
This instrument is in compliance with EN 61010-1“Safety requirements for electrical equipment for measure-
ment, control and laboratory use”; for this reason it could not be used as a safety equipment.
Whenever a failure or a malfunction of the control device may cause dangerous situations for persons, thing
or animals, please remember that the plant has to be equipped with additional safety devices.
EL.CO. S.r.l. and its legal representatives do not assume any responsibility for any damage to people, things
or animals deriving from violation, wrong or improper use or in any case not in compliance with the instru-
ment’s features.
Declaration of conformity and Manual retrieval
ELKM43 is a panel mounting, Class II instrument. It has been designed with compliance to the European Direc-
tives.
All information about the controller use can be found in the Engineering User Manual available on the down-
load area of our website www.elco-italy.com .
The Declaration of Conformity is available for free on request by our web-ticketing support service on our
website.
Maintenance
This instrument does not requires periodical recalibration and it have no consumable parts so that no particular
maintenance is required.
Sometimes it is advisable to clean the instrument.
1. SWITCH THE EQUIPMENT OFF (power supply, relay output, etc.).
2. Using a vacuum cleaner or a compressed air jet (max. 3 kg/cm
2
) remove all deposits of dust and dirt which may
be present on the case and on the internal circuits being careful not to damage the electronic components.
3. To clean external plastic or rubber parts use only a cloth moistened with:
Ethyl Alcohol (pure or denatured) [C2H5OH] or
Isopropyl Alcohol (pure or denatured) [(CH3)2CHOH] or
Water (H2O).
4. Make sure that there are no loose terminals.
5. Before turning ON the instrument make sure it is perfectly dry.
6. Apply the power supply to the instrument.
Disposal
The appliance (or the product) must be disposed of separately in
compliance with the local standards in force on waste disposal.
Warranty
This product is under warranty against manufacturing defects or faulty materials that are found within 12
months from delivery date. The warranty is limited to repairs or to the replacement of the instrument.
The tampering of the instrument or an improper use of the product will bring about the immediate withdrawal
of the warranty eects.
In the event of a faulty instrument, either within the period of warranty, or further to its expiry, please contact
our our support team through the web-ticketing service on our website.
The return policy will be communicated once the request will be accepted and is also available on the “Sales
Condition”.
8. ORDER CODE
Model
ELKM43 = Controller
ELKM43T = Controller + timer
ELKM43P = Controller + timer + programmer
Power supply
240 = 100... 240 VAC
EV = 24…240 VAC-VDC
Analogue input + Digital input DI1 (standard)
C= J, K, R, S, T, PT100, PT 1000 (2 fili), mA, mV, V
E= J, K, R, S, T, NTC, PTC, mA, mV, V
Output 1
A= 0/4...20 mA, 0/2...10V
R= Relais SPST 4A (resistive load)
S= VDC forSSR
Output 3
-= Not available
3R = Relais SPST 2 A (resistive load)
3S = VDC forSSR
3M= Relè SPST 2 A (servomotor drive)
Serial communications
- = TTL Modbus
S= RS485 Modbus + TTL Modbus
Output 2
-= Not available
2R = Relais SPST 2 A (resistive load)
2S = VDC for SSR
2M= Relais SPST 2 A (servomotor drive)
Note: Add“W” after the product name for white coloured display led’s
Note: For servomotor drive, both Output 2 and Output 3 codes must be selected as“M”
Other elco Controllers manuals
