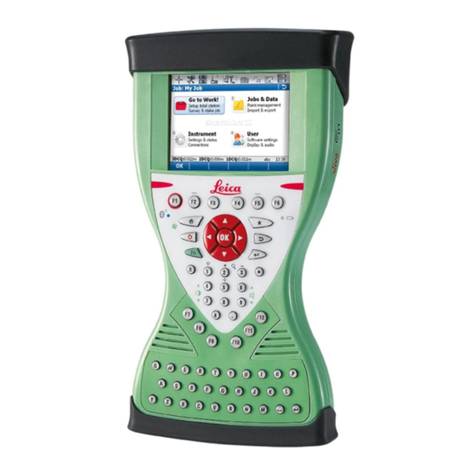
Leica mojo3D User manual

Leica mojo3D:
Direct Section Control
Amazone Amatron+
Installation Guide
Version 1.2
English

Leica mojo3D Direct Section Control – Amazone Amatron+
2
Table of Contents
1
Introduction ...................................................................................................................................3
2
Amatron+ Verification.....................................................................................................................4
3
Installation.....................................................................................................................................5
4
System Configuration .....................................................................................................................6
5
Controller Configuration .................................................................................................................8
6
Spraying With The Amatron+...........................................................................................................9
7
General Troubleshooting...............................................................................................................11
8
Appendix A – Changing Section Channels.......................................................................................13

Leica mojo3D Direct Section Control –Amazone Amatron+
3
1Introduction
This manual contains instructions for installing and setting up the product to operate with
a Leica mojo3D. Read carefully through this manual before starting the installation. When
this product is used with the Leica mojo3D it is mandatory to observe the safety
directions and instructions contained in the corresponding user manual.
Compatibility
Equipment: Amazone Amatron+ with Amazone Sprayers
Cable Article Number: 789877 Cable, Amazone Amatron+ CAN Cable
Max number of sections: 15
Master Switch Detection: No
Software settings
summary
Auth Code: Direct Section Control unlocked
Section Controller: Amazone Amatron+
Implement Mode: Sprayer Mode
Master Input Source: Amatron+ and mojo3D
Input Mode: Touch

Leica mojo3D Direct Section Control – Amazone Amatron+
4
2Amatron+ Verification
Before starting
installation
Before starting the installation check that the equipment, section switches and rate
control, is functioning as intended.
Firmware version For the mojo3D to be able to successfully control the Amazone
sprayer, the sprayer must be running firmware version 7.0
7.07.0
7.0.
..
.7
77
7 or
higher. Follow these steps to verify the Amazone firmware
version:
1. From the main Amatron+ screen (showing the boom and
sections) press
ESC
ESCESC
ESC
to access the menu
2. Press the soft-key corresponding to
Setup
SetupSetup
Setup
and confirm the
warning with the
ESC
ESCESC
ESC
button
3. At the bottom left of the screen is the version information,
check that the
MHX
MHXMHX
MHX-
--
-Version
VersionVersion
Version
is "V 7.0.7" or higher. If the
firmware is older than 7.0.7 contact your Amazone dealer to
have it updated. With older firmware the mojo3D will not be
able to control the Amatron+ sections.
4. If after the full setup has been completed and the sections are
still not operating correctly refer to Appendix A
Appendix AAppendix A
Appendix A –
––
–
Changing
ChangingChanging
Changing
Section Channels.
Section Channels.Section Channels.
Section Channels.

Leica mojo3D Direct Section Control –Amazone Amatron+
5
3Installation
Connect data cable 1. Install the Leica mojo3D Port Expansion Cable by connecting it
to the mojo3D.
2. Connect the data cable to CAN 2 (the grey three pin
connector) on the mojo3D Port Expansion Cable.
3. Connect the data cable to the centre DB9 connector on the
bottom of the Amatron+ controller in-line with the cables and
accessories supplied by Amazone. Refer to the Amazone
Amatron+ manual for further details about the controller
cabling.

Leica mojo3D Direct Section Control – Amazone Amatron+
6
4System Configuration
mojo3D
configuration
1. On the main navigation screen, tap the settings button.
2. On the flyout menu, tap the Implement Setup button.
3. Tap until the Section Controller
Section ControllerSection Controller
Section Controller -
--
-
Implement
ImplementImplement
Implement M
MM
Mode
odeode
ode screen is displayed.
4. Tap Amazone Amatron+, to select it as the section controller.
5. Tap Sprayer Mode, to select it as the implement mode; then tap to continue.
6. Tap mojo3D and Touch to configure the mojo3D turn on/off by touching the screen.
7. Tap to continue to the Section Control Setup
Section Control SetupSection Control Setup
Section Control Setup screen.
8. Enter the number of sections that are going to be used. If you are not sure, check
how many sections the Amatron+ is configured to use which is displayed on the main
spraying screen or in the sprayer setup screen, see the next section (Controller
Configuration) for more details.

Leica mojo3D Direct Section Control –Amazone Amatron+
7
After connecting a new section control cable it is important that the following settings
are checked:
Latency on and off
Section channels should be set sequentially from left to right. If this causes the
sections not to operate correctly refer to Appendix A
Appendix AAppendix A
Appendix A –
––
–
Changing Section
Changing SectionChanging Section
Changing Section
Channels
ChannelsChannels
Channels
to enter a different configuration depending on the number of sections
being used.
..
.
Refer to the Leica mojo3D user manual for instructions on configuring calculating and
updating the latency values.

Leica mojo3D Direct Section Control – Amazone Amatron+
8
5Controller Configuration
Amatron+ Spray
Equipment
Configuration
1. Press and hold the I/O
I/OI/O
I/O button to switch the power on. Wait until the controller starts
with the Menu displayed.
2. Navigate to the Menu. If you are on the main section control screen then press ESC
ESCESC
ESC
to get to the Menu.
3. Press the Setup
SetupSetup
Setup button (bottom row right hand button) and confirm the warning with
the
ESC
ESCESC
ESC key.
4. Select the Vehicle Setup
Vehicle SetupVehicle Setup
Vehicle Setup button (bottom row right hand button).
5. Press the Page
PagePage
Page button to move to the next page on the screen.
6. Check that the Num of Boom Sections
Num of Boom SectionsNum of Boom Sections
Num of Boom Sections displayed on the Amatron+ matches the
number set on the mojo3D in the Section Control Setup
Section Control SetupSection Control Setup
Section Control Setup screen.
7. Enter the Working Width
Working WidthWorking Width
Working Width and press the tick (bottom row right hand button) when
complete. Return to the main screen by pressing the ESC
ESCESC
ESC key.
8. Review the Section Control Setup
Section Control SetupSection Control Setup
Section Control Setup on the mojo3D to ensure the number of sections,
section widths and total implement width are correct.

Leica mojo3D Direct Section Control –Amazone Amatron+
9
6Spraying With The Amatron+
Start Treating 1. Turn on the mojo3D and the Amatron+,
use the
ESC
ESCESC
ESC
button to get the Amatron+
to the main screen
2. Unfold the sprayer booms and ensure the
boom is unlocked. The lock icon is shown
on the main screen of the Amatron+.
The boom can be unlocked by pressing
the page button until the lock icon is
shown on the right side of the screen.
Press the corresponding soft-key to
unlock the boom. The Amatron+ does
not permit section control while the
boom is locked.

Leica mojo3D Direct Section Control – Amazone Amatron+
10
3. Once the mojo3D has a guidable position
the system is ready to spray. Enable
auto-section control on the mojo3D with
the spray button on the bottom left of
the main screen. Enable spray using the
master button on the Amatron+, on the
main screen it is the top right button on
page 1. The Amatron+ remains the
master for enabling the sprayer. The
mojo3D will then enable sections as
required and can be used to force
sections on and off.

Leica mojo3D Direct Section Control –Amazone Amatron+
11
7General Troubleshooting
Problem
ProblemProblem
Problem
Solution
SolutionSolution
Solution
Troubleshooting The sprayer does not spray when treatment is
enabled on the mojo3D.
Both the Amatron+ and mojo3D must be
enabled for auto section spraying to
occur. Press the spray button on the main
screen of the mojo3D and the Amatron+
to enable spray. The Amatron+ remains
the master for enabling the sprayer. The
mojo3D will then enable sections as
required and can be used to force
sections on and off.
Check that the spray boom is unlocked.
The Amatron+ does not permit auto
section spraying while the boom is locked.
One or more sections are not automatically
controlled.
Check the section override is not active by
using the left and right arrows on the
Amatron+ to select a section then use the
return button (↵) to toggle the section
on and off.

Leica mojo3D Direct Section Control – Amazone Amatron+
12
Check the number of sections set on the
mojo3D (in the Section Control Setup
Section Control SetupSection Control Setup
Section Control Setup
screen) matches the number of sections
set on the Amatron+.
Check the channel setup in the Section
SectionSection
Section
Control Setup
Control SetupControl Setup
Control Setup screen of the mojo3D. The
channels should be sequential from 1 to
the number of section when moving from
left to right. If this does not work refer to
Appendix A
Appendix AAppendix A
Appendix A –
––
–
Changing Section
Changing SectionChanging Section
Changing Section Channels
ChannelsChannels
Channels
to enter a different configuration
depending on the number of sections
being used.
..
.

Leica mojo3D Direct Section Control –Amazone Amatron+
13
8Appendix A – Changing Section Channels
Changing Section
Channels
1. These steps should only be performed if having the Section
Channels set sequentially from left to right causes some sections
not to work correctly.
2. On the main navigation screen, tap the settings button.
3. On the flyout menu, tap the Implement Setup button.
4. Tap until the Section Control Setup
Section Control SetupSection Control Setup
Section Control Setup screen is displayed.

Leica mojo3D Direct Section Control – Amazone Amatron+
14
5. Using the table below determine which Section Channel number to Enter for each
section depending on the number of sections used.
Number Of
Sections 1 2 3 4 5 6 7 8 9 10 11 12 13 14 15
1 1
2 1 8
3 1 6 11
4 2 5 9 12
5 1 4 7 10 13
6 2 4 6 9 11 13
7 2 4 6 8 10 12 14
8 1 3 5 7 9 11 13 15
9 1 3 5 7 8 9 11 13 15
10 2 3 4 6 7 9 10 12 13 14
11 2 3 4 5 7 8 9 11 12 13 14
12 2 3 4 5 6 7 9 10 11 12 13 14
13 2 3 4 5 6 7 8 9 10 11 12 13 14
14 1 2 3 4 5 6 7 9 10 11 12 13 14 15
15 1 2 3 4 5 6 7 8 9 10 11 12 13 14 15
Channel

Leica mojo3D Direct Section Control –Amazone Amatron+
15
6. Enter the Section Channel number by tapping the corresponding section at the top of
the screen and changing the Section Channel to the appropriate number.
7. Continue this for all sections.
8. Tap to save the changes.

Leica Geosystems AG
Heinrich-Wild-Strasse
CH-9435 Heerbrugg
Switzerland
Phone: +41 71 727 31 31
www.leica-geosystems.com
790725-1.2.0en
Original text
© 2011 Leica Geosystems AC, Heerbrugg, Switzerland
Other manuals for mojo3D
2
Table of contents
Other Leica Controllers manuals
Popular Controllers manuals by other brands

Playcore
Playcore Colorado Time Systems Championship Elite Start... User instructions

DNF Controls
DNF Controls 2044CL-EVS user manual

JUMO
JUMO DICON touch Interface manual

Victaulic
Victaulic FireLock 758-LPA Series Installation, Maintenance, and Testing Manual

Primex
Primex CW6CDC user manual

Belimo
Belimo NMV-D3-RE2-SET installation instructions