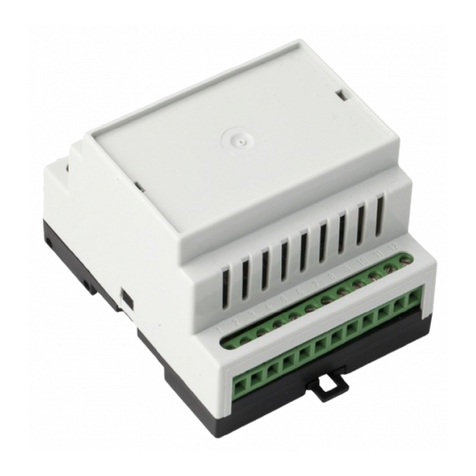
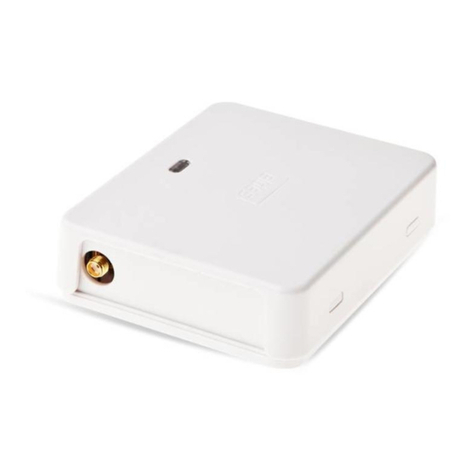
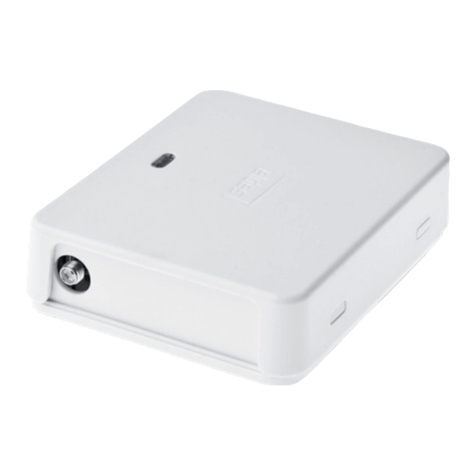
Eldes ESIM110 User manual

GSM SWITCH GATE CONTROLLER
GSM RĖLĖ AUTOMATINIŲ VARTŲ VALDIKLIS · GSM
ELDES ESIM110
LT EN RU

Copyright ©“ELDES UAB”, 2011. All rights reserved
It is strictly forbidden to copy and distribute information in this document or pass to a third party without an advanced written authorization from
“ELDES UAB”. “ELDES UAB” reserves the right to update or modify this document and/or related products without a warning. Hereby, ELDES UAB
declares that this GSM Switch -Gate controller Esim110 is in compliance with the essential requirements and other relevant provisions of Directive
1999/5/EC. The declaration of conformity may be consulted at www.eldes.lt.
User Manual v1.0
Safety instructions
Please read and follow these safety guidelines and assembly instructions in order to maintain safety of operators and people around:
• GSM switch - gate controller Esim110 (further referenced as the system) contains an GSM Switch - Gate controller in GSM
850/900/1800/1900 MHz bands.
• Don’t use the system where it can interfere with other devices and cause any potential danger.
• Don’t mount the system next to medical equipment or devices, if they require so.
• Don’t use the system in hazardous environment.
• Don’t expose the system to high humidity, chemical environment or mechanical impacts.
• Don’t attempt to personally repair the system.
• System label is on the bottom side of the device.
System Esim110 is a device mounted in limited access areas. Any system repairs must be done only by qualied, safety aware
personnel.
Mains power must be disconnected before any installation or tuning work starts. The system installation or maintenance
must not be done during stormy conditions.
The system must be powered by main 10-24V 50Hz ~200mA AC or 10-24V 200mA DC power supply which must be
approved by LST EN 60950-1 standard and be easily accessible.
Any additional devices linked to the system Esim110 (computer, sensors, relays etc.) must be approved by LST EN 60950-1
standard.
External power supply can be connected to AC mains only inside instal-
lation room with automatic 2-pole circuit breaker capable of disconnec-
ting circuit in the event of short circuit or over-current condition. Open
circuitbreaker musthave agapbetween connections ofmore than3mm.
Fuse F1 type C1S 2.5A. Blown fuse cannot be replaced by the user and the replacement fuses have to be exactly the same as
indicated by the manufacturer.
The device is fully turned o by disconnecting 2-pole switch o device of the external power supply or any other linked
device that the system Esim110 is powered from.
The WEEE (Waste Electrical and Electronic Equipment) marking on this product or its documentation indicates that in the EU the
product must not be disposed of together with household waste.
Phase
AC 230V
50 Hz/DC 24V
USB cable
Null
ESIM110
PE
If you use I security class computer for setting the parameters it must be connected to earth.
ESIM110 can be powered direct from 12V battery. The battery capacity shouldn‘t be higher than 7Ah.

Limited Liability
The buyer must agree that the system will re-
duce the risk of re, theft, burglary or other dan-
gers but does not guarantee against such events.
“ELDES UAB” will not take any responsibility
regarding personal, property or revenue loss while
using the system.
“ELDES UAB” responsibility according to local
laws does not exceed value of the purchased sys-
tem.
“ELDES UAB” is not aliated with GSM opera-
tors providing cellular services therefore is not res-
ponsible for the quality of cellular services.
Manufacturer Warranty
The system carries a 24-month warranty by the
manufacturer “ELDES UAB”.
Warranty period starts from the day the system
has been purchased by the end user. The warranty
is valid only if the system has been used as inten-
ded, following all guidelines listed in the manual
and within specied operating conditions. Receipt
with purchase date must be kept as a proof.
The warranty is voided if the system has been
exposed to mechanical impacts, chemicals, high
humidity, uids, corrosive and hazardous environ-
ment or other force majeure factors.
Content:
1. The system Esim110.............................................1pcs
2. Esim110 user manual................. .........................1pcs
3. GSM antenna.................................... .....................1pcs
About User Manual
This document describes GSM Gate Controller
Esim110, its operation and installation.
It is very important to read User Manual be-
fore start using the system. A quick start guide is
located in rst two chapters. Chapter 3 describes
additional system capabilities.
CONTENT
1. General Information.........................................................4
1.1 Function..................................................................................................................4
1.2 Operation Description.......................................................................................4
1.3 Technical Specications....................................................................................4
1.4 Connector and LED Indicators Functionality ...........................................5
1.5 Connection Circuit..............................................................................................5
1.6 System Installation..............................................................................................5
2. System Pre-operation
and the Main Control Commands .......................................6
2.1 Selecting device language and verication of SMS central number6
2.2 Administrator Password Change...................................................................6
2.3 Administrator Numbers....................................................................................7
2.3.1 Saving or Changing Administrator Numbers........................................7
2.3.2 Verication of Administrator Numbers....................................................7
2.3.3 Deletion of Administrator Numbers ........................................................7
2.4 Date and Time Settings .....................................................................................7
2.5 User Numbers......................................................................................................7
2.5.1 Saving User Numbers.....................................................................................8
2.5.2 Verication of User Numbers.......................................................................8
2.5.3 Deletion of User Numbers ...8
2.6 Conguring Output Impulse Duration of User Numbers.....................8
2.7 Info on Status SMS..............................................................................................9
2.8 Sending Messages from Any Phone Number..........................................9
2.9 Input Status ...........................................................................................................9
2.10 Changing input names................................................................................10
2.11 Input arming/disarming.............................................................................. 10
2.12 Conguring input impulse duration ...................................................... 10
3. Appendix.........................................................................11
3.1 Restoring Default Parameters......................................................................11
3.2 Esim110 CongTool conguration software..........................................11
3.3 ESIM110 control by GPRS.............................................................................. 11
3.3.1 How to connect to ESIM110 through www.eldes.lt website ........11
3.3.2 How to connect directly to ESIM110 with your web browser.......12
3.3.3. Standart GPRS parameters. ..................................................................... 13
3.4 Technical Support.............................................................................................14

4
1. General Information
1.1 Function
Esim110 is a microcontroller based device used to control gate automatics, road barriers or to remotely turn on the electronic
device over GSM network.
Examples of using the system:
• Controlling road barriers in the yards of blocks of ats or oces
• Opening personal house gates
• Turning on an electronic device for a specied period.
E. g., aquarium lighting, turning on the pump, watering, controlling heating in premises etc.
• Turning on the system
• Turning on any electric device controlled with using ON/OFF function
• Rebooting “frozen” system, e. g., computer network or server.
• Notication about a fault in gate or other automatics device.
1.2 Operation Description
Automatic gate controller system Esim110 works over GSM network. Gates are opened or any other electronic appliance is turned
on by a free phone call. The phone is automatically rejected.
On calling to the phone number of the system it checks whether the caller is recorded in the database. If user is saved in the system,
the relay is turned on for a specied period. The system will ignore requests incoming from an unknown telephone number or an
SMS message with a wrong password.
Connecting open gates sensor or switch allows administrators receiving SMS message about the gates that did not close during
the preset period, for instance, if the gates or road barrier did not close during the particular time period.
There are 3 ways of conguration: SMS, USB or Internet.
1.3 Technical Specications
Electrical, mechanical and other specications
Supply voltage 10-24V 50Hz ~ 200mA max / 10-24V 200mA max
Current used in standby model not more than 50mA
GSM modem frequency 850/900/1800/1900 MHz
Number of outputs 1
Output type NO (relay)
Number of“low” level (negative) inputs 2
Number of“high” level (positive) inputs 1
Allowable“low” level (negative) input voltage values 0-1.6V
Allowable“high” level (positive) input voltage values 5-50V
C1 output maximum commutating values 24V 1A / 32V 50Hz ~0.5A
Dimensions 70x85x57mm
Operating temperature range -20…+55oC (-30...+55oC with limitations)
Number of administrators 5
Number of users 500

MANUAL ELDES ESIM110 V1.0 5
EN
1.4 Connector and LED Indicators Functionality
1.5 Connection Circuit
1.6 System Installation
The system can be installed only in a metal or non-ammable plastic enclosure. If the metal enclosure and transformer is used it
is necessary to ground the enclosure using yellow/green colour cable. For the connection of 230V transformer use 3x0.75 mm2
1 thread double isolated cable. The primary circuit of the transformer must be connected through 0.5A fuse. 230V power supply
cables cannot be grouped with low voltage cable group. For the connection of power supply and output connectors use 1 thread
2x0.75 mm2 cable. For the connection of input/output connectors use 0.50 mm2 1 thread cable.
1. Place SIM card in the holder but make sure that SIM card PIN code is disabled (PIN code can be disabled by putting SIM card
into mobile phone and following proper menus). SIM card should not have any remaining SMS messages.
2. Connect the circuit as shown in g. No 2. Connect control connectors of the gate automatics device to the relay contacts. The
systems that are already installed most often contain a button for opening the gates. The relay can be connected instead of the
button or in parallel with its contacts.
3. Connect a sensor or switch to inputs Z1-Z3 that turns on only when gates are lifted. Low level signal is connected to Z1 and Z3.
High level signal is connected to Z2. (Input connection is an additional function and it is not necessary to install).
4. The system will start in less than a minute. LED2 indicator should be blinking or be ON indicating connection to GSM.
Short explanation of the main units
GSM MODEM GSM network 850/900/1800/1900 MHz modem
SIM CARD SIM card
LED Light-emitting diodes indicator
DEFAULT Connectors (D1 and D2) for restoring default settings
ANT GSM antenna SMA type connector
USB Mini USB connector
Connector functionality
Labeling Explanation
AC/DC Power supply pins
RELAY Dry relay contact. Normally open (NO)
RELAY Dry relay contact. Normally open (NO)
COM Common pin
Z3 “Low” level input Z3
Z2 “High”level input Z2
Z1 “Low” level input Z1
Fig. No 1
ANT
GSM
MODEM
SIM
CARD
MIC
LED1
LED2
DEFAULT D1 D2
AC/DC RELAY COM-- Z5 Z4 Z3 Z2 Z1
USB
ESIM 110
AC/DC
Power
supply
Gate controller
+
-
RELAY COM Z3 Z2 Z1
Fig. No 2
NOTE
Although the installation of system Esim110 is not complex, we highly
recommend installing the device only in the case if you have minimal
electrotechnical or electronics knowledge. Otherwise you can damage
the device.
LED indicators functionality
LED1 Indicates SIM card
status
LED2 Indicates network
status
LED1 status Meaning
OFF SIM card is wor-
king properly
ON SIM card
error
LED2 status Meaning
OFF No network connection
Blinking 1 times per second Poor network connection
Blinking 3 time per second Medium network connection
ON Excellent network connection

6
2. System Pre-operation
and the Main Control Commands
VERY IMPORTANT!!!
Underscore symbol‘_’in this manual is used to represent space.When writing SMS messages, every underscore symbol should be
replaced by single space symbol. XXXX – means password. Don’t leave any space at the beginning and the end of the message.
To set Esim110 system parameters easier and quicker you can use the computer, USB cable and conguration program Esim110
CongTool. You can read more in chapter 3.2.
2.1 Selecting device language and verication of SMS central number
The language in which the device communicates with the user can be chosen before changing factory default password.To change
the language in the system that is already congured reset default settings as described in 3.1 appendix.
Send SMS message with the required language
code to the number of the SIM card inserted in
Esim110.
E.g., if you want to set the English language send
the following SMS message: EN
30-60 seconds later you should get an SMS message:
„English language conrmed.“ Go to chapter 2.2 upon
reception of this message.
Otherwise check for network connection and call Esim110 system from your mobile and wait until the system drops the call. You
should get an SMS message asking to change default password. Ot- herwise check for network connection and change SMS central
number.
SMS central number is saved in SIM card, therefore if SIM card has been used to send SMS messages with a mobile phone,
then you don’t’ need to change SMS central number. Often SMS central number is already saved in SIM card by cellular
operator.
Central number can be entered by sending SMS message:
XXXX – is a password. Default password is four zeros: 0000. SMS central number is provided by cellular network provider.
Example: 0000_SMS_+37069899992
Message should be sent to the number of SIM card which is placed into the system. If all went correct, the system will send a messa-
ge: SMS central number has been successfully changed to +37011111111
2.2 Administrator Password Change
All SMS commands start with a password, please memorize it. Manufacturer default password is four zeros 0000, which is ne-
cessary to change! Manufacturer default password can be changed by sending the following SMS message to ELDES Esim110
system:
To replace your password send the following SMS message:
XXXX is any four digit number except four zeros. Non-numerical characters like dots, colons, spaces are not allowed. YYYY is the
old system password. If you forgot the password, default manufacturer password can be restored, see chapter 3.1 for more details.
Language Code
lithuanian LT
english EN
russian RU
Table of
possible
languages
ESIM 110
XXXX_SMS_+37011111111
0000_PSW_XXXX
YYYY_PSW_XXXX

MANUAL ELDES ESIM110 V1.0 7
EN
2.3 Administrator Numbers
The system Esim110 allows to pre-program up to ve dierent mobile numbers which will have access to and control the system.
NR1 is mandatory while others can be skipped. All numbers must be entered starting with international country code, e. g. national
code for Lithuania is 370, UK- 44. The plus sign is not necessary. Numbers without the international code are not allowed.
2.3.1 Saving or Changing Administrator Numbers
Send SMS message with the following text:
Ones should be replaced with administrator numbers. Numbers don’t have to be entered in sequential order right away. E. g. use
can enter rst and fourth number by sending the following SMS message:
Or individually one number at a time:
Numbers can be changed same way as described above. New number will overwrite old one, therefore no erasing is necessary.
2.3.2 Verication of Administrator Numbers
To inquire the system about pre-programmed administrator numbers send the following SMS message:
The system will reply with all pre-programmed numbers.
2.3.3 Deletion of Administrator Numbers
To erase a particular or several administrator numbers send an SMS message with the numbers to be
deleted:
E. g. XXXX_NR3:DEL
The system will not allow erasing rst number NR1. It can only be modied.
2.4 Date and Time Settings
It is important to set correct date and time so that the system can send reports at specied times.
Date and time can be set by sending the following format SMS message:
where MMMM means year; mn - month; dd - day; va - hour; mi - minutes
E. g. XXXX_2009.01.01_14:15
2.5 User Numbers
The system Esim110 allows to pre-program up to 500 dierent mobile numbers which will have access to controlling the gates by a
phone call.The gates can also be controlled by administrators. All numbers must be entered starting with international country
code, e. g. national code for UK is 44. The plus sign is not necessary. Numbers without the international code, e. g., 070..., are not
allowed. The numbers can be recorded or deleted only by administrator.
XXXX_NR1:37011111111_NR2:37011111111_NR3:37011111111_NR4:37011111111_NR5:37011111111
XXXX_NR1:37011111111_NR4:37011111111
XXXX_NR3:37011111111
XXXX_HELPNR
ESIM 110
XXXX_
NR3:DEL
ESIM 110
XXXX_
2009.01.
01_14:15
XXXX_NR2:DEL_NR3:DEL_NR4:DEL_NR5:DEL
XXXX_MMMM.mn.dd_va:mi

8
2.5.1 Saving User Numbers
Send SMS message with the following text:
Ones should be replaced with user numbers. Up to 10 numbers can be entered sending an SMS message. To enter more numbers,
send another analogous SMS message. The ten numbers don’t have to be entered in sequential order right away. E. g. use can enter
only one number. After saving 500 user numbers you will be able to enter new users after you have deleted the users not using the
system thus emptying memory space
2.5.2 Verication of User Numbers
To learn if a particular user number is programmed in the system send the following SMS message:
Ones should be replaced with the number which you want to check if it is entered in the system.
To see all numbers entered send the following SMS message:
ATTENTION!
Depending on entered user numbers you might receive up to 55 SMS messages!
2.5.3 Deletion of User Numbers
To delete a particular or several user numbers send an SMS message with the numbers to be deleted:
Ones should be replaced with user numbers. Up to 10 numbers can be deleted sending an SMS mes-
sage. To enter more numbers, send another analogous SMS message. The numbers don’t have to be
deleted in sequential order right away. E. g. use can delete only one number.
To delete all numbers except administrators send the following SMS message:
2.6 Conguring Output Impulse Duration of User Numbers
NOTE
The manufacturer set that after the user’s call relay connectors are connected for 2 seconds (impulse duration).
To change the duration of switching on the relay end the following SMS message:
where t means the time of turning on the relay in seconds. Possible t values are [1-10]. Quantization is by 1.
E. g. XXXX_TIMER:10 means that relay contacts will be connected for 10 seconds. After 10 seconds the
relay will be turned o and the contact will be open, i. e. NO.
XXXX_T:37011111111
XXXX_D:37011111111_37011111111_370.........
XXXX_TIMER:t
XXXX_D:ALL
XXXX_GETALLNUMBERS
ESIM 110
XXXX_GET
ALLNUMB
ERS
ESIM 110
XXXX_D:
ALL
ESIM 110
XXXX_
TIMER:10
XXXX_N:37011111111_37011111111_370.........

MANUAL ELDES ESIM110 V1.0 9
EN
2.7 Info on Status SMS
The system Esim110 can any time be inquired about signal strength and the status of zones active at the time when SMS message is
sent. At the same time system test is performed. If the answer to the request has been received, it means the system nely operates.
It is also useful for those using prepayment service – you can check if the credit in the account is sucient for sending an SMS
message. Send the following SMS message:
The reply SMS will have following info: e. g. 2008.08.07 11:15 Signal strength satisfactory. Free Memory status.
By default this status SMS message is disabled.
These parameters can be congured by sending the following SMS message:
PP – message period in days, valid values [00-10].
VV - time when message is sent, valid values [00-23].
E. g. XXXX_INFO:01.10 means that status message will be sent every 1 day at 10:00.
If PP value is 0, and VV in the range of [1-23], then periodic status messages will be sent multiple times
per day, with period being specied as VV time.
E. g. XXXX_INFO:0.2 means that status message will be sent every 2 hours.
To disable periodic status messages send the following SMS message:
The status messages will not be sent until enabling or restoring default parameters or receiving pre-
viously described XXXX_INFO:PP.VV SMS message.
2.8 Sending Messages from Any Phone Number
The system is set so that the relay of the unit can be controlled only by the users entered on the system. However, it is possible tur-
ning on a special mode the relay can be turned on by any caller calling to the SIM card number of the device.
To turn on this mode send the following SMS message:
To turn o controlling from any phone send the following SMS message:
2.9 Input Status
To nd out current input names and their settings send the following SMS message:
You will receive the answer, e. g.: Z1:Zone1:ON/OFF T1:600 Z2:Zone2:ON/OFF T2:600 Z3:Zone3:ON/OFF T3:600
T1, T2 and T3 – delay of particular input in milliseconds, i. e. a period during which the input starts reac-
ting to signal change. For instance, the alarm will be triggered just in the case when voltage (signal) is
supplied for at least 600ms.
XXXX_STATUS
ESIM 110
XXXX_
STATUS
ESIM 110
XXXX_
INFO:01.
10
ESIM 110
XXXX_
INFO:0.2
XXXX_INFO
XXXX_ALLNUM:ON
XXXX_ALLNUM:OFF
XXXX_INFO:PP.VV
XXXX_INFO:00.00

10
2.10 Changing input names
Input names set by the manufacturer: Z1- Zone1, Z2-Zone2, Z3-Zone3. Any of these names can be changed by the user. The names
cannot repeat or coincide with control commands.
Input names can be changed by sending the following SMS message:
The user can change all names at once, several names or only one name. Maximum input name length
is 8 characters.
E. g. XXXX_Z2:OpenGate
2.11 Input arming/disarming
Input arming
Any of the inputs can be armed by sending the following SMS message:
E. g. XXXX_Z2:ON or XXXX_doors:ON
Input disarming
Any of the inputs can be disarmed by sending the following SMS message:
E. g. XXXX_Z2:OFF or XXXX_doors:OFF
2.12 Conguring input impulse duration
Impulse duration can be changed for any IN1-IN3 input. The input is triggered only if impulse duration is longer than the pre-set
value. Duration set by the manufacturer is 600ms.
This parameter can be changed for every input or for all inputs at once by sending the following SMS message:
where TT means input reaction time in milliseconds. Possible TT values are 100-42000000. Measuring
is by 100.
E. g. XXXX_T3:300000 means that IN3 input will react only if the impulse was not shorter than 5mins.
XXXX_T1:TT_T2:TT_T3:TT
ESIM 110
XXXX_
T3:300000
XXXX_Z1:ON_Z2:ON_Z3:ON
XXXX_Z1:OFF_Z2:OFF_Z3:OFF
ESIM 110
XXXX_Z2:
ON
ESIM 110
XXXX_Z2:
OFF
XXXX_Z1:NewInputName_Z2:NewInputName_
Z3:NewInputName
ESIM 110
XXXX_Z2:
OpenGate

MANUAL ELDES ESIM110 V1.0 11
EN
3. Appendix
3.1 Restoring Default Parameters
To restore default parameters:
1. disconnect power supply and USB connector
2. short circuit (connect) connectors D1 and D2
3. connect power supply for several seconds
4. disconnect power supply
5. disconnect connectors D1 and D2
3.2 Esim110 CongTool conguration software
To congure the system quicker and easier as well as use more system capabilities use congura- tion program„Esim110 Cong-
Tool”which can be downloaded from our website www.eldes.lt
Before connecting USB cable to the computer read Esim110 CongTool user guide available in the program chapter HELP.
3.3 ESIM110 control by GPRS
3.3.1 How to connect to ESIM110 through www.eldes.lt website
In order to connect to ESIM110 using your web browser, ensure the following conditions:
• ESIM110 is with a SIM card placed in it.
• Power supply is connected.
• The default 4-digit password is changed to a new one and your mobile number is uploaded as administrator mobile number.
• The device isn't connected to computer with USB cable.
Activate GPRS connection between ESIM110 and the server.
Use default settings*1 to connect to ESIM110 through www.eldes.lt website. If default settings is
changed, set ESIM110 to work in Client mode and make sure that GPRS server parameters is set to
default. To select Client mode send SMS message with the following text:
Activate GPRS connection using standart or one-time GPRS parameters*:
To use standart GPRS parameters, send SMS message with the following text:
Here 'prole1' is the default name of your standart GPRS parameters. By default settings, ESIM110
will connect to ELDES server and session will be activated for 20 minutes.
To use one-time GPRS parameters, for example send SMS message with the following text*1:
Here 'MM' – time duration in minutes. In the example above, ESIM110 will connect to
ELDES server and session will be activated for MM minutes.
The system generates and sends login details to your mobile telephone.
Upload www.eldes.lt/login webpage in your web browser and login with received username and
password to the ESIM110 congurations webpage.
XXXX_setgprs:type:client
XXXX_connect:profile1
XXXX_connect:timeout:MM
ESIM 110
1111 setg
prs:type:
client
ESIM 110
1111 conn
ect:profil
e1
ESIM 110
1111 conn
ect:timeo
ut:25

12
Make congurations to the device, update users database or/and review the device activity summary.*3
To work properly using congurations web interface, you should wait while webpages is fully downloaded to your web browser
before doing other actions.
Kitu atveju galimi atvaizdavimo iškraipymai ar nesutapimai!!
Stop the session*4.
If connection session hasn't ended before you closed congurations webpage, send SMS message
in the following format:
3.3.2 How to connect directly to ESIM110 with your web browser.
ATTENTION: you can proceed through these instructions only if the sim card inserted in the device will have static ip addess
(request your gsm operator if he can provide it).
Ensure the following conditions:
• ESIM110 is with a SIM card placed in it.
• Power supply is connected.
• The default 4-digit password is changed to a new one and your mobile number is uploaded as administrator mobile number.
• The device isn't connected to computer with USB cable.
Update standart GPRS parameters. *1.
Activate Server mode by sending SMS message with the following text:
Activate GPRS connection between ESIM110 and your computer.
You can indicate to use standart or one-time GPRS parameters*2:
To use standart GPRS parameters, send SMS message with the following text:
Here 'prole1' is the default name of your standart GPRS parameters. ESIM110 will connect to your
computer and session will be activated for 20 (by default settings) minutes.
To use one-time GPRS parameters, for example send SMS message with the following text
Here 'MM' – time duration in minutes. In the example above, ESIM110 will connect to your computer
and session will be activated for MM minutes.
The system generates and sends login details to your mobile telephone.
Upload http://SIM_card_IP:local_TCP_port webpage in your web browser and login with received username and password to
the ESIM110 congurations webpage. Here 'SIM_card_IP' is the IP address of your SIM card, 'local_TCP_port' – TCP port of your
computer which is used to communicate with ESIM110 (For example http://195.22.161.210:5000 ).
Make congurations to the device, update users database or/and review the device activity summary.
To work properly using web congurations interface, you should wait while webpages is fully downloaded to your web
browser before doing othe actions.
Stop the session*4.
XXXX_stop
XXXX_setgprs:type:server
XXXX_connect:profile1
XXXX_connect:timeout:MM
ESIM 110
1111 stop
ESIM 110
1111 setg
prs:type:
client
ESIM 110
1111 conn
ect:profil
e1
ESIM 110
1111 conn
ect:timeo
ut:25
*1 – check Table 1 and examples *2 – Device will use standart or one-time GPRS parameters to connect with a server. Standart GPRS parameters can be stored to de-
vice memory by SMS messages, software or web browser. Those parameters will be accesible with prole name which you have to include when sending SMS mes-
sage to activate GPRS connection. Use one-time GPRS parameters when you want to change only one or several parameters from the standart GPRS parameters
and use it only for upcoming session. *3 – For more information download esim010_gprs.pdf from www.eldes.lt website. *4 - If session ends and you haven’t made
all the necessary congurations, you will have to start a new session and login to a webpage with new username and password (repeat all steps from no.2).

MANUAL ELDES ESIM110 V1.0 13
EN
If session hasn't ended before you closed congurations webpage, send SMS message in the follow-
ing format:
3.3.3. Standart GPRS parameters.
Settings Parameters Default Description Mode*
type client / server client
Choose Server mode if you want to connect directly to the device (inserted
SIM card must have static IP address). Choose Client mode if you want to
connect through www.eldes.lt website.
-
prole Code name prole1 The code name of the standart GPRS parameters. Congurable only by
software or using web interface. Both
ip IP or DNS address cong.eldes.lt ELDES server parameter. It is recommended not to change this default
parameter. Client
port xxxx 5555 ELDES server parameter. It is recommended not to change this default
parameter. Client
dns1 IP address 84.32.3.34 ELDES server parameter. It is recommended not to change this default
parameter. Client
dns2 IP address 84.32.134.1 ELDES server parameter. It is recommended not to change this default
parameter. Client
lport xxxx 5000 Computer TCP port used for communication with the device. Server
timeout xx 20 Time of one session; when this period expires the administrator has to
connect anew using new connection data. Both
protocol TCP / UDP TCP Data transmission protocol. It is recommended not to change this default
parameter. Both
apn - - GPRS diversion point provided by the GSM operator of the used SIM card.
Entered only in the case if GSM operator requires it. Both
user - - GPRS username. Entered only in the case if GSM operator requires it. Both
password - - GPRS user password. Entered only in the case if GSM operator requires it. Both
* – indicates in which working mode selected parameter is required.
Examples: how to create SMS messages.
To update standart GPRS parameters with a new one, send SMS message in the following format:
Here in the place of 'Settings' and 'Parameters' enter the corresponding commands from Table 1.
For example, sending SMS message„0001 setgprs:type:server“ you indicate to ESIM110 to work in
Server mode from the next session.
XXXX_stop
XXXX_setgprs:Settings:Parameters
ESIM 110
1111 stop
ESIM 110
0001 setg
prs:type:
server
*1 – Device will use standart or one-time GPRS parameters to connect with a server. Standart GPRS parameters can be updated to device memory by SMS mes-
sages, software or web browser. Those parameters will be accesible with prole name which you have to include then sending SMS message to activate GPRS con-
nection. Use one-time GPRS parameters when you want to change only one or several parameters from the standart GPRS settings and use it only for upcoming
session. *2 – check Table 1 and examples *3 – Donwload esim010_gprs.pdf from www.eldes.lt for detailed information. *4 - If session ends and you haven’t made
all the necessary congurations, you will have to start a new session and login to a webpage with new username and password (repeat all steps from no.3).

14
3.4 Technical Support
Indication Possible reason
Indicator is o or not blinking • no external power supply
• circuit not properly connected
• blown fuse
• no network signal
Indicator blinking several times per second • SIM card is not inserted
• PIN code hasn’t been disabled
• Sim card not active
System does not send any SMS messages • SIM card account depleted
• incorrect SIM central number
• no network signal
• user number is not programmed in user list
Received SMS message“Incorrect Format” • incorrect syntax
• extra space symbol left in SMS message
If your problem could not be xed by the self-guide above, please contact your distributor or ELDES tech support by
email [email protected]
More up to date information about your device and other products can be found at the manufacturer’s website www.eldes.lt
To activate GPRS connection with unique GPRS parameters only for the upcoming session, send the
following SMS message:
Here in the place of 'Settings' and 'Parameters' enter the corresponding commands from Table 1.
For example, sending SMS message„0001 connect:timeout:25“ you indicate to ESIM110 to start
GRPS connection for 25 minutes (session time). To specify more than one parameter, you have
to separate settings and parameters with ';' symbol (for example, sending SMS message„0001
connect:type:client;timeout:25“ you indicate to ESIM110 to work in Client mode for 25 minutes).
XXXX_connect:Settings:Parameters
ESIM 110
0001 conn
ect:timeo
ut:25

MANUAL ELDES ESIM110 V1.0 15
EN

Copyright ©“ELDES UAB”, 2009. Visos teisės saugomos
Draudžiama kopijuoti, kaupti ar perduoti tretiesiems asmenims, šiame dokumente esančią informaciją, ar bet kokią dokumento dalį be išankstinio
raštiško“ELDES UAB”sutikimo.“ELDES UAB”pasilieka teisę be išankstinio įspėjimo tobulinti ar keisti bet kuriuos dokumente paminėtus gaminius,
taip pat patį dokumentą. Šiuo ELDES UAB deklaruoja, kad šis GSM Rėlė automatinių vartų valdiklis ESIM 110 atitinka esminius reikalavimus ir kitas
1999/5/EC Direktyvos nuostatas. Jos atitikties deklaraciją galima rasti šiame tinklalapyje: www.eldes.lt
Vartotojo vadovas v1.0
Saugos informacija
Kad užtikrinti jūsų ir aplinkinių saugumą prašome perskaityti šias taisykles, bei laikytis visų vartotojo vadove esančių montavimo ins-
trukcijų ir nurodymų:
• GSM RĖLĖ -Automatinių vartų valdiklis Esim110 (toliau – sistema) turi įmontuotą radijo siųstuvą,
veikiantį GSM 850/900/1800/1900 MHz tinkluose
• Nenaudokite sistemos ten, kur ji gali sukelti trikdžius ar pavojų.
• Nemontuokite sistemos prie medicininės aparatūros ar prietaisų, jei jie to reikalauja.
• Nenaudokite sistemos sprogiose vietose.
• Sistema nėra atspari drėgmei, cheminei aplinkai, bei mechaniniams poveikiams.
• Neremontuokite sistemos patys.
• Sistemos ženklinimo lipdukas yra apatinėje įrenginio pusėje.
Sistema Esim110 yra ribotos prieigos zonos įrenginys. Sistemą montuoti ir remontuoti gali tik asmuo turintis žinių apie ben-
druosius saugos reikalavimus ir pakankamą tam darbui kvalikaciją.
Prieš pradedant montavimo ar derinimo darbus privaloma atjungti įrenginio maitinimą. Draudžiama liesti įrenginį ar atlikti
derinimo darbus žaibuojant.
Sistema turi būti maitinama iš 10-24V 50Hz ~200mA kintamos srovės arba 10-24V 200mA nuolatinės srovės maitinimo
šaltinio, kuris privalo tenkinti LST EN 60950-1 standarto reikalavimus ir būti lengvai pasiekiamas.
Kiekvienas prie sistemos Esim110 prijungtas susietasis įrenginys (kompiuteris, jutikliai, rėlės ir pan.) privalo tenkinti LST
EN 60950-1 standarto reikalavimus.
Sistemos išorinis maitinimo šaltinis gali būti prijungtas tik prie kinta-
mosios srovės tinklo, instaliavimo patalpoje, turinčio visiškai grandinę
nutraukiančią automatinę apsaugą. Automatinė apsauga turi suveikti
nuo trumpojo jungimo ar viršsrovių ir turėti dvipolį atjungimo įtaisą,
kuris nutraukia grandinę. Tarp nutrauktos grandinės kontaktų turi būti
ne mažesnis kaip 3mm tarpelis.
Saugiklio F1 tipas C1S 2.5A. Perdegusio saugiklio negalima keisti savarankiškai ir naudoti kitokį tipą nei nustatyta gamintojo.
Įrenginio pilnas išjungimas atliekamas išjungus išorinį elektros maitinimo šaltinio dvipolį atjungimo įtaisą arba kitą susietąjį
įrenginį iš kurio maitinama sistema Esim110.
Pagal WEEE direktyvą, perbrauktos šiukšlių dėžės su ratais ženklas reiškia, kad nebetinkamą naudoti gaminį Europos Sąjungoje reikia
atiduoti perdirbti atskirai nuo kitų šiukšlių.
Phase
AC 230V
50 Hz/DC 24V
USB cable
Null
ESIM110
PE
Jei parametrų nustatymui yra naudojamas I saugumo klasės kompiuteris, jis privalo būti įžemintas.
ESIM110 gali būti maitinamas iš 12V akumuliatoriaus su nedidesne talpa kaip 7Ah.

Atsakomybės ribojimas
Pirkėjas sutinka, kad sistema sumažina vagys-
tės ar kitą riziką, tačiau tai nėra draudimas ar ga-
rantija, kad paminėti veiksniai neįvyks, bei nebus
asmenų sužeidimų, ar turto praradimo, ar sunaiki-
nimo atvejų.
“ELDES UAB”neprisiima jokios atsakomybės už
tiesioginę ar netiesioginę žalą ar nuostolius, taip
pat negautas pajamas, naudojantis sistema.
“ELDES UAB” atsakomybė, kiek tai leidžia ga-
liojantys įstatymai, neviršija produkto įsigijimo
kainos.
Korinio ryšio paslaugas teikiantys GSM opera-
toriai nėra susiję su “ELDES UAB” bendrove. Todėl
bendrovė neprisiima jokios atsakomybės už tinklo
paslaugas, jo aprėptį bei funkcionavimą.
Garantinis laikotarpis
“ELDES UAB” suteikia įsigytam produktui
24mėn. garantiją.
Garantinis laikotarpis pradedamas skaičiuo-
ti nuo produkto pardavimo pirmam galutiniam
vartotojui datos. Garantija taikoma tik jei sistema
buvo naudota pagal paskirtį, laikantis visų vartoto-
jo vadovo instrukcijų, bei techninėje specikacijoje
nustatytų sąlygų ir maksimalių leistinų reikšmių.
Pardavimo data laikoma čekio, sąskaitos ar kito
pardavimo dokumento data.
Garantija netaikoma jei sistema buvo paveikta
mechaniškai, cheminių medžiagų, drėgmės, koro-
zijos, skysčių, ekstremalių aplinkos veiksnių ar kito-
kių force majeure aplinkybių.
Pakuotės sudėtis:
1. Sistema Esim110............................................. .....1vnt
2. Esim110 vartotojo vadovas...............................1vnt
3. GSM antena.................................... ........................1vnt
Apie vartotojo vadovą. Greitas
startas.
Šis dokumentas aprašo GSM automatinių vartų
valdiklį Esim110, jos veikimą, bei instaliavimą.
Prieš pradedant naudotis sistema būtina per-
skaityti vartotojo vadovą. Pirmame ir antrame sky-
riuje aprašyta informacija reikalinga greitam startui.
Trečiame ir ketvirtame – apie sistemos papildomas
galimybes.
Turinys
1. Bendroji informacija.......................................................18
1.1 Paskirtis................................................................................................................18
1.2 Veikimo aprašymas..........................................................................................18
1.3 Techninė specikacija.....................................................................................18
1.4 Kontaktų ir LED indikatorių paskirtis.........................................................19
1.5 Pajungimo schema.......................................................................................... 19
1.6 Sistemos instaliavimas....................................................................................19
2. Sistemos paruošimas darbui ir
pagrindinės valdymo komandos...................................20
2.1 Įrenginio kalbos pasirinkimas bei
SMS centro numerio patikrinimas.............................................................. 20
2.2 Administratoriaus slaptažodis ir jo keitimas...........................................20
2.3 Administratoriaus numeriai..........................................................................21
2.3.1 Administratoriaus numerių užprogramavimas arba keitimas......21
2.3.2 Administratoriaus numerių užklausa.....................................................21
2.3.3 Administratoriaus numerių trynimas ....................................................21
2.4 Laiko ir datos nustatymas..............................................................................21
2.5 Vartotojų numeriai..........................................................................................21
2.5.1 Vartotojų numerių užprogramavimas................................................... 22
2.5.2 Vartotojų numerių užklausa......................................................................22
2.5.3 Vartotojų numerių trynimas ....................................................................22
2.6 Išėjimo impulso trukmės kongūravimas...............................................22
2.7 Informacinės SMS žinutės INFO ..................................................................22
2.8 Valdymas iš bet kurio telefono numerio .................................................23
2.9 Įėjimų būsenos statusas................................................................................. 23
2.10 Įėjimų pavadinimų keitimas.......................................................................23
2.11 Įėjimo įjungimas/išjungimas......................................................................24
2.12 Įėjimų impulso trukmės kongūravimas ..............................................24
3. Priedas.............................................................................25
3.1 Gamyklinių parametrų atstatymas............................................................. 25
3.2 Esim110 CongTool kongūravimo programa...................................... 25
3.3 ESIM110 valdymas per GPRS........................................................................25
3.3.1 Kaip prisijungti prie ESIM110
per www.eldes.lt interneto svetainę .......................................................25
3.3.2 Kaip prisijungti tiesiogiai
prie ESIM110 naudojantis interneto naršykle.................................. 26
3.3.3. GPRS parametrai.
Komandinių SMS žinučių sudarymo pavyzdžiai............................27
3.4 Techninė pagalba..........................................................................................28

18
1. Bendroji informacija
1.1 Paskirtis
Esim110 – tai mikroprocesorinis prietaisas, skirtas valdyti vartų automatiką, kelio užtvarus arba įjungti elektrinį prietaisą nuotoli-
niu būdu per GSM tinklą.
Sistemos pritaikymo pavyzdžiai:
• Automatinių užtvarų (šlagbaumų) valdymas daugiabučių namų ar įstaigų kiemuose
• Nuosavo namo vartų atidarymui
• Vieno elektrinio prietaiso įjungimas nustatytam laiko tarpui.
PVZ. akvariumo apšvietimui, siurblio įjungimui, laistymui, patalpų šildymo valdymui ir pan.
• Apsaugos sistemos įjungimui
• Bet kokiam elektriniam prietaisui įjungti, kuris valdomas ON/OFF pagalba.
• Perkrauti pakibusią sistemą, pvz. Kompiuterinį tinklą ar serverį.
• Informavimas apie apie gedimą vartų ar kituose automatikos įrenginiuose.
1.2 Veikimo aprašymas
Automatinių vartų valdymo sistema Esim110 veikia GSM tinkle. Vartai atidaromi ar bet koks kitas elektrinis prietaisas įjungiamas
trumpuoju skambučiu iš telefono, kuris nieko nekainuoja. Skambutis yra atmetamas automatiškai.
Paskambinus sistemos telefono numeriu yra patikrinama ar skambinantysis įrašytas į duomenų bazę, Jei taip – tai įjungiama nu-
statytam laiko tarpui rėlė. Jei į apsaugos sistemą bandytų prisiskambinti svetimas telefono numeris, ar būtų priimta SMS žinutė su
klaidingu slaptažodžiu – sistema tai ignoruotų.
Sistemą gali kongūruoti užprogramuoti administratoriai per SMS, USB arba Internetą. Jie gali kongūruoti rėlės suveikimo tru-
kmę, įrašyti naujų vartotojų telefono numerius ar juos ištrinti. Nusiuntus užklausą, sistema SMS žinute praneša ryšio kokybę, bei
laisvos atminties kiekį.
Prijungus atidarytų vartų sensorių ar jungiklį administratoriai gali gauti SMS žinutę apie per nustatytą laiką neužsidariusius vartus.
Pvz įvykus vartų įrangos gedimui, jei nenusileido vartai ar kelio užtvaras per jam nustatytą laiką.
1.3 Techninė specikacija
Elektrinės, mechaninės ir kitos charakteristikos
Maitinimo įtampa 10-24V 50Hz ~ 200mA max / 10-24V 200mA max
Naudojama srovė budinčiame režime ne daugiau 50mA
GSM modemo dažnis 850/900/1800/1900 MHz
Išėjimų skaičius 1
Išėjimo tipas NO (rėlinis)
„Žemo“ lygio (minusinių) įėjimų skaičius 2
„Aukšto“ lygio (pliusinių) įėjimų skaičius 1
„Žemo“ lygio (minusinio) įėjimo leistinų įtampų reikšmės 0-1.6V
„Aukšto“ lygio (pliusinio) įėjimo leistinų įtampų reikšmės 5-50V
Išėjimo C1 maksimalios komutuojamos reikšmės 24V 1A / 32V 50Hz ~0.5A
Matmenys 70x85x57mm
Darbinis temperatūrų diapazonas -20…+55oC (-30...+55oC su apribojimais)
Administratorių skaičius 5
Vartotojų skaičius 500

VARTOTOJO VADOVAS ELDES ESIM110 V1.0 19
LT
1.4 Kontaktų ir LED indikatorių paskirtis
1.5 Pajungimo schema
1.6 Sistemos instaliavimas
Sistemą instaliuoti galima tik metalinėje arba nedegioje plastikinėje dėžėje. Naudojant metalinę dėžę ir kaip maitinimo šaltinį žemi-
nantį transformatorių - būtina dėžę įžeminti geltonai/žalios spalvos kabeliu. Žeminančio 230V transformatoriaus prijungimui nau-
dokite 3x0,75 mm2 vienos gyslos dvigubos izoliacijos kabelį. Žeminančio transformatoriaus pirminė apvija turi būti prijungta per
0,5A saugiklį. 230V jungiamieji maitinimo laidai negali būti grupuojami su žemos įtampos laidų grupe. Maitinimo šaltinio ir išėjimo
kontaktų prijungimui naudoti vienos gyslos 2x0,75 mm2 kabelį. Įėjimų kontaktams sujungti naudokite 0,50 mm2 vienos gyslos kabelį.
1. Įdėkite SIM kortelę su nuimtu PIN kodo reikalavimu. (PIN kodo reikalavimą išjungsite įdėję SIM kortelę į mobilų telefoną ir
pasirinkę atitinkamą punktą.) Kortelėje neturi būti senų SMS žinučių. Prijunkite anteną (be antenos prietaiso jungti negalima).
2. Sujunkite grandinę pagal pav. Nr2 pavaizduotą schemą. Prie rėlės kontaktų junkite jūsų vartų automatikos įrenginio valdymo
kontaktus. Jau instaliuotose sistemose dažniausiai būna prijungtas mygtukas vartų atidarymui. Jūs galite rėlę jungti vietoj
mygtuko arba lygiagrečiai ant jo kontaktų.
3. Prie įėjimų Z1-Z3 prijungkite sensorių ar jungiklį, kuris įsijungia tik esant pakeltiems vartams. Prie Z1 ir Z3 jungiamas žemą lygio
signalas. Prie Z2 jungiamas aukšto lygio signalas. (Įėjimų prijungimas papildoma funkcija. Instaliuoti neprivaloma).
4. Sistema greičiau kaip per minutę turi startuoti. Indikatorius LED2 turi mirksėti arba nuolat šviesti, informuodamas apie prisiregistravimą
prie GSM tinklo
Pagrindinių mazgų trumpas paaiškinimas
GSM MODEM GSM tinklo 900/1800MHz modemas
SIM CARD SIM kortelė
LED Šviesos diodų indikatorius
DEFAULT Gamyklos parametrų atstatymo kontaktai D1 ir D2
ANT GSM antenos SMA tipo jungtis
USB Mini USB jungtis
Kontaktų paskirtis
Žymėjimas Paaiškinimas
AC/DC Maitinimo šaltinio kontaktai
RELAY Rėlės galvaniškai atrištas„sausas“ kontaktas. Normaliai atviras (NO)
RELAY Rėlės galvaniškai atrištas„sausas“ kontaktas. Normaliai atviras (NO)
COM Bendras kontaktas
Z3 „žemo“ lygio įėjimas Z3
Z2 „aukšto“ lygio įėjimas Z2
Z1 „žemo“ lygio įėjimas Z1
Pav. 1
ANT
GSM
MODEM
SIM
CARD
MIC
LED1
LED2
DEFAULT D1 D2
AC/DC RELAY COM-- Z5 Z4 Z3 Z2 Z1
USB
ESIM 110
AC/DC
Maitinimo
šaltinis
Vartų kontroleris
RELAY COM Z3 Z2 Z1
+
-
Pav. 2
PASTABA
Nors ir sistemos Esim110 instaliacija yra nesudėtinga, tuo užsiimti reko-
menduojame tik jei turite minimalias elektrotechnikos ar elektronikos ži-
nias, kitaip galite sugadinti prietaisą.
LED indikatorių paskirtis
LED1 SIM kortelės būsenos
indikatorius
LED2 Tinklo būsenos indi-
katorius
LED1 būsena Reikšmė
Nedega SIM kortelė dir-
ba tvarkingai
Dega nuolatos SIM kortelės
klaida
LED2 būsena Reikšmė
Nedega Nėra ryšio
Mirksi 1 kartus į sekundę Silpnas ryšys
Mirksi 3 kartą į sekundę Vidutiniškas ryšys
Dega nuolatos Puikus ryšys

20
2. Sistemos paruošimas darbui ir
pagrindinės valdymo komandos
!!! LABAI SVARBU !!!
Šiame vartotojo vadove apatinis brūkšnys _ visur reiškia tarpelį, t.y. rašant SMS žinutę vietoj šio brūkšnio turi būti daromas vieno
simbolio tarpelis. XXXX – reiškia slaptažodį. Žinutės pradžioje ir gale neturi būti jokio tarpelio.
Patogesniam ir greitesniam sistemos Esim110 parametrų nustatymui galite naudoti kompiuterį, USB kabelį ir kongūravimo pro-
gramą Esim110 CongTool. Plačiau skaitykite 3.2 skyriuje.
2.1 Įrenginio kalbos pasirinkimas bei SMS centro numerio patikrinimas
Kalbą, kuria su vartotoju bendraus įrenginys, galima išsirinkti tik tol, kol nepakeistas gamyklinis slaptažodis. Norėdami pakeisti kalbą
jau sukongūruotoje sistemoje atstatykite gamintojo parametrus kaip aprašyta 3.1 priede.
Iš savo mobilaus telefono į Esim110 esančios SIM
kortelės abonentinį numerį nusiųskite SMS žinutę su
pageidaujamos kalbos kodu.
Pvz. Norėdami, nustatytį lietuvių kalbą siųskite
SMS žinutę : LT
Maždaug po 30-60 sekundžių sulauksite SMS žinutės:
„Lietuvių kalba nustatyta.“ Jei gavote šią žinutę perei-
kite prie 2.2 punkto. Jei SMS žinutės negavote iš savo
mobilaus telefono paskambinkite į sistemą Esim110 ir palaukite kol sistema nutrauks skambutį. Turi ateiti SMS žinutė: „Prašome
pakeisti gamyklinį slaptažodį.“ Jei nieko negavote, pakeiskite SMS centro numerį.
SMS centro numeris yra saugomas SIM kortelėje, todėl jei sistemos Esim110 SIM kor telę prieš tai naudojote mobiliajame telefone
ir sėkmingai siuntėte SMS pranešimus, SMS centro numerio keisti nereikia. Dažniausiai SIM kortelės SMS centro numeris būna jau
įvestas operatoriaus.
SMS centro numerio keitimas daromas siunčiant SMS žinutę
XXXX tai slaptažodis. Gamintojo suteiktas slaptažodis yra keturi nuliai 0000.Vietoj vienetų rašomas SMS centro numeris. Jei nežinote
SMS centro numerio, jo paklauskite mobilaus ryšio operatoriaus.
Pvz. 0000_SMS_+37069899992
Žinutes siųskite tuo abonentiniu numeriu, kurio SIM kortelė yra įdėta į sistemą. Jei viską suvedėte teisingai sistema atsiųs žinutę: SMS
centro numeris sėkmingai pakeistas į +37011111111
2.2 Administratoriaus slaptažodis ir jo keitimas
Visos siunčiamos komandos yra pradedamos slaptažodžiu, todėl prašome jį įsidėmėti. Gamintojo suteiktas slaptažodis yra keturi
nuliai 0000. Gamyklinį slaptažodį būtina pakeisti kitu. Norėdami pakeisti gamyklinį slaptažodį į sistemos Esim110 numerį siųskite
SMS žinutę:
Norėdami pakeisti anksčiau sukurtą slaptažodį nauju siųskite tokią SMS žinutę:
XXXX bet koks vartotojo sukurtas keturženklis slaptažodis, išskyrus keturis nulius. Negalima naudoti taškų, dvitaškių bei tarpelių.
YYYY reiškia seną slaptažodį. Jei pamiršote slaptažodį, galite atstatyti gamintojo parametrus kaip aprašyta 3.1 priede.
Kalba Kodas
lietuvių LT
anglų EN
rusų RU
Galimų
kalbų
lentelė
ESIM 110
XXXX_SMS_+37011111111
0000_PSW_XXXX
YYYY_PSW_XXXX
Other manuals for ESIM110
2
Table of contents
Languages:
Other Eldes Controllers manuals
Popular Controllers manuals by other brands

Emerson
Emerson HVAC Drive H300 Installation and commissioning guide
Siemens
Siemens SIMATIC NET S7-1200 operating instructions
WORLD LEDS GO
WORLD LEDS GO 8CT318WLG manual

Sunricher
Sunricher SR-ZV9001T-CCT-US instruction manual
LEGRAND
LEGRAND 0 035 40 quick guide
Osram
Osram ENCELIUM EN-WS-SC3D-GB2-WT Wiring and installation instruction
Honeywell
Honeywell HR 40 F Mounting and operation instructions

Festo
Festo CMMP-AS-***-M0 Series Description

Senztek
Senztek SolaSmart Plus user guide
Omron
Omron SGE Series manual
HomeMatic
HomeMatic HM-LC-Sw1-Pl-DN-R1 operating manual
Newton Waterproofing
Newton Waterproofing Control Panel-Pro Operational manual

