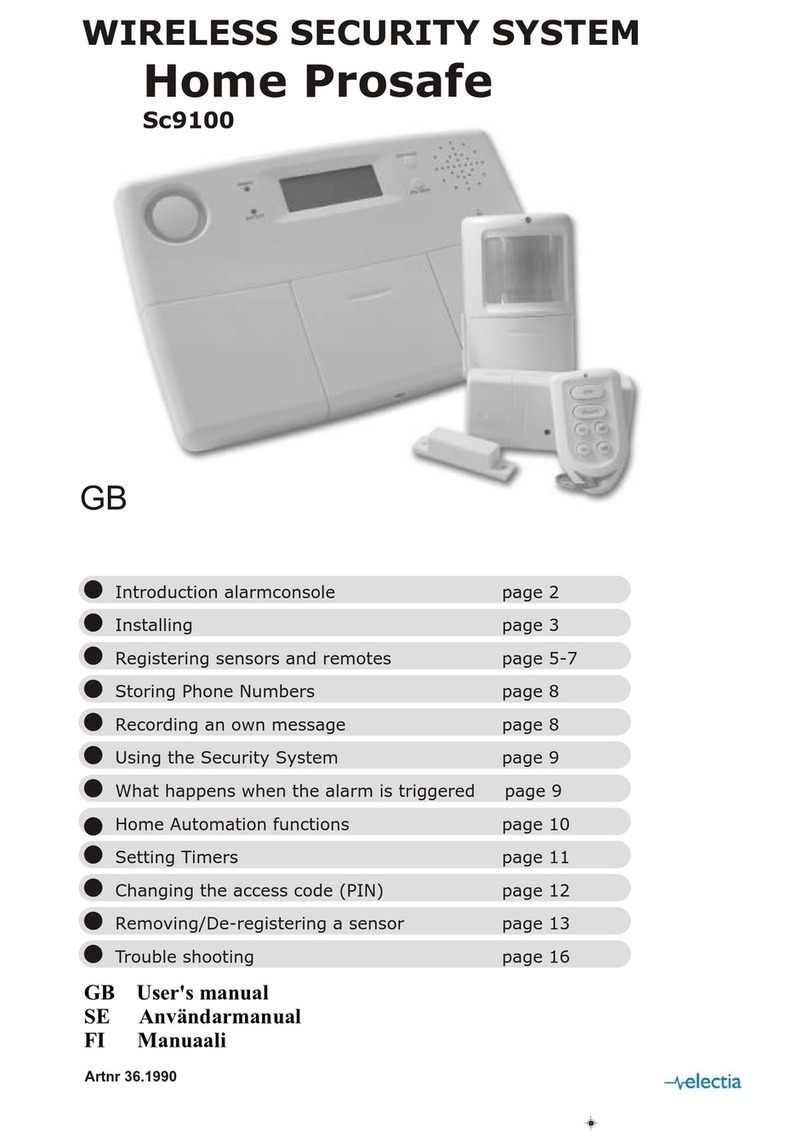
Electia CTC 1132 User manual

868MHz
Home Prosafe 1132 GSM
CTC 1132
GB User manual
SE Användarmanual
FI Manuaali
Art 36.2868

Table of Contents
Application Overview…………………………………………1
I. Identifying the parts……………………………..…………………………..……………………………………1
II. Insert GSM SIM Card………………………………..…………………………………………………………..2
III. The power supply……………………………………..………………………………………………………...2
IV. How to install the Control Panel……………………………………………………………………………….2
V. 2-level passwords……………………………………..…………………………………………………..3
VI. Getting Started……………………………………………..……………..………………………………….…3
Configuring Your System……………………………………………4
I. Entering programming mode………………………..………………………………………………………….4
II. Telephone Settings…………………………..…………………….……………………………………………5
III. General Settings………………………………..……………………..………………………………………8
IV. Special Settings……………………………………………………………………………………………13
V. ADD/Delete Device.…………………………..……………………………………………………………….16
VI. SMS Editor………….. ……………………..……………………………………………………………..…23
VII. SMS Keyword..……………. ……………………..………………………………………………………...24
VIII. Country Code………….. ……………………..…………………………………………………………..…24
IX. GSM Signal..……………. ……………………..………………………………………………………...25
X. Walk Test…………………………………………………………………………………………………25
XI. Reset GSM……………………………………………………………………………………………………..25
Operation……………………………………………………………26
I. Entering User Menu…………………………..…………………………………………………………….…..26
II. Away (Alarm On) Mode….………………………..………………………………………………………….26
III. Forced Arming ……..……. ……………………..…………………………………………………………..27
IV. Disarm (Alarm off) Mode……………………………..………………………………………………………28
V. Home Arm Mode…..……….……………………………..……………………………..……………………38
VI. Partial (By-pass) Arm mode…………………………………..……………………………………………..29
VII. Alarm Activation…………………………………..…………………………………………………………..30
VIII. Stop the Alarm and Alarm Display……. ……………………..……………………………………………31
IX. Event Log….……………………………..………………………………………………………………..32
X.Power Switch “Home Matic”………………………………………………………………………………….32
XI. False Alarm Management…………………………..………………………………………………………33
XII. Remote Commanding………………………..……………………………..………………………..…33
XIII. Dialling & Call Acknowledgment………………………..…………………………..……………………38
Appendix………………………………………………………40
I. Reset Procedure…………….………………..……………..……………………………………………….….40

CTC-1132 868AM 2007.07.18
1
3
Application Overview
I. Identifying the parts
Backlit LCD Display
Green Power LED
— ON: AC Power is On.
— OFF: AC Power failure.
Yellow Fault LED
— On: when any fault situation Fault is
detected.
— Off: when all fault conditions are
restored. (The Unit is in Normal
Mode)
Numeric Keys
SKey
—Programming mode: press this key
to move the cursor and scroll the
display upwards.
TKey
—Programming mode: press this key to
move the cursor and scroll the
display downwards.
Key
— Programming mode: use this key to
delete a digit, cancel the selection,
abort the current screen, return to the
previous screen, etc.
OK Key
—To confirm the keyed-in data or
confirm the selection.
# Key
— Enter Programming menu
¿Key
— Enter Installer menu.
Buzzer
DC jack
—DC 9V 500mA power adapter
connection.
2 Mounting Holes & Tamper.
SIM card holder cover
Battery Switch.
Microphone.
1
2
7
8
5
9
6
4
ON
123
456
78
9
abc def
ghi jkl mno
pqrs tuv wxyz

CTC-1132 868AM 2007.07.18
2
II. Insert GSM SIM Card
CTC-1132 Control Panel features built-in GSM
communication facility to make message
reporting to the phone numbers pre-
programmed within the system.
zTo Insert your SIM card:
The GSM component is situated inside the
Power Supply compartment as pointed out
by the arrow below:
SIM CARD
zUnlock the SIM card base by sliding the
cover toward “OPEN-backward” direction.
zSpring open the SIM card slot and insert
your new SIM card.
zReplace the SIM slot onto the base lightly.
zRemember to lock the SIM card base by
sliding the cover toward “LOCK-forward”
direction.
<
<I
IM
MP
PO
OR
RT
TA
AN
NT
T
N
NO
OT
TE
E>
>
Be aware to only insert or remove SIM card
when the Control Panel is completely
depleted of any power residual.
III. The Power Supply
An AC power adapter is required to connect to
a wall outlet. Be sure only to use an adapter
with the appropriate AC voltage rating to
prevent component damage. A DC 9V output
and 500mA adapter is generally used to power
the Control Panel.
zRechargeable Battery
zIn addition to the adapter, there is a
rechargeable battery inside the Control
Panel, which serves as a back up in case
of a power failure.
zThe battery used is a Ni-MH 600mAH
7.2V rechargeable battery.
zDuring normal operation, the AC power
adapter is used to supply power to the
Control Panel and at the same time
recharge the battery.
zWhen the battery is fully charged, it can
provide back-up power for a period of
about 8 hours. It takes approximately 48
hours to fully charge the battery.
<
<N
NO
OT
TE
E>
>
"If the AC power is missing and the
battery is near exhaustion, a low
battery message will be displayed and
the internal siren and Backlit feature
will be disabled to conserve power.
IV. How to install the Control
Panel
The easiest way to get to know the system
and get it up and running quickly is to get
all the devices and accessories
programmed on a tabletop before locating
and mounting them.
The Control Panel can be mounted on the wall
or wherever desired. Ensure the Control Panel
is fitted at approximately chest height where
the display can be easily seen and the keypad
convenient to operate.
zUsing the 2 holes of the Wall Mounting
Cross Bracket as a template, mark off the
holes’ positions.
zDrill 2 holes and fix the screws & plugs
provided.
zHook the CTC-1132 unit onto the Wall
Mounting Cross Bracket (holding the unit
with the front facing you).

CTC-1132 868AM 2007.07.18
3
V. 2 – level passwords
In order to provide highest security in operating
the system, CTC-1132 offers 2 levels of
authorization. That is
9Personal PIN Code
9Master Code
A. PIN Code
zThere are a total of 4 User PIN Codes
per each system. The PIN Code is
the 1st level of password. It has the
authorization for daily operation, such
as
9Arm the system
9Disarm the system
9Enter the Home mode
9Partially arm the system (By-pass
mode)
9Display Fault events
9View the Event log
9Power Switch (Home Matic)
z“1234” is set as default User #1 PIN
Code by the factory.
zUser PIN code #2~#4 are deactivated
by factory default
B. Master Code
zThe Master Code has the
authorization to enter Programming
mode. In Programming mode, the
following options can be programmed.
9Add the device in
9Edit the devices
9Remove a device
9Program the External Siren
9Edit Power Switch “HomeMatic”
9Set Pin Code
9Set Temporary Code
9Set Duress Code
9Set Master Code
9Set Telephone Numbers
9Set Messages
9Set SMS related Features
9Select Walk Test mode
9GSM signal
9SMS Keyword
z“1111” is set as default Master Code
by the factory.
<
<N
NO
OT
TE
E>
>
)No any two codes can be the same, if
so, the message, “Code in use,
Select another” will be displayed to
prompt the user to choose differently .
VI. Getting Started
Step 1. Find a suitable location for the Control
Panel to be installed.
Step 2. Apply the AC Power. You will hear a
long beep. “Alarm On” will be
displayed on the first line and “00:01
01 Jan” displayed on the second line
of the screen indicating the system is
in Away mode (this is the default
mode)
Step 3. Press “ 1 “key on the keypad, the
display will show.
E n t e r C o d e
¿. . .
Step 4. Key in the remaining “234” (default
User1PIN code, 1234) within 30 sec.
Step 5. Press “OK”. You will hear 2 short
beeps and the display will show.
A l a r m O f f
0 0 : 0 1 0 1 J a n
The system is now in Disarmed mode.
<
<N
NO
OT
TE
E>
>
)In Step 4, press ““ (cancel) key will
clear one previously entered code.
)“OK” key confirming the entered PIN
code should be pressed within 30 sec.
Otherwise, the display will go back to
“Alarm On”and the system remains
armed.
)During entering PIN code, if more than
20 keys (including “OK” & “ “key)
were pressed without a valid PIN code

CTC-1132 868AM 2007.07.18
4
strings, it will inhibit further key
presses for 1 minute.
)In Step3, if you press a key other than
numeric keys, the display will remain
the same requesting you to key in
“1234” (default PIN code) and then
press “OK”.
)The Control Panel has “Screen Save”
function. The “Alarm off” message
will be displayed for 160 sec. only.
Afterwards only current date & time is
displayed on the second row line.
Step 6. Please wait for 2 to 3 minutes for the
system to read it status. Then, if the
yellow LED turns on, it indicates that
there is a fault. Press “1234” to enter
the user menu within 30 sec.
Step 7. Press “OK” and the display will show.
F a u l t D s p
A w a y A r m
H o m e A r m
B y p a s s
Log
P o w e r S w i t c h
Step 8. Choose “Fault Dsp” and press “OK”
The following possible Fault will
display:
Configuring your system
I. Entering Programming mode
If the system is in Disarmed (Alarm off) mode,
to enter the Programming mode, follow the
steps below.
Step 1. Press “#”key.
The screen will prompt you to enter
the User1 PIN code.
P - M o d e E n t e r
P - C o d e . . . .
Step 2. Key in “1234” (default “User1” PIN
code) within 30 sec. Then, press “OK”
The screen will prompt you to enter
the Master PIN code.
P - M o d e E n t e r
M - C o d e . . . .
<
<N
NO
OT
TE
E>
>
)During keying in the PIN code, press
““ will clear one previously entered
code. If the code field is empty, press
““, the screen will exit and return to
“Alarm Off”screen.
Step 3. Key in “1111” (default “Master”Code)
within 30 sec.
Step 4. Press “OK”
The following message is displayed
for 2 sec.
P r o g r a m M e n u
M a k e a S e l e c t i o n
Step 5. Then the Programming Main menu will
be displayed.
O
W
a l k T e s t
Tel.Setting v
<
<N
NO
OT
TE
E>
>
)The cursor is indicated by a flashing dot
on the left upper corner. It can be
move up & down by pressing “S”&
“T” key respectively.
Step 6. Press “S”“T” keys to move the cursor
downward or upward. The screen is
also scrolled down or up respectively.
The following items can be selected.
9Walk Test
9Tel. Setting
9Gen. Settings.
9Spc. Settings
9Devices +/-
9SMS Editor
9SMS Keyword
9Country Code
9GSM Signal
9Reset GSM
Step 7. After making a selection by moving the
cursor to the desired item, press “OK”
to confirm the selection. The display
will show you the individual
programming screen accordingly.
<
<N
NO
OT
TE
E>
>
)If a down-arrow symbol “V”appears on

CTC-1132 868AM 2007.07.18
5
the last column of the screen, it
indicates the selection list can be
downwards scrolled. If the lowest
position is reached, the down-arrow
symbol disappears.
)If an up-arrow symbol “Λ” appears on
the last column of the screen, it
indicates the selection list can be
upwards scrolled. If the upper
position is reached, the up-arrow
symbol disappears.
)Pressing “ “, the screen will also
return to “Alarm Off” screen.
)After User1, 2, 3 & 4 PIN codes and
Master code are programmed with
new numbers, remember to enter the
newly programmed codes when
accessing Programming mode
afterwards.
)In Programming mode, if no key is
pressed within 5 minutes, the Control
Panel will automatically exit
Programming mode to Alarm Off
mode.
II. Telephone Settings
In “Telephone Settings” menu, the following
parameters can be programmed at your
discretion.
*T e l . N u m b e r s
R e c o r d M s g
T e s t R e p o r t
1. Telephone Numbers
zIn “Tel.Setting” menu, select “Tel Numbers”,
the screen allows you to set/change/delete
the emergency telephone numbers.
zA maximum of six numbers can be stored
in priority order (in the order of A. B. … to
F).
<
<N
NO
OT
TE
E>
>
)A, B,… to F represent the priority
number of the six tel. numbers
respectively.
)If the tel. number for a particular priority
number has not been stored, three
dots are displayed indicating the
memory spot is empty.
)Only 11 digits can be displayed on the
tel. Numbers list. Non fitting numbers
are indicated with after the incomplete
number.
zStore Tel. Numbers
Step 1. Move the curser to the “Tel. Number”
submenu and press “OK”.
The display will show the following
screen when no tel. number has been
entered:
* A)...
B)...
C)...
D)...
E)...
F)...
Step 2. Choose from “A” to “F” sets to store
your phone number. Then press “OK”.
<
<N
NO
OT
TE
E>
>
)The phone number “A” must be
entered, or the Panel will not dial
out at the Alarm situation.
The following screen will be shown for
you to enter the phone number.
E n t e r n e w N o . + O K
................
Step 3. Key in your phone number.
Step 4. Press “OK”
The screen will then prompt you to
choose:
* V o i c e R e p o r t
S M S r e p o r t
<
<N
NO
OT
TE
E>
>
Voice Reporting: For an alarm event,
the reporitng is done via playing voice
messages. Available ones are: Burglar,
Medical Emergency, Fire and Panic to
the phone numbers programmed at
this step.
SMS Reporting: For an alarm event,
the reporting is done via sending pre-
edited SMS messages to the mobile
phone numbers programmed at this
step.
Step 5. Select a preferred reporting style and
press “OK”, The screen will return to

CTC-1132 868AM 2007.07.18
6
the “Tel. Number” screen to show you
the stored phone number with a letter
V indicting it’s a Voice report style and
a letter S for SMS report style.
* A ) 2 2 1 8 0 5 5 1 V
B ) 2 6 9 4 0 6 3 3 S
<
<N
NO
OT
TE
E>
>
)The maximum length of a number is 20
digits including “¿” & “#”. If this length
is reached, the Control Panel will
sound 5 beeps and no key can be
keyed in except “ “ key and “OK”
key.
)During entering the number, the “ “ key
is used as backspace. However, if the
number field is empty, pressing the
“ “ key, the screen will return to
“Tel. Numbers” screen.
)During entering the number, when the
15th position is reached, non-fitting
numbers will scroll sideward to the left.
zChange Tel. Numbers
Step 1. On the “Tel. Number” screen. Press
“OK”.
Step 2. The following screen will be displayed
for you to confirm if you really want to
change.
C h a n g e N u m b e r
2 2 1 8 0 5 5 1 ? ( O k )
Step 3. Press “OK” to confirm. The following
screen will be displayed for you to
enter the new number.
E n t e r n e w N o . + O k
. . . . . . . . . . . . . . . .
<
<N
NO
OT
TE
E>
>
)Press “ “ to abort and the screen
returns to “Tel. Number”screen.
Step 4. Key in the new number and choose a
preferred reporting method.
Step 5. Press “OK”
The new number will then override the
previous one. The screen returns to
“Tel. Number” screen.
zDelete Tel. Numbers
To delete a telephone number, follow the Step
1 to Step 3 of “Changing Tel. Number”
described above, and when “Enter new No.”
prompt screen is displayed.
E n t e r n e w N o . + O k
................
Step 4. Press “OK”, then the previous stored
number will be deleted.
2. Message Menu
zThis menu is for you to record and play the
emergency messages.
R e c o r d M s g
T e s t r e p o r t
zWith a total capacity of 20 sec, you are
allowed to record the emergency
messages in 5 parts.
Address message – 8 sec.
Burglar message – 3 sec.
Fire message - 3 sec.
Panic message - 3 sec.
Emergency message - 3 sec.
<
<I
IM
MP
PO
OR
RT
TA
AN
NT
T
N
NO
OT
TE
E>
>
)The “Address message” must be
recorded, or the Panel will not dial
out at the Alarm situation.
zIn an emergency, the Control Panel will
dial the emergency phone numbers
according to the priority order, then first
play the Address message and then play
the specific part message (Burglar, Fire,
Panic and Emergency) according to the
nature of the alarm raised.
zRecording the messages
When the “Record Msg.” is selected, the
following “Recording Selection” menu is
displayed for you to select which part of the
message is to be recorded.
R e c . A d d r e s s
R e c . S p e c i f I c
Stop

CTC-1132 868AM 2007.07.18
7
zRecording Address message
Step 1. Move the cursor to select “Rec.
Address” and then press “OK”, the
screen will ask you to confirm.
C h a n g e
A d d r e s s M s g + O k
Step 2. Press “ “ to abort. Or press “OK”
to confirm. A prompt Message will be
displayed for 2 sec.
S t a r t R e c o r d i n g
A f t e r t h e B e e p
Step 3. After 2 sec, the Control Panel will
sound a long beep, the following
prompt message will be displayed,
and recording can be started.
* N o w R e c o r d i n g *
E n d w i t h O k
Step 4. Press “OK” to end the message; the
screen will go to “Specific Part
Selection” menu to allow you to
select a specific part to be recorded.
<
<N
NO
OT
TE
E>
>
)To end recoridng at any time, press “
“ and the message will be saved as it is.
The screen returns to “Recording
Selection” menu.
)The maximum length of Address
message is 8 sec. When the 8 sec
duration is over, recording will be
stopped automatically. The message
being recorded will be saved.
)When recording, make sure you are
facing the microphone and are within 30
cm infront of it.
zRecording Specific Alarm messages
If “Rec. Specific” is chosen, the
specific alarm message selection
menu is displayed for you to select
the desired one.
B u r g l a r M s g
F i r e M s g
PA Msg
E m e r g e n . M s g
Stop
Selection a specific message and
follow the same procedure as those
for recording Address message to
record each specific message
respectively.
<
<N
NO
OT
TE
E>
>
)The message length for each specific
message is 3 sec only.
zChanging a message
If for any reason, you want to change any part
of the recorded message, just follow the same
procedure to record a new message for that
part. The new message will override the
previous one.
zTest Report
Control unit allows you to test whether
telephone function is working properly or not
with the pre-set telephone numbers.
Step 1: Using “V” or ”Λ” cursors to select the
test-call number to test dial. Press
“OK” to confirm.
Step 2: Following screen will appear:
D i a l i n g . . . . . . . . .
. . . . . . . . . . . . . . . .
Step 3: Panel will show what messages are
being played. The word prompt will
shows the following:
“Now Playing:
Address Msg
Emergen. Msg
PA . Msg
Fire Msg.
Burglar Msg
The “Address Message” will be
played first. Followed by “Emergency
Message” and “Burglar Message”.
PA . Message The last “” will be
played to the recipient and to confirm
their reception & end the call by
pressing DTMF “#9”
<
<N
NO
OT
TE
E>
>
)Messages will be played in the following
order: Address, Emergency Panic ,Fire
& Burglar message.
)Until the recipient acknowledges and
confirms acknowledgement on his or her
phone, the control unit will play the

CTC-1132 868AM 2007.07.18
8
message for 85 sec. before returning to
selection menu.
)Pressing “ ” will return you to the menu
with the list of numbers.
)If the Burglar message, Emergency
Message, Panic message or Fire
message has not been recorded, when
you do the Test Report, it will be ignored.
zChanging a message
If for any reason, you want to change any part
of the recorded message, just follow the same
procedure to record a new message for that
part. The new message will override the
previous one.
III. General Settings
In “General Settings” menu, the following
parameters can be programmed at your
discretion.
*P i n C o d e
T e m p . C o d e
D u r e s s C o d e
M a s t e r C o d e
A . E n t r y T i m e
A . E x i t T i m e
H . E n t r y T i m e
H . E x i t T i m e
D o o r C h i m e
Time
Date
P a n e l S i r e n
L a n g u a g e
1. Pin Code
zThere are 4 User Pin Code in total, and
each consists of 4 digits. User PIN code
#1 is activated with “1234”as factory
default. Before you set your own User PIN
Code #1, “1234” has to be keyed in every
time “Entering Code” is required.
zUser PIN code #2~#4 are deactivated by
factory default.
zAll 4 User Pin Codes are used to
regularly arm/disarm the system and are
allowed to access the Programming mode
accompanied with the Master Code.
zTo set your own PIN code
Step 1. Move the cursor to the item “Pin Code”
then press “OK” the following screen
is displayed.
*1) ¿¿¿¿
2)....
3)....
4)....
Step 2. Move the cursor to the desired # of
User Pin Code” then press “OK” the
following screen is displayed.
E n t e r N e w C o d e
....
Step 3. You can key in your preferred 4-digit
number then press “OK”.
Step 4. The following screen will be displayed.
Repeat New Code
....
You are requested to enter the same
code again (as the one entered in Step
3)
Step 5. Key in the same code again, then
press “OK”. If the code is correct, the
following screen will ask you to enter
the user’s name for reference:
E n t e r N e w N a m e
.......... +Ok
Step 6. You are now invited to give a name for
this User who will be using this newly
programmed code to help better
understand system events. You can
enter up to 10 letters as you want for
the name followed by press “OK” or
just press “OK”for no name. Please
see section “User Naming” for details.
Then, the screen returns to the “PIN
Code” menu showing post-
programmed status of each User PIN
code:
*1 ) M R . S M I T H
2 ) M R S . S M I T H
3) ¿¿¿¿¿¿
4)....
<
<N
NO
OT
TE
E>
>
)2) “MRS. SMITH” representing the

CTC-1132 868AM 2007.07.18
9
1 1
2 2ABCabc
3 3DEFdef
4 4GHIghi
5 5JKLjkl
6 6MNOmno
7 7PQRSpqrs
8 8TUVtuv
9 9WXYZwxyz
0 0<space>/-&’.”+
¿¿
# #
4Delete character
and backspace
User #2 PIN code is set up and user
name specified.
)3) “¿¿¿¿”representing this User #3
code is programmed without user
name specified.
)4) “●●●●”representing the User #4
code is not yet set up for activation.
Step 8. Proceed to set additional User PIN
Codes as instructed from Step 2 ~
Step 7. When done, press “ ” and
the screen returns to “General
settings”menu, setting the PIN code
is completed.
<
<N
NO
OT
TE
E>
>
)In Step 5, if the code is not correct, a
“Code is not correct” prompt message
will be displayed 2 sec., and you are
requested to repeat Step 3 to enter
again.
User Naming
Each individual User can be given a name for
easy recogniztion when understanding system
events. User Names can be named in the first-
time setting or by resetting. The procedure is
similar for both situations.
zWhen the “Enter New Name”screen is
displayed, the keypad can be used to
enter text. Simply locate the
corresponding numeric keys to the desired
alphabets/symbols and press repeatedly
until the wanted alphabets/symbols appear.
Release the key and the flashing cursor
automatically jumps to the next position for
you to continue with the next letter by the
same method.
zThe keys have the following functions:
zWhen the name is complete, press “OK”
to confirm and return to the previous or
main menu.
<
<N
NO
OT
TE
E>
>
)The name can be erased or clearing
the display by entering backward
spaces “ ” and pressing “OK”.
zTo Delete User PIN code
Except User #1 which is activated by factory
default and can’t be deleted in any way,
User#2, 3 and 4 PIN code can be deleted by
following the steps below:
Step 1. Move the cursor to the item “Pin Code”
then press “OK”, the following screen
will show the status of each User PIN
code:
*1 ) M R . S M I T H
2 ) M R S . S M I T H
3) ¿¿¿¿¿¿
4)......
Step 2. Move the cursor to the desired # (2~4)
of programmed user PIN code to be
deleted, then press “OK” the following
screen is displayed.
Delete
P i n - C o d e ( + O k ) ?
Step 3. Press “OK” and the screen returns to
previous one with the deleted User
PIN code marked with “●●●●”.
zTo Edit User PIN code
All 4 User PIN code can be edited freely by the
following steps:
Step 1. Move the cursor to the item “Pin Code”
then press “OK” the following screen
will show the status of each User PIN
code:
*1 ) M R . S M I T H
2 ) M R S . S M I T H
3) ¿¿¿¿¿¿
4)......
Step 2. Move the cursor to the desired # (2~4)
of programmed user PIN code to be
deactivated/deleted, then press “OK”
the following screen is displayed.
Delete
P i n - C o d e ( + O k )

CTC-1132 868AM 2007.07.18
10
Step 3. Press “ “ key, the next screen will
ask you to enter your new PIN code
and repeat it for double confirmation.
Step 4. Follow the same steps as described in
“Set your own pin code” to edit.
2. Temporary Code
zThe Temporary Code is used to
arm/disarm the system for a temporary
user and is valid only once per Arming and
once per Disarming. Afterwards, the
Temporary Code is automatically erased
and needs to be reset for a new Temporary
user .
zThe Temp. Code consists of 4 digits and is
not activated as default by the factory.
zTo Set Temporary Code
Step 1. Use the arrow keys to select “Temp.
Code” and press “OK”
E n t e r N e w C o d e
....
Step 2. You can key in your preferred 4-digit
number and then press “OK”
R e p e a t N e w C o d e
....
Step 3. You are prompted to re-enter the same
code again and press “OK”
If the code is correct, the screen
changes to the following:
*L a t c h . R p t . O f f
L a t c h . R p t . O n
You are requested to choose to have
all arm/disarm actions of the user to be
reported to the Central Monitoring
Station or not.
Step 4. Press “S” “T” keys to select your
option and press “OK”. The screen
returns to “General Setting” menu,
setting the Temporary code is
completed.
<
<N
NO
OT
TE
E>
>
)There is no User Naming feature for
Temp. Code.
)
zTo Delete Temp. Code
After the Temp. Code is programmed, it can be
deleted by following the steps below:
Step 1. Move the cursor to the item “Temp.
Code” then press “OK”.
Delete
P i n - C o d e ( + O k )
Step 2. Press “OK” and the screen returns to
“Gen. Settings Menu”
zTo Edit Temp. Code
After the Temp. Code is programmed, it can be
edited by following the steps below:
Step 1. Move the cursor to the item “Temp.
Code” then press “OK”.
Delete
P i n - C o d e ( + O k )
Step 2. Press “ “ key, the next screen will
ask you to enter your new Temp. code
and repeat it for double confirmation.
Step 3. Press “OK”. The screen returns to
“General Setting” menu, editing the
Temporary code is now completed.
3. Duress Code
zDuress Code can arm/disarm the system.
When this code is used for accessing the
system, the Control Panel will report a
secret alarm message without sounding
the siren to the Call recipient to indicate of
a “Duress Situation in Progress”.
zThe Duress Code consists of 4 digits and
is not activated as default by the factory.
zTo Set Duress Code
Step 1. Use the arrow keys to select “Duress
Code” and press “OK”
E n t e r N e w C o d e
....
Step 2. You can key in your preferred 4-digit
number and then press “OK”
Repeat New Code
....
Step 3. You are prompted to re-enter the same
code again and press “OK”

CTC-1132 868AM 2007.07.18
11
<
<I
IM
MP
PO
OR
RT
TA
AN
NT
T
N
NO
OT
TE
E>
>
When entering the following individual
setting screens, the value displayed on the
screen is the current setting of each item.
If it is not necessary to change the current
setting, just press “ “to escape.
If the code is correct, the screen
returns to “General Setting” menu,
setting the Duress code is completed.
zTo Delete Duress Code
After the DuressCode is programmed, it can be
deactivated/deleted by following the steps
below:
Step 1. To delete programmed Duress code,
select the “Duress Code” from the
“Gen. Setting Menu”, then, the
screen will show:
Delete
P i n - C o d e ( + O k ) ?
Step 2. Press “OK” to confirm.
zTo Edit Duress Code
After the DuressCode is programmed, it can be
edited by following the steps below:
Step 1. To edit programmed Duress code,
select the “Duress Code” from the
“Gen. Setting Menu”, then, the
screen will show:
Delete
P i n - C o d e ( + O k ) ?
Step 2. Press “ “ key, the next screen will
ask you to enter your new Duress
code and repeat it for double
confirmation.
Step 3. Press “OK” and editing the Duress
code is completed.
4. Master Code
zMaster Code is used for accessing the
Programming mode and it is set to “1111”
as factory default. Before you set your
own Master PIN code, “1111” has to be
keyed in every time it is required.
zTo set your Master Code, follow the same
steps as in setting the “Duress Code”
described above.
zTo Edit Master Code
After the Master Code is programmed, it can
be edited by following the same steps as in
editing the Duress Code described above.
<
<N
NO
OT
TE
E>
>
)The Master code can not be
deactivated (same as the User #1 PIN
Code).
)The Master Code is used only when
you enter the Programming mode. In
other cases, only PIN Code should be
entered.
5. A. Entry Time
This is for you to select the Entry Delay time
when Away Arming. Options available are 0
sec., 10 sec., 20 sec., up to 70 sec. in 10-sec
increments.
A.Entry Time
2 0 s e c . (
ΛVOK)
zUse “S”,“T”keys to switch between
options.
zPress “OK” to confirm.
z20 sec. is set as factory default.
<
<N
NO
OT
TE
E>
>
)Full Arm Entry time applies only to the
zone that a Door Contact or PIR
Detector is installed and is set to
“Entry”.
)If incorrect PIN code is entered and/or
the entry delay time has expired, then
the system will trigger the Burglar
alarm.
6. A. Exit Time
This is for you to select the Exit Delay time
when Full Arming. Options available are 0 sec.,
10 sec., 20 sec. up to 70 sec. in 10-sec
increments.
A . E x i t T i m e
3 0 s e c . (
ΛVOK)

CTC-1132 868AM 2007.07.18
12
zUse “S”,”T” keys to switch between
options.
zPress “OK” to confirm.
z30 sec. is set as factory default.
<
<N
NO
OT
TE
E>
>
)Full Arm Exit time applies only to the
zone that a Door Contact or PIR
Detector is installed and is set to
“Entry”.
)If incorrect PIN code is entered and/or
the Exit delay time has expired, then
the system will trigger the Burglar
alarm
7. H. Entry Time
This is for you to select the Entry Delay time
when Home Arming. Options available are 0
sec., 10 sec., 20 sec., up to 70 sec. in 10-sec
increments.
H . E n t r y T i m e
2 0 s e c . ( ΛV O K )
zUse “S”,“T”keys to switch between
options.
zPress “OK” to confirm.
z20 sec. is set as factory default.
<
<N
NO
OT
TE
E>
>
)Home Arm Entry Delay time applies
only to the zone that a Door Contact
or PIR Detector is installed and is set
to “Entry”.
)If incorrect PIN code is entered and/or
the entry delay time has expired, then
the system will trigger the Burglar
alarm
8. H. Exit Time
This is for you to select the Exit Delay time
when Home Arming. Options available are 0
sec., 10 sec., 20 sec. up to 70 sec. in 10-sec
increments.
H . E x i t T i m e
3 0 s e c . ( ΛV O K )
zUse “S”,”T” keys to switch between
options.
zPress “OK” to confirm.
z30 sec. is set as factory default.
<
<N
NO
OT
TE
E>
>
)Home Arm Exit Delay time applies only
to the zone that a Door Contact or PIR
Detector is installed and is set to
“Entry”.
)If incorrect PIN code is entered and/or
the Exit delay time is expired, then the
system will trigger the Burglar alarm.
9. Door Chime
This is for you to decide whether the Control
Panel will sound a Door Chime if the Door
Contact or PIR Detector is activated at the
Entry Point while the system is in Disarmed
mode.
Door Chi me On
Door Chi me Of f
zPress “S”,”T”keys to select the option
followed by “¿” appearing next to the
selected option.
zPress “OK” to confirm
z“Door Chime Off” is set as factory default.
<
<N
NO
OT
TE
E>
>
)When Door Chime is disabled, there
will be no door chime when Entry
point DC or PIR is triggered at
Disarmed mode.
)When Door Chime is enabled, the
system will make a “Ding-Dong”
sound to inform user that a DC or PIR
at Entry Point is triggered at Disarmed
mode.
10. Time
This is for you to program the current time to
be displayed. (hour & minute)
T i m e S e t t i n g
00: 00 (
S
T
OK)
zHour flashes first, use “S”,”T” keys to
choose a correct number for the current
hour. Hours are indicated by “00 ~ 23”.
zPress “OK” to confirm. Next, the screen

CTC-1132 868AM 2007.07.18
13
will be displayed for you to set the correct
minute.
zMinutes are then flashing.
zUse “S”,”T” keys to choose a correct
number.
zPress “OK” to confirm.
11. Date
This is for you to set the current date.
D a t e S e t t i n g
1 5 J a n (
S
T
OK)
zMonths flash first, use “S”,”T” keys to
choose the current Month.
zPress “OK” to confirm. Next, the screen
will be displayed for you to set the current
day.
zDays are then flashing.
zUse “S”,”T” keys to choose the correct
day.
zPress “OK” to confirm.
12. Panel Siren
This is for you to decide to enable or disable
the Control Panel built-in Siren when there is
an alarm event.
S i r e n O n
S i r e n O f f
zPress “S” & “T” keys to select the option.
zPress “OK” to confirm
z“Siren On” is set as factory default
13. Language
This function is for setting the display language.
You can select English or Swedish. The screen
will show:
E n g l i s h
S w e d i s h
zUse “S”,”T” keys to choose the language.
zPress “OK” to confirm.
zDefault: English
IV. Special Settings.
This menu is for the user to store the
specialized features for CTC-1132 system.
Step 1. Select Spc. Settings option..
Step 2. Press “OK”, then the Special Settings
Menu will be displayed.
A
la
r
m L e n
g
t h
A
. E x i t S o u n d
A
.Ent
r
y
S o u n d
H . E x i t S o u n d
H. Ent
r
y
S o u n d
Si
r
e n D e l a
y
V
e
r
i
f
i c a t i o n
Fi nal Doo
r
Inte
r
f
e
r
e n c e
RC Ent E
M o b i l i t
y
C H K .
Tam
p
e
r
A l a
r
m
Su
p
e
r
v i s i o n
Se t S IM-Code
St o
p
<
<N
NO
OT
TE
E>
>
)Interference function is used in 868
Mhz frequency band Control Panel
only.
)Use “S” & “T”to move the cursor to
select the item, press “OK” to confirm
the selection.
)“¿” displayed in front of an option
indicates the current setting.
)In “Spc. Settings”, if no key is pressed
within 10 minutes, the Control Panel
will automatically exit this menu and
return to “Alarm Off” display.
1. Alarm length
This is for you to select the period of time that
the built-in siren will sound when an alarm is
activated. You can choose from 1 min. to 15
min. in 1-min increments.
A l a r m L e n g t h
3 min.(
ΛVOK)
zUse “ S“ &“T“ keys to switch between
options.
zPress “OK” to confirm.
z3 minutes is set as factory default.

CTC-1132 868AM 2007.07.18
14
2. A. Exit Sound
This is for you to decide whether the Control
Panel will sound short beeps during the Exit
Delay period when in Away Arming.
E x i t S n d O n
E x i t S n d O f f
zPress “ S“ & “ T“ keys to select the
option. Options available are “On” for Exit
Sound and “Off” for no entry sound
zPress “OK” to confirm
z“Exit Snd On” (Exit sound On) is set as
factory default.
3. A. Entry Sound
This is for you to decide whether the Control
Panel will sound short beeps during the Entry
Delay Period when Away Arming.
E n t r y S n d O n
E n t r y S n d O f f
zPress “ S“ & “ T“ keys to select the
option.
zPress “OK” to confirm.
z“Entry Snd On” (Entry Sound On) is set as
factory default.
4. H. Exit Sound
This is for you to decide whether the Control
Panel will sound short beeps during the Exit
Delay period when Home Arming.
E x i t S n d O n
E x i t S n d O f f
zPress “ S“ & “ T“ keys to select the
option.
zPress “OK” to confirm
z“Exit Snd On” (Exit sound On) is set as
factory default.
5. H. Entry Sound
This is for you to decide whether the Control
Panel will sound short beeps during the Entry
Delay Period when Home Arming.
E n t r y S n d O n
E n t r y S n d O f f
zPress “ S“ & “ T“ keys to select the
option.
zPress “OK” to confirm.
z“Entry Snd On” (Entry Sound On) is set as
factory default.
6. Siren Delay
This is for you to decide how long should the
Control Panel suppress all audible alarms after
an Burglar alarm is reported. Options are
“OFF” and 1-min delay to 10-min delay in
increments of 1 minute
Off
1 Min.
2 Min.
3 Min.
4 Min.
to
10 Min.
zPress “ S“ & “ T“ keys to select the
option.
zPress “OK” to confirm.
z“Off” is set as factory default.
7. Verification
Turn on and off the Sequential Verification
Reporting.
S e q . V e r i f . O f f
S e q . V e r i f . O n
zPress “S” & “T” keys to select the option.
zPress “OK” to confirm.
z“Seq.Verif.Off” (Sequential Verification Off)
is set as factory default.
<
<N
NO
OT
TE
E>
>
)For detailed description of this feature,
please refer to Sec. X, “False Alarm
Management” of “Configuring your
system”
8. Final Door
Turn on and off the Final Door Set Option.

CTC-1132 868AM 2007.07.18
15
F i n a l D o o r O f f
F i n a l D o o r O n
zPress “S” & “T” keys to select the option.
zPress “OK” to confirm.
z“FinalDoor On” (Final Door Set Option On)
is set as factory default.
<
<N
NO
OT
TE
E>
>
When “Final Door Arming” is programmed,
the Control Panel will arm after the entry door
is closed. For more description of this feature,
please refer to Sec. II “Away (Alarm On)
Mode” of “Operation”
9. Interference
Turn on and off the detection feature of
interference.
D e t e c t i o n O f f
D e t e c t i o n O n
zPress “S” & “T” keys to select the option.
zPress “OK” to confirm.
z“Detection Off” is set as factory default.
<
<N
NO
OT
TE
E>
>
)When the “Detection On” is selected,
whenever the signal jamming period
lasted longer than 30 seconds, this
fault event will be logged, and
displayed on the LCD to warn the user.
)When the “Dectection Off” is selected,
CTC-1132 will not check interference
status.
10. Remote Controller Entry Enable
Turn on and off the Remote Controller disarm
function.
R C E n t E O f f
R C E n t E O n
zPress “S” & “T” keys to select the option.
zPress “OK” to confirm.
z“Remote Controller Entry Enable off” is
set as factory default.
<
<N
NO
OT
TE
E>
>
)When the “Remote Controller Entry
Enable” is set to “Off” it will not be
possible to disarm the Control Panel
when the system is fully armed unless
an entry point device is activated first.
This feature is used to ensure that the
system cannot be disarmed with a
stolen Remote Control without
unlocking a door first.
)When the “Remote Controller Entry
Enable” is set to “On”, the Remote
Controller can Arm and Disarm the
Control Panel as normal without
activating an entry point first.
11. Mobility
This is to disable or enable the Mobility Timer
with selected countdown period. Options
available are Disable, 4 hours, 8 hours and
12 hours.
If the Mobility Timer is enabled, it will count
down the pre-programmed time length. When
the timer times out without being reset, a report
will be made to the Programmed phone
numbers.
Disable
4 Hrs
8 Hrs
12 Hrs
zUse “T” &“S” keys to select the options.
zPress “OK” to confirm.
z“Disable” is set as factory default.
<
<N
NO
OT
TE
E>
>
)When the “Mobility” is set with a
specified timer, the Control Panel will
report to the Programmed phone numbers
when the timer runs out unless one of the
following actions occurred in advance to
reset the timer:
In “Home” mode: whenever any
“Home Omit” DC, IR is triggered, or
whenever any of the keys of the
Control Panel is pressed
In “Disarm” mode: whenever any of
the DC or IR (except 24 Hr, Fire,
Medical Emergency and Water) is
triggered, or whenever any of the keys
of the Control Panel is pressed
)When the system is set to “Away Arm”,
the timer automatically stops. When the

CTC-1132 868AM 2007.07.18
16
system enters “Home Arm” or “Disarm”
mode, the timer automatically starts again.
12. Tamper Alarm
This extra option is to choose for Tamper Alarm
of unauthorized sabotage to the devices only
when the system is “Away Armed” in addition
to the normal operational directive of Tamper
Alarm.
A w a y A r m O n l y
Normal V
zUse “T” &“S” keys to select the options.
zPress “OK” to confirm.
z“Away Arm Only” is set as factory default.
13. Supervision
This extra option is used to enable system
supervision function. When this option is
chosen “ON”, CTC-1132 will be able to receive
the check-in signals from its system devices to
indicate their proper functioning.
D i s a b l e
4 Hours
6 Hours
8 Hours
1 2 H o u r s
zUse “T” &“S” keys to select the options.
zPress “OK” to confirm.
z“Disable” is set as factory default.
14. Set SIM-Code
Before proceeding with this step, the SIM Card
must be inserted and the Control Panel must
have already been powered on for longer than
3 minutes. After above mentioned condition is
met, this step is for you to set the PIN code of
the GSM SIM card.
Move the cursor to the “Set G.P-Code”, and
then press “OK”. The display will prompt you
to enter the PIN code of your SIM card:
E n t e r N e w ( + 0 K )
P - C o d e . . . .
zEnter your new GSM PIN Code and
confirm by pressing “OK”.
zThe screen will then display a message
prompt saying, “Wait for a minute. Please”
zAfterward, another message prompt will
confirm, “Pin-Code has been changed”
and the display automatically return to the
“Special Setting Menu”.
<
<N
NO
OT
TE
E>
>
)Press “ “ to escape and the screen
returns to “Special Setting Menu”
zChange GSM Pin Code
GSM Pin Code can be changed at user’s
discretion.
zWhen Old Pin Code is requested, enter
Old Pin Code followed by OK.
zProceed to “Set G.P-Code” as instructed
in this section.
15. Stop
Press “OK” to return to the previous menu.
V. Add / Delete Device
If “Devices +/-“ is selected in Programming
Main menu, the “Device +/-“ menu is displayed.
From here you can edit all the devices
previously learnt-in, add or delete devices
including the external sirens.
A d d D e v i c e
E d i t D e v i c e s
R e m o v e D e v i c e
P r o g r a m S i r e n
Power Swi t ch
1. Adding Devices
Step 1. To learn in a sensor, move the cursor
to the position “Add Device”, then
press “OK”, a prompting message is
displayed.
*P u s h B u t t o n O n *
Devi ce t o Add!
Step 2. Press the test button on the sensor or
any button on the Remote Controller.
Step 3. If a signal is detected, the screen will
show you the type of the device on the
second line.
D e t e c t e d ( O k ? )
D o o r C o n t a c t

CTC-1132 868AM 2007.07.18
17
<
<N
NO
OT
TE
E>
>
)The categories of devices are listed as
followings:
9Door Contact ---- DC
9Panic Button-PB
9PIR Sensor ----- IR
9Remote Controller --- RC
9Remote Keypad ---KP
9Smoke Detector --- SD
9Water Sensor --- WS
9Outdoor Siren --- BX
9Universal Receiver – UR
9Wireless Siren ---SR
Step 4. Press “OK” to confirm the device type.
A prompting message will be
displayed for 2 sec. to prompt you to
select the zone number for the device.
S e L e c t D e v i c e
Z o n e
Step 5. Then all the available unused zones
(zones which have no device added in)
out of a total 20 zones will be
displayed on the screen.
Z o n e 0 1
Z o n e 0 2
Z o n e 0 3
-
-
-
-
Z o n e 1 9
Z o n e 2 0
STOP
Step 6. Use “S” & “T” keys to move the
cursor to the desired zone number
then press “OK”.
<
<N
NO
OT
TE
E>
>
)When a sensor is added to the system
for the second time (without removing
first). An error message will be
displayed.
A l r e a d y E x i s t
i n s y s t e m
The message will be displayed for 2
sec. then the screen return to Step 1.
screen to wait for the signal from
another device.
)Pressing ““key will abort the
procedure and will not learn-in the
device.
)Depending the type of the device,
different screens will then be
displayed accordingly for further
configuration purpose.
Door Contact
StepA7. After a zone number for the Door
Contact is assigned, you can futher
specify how it will work in different
modes. You are requested to make a
selection among “Burglar”, “ Home
Omit”, “Home Access”, “Delay”,
“Entry”, “Away Only”, “24 Hour”,
“Fire”, “Medical Emg”and “Water”
device.:
Burglar
H o me O mi t
H o m e A c c e s s
DelaY
EntrY
24 Hour
Fire
M e d i c a l E
m
g
W
at er
<
<N
NO
OT
TE
E>
>
)“B” for Burglar Door Contact
zWhen the system is in Arm mode, if a
“Burglar” Door Contact is triggered, a
“Burglar Alarm” will be activated
immediately and be reported.
zWhen the system is in Armed mode,
and the Control Panel is counting
down the Entry Delay, if a “Burglar”
Door Contact is triggered, the Control
Panel will not respond.
zDuring the Exit Delay period, if a
“Burglar” Door Contact is triggered,
the Control Panel will not respond .
)“O” for Home Omit Door Contact
zWhen the system is in Home mode, if
a “Home Omit” Door Contact is
triggered, the Control Panel will not

CTC-1132 868AM 2007.07.18
18
respond.
zWhen the system is in Full Arm mode,
if a “Home Omit” Door Contact is
triggered, the Control Panel will
respond in the same way as if a
“Burglar” Door Contact is triggered.
)“A” for Home Access Door Contact
zWhen the Door Contact has been set
to “Home Access” and triggered
when the system is in Arm mode, the
Control Panel will start a Burglar
Alarm and be reported.
zWhen the system is in Home mode, if
a “Home Access” Door Contact is
triggered, the Control Panel will start
an Entry Delay period to give enough
time to disarm the system
zHowever, during the Entry Delay or
Exit Delay period, if a “Home Access”
Door Contact is triggered, the Control
Panel will not respond.
)“D” for Delay Door Contact
zWhen the system is in Arm mode, if a
“Delay” Door Contact is triggered first,
a “Burglar Alarm” will be generated
immediately.
zHowever, during the Entry Delay or
Exit Delay period, if a “Delay” Door
Contact is triggered, the Control Panel
does not respond.
)“E” for Entry Door Contact
zIf the Door Contact has been set to
“Entry” and triggered when the
system is in Arm mode, the Control
Panel will start an entry period to give
enough time to disarm the system.
zAfter the delay period has expired and
no correct PIN code entered, the
Control Panel will respond with a
“Burglar Alarm”and be reported.
zIf the Door Contact has been set to
“Entry”and triggered when the
system is in Disarmed mode, the
Control Panel will make a “ding-dong”
Door Chime sound (if programmed).
)“H” for 24 Hour Door Contact
zThe“24 Hour” Door Contact is active
all the time and does not have to be
armed or disarmed.
)“F” for Fire Door Contact
zThe “Fire” Door Contact is active all
the time and does not have to be
armed or disarmed.
)“M” for Medical Emgenercy Door
Contact
zA “Medical Emg” Door Contact is
active all the time and does not have
to be armed or disarmed.
)“W” for Water Door Contact
z“Water”Door Contact acts as an
Universal Transmitter and have a
Water leakage sensor connected to it.
zThe “Water”Door Contact is active all
the time and does not have to be
armed or disarmed.
StepA8.Use the “T”,”S” to make your
selection and confirm by pressing
“OK”. You are now invited to give a
name or location description to the
device to help understand system
events. You can enter up to 10 letters
as you want for the name followed by
“OK” or just press “OK” for no name.
Please see section “Device Naming”
for details.
Ent er Name +Ok
............
StepA9. Press “OK” when zone name entering
is completed. The display will show
the new zone name with the attribute
next to the device and prompt you to
confirm your programming:
I nst al l ed: ( OK?)
D C B a c k d o o r B
StepA10. Press “OK”, adding a Door Contact
is now completed, screen returns to
the “Device +/-“ menu.
<
<N
NO
OT
TE
E>
>
)Press “ “, all the learning/setting
processes having done will be ignored,
the screen returns to “Device +/-
“menu.
Table of contents
Languages:
Other Electia Security System manuals
Popular Security System manuals by other brands
Rafiki Protection
Rafiki Protection Twinflex user guide

Teknim
Teknim PARS Series Installation and programming manual

Abacus Electric
Abacus Electric Evolve Sonix user guide

B&B
B&B 480 SERIES Operation & maintenance manual

Se-Kure Controls
Se-Kure Controls MicroMini SK-4841 instructions

DSC
DSC PC 4010 Programming manual

