AVERTISSEMENT
La sécheuse doit toujours être correctement mise à la terre.•
La sécheuse doit être munie d’un système d’aération à écoulement libre•
avec sortie d’air extérieure et conduite en métal.
Une mauvaise installation du système au gaz peut entraîner des blessures,•
voire la mort.
Pour éviter les blessures au dos ou d’autres types de blessures. Demandez•
l’aide d’une ou de plusieurs autres personnes pour déplacer, soulever ou
incliner la sécheuse.
IMPORTANT
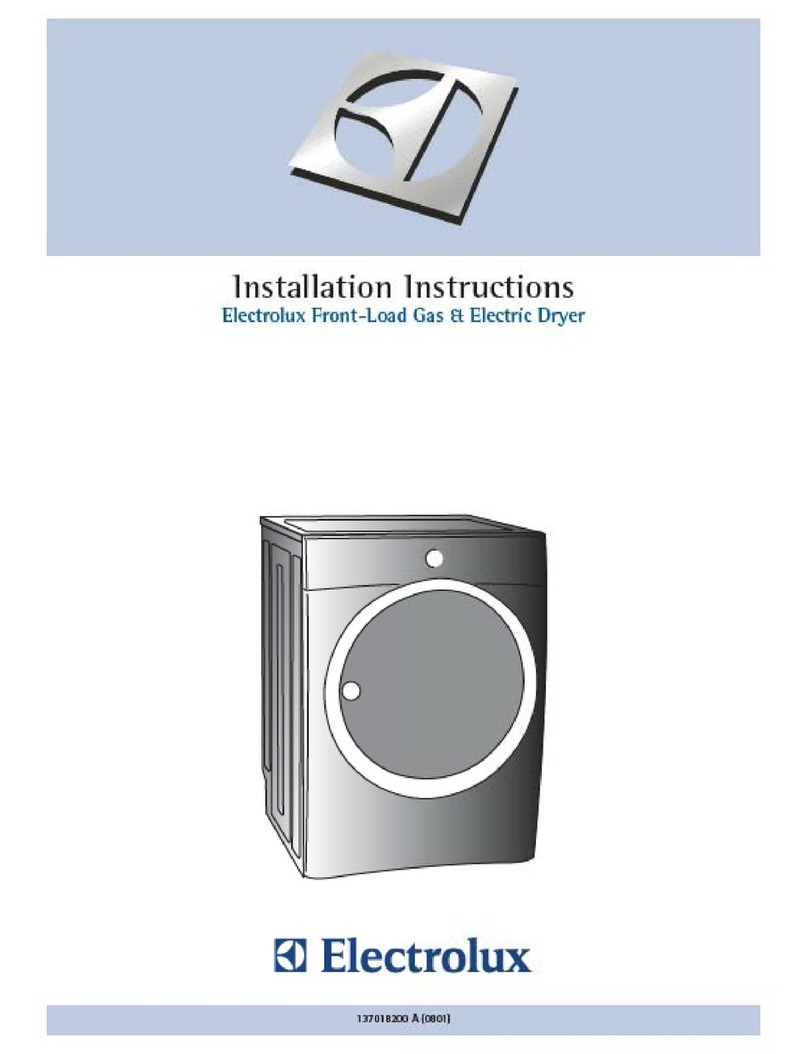
Veuillez lire toutes les instructions de sécurité
avant d’utiliser votre nouvelle sécheuse à char-
gement frontal. Pour obtenir un séchage op-
timal avec votre nouvelle sécheuse, n’oubliez
pas de consulter les documents suivants:
9
INSTRUCTIONS D’INSTALLATION
9
GUIDE D’UTILISATION ET D’ENTRETIEN
IMPORTANTE
Lea todas las instrucciones de seguridad
antes de usar su nueva secadora de carga
frontal. Para lograr los mejores resultados
en el secado con su nueva secadora,
recuerde verificar:
9
INSTRUCCIONES DE INSTALACIÓN
9
GUÍA DE USO Y CUIDADO
UTILISEZ UNIQUEMENT DES CONDUITS EN MÉTAL RIGIDE•
OU SEMI-RIGIDE DE 10,2 cm (4 po)
REMPLACEZ LES CONDUITS EN PLASTIQUE OU EN•
ALUMINIUM PAR DES CONDUITS EN MÉTAL
NETTOYEZ LE FILTRE À CHARPIE DU SYSTÈME DE CONDUITS•
ACTUEL AVANT DE POSER LES NOUVEAUX CONDUITS
CONSULTEZ LE TABLEAU DE DROITE POUR CONNAÎTRE LE•
NOMBRE DE TOURS À 90° ACCEPTABLES POUR LE SYSTÈME
NE RACCORDEZ PAS LES CONDUITS À L’AIDE DE VIS•
NE RACCORDEZ PAS LES CONDUITS AVEC DU RUBAN À•
CONDUITS RÉGULIER, MAIS PLUTÔT AVEC DU RUBAN
MÉTALLIQUE
COLLIER DE 10,2 cm (4 po) RECOMMANDÉ POUR LE•
RACCORDEMENT DE LA SÉCHEUSE AU SYSTÈME
D’ÉVACUATION
LE SYSTÈME D’ÉCHAPPEMENT DOIT ÉVACUER L’AIR À•
L’EXTÉRIEUR À L’AIDE D’UN ÉVENT APPROUVÉ
POUR INSTALLER L’ÉVENT À GAUCHE OU À DROITE DE LA•
SÉCHEUSE, UTILISEZ UN COUDE DE 90° À COURBE IMMÉDIATE
POUR LES INSTALLATIONS DANS UN ENDROIT EN•
RETRAIT OU UNE ARMOIRE, VEUILLEZ CONSULTER LES
INSTRUCTIONS D’INSTALLATION COMPLÈTES
POUR LES INSTALLATIONS DANS UNE MAISON•
MOBILE, VEUILLEZ CONSULTER LES INSTRUCTIONS
D’INSTALLATION COMPLÈTES
UTILICE SOLAMENTE CONDUCTOS DE METAL•
RÍGIDO O SEMIRÍGIDO DE 10,2 CM (4 PULGADAS)
REMPLACE LOS CONDUCTOS DE PLÁSTICO O DE•
PAPEL DE ALUMINIO POR CONDUCTOS DE METAL
LIMPIE LAS PELUSAS DEL SISTEMA DE•
CONDUCTOS EXISTENTE ANTES DE
INCORPORAR PIEZAS ADICIONALES
CONSULTE LA TABLA DE LA DERECHA PARA•
OBTENER INFORMACIÓN SOBRE LA CANTIDAD
ACEPTABLE DE GIROS DE 90° EN EL SISTEMA
NO UTILICE TORNILLOS PARA FIJAR LOS CONDUCTOS•
NO UTILICE CINTA ADHESIVA AISLANTE DE USO•
COMÚN PARA FIJAR LOS CONDUCTOS, SINO
SOLAMENTE CINTA DE PAPEL DE ALUMINIO
SE RECOMIENDA USAR UNA ABRAZADERA•
DE 4" (10,2 cm) PARA LA CONEXIÓN ENTRE LA
SECADORA Y EL SISTEMA DE ESCAPE
EL SISTEMA DE EVACUACIÓN DEBE VENTILAR•
AL EXTERIOR Y CONTAR CON UNA CAPUCHA DE
VENTILACIÓN APROBADA
PARA VENTILAR HACIA LA IZQUIERDA O•
DERECHA DE LA SECADORA, UTILICE UN CODO
DE GIRO RÁPIDO DE 90°
PARA LA INSTALACIÓN EN UN NICHO O•
ARMARIO, CONSULTE LAS INSTRUCCIONES DE
INSTALACIÓN COMPLETAS
PARA LA INSTALACIÓN EN UNA CASA•
RODANTE, CONSULTE LAS INSTRUCCIONES DE
INSTALACIÓN COMPLETAS
INCORRECT
INCORRECTO
CORRECT
CORRECTO
IMPORTANTE
Para una instalación apilada, en un armario o
sobre un pedestal, consulte las instrucciones de
instalación detalladas que se incluyen.
IMPORTANT
Pour les installations superposées, sur un socle
ou dans une armoire, consultez les instructions
d’installation détaillées fournies avec l’appareil.
Nombre de tours à 90°
Cantidad de codos de 90°
LONGUEUR MAXIMALE*
pour le conduit en métal rigide de 10,2 cm
LONGITUD MÁXIMA*
Conducto de metal rígido de 10,2 cm
(10 cm) 6.5 cm
0 38.0 m 33.5 m
1 35.0 m 30.5 m
2 32.0 m 27.5 m
3 29.0 m 24.5 m
4 26.0 m 21.5 m
* N’installez pas de matériel de ventilation en plastique
ou en aluminium flexible. Si vous installez du matériel
de ventilation semirigide, il est nécessaire que la
longueur du conduit soit égale ou inférieure à 2,4 m.
* No utilice material de ventilación flexible de plástico
o aluminio. Si va a instalar conductos de ventilación
semirrígidos, no exceda una longitud de 2,4 m.
VIDEZ LE CONTENU
DU TAMBOUR
VACÍE EL TAMBOR
PENCHER
SOIGNEUSEMENT
INCLINAR
CUIDADOSAMENTE
A)
B)
C)
D)
RETIRER ET
CONSERVER
RETIRAR Y
GUARDAR
PROTÉGEZ
LE PLANCHER
PROTEGER
EL PISO
REMETTRE
EN POSITION DEBOUT
VOLVER A COLOCAR EN
POSICIÓN VERTICAL
CONSULTEZ AUSSI LE PANNEAU « 1 » DE
L'AUTRE CÔTÉ POUR LA PROCÉDURE DE
MANUTENTION ADÉQUATE.
MANIPULEZ L'UNITÉ SUR UN CHARIOT•
DEPUIS L'ARRIÈRE SEULEMENT
LA PROFONDEUR MINIMALE DE LA FOURCHE•
DU CHARIOT DEVRAIT ÊTRE DE 18 cm (7 po)
LE SOULÈVEMENT DE L’UNITÉ DE L’AVANT•
VERS L’ARRIÈRE PAR 2 PERSONNES AU
MOYEN DE COURROIES EST RECOMMANDÉ
N’UTILISEZ PAS VOS GENOUX POUR•
DÉPLACER L’UNITÉ PAR LES CÔTÉS
NE SOULEVEZ PAS L’UNITÉ ET NE•
L’INCLINEZ PAS EN UTILISANT LA PORTE
OUVERTE COMME POINT D’APPUI
TAMBIÉN CONSULTE EL PANEL "1" EN EL
OTRO COSTADO PARA CONOCER LOS
PROCEDIMIENTOS DE MANEJO ADECUADO.
AL TRANSPORTAR LA UNIDAD, HÁGALO•
SOLAMENTE CON LA PARTE POSTERIOR
APOYADA EN LA CARRETILLA
LA PROFUNDIDAD MÍNIMA DE LAS HORQUILLAS•
DE LA CARRETILLA DEBE SER DE 7" (18 cm)
SE RECOMIENDA EL USO DE CORREAS•
PARA 2 PERSONAS PARA LEVANTAR LA
UNIDAD POR ADELANTE Y POR ATRÁS
NO APOYE LA RODILLA EN EL LATERAL•
DEL GABINETE PARA MOVER LA UNIDAD
NO LEVANTE NI INCLINE LA UNIDAD•
SUJETÁNDOLA CON LA PUERTA ABIERTA
DÉBALLAGE
DESEMBALAJE
30 AMP 30 AMP
NE PAS DÉPLACER
NO MOVER
DÉPLACER LA MISE
À LA TERRE
MOVER TIERRA
VERT
VERDE
NOIR OU ROUGE
NEGRO O ROJO
NOIR OU
ROUGE
NEGRO O
ROJO
BLANC
BLANCO
INSTALLEZ UN REDUCTER
DE TENSION CERTIIE UL
INSTALE UN DISPOSITIVO DE
LIBERACIÓN DE TENSIÓN
APROBADO POR U.L.
SÉCHEUSE AU GAZ / SECADORA A GAS
SÉCHEUSE ÉLECTRIQUE / SECADORA ELÉCTRICA
SERRER À L'AIDE
D'UNE CLÉ
APRETAR CON UNA
LLAVE
ROBINET
D’ARRÊT MANUEL
VÁLVULA DE
CIERRE MANUAL
VOUS DEVEZ UTILISER LE
NÉCESSAIRE DE CONVERSION
INSTALLÉ PAR UN TECHNICIEN
QUALIFIÉ POUR LES
SYSTÈMES AU GPL.
LOS SISTEMAS DE GAS
LP REQUIEREN UN KIT DE
CONVERSIÓN QUE DEBE SER
INSTALADO POR UN TÉCNICO
CALIFICADO.
UTILISEZ UN RUBAN À JOINTS APPROUVÉ. REPORTEZ-VOUS AUX
INSTRUCTIONS D'INSTALLATION POUR EN SAVOIR PLUS.
APLIQUE SELLANTE DE ROSCA APROBADO. CONSULTE LAS INSTRUCCIONES
DE INSTALACIÓN PARA OBTENER INFORMACIÓN MÁS DETALLADA.
SOURCE DE CHALEUR
FUENTE DE CALOR
UTILISEZ UNIQUEMENT DES CONDUITS EN MÉTAL R
ÉVENT D’ÉVACUATION
CONDUCTO DE VENTILACIÓN
S’IL NE S’AGIT PAS D’UNE SÉCHEUSE À
LA VAPEUR, PASSEZ À L’ÉTAPE 5.
SI ESTA NO ES UNA SECADORA A VAPOR,
VAYA AL PASO 5.
FERMEZ L’ALIMENTATION D’EAU DE LA LAVEUSE.A)
RETIREZ LE TUYAU D’EAU FROIDE DE L’ALIMENTATIONB) D’EAU FROIDE.
VÉRIFIEZ LA PRÉSENCE DE RONDELLES DEC) CAOUTCHOUC. REMPLACEZ-LES SI ELLES SONT USÉES.
FAITES COULER L’EAU DU ROBINET D’EAU FROIDED) POUR ÉVACUER LES CONTAMINANTS.
RETIREZ LES ARTICLES DU SAC ET VÉRIFIEZ LAE) PRÉSENCE DE RONDELLES DE CAOUTCHOUC.
UTILISEZ UN NÉCESSAIRE DE RALLONGE DE TUYAUF) S’IL EST IMPOSSIBLE DE JOINDRE DIRECTEMENT LE
RACCORD EN « Y » À L’ALIMENTATION D’EAU FROIDE.
BRANCHEZ LE TUYAU D’ALIMENTATION D’EAU À LA
SÉCHEUSE. BRANCHEZ L’AUTRE EXTRÉMITÉ DU TUYAU
D’ARRIVÉE D’EAU DE LA SÉCHEUSE ET DE CELUI DE
LA LAVEUSE AU RACCORD EN « Y ». SERREZ TOUS LES
RACCORDS À LA MAIN. SERREZ LES RACCORDS DE 2/3
DE TOUR SUPPLÉMENTAIRE À L’AIDE DES PINCES.
RACCORDEZ LE RACCORD EN «Y » OU LE NÉCESSAIREG) DE RALLONGE DE TUYAU À L’ALIMENTATION D’EAU
FROIDE. SERREZ LES RACCORDS À LA MAIN.
SERREZ LES RACCORDS DE 2/3 DE TOURH) SUPPLÉMENTAIRE À L’AIDE DES PINCES.
OUVREZ L’ALIMENTATION EN EAU ET VÉRIFIEZ S’IL Y AI) DES FUITES.
CIERRE EL SUMINISTRO DE AGUA A LAA) LAVADORA.
RETIRE LA MANGUERA DE AGUA FRÍA DELB) SUMINISTRO DE AGUA FRÍA.
INSPECCIONE LA ARANDELA DE GOMA.C) REEMPLÁCELA SI ESTÁ DESGASTADA.
HAGA CORRER AGUA DE LA SALIDA DE AGUAD) FRÍA PARA LIMPIAR LOS CONTAMINANTES.
RETIRE DE LA BOLSA Y UBIQUE LAS ARANDELASE) DE GOMA.
USE LA EXTENSIÓN DE LA MANGUERA SI ELF) CONECTOR EN “Y” NO PUEDE SER CONECTADO
DIRECTAMENTE AL SUMINISTRO DE AGUA FRÍA.
CONECTE LA MANGUERA DE SUMINISTRO DE
AGUA A LA SECADORA. CONECTE EL OTRO
EXTREMO DE LA MANGUERA DE SUMINISTRO
DE AGUA DE LA SECADORA AL CONECTOR “Y”.
APRIETE TODAS LAS CONEXIONES A MANO.
AJÚSTELAS 2/3 MÁS DE VUELTA CON LA PINZA..
CONECTE EL ACCESORIO EN “Y” O LAG) MANGUERA DE EXTENSIÓN AL SUMINISTRO DE
AGUA FRÍA. AJÚSTELAS CON LA MANO.
AJÚSTELAS 2/3 MÁS DE VUELTA CON LA PINZA.H)
ABRA EL SUMINISTRO DE AGUA Y VERIFIQUEI) QUE NO HAYA FUGAS.
CONSULTEZ AUSSI LE PANNEAU « 4 » DE L’AUTRE CÔTÉ
POUR LE BRANCHEMENT DE L’ARRIVÉE D’EAU SUR LES
SÉCHEUSES À LA VAPEUR.
TAMBIÉN CONSULTE EL PANEL “4” EN EL OTRO
COSTADO PARA INSTALACIÓN DEL SUMINISTRO
DE AGUA EN SECADORAS A VAPOR.
S’IL NE S’AGIT PAS D’UNE SÉCHEUSE À
RACCORDEMENT DE L’ALIMENTATION EN EAU
CONECTE EL SUMINISTRO DE AGUA
CONSULTEZ AUSSI LE PANNEAU « 5 » DE L’AUTRE CÔTÉ POUR RÉGLER
LES PIEDS DE MISE À NIVEAU ET BRANCHER LA SÉCHEUSE.
TAMBIÉN CONSULTE EL PANEL “5” EN EL OTRO COSTADO PARA
AJUSTE DE LAS PATAS NIVELADORAS Y CONEXIÓN DE LA SECADORA.
PRECAUCIÓN
PELIGRO DE DESCARGA ELÉCTRICA
NO utilice un adaptador de terminales.
NO retire la terminal de conexión a tierra.
NO utilice un cable de extensión.
ATTENTION
RISQUE DE CHOC ÉLECTRIQUE
NE PAS UTILISER d’adaptateur de fiche.
NE PAS RETIRER la broche de mise à la terre.
NE PAS UTILISER de rallonge électrique.
LEVEZ OU ABAISSEZ CHACUN DES PIEDS DE MISE À NIVEAU.A)
METTRE DE NIVEAU DES DEUX CÔTÉS.B)
VÉRIFIER LA STABILITÉ AUX QUATRE COINSC)
.
BRANCHER LA FICHE.D)
OUVREZ LE ROBINETE) DE GAZ, VÉRIFIEZ
LES RACCORDS EN
APPLIQUANT DE L’EAU
SAVONNEUSE
.
SUBA O BAJE LAS PATAS NIVELADORAS INDIVIDUALES.A)
NIVELAR EN AMBAS DIRECCIONES.B)
VERIFICAR LA ESTABILIDAD DE UNA ESQUINA A OTRAC)
.
CONECTAR SUMINISTROD) ELÉCTRICO.
ABRA LA VÁLVULA DEE) GAS, PRUEBE TODAS
LAS CONEXIONES
APLICANDO AGUA
JABONOSA EN ESTAS.
MISE À NIVEAU ET RACCORDEMENT
NIVELAR Y CONECTAR
Faites démarrer un court programme pour vérifier l’installation de votre appareil en suivant ces directives: Ejecute un ciclo de instalación breve para su modelo de la siguiente manera:
Si la sécheuse
possède cette
console :
Si la secadora
tiene esta con-
sola:
Si la sécheuse
possède cette
console :
Si la secadora
tiene esta con-
sola:
Videz la cuve de la sécheuse, puis fermez la porte.1.
Réactivez la sécheuse (en appuyant sur n’importe quel bouton),2. tournez le bouton des programmes à touch up (Retouches),
appuyez sur start (Mise en marche), puis sur cancel (Annuler).
Réactivez de nouveau la sécheuse, puis appuyez immédiatement3. et simultanément sur sanitize (Désinfection) et my favorite (Mes
préférences) pendant 5 secondes.
L’afficheur ACL indiquera le message4.
INSTAL CYCLE
(Programme
d’installation) suivi du temps approximatif de la durée du program-
me. Appuyez sur start (Mise en marche).
Le cycle d’installation va effectuer diverses routines de diagnostic.5.
À la fin du programme, l’afficheur ACL indiquera le message6. INSTAL
PASS! (Installation réussie) ou vous demandera d’effectuer une ac-
tion en indiquant les messages SERVICE CORD (
Cordon d’alimen-
tation défectueux
), NO GAS (
Aucun gaz
) ou CALL SERVICE 877
435 3287 (Placer un appel de service au 1-877-435-3287).
La7.
sécheuse
quittera le programme d’installation et reviendra à son
mode de fonctionnement normal la prochaine fois que vous la réac-
tiverez. Veuillez lire le Guide d’utilisation et d’entretien et profitez de
votre nouvelle laveuse de qualité!
Vacíe el tambor de la secadora y cierre la puerta.1.
Presione cualquier botón para encender la secadora, gire la perilla2. de ciclo al ciclo touch up (retoque), presione el botón start (en-
cender) y, por último, el botón cancel (cancelar).
Presione cualquier botón para encender la lavadora nuevamente y3. presione y mantenga presionados en forma inmediata y simultá-
nea los botones sanitize (desinfectar) y my favorite (mi favorito)
durante 5 segundos.
La pantalla LCD mostrará4.
INSTAL CYCLE
(CICLO DE INSTALA-
CIÓN) y el tiempo estimado de duración del ciclo. Presione start
(encender).
El ciclo de instalación realizará varias rutinas de diagnóstico.5.
Cuando termine el ciclo, la pantalla LCD mostrará6.
INSTAL PASS!
(INSTALACIÓN APROBADA) o se pedirá una acción durante el
ciclo, como
SERVICE CORD
(cable eléctrico),
NO GAS
(no hay gas)
o
CALL SERVICE 877 435 3287
(solicite servicio al 1-877-435-
3287).
La secadora saldrá del ciclo de instalación y regresará al funcio-7. namiento normal la próxima vez que la encienda. ¡Lea la Guía de
uso y cuidado, y disfrute su nueva lavadora de alta calidad!
Videz la cuve de la laveuse, puis fermez la porte.1.
Réactivez la2. sécheuse (en appuyant sur n’importe quel bouton)
et suivez les instructions qui s’affichent sur l’interface utilisateur
ACL, y compris le choix de la langue. REMARQUE: Il est possible
d’accéder manuellement à ce premier cycle automatique grâce
aux touches de défilement des sections reg prefs (Enr. préf.),
sous options.
L’afficheur ACL indiquera le message3.
PROG INSTAL
(Programme
d’installation) suivi du temps approximatif de la durée du program-
me. Appuyez sur start (Mise en marche).
Le cycle d’installation va effectuer diverses routines de diagnostic.4.
À la fin du programme, l’afficheur ACL indiquera le message5. INSTAL
PASS! (Installation réussie) ou vous demandera d’effectuer une ac-
tion en indiquant les messages SERVICE CORD (
Cordon d’alimen-
tation défectueux
), NO GAS (
Aucun gaz
) ou CALL SERVICE 877
435 3287 (Placer un appel de service au 1-877-435-3287).
La6. sécheuse quittera le programme d’installation et reviendra à
son mode de fonctionnement normal la prochaine fois que vous
la réactiverez. Veuillez lire le Guide d’utilisation et d’entretien et
profitez de votre nouvelle laveuse de qualité!
Vacíe el tambor de la secadora y cierre la puerta.1.
Presione cualquier botón para encender la secadora y siga las2.
indicaciones que figuran en la interfaz de usuario de la pantalla
LCD, incluso la selección del idioma. NOTA: puede acceder a
este ciclo inicial automático usando los botones de navegación
en la sección ajut prefs bajo opciones.
La pantalla LCD mostrará3.
INSTAL CYCLE
(CICLO DE INSTALA-
CIÓN) y el tiempo estimado de duración del ciclo. Presione start
(encender).
El ciclo de instalación realizará varias rutinas de diagnóstico.4.
Cuando termine el ciclo, la pantalla LCD mostrará5.
INSTAL PASS!
(INSTALACIÓN APROBADA) o se pedirá una acción durante el
ciclo, como
SERVICE CORD
(cable eléctrico),
NO GAS
(no hay gas)
o
CALL SERVICE 877 435 3287
(solicite servicio al 1-877-435-
3287).
La secadora saldrá del ciclo de instalación y regresará al funcio-6. namiento normal la próxima vez que la encienda. ¡Lea la Guía de
uso y cuidado, y disfrute su nueva lavadora de alta calidad!
FONCTIONNEMENT
FUNCIONAMIENTO
ADVERTENCIA
La secadora debe estar debidamente puesta a tierra en todo momento.•
Ventile la secadora a través de un sistema de conductos de metal con•
flujo de aire libre y salida al exterior.
La instalación inadecuada del suministro de gas puede ocasionar•
lesiones personales o incluso la muerte.
Evite las lesiones en la espalda u otro tipo de lesiones. Procure levantar,•
mover o inclinar la secadora en compañía de más de una persona.


