manuals.online logo
Brands
  1. Home
  2. •
  3. Brands
  4. •
  5. Electrolux
  6. •
  7. Oven
  8. •
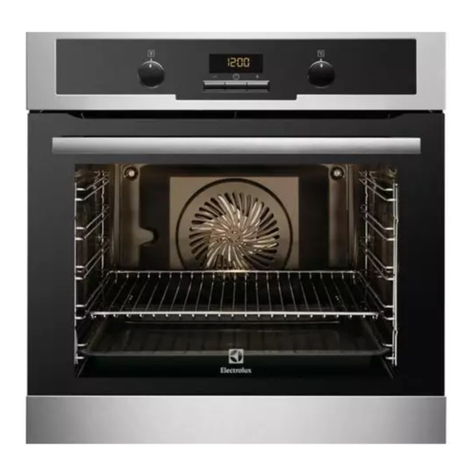
  9. Electrolux EOB 966 User manual

Electrolux EOB 966 User manual

GB
Electric ovens
INSTRUCTION BOOKLET
Please read this instruction booklet before using the appliance
Mod. EOB 966
35674-1302
2
This appliance complies with the following E.E.C.
Directives:
* 73/23 - 90/683 (Low Voltage Directive);
* 93/68 (General Directives);
* 89/336 (Electromagnetical Compatibility
Directive) .
an subsequent mo ifications
Guide to Use the instructions
The following symbols will be foun in the text to gui e
you throughout the Instructions:
Safety Instructions
Step by step instructions for an operation
Hints an Tips
Environmental information
F
Important Safety Information
You MUST rea these warnings carefully before installing or using the oven. If you nee assistance,
contact our Customer Care Department on 08705 950950
Installation
 This oven must be installe by qualifie personnel to the
relevant British Stan ar s.
 This oven is heavy. Take care when moving it.
 Remove all packaging, both insi e an outsi e the oven,
before using the oven.
 Do not attempt to mo ify the oven in any way.
Child Safety
 This oven is esigne to be operate by a ults. Do not
allow chil ren to play near or with the oven.
 The oven gets hot when it is in use. Chil ren shoul be
kept away until it has coole .
During Use
 This oven is inten e for omestic cooking only. It is not
esigne for commercial or in ustrial purposes.
 Never line any part of the oven with aluminium foil.
 Do not allow heatproof cooking material, e.g. roasting
bags, to come into contact with oven elements.
 Never place plastic or any other material which may melt
in or on the oven.
 Do not place seale cans or aerosols insi e the oven.
They may explo e if they are heate .
 Do not hang towels, ishcloths or clothes from the oven
or its han le.
 Do not use this oven if it is in contact with water an never
operate it with wet han s.
 Take great care when heating fats an oils as they will
ignite if they become too hot.
 Always use oven gloves to remove an replace foo in the
oven.
 Ensure that all control knobs are in the OFF position
when not in use.
 Do not leave cookware containing foo stuffs, e.g. fat or
oil in or on the oven in case it is ina vertently switche
ON.
 When using other electrical appliances, ensure the
cable oes not come into contact with the hot surfaces
of the oven.
Maintenance and Cleaning
 Only clean this oven in accor ance with the instructions.
 The oven shoul be kept clean at all times. A buil -up of
fats or other foo stuffs coul result in a fire, especially in
the grill pan.
 Always allow the oven to cool own an switch off the
electrical supply before carrying out any cleaning or
maintenance work.
Service
 This oven shoul only be repaire or service by an
authorise Service Engineer an only genuine approve
spare parts shoul be use .
Environmental Information
 After installation, please ispose of the packaging with
ue regar to safety an the environment.
 When isposing of an ol appliance, make it unusable,
by cutting off the cable. Remove any oor catches, to
prevent small chil ren being trappe insi e.
Keep this instruction book for future reference
an ensure it is passe on to any new owner.
3
Description of the Appliance
Electronic
timer
Oven oor
Thermostat
Control Light
Oven Function
Control Knob
Thermostat
Control Knob
Control Panel
Mains on Light
Grill Element
Rating Plate
For the User For the Installer
Contents
Oven Door Protection Device
All our appliances comply with the European safety
stan ar s. Nevertheless, in or er to ensure the
highest safety level, an avoi small chil ren to be
expose to the heat when the appliance is operate ,
it is possible to fit a special protection evice to the
oven oor. This evice can be purchase in our
Service Force Centres, specifying the relevant co e
(35791) an the Pro uct No. shown on the rating
plate.
Important Safety Information 2
Description of the Appliance 3
Controls 4
24 hour Clock an Timer 5
Hints an Tips 7
Before the First Use 7
Using the Oven 7
Using the Fan Oven 8
Defrosting 11
Grilling 12
Cleaning the Oven 14
Cleaning the hinge grill 15
Service an Spare Parts 16
Something not working 16
Guarantee Con itions 17
Technical Data 18
Electrical Connection 18
Buil ing In 19
4
Controls
Oven Function Control Knob
Oven Light - The oven light will be on without any
cooking function.
Inner grill element only - can be used for grilling
small quantities.
Double Grill - The full grill element will be on.
Thermal Grilling - This function offers an alterna-
tive method of cooking food items, normally
associated with conventional grilling. The grill
element and the oven fan operate together,
circulating hot air around the food.
Fan Oven cooking - This allows you to roast or
roast and bake simoultaneously using any shelf,
without flavour transference.
Defrost Setting - This setting is intended to assist
in thawing of frozen food.
Thermostat Control Knob
Turn the thermostat control knob clockwise to select
temperatures between 50 C and 250 C (MAX).
The Safety Thermostat
This oven is provided with a safety thermostat. In case of
malfunctioning of the main thermostat, and consequent
over-heating, the safety device will stop the power supply
to the appliance. If this happens, call your local Service
Force Centre. Under no circumstances should you
attempt to repair the appliance yourself.
Cooling fan
The cooling fan operates during cooking. Air is expelled
through vents between the oven door and the control
panel, as shown in the diagram.
The cooling fan may run on after the oven is switched off
to keep the controls cool. This is quite normal.
100
150
200
50
MAX
Accessories
Anti-tip shelf (x 2)
Grill/
Roasting pan
Removable
handles
Grill trivet
5
- +
- +
The electronic timer can in icate the time of ay, opera-
te as a minute min er an automatically operate the oven.
Before the oven can be operate , the time of ay must
be set on the electronic timer.
Please note that this is a 24 hour clock. For example,
2pm is shown as 14:00.
In case of loss of power, all the settings (time of ay, set
program or program in operation), will be cancelle . When
the power is restore , the numbers on the isplay will
flash, an the timer has to be reset.
FTO SET THE TIME OF DAY
Press buttons an , an at the same time turn
the time setting knob until the correct time of ay is
isplaye .
F
TO SET THE MINUTE MINDER
Press button an at the same time turn the setting
time knob until the uration time is isplaye (maximum
23 hours, 59 minutes).
Our iagram shows the timer set for 35 minutes. After a
few secon s the time of ay will show in the isplay.
To check the number of minutes remaining, press the
button. At the en of the time perio an alarm will
soun . To switch off the alarm press button .
- +
A
U
T
O
A
U
T
O
Time
setting
Cookpot
symbol
Programming
controls
24 hour Clock and Timer
Auto
symbol
Minute min er
Cooking uration
En of cooking time
Manual function
Cookpot symbol - This will be isplaye when a
program is in operation.
Auto symbol - This will be isplaye when the
oven has been programme for automatic
operation.
- + Time setting knob
A
U
T
O
6
- +
A
U
T
O
A
U
T
O
- +
A
U
T
O
A
U
T
O
F
TO SET THE TIMER TO SWITCH OFF ONLY
This is useful if you want to begin cooking imme iately
but have the oven switch off automatically.
1. Set the oven function control knob an the thermostat
control knob on the require settings.
2. Place foo in the oven.
3. Press button an , at the same time, turn the
time setting knob until the require cooking uration
is isplaye .
Our iagram shows the timer set for 1 hour 10 minutes.
At the en of the cooking time the oven will switch off, an
alarm will soun . Turn the oven function an thermostat
control knob to zero. To switch off the alarm press button
.
F
TO SET THE TIMER TO SWITCH THE OVEN ON
AND OFF
1. Ensure the clock is showing the right time of ay.
2. Carry out steps 1, 2 an 3 as explaine in "To set the
timer to switch off only".
3. Press button an at the same time turn the time
setting knob until the en cooking time is isplaye .
Our iagram shows the en cooking time set for 7:35
pm.
At the en of the cooking time turn the oven function an
thermostat control knob to zero.
F
TO CANCEL A PROGRAMME
1. Press button an , at the same time, turn the
time setting knob until the cooking uration is set on
"zero".
2. If the en cooking time has been set too, press button
an at the same time turn the time setting knob
until the en cooking time is set on "zero".
- +
F
MANUAL FUNCTION
Press button to set the oven for manual function.
7
Condensation and steam
When foo is heate it pro uces steam in the same way
as a boiling kettle. The oven vents allow some of this
steam to escape. However, always stan back from
the oven when opening the oven oor to allow any
buil up of steam or heat to release.
If the steam comes into contact with a cool surface on
the outsi e of the oven, e.g. a trim, it will con ense an
pro uce water roplets. This is quite normal an is not a
fault with the oven.
To prevent iscoloration, regularly wipe away
con ensation an also soilage from surfaces.
Cookware
 Use any oven proof cookware which will withstan
temperatures of 250°C.
 Baking trays, oven ishes, etc. shoul not be place
irectly against the gri covering the fan at the back
of the oven, or place on the oven base.
Hints and Tips
Before the First Use
Remove all packaging, both insi e an outsi e
the oven, before using the appliance.
Before first use, the oven shoul be heate without foo .
During this time, an unpleasant o our may be emitte .
This is quite normal.
1. Set the programmer to manual function.
2. Switch the oven function control knob to fan
cooking .
3. Set the thermostat control knob to MAX.
4. Open a win ow for ventilation.
5. Allow the oven to run empty for approximately
45 minutes.
This proce ure shoul be repeate with the grill
function for approximately 5-10 minutes.
Usin the Oven
Always cook with the oven oor close .
Stan clear when opening the rop own oven oor.
Do not allow it to fall open - support the oor using
the oor han le, until it is fully open.
The oven has four shelf levels, an is supplie with
two shelves. The shelf positions are counte from
the bottom of the oven as shown in the iagram.
It is important that these shelves are correctly
positione as shown in the iagram.
Do not place cookware irectly on the oven base.
4
3
2
1
FO 0336
F
 Do not use baking trays larger than 30 cm x 35 cm
(12 in x 14 in) as they will restrict the circulation of
heat an may affect performance.
he effects of dishes
on cooking results
Dishes an tins vary in their thickness, con uctivity,
colour, etc. which affects the way they transmit heat to
the foo insi e them.
AAluminium, earthenware, oven glassware an bright
shiny utensils re uce cooking an base browning.
BEnamelle cast iron, ano ize aluminium, aluminium
with non-stick interior an coloure exterior an ark,
heavy utensils increase cooking an base browning.
8
Using the Fan Oven
The air inside the oven is heated by the element around
the fan situated behind the back panel. The fan circulates
hot air to maintain an even temperature inside the oven.
The advantages of cooking with this function are:
l Faster Preheating
As the fan oven quickly reaches temperature, it is not
usually necessary to preheat the oven although you may
find that you need to allow an extra 5- minutes on
cooking times. For recipes which require higher
temperatures, best results are achieved if the oven is
preheated first, e.g. bread, pastries, scones, souffles,
etc.
l Lower Temperatures
Fan oven cooking generally requires lower temperatures
than conventional cooking.
Follow the temperatures recommended in the cooking
chart or remember to reduce temperatures by about 20-
25°C for your own recipes which use conventional cooking.
l Even Heating for Baking
The fan oven has uniform heating on all shelf positions.
This means that batches of the same food can be cooked
in the oven at the same time. However, the top shelf may
brown slightly quicker that the lower one.
This is quite usual. There is no mixing of flavours between
dishes.
FHow to Use the Fan Oven
1. Turn the oven function control knob to .
2. Turn the thermostat control to the required tempera-
ture.
THING TO NOTE
 The oven light will come on when the oven function
control knob is set.
 The oven fan will operate continually during cooking.
 The thermostat control light will remain on until the
correct temperature is reached. It will then cycle on
and off to show the temperature is being maintained.
FO 2079
9
Foo Shelf Cooking
Position Temp (°C)
Biscuits 180-190
Brea 210-220
Casseroles 130-140
Cakes: Small an queen 160-170
Sponges 160-170
Ma eira 140-150
Rich Fruit 130-140
Christmas 130-140
Meringues 90-100
Fish 170-190
Fruit Pies an Crumbles 190-200
Milk Pu ings 130-140
Pastry: Choux
Shortcrust
Flaky 190-200
Puff
Plate Tarts180
Quiches/Flans 170-180
Scones 210-220
Roasting: Meat & Poultry 160-180
Cookin Chart
This chart is inten e as a gui e only. It may be necessary to increase or ecrease the temperature to suit your
in ivi ual requirements. Only experience will enable you to etermine the correct setting for your personal requirements.
When roasting, ensure the meat is cooke thoroughly, use a meat thermometer if preferre to check the centre
temperature has reache the require temperature (see table below).
MEAT TEMPERATURES
Beef Rare - 60°C
Me ium - 70°C
Well Done - 80°C
Pork Well Done - 80°C
Lamb Me ium - 70°C
Well Done - 80°C
}
Shelf
positions
are not
critical but
ensure that
oven
shelves are
evenly
space
when more
than one is
use .
10
Shelf positions are not critical, but make sure the shelves
are evenly sprea .
When cooking more than one ish in the fan oven, place
ishes centrally on the shelves rather than several ishes
on one shelf.
When the oven is full, you may nee to allow slightly
longer cooking time.
A shelf may be place on the floor of the oven. Place
ishes on a shelf in this position rather than on the oven
base, to allow air circulation aroun the foo .
When the oven is full of the same foo , e.g. equal trays
of small cakes or equal size victoria san wich cakes,
then they will be cooke in the same time an remove
from the oven together. When ifferent sizes of trays or
types of foo , e.g. biscuits an cakes are cooke , they
will not necessarily be rea y together.
The fan oven can be use to heat foo s through without
thawing first, e.g. fruit tarts, mince pies, sausage rolls,
an other small pastry items. Use a temperature of 190-
200°C an allow 20-40 minutes ( epen ing on the quantity
of foo in the oven).
The use of too high temperatures can cause uneven
browning. Check with the recommen ations for oven
temperatures given in the cooking charts, but be prepare
to a just the temperature by 10°C if necessary. Remember
to re uce temperatures by about 20-25°C for your own
conventional recipes.
When roasting o use the trivet in the meat tin. Fat an
meat juices will rain into the meat tin below an can be
use to make gravy. The trivet also prevents splashes of
fat from soiling the oven interior.
The meat tin shoul not be place on a heate hotplate
as this may cause the enamel to crack.
Hints and ips
11
The oven fan operates without heat an circulates the
air, at room temperature, insi e the oven. This increases
the spee of efrosting. However, please note that the
temperature of the kitchen will influence the spee of
efrosting.
This function is particularly suitable for elicate foo which
coul be amage by heat, e.g. cream fille gateaux,
ice cakes, pastries, brea an other yeast pro ucts.
FHow to Use Defrosting
1. Turn the oven function control knob to .
2. Ensure the thermostat control knob is in the OFF
position.
Defrostin
Hints and ips
 Cover foo with a li , aluminium foil or plastic film to
prevent rying out uring efrosting.
 ALWAYS COOK THOROUGHLY IMMEDIATELY
AFTER THAWING.
 Frozen foo shoul be place in a single layer when
ever possible an turne over half way through the
efrosting process.
 Only joints of meat an poultry up to 2 kg. (4 lb.) are
suitable for efrosting in this way.
Refer to the following table for approximate efrosting
times.
Chicken 1000 g. 100-140 20-30 Place the chicken on an inverte
saucer on a large plate. Defrost open
an turn at half time or efrost
covere with foil. Remove giblets
as soon as possible.
Meat 1000 g. 100-140 20-30 Defrost open an turn at
half time or cover with foil
Meat 500 g. 90-120 20-30 As above
Trout 150 g. 23-35 10-15 Defrost open
Strawberries 300 g. 30-40 10-20 Defrost open
Butter 250 g. 30-40 10-15 Defrost open
Cream 2 x 200 g. 80-100 10-15 Defrost open (cream is
easy to whip even if parts
of it are still slightly frozen)
Cake 1400 g. 60 60 Defrost open
Foo Defrosting time
(Mins)
Stan ing time
(Mins) Notes
The times quote in the chart shoul be use as a gui e only, as the spee of efrosting will epen on the kitchen
temperature. For example, the col er the ambient temperature, the longer the efrosting time.
12
FHow to Use the Inner Grill
Element
The inner grill provides quick direct heat to the central
area of the grill pan. By using the inner grill element for
cooking small quantities, it can help to save energy.
1. Turn the oven control function knob on .
2. Turn the thermostat control knob on the required tem-
perature.
3. djust the grid and grill pan runner position to allow
for different thicknesses of food and follow the
instructions for grilling.
FHow to Use the Thermal
Grill
Thermal grilling offers an alternative method of cooking
food items normally associated with conventional grilling.
The grill element and the oven fan operate alternately,
circulating hot air around the food. The need to check
and turn the food is reduced. Thermal grilling helps to
minimize cooking smells in the kitchen.
With the exception of toast and rare steaks, you can
thermally grill all the foods you would normally cook
under a conventional grill. Cooking is more gentle,
therefore food generally takes a little longer to cook with
thermal grilling compared with conventional grilling. One
of the advantages is that larger loads can be cooked at
the same time.
1. Turn the oven control function knob on .
2. Turn the thermostat control knob on the required tem-
perature. Select a maximum temperature of 200°C
and do not exceed 1 hour of operation.
3. djust the grid and grill pan runner position to allow
for different thicknesses of food and follow the
instructions for grilling.
Grilling
Grilling must be carried out with the oven door
closed. The grill pan handles must be removed
from the pan.
FHow to Use the Grill
1. Turn the oven control function knob on .
2. Turn the thermostat control knob on the required tem-
perature.
3. djust the grid and grill pan runner position to allow
for different thicknesses of food. Position the food
close to the element for faster cooking and further
away for more gentle cooking.
Preheat the grill on a full setting for a few minutes before
sealing steaks or toasting. djust the heat setting and
the shelf as necessary, during cooking.
During cooking, the cooling fan and the thermostat
control light will operate in the same way as described
for the fan oven function.
Hints and Tips
- Most foods should be placed on the grid in the grill
pan to allow maximum circulation of air to lift the food
out of the fats and juices. Food such as fish, liver and
kidneys may be placed directly on the grill pan, if
preferred.
- Food should be thoroughly dried before grilling to
minimise splashing. Brush lean meats and fish lightly
with a little oil or melted butter to keep them moist
during cooking.
- ccompaniments such as tomatoes and mushrooms
may be placed underneath the grid when grilling
meats.
- When toasting bread, we suggest that the top runner
position is used.
- The food should be turned over during cooking, as
required.
The grill element is controlled by the thermostat.
During cooking the grill cycles on and off to
prevent overheating.
13
Prepare foo s in the same way as for conventional grilling.
Brush lean meats an fish lightly with little oil or butter to
keep them moist uring cooking.
A general gui e to cooking times is given below but these
times may vary slightly epen ing on the thickness an
quantity of foo being cooke .
Cooking Chart - Grilling
Time
(Mins)
Temp
(°C)
Time
(Mins per si e)
Temp
(°C)
FOOD Grill an Inner Grill Element Thermal Grill
Bacon Rashers 210 2-3 200 8-12
Beefburgers 200 6-10 190 10-15
Chicken Joints 170 10-15 160 35-45
Chops - Lamb 180 7-10 170 20-25
- Pork 180 10-15 170 25-35
Fish - Whole Trout/Herring 170 8-12 170 10-20
- Fillets Plaice/Co 170 4-6 170 10-20
Kebabs 180 10-15 170 20-30
Ki neys - Lamb/Pig 170 4-6 180 10-15
Liver - Lamb/Pig 170 5-10 180 20-30
Sausages 180 10-15 190 10-15
Toast 250 1-2 --
Heating through an
Browning, e.g. au-gratin, - - 170 20-30
lasagne, shepher 's pie.
epen ing on size epen ing on size
Browning ishes only 230 3-5 --
Hints and ips
14
Oven Cavity
The enamelle oven cavity is best cleane whilst the oven
is still warm.
Wipe the oven over with a soft cloth soake in warm soapy
water after each use. From time to time it will be
necessary to o a more thorough cleaning, using a
proprietary oven cleaner.
If the soilage has become set, after the oven has coole
own, the following process will help to soften the splatters
to help make cleaning easier.
F1. Place the grill/ meat pan on the oven shelf
positione in the lowest runner.
2. A a few rops of washing-up liqui to the pan
an fill to about 12 mm. with boiling water from the
kettle.
3. Close the oven oor, turn the oven function
knob on fan oven an set the thermostat knob
on 50°C.
4. After 15 minutes, turn off the thermostat an
allow the fan oven to continue without heat for a
further 5 minutes, when the temperature of the
water will have coole own.
5. Carefully remove the pan of water from the oven
an use normal oven cleaners to clean away soil
resi ues.
6. Leave a small amount of soapy water to soak
into any burne on spillage on the floor of the oven
for a longer time if necessary.
Oven Shelves
To clean the oven shelves, soak in warm soapy water
an remove stubborn marks with a well wette soap
impregnate pa . Rinse well an ry with a soft cloth.The
shelf supports can be remove for easy cleaning (see
iagram). Please, ensure the retaining nuts are secure
when refitting the shelf support.
Before cleaning always allow the cooling fan to
cool the cooker own before switching off at the
electricity supply.
The oven shoul be kept clean at all times. A buil -
up of fats or other foo stuffs coul result in a fire,
especially in the grill pan.
Cleaning materials
Before using any cleaning materials on your oven, check
that they are suitable an that their use is recommen e
by the manufacturer.
Cleaners that contain bleach shoul NOT be use as
they may ull the surface finishes. Harsh abrasives
shoul also be avoi e .
External cleaning
Regularly wipe over the control panel, oven oor an oor
seal using a soft cloth well wrung out in warm water to
which a little liqui etergent has been a e .
To prevent amaging or weakening the oor glass
panels avoi the use of the following:
 Househol etergent an bleaches
 Impegnate pa s unsuitable for non-stick
saucepans
 Brillo/Ajax pa s or steel wool pa s
 Chemical oven pa s or aerosols
 Rust removers
 Bath/Sink stain removers
Clean the outer an inner oor glass using warm soapy
water. Shoul the inner oor glass become heavily soile
it is recommen e that a cleaning pro uct such as Hob
Brite is use .
DO NOT clean the oven oor while the glass panels
are warm. If this precaution is not observe the
glass panel may shatter.
If the oor glass panel becomes chippe or has
eep scratches, the glass will be weakene an
must be replace to prevent the possibility of the
panel shattering. Contact your local Service Force
Centre who will be please to a vise further.
Cleanin the Oven
FO 0145
15
FO 0287
Cleanin the hin ed rill
F
Replacing the Oven Light
Disconnect the appliance
If the oven bulb nee s replacing, it must comply with the
following specifications:
- Electric power: 15W,
- Electric rate: 230-240 V (50 Hz),
- Resistant to temperatures of 300°C,
- Connection type: E14.
These bulbs are available from your local Service Force
Centre.
To replace the faulty bulb:
1. Ensure the oven is isconnecte from the electrical
supply.
2. Turn the glass cover anticlockwise.
3. Remove the faulty bulb an replace with the new one.
4. Refit the glass cover.
5. Reconnect to the electrical supply.
This mo el has been fitte with a hinge grill element to
enable you to clean the roof of the oven easily.
Before proceeding ensure the oven is cool and
is isolated from the electricity supply.
1) Un o the screws which hol s the grill in place
(see iagram). When oing this operation for the
first time, we recommen using a screw river.
2) Then gently pull the grill ownwar to allow
access to the oven roof (see iagram).
3) Clean the oven roof with a suitable cleaner an
wipe ry before replacing the hinge grill element.
4) Gently push up the grill element into place an
firmly screw into place the hol ing nuts.
Ensure the grill holding nuts are firmly in place to
avoid the grill falling down when in use.
16
Somethin not workin
SYMPTOM
nThe oven oes not come on
nThe oven temperature light oes not come on
nThe oven light oes not come on
nIt takes too much time to finish the ishes, or they are
cooke too fast.
nSteam an con ensation settle on the foo an the
oven cavity.
nThe programmer oes not work
nThe oven fan is noisy
SOLUTION
uCheck the oven is in manual operation an that both a
cooking function an temperature have been selecte .
uCheck the appliance is wire in properly, an the socket
switch or the switch from the mains supply to the oven
are ON.
uSelect a temperature with the thermostat control knob
uSelect a function with the oven function control knob.
uSelect a function with the oven function control knob
uCheck the light bulb, an replace it if necessary (see
"Cleaning the Oven")
uThe temperature may nee a justing
uRefer to the contents of this booklet, especially to the
chapter Using the Oven.
uLeave ishes insi e the oven no longer than 15-20
minutes after the cooking is complete .
uCheck the instructions for the programmer.
uCheck that shelves an bakeware are not vibrating in
contact with the oven back panel.
If the appliance is not working correctly, please carry out the following checks, before contacting your local Service
Force Centre.
IMPORTANT: If you call out an engineer to a fault liste below, or to repair a fault cause by incorrect use or installation,
a charge will be ma e even if the appliance is un er guarantee.
In the event of your appliance requiring service, or if you
wish to purchase spare parts, please contact your local
Service Force Centre by telephoning:
0870 5 929929
Your telephone call will be automatically route to the
Service Force Centre covering your post co e area.
For the a ress of your local Service Force Centre an
further information about Service Force, please visit the
website at www.serviceforce.co.uk
Before calling out an engineer, please ensure you have
rea the etails un er the hea ing Something Not
Working.
Service and Spare Parts
When you contact the Service Force Centre you will nee
to give the following etails:
1. Your name, a ress an post co e
2. Your telephone number
3. Clear an concise etails of the fault
4. The mo el an serial number of the appliance (foun
on the rating plate)
5. The purchase ate
Please note that a vali purchase receipt or
guarantee ocumentation is require for in-
guarantee service calls.
17
For general enquiries concerning your Electrolux
appliance an for further information on Electrolux
pro ucts, contact our Customer Care Department by letter
or telephone as follows:
Customer Care Department
Electrolux
55-77 High Street
Slough
Berkshire SL1 1DZ
Tel : 08705 950950 (*)
* calls to this number may be recorded for training purposes.
Electrolux Standard Guarantee
conditions
We, Electrolux, un ertake that if, within 12 months of the ate
of the purchase, this Electrolux appliance or any part thereof
is prove to be efective by any reason only of faulty
workmanship or materials, we will, at our option, repair or
replace the same FREE OF ANY CHARGE for labour,
materials or carriage on con ition that:
* The appliance has been correctly installe an use only
on the gas an electricity supply state on the rating
plate.
* The appliance has been use for normal omestic
purposes only, an in accor ance with the
manufacturer's instructions.
* The appliance has not been service , maintaine ,
repaire , taken apart or tampere with by any person not
authorise by us.
* All service work un er this guarantee must be
un ertaken by a Electrolux Service Force Centre.
* Any appliance or efective part replace shall become
the Company's property.
* This guarantee is in a ition to your statutory an other
legal rights.
Home visits are ma e between 8.30am an 5.30pm
Mon ay to Fri ay. Visits may be available outsi e these
hours, in which case a premium will be charge .
Exclusions
This guarantee oes not cover:
* Damage or calls resulting from transportation, improper
use or neglect, the replacement of any light bulbs or
removable parts of glass or plastic.
* Costs incurre for calls to put right an appliance which
is improperly installe or calls to appliance outsi e the
Unite King om.
* Appliances foun to be in use within a commercial or
similar environment, plus those which are the subject to
rental agreements.
* Pro ucts of Electrolux manufacture which are not
markete by Electrolux.
European Guarantee
If you shoul move to another country within Europe then
your guarantee moves with you to your new home subject
to the following qualifications:
* The guarantee starts from the ate you first purchase
your pro uct.
* The guarantee is for the same perio an to the same
extent for labour an parts as exist in the new contry of
use for this bran or range of pro ucts.
* This guarantee relates to you an cannot be transferre
to another user.
* Your new home is within the European Community (EC)
or European Free Tra e Area.
* The pro uct is installe an use in accor ance with our
instructions an is only use omestically, i.e. a normal
househol
The electrical supply complies with the specification
given in the rating label.
* The pro uct is installe taking into account regulations
in your new country.
Before you move, please contact your nearest Customer
Care centre, liste below, to give them etails of your new
home. They will then ensure that the local Service
Organisation is aware of your move an able to look after
you an your appliances.
France Senlis +33 (0) 3 44 62 20 13
Germany Nürnberg +49 (0) 800 234 7378
Italy Por enone +39 (0) 800117511
Swe en Stockholm +46 (0) 20 78 77 50
UK Slough + 44 (0) 1753 219898
Guarantee Conditions
Customer Care Department
18
Technical Data
Dimensions of recess
Height 580 mm.
Wi th 560-570 mm.
Depth 550 mm.
Dimensions of the oven cavity
Height 325 mm.
Wi th 420 mm.
Depth 390 mm.
Oven capacity 53 litres
Electrical Connection
The oven is esigne to be connecte to 230-240V (50Hz)
electricity supply.
The oven has an easily accessible terminal block which
is marke as follows:
Letter L - Live terminal
Letter N - Neutral terminal
or E - Earth terminal
THIS OVEN MUST BE EARTHED
The cable use to connect the oven to the electrical
supply must comply to the specifications given below.
It is necessary that you install a ouble pole switch
between the oven an the electricity supply (mains), with
a minimum gap of 3mm between the switch contacts an
of a type suitable for the require loa in compliance with
the current rules.
The switch must not break the yellow an green earth
cable at any point.
Important
After installation an connecting, the cable must be
place so that it cannot at any point reach a temperature
of more than 60°C above the ambient temperature.
Before the oven is connecte , check that the main fuse
an the omestic installation can support the loa ; an
that the power supply is properly earthe .
The manufacturer isclaims any responsibility shoul
these safety measures not be carrie out.
Connection Min. size Cable / flex Fuse
via Cable/flex type
 13 A socket 2.5 mm23 core 13 A
outlet butyl min.
 13 A insulate
spur box
 Cooker 2.5 mm2PVC/PVC
Control twin an 20 A
Circuit earth
For Uk use only
For Europe use only
Heating elements rating
Circular heating element 2.08 kW
Inner Grill element 1.83 kW
Double Grill element 2.66 kW
Oven Light 15 W
Cooling Fan 25 W
Convection Fan 30 W
Total Rating 2.70 kW
Min. size Cable/flex Cable / flex type Fuse
1.5 mm207 RN-F, 05 RN-F, 13 A
05 RR-F, 05 VV-F,
05 V2V2-F (T90),
05 BB-F
19
Buildin In
Please ensure that when the oven is installe it is
easily accessible for the engineer in the event of a
break own.
Building In
The surroun or cabinet into which the oven will be built
must comply with these specifications:
lthe imensions must be as shown in the relevant
iagrams;
lthe materials must withstan a temperature increase
of at least 60°C above the ambient temperature;
lproper arrangements must be ma e for a continuous
supply of air to the oven to prevent the oven overheating.
Dimensions of the oven an recess require are given in
the relevant iagrams.
Securing he Oven o he
Cabinet
1. Fit the oven into the cabinet recess,
2. Open the oven oor
3. Secure the oven to the kitchen cabinet with four woo
screws, which fit the holes provi e in the oven fra-
me.
FO 0290
FO 0374
FO 0039
FO 0292
Grafiche MDM - Forlì
CUSTOMER CARE
Electrolux
55-77 High Street
Slough
Berkshire, SL1 1DZ
Tel:
08705 950950
© Electrolux Househol Appliances Limite 2002
The Electrolux Group. The worlds No.1 choice.
The Electrolux Group is the worlds largest producer of powered appliances for kitchen, cleaning and outdoor use. More than
55 million Group products (such as refrigerators, cookers, washing machines, vacuum cleaners, chain saws and lawn mowers
are sold each year to a value of approx. USD 14 billion in more than 150 countries around the world.
02/02

Other manuals for EOB 966

4

Other Electrolux Oven manuals

Electrolux EOG2100 User manual

Electrolux

Electrolux EOG2100 User manual

Electrolux EHGL3 User manual

Electrolux

Electrolux EHGL3 User manual

Electrolux EOD5420AAX User manual

Electrolux

Electrolux EOD5420AAX User manual

Electrolux EB6SL80QCN User manual

Electrolux

Electrolux EB6SL80QCN User manual

Electrolux EOT1513X User manual

Electrolux

Electrolux EOT1513X User manual

Electrolux EOB 2620 User manual

Electrolux

Electrolux EOB 2620 User manual

Electrolux EVE8P21X User manual

Electrolux

Electrolux EVE8P21X User manual

Electrolux EOK9837 User manual

Electrolux

Electrolux EOK9837 User manual

Electrolux EOD63142 User manual

Electrolux

Electrolux EOD63142 User manual

Electrolux Air-O-Steam 267553 User manual

Electrolux

Electrolux Air-O-Steam 267553 User manual

Electrolux EW30EW65GS - 30" E Dbl Wall Oven WAVETCH... Installation instructions

Electrolux

Electrolux EW30EW65GS - 30" E Dbl Wall Oven WAVETCH... Installation instructions

Electrolux EI30EW45JS User manual

Electrolux

Electrolux EI30EW45JS User manual

Electrolux E3000-5 User manual

Electrolux

Electrolux E3000-5 User manual

Electrolux EI30EW35JS Quick start guide

Electrolux

Electrolux EI30EW35JS Quick start guide

Electrolux EOG 621 User manual

Electrolux

Electrolux EOG 621 User manual

Electrolux EP3003011 User manual

Electrolux

Electrolux EP3003011 User manual

Electrolux EOU 5330 User manual

Electrolux

Electrolux EOU 5330 User manual

Electrolux EOU 6330 User manual

Electrolux

Electrolux EOU 6330 User manual

Electrolux EOB990 Specification sheet

Electrolux

Electrolux EOB990 Specification sheet

Electrolux U02108 EOD 982 User manual

Electrolux

Electrolux U02108 EOD 982 User manual

Electrolux EOE7C31X User manual

Electrolux

Electrolux EOE7C31X User manual

Electrolux EOD43102 User manual

Electrolux

Electrolux EOD43102 User manual

Electrolux EOB5450AAV User manual

Electrolux

Electrolux EOB5450AAV User manual

Electrolux EOB53000 User manual

Electrolux

Electrolux EOB53000 User manual

Popular Oven manuals by other brands

Cosmo COS-30ESWC installation instructions

Cosmo

Cosmo COS-30ESWC installation instructions

Russell Hobbs Bake Expert RHTOV15 Instructions and warranty

Russell Hobbs

Russell Hobbs Bake Expert RHTOV15 Instructions and warranty

BKI 1.06 Service manual

BKI

BKI 1.06 Service manual

DOREGRILL Ginox 4 E instruction manual

DOREGRILL

DOREGRILL Ginox 4 E instruction manual

Garland EC0-E-20 parts list

Garland

Garland EC0-E-20 parts list

Maytag MEW5527DD install guide

Maytag

Maytag MEW5527DD install guide

Angelo Po FX61G 3 Use and installation  manual

Angelo Po

Angelo Po FX61G 3 Use and installation manual

Beko BBIMA13301XMP user manual

Beko

Beko BBIMA13301XMP user manual

Dacor EO Series installation instructions

Dacor

Dacor EO Series installation instructions

AEG BSE78828BM user manual

AEG

AEG BSE78828BM user manual

NEFF E 1544 Series Instructions for use

NEFF

NEFF E 1544 Series Instructions for use

NEFF C17CR22G0 instruction manual

NEFF

NEFF C17CR22G0 instruction manual

Frigidaire FEB30S5DB - 30 Inch Single Electric Wall... Wiring diagram

Frigidaire

Frigidaire FEB30S5DB - 30 Inch Single Electric Wall... Wiring diagram

AGA DC3G user guide

AGA

AGA DC3G user guide

Westinghouse WVG613S user manual

Westinghouse

Westinghouse WVG613S user manual

Professional Series PS77581 instruction manual

Professional Series

Professional Series PS77581 instruction manual

AEG BCK456220M user manual

AEG

AEG BCK456220M user manual

Amica 10173.3EDpHbJVQaS instruction manual

Amica

Amica 10173.3EDpHbJVQaS instruction manual

manuals.online logo
manuals.online logoBrands
  • About & Mission
  • Contact us
  • Privacy Policy
  • Terms and Conditions

Copyright 2025 Manuals.Online. All Rights Reserved.