Electrolux ERC6503W User manual

Rice Cooker ERC6503W/ERC6603W

EN Instruction book
Before using the appliance for the
rst time, please read the safety
advice
TH คู่มือแนะนำ�ก�รใช้ง�น
ก่อนใช้อุปกรณ์เป็นครั้งแรก
กรุณ�อ่�นคำ�แนะนำ�ด้�นคว�มปลอดภัย
ID Buku petunjuk
Sebelum menggunakan alat ini
untuk pertama kalinya, harap baca
saran keselamatan
VN Sách hướng dẫn
Trước khi sử dụng thiết bị lần
đầu, vui lng đọc lời khuyên v
an toàn

3
Components
1. Push button
2. Top lid
3. Inner lid
4. LCD panel with clock*
5. Concealed micro valve
6. Handle
7. Body
8. Rice paddle
9. Soup ladle
10. Measuring cup
11. Steam tray
12. Power cord
13. Inner pot
* LCD panel vary from model to
model
EN
VNID
Cấu tạo
1. Nút ấn
2. Nắp trên
3. Nắp trong
4. Màn hình LCD có đồng hồ*
5. Van nhỏ đóng kín
6. Tay cầm
7. Thân nồi
8. Muôi xới cơm
9. Thìa múc canh
10. Cốc đong
11. Khay hấp
12. Dây điện
13. Nồi trong
* Màn hình LCD có thể khác nhau tùy
theo model
Komponen
1. Tombol tekan
2. Tutup atas
3. Tutup dalam
4. Layar LCD dengan kunci*
5. Katup mikro tersembunyi
6. Pegangan
7. Badan penanak nasi
8. Sendok nasi
9. Sendok sup
10. Cangkir ukur
11. Baki uap
12. Kabel daya
13. panci pemasak
* Layar LCD bisa berbeda dari model ke
model
EN
ID
VN
11
12
4
3
6
7
910
8
13
4
5
2
1
TIMER HOUR
REHEAT
MINUTE
BROWN
SOUP
CONGEE
QUICK
SLOW
STICKY
OFF
KEEP WARM
COOK
REHEAT
PRESS TWICE
BROWN RICE
SOUP
CONGEE
QUICK COOK
SLOW COOK
STICKY RICE

4
ส่วนประกอบ
1. ปุ่มกด
2. ฝ�ด้�นบน
3. ฝ�ด้�นใน
4. จอ LCD ที่มีน�ฬิก�*
5. ไมโครว�ล์วแบบซ่อน
6. มือจับ
7. ตัวหม้อ
8. ทัพพีตักข้�ว
9. ทัพพีตักซุป
10. ถ้วยตวง
11. ถ�ดนึ่ง
12. ส�ยไฟ
13. หม้อใน
* จอ LCD อ�จแตกต่�งกันใน
แต่ละรุ่น
TH
11
12
4
3
6
7
910
8
13
4
5
2
1
TH

5
When using electrical appliances, basic
safety precautions should always be
followed, these include the following:
• Read all instructions before using
the appliance.
• Donottouchhotsurfaces.Usethe
handle.
• Toprotectagainstelectricalshock,do
not immerse cord, plug, or rice cooker
in water or any other liquid.
• Thisapplianceisnotintendedforuse
by persons (including children) with
reduced physical, sensory or mental
capabilities, or lack of experience
and knowledge, unless they have
been given instructions or are being
supervised concerning the use of the
appliance, by a person responsible
for their safety. Children should be
supervised to ensure that they do not
play with the appliance.
• Unplugricecookerfromelectrical
outlet when not in use and before
cleaning. Allow appliance to cool
before adding or taking parts o.
• Donotoperateanyappliancewith
a damaged cord or plug it in if the
appliance malfunctions, or has been
damaged in any manner. Return
appliance to the manufacturer
or appointed service agent for
examination, repair, or adjustment.
• Donotuseoutdoors.
• Donotlettheelectricalcordhang
over the edge of a table or touch hot
surfaces.
• Donotplaceon,ornear,ahotgasor
electrical burner, or in a heated oven.
• Extremecautionmustbeusedwhen
moving an appliance containing hot
oil or other hot liquids.
• Asasafetyfeature,thisproduct
is equipped with a grounded
plug. Improper connection of the
grounding conductor may result in
the risk of electric shock. Consult a
qualied electrician if you are in doubt
as to whether the outlet is properly
grounded.
• Ashortpowersupplycordisprovided
to reduce the risk resulting from
becoming entangled in, or tripping,
over a longer cord.
• Ifanextensioncordisused,the
marked electrical rating of the cord
set or extension cord should be at
least as great as the electrical rating
of the appliance, and the cord should
be arranged so that it will not drape
over the countertop or tabletop where
it can be pulled on by children or
tripped over unintentionally.
• Toreducetheriskofreorelectric
shock, do not attempt to remove
the outer cover. There are no
userserviceable parts inside. Repair
should be done only by authorized
Electrolux technicians.
• Ifthepowersupplycordisdamaged,
it should be replaced by a qualied
technician from Electrolux.
Warning! There may be residual heat
after use on heating element surface. Do
not touch the heating element surface
immediately after use.
Warning! Do not use the appliance other
than intended use, which may cause
potential injury.
WARNING! DO NOT IMMERSE THE
APPLIANCE and AVOID SPILLAGE ON THE
CONNECTOR
ขณะใช้เครื่องใช้ไฟฟ้า ควรระมัดระวัง
ด้านความปลอดภัยเบื้องต้น รวมทั้ง
ปฏิบัติตามคำาแนะนำาต่อไปนี้
• อ่�นคำ�แนะนำ�ทั้งหมดก่อนใช้ง�น
• ห้�มสัมผัสพื้นผิวที่มีคว�มร้อน ให้จับที่
มือจับ
• เพื่อป้องกันอันตร�ยจ�กไฟฟ้�ช็อต อย่�
ให้ส�ยไฟ ปลั๊ก หรือหม้อหุงข้�วจุ่มลง
ในน้ำ�หรือของเหลวอื่นๆ
• เครื่องใช้ไฟฟ้�นี้ไม่ได้มีไว้เพื่อก�รใช้
ง�นโดยบุคคล (รวมถึงเด็ก) ที่มีคว�ม
บกพร่องท�งร่�งก�ย ก�รรับรู้สัมผัสหรือ
จิตประส�ท หรือข�ดประสบก�รณ์และ
คว�มรู้ เว้นแต่จะได้รับคำ�แนะนำ�หรือ
อยู่ภ�ยใต้ก�รควบคุมดูแลเกี่ยวกับก�ร
ใช้เครื่อง โดยผู้ที่รับผิดชอบต่อคว�ม
ปลอดภัยของบุคคลเหล่�นั้น เด็กควรมีผู้
ดูแลขณะใช้ง�น เพื่อให้แน่ใจว่�เด็กจะ
ไม่เล่นเครื่องใช้ไฟฟ้�
• ถอดปลั๊กหม้อหุงข้�วจ�กเต้�รับเมื่อไม่
ได้ใช้ง�นและก่อนทำ�คว�มสะอ�ด รอให้
เครื่องเย็นก่อนใส่หรือนำ�ส่วนประกอบใด
ออก
• ห้�มเปิดใช้ง�นเครื่องที่ส�ยไฟหรือปลั๊ก
ไฟเสียห�ย หรือในกรณีที่เครื่องทำ�ง�น
ผิดพล�ด หรือมีลักษณะเสียห�ยใดๆ ส่ง
เครื่องคืนให้แก่ผู้ผลิตหรือผู้ให้บริก�ร
ที่ได้รับแต่งตั้งเพื่อทำ�ก�รตรวจสอบ
ซ่อมแซม หรือปรับตั้ง
• ห้�มใช้ง�นในที่โล่งแจ้ง
• อย่�ให้ส�ยไฟห้อยเหนือขอบโต๊ะหรือ
สัมผัสโดนพื้นผิวที่มีคว�มร้อน
• อย่�ว�งไว้บนหรือใกล้กับเต�แก๊สหรือ
เต�ไฟฟ้�ที่มีคว�มร้อนหรือในเต�อบที่
ร้อนอยู่
• ใช้คว�มระมัดระวังเป็นพิเศษเมื่อเคลื่อน
ย้�ยเครื่องขณะที่มีน้ำ�มันร้อนหรือ
ของเหลวคว�มร้อนสูงอื่นๆ
• เพื่อคว�มปลอดภัย ผลิตภัณฑ์จึงติดตั้ง
ม�พร้อมกับส�ยดิน ก�รต่อตัวนำ�ไฟฟ้�
ลงดินไม่ถูกต้องอ�จทำ�ให้เกิดไฟฟ้�
ช็อตได้ ห�กมีข้อสงสัยว่�เต้�รับไฟฟ้�
ต่อส�ยดินถูกต้องหรือไม่ กรุณ�สอบถ�ม
กับช่�งไฟที่มีคว�มเชี่ยวช�ญ
• ส�ยไฟที่จัดม�ให้เป็นแบบสั้นเพื่อลด
คว�มเสี่ยงอุบัติเหตุที่เกิดจ�กส�ยย�ว
พันกันหรือสะดุดล้ม
• ห�กใช้ส�ยต่อพ่วง พิกัดท�งไฟฟ้�ของ
ชุดส�ยไฟหรือส�ยต่อพ่วงจะต้องไม่น้อย
กว่�พิกัดท�งไฟฟ้�ของเครื่องใช้ และ
ส�ยไฟจะต้องไม่พ�ดบนเค�น์เตอร์หรือ
โต๊ะซึ่งเด็กอ�จดึงเล่นหรือสะดุดล้มโดย
ไม่ตั้งใจได้
• เพื่อลดคว�มเสี่ยงจ�กก�รเกิดเพลิง
ไหม้หรือไฟฟ้�ช็อต อย่�ถอดฝ�ครอบ
ด้�นนอกออก ชิ้นส่วนอะไหล่ภ�ยในไม่
ส�ม�รถซ่อมบำ�รุงเองได้ ควรให้ช่�งไฟ
ที่ได้รับอนุญ�ตจ�ก Electrolux เป็นผู้
ซ่อมแซมเท่�นั้น
• ห�กส�ยไฟชำ�รุดเสียห�ย ให้เปลี่ยนส�ย
ใหม่โดยช่�งไฟของ Electrolux
คำ�เตือน! พื้นผิวส่วนทำ�คว�มร้อนอ�จยังคง
ร้อนอยู่หลังจ�กใช้ง�นแล้ว ห้�มสัมผัสพื้น
ผิวส่วนทำ�คว�มร้อนทันทีหลังจ�กใช้ง�น
คำ�เตือน! ห้�มใช้เครื่องนอกเหนือจ�ก
วัตถุประสงค์ที่กำ�หนดไว้ เพร�ะอ�จทำ�ให้
เกิดก�รบ�ดเจ็บได้
คำ�เตือน! ห้�มจุ่มเครื่องลงในน้ำ� และหลีก
เลี่ยงอย่�ให้น้ำ�กระเด็นไปที่หัวต่อ
Safety advice/คำ�แนะนำ�ด้�นคว�มปลอดภัย/Saran keselamatan/Lời khuyên v an toàn
TH
EN

6
Safety advice/คำ�แนะนำ�ด้�นคว�มปลอดภัย/Saran keselamatan/Lời khuyên v an toàn
Khi s dng cc thit b đin, cần
luôn luôn tuân th cc bin php
phng nga an ton cơ bn, bao
gm như sau:
• Đọc tất c hướng dẫn trước khi sử
dụng thiết bị.
• Không chạm vào các b mt nóng.
Sử dụng tay cầm.
• Để bo vệ khỏi điện git, không
nhúng dây điện, phích cắm, hoc
nồi cơm điện vào nước hoc bất k
chất lỏng nào khác.
• Thiết bị này không được thiết kế để
sử dụng bởi các cá nhân (kể c trẻ
em) có khuyết tt v thể chất, giác
quan hoc thần kinh, hoc thiếu kinh
nghiệm và kiến thc, trừ phi họ được
giám sát hoc ch dẫn sử dụng thiết
bị bởi một người chịu trách nhiệm
v s an toàn của họ. Trẻ em phi
được giám sát để đm bo chúng
không nghịch phá thiết bị này.
• Rút phích cắm khỏi điện khi không
sử dụng và trước khi làm sạch. Để
nguội trước khi đưa vào hoc lấy
các bộ phn ra.
• Không vn hành bất k thiết bị nào
khi dây điện hoc phích cắm bị hư
hại hoc nếu thiết bị gp trục trc
hoc đ bị hư hỏng dưới mọi hình
thc. Gửi tr thiết bị cho nhà sn
xuất hoc trung tâm bo hành được
ch định để được kiểm tra, sửa
cha hoc điu chnh.
• Không được dùng ngoài trời.
• Không treo dây điện lên cạnh bàn
hoc để dây chạm vào các b mt
nóng.
• Không để lên hoc gần nguồn khí
nóng hoc bếp điện hoc trong l
đun nóng.
• Phi cc k thn trọng khi di chuyển
thiết bị có cha dầu ăn nóng hoc
các chất lỏng nóng khác.
• Một trong nhng tính năng an toàn
là sn phm này được trang bị
phích cắm tiếp đất. Việc kết nối dây
dẫn tiếp đất không đúng cách có thể
dẫn đến nguy cơ điện git. Tham
kho kiến thợ điện có trình độ nếu
bạn nghi ngờ v việc liệu điện có
được tiếp đất đúng cách hay không.
• Dây dẫn điện ngắn s giúp gim rủi
ro do việc bị vướng vào hoc vướng
vào dây điện dài hơn.
• Nếu sử dụng dây điện ko dài,
thông số điện được ghi nhn cho
bộ dây điện hoc dây điện ko dài
tối thiểu cần lớn bng thông số điện
của thiết bị và cần bố trí dây điện
sao cho dây s không nm trên mt
cắt hoc mt bàn, nơi trẻ em có thể
bị git hoc vô tình vướng vào dây
• Để gim nguy cơ cháy hoc điện
git, không được tháo bỏ lớp vỏ
bọc ngoài. Không có bộ phn bên
trong nào người dùng có thể bo
dưng. Việc sửa cha ch nên do
các kỹ thut viên được ủy quyn
của Electrolux thc hiện.
• Nếu dây dẫn điện bị hư hại, việc thay
thế nên được thc hiện bởi kỹ thut
viên đủ năng lc của Electrolux.
Cnh báo! Mt bộ phn gia nhiệt có
thể vẫn cn nóng sau khi sử dụng.
Không được tiếp xúc với mt bộ phn
gia nhiệt ngay sau khi sử dụng.
Cnh báo! Không sử dụng thiết bị cho
các mục đích khác để đ phng nguy
cơ chấn thương.
CẢNH BÁO! KHÔNG NHÚNG THIẾT
BỊ VÀO NƯỚC VÀ TRÁNH LÀM ĐỔ
NƯỚC LÊN PHÍCH CẮM
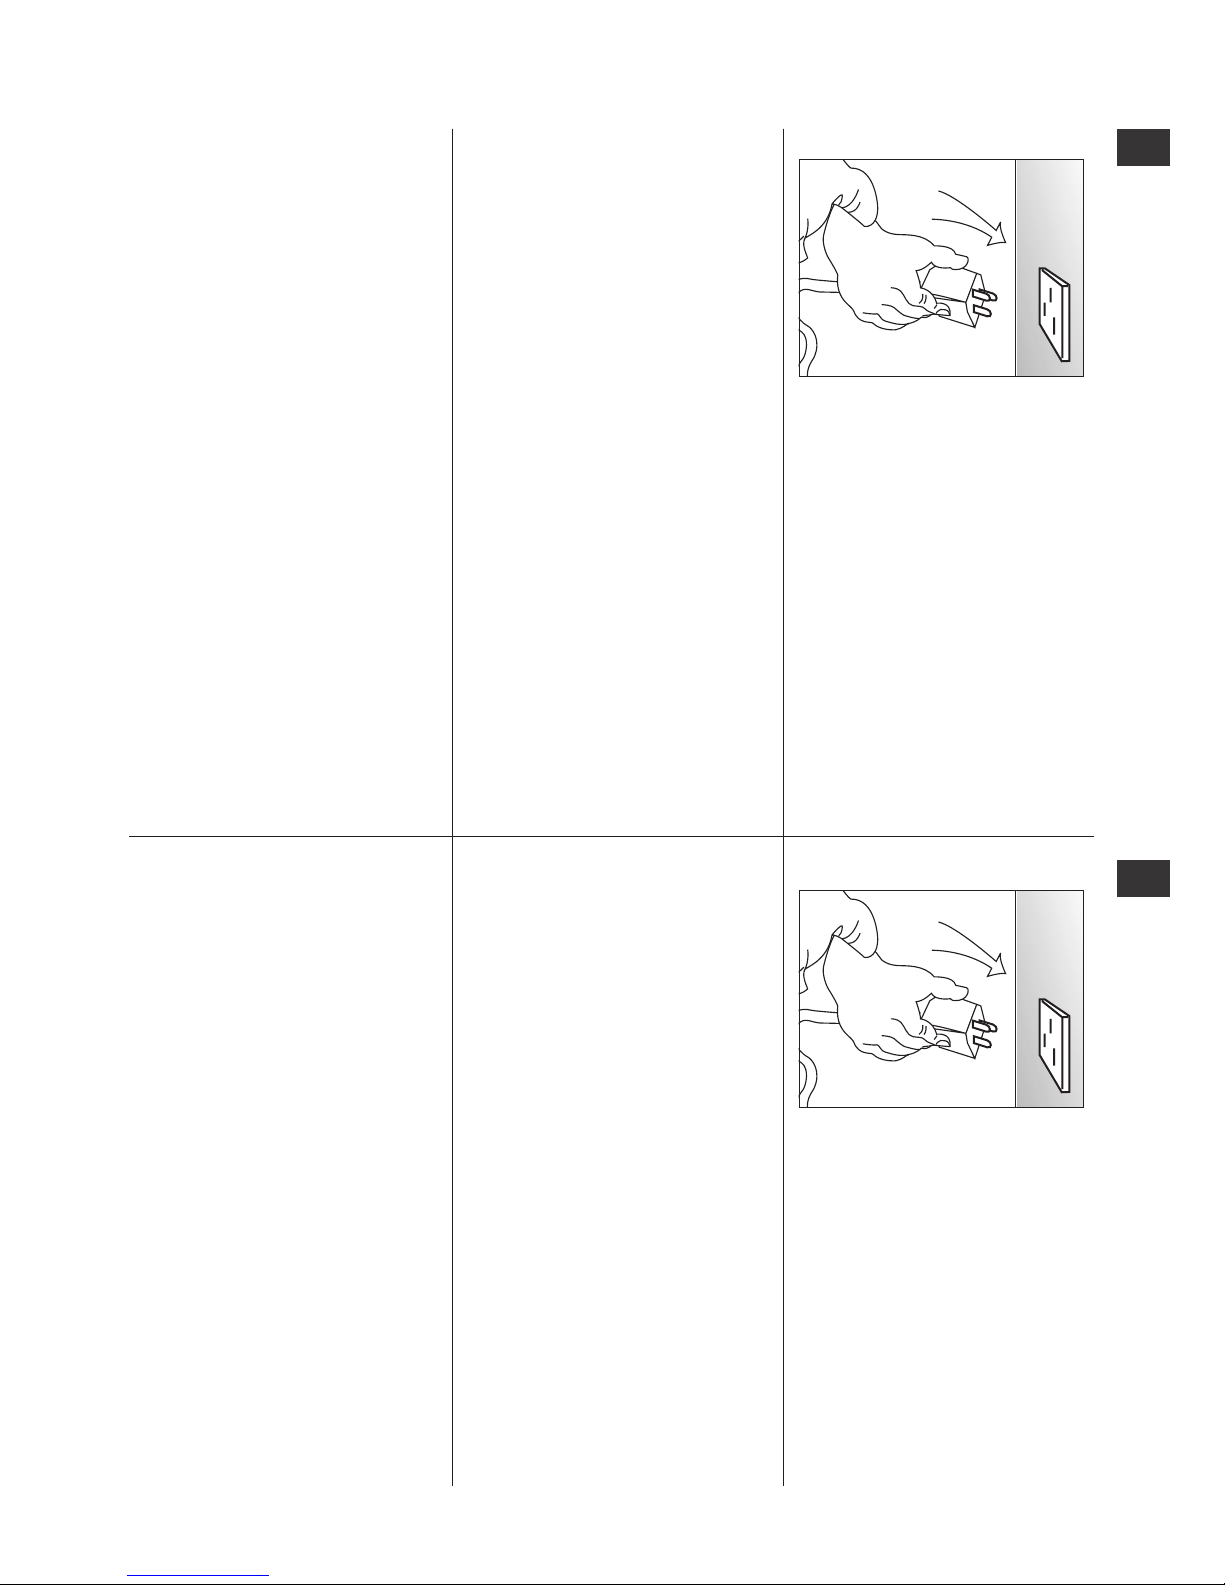
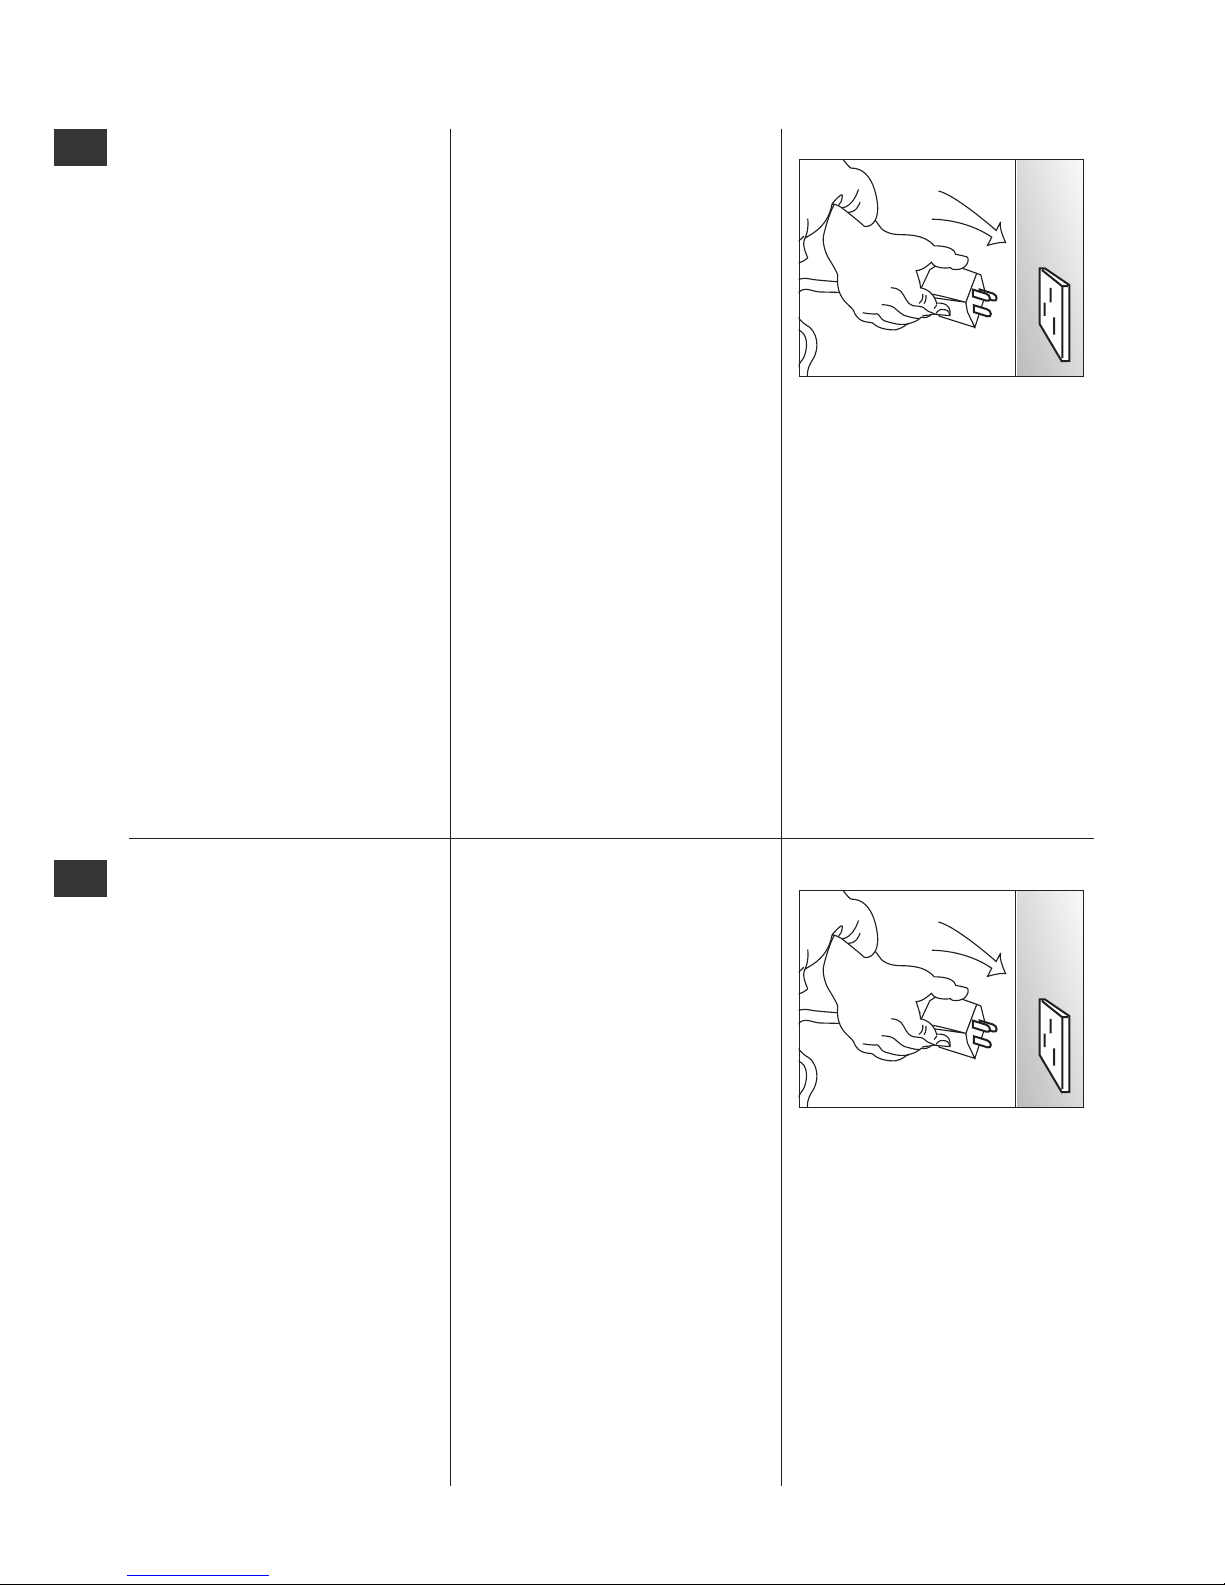
Ketika menggunakan perangkat listrik,
langkah pencegahan dasar harus selalu
diikuti, termasuk yang berikut ini:
• Bacalah seluruh petunjuk sebelum
menggunakan perangkat ini.
• Janganmenyentuhpermukaanpanas.
Gunakan pegangan.
• Untukmelindungidarisengatanlistrik,
jangan merendam kabel, steker, atau
penanak nasi di dalam air atau cairan
lainnya.
• Perangkatinitidakdimaksudkan
untuk digunakan oleh orang
(termasuk anak-anak) dengan
kemampuan sik, indera, atau mental
yang kurang, atau kurang pengalaman
dan pengetahuan, kecuali jika mereka
telah diberi petunjuk atau diawasi
dalam menggunakan perangkat ini
oleh orang yang bertanggung jawab
atas keselamatan mereka. Anak-anak
harus diawasi untuk memastikan
bahwa mereka tidak bermain-main
dengan perangkat ini.
• Cabutpenanaknasidaristopkontak
listrik bila sedang tidak digunakan dan
sebelum dibersihkan. Biarkan perangkat
menjadi dingin sebelum menambahkan
atau melepas bagian-bagiannya.
• Janganmengoperasikanperkakas
dengan kabel yang rusak atau
menancapkannya ke stopkontak jika
perangkat mengalami malfungsi,
atau mengalami kerusakan apa pun.
Kembalikan perkakas kepada produsen
atau agen servis yang ditunjuk untuk
diperiksa, diperbaiki, atau disetel.
• Jangangunakandiluarruangan.
• Janganbiarkankabellistriktergantung
di tepi meja atau menyentuh
permukaan panas.
• Janganmenempatkandiatas,ataudi
dekat kompor gas atau kompor listrik
panas, atau dalam oven yang panas.
• Andaharusekstrahati-hatiketika
memindahkan perangkat yang berisi
minyak panas atau cairan panas lainnya.
• Sebagaiturkeamanan,produkini
dilengkapi dengan steker berarde
(dibumikan). Sambungan konduktor
arde yang kurang baik dapat
menimbulkan risiko sengatan listrik.
Konsultasikan dengan teknisi listrik
yang berkualikasi jika Anda ragu
apakah stopkontak Anda berarde.
• Kabelcatudayayangpendek
disediakan untuk mengurangi risiko
yang timbul akibat terjerat, atau
tersandung kabel yang panjang.
• Jikamenggunakankabelekstensi,
rating listrik yang tertera pada
perangkat kabel atau kabel ekstensi
harus paling tidak sama besar dengan
rating listrik perkakas, dan kabel harus
diatur sedemikian sehingga tidak akan
menggantung pada permukaan meja
sehingga dapat ditarik oleh anak-anak
atau membuat tersandung.
• Untukmengurangirisikokebakaran
atau sengatan listrik, jangan mencoba
melepaskan penutup luar perangkat.
Tidak ada komponen yang dapat
diservis oleh pengguna di bagian dalam
perkakas. Perbaikan harus dilakukan
hanya oleh teknisi Electrolux resmi.
• Jikakabelcatudayarusak,kabel
ini harus diganti oleh teknisi yang
berkualikasi dari Electrolux.
Peringatan! Bisa ada sisa panas setelah
penggunaan pada permukaan elemen
pemanas.Janganmenyentuhpermukaan
elemen pemanas segera setelah
penggunaan.
Peringatan!Janganmenggunakan
perangkat selain untuk penggunaan yang
dimaksudkan, yang dapat menyebabkan
kemungkinan cedera.
PERINGATAN!JANGANMERENDAM
PERANGKATdanHINDARITUMPAHAN
PADA KONEKTOR
VN
ID

7
Getting started/เริ่มใช้ง�น/Untukmemulai/Bắt đầu
COOKING PREPARATION
Before using the appliance for the rst
time, clean the parts of the rice cooker
thoroughly. Make sure all the parts are
completely dry before you start using the
appliance.
1. Measure the rice using the measuring
cup provided. Each cup of uncooked
rice normally gives two bowls of
cooked rice. Do not exceed the
quantities indicated on the inside of
the inner pot. A measuring cup of rice
is approximately 160 g.
2. To prevent damaging the non-stick
coating of the inner pot, use a
separate container to wash the rice.
3. Wash the rice thoroughly and then
transfer to the inner pot. Add water
to the level indicated on the scale
inside the pot that corresponds to
the number of cups of rice used.
For instance, if you cook 3 cups
of rice, add water up to the 3-cup
level indicated on the scale. You can
adjust the water level accordingly for
dierent types of rice and individual
preference.
4. Water should not exceed the
maximum water level mark.
5. Press the lid release button to open
the lid.
6. Wipe the outside of the inner pot
dry and clean to make sure there is
no water or foreign residue on the
heating element or the magnetic
switch.
7. Place the inner pot gently in the rice
cooker.
8. Close the lid of the rice cooker until
a ‘click’ sound is heard. Plug in the
power cord into the rice cooker and
to the wall socket and switch on the
mains.
การเตรียมประกอบอาหาร
ก่อนใช้เครื่องเป็นครั้งแรก ให้ทำ�คว�ม
สะอ�ดส่วนต่�งๆ ของหม้อหุงข้�วให้ทั่ว และ
ก่อนเริ่มใช้ง�นเครื่อง จะต้องแน่ใจว่�ส่วน
ประกอบทุกชิ้นของหม้อหุงข้�วแห้งสนิท
ดีแล้ว
1. ตวงข้�วโดยใช้ถ้วยตวงที่จัดม�ให้ โดย
ปกติ ข้�วส�รหนึ่งถ้วยส�ม�รถหุงข้�ว
สวยได้ 2 ช�ม อย่�ให้เกินขีดที่กำ�หนด
ปริม�ณที่อยู่ด้�นในของหม้อใน หนึ่งถ้วย
ตวงมีคว�มจุประม�ณ 160 ก.
2. เพื่อป้องกันคว�มเสียห�ยต่อชั้นเคลือบ
ผิวภ�ยในของหม้อใน ให้ใช้ภ�ชนะอื่น
เพื่อซ�วข้�ว
3. ซ�วข้�วให้ทั่วและเทข้�วที่ซ�วแล้วลง
หม้อใน เติมน้ำ�ลงในหม้อในต�มจำ�นวน
ถ้วยตวงข้�ว โดยดูที่ขีดบอกระดับด้�น
ใน เช่น ห�กตวงข้�วส�ร 3 ถ้วย ให้เติม
น้ำ�ถึงขีดสำ�หรับข้�ว 3 ถ้วย หรืออ�จปรับ
เปลี่ยนระดับน้ำ�ได้ต�มประเภทของข้�ว
และคว�มพอใจส่วนตัว
4. น้ำ�จะต้องไม่เกินขีดสูงสุด
5. กดปุ่มปลดล็อคฝ�เพื่อเปิดฝ�ขึ้นม�
6. เช็ดรอบนอกของหม้อในเพื่อให้แน่ใจ
ว่�หม้อแห้งสนิทและสะอ�ดดีแล้ว
นอกจ�กนี้ จะต้องไม่มีสิ่งแปลกปลอมที่
ส่วนทำ�คว�มร้อนหรือสวิตช์แม่เหล็ก
7. ว�งหม้อในลงในหม้อหุงข้�ว
8. ปิดฝ�หม้อหุงข้�วลงจนกระทั่งได้ยิน
เสียง "คลิก" เสียบส�ยไฟเข้�ที่หม้อหุง
ข้�วฝั่งหนึ่ง และอีกฝั่งหนึ่งเสียบเข้�กับ
เต้�รับที่ผนัง จ�กนั้นจึงเปิดสวิตช์หลัก
TH
EN

88
Getting started/เริ่มใช้ง�น/Untukmemulai/Bắt đầu
PERSIAPAN MEMASAK
Sebelum menggunakan perangkat
ini untuk pertama kalinya, bersihkan
dulu bagian-bagian penanak nasi secara
menyeluruh. Pastikan bahwa semua
bagiannya benar-benar kering sebelum
Anda mulai menggunakan perangkat ini.
1. Takar beras menggunakan cangkir
ukur yang disediakan. Satu cangkir
beras normalnya menghasilkan 2
mangkuknasi.Janganmelebihi
jumlah yang ditunjukkan dalam panci
pemasak. Berat satu cangkir ukur
beras adalah sekitar 160 g.
2. Untukmencegahkerusakanlapisan
anti-lengket panci pemasak, gunakan
wadah terpisah untuk mencuci beras.
3. Cuci beras sampai bersih dan
kemudian tuangkan beras ke dalam
panci pemasak. Tambahkan air sampai
ke tingkat yang ditunjukkan di dalam
panci sesuai dengan jumlah cangkir
beras yang dimasak. Misalnya, jika
Anda memasak 3 cangkir beras,
tambahkan air sampai ke tingkat
3-cangkir yang ditunjukkan pada
skala. Anda dapat mengatur tingkat
air yang sesuai untuk jenis beras yang
berbeda dan sesuai selera Anda.
4. Air sebaiknya tidak melampaui tanda
tingkat air maksimum.
5. Tekan tombol pembuka tutup untuk
membuka tutup.
6. Lap bagian luar panci pemasak dan
bersihkan untuk memastikan tidak
ada air atau benda asing pada elemen
pemanas atau sakelar magnetik.
7. Masukkan panci pemasak dengan
perlahan ke dalam penanak nasi.
8. Tutupkan tutup Penanak Nasi sampai
suara ‘klik’ terdengar. Tancapkan
kabel daya ke penanak nasi dan ke
stopkontak dinding, lalu hidupkan
listrik.
CHUẨN BỊ NẤU
Trưc khi s dng thit b lần đầu
tiên, làm sạch kỹ các bộ phn của nồi
cơm điện. Đm bo rng tất c các bộ
phn hoàn toàn khô trước khi bạn bắt
đầu sử dụng thiết bị.
1. Đong gạo bng cách sử dụng cốc
đong đi km. Mi cốc gạo thường
bng hai bát cơm. Không vượt quá
số lượng được ch định ở mt trong
của nồi bên trong. Cốc đong gạo
cha khong 160 g.
2. Để ngăn ngừa hư hại đối với lớp
mạ chống dính của nồi bên trong,
sử dụng vt đng riêng để vo gạo.
3. Vo gạo kỹ và cho gạo đ vo vào
nồi bên trong. Thêm nước tới mc
được ch định trên thang chia ở mt
trong nồi bên trong tương ng với
số cốc gạo được nấu. Ví dụ, nếu
bạn nấu 3 cốc gạo, thêm nước tối
đa tới mc 3 cốc được ch định trên
thang chia. Bạn có thể điu chnh
mc nước tùy theo các loại gạo
khác nhau và sở thích cá nhân.
4. Nước không được vượt quá vạch
dấu mc nước tối đa.
5. Bấm nút nh nắp để mở nắp.
6. Đm bo rng mt ngoài của nồi
bên trong khô ráo và sạch s và
không có các vết cn lạ trên bộ
phn gia nhiệt hoc bộ chuyển
mạch từ.
7. Đt nồi bên trong vào nồi cơm điện.
8. Đóng nắp của nồi cơm điện cho đến
khi nghe thấy tiếng ‘cách’. Cắm dây
điện vào nồi cơm điện và vào cắm
trên tường và bt nguồn điện.
VN
ID

9
UsingtheProduct/ก�รใช้ง�นผลิตภัณฑ์/Menggunakan Produk/Sử dụng Sn phm
STEAMING
1. Add appropriate amount of water into
the inner pot. The amount of water
varies according to the quantity of
food to be steamed.
2. Ensure that the water level does not
exceed the height of the steam tray.
Insert the steam tray into the inner
pot and place the food on a plate or
on the steam tray.
3. UsetheQUICKCOOKModefor
steaming.
REHEATING
1. Press COOK/REHEAT button twice.
The [REHEAT] icon appears on the
LCD screen and the red indicator
lights up on COOK/REHEAT button.
An animation showing the reheating
progress is displayed on the LCD
screen.
2. With 10 minutes of cooking time
to go, the LCD screen changes the
display to a countdown timer and
switches to Keep Warm mode when
completed.
การนึ่ง
1. เติมน้ำ�ในปริม�ณที่เหม�ะสมลงในหม้อ
ใน ปริม�ณน้ำ�จะแตกต่�งกันไปต�ม
ปริม�ณอ�ห�รที่ต้องก�รนึ่ง
2. ตรวจดูให้แน่ใจว่�ระดับน้ำ�ไม่สูงท่วม
ถ�ดนึ่ง ใส่ถ�ดนึ่งลงในหม้อในและว�ง
อ�ห�รบนจ�นหรือบน ถ�ดนึ่ง
3. ใช้โหมด หุงด่วน เพื่อทำ�ก�รนึ่ง
การอุ่นให้ร้อนอีกครั้ง
1. กดปุ่มหุงข้�ว/อุ่นร้อนใหม่สองครั้ง
ไอคอน [อุ่นร้อนใหม่] จะปร�กฏขึ้นบน
หน้�จอ LCD และไฟสีแดงที่ปุ่มหุงข้�ว/
อุ่นร้อนใหม่จะติดสว่�งขึ้น จ�กนั้น จะมี
ภ�พเคลื่อนไหวแสดงคว�มคืบหน้�ใน
ก�รอุ่นบนหน้�จอ LCD
2. เมื่อเวล�ในก�รอุ่นเหลือ 10 น�ที
หน้�จอ LCD จะเปลี่ยนก�รแสดงผลเป็น
น�ฬิก�นับถอยหลัง และเปลี่ยนเป็น
โหมดอุ่นร้อน
COOKING JASMINE/WHITE RICE
1. Add pre-washed rice and appropriate
amount of water into the inner pot.
2. Press COOK/REHEAT button once
and the red indicator light on COOK/
REHEAT button starts blinking.
3. Press COOK/REHEAT again to start
cooking. The red indicator light stops
blinking and stays on. An animation
showing cooking progress is displayed
on the LCD screen.
4. With 10 minutes of cooking time to go,
the LCD screen changes the display
to a countdown timer and switches to
Keep Warm mode when completed.
การหุงข้าวขาว
1. ใส่ข้�วที่ซ�วแล้วและเติมน้ำ�ในปริม�ณที่
เหม�ะสมลงในหม้อใน
2. กดปุ่มหุงข้�ว/อุ่นร้อนใหม่หนึ่งครั้ง ไฟ
สีแดงที่ปุ่มหุงข้�ว/อุ่นร้อนใหม่จะเริ่ม
กะพริบ
3. กดปุ่มหุงข้�ว/อุ่นร้อนใหม่อีกครั้งเพื่อเริ่ม
หุง ไฟสีแดงจะหยุดกะพริบและติดสว่�ง
คงที่ จ�กนั้นจะมีภ�พเคลื่อนไหวแสดง
คว�มคืบหน้�ในก�รหุงบนหน้�จอ LCD
4. เมื่อเวล�ในก�รหุงเหลือ 10 น�ที หน้�จอ
LCD จะเปลี่ยนก�รแสดงผลเป็นน�ฬิก�
นับถอยหลัง และเปลี่ยนเป็นโหมดอุ่นร้อน
Note: • Usethericepaddleprovidedto
scoop the cooked rice. Do not use
metal utensils as these scratch
and damage the non-stick coating
in the inner pot.
หมายเหตุ: • ใช้ทัพพีตักข้�วที่ให้ม�ด้วย
เพื่อตักข้�วที่หุงสุกแล้ว ห้�ม
ใช้ทัพพีที่ทำ�ด้วยโลหะเพร�ะ
อ�จทำ�ให้เกิดรอยหรือคว�ม
เสียห�ยกับชั้นเคลือบของ
หม้อใน
TH
EN

10 10
HẤP
1. Đ lượng nước phù hợp vào trong
nồi. Lượng nước có thể khác nhau
tùy theo lượng thc ăn cần hấp.
2. Không được để mc nước vượt
quá chiu cao của khay hấp. Đt
khay hấp vào trong nồi và cho thc
ăn lên một chiếc đĩa hoc lên khay
hấp.
HÂM LẠI
1. Nhấn nút COOK/REHEAT hai lần.
Biểu tượng [REHEAT] xuất hiện
trên màn hình LCD và đn ch báo
màu đỏ trên nút COOK/REHEAT s
sáng. Hình nh động cho biết quá
trìnhh hâm lại được hiển thị trên
màn hình LCD.
2. Với thời gian bắt đầu nấu là 10
phút, màn hình LCD thay đi hiển
thị sang hẹn giờ đếm ngược và
chuyển sang chế độ Gi ấm khi
nấu xong.
NẤU GẠO TRẮNG/GẠO THƠM
1. Cho gạo đ vo trước và lượng nước
phù hợp vào trong nồi.
2. Nhấn nút COOK/REHEAT một lần
và đn màu đỏ trên nút COOK/
REHEAT bắt đầu nhấp nháy.
3. Nhấn nút COOK/REHEAT một lần
na để bắt đầu nấu. Đn ch báo
màu đỏ hết nhấp nháy và báo sáng.
Hình nh động cho biết quá trình
nấu được hiển thị trên màn hình
LCD.
4. Với thời gian bắt đầu nấu là 10 phút,
màn hình LCD thay đi hiển thị sang
hẹn giờ đếm ngược và chuyển sang
chế độ Gi ấm khi nấu xong.
Lưu ý: • Sử dụng muôi xới cơm đi km
để xới cơm. Không dùng đồ
dùng kim loại vì chúng s làm
xước và hỏng lớp mạ chống
dính của nồi bên trong.
UsingtheProduct/ก�รใช้ง�นผลิตภัณฑ์/Menggunakan Produk/Sử dụng Sn phm
MENGUKUS
1. Tambahkan sejumlah air yang sesuai
kedalampancipemasak.Jumlahair
berbeda-beda sesuai dengan jumlah
makanan yang akan dikukus.
2. Pastikan bahwa tingkat air tidak
melebihi tinggi baki uap. Masukkan
baki uap ke dalam panci pemasak dan
tempatkan makanan di atas piring
atau pada baki uap.
3. GunakanmodeQUICKCOOKuntuk
mengukus.
MENGHANGATKAN KEMBALI
1. Tekan tombol COOK/REHEAT dua kali.
Ikon [REHEAT] muncul pada layar LCD
dan lampu indikator merah menyala
pada tombol COOK/REHEAT. Animasi
yang memperlihatkan kemajuan
proses penghangatan kembali
ditampilkan pada layar LCD.
2. Ketika waktu memasak tersisa 10
menit, layar LCD mengubah tampilan
menjadi penghitung waktu mundur
dan berpindah ke mode Keep Warm
(menghangatkan) setelah selesai.
MENANAK NASI
1. Masukkan beras yang sudah dicuci
dan sejumlah air yang sesuai ke dalam
panci pemasak.
2. Tekan tombol COOK/REHEAT sekali dan
lampu indikator merah pada tombol
COOK/REHEAT mulai berkedip.
3. Tekan COOK/REHEAT lagi untuk mulai
memasak. Lampu indikator merah
berhenti berkedip dan terus menyala.
Animasi yang memperlihatkan
kemajuan proses memasak
ditampilkan pada layar LCD.
4. Ketika waktu memasak tersisa 10
menit, layar LCD mengubah tampilan
menjadi penghitung waktu mundur
dan berpindah ke mode Keep Warm
(menghangatkan) setelah selesai.
Catatan: • Gunakansendoknasiyang
disediakan untuk menyendok
nasi.Jangangunakan
perkakas logam karena dapat
menggores dan merusak
lapisan anti-lengket dalam
panci pemasak.
VN
ID

11
UsingtheProduct/ก�รใช้ง�นผลิตภัณฑ์/Menggunakan Produk/Sử dụng Sn phm
QUICK COOK
1. Usethisfunctionwithmaximum2cup
of rice to optimise cooking time.
2. PresstheQUICKbuttononce.The
arrow on the LCD display points to
[QUICKCOOK]andtheredindicator
light starts blinking on the COOK/
REHEAT button.
3. Press the COOK/REHEAT button to
start cooking. The red indicator light
on the COOK/REHEAT button stops
blinking and stays on. An animation
showing cooking progress is displayed
on the LCD screen.
4. With 9 minutes of cooking time to go,
the LCD screen changes the display
to a countdown timer and switches to
Keep Warm mode when completed.
SLOW COOK
1. Add ingredients and appropriate
amount of water into the inner pot.
2. Press the SLOW button once. The arrow
on the LCD display points to [SLOW
COOK] and the red indicator light starts
blinking on the COOK/REHEAT button.
3. PressHOURandMINUTEbuttonsto
adjust the cooking time (4-12 hours).
The hour goes up by 1 with every press
oftheHOURbutton.PressingMINUTE
gives 15, 30, 45, and 00 options.
4. Press the COOK/REHEAT button to start
cooking. The red indicator light on the
COOK/REHEAT button stops blinking
and stays on. An animation showing
cooking progress is displayed on the
LCD screen.
5. With 10 minutes of cooking time to go,
the LCD screen changes the display to a
countdown timer and switches to Keep
Warm mode when completed.
COOKING STICKY RICE
1. Add ingredients and appropriate
amount of water into the inner pot.
2. Press the STICKY button once. The
arrow on the LCD display points to
[STICKY RICE] and the red indicator
light starts blinking on the COOK/
REHEAT button.
3. Press the COOK/REHEAT button to
start cooking. The red indicator light
on the COOK/REHEAT button stops
blinking and stays on. An animation
showing cooking progress is
displayed on the LCD screen.
4. With 10 minutes of cooking time
to go, the LCD screen changes the
display to a countdown timer and
switches to Keep Warm mode when
completed.
การหุงแบบด่วน
1. ใช้ฟังก์ชั่นนี้ในกรณีที่หุงข้�วไม่เกิน 2
ถ้วย เพื่อประหยัดเวล�ในก�รหุงม�ก
ที่สุด
2. กดปุ่มหุงด่วนหนึ่งครั้ง ลูกศรบน
หน้�จอ LCD จะชี้ไปที่ [หุงด่วน] และ
ไฟสีแดงที่ปุ่มหุงข้�ว/อุ่นร้อนใหม่จะเริ่ม
กะพริบ
3. กดปุ่มหุงข้�ว/อุ่นร้อนใหม่เพื่อเริ่มหุง ไฟ
สีแดงที่ปุ่มหุงข้�ว/อุ่นร้อนใหม่จะหยุด
กะพริบและติดสว่�งคงที่ จ�กนั้น จะมี
ภ�พเคลื่อนไหวแสดงคว�มคืบหน้�ใน
ก�รหุงบนหน้�จอ LCD
4. เมื่อเวล�ในก�รหุงเหลือ 9 น�ที หน้�จอ
LCD จะเปลี่ยนก�รแสดงผลเป็นน�ฬิก�
นับถอยหลัง และเปลี่ยนเป็นโหมดอุ่น
ร้อน
การตุ๋นอาหาร
1. ใส่ส่วนผสมต่�งๆ และเติมน้ำ�ในปริม�ณ
ที่เหม�ะสมลงในหม้อใน
2. กดปุ่มตุ๋นหนึ่งครั้ง ลูกศรบนหน้�จอ LCD
จะชี้ไปที่ [ตุ๋น] และไฟสีแดงที่ปุ่มหุง
ข้�ว/อุ่นร้อนใหม่จะเริ่มกะพริบ
3. กดปุ่มชั่วโมงและน�ทีเพื่อตั้งเวล�ในก�ร
ตุ๋น (4-12 ชั่วโมง) แต่ละครั้งที่กดปุ่ม
ชั่วโมง เวล�จะเพิ่มขึ้นทีละ 1 ชั่วโมง
ก�รกดปุ่มน�ทีจะเลือกเวล�ได้ 15, 30,
45 และ 00 น�ที
4. กดปุ่มหุงข้�ว/อุ่นร้อนใหม่เพื่อเริ่มตุ๋น ไฟ
สีแดงที่ปุ่มหุงข้�ว/อุ่นร้อนใหม่จะหยุด
กะพริบและติดสว่�งคงที่ จ�กนั้น จะมี
ภ�พเคลื่อนไหวแสดงคว�มคืบหน้�ใน
ก�รตุ๋นบนหน้�จอ LCD
5. เมื่อเวล�ในก�รตุ๋นเหลือ 10 น�ที
หน้�จอ LCD จะเปลี่ยนก�รแสดงผลเป็น
น�ฬิก�นับถอยหลัง และเปลี่ยนเป็น
โหมดอุ่นร้อน
การหุงข้าวเหนียว
1. ใส่ส่วนผสมต่�งๆ และเติมน้ำ�ในปริม�ณ
ที่เหม�ะสมลงในหม้อใน
2. กดปุ่มข้�วเหนียวหนึ่งครั้ง ลูกศรบน
หน้�จอ LCD จะชี้ไปที่ [ข้�วเหนียว]
และไฟสีแดงที่ปุ่มหุงข้�ว/อุ่นร้อนใหม่
จะเริ่มกะพริบ
3. กดปุ่มหุงข้�ว/อุ่นร้อนใหม่เพื่อเริ่มหุง ไฟ
สีแดงที่ปุ่มหุงข้�ว/อุ่นร้อนใหม่จะหยุด
กะพริบและติดสว่�งคงที่ จ�กนั้น จะมี
ภ�พเคลื่อนไหวแสดงคว�มคืบหน้�ใน
ก�รหุงบนหน้�จอ LCD
4. เมื่อเวล�ในก�รหุงเหลือ 10 น�ที
หน้�จอ LCD จะเปลี่ยนก�รแสดงผลเป็น
น�ฬิก�นับถอยหลัง และเปลี่ยนเป็น
โหมดอุ่นร้อน
TH
EN

12
UsingtheProduct/ก�รใช้ง�นผลิตภัณฑ์/Menggunakan Produk/Sử dụng Sn phm
NẤU NHANH
1. Sử dụng chc năng này với tối đa
2 cốc gạo để tối ưu hóa thời gian
nấu.
2. Nhấn nút QUICK một lần. Mũi tên
trên màn hình LCD ch [QUICK
COOK] và đn ch báo màu đỏ trên
nút COOK/REHEAT bắt đầu nhấp
nháy.
3. Nhấn nút COOK/REHEAT để bắt
đầu nấu. Đn ch báo màu đỏ trên
nút COOK/REHEAT ngừng nhấp
nháy và sáng n định. Hình nh
động cho biết quá trình nấu được
hiển thị trên màn hình LCD.
4. Với thời gian bắt đầu nấu là 9
phút, màn hình LCD thay đi hiển
thị sang hẹn giờ đếm ngược và
chuyển sang chế độ Gi ấm khi
nấu xong.
NẤU CHẬM
1. Cho các nguyên liệu và lượng nước
phù hợp vào trong nồi.
2. Nhấn nút SLOW một lần. Mũi tên
trên màn hình LCD ch [SLOW
COOK] và đn ch báo màu đỏ trên
nút COOK/REHEAT bắt đầu nhấp
nháy.
3. Nhấn nút HOUR và MINUTE để điu
chnh thời gian nấu (4-12 giờ). Mi
lần nhấn nút HOUR, giờ s tăng
thêm 1. Nhấn MINUTE s cho các
tùy chọn 15, 30, 45, và 00 phút.
4. Nhấn nút COOK/REHEAT để bắt
đầu nấu. Đn ch báo màu đỏ trên
nút COOK/REHEAT ngừng nhấp
nháy và sáng n định. Hình nh
động cho biết quá trình nấu được
hiển thị trên màn hình LCD.
5. Với thời gian bắt đầu nấu là 10 phút,
màn hình LCD thay đi hiển thị sang
hẹn giờ đếm ngược và chuyển sang
chế độ Gi ấm khi nấu xong.
NẤU CƠM NẾP
1. Cho các nguyên liệu và lượng
nước phù hợp vào trong nồi.
2. Nhấn nút CƠM NẾP một lần. Mũi
tên trên màn hình LCD ch [STICKY
RICE] và đn ch báo màu đỏ trên
nút COOK/REHEAT bắt đầu nhấp
nháy.
3. Nhấn nút COOK/REHEAT để bắt
đầu nấu. Đn ch báo màu đỏ trên
nút COOK/REHEAT ngừng nhấp
nháy và sáng n định. Hình nh
động cho biết quá trình nấu được
hiển thị trên màn hình LCD.
4. Với thời gian bắt đầu nấu là 10
phút, màn hình LCD thay đi hiển
thị sang hẹn giờ đếm ngược và
chuyển sang chế độ Gi ấm khi
nấu xong.
MEMASAK CEPAT
1. Gunakan fungsi ini dengan
maksimum 2 cangkir beras untuk
mengoptimalkan waktu pemasakan.
2. TekantombolQUICKsekali.Tanda
panah pada tampilan LCD menunjuk
ke[QUICKCOOK]danlampuindikator
merah mulai berkedip pada tombol
COOK/REHEAT.
3. Tekan tombol COOK/REHEAT untuk
mulai memasak. Lampu indikator
merah pada tombol COOK/REHEAT
berhenti berkedip dan tetap menyala.
Animasi yang memperlihatkan
kemajuan proses memasak
ditampilkan pada layar LCD.
4. Ketika waktu memasak tersisa 9
menit, layar LCD mengubah tampilan
menjadi penghitung waktu mundur
dan berpindah ke mode Keep Warm
(menghangatkan) setelah selesai.
MEMASAK LAMBAT
1. Masukkan bahan-bahan dan sejumlah
air yang sesuai ke dalam panci
pemasak.
2. Tekan tombol SLOW sekali. Tanda
panah pada tampilan LCD menunjuk
ke [SLOW COOK] dan lampu indikator
merah mulai berkedip pada tombol
COOK/REHEAT.
3. TekantombolHOURdanMINUTE
untuk mengatur waktu memasak (4-12
jam). Waktu bertambah 1 jam setiap
kalitombolHOURditekan.Menekan
MINUTEmemberikanpilihan15,30,
45, dan 00.
4. Tekan tombol COOK/REHEAT untuk
mulai memasak. Lampu indikator
merah pada tombol COOK/REHEAT
berhenti berkedip dan tetap menyala.
Animasi yang memperlihatkan
kemajuan proses memasak
ditampilkan pada layar LCD.
5. Ketika waktu memasak tersisa 10
menit, layar LCD mengubah tampilan
menjadi penghitung waktu mundur
dan berpindah ke mode Keep Warm
(menghangatkan) setelah selesai.
MEMASAK NASI KETAN
1. Masukkan bahan-bahan dan
sejumlah air yang sesuai ke dalam
panci pemasak.
2. Tekan tombol STICKY sekali. Tanda
panah pada tampilan LCD menunjuk
ke [STICKY RICE] dan lampu indikator
merah mulai berkedip pada tombol
COOK/REHEAT.
3. Tekan tombol COOK/REHEAT untuk
mulai memasak. Lampu indikator
merah pada tombol COOK/REHEAT
berhenti berkedip dan tetap menyala.
Animasi yang memperlihatkan
kemajuan proses memasak
ditampilkan pada layar LCD.
4. Ketika waktu memasak tersisa 10
menit, layar LCD mengubah tampilan
menjadi penghitung waktu mundur
dan berpindah ke mode Keep Warm
(menghangatkan) setelah selesai.
VN
ID

13
COOKING CONGEE
1. Add pre-washed rice and ingredients
and appropriate amount of water into
the inner pot.
2. Press the CONGEE button once. The
arrow on the LCD display points to
[CONGEE]. The red indicator light starts
blinking on the COOK/REHEAT button.
3. PressHOURandMINUTEbuttonsto
adjust the cooking time (1-4 hours).
The hour goes up by 1 with every
pressoftheHOURbutton.Pressing
MINUTEgives15,30,45,and00
options.
4. Press COOK/REHEAT button once
to start cooking. The red indicator
light on COOK/REHEAT button stops
blinking and remains lighted. An
animation showing the cooking
progress is displayed on the LCD
screen.
5. With 10 minutes of cooking time
to go, the LCD screen changes the
display to a countdown timer and
switches to Keep Warm mode when
completed.
COOKING BROWN RICE
1. Add pre-washed brown rice and
appropriate amount of water into the
inner pot.
2. Press the BROWN button once. The
arrow on the LCD display points to
[BROWN RICE] and the red indicator
light starts blinking on the COOK/
REHEAT button.
3. Press the COOK/REHEAT button to
start cooking. The red indicator light
on the COOK/REHEAT button stops
blinking and stays on. An animation
showing cooking progress is displayed
on the LCD screen.
4. With 10 minutes of cooking time to go,
the LCD screen changes the display
to a countdown timer and switches to
Keep Warm mode when completed.
UsingtheProduct/ก�รใช้ง�นผลิตภัณฑ์/Menggunakan Produk/Sử dụng Sn phm
BOILING SOUP
1. Add ingredients and appropriate
amount of water into the inner pot.
2. PresstheSOUPbuttononce.The
arrow on the LCD display points
to[SOUP].Theredindicatorlight
starts blinking on the COOK/REHEAT
button.
3. PressHOURandMINUTEbuttonsto
adjust the cooking time (1-4 hours).
The hour goes up by 1 with every
pressoftheHOURbutton.Pressing
MINUTEgives15,30,45,and00
options.
4. Press COOK/REHEAT button once
to start cooking. The red indicator
light on COOK/REHEAT button stops
blinking and remains lighted. An
animation showing the cooking
progress is displayed on the LCD
screen.
5. With 10 minutes of cooking time
to go, the LCD screen changes the
display to a countdown timer and
switches to Keep Warm mode when
completed.
การหุงข้าวกล้อง
1. ใส่ข้�วกล้องที่ซ�วแล้วและเติมน้ำ�ใน
ปริม�ณที่เหม�ะสมลงในหม้อใน
2. กดปุ่มข้�วกล้องหนึ่งครั้ง ลูกศรบนหน้�
จอ LCD จะชี้ไปที่ [ข้�วกล้อง] และไฟ
สีแดงที่ปุ่มหุงข้�ว/อุ่นร้อนใหม่จะเริ่ม
กะพริบ
3. กดปุ่มหุงข้�ว/อุ่นร้อนใหม่เพื่อเริ่มหุง ไฟ
สีแดงที่ปุ่มหุงข้�ว/อุ่นร้อนใหม่จะหยุด
กะพริบและติดสว่�งคงที่ จ�กนั้น จะมี
ภ�พเคลื่อนไหวแสดงคว�มคืบหน้�ใน
ก�รหุงบนหน้�จอ LCD
4. เมื่อเวล�ในก�รหุงเหลือ 10 น�ที หน้�จอ
LCD จะเปลี่ยนก�รแสดงผลเป็นน�ฬิก�
นับถอยหลัง และเปลี่ยนเป็นโหมดอุ่น
ร้อน
การต้มโจ๊ก
1. ใส่ข้�วที่ซ�วแล้วและส่วนผสม จ�กนั้น
เติมน้ำ�ในปริม�ณที่เหม�ะสมลงในหม้อ
ใน
2. กดปุ่มโจ๊กหนึ่งครั้ง ลูกศรบนจอ LCD จะ
ชี้ไปที่ [โจ๊ก] ไฟสีแดงที่ปุ่มหุงข้�ว/อุ่น
ร้อนใหม่จะเริ่มกะพริบ
3. กดปุ่มชั่วโมงและน�ทีเพื่อตั้งเวล�ใน
ก�รต้ม (1-4 ชั่วโมง) แต่ละครั้งที่กดปุ่ม
ชั่วโมง เวล�จะเพิ่มขึ้นทีละ 1 ชั่วโมง
ก�รกดปุ่มน�ทีจะเลือกเวล�ได้ 15, 30,
45 และ 00 น�ที
4. กดปุ่มหุงข้�ว/อุ่นร้อนใหม่หนึ่งครั้งเพื่อ
เริ่มหุง ไฟสีแดงที่ปุ่มหุงข้�ว/อุ่นร้อน
ใหม่จะหยุดกะพริบและติดสว่�งคงที่
จ�กนั้น จะมีภ�พเคลื่อนไหวแสดงคว�ม
คืบหน้�ในก�รต้มบนหน้�จอ LCD
5. เมื่อเวล�ในก�รต้มเหลือ 10 น�ที
หน้�จอ LCD จะเปลี่ยนก�รแสดงผลเป็น
น�ฬิก�นับถอยหลัง และเปลี่ยนเป็น
โหมดอุ่นร้อน
การต้มซุป
1. ใส่ส่วนผสมต่�งๆ และเติมน้ำ�ในปริม�ณ
ที่เหม�ะสมลงในหม้อใน
2. กดปุ่มซุปหนึ่งครั้ง ลูกศรบนจอ LCD ชี้
ไปที่ [ซุป] ไฟสีแดงที่ปุ่มหุงข้�ว/อุ่น
ร้อนใหม่จะเริ่มกะพริบ
3. กดปุ่มชั่วโมงและน�ทีเพื่อตั้งเวล�ใน
ก�รต้ม (1-4 ชั่วโมง) แต่ละครั้งที่กดปุ่ม
ชั่วโมง เวล�จะเพิ่มขึ้นทีละ 1 ชั่วโมง
ก�รกดปุ่มน�ทีจะเลือกเวล�ได้ 15, 30,
45 และ 00 น�ที
4. กดปุ่มหุงข้�ว/อุ่นร้อนใหม่หนึ่งครั้งเพื่อ
เริ่มต้ม ไฟสีแดงที่ปุ่มหุงข้�ว/อุ่นร้อน
ใหม่จะหยุดกะพริบและติดสว่�งคงที่
จ�กนั้น จะมีภ�พเคลื่อนไหวแสดงคว�ม
คืบหน้�ในก�รต้มบนหน้�จอ LCD
5. เมื่อเวล�ในก�รต้มเหลือ 10 น�ที
หน้�จอ LCD จะเปลี่ยนก�รแสดงผลเป็น
น�ฬิก�นับถอยหลัง และเปลี่ยนเป็น
โหมดอุ่นร้อน
TH
EN

14
UsingtheProduct/ก�รใช้ง�นผลิตภัณฑ์/Menggunakan Produk/Sử dụng Sn phm
NẤU CƠM GẠO LỨC
1. Cho gạo lc đ vo trước và lượng
nước phù hợp vào trong nồi.
2. Nhấn nút BROWN một lần. Mũi tên
trên màn hình LCD ch [BROWN
RICE] và đn ch báo màu đỏ trên
nút COOK/REHEAT bắt đầu nhấp
nháy.
3. Nhấn nút COOK/REHEAT để bắt
đầu nấu. Đn ch báo màu đỏ trên
nút COOK/REHEAT ngừng nhấp
nháy và sáng n định. Hình nh
động cho biết quá trình nấu được
hiển thị trên màn hình LCD.
4. Với thời gian bắt đầu nấu là 10 phút,
màn hình LCD thay đi hiển thị sang
hẹn giờ đếm ngược và chuyển sang
chế độ Gi ấm khi nấu xong.
NẤU CHÁO
1. Cho gạo đ vo trước, nguyên liệu
và lượng nước phù hợp vào trong
nồi.
2. Nhấn nút CONGEE một lần. Mũi tên
trên màn hình LCD ch [CONGEE].
Đn ch báo màu đỏ trên nút COOK/
REHEAT bắt đầu nhấp nháy.
3. Nhấn nút HOUR và MINUTE để
điu chnh thời gian nấu (1-4 giờ).
Mi lần nhấn nút HOUR, giờ s tăng
thêm 1. Nhấn MINUTE s cho các
tùy chọn 15, 30, 45, và 00 phút.
4. Nhấn nút COOK/REHEAT một lần
na để bắt đầu nấu. Đn ch báo
màu đỏ trên nút COOK/REHEAT
ngừng nhấp nháy và sáng n định.
Hình nh động cho biết quá trình
nấu được hiển thị trên màn hình
LCD.
5. Với thời gian bắt đầu nấu là 10 phút,
màn hình LCD thay đi hiển thị sang
hẹn giờ đếm ngược và chuyển sang
chế độ Gi ấm khi nấu xong.
NẤU CANH
1. Cho các nguyên liệu và lượng
nước phù hợp vào trong nồi.
2. Nhấn nút SOUP một lần. Mũi tên
trên màn hình LCD ch [SOUP].
Đn ch báo màu đỏ trên nút
COOK/REHEAT bắt đầu nhấp
nháy.
3. Nhấn nút HOUR và MINUTE để
điu chnh thời gian nấu (1-4 giờ).
Mi lần nhấn nút HOUR, giờ s
tăng thêm 1. Nhấn MINUTE s cho
các tùy chọn 15, 30, 45, và 00 phút.
4. Nhấn nút COOK/REHEAT một lần
na để bắt đầu nấu. Đn ch báo
màu đỏ trên nút COOK/REHEAT
ngừng nhấp nháy và sáng n định.
Hình nh động cho biết quá trình
nấu được hiển thị trên màn hình
LCD.
5. Với thời gian bắt đầu nấu là 10
phút, màn hình LCD thay đi hiển
thị sang hẹn giờ đếm ngược và
chuyển sang chế độ Gi ấm khi
nấu xong.
MEMASAK BUBUR BERAS
1. Masukkan beras dan bahan yang
sudah dicuci serta sejumlah air yang
sesuai ke dalam panci pemasak.
2. Tekan tombol CONGEE sekali. Tanda
panah pada tampilan LCD menunjuk
ke [CONGEE]. Lampu indikator merah
mulai berkedip pada tombol COOK/
REHEAT.
3. TekantombolHOURdanMINUTE
untuk mengatur waktu memasak (1-4
jam). Waktu bertambah 1 jam setiap
kalitombolHOURditekan.Menekan
MINUTEmemberikanpilihan15,30,
45, dan 00.
4. Tekan tombol COOK/REHEAT sekali
untuk mulai memasak. Lampu
indikator merah pada tombol
COOK/REHEAT berhenti berkedip
dan tetap menyala. Animasi yang
memperlihatkan kemajuan proses
memasak ditampilkan pada layar LCD.
5. Ketika waktu memasak tersisa 10
menit, layar LCD mengubah tampilan
menjadi penghitung waktu mundur
dan berpindah ke mode Keep Warm
(menghangatkan) setelah selesai.
MEMASAK BERAS PECAH KULIT/BERAS MERAH
1. Masukkan beras pecah kulit/beras
merah yang sudah dicuci dan sejumlah
air yang sesuai ke dalam panci
pemasak.
2. Tekan tombol BROWN sekali. Tanda
panah pada tampilan LCD menunjuk
ke [BROWN RICE] dan lampu indikator
merah mulai berkedip pada tombol
COOK/REHEAT.
3. Tekan tombol COOK/REHEAT untuk
mulai memasak. Lampu indikator
merah pada tombol COOK/REHEAT
berhenti berkedip dan tetap menyala.
Animasi yang memperlihatkan
kemajuan proses memasak ditampilkan
pada layar LCD.
4. Ketika waktu memasak tersisa 10
menit, layar LCD mengubah tampilan
menjadi penghitung waktu mundur
dan berpindah ke mode Keep Warm
(menghangatkan) setelah selesai.
MEREBUS SUP
1. Masukkan bahan-bahan dan sejumlah
air yang sesuai ke dalam panci
pemasak.
2. TekantombolSOUPsekali.Tanda
panah pada tampilan LCD menunjuk
ke[SOUP].Lampuindikatormerah
mulai berkedip pada tombol COOK/
REHEAT.
3. TekantombolHOURdanMINUTE
untuk mengatur waktu memasak (1-4
jam). Waktu bertambah 1 jam setiap
kalitombolHOURditekan.Menekan
MINUTEmemberikanpilihan15,30,
45, dan 00.
4. Tekan tombol COOK/REHEAT sekali
untuk mulai memasak. Lampu
indikator merah pada tombol
COOK/REHEAT berhenti berkedip
dan tetap menyala. Animasi yang
memperlihatkan kemajuan proses
memasak ditampilkan pada layar LCD.
5. Ketika waktu memasak tersisa 10
menit, layar LCD mengubah tampilan
menjadi penghitung waktu mundur
dan berpindah ke mode Keep Warm
(menghangatkan) setelah selesai.
VN
ID

15
TURNING OFF
1. To turn o the rice cooker when it is in
keep-warm mode, press the OFF/KEEP
WARM button once.
2. Switch o the main switch and remove
the main plug from the wall socket.
การปิดเครื่อง
1. ถ้�ต้องก�รปิดสวิตช์หม้อหุงข้�วเมื่ออยู่
ในโหมดอุ่นร้อน ให้กดปุ่มปิด/อุ่นหนึ่ง
ครั้ง
2. ปิดสวิตช์หลัก และถอดส�ยไฟจ�ก
เต้�รับไฟฟ้�
MEMATIKAN
1. Untukmematikanpenanaknasiketika
berada dalam mode keep warm, tekan
tombol OFF/KEEP WARM sekali.
2. Matikan sakelar utama dan cabut
steker utama dari stopkontak dinding.
TẮT
1. Để tắt nồi cơm điện khi ở chế độ Gi
ấm, nhấn nút OFF/KEEP một lần.
2. Tắt nguồn điện và rút phích cắm ra
khỏi cắm trên tường.
KEEP WARM MODE
• Whenanymodeofcookingiscompleted,
the cooker automatically switches to
Keep Warm mode. This is indicated by an
orange light on OFF/KEEP WARM button.
• TheLCDscreenthenshowsinonehour
increments the timing of how long the
cooker has been in Keep Warm mode. For
example, [1:00] after one hour and so on.
• After12hoursinKeepWarmmode,the
cooker switches o and goes to Standby
mode.
โหมดอุ่นร้อน
• เมื่อก�รหุงหรือต้มไม่ว่�ในโหมดใดเสร็จสิ้น
หม้อหุงข้�วจะเปลี่ยนเป็นโหมดอุ่นร้อนโดย
อัตโนมัติ ซึ่งจะทร�บได้จ�กไฟสีส้มที่ปุ่ม
ปิด/อุ่นติดสว่�ง
• จ�กนั้นหน้�จอ LCD จะแสดงระยะเวล�ที่
หม้อหุงข้�วอยู่ในโหมดอุ่นร้อน โดยจะแสดง
เวล�เพิ่มขึ้นทีละชั่วโมง เช่น แสดง [1:00]
หลังจ�กที่ผ่�นไปแล้วหนึ่งชั่วโมง เป็นต้น
• หลังจ�กที่อยู่ในโหมดอุ่นร้อน 12 ชั่วโมง
แล้ว หม้อหุงข้�วจะปิดสวิตช์ และเข้�สู่
โหมดสแตนด์บ�ย
MODE KEEP WARM (MENGHANGATKAN)
• Ketikamodememasakapasajaselesai,
penanak secara otomatis akan beralih ke
mode Keep Warm (Menghangatkan). Ini
ditunjukkan dengan lampu jingga pada
tombol OFF/KEEP WARM.
• LayarLCDkemudianmenunjukkan
sudah seberapa lama penanak nasi
berada dalam mode Keep Warm, dengan
penambahan satu jam. Misalnya, [1:00]
setelah satu jam dan seterusnya.
• Setelah12jamdalammodeKeepWarm,
penanak akan mati dan memasuki mode
Standby.
CHẾ ĐỘ GIỮ ẤM
• Khi hoàn thành chế độ nấu, nồi cơm
s t động chuyển sang chế độ Gi
ấm. Điu này được thể hiện bng đn
màu cam trên nút OFF/KEEP WARM
sáng.
• Sau đó, màn hình LCD hiển thị một
giờ b sung vào thời gian nấu đ có
trong chế độ Gi ấm. Ví dụ, [1:00] sau
một giờ, v.v.
• Sau 12 giờ ở chế độ Gi ấm, nồi cơm
s chuyển sang tắt và chế độ D phng.
UsingtheProduct/ก�รใช้ง�นผลิตภัณฑ์/Menggunakan Produk/Sử dụng Sn phm
EN
TH
ID
VN

16
Advance Setting /ก�รตั้งค่�ขั้นสูง/Pengaturan Lanjut/Cài đt Nâng cao
SETTING THE TIMER
1. Select the desired cooking function.
(See instructions in this guide).
2. Hold down the TIMER button for 2
seconds. The green indicator light
on TIMER lights up. The red indicator
light on COOK/REHEAT button starts
blinking and the chosen cooking
function is highlighted in the LCD
screen. The LCD screen shows a
blinking display of the minimum
default timing [1:00].
3. Toadjustthehour,pressHOURbutton
quickly to increase hour by 1 for every
press. For quicker hour adjustment,
press and hold down the button and
the hour will roll continuously (1-24).
4. PressMINUTEbuttononcetostart
setting the minute. When the minute
startsblinking,pressMINUTEbutton
quickly until the preferred minute is
reached. Minute setting is available in
15 minute increments (15, 30, 45, 00).
การตั้งค่าตัวตั้งเวลา
1. เลือกฟังก์ชั่นก�รหุงที่ต้องก�ร (ดูคำ�
แนะนำ�ในคู่มือนี้)
2. กดปุ่มตั้งเวล�ค้�งไว้ 2 วิน�ที ไฟสีเขียว
ที่ปุ่มตั้งเวล�จะติดสว่�งขึ้น ไฟสีแดงที่
ปุ่มหุงข้�ว/อุ่นร้อนใหม่จะเริ่มกะพริบและ
ฟังก์ชั่นก�รหุงต้มที่เลือกไว้จะถูกไฮไลต์
ในหน้�จอ LCD หน้�จอ LCD จะแสดง
เวล�ที่เป็นค่�เริ่มต้นคือ [1:00] ซึ่งป็นค่�
ต่ำ�สุดที่ส�ม�รถตั้งได้ และตัวเลขจะ
กะพริบ
3. ถ้�ต้องก�รปรับชั่วโมง ให้กดปุ่มชั่วโมง
เร็วๆ โดยแต่ละครั้งที่กดเป็นก�รเพิ่มทีละ
1 ชั่วโมง ถ้�ต้องก�รปรับชั่วโมงให้เร็วยิ่ง
ขึ้น ให้กดปุ่มนี้ค้�งไว้ แล้วตัวเลขชั่วโมง
จะเปลี่ยนวนอย่�งต่อเนื่อง (1-24)
4. กดปุ่มน�ทีหนึ่งครั้งเพื่อเริ่มตั้งค่�น�ที
เมื่อตัวเลขบอกน�ทีเริ่มกะพริบ ให้กด
ปุ่มน�ทีเร็วๆ จนกระทั่งถึงน�ทีที่ต้องก�ร
ก�รตั้งค่�น�ทีจะเพิ่มทีละ 15 น�ที (15,
30, 45, 00)
TIMER FUNCTION
The rice cooker has a timer function that
allows you to delay the cooking of rice that
you have prepared.
Note: The time set is the delay time for
the food to be ready. Example: if the
timer is set to 5hours, it means it
will take 5 hours for the food to be
ready.
ฟังก์ชั่นตัวตั้งเวลา
หม้อหุงข้�วนี้มีฟังก์ชั่นตัวตั้งเวล�ที่ให้คุณ
ส�ม�รถหน่วงเวล�ก�รหุงข้�วที่เตรียมไว้ได้
หมายเหตุ: เวล�ที่ตั้งคือเวล�ที่หน่วงเพื่อ
ให้อ�ห�รเสร็จ เช่น ถ้�ตั้ง
เวล�ตัวตั้งเวล�ไว้ที่ 5 ชั่วโมง
หม�ยคว�มว่� จะใช้เวล� 5
ชั่วโมงเพื่อให้อ�ห�รเสร็จ
5. Once timing is set, press TIMER button
for two seconds to save your setting.
The green indicator light on TIMER
button stays lighted.
6. Press COOK/REHEAT button once to
start timer. The red indicator light on
COOK/REHEAT button stays lighted.
An animation showing the cooking
progress will be displayed on the LCD
screen.
7. Default cooking procedure progresses
depending on the menu function
selected. The rice cooker switches to
Keep Warm mode once cooking is
completed at the set time.
Note: • Timerfunctionisnotapplicable
for Reheat and Soup modes.
5. เมื่อตั้งเวล�แล้ว ให้กดปุ่มตั้งเวล�ค้�งไว้
สองวิน�ทีเพื่อบันทึกก�รตั้งค่�ของคุณ
ไฟสีเขียวที่ปุ่มตั้งเวล�จะติดสว่�งคงที่
6. กดปุ่มหุงข้�ว/อุ่นร้อนใหม่หนึ่งครั้งเพื่อ
เริ่มตัวตั้งเวล� ไฟสีเขียวที่ปุ่มหุงข้�ว/
อุ่นร้อนใหม่จะติดสว่�งคงที่ จ�กนั้น จะ
มีภ�พเคลื่อนไหวแสดงคว�มคืบหน้�ใน
ก�รหุงบนหน้�จอ LCD
7. ก�รหุง/อุ่น/ต้มจะดำ�เนินไปต�ม
กระบวนก�รม�ตรฐ�นซึ่งขึ้นอยู่กับ
ฟังก์ชั่นเมนูที่เลือก และทันทีที่ก�รหุง/
ต้ม/อุ่นเสร็จเรียบร้อยในเวล�ที่ตั้งไว้
หม้อหุงข้�วจะเข้�สู่โหมดอุ่นร้อน
หมายเหตุ: • ฟังก์ชันตัวตั้งเวล�ไม่ส�ม�รถ
ใช้ได้กับโหมดอุ่นร้อนใหม่
และซุป
TH
EN

17
VN
Advance Setting /ก�รตั้งค่�ขั้นสูง/Pengaturan Lanjut/Cài đt Nâng cao
5. Sau khi đt xong thời gian, nhấn
nút TIMER trong hai giây để lưu cài
đt của bạn. Đn ch báo màu xanh
trên nút TIMER s sáng.
6. Nhấn nút COOK/REHEAT một lần
na để bắt đầu hẹn giờ. Đn ch
báo màu xanh trên nút COOK/
REHEAT vẫn sáng. Hình nh động
cho biết quá trình nấu s được hiển
thị trên màn hình LCD.
7. Quy trình nấu mc định s tiếp tục
tùy theo chc năng menu được
chọn. Nồi cơm điện chuyển sang
chế độ Gi ấm ngay khi nấu xong
theo thời gian đ hẹn.
Lưu ý: • Không có chc năng hẹn
giờ ở chế độ Hâm lại và Nấu
canh.
CÀI ĐẶT HẸN GIỜ
1. Chọn chc năng nấu mong muốn.
(Tham kho các hướng dẫn trong
sách hướng dẫn này.
2. Gi nút TIMER trong 2 giây. Đn
ch báo màu xanh trên nút TIMER
s sáng. Đn ch báo màu đỏ trên
nút COOK/REHEAT bắt đầu nhấp
nháy và chc năng nấu được la
chọn s được chiếu sáng trên màn
hình LCD. Màn hình LCD hiển thị
màn hình nhấp nháy với thời gian
mc định tối thiểu [1:00].
3. Để điu chnh giờ, nhấn nhanh nút
HOUR một lần để tăng 1 giờ mi
lần nhấn. Để điu chnh giờ nhanh
hơn, nhấn và gi nút này và giờ s
chuyển tiên tục (1-24).
4. Nhấn nút MINUTE một lần để bắt
đầu cài đt phút. Khi phút bắt đầu
sáng, nhấn nhanh nút MINUTE cho
đến khi đạt được số phút mong
muốn. Cài đt phút mi lần tăng 15
phút (15, 30, 45, 00).
CHỨC NĂNG HẸN GIỜ
Nồi cơm điện có chc năng hẹn giờ
cho php bạn gim thời gian nấu cơm
mà bạn đ chun bị.
Lưu ý: Thời gian cài đt là thời gian
trì hon để nấu xong thc ăn.
Ví dụ: nếu thời gian cài đt
là 5 giờ, điu này có nghĩa là
mất 5 giờ để nấu xong.
MENYETEL PENGATUR WAKTU
1. Pilih fungsi memasak yang diinginkan.
(Lihat petunjuk dalam panduan ini).
2. Tekan dan tahan tombol TIMER selama
2 detik. Lampu indikator hijau pada
TIMER menyala. Lampu indikator
merah pada tombol COOK/REHEAT
mulai berkedip dan fungsi memasak
yang dipilih disorot pada layar LCD.
Layar LCD memperlihatkan tampilan
berkedip untuk pengaturan waktu
default minimum [1:00].
3. Untukmengaturjam,tekantombol
HOURdengancepatuntukmenambah
jam dengan penambahan 1 jam
dengan setiap penekanan tombol.
Untukpengaturanjamyanglebih
cepat, tekan dan tahan tombol
tersebut dan jam akan bergulir terus
menerus (1-24).
4. TekantombolMINUTEsekaliuntuk
mulai menyetel menit. Ketika menit
mulaiberkedip,tekantombolMINUTE
dengan cepat sampai menit yang
diinginkan tercapai. Setelan menit
tersedia dalam penambahan 15 menit
(15, 30, 45, 00).
FUNGSI PENGATUR WAKTU
Penanak nasi ini memiliki fungsi pengatur
waktu yang memungkinkan Anda
menunda pemasakan nasi yang sudah
Anda persiapkan.
Catatan: Waktu yang disetel merupakan
waktu tunda bagi makanan
untuk menjadi siap disajikan.
Misalnya: jika pengatur waktu
disetel ke 5 jam, berarti
akan dibutuhkan waktu 5
jam sebelum makanan siap
disajikan.
5. Setelah pengaturan waktu disetel,
tekan tombol TIMER selama dua detik
untuk menyimpan setelan ini. Lampu
indikator hijau pada tombol TIMER
tetap menyala.
6. Tekan tombol COOK/REHEAT sekali
untuk memulai pengatur waktu.
Lampu indikator merah pada tombol
COOK/REHEAT tetap menyala. Animasi
yang memperlihatkan kemajuan
proses memasak ditampilkan pada
layar LCD.
7. Kemajuan prosedur memasak
tergantung pada fungsi menu yang
dipilih. Penanak nasi beralih ke mode
Keep Warm (menghangatkan) setelah
proses memasak selesai pada waktu
yang disetel.
Catatan: • Fungsipengaturwaktutidak
berlaku untuk mode Reheat
dan Soup.
ID

18
Advance Setting /ก�รตั้งค่�ขั้นสูง/Pengaturan Lanjut/Cài đt Nâng cao
SETTING THE TIMER FOR WHITE RICE
1. Choose the White Rice cooking
function from the control panel. (See
instructions in this guide).
2. Hold down the TIMER button for 2
seconds. The green indicator light
on TIMER lights up. The red indicator
light on COOK/REHEAT button starts
blinking and the chosen cooking
function is highlighted in the LCD
screen.
3. To start adjusting the timer, press
HOURbuttononcequicklytoincrease
timing by 1 for every press. You can
also press the button longer and the
hour will roll continuously (1-24) until
the preferred hour is reached.
4. Tosettheminutes,pressMINUTE
button once. When the minute starts
blinking,pressMINUTEagainuntilthe
preferred minute is reached. Minute
setting is available in 15 minute
increments (15, 30, 45, 00).
5. Once timing is set, press TIMER button
for two seconds to save your setting.
The green indicator light on TIMER
button stays lighted.
6. Select White Rice cooking mode
and press COOK/REHEAT button
once to start timer. The red indicator
light on COOK/REHEAT button stays
lighted. The time set will blink for
conrmation then switch to the
current time display. An animation
showing the cooking progress is
displayed on the LCD screen.
4. ถ้�ต้องก�รตั้งค่�น�ที ให้กดปุ่มน�ทีหนึ่ง
ครั้ง เมื่อตัวเลขบอกน�ทีเริ่มกะพริบ ให้
กดปุ่มน�ทีอีกครั้งจนกระทั่งถึงน�ทีที่
ต้องก�ร ก�รตั้งค่�น�ทีจะเพิ่มทีละ 15
น�ที (15, 30, 45, 00)
5. เมื่อตั้งเวล�แล้ว ให้กดปุ่มตั้งเวล�ค้�งไว้
สองวิน�ทีเพื่อบันทึกก�รตั้งค่�ของคุณ
ไฟสีเขียวที่ปุ่มตั้งเวล�จะติดสว่�งคงที่
6. เลือกโหมดก�รหุงข้�วข�วและกดปุ่มหุง
ข้�ว/อุ่นร้อนใหม่หนึ่งครั้งเพื่อเริ่มตัวตั้ง
เวล� ไฟสีเขียวที่ปุ่มหุงข้�ว/อุ่นร้อนใหม่
จะติดสว่�งคงที่ เวล�ที่ตั้งไว้จะกะพริบ
เพื่อรอก�รยืนยันแล้วเปลี่ยนเป็นแสดง
เวล�ปัจจุบัน จะมีภ�พเคลื่อนไหวแสดง
คว�มคืบหน้�ในก�รหุงบนหน้�จอ LCD
7. The cooking procedure then
progresses as usual depending on
the menu function selected. The rice
cooker switches to Keep Warm mode
once cooking is completed at the set
time.
7. จ�กนั้นก�รหุงจะดำ�เนินต่อไปต�มปกติ
ซึ่งขึ้นอยู่กับฟังก์ชั่นเมนูที่เลือก และ
ทันทีที่ก�รหุงเสร็จเรียบร้อยในเวล�ที่ตั้ง
ไว้ หม้อหุงข้�วจะเข้�สู่โหมดอุ่นร้อน
การตั้งค่าตัวตั้งเวลาสำาหรับข้าวขาว
1. เลือกฟังก์ชั่นก�รหุงข้�วข�วจ�กแผง
ควบคุม (ดูคำ�แนะนำ�ในคู่มือนี้)
2. ให้กดปุ่มปุ่มตั้งเวล�ค้�งไว้ 2 วิน�ที ไฟ
สีเขียวที่ปุ่มตั้งเวล�จะติดสว่�งขึ้น ไฟ
สีแดงที่ปุ่มหุงข้�ว/อุ่นร้อนใหม่จะเริ่ม
กะพริบและฟังก์ชั่นก�รหุงต้มที่เลือกไว้
จะถูกไฮไลต์ในหน้�จอ LCD
3. ถ้�ต้องก�รปรับตัวตั้งเวล� ให้กดปุ่มชั่ว
โมงเร็วๆ หนึ่งครั้ง โดยแต่ละครั้งที่กด
เป็นก�รเพิ่มทีละ 1 ชั่วโมง นอกจ�ก
นี้ ยังอ�จกดปุ่มค้�งไว้เพื่อให้ตัวเลข
ชั่วโมงเปลี่ยนวนอย่�งต่อเนื่อง (1-24)
จนกระทั่งถึงชั่วโมงที่ต้องก�ร
TH
EN

19
7. Sau đó quy trình nấu s tiếp tục
như bình thường tùy theo chc
năng menu được chọn. Nồi cơm
điện chuyển sang chế độ Gi ấm
ngay khi nấu xong theo thời gian đ
hẹn.
4. Để cài đt phút, nhấn nút MINUTE
một lần. Khi phút bắt đầu sáng, nhấn
lại nút MINUTE cho đến khi đạt được
số phút mong muốn. Cài đt phút mi
lần tăng 15 phút (15, 30, 45, 00).
5. Sau khi đt xong thời gian, nhấn nút
TIMER trong hai giây để lưu cài đt
của bạn. Đn ch báo màu xanh trên
nút TIMER s sáng.
6. Chọn chế độ nấu Cơm thường và
nhấn nút COOK/REHEAT một lần để
bắt đầu hẹn giờ. Đn ch báo màu
xanh trên nút COOK/REHEAT vẫn
sáng. Thời gian đt s nhấp nháy để
xác nhn sau khi chuyển sang hiển
thị thời gian hiện tại. Hình nh động
cho biết quá trình nấu được hiển thị
trên màn hình LCD.
CÀI ĐẶT HẸN GIỜ ĐỂ NẤU CƠM THƯỜNG
1. Chọn chc năng nấu cơm thường
từ bng điu khiển. (Tham kho các
hướng dẫn trong sách hướng dẫn này.
2. Gi nút TIMER trong 2 giây. Đn ch
báo màu xanh trên nút TIMER s
sáng. Đn ch báo màu đỏ trên nút
COOK/REHEAT bắt đầu nhấp nháy
và chc năng nấu được la chọn s
được chiếu sáng trên màn hình LCD.
3. Để bắt đầu điu chnh hẹn giờ, nhấn
nhanh nút HOUR một lần để tăng
thời gian 1 giờ mi lần nhấn. Bạn
cũng có thể nhấn nút lâu hơn và giờ
s chuyển liên tục (1-24) cho đến
khi đt được số giờ mong muốn.
4. Untukmenyetelmenit,tekantombol
MINUTEsekali.Ketikamenitmulai
berkedip,tekanMINUTElagisampai
menit yang diinginkan tercapai.
Setelan menit tersedia dalam
penambahan 15 menit (15, 30, 45, 00).
5. Setelah pengaturan waktu disetel,
tekan tombol TIMER selama dua detik
untuk menyimpan setelan ini. Lampu
indikator hijau pada tombol TIMER
tetap menyala.
6. Pilih mode memasak White Rice
dan tekan tombol COOK/REHEAT
sekali untuk memulai pengatur
waktu. Lampu indikator merah pada
tombol COOK/REHEAT tetap menyala.
Setelan waktu akan berkedip sebagai
konrmasi kemudian beralih ke
tampilan waktu saat ini. Animasi yang
memperlihatkan kemajuan proses
memasak ditampilkan pada layar LCD.
MENYETEL PENGATUR WAKTU UNTUK
NASI PUTIH
1. Pilih fungsi memasak White Rice dari
panel kontrol. (Lihat petunjuk dalam
panduan ini).
2. Tekan dan tahan tombol TIMER selama
2 detik. Lampu indikator hijau pada
TIMER menyala. Lampu indikator
merah pada tombol COOK/REHEAT
mulai berkedip dan fungsi memasak
yang dipilih disorot pada layar LCD.
3. Untukmulaimenyesuaikanpengatur
waktu,tekantombolHOURsekali
dengan cepat untuk menambah
waktu sebesar 1 jam dengan setiap
penekanan. Anda juga dapat menekan
tombol lebih lama dan jam akan
bergulir terus menerus (1-24) sampai
jam yang dipilih tercapai.
7. Prosedur memasak kemudian
berlanjut seperti biasa tergantung
pada fungsi menu yang dipilih.
Penanak nasi beralih ke mode Keep
Warm (menghangatkan) setelah
proses memasak selesai pada waktu
yang disetel.
Advance Setting /ก�รตั้งค่�ขั้นสูง/Pengaturan Lanjut/Cài đt Nâng cao
VN
ID

20
Cleaning and Maintainance/ก�รทำ�คว�มสะอ�ดและดูแลรักษ�/Pembersihan dan Perawatan/
Làm Sạch và Bo Trì
1. Unplugthericecookerfromthepower
switch and wait until the rice cooker
has cooled down suciently before
cleaning it.
2. Remove the steam tray and the inner
pot from the body of the appliance.
Clean the inner pot, steam tray, rice
paddle, and soup ladle with a sponge
or a cloth dipped in warm water with
dishwashing liquid solution.
Note: • Toprotectthenon-stickcoating
of the inner pot, do not use the
inner pot for washing rice.
• Donotputvinegarorother
acidic liquids in the pot.
• Donotuseabrasivecleaning
agents, scourers or metal utensils
to clean the inner pot.
3. Useadampclothtowipetheinner
lid, the interior and the exterior body
of the rice cooker.
3. Ch sử dụng giẻ ướt để lau nắp bên
trong và bên ngoài, bên trong thân
nồi cơm điện.
Lưu ý: • Để bo vệ lớp phủ chống
dính của nồi bên trong,
không sử dụng nồi bên trong
để rửa bát đĩa.
• Không cho giấm hoc các
dung dịch axít khác vào nồi.
• Không sử dụng chất ty rửa
ăn mn, miếng cọ rửa hoc
đồ dùng kim loại để làm sạch
nồi bên trong.
1. Rút phích cắm nồi cơm điện ra
trước khi bạn bắt đầu làm sạch nồi
và đợi cho đến khi nồi cơm điện
nguội hn trước khi làm sạch nồi.
2. Lấy khay hấp và nồi bên trong ra
khỏi thân nồi cơm điện. Làm sạch
nồi bên trong, khay hấp, muôi xới
cơm và thìa múc canh bng miếng
bọt biển hoc giẻ ngâm nước ấm
cùng với một chút dung dịch làm
sạch.
TH
ID
VN
1. ถอดปลั๊กหม้อหุงข้�วออกจ�กสวิตช์ไฟ
และรอจนกระทั่งหม้อหุงข้�วเย็นลงพอ
สมควรก่อนเริ่มทำ�คว�มสะอ�ด
2. นำ�ถ�ดนึ่งและหม้อในออกจ�กตัวเครื่อง
ทำ�คว�มสะอ�ดหม้อใน ถ�ดนึ่ง และ
ทัพพีด้วยฟองน้ำ�หรือผ้�ชุบน้ำ�อุ่นผสม
น้ำ�ย�ล้�งจ�น
1. Cabut steker penanak nasi dari
stopkontak dan tunggu sampai
penanak nasi menjadi cukup dingin
sebelum membersihkannya.
2. Keluarkan baki uap dan panci
pemasak dari dalam perangkat ini.
Bersihkan panci pemasak, baki uap,
sendok nasi, dan sendok sup dengan
busa atau kain yang telah dicelupkan
ke dalam larutan sabun pencuci
piring dalam air hangat.
หมายเหตุ: • เพื่อป้องกันชั้นเคลือบของ
หม้อใน ห้�มใช้หม้อในสำ�หรับ
ซ�วข้�ว
• ห้�มใส่น้ำ�ส้มส�ยชูหรือ
ของเหลวอื่นที่มีฤทธิ์เป็นกรด
• ห้�มใช้น้ำ�ย�ทำ�คว�มสะอ�ด
ที่มีฤทธิ์กัดกร่อน ฝอยขัด
หรือวัสดุโลหะเพื่อทำ�คว�ม
สะอ�ดหม้อใน
Catatan: • Untukmelindungilapisananti-
lengket panci pemasak, jangan
gunakan panci pemasak untuk
mencuci beras.
• Janganmenaruhcukaatau
cairan asam lainnya di dalam
panci pemasak.
• Janganmenggunakan
bahan pembersih abrasif
(pengikis), bahan penggosok,
atau perkakas logam untuk
membersihkan panci pemasak.
3. ใช้ผ้�ชุบน้ำ�หม�ดๆ เพื่อเช็ดฝ�ด้�นใน
รวมทั้งด้�นในและด้�นนอกของตัวหม้อ
หุงข้�ว
3. Gunakan kain lembab untuk
mengelap tutup dalam, bagian dalam,
dan bagian luar badan Penanak Nasi.
EN
This manual suits for next models
1
Table of contents
Other Electrolux Rice Cooker manuals