manuals.online logo
Brands
  1. Home
  2. •
  3. Brands
  4. •
  5. Electrolux
  6. •
  7. Ventilation Hood
  8. •
  9. Electrolux EFP 6400 Specification sheet

Electrolux EFP 6400 Specification sheet

Other manuals for EFP 6400

2

Other Electrolux Ventilation Hood manuals

Electrolux ICON E30DD75ESS User manual

Electrolux

Electrolux ICON E30DD75ESS User manual

Electrolux EFV418X User manual

Electrolux

Electrolux EFV418X User manual

Electrolux EFP6500X User manual

Electrolux

Electrolux EFP6500X User manual

Electrolux 740 D User manual

Electrolux

Electrolux 740 D User manual

Electrolux GI5220GR User manual

Electrolux

Electrolux GI5220GR User manual

Electrolux EFP6500X User manual

Electrolux

Electrolux EFP6500X User manual

Electrolux CH 950 User manual

Electrolux

Electrolux CH 950 User manual

Electrolux KFVB19K User manual

Electrolux

Electrolux KFVB19K User manual

Electrolux EFC 6940 User manual

Electrolux

Electrolux EFC 6940 User manual

Electrolux LFG335S User manual

Electrolux

Electrolux LFG335S User manual

Electrolux IHGL9031CN User manual

Electrolux

Electrolux IHGL9031CN User manual

Electrolux EI36HI55KS User manual

Electrolux

Electrolux EI36HI55KS User manual

Electrolux ICON E30WV60EPS Quick start guide

Electrolux

Electrolux ICON E30WV60EPS Quick start guide

Electrolux Icon E48DD75ESS User guide

Electrolux

Electrolux Icon E48DD75ESS User guide

Electrolux EFA90245X User manual

Electrolux

Electrolux EFA90245X User manual

Electrolux EFT 540 User manual

Electrolux

Electrolux EFT 540 User manual

Electrolux WOSL9062CN User manual

Electrolux

Electrolux WOSL9062CN User manual

Electrolux EFP60473OS User manual

Electrolux

Electrolux EFP60473OS User manual

Electrolux EFC 9416 User manual

Electrolux

Electrolux EFC 9416 User manual

Electrolux LFL219X User manual

Electrolux

Electrolux LFL219X User manual

Electrolux EFC9062 User manual

Electrolux

Electrolux EFC9062 User manual

Electrolux EFA90245X User manual

Electrolux

Electrolux EFA90245X User manual

Electrolux ECI6300S User manual

Electrolux

Electrolux ECI6300S User manual

Electrolux LFP216W User manual

Electrolux

Electrolux LFP216W User manual

Popular Ventilation Hood manuals by other brands

Gorenje S3 IHGC963S4X manual

Gorenje

Gorenje S3 IHGC963S4X manual

KOBE ISX2136SQB-1 Installation instructions and operation manual

KOBE

KOBE ISX2136SQB-1 Installation instructions and operation manual

U.S. Products ADVANTAGE-100H Information & operating instructions

U.S. Products

U.S. Products ADVANTAGE-100H Information & operating instructions

Kuppersberg DUDL 4 LX Technical Passport

Kuppersberg

Kuppersberg DUDL 4 LX Technical Passport

Framtid HW280 manual

Framtid

Framtid HW280 manual

Thermador HGEW 36 FS installation manual

Thermador

Thermador HGEW 36 FS installation manual

AEG X69453MVO UK user manual

AEG

AEG X69453MVO UK user manual

Broan B5836SS manual

Broan

Broan B5836SS manual

Heinner HDCH-6060RGBK quick start guide

Heinner

Heinner HDCH-6060RGBK quick start guide

Baumatic AS35SS instruction manual

Baumatic

Baumatic AS35SS instruction manual

Franke FTF 604 XS V2 Instructions for use and installation

Franke

Franke FTF 604 XS V2 Instructions for use and installation

Best UCB3I30SBW installation instructions

Best

Best UCB3I30SBW installation instructions

Gram EFU 503-90 X instruction manual

Gram

Gram EFU 503-90 X instruction manual

CIARRA CBCS6803 Installation and user manual

CIARRA

CIARRA CBCS6803 Installation and user manual

sauter SHG501 Instructions for installation and use

sauter

sauter SHG501 Instructions for installation and use

Franke 392-17 User instructions

Franke

Franke 392-17 User instructions

FALMEC Polar Black 35 Instruction booklet

FALMEC

FALMEC Polar Black 35 Instruction booklet

AEG 740 D Operating and installation instructions

AEG

AEG 740 D Operating and installation instructions

manuals.online logo
manuals.online logoBrands
  • About & Mission
  • Contact us
  • Privacy Policy
  • Terms and Conditions

Copyright 2025 Manuals.Online. All Rights Reserved.

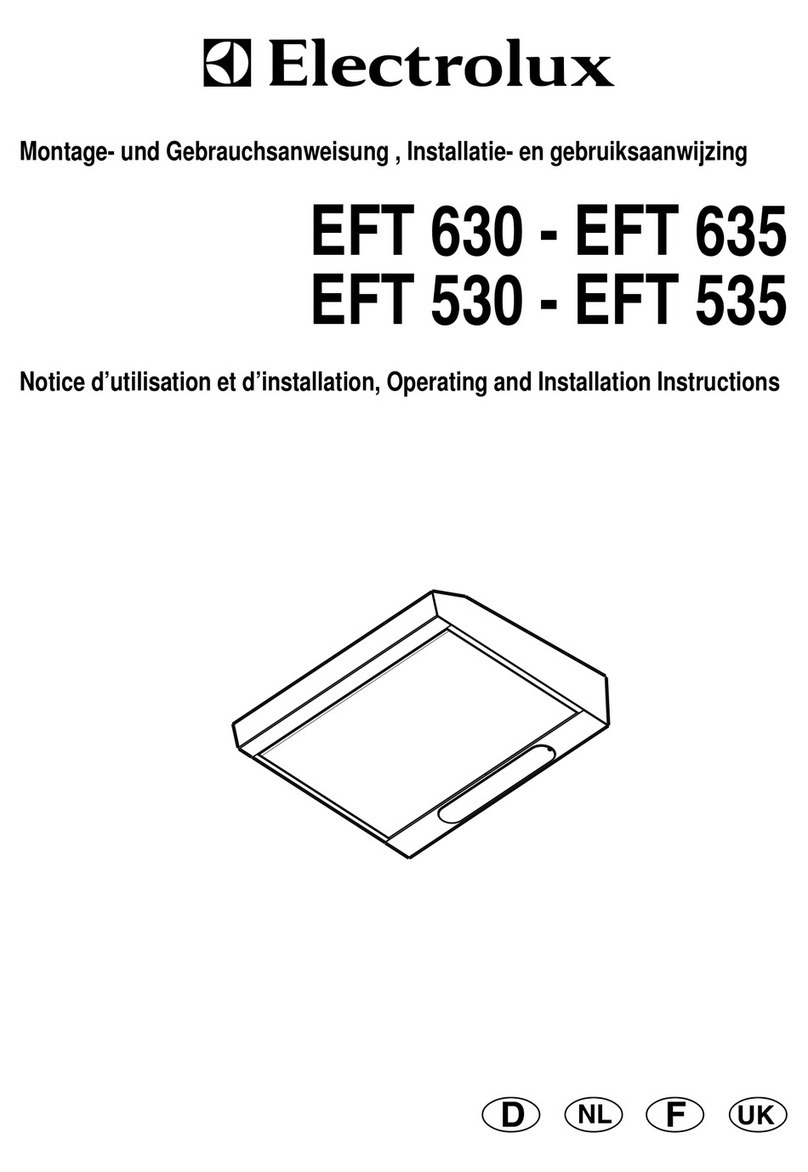
EFP 6400
F
DUK E P
NL
Montage- und Gebrauchsanweisung , Installatie- en gebruiksaanwijzing, Notice dutilisation et dinstallation
Operating and Installation Instructions, Instrucciones de montaje y manejo, Manual de Instru ões
2
Inhalt Seite 2
Sommaire page 15
Inhoudsopgave pagina 29
Contents page 43
Indice pagina 58
Índice pagina 71
D
NL
F
UK
E
P
Inhalt D
Sicherheitshinweise............................................................................................................................................. 3
für den Küchenmöbel-Monteur ............................................................................................................................... 3
für den Benutzer ......................................................................................................................................................4
Allgemeines.......................................................................................................................................................... 5
Abluftbetrieb ............................................................................................................................................................ 5
Umluftbetrieb ...........................................................................................................................................................5
Gerätebeschreibung............................................................................................................................................ 5
Bedienung der Dunstabzugshaube ................................................................................................................... 6
Korrekte Belüftung ..................................................................................................................................................6
Wartung und Pflege .............................................................................................................................................
einigung .................................................................................................................................................................7
Metallfettfilter ..........................................................................................................................................................7
Aktivkohlefilter.........................................................................................................................................................8
Austausch der Glühlampe(n) ...................................................................................................................................8
Sonderzubehör ..................................................................................................................................................... 9
Kundendienst ....................................................................................................................................................... 9
Technische Daten ................................................................................................................................................ 9
Installation .......................................................................................................................................................... 10
Auspacken ............................................................................................................................................................. 10
Platzierung ............................................................................................................................................................. 10
Elektroanschluß ..................................................................................................................................................... 10
Zubehör/Montagematerial...................................................................................................................................... 11
Vorbereitung Oberschrank- Abluft/Umluft ............................................................................................................ 11
Vorbereitung Mauerkasten- Abluft ........................................................................................................................ 11
Abluftöffnung (Abluft-Umluft) .............................................................................................................................. 11
Gewürzbord (Abluft-Umluft) ................................................................................................................................. 12
Montage der Dunstabzugshaube im Oberschrank - Abluft ................................................................................... 12
Einsatz Kohleaktivfilter bei Umluftbetrieb ............................................................................................................. 13
Herausnahme Dunstabzugshaube aus dem Oberschrank ..................................................................................... 13
Verstellen des Wrasenschirms ...............................................................................................................................14
Montage Lichtblende ............................................................................................................................................. 14
Bevor Sie jedoch Ihre neue Dunsthaube in Betrieb nehmen, lesen Sie erst diese Bedienungs- und
Montageanleitung.
Um isiken zu vermeiden, die der Betrieb elektrischer Geräte mit sich bringt, ist es wichtig, daß die Dunsthaube
korrekt installiert wird und Sie die Sicherheitsvorschriften beachten.
Heben Sie die Bedienungsanleitung an einem Ort auf, an dem Sie sie jederzeit greifen können.
43
Contents UK
Before you use the cooker hood we recommend that you read through the whole user manual giving a direct
description of the cooker hood and its functions.
To avoid the risks, that are always present when you use a product driven by electricity, it is important that the
cooker hood is installed correctly and that you read the safety instructions carefully to avoid misuse and hazard.
Save the instruction manual and keep it available at use of the cooker hood.
Safety warnings................................................................................................................................................... 44
For the installer ...................................................................................................................................................... 44
For the user ............................................................................................................................................................ 45
Description of the appliance ............................................................................................................................ 46
Extraction mode ..................................................................................................................................................... 46
ecirculation mode ................................................................................................................................................ 46
Description of the hood .................................................................................................................................... 46
Control Panel...................................................................................................................................................... 4
Correct ventilation .................................................................................................................................................. 47
Maintenance and care ....................................................................................................................................... 48
Cleaning the hood .................................................................................................................................................. 48
Metal grease filter .................................................................................................................................................. 48
Charcoal filter ........................................................................................................................................................ 49
Changing the light bulb ........................................................................................................................................... 49
What to do if ....................................................................................................................................................... 50
Special Accessories ........................................................................................................................................... 50
Technical assistance service............................................................................................................................ 51
Service and Spare Parts .................................................................................................................................... 51
Customer Care Department .................................................................................................................................. 51
Guarantee Conditions ............................................................................................................................................. 52
Standard guarantee conditions ...............................................................................................................................52
Exclusions .............................................................................................................................................................. 52
European Guarantee ......................................................................................................................................... 52
Technical Specifications .................................................................................................................................... 53
Installation .............................................................................................................................................................. 53
Unpacking .............................................................................................................................................................. 53
Fitting ..................................................................................................................................................................... 53
Electrical connection .............................................................................................................................................. 53
Mounting accessories included .............................................................................................................................. 54
Preparing the wall unit - Extraction mode ............................................................................................................. 54
Outlet hole.............................................................................................................................................................. 54
Spice rack .............................................................................................................................................................. 55
Installing the extractor hood in the wall unit .......................................................................................................... 55
Fitting the charcoal filter for ecirculation mode .................................................................................................. 56
emoving the hood from the wall unit ................................................................................................................... 56
Adjusting the extractor part ................................................................................................................................... 57
Installing the front panel......................................................................................................................................... 57
44
Safety warnings
 Since the rule for rooms with fuel burning
appliances is outlet hole of the same size as the
ventilation hole, a hole of 500-600 cm2, which
is to say a larger hole, could reduce the perfor-
mance of the extractor hood.
 If the hood is used in its recirculation mode, it
will operate simply and safely in the above
conditions without the need for any of the
aforementioned measures.
 When the hood is used in its extraction mode,
the following rules must be followed to obtain
optimal operation:
- short and straight outlet hose
- keep bends in outlet hose to a minimum
- never install the hoses with an acute angle,
they must always follow a gentle curve.
- keep the hose as large as possible
(preferably the same diameter as the outlet
hole).
- the length should be no more than:
3 metres with one 90° bend
2 metres with two 90° bends
Bends of more than 90° will reduce the
efficiency of the hood and reduce the
airflow.
 Failure to observe these basic instructions will
drastically reduce the performance and increase
the noise levels of the extractor hood.
For the installer
 When used as an extractor unit, the hood must
be fitted with a hose having preferably the same
diameter as the outlet hole.
Should there already be a hose of diameter 125
mm that ducts to the outside through the walls
or roof, it is possible to use the 150/125/120 mm
reduction flange provided. In this case the hood
will be slightly more noisy.
Attention: The hose is not supplied and
must be purchased separately.
When installing the hood, make sure you
observe the following minimum distance
from the top edge of the cooking hob/ring
surfaces:
electric cookers 430 mm
gas cookers 650 mm
If the instructions for installation for the gas hob
specify a greater distance, this must be adhered
to.
 The national Standard on fuel-burning systems
specifies a maximum depression of 0.04 mbar in
such rooms.
 The air outlet must not be connected to chimney
flues or combustion gas ducts. The air outlet
must under no circumstances be connected to
ventilation ducts for rooms in which fuel-burning
appliances are installed.
 The air outlet installation must comply with the
regulations laid down by the relevant local
authorities.
 When the unit is used in extraction mode, a
sufficiently large ventilation hole must be
provided, with dimensions that are approxi-
mately the same as the outlet hole.
 National and regional building regulations
impose a number of restrictions on using hoods
and fuel-burning appliances connected to a
chimney, such as coal or oil room-heaters and
gas fires, in the same room.
 Hoods can only be used safely with appliances
connected to a chimney if the room and/or flat
(air/environment combination) is ventilated from
outside using a suitable ventilation hole approxi-
mately 500-600 cm2 large to avoid the
possibility of a depression being created during
operation of the hood.
 If you have any doubts, contact the relevant
controlling authority or building inspectors
office.
45
For the user
 The cooker hood is designed to extract
unpleasant odours from the kitchen, it will not
extract steam.
 Always cover lighted elements, to prevent
excess heat from damaging the appliance. In
the case of oil, gas and coal fired cookers it is
essential to avoid open flames.
 Also, when frying, keep the deep frying pan on
the cooker top/cooker under careful control.
 The hot oil in the frying pan might ignite due to
overheating.
 The risk of self-ignition increases when the oil
being used is dirty.
 It is extremely important to note that
overheating can cause a fire.
Never carry out any flambé cooking under
the hood.
Always disconnect the unit from the power
supply before carrying out any work on the
hood, including replacing the light bulb
(take the cartridge fuse out of the fuse holder or
switch off the automatic circuit breaker).
It is very important to clean the hood and
replace the filter at the recommended
intervals. Failure to do so could cause
grease deposits to build up, resulting in a
fire hazard.
 The appliance is not intended for use by young
children or infirm persons without supervision.
 Older children must be supervised if using the
appliance.
 Young children should be supervised to ensure
that they do not play with the appliance.
 WARNING - Ensure that the appliance is
switched off before replacing the lamp to avoid
the possibility of electric shock.
This appliance is marked according to the
European directive 2002/96/EC on Waste Electrical
and Electronic Equipment (WEEE).
By ensuring this product is disposed of correctly,
you will help prevent potential negative
consequences for the environment and human
health, which could otherwise be caused by
inappropriate waste handling of this product.
The symbol on the product, or on the
documents accompanying the product, indicates
that this appliance may not be treated as household
waste. Instead it shall be handed over to the
applicable collection point for the recycling of
electrical and electronic equipment.
Disposal must be carried out in accordance with
local environmental regulations for waste disposal.
For more detailed information about treatment,
recovery and recycling of this product, please
contact your local city office, your household waste
disposal service or the shop where you purchased
the product.
46
Description of the hood
A = ON/OFF switches (Motor, light)
B = Grease filter
C = Light
D = Control panel
E = Visor ( emovable)
Fig. 1
Description of the appliance
The cooker hood is designed to extract
unpleasant odours from the kitchen, it will
not extract steam.
 The hood is supplied as an extractor unit and
can also be used with a recirculation mode by
fitting a charcoal filter.
 You will need an original charcoal filter for this
function (Available from your local Service
Force Centre).
Extraction mode
 In this mode fumes are extracted to the outside
via a hose connected to the coupling ring .
 In order to obtain the best performance the hose
should have a diameter equal to the outlet hole.
Recirculation mode
 The air is filtered through a charcoal filter and
returned to the kitchen.
 You will need an original charcoal filter for the
recirculation mode. (See Special Accessories).
47
Fig. 2
Control Panel
 The switches are mounted on the upper right side of the visor (Fig. 1 - E).
The numbers and symbols have the following meanings (from left to right):
The fan is controlled by moving the sliding switch.
The extractor part (visor) of the hood is used to
switch the fan on and off when the appliance is
switched on (Motor).
When the visor of the appliance is withdrawn, the
fan automatically switches on.
If the visor is pushed in without operating the
switches, the fan is switched off.
The lighting can be separately switched on and off
with the slide switch.
Turn the hood on a few minutes before you start
cooking then you will get an underpressure in the
kitchen. It should be left on after cooking for about
15 minutes or until all odours have disappeared.
Correct ventilation
If the cooker hood is to work correctly there must
be an under pressure in the kitchen. It is important
to keep the kitchen windows closed and have a
window in an adjacent room open.
= Continuously variable
fan control
= Intensive setting
= Light OFF
= Light ON
= Light
48
Fig. 3
Maintenance and care
The hood must always be disconnected from the electricity supply before beginning any
maintenance work.
Cleaning the hood
 Clean the outside of the hood using a damp
cloth and a solution of water and mild washing
up liquid.
 Never use corrosive, abrasive or flammable
cleaning products or products containing bleach.
.
 Never insert pointed objects in the motors
protective grid.
 Only ever clean the switch panel and filter grill
using a damp cloth and mild washing up liquid.
 It is extremely important to clean the unit and
change the filters at the recommended intervals.
Failure to do so will cause grease deposits to
build up that could constitute a fire hazard.
Metal grease filter
 The purpose of the grease filters is to absorb
grease particles which form during cooking and
it must always be used, either in the external
extraction or internal re-circulation function.
Attention: the metal grease filters must be
removed and washed, either by hand or in the
dishwasher, every four weeks.
Removing the metal grease filters
 Pull out the visor, remove the rear grease filter
pulling the handle designed for this purpose, then
proceed in the same way to remove the front
grease filter. Fig. 3.
Hand washing
Soak grease filters for about one hour in hot
water with a grease-loosening cleaner, then
rinse off thoroughly with hot water. epeat the
process if necessary. efit the grease filters
when they are dry.
Dishwasher
Place grease filters in the dishwasher. Select
most powerful washing programme and highest
temperature, at least 65°C. epeat the process.
efit the grease filters when they are dry.
When washing the metal grease filter in the
dishwasher a slight discolouration of the filter
can occur, this does not have any impact on its
performance.
 Clean the inner housing using a hand hot
solution only(never use caustic detergents,
abrasive powders or brushes).
Warning
 Failure to observe the instructions on cleaning
the unit and changing the filters will cause a fire
hazard. You are therefore strongly
recommended to follow these instructions.
 The manufacturer declines all responsibility for
any damage to the motor or any fire damage
linked to inappropriate maintenance or failure to
observe the above safety recommendations.
49
Fig. 4
Charcoal filter
 The charcoal filter should only be used if you
want to use the hood in the recirculation
function.
 To do this you will need an original charcoal
filter (available from your local Service Force
Centre).
Replacing the charcoal filter Type 150
This filter cannot be cleaned or reused.
As a general rule, the activated charcoal filter
should be changed once every 4 months.
Cleaning/replacing the charcoal filter Type
150 LONG LIFE
Unlike other charcoal filters, the LONGLIFE
charcoal filter can be cleaned and reactivated.
At normal use the filter should be cleaned every
second month (when using the hood 2,5 hours
per day, on avarage). The best way to clean the
filter is in the dishwasher. Use normal detergent
and choose the highest temperature (65º C).
Wash the filter separately so that no food parts
gets stuck on the filter and later causes bad
odours. To reactivate the charcoal, the filter
should be dried in an oven for 10 minutes with a
maximum temperature of 100ºC.
After approximately three years of use, the
charcoal filter should be replaced with a new, as
the odour reduction capacity will be reduced.
Fitting
1. Pull out the visor (Fig. 1 - E).
2. emove first the rear then the front grease
filters.
3. Insert the charcoal filter into the lugs of the
frame above using the 2 red clips to retain it,
press the red clips inwards, and insert the
charcoal filter in the frame. Fig. 4.
Removing:
1. Press both red lugs upwards (towards the
inside of the housing) and remove the charcoal
filter downwards.
2. Clean the internal housing only with warm
washing-up liquid suds (never use any abrasive
cleaners, brushes, or scouring agents).
 Always specify the hood model code number
and serial number when ordering replacement
filters. This information is shown on the
registration plate located on the inside of the
unit.
 The charcoal filter can be ordered from your
local Service Force Centre.
Changing the light bulb
 Disconnect the cooker hood from the main
supply.
 Unlock the lighting cover (D) by twisting the
bolts to the left and fold down the bulb cover.
Fig. 5.
 eplace the old light bulb(s) with a new light
bulb of the same kind.
 Close the bulb cover and relock it by twisting
the bolts to the right.
 If the light does not come on, make sure the
bulb has been inserted correctly before
contacting your local Service Force Centre.
D
Fig. 5
50
What to do if
If your appliance fails to work properly please carry out the following checks.
Symptom Solution
The cooker hood will not start... Check that: The hood is connected to the electricity supply.
Check that a fan speed has been selected
The cooker hood is not working Check that: The fan speed is set high enough for the task.
The grease filters are clean.
The kitchen is adequately vented to allow the entry of fresh air.
If set up for recirculation, check that the charcoal filter is still effective.
If set up for extraction, check that the ducting and outlets are not
blocked.
The cooker hood has The safety cut-out device has been tripped.
switched off during operation... Turn off the hob and then wait for the device to reset.
If the hood has been installed below the heights indicated in the
installation instructions the motor will cut-out frequently which will
damage the hood.
If after all these checks, the problem persists, contact your local Service Force Centre, quoting the model and
serial number.
Please note that it will be necessary to provide proof of purchase for any in-guarantee service calls.
In-guarantee customers should ensure that the above checks have been made as the engineer will make a
charge if the fault is not a mechanical or electrical breakdown.
Special Accessories
Charcoal filter Type 150 LONG LIFE Available from your retailer as an accessory
Charcoal filter Type 150 Available from your retailer as an accessory
Front panel EFL 6400 X 942 121 494
Front panel EFL 6400 U 942 121 495
Finishing strip* ET-N .: 502 426 420 02
Clips for finishing strip (3x)* ET-N .: 502 302 940 06
* ET-N . contact our Service Force Centre